IFP-450M - Food processor Imarflex - Free user manual and instructions
Find the device manual for free IFP-450M Imarflex in PDF.


| Brand | Imarflex |
| Model | IFP-450M |
| Product Type | Food Processor |
| Power Consumption | 450 W |
| Motor Type | Electric, induction motor |
| Bowl Capacity | 2.0 L (approx.) |
| Number of Speeds | 2 speeds + pulse |
| Main Functions | Chopping, slicing, shredding, mixing, dough kneading, blending |
| Included Attachments | Stainless steel S-blade, slicing disc, shredding disc, dough hook |
| Bowl Material | Plastic (BPA-free) |
| Blade Material | Stainless steel |
| Housing Material | Plastic |
| Safety Features | Safety interlock lid, overload protection, non-slip feet |
| Cord Length | 1.2 m (approx.) |
| Dimensions (L x W x H) | 25 x 20 x 35 cm (approx.) |
| Weight | 3.0 kg (approx.) |
| Noise Level | < 85 dB |
| Cleaning | Dishwasher-safe parts (except motor base) |
| Warranty | 1 year limited |
| Spare Parts Availability | Contact authorized service centers |
| Certifications | CE, RoHS |
Frequently Asked Questions - IFP-450M Imarflex
User questions about IFP-450M Imarflex
0 question about this device. Answer the ones you know or ask your own.
Ask a new question about this device
Download the instructions for your Food processor in PDF format for free! Find your manual IFP-450M - Imarflex and take your electronic device back in hand. On this page are published all the documents necessary for the use of your device. IFP-450M by Imarflex.
USER MANUAL IFP-450M Imarflex



FOOD GRADE
STAINLESS STEEL
• CHOPPING BLADES • FRENCH FRIES SLICER
• SLICER BLADE• FINE & LARGE SHREDDER
• 1500cc Plastic Jug
- 2-speed w/ Pulse
- Double Safety Lock
- Suction Footing
5 BLADE ATTACHMENTS
- Slicer Blade
• Large Shredder - Fine Shredder
• French Fries Slicer
• Includes Chopping & Dough Blades

natural_image
Close-up of a modern toaster oven with visible brand logo and 'Blades' text (no other readable signage)
imarflex®
In Every Home.
IFP-450M
SPECIFICATION
MODEL NO. : IFP-450M
RATED VOLTAGE : 230Va.c. 60Hz
POWER CONSUMPTION : 450 Watts
IMPORTANT SAFEGUARDS:
When using electrical appliances, basic safety precautions should always be followed, including the following:
- Read all instructions thoroughly.
-
Before using the unit, check if the voltage indicated corresponds with the convenience outlet (230Va.c.).
-
Do not use a two-way socket with another appliance.
-
Do not use any appliance with a damaged cord or plug. If the cord is damaged it should be replaced with the same type and size or bring the unit to the nearest lmarflex Authorized Service Center.
-
Do not place the unit near a gas stove, an electric burner or in a heated oven.
-
Place the unit on stable surface; keep it away from the edge of counter to avoid accident.
-
Children should be supervised to ensure that they do not play with the appliance.
-
This appliance is not intended for use by persons (including children) with reduced physical, sensory or mental capabilities, or lack of experience and knowledge, unless they have been given supervision or instruction concerning use of the appliances by a person responsible for their safety.
-
The maximum continuous operating time of the food processor is one minute only. Do not exceed with the maximum operating time. It may cause damage to the unit.
-
To protect against electric shock, do not immerse the appliance in water or any other liquids.
-
Extreme caution must be exercised when using an appliance containing hot liquid in the food processor when mixing as it can be ejected out of the appliance due to sudden steaming.
-
Use of accessories or equipment not supplied by the manufacturer may cause damage or malfunctioning of your appliance or result in injuries.
-
Use on a hard, flat level surface only, to avoid interruption of air flow underneath the appliance.
-
Blade is sharp, handle it carefully.
-
The maximum continuous operating time of the chopping is three minutes only. Do not exceed with the maximum operating time. It may cause damage to the unit.
-
Do not exceed into the maximum capacity if food processor is overfilled, it may cause damage to the unit.
-
Do not put the blade assembly on the base without the bowl.
-
Do not use the appliance if the bowl has a crack or damage.
-
This appliance is not intended for outdoor use.
-
Never place the appliance near hot surfaces.
-
In case of malfunctions, please bring the appliance to the nearest Authorized Imarflex Service Center.
-
Avoid water spillage into the socket, connector, cord and alike.
-
Switch off the appliance before removing the bowl into the motor base.
-
Do not use this unit other than its intended use.
-
For household use only; not intended for any business purposes
-
Save this instruction manual for future reference.
-
CAUTION: In order to avoid a hazard due to inadvertent resetting of the thermal cutout, this appliance must not be supplied through an external switching device, such as a timer, or connected to a circuit that is regularly switched on and off by the utility.
DESCRIPTION OF PARTS
- Motor Base
- Drive Shaft
- Bowl
- Blade Adapter
- Bowl Cover w/ Chute
- Food
Pusher - Disc Holder
- Slicing Disc
- Dough Blade
- Chopper
- Large Shredding Blade
- Fine Shredding Blade
- French Fries Shredder
- Blender Jug
- Center Lid
- Strainer
- Cone Reamer
- Blade Assembly
- Speed Selector
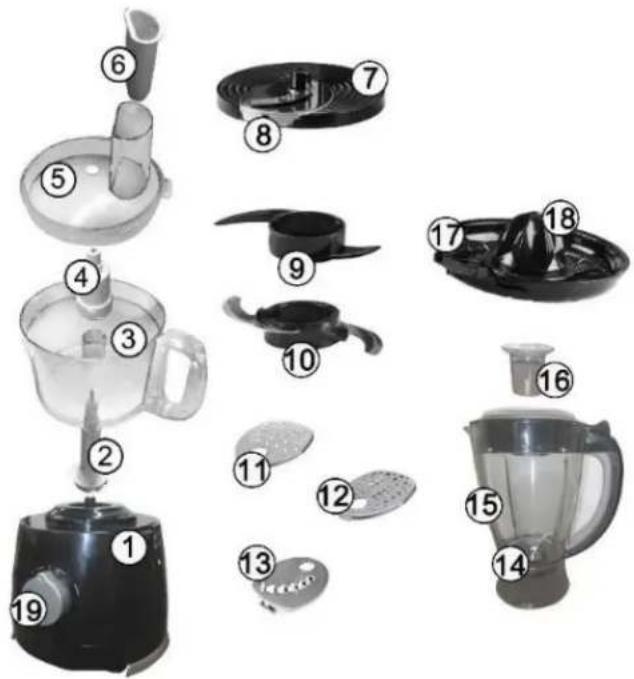
NOTE: Disc holder (7) is for slicing and shredding blade attachment.
HOW TO ASSEMBLE:
FOOD PROCESSOR
IMPORTANT: Your Plastic Jug, Bowls and Blades are subject to wear and tear during normal use. Always inspect the jar for nicks, chips or cracks. Always inspect blades for broken, bent or loose blades. Avoid using the jar or blades if damaged.
Contact any Authorized Imarflex Service Center to obtain evaluation and repair.
Make sure that the unit is unplugged. Place motor base on clean, dry surface to keep foreign particles from being pulled up into motor during operation.
- Fit the Drive Shaft on the Motor Base. (See pic.1)
- Put the Bowl into the Drive Shaft and turn counter-clockwise to lock. (See pic.2)
- Insert the Blade Adapter on the Bowl's hole. (See pic.3)
- Select the desired attachment; chopper (see pic. 4), dough blade (see pic. 5), whipping disc (see pic 6), slicing, shredding disc assembly (see pic. 7).
NOTE: If Slicing and Shredding Disc will be used, do not use the Adapter anymore. - Align the Bowl Cover into Bowl Slot then slightly turn it counter-clockwise to lock. (See pic.8) NOTE: Make sure that the bowl and cover is properly fitted otherwise the unit will not function. Please refer to lock and unlock icon.
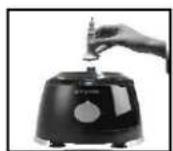
Pic.1
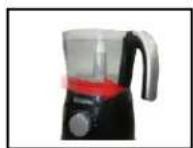
Pic.2
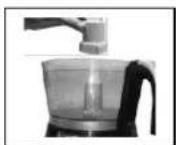
Pic.3
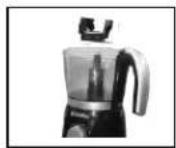
Pic.4
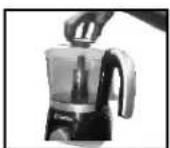
Pic.5
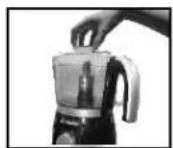
Pic.6
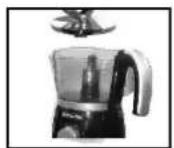
Pic.7
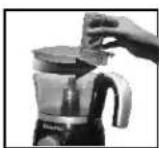
Pic.8
CITRUS JUICER
- Fit the Drive Shaft on the Motor Base. (See pic. 1)
- Put the Bowl into the Drive Shaft holding the bowl handle with the right hand, align the slot then turn it counter-clockwise. (See pic.2)
- Place the Straining Basket with the Cone Reamer into the Bowl and turn clockwise to lock. (See pic.3)
NOTE: Make sure that the straining basket with cone reamer is properly fitted otherwise the unit will not function
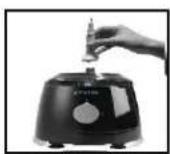
Pic.1
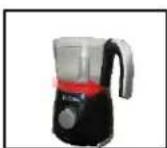
Pic.2
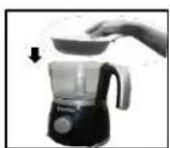
Pic.3
BLENDER
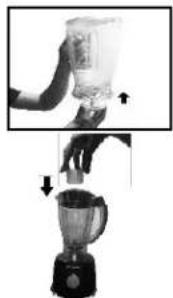
- Put the Rubber Packing into the Blade Assembly.
- Insert the Blade Assembly in the bottom of the Plastic Jug, turn it counter-clockwise to lock.
- Put the Jug Assembly on the Motor Base and turn counter-clockwise to lock.
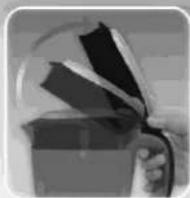
- Put the Center Lid on the Cover.
- Secure the Cover into the Plastic Jug and press down.
natural_image
Illustration of a blender being placed on top, showing the blade and handle (no text or symbols)NOTE: Make sure that the jug is properly fitted otherwise the unit will not function
FOOD PROCESSOR
- Place the unit on stable surface.
- Assemble the unit properly. Please refer on "How to Assemble on page 2"
- Select the desired function.
a. Chopper-to chops different types of food.
| Ty pe of F ood | Me asu rem ent Pe r b atc h |
| Ch oco la te | ≤1 00 g |
| Ch ees e | ≤2 00 g |
| Meat | ≤5 00 g |
| F ru it & Veg et ab le | 10 0~3 00g |
| On io n | ≤5 00 g |
Tips and Warning
• Always keep the chopper inside the bowl before adding food.
- Use pulse function for several times to avoid cutting too fine. Do not operate for too long while processing hard cheese or chocolate. These ingredients melt easily
- For chopping meat, remove the skin and bone before processing
- Standard chopping period: 30-60 seconds
NOTE: Processing time depends on size and amount of food to be processed.
b. Dough Blade- to process dough or soft food/ ingredients.
| Type of Food | Me asu rem ent P er ba tch |
| Fl ou r or Soft Cheese | ≤ 3 00 g |
| Eg g | ≤ 5 pie ces |
Tips and Warning
• Always keep the dough blade inside the bowl before adding food
- Standard measurement for processing dough; 300 grams flour-180ml water
- Standard processing period: 20-30 seconds
NOTE: Process dough mixture batch by batch, never process larger amount as it may
affect the performance of the motor.
- Hold the Attachment with the right hand while the other hand holding the disc holder, insert the attachment into the disc slowly and push down to lock. (See pic.)
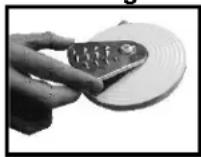
c. Slicing Disc- for slicing different types of vegetables, fruits and other food; i.e., for banana chips, potato
d. Fine Shredder- for shredding cheese, some vegetables with a fine outcome
e. Shredder- for shredding cheese, vegetables and some other foods with coarse outcome
f. French Fries Slicer- for slicing potato for French fries
Tips and Warning
- Choose desired attachment according to the food needed to process and desired shape of food.
- Push softly when feeding food.
- Pre-cut food into smaller pieces according to the diameter of food chute.
- Feed gradually for better effect. When cutting soft food, choose lower speed to achieve the best result. If large quantity food needs to be sized, please cut it for several batches.
-
Capacity for one batch is 1200ml.
-
Put the Bowl Cover, align the slot then slightly turn it counter-clockwise to lock.
-
Plug the unit into the convenience outlet.
-
Select the desired speed.
-
Insert the food on the chute.
-
Press down the food with the Food Pusher. Never push the food pusher forcibly as it may affect the performance of the motor.
-
Switch OFF and unplug the unit after every use.
CITRUS JUICER
- Place the Straining Basket with the Cone Reamer into the Bowl and turn counter-clockwise to lock.
- Cut citrus fruits into halves.
- Plug the unit into the convenience outlet.
- Turn ON the unit then squeeze the fruits.
- Turn OFF and wait for the unit to stop.
- To pour the juice, simply remove the Straining Basket, turn the Bowl counter-clockwise.
- Unplug the unit after use.
BLENDER
- For initial use, wash the Plastic Jug with Blade Assembly thoroughly. "Please refer to cleaning and maintenance".
- Put the Plastic jug with Blade Assembly on the motor base then turn it right to lock.
- Plug the unit into the convenience outlet.
- Be sure to remove the seeds of the fruits/vegetables if needed.
- Put the desired mixture.
- Place the Center Lid into the hole of the cover. Slide the adjustable spout
lock to this" " icon to cover the spout.
-
Use PULSE first to crack the ice cube or ice tube and then set the desired speed.
-
Additional ingredients can be added through opening in the Center Lid.
-
Maximum single operation should be up to 1 minute only.
-
After use switch OFF and unplug the unit from the convenience outlet.
Pouring Guide
- Slide the Plastic Jug to the left to remove from the base.
- Select the desired Pouring Slot, then pour.
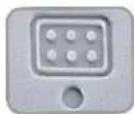
STRAINER
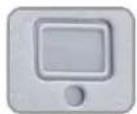
CLOSE
OPEN
SPEED SETTING GUIDE:
| SPEED | USAGE |
| I | for light usage with liquids |
| II | for more solid consistency – for mixing liquids and solid food stuffs |
| Pulse | for ice crushing & short, powerful impulse movements |
NOTE: Make sure that the jug is properly fitted otherwise the unit will not function
CAUTION:
- When using cube ice or tube ice, use the pulse speed first before setting to desired speed.
USEFUL TIPS
- To achieve the best results when pureeing solid ingredients, place small portions through the opening in the lid one by one.
- When mixing solid ingredients, start with a small amount of liquid. Gradually add more liquid through the opening in the lid.
- For stirring solid or very thick liquid ingredients, we recommend that you use the blender in pulse mode to prevent the blades from being stuck.
NOTE:
• Some burnt smell may be observed on first use, this is normal.
• Maximum continuous operation time is 1 minute.
- THE UNIT IS EQUIPPED WITH OVERLOAD PROTECTION. IT WILL AUTOMATICALLY STOP WHEN MOTOR REACH THE TEMPERATURE LIMIT. UNPLUG THE UNIT THEN LET IT COOL.
CLEANING AND MAINTENANCE
FOOD PROCESSOR
- Turn OFF and unplug the unit after every use.
- Remove the food pusher from the food chute.
- Turn the cover clockwise to unlock.
- Carefully remove the attachment used. The blade is sharp, handle it carefully.
- Turn the Bowl clockwise to remove. Lift the Drive Shaft from the base.
- Wash the Bowl, Cover, Food Pusher, Adapter and other attachments with soap and water.
- Dry all parts before the next use and before storing the unit.
CITRUS JUICER
- Remove the Straining Basket with Cone Reamer from the Bowl.
- Turn the Bowl clockwise to unlock.
- Wash the Bowl and the Straining Basket with Cone Reamer with soap and water.
- Wipe it dry.
BLENDER
Motor Base
- Unplug from the convenience outlet.
- Wipe the Base with damp cloth.
- Clean the Speed Selector Switch using a damp cloth or sponge to clean the groove around the switch.
- Keep it dry.
Lid/Spout Lock
- Slide the Spout Lock to the left then pull up to remove.
- Wash in warm soapy water, rinse and dry.
- Return the Spout Lock to the Cover then slide to the right to lock
Plastic Jug and Blade Assembly
Method #1
- After use, add warm water and a splash of vinegar to Plastic Jug. Turn ON for about a minute.
- Discard.
- Wash with soap and water, rinse well.
Method #2
- Fill the Plastic Jug half way with warm water, add a small amount of liquid dish detergent and turn the unit ON for about 30 seconds. Repeat if needed. Rinse well.
Method #3
A- If the Plastic Jug was left with crusty food bits, fill with warm, soapy water (or vinegar water) and let it stand for about 30 to 60 minutes. Discard about half of the water with soap and blend for 30 second intervals until the crusty food bits loosen.
B- Remove the Blade Assembly by turning it to the left.
C- Clean with soap and water.
D- Let it dry. Make sure to reassemble the unit properly before storing it.
Note: Always make sure that the rubber is in proper place.
E- Never leave food inside the Blender Jug for a long period of time.
F- Store the Blender on a dry cool place.
- FOOD GRADE
- STAINLESS STEEL
- BLADE ATTACHMENTS
- imarflex®
- SPECIFICATION
- IMPORTANT SAFEGUARDS:
- DESCRIPTION OF PARTS
- HOW TO ASSEMBLE:
- FOOD PROCESSOR
- CITRUS JUICER
- BLENDER
- Tips and Warning
- Pouring Guide
- SPEED SETTING GUIDE:
- NOTE: Make sure that the jug is properly fitted otherwise the unit will not function
- CAUTION:
- USEFUL TIPS
- NOTE:
- CLEANING AND MAINTENANCE
- Motor Base
- Lid/Spout Lock
- Plastic Jug and Blade Assembly
- Method #1
- Method #2
- Method #3
Brand : Imarflex
Model : IFP-450M
Category : Food processor