HBL-HE800SS - Blender Heinner - Free user manual and instructions
Find the device manual for free HBL-HE800SS Heinner in PDF.

| Product Type | Blender |
| Model | HBL-HE800SS |
| Brand | Heinner |
| Power Consumption | 800 W |
| Voltage | 220-240 V ~ 50/60 Hz |
| Capacity | 1.5 L |
| Material of Jug | Stainless steel |
| Blade Material | Stainless steel |
| Number of Speeds | 2 speeds + pulse |
| Dimensions (W x D x H) | 200 x 180 x 400 mm |
| Weight | 3.2 kg |
| Main Functions | Blending, mixing, pureeing, crushing ice |
| Safety Features | Non-slip feet, overload protection, safety lock |
| Cleaning | Removable jug, dishwasher safe parts (except motor base) |
| Spare Parts Available | Replacement jug, blades, lid, sealing ring |
| Repairability Index | 7.2 / 10 |
| Warranty | 2 years |
| Certifications | CE, RoHS |
Frequently Asked Questions - HBL-HE800SS Heinner
User questions about HBL-HE800SS Heinner
0 question about this device. Answer the ones you know or ask your own.
Ask a new question about this device
Download the instructions for your Blender in PDF format for free! Find your manual HBL-HE800SS - Heinner and take your electronic device back in hand. On this page are published all the documents necessary for the use of your device. HBL-HE800SS by Heinner.
USER MANUAL HBL-HE800SS Heinner
natural_image
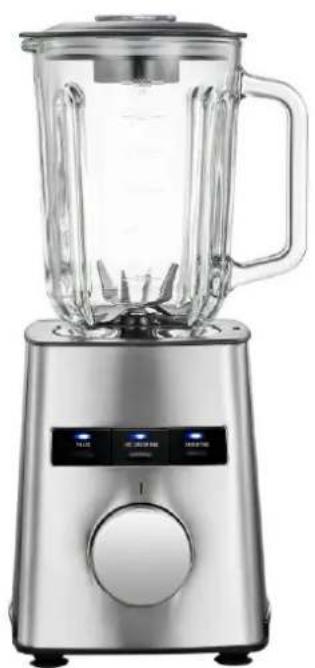
Exterior view of a modern stainless steel blender with clear glass lid and control buttons (no text or symbols visible)natural_image
Line drawing of a blender with handle and lid, showing blade and cover (no text or symbols)natural_image
Pure mechanical diagram showing a downward arrow and a horizontal base structure without any text or symbolsnatural_image
Line drawing of a blender with lid and base, no text or symbols present
natural_image
Diagram showing a blender being placed into a blender with a handle, labeled with number ② (no text or symbols on the diagram itself)
natural_image
Line drawing of a blender with handle and control panel (no text or symbols)natural_image
Exterior view of a modern stainless steel blender with clear glass and handle (no visible text or symbols)- Stand blender
- Max power: 800W
• Color: silver
Thank you for choosing this product!
I. INTRODUCTION
Please read this instruction manual carefully before using it and kee it for later information
This manual is conceived for offering you all of the necessary info regarding installation, using and maintenance of the machine. For a correctly and safely use of the machine, please, read this manual before installation and using.
II. PACKAGE CONTENTS

Stand blender
➢ Instruction Manual
Warranty card
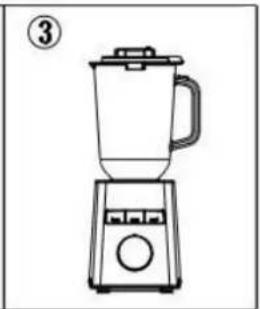
III. PRODUCT DESCRIPTION
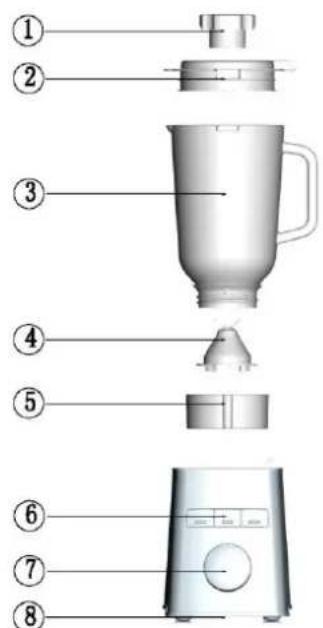
| 1. Measuring Cup | 5. Glass Bowl Holder |
| 2. Lid | 6. Function Button |
| 3. Glass Bowl | 7. Rotary Knob |
| 4. Blade | 8. Main Body |
IV. SAFETY MEASURES
IMPORTANT SAFEGUARDS

When using electrical appliances, in order to reduce the risk of fire, electric shock, and/or injury to persons, basic safety precautions and safety warnings should always be followed as below:
WARNING: The blades of the knife are extremely sharp. Handle
them with caution!
Please read all instructions carefully.
- To protect against electric shock, do not place the power cord, the plug or the appliance in water or any other liquid.
- Close supervision is necessary when any appliance is used by children or near children.
- This appliance is not intended for use by persons (including children) with reduced physical, sensory or mental capabilities, or lack of experience and knowledge, unless instructions concerning use of the appliance by a person who is responsible for their safety.
- Unplug from outlet when not in use and before cleaning.
- Do not operate any appliance with a damaged cord or plug if the appliance has malfunctioned or has been damaged in any manner.
- Accessories not recommended by the manufacturer may cause malfunction. For your own safety, please only use the original accessories and spare parts that are suitable for your appliance.
- Do not use outdoors.
- Do not hang the cord over the edge of table or counter. Do not make the power cord contact with hot surfaces.
- Do not place the appliance on or near hot gas or electric burner, or in a heating oven.
- This appliance is for domestic use only. Any commercial use, inappropriate use or failure to comply with the instructions, the manufacturer takes no responsibility and the warranty is no more valid.
- Do not use the appliance if any part is broken or the power cord or the plug is damaged.
-
Make sure that the glass lid is securely locked in place before operating the appliance.
-
Never put ingredients in the glass jar by hand when running the appliance. Always use the food pusher.
- The blades are sharp. Please handle carefully. Always keep the knife out of reach of children.
- Never remove the lid until the knife stops completely.
- This appliance is used for processing small quantities. Do not exceed the quantity indicated in the instruction manual.
- Do not use the appliance to mix glutinous food or substance.
- Do not use the appliance for other than intended use.
- For your safety, this appliance conforms to the appliance standards, regulations and directives of Low Voltage, Electromagnetic Compatibility, Environment, etc.
SAVE THESE INSTRUCTIONS!
V. USING THE APPLIANCE
Using Your Appliance
Before first use, clean all parts of the appliance.
Notes:
- When plugging in the appliance, the indicator rings of 3 function buttons will be flashing blue. After the glass jar is fixed, the lights will stop flashing and keep on.
- The start knob allows you to use step-less speeds from mini power to max power.
- When you use start knob for your speed control, the function buttons cannot work in the meantime and their indicators are off.
- Three function buttons for your reference:
* Pulse
* Ice Crushing
* Smoothie
- When you use the function button for your food, you can change the buttons basing on your need. Besides, you can use the start knob for speed control. If so, you cannot use the function buttons in the meantime.
• The working capacity of the glass jar is 1.5L.
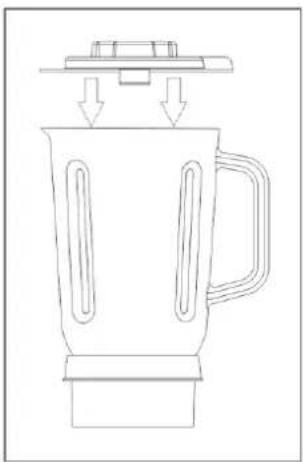
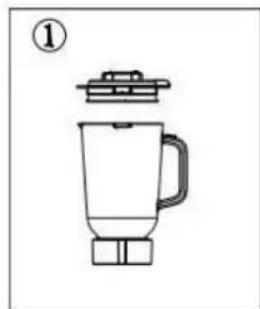
How to use the glass jar
- Place the ingredients in the glass jar.
- Place the lid on the jar and close it tightly.
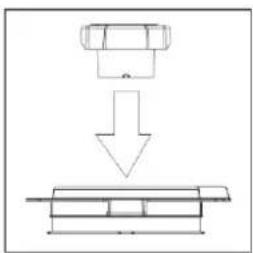
natural_image
Line drawing of a blender with handle and lid, showing mechanical components (no text or symbols)- Insert the measuring cup into the lid opening.
natural_image
Diagram showing a vehicle being lowered into a structural component (no text or labels)- Select the speed by turning the control knob or press the Quick-select button.
Note: Do not let the appliance to operate more than 1 minute continuously. Let the appliance to cool down to room temperature before continue operating the appliance
Blending With Function Buttons
Rotate the start knob to the position ON, then press the button basing on your need.
- Pulse Function
The appliance runs when pressing "Pulse" and stops working when releasing the button. When you press button "Pulse", you should press it continuously until the food finish processing.
- Ice Crushing Function
When you press this button, the appliance will run with the program for 30 seconds.
- Smoothie Function
When you press this button, it will work with 90% power for 1 minute.
Remark:
* The button you press, only the indicator ring of the button is lighted accordingly.
* The appliance will stop automatically when it finishes the pre-set program after you press the button "Ice Crushing" or "Smoothie".
* Press the function button "Ice Crushing" or "Smoothie" to start the appliance, press the button again before the pre-set program finishes to stop the program. The appliance will go to standby status. Then the indicator rings of 3 buttons are lighted.
Baby Food
- Chop the food into small pieces, add some broth (meat or vegetables) and mix the ingredients with pulses. To blend the mixed food, rotate the start knob till the food reach the desired result.
- Chop the fruits into small pieces, add some milk, water or juice and mix the ingredients with pulses. To blend the food well, rotate the start knob or press the button "Smoothie" till the food reach the desired result.
natural_image
Line drawing of a blender with lid and handle (no text or symbols)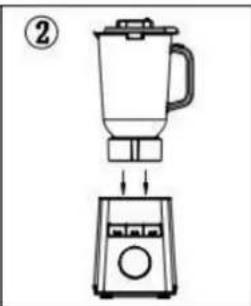
natural_image
Diagram showing a blender being placed into a blender with a handle, labeled with number ② (no text or symbols on the diagram itself)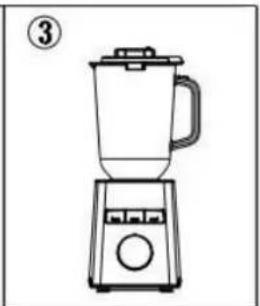
natural_image
Line drawing of a blender with handle and base (no text or symbols)CAUTION: Maximum processing time for each continuous use should not exceed 1 MINUTE. If the food need to be processed more than 1 minute, run the appliance with pulses and allow intermediate 10-second pauses.
CAUTION: DO NOT OPERATE THE APPLIANCE WHEN EMPTY.
CAUTION: Do not put hot ingredients into the jar. Allow the food to cool down for a few minutes before food preparation.
CAUTION: Before you eat or serve the blended food, please always check the ingredients that might have not been blended adequately.
In General:
For better results: please make sure that the quantity of ingredients fully covers the blades before blending solid foods.
VI. RECOMMENDED USAGE FOR FUNCTION BUTTONS
| Function Button | Usage / Ingredients | Maximum Recommended Dosage | Processing Time |
| Drink (Smoothie) | Cold drinks / Cocktails | 1.5L | 60 seconds |
| Milk shakes and dairy drinks | 1.2L | ||
| SmoothiePut fresh fruits and some liquid (including yogurt, milk and juice). Then add ice or frozen food (including frozen fruits, ice or ice cream). | 1.0L | ||
| Ice Crushing | Press the button “Ice Crushing”. The speed change in the process, pre-set by the program, is normal. To make smoothie from frozen juice. | 200g (10 pieces of ice cube) | 30 seconds |
| Rinse (Pulse) | Rinse the glass jar with warm water by pressing “Pulse” before cleaning. For better results in the future use, it is recommended to thoroughly clean and dry the blending jar before reassembling. | 500ml of warm water | 20 seconds |
After using the blender
- Disconnect the power from main supply.
- Remove the lid (together with measuring cup) from the jar.
- Remove the jar (together with blade assembly unit interface) from the motor part.
- Detach the blade assembly unit interface from the bottom of the jar.
Note: Always clean the removable parts immediately after use
Note: It is recommended to cut the meat or other food into smaller pieces before putting them in the jar. Do not operate with large quantities of food at one time.
VII. TROUBLESHOOTING
| Problem | Reason | Solution |
| The appliance doesn't work after power on and start the appliance. | The appliance is not live. | Ensure that the appliance is connected well to a suitable wall power outlet. Ensure that the wall power outlet is live by connecting a lamp. After power on, the indicator should be lighted. |
| The glass jar has not been installed well and safety locked. | Install the jar correctly as operation instruction. | |
| The motor is overheated. It stops automatically for protection to avoid burnt. | Stop working and cool it down for about 30 minutes. | |
| The blades are blocked. | Immediately turn off the switch and unplug the appliance. Then remove the obstacle. Cut the big ingredients into small pieces before processing. | |
| A terrible smell comes from the motor unit during the first several uses of the new appliance. | It is normal to operate the new appliance for the first uses. | If there is still a terrible smell after multiple uses, please contact your vendor. |
| The motor agitates, OR there are unusual noises. | The appliance is not placed on a firm, flat and stable surface. Or the rubber feet have not been installed well. | Place the appliance on a firm, flat, stable, and dry surface or make every rubber foot installed well. |
| High voltage or unstable voltage. | Check the voltage and plug the appliance in stable-voltage outlets. | |
| The blade is loose. | Please contact your vendor or get help from the service center. |
VIII. CLEANING AND MAINTENANCE
Always clean the removable parts immediately after use
Note: Be careful when cleaning the parts. Avoid touching the sharp blades!
- Disconnect the power from main supply.
- Disassemble all removable parts before cleaning.
- Clean all removable parts in lukewarm water with dish-washing liquid.
- Use dry cloth to clean the main body.
IX. TECHNICAL FICHE
| Rated voltage | 220-240V |
| Rated frequency | 50/60Hz |
| Max power | 800W |

Environment friendly disposal
You can help protect the environment!
Please remember to respect the local regulations: hand in the non-working electrical equipment's to an appropriate waste disposal center.

HEINNER is a registered trademark of Network One Distribution SRL. Other brands and product names are trademarks or registered trademarks of their respective holders.
No part of the specifications may be reproduced in any form or by any means or used to make any derivative such as translation, transformation, or adaptation without permission from NETWORK ONE DISTRIBUTION.
Copyright © 2013 Network One Distribution. All rights reserved.
www.heinner.com, http://www.nod.ro
http://www.heinner.com, http://www.nod.ro

This product is in conformity with norms and standards of European Community
Importer: Network One Distribution
Marcel Iancu Street, no 3-5, Bucharest, Romania
Tel: +40 21 211 18 56, www.heinner.com, www.nod.ro
HEINNER
НАСТОЛЕН БЛЕНДЕР
Модел: HBL-HE800SS
natural_image
Modern kitchen blender with clear glass body and control panel (no visible text or symbols)- Настолен блендер
• Максимална мощност: 800 W
• Цвят: сребрист
natural_image
Line drawing of a blender with handle and lid, showing mechanical components (no text or symbols)natural_image
Pure mechanical assembly diagram showing a component being lowered into a base plate (no text or symbols)natural_image
Modern kitchen blender with clear glass body and control panel (no visible text or symbols)natural_image
Line drawing of a blender with handle and lid, showing blade and lid structure (no text or symbols)natural_image
Pure mechanical diagram showing a downward arrow and a rectangular component with dimension lines (no text or symbols)natural_image
Line drawing of a blender with lid and base, no text or symbols present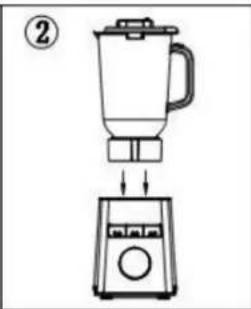
natural_image
Diagram showing a blender being placed into a blender with a handle, labeled with number ② (no text or symbols on the diagram itself)