
27MC925BQ - Monitor TESLA - Free user manual and instructions
Find the device manual for free 27MC925BQ TESLA in PDF.


| Product Type | Monitor |
| Brand | TESLA |
| Model | 27MC925BQ |
| Screen Size | 27 inches (measured diagonally) |
| Panel Type | IPS |
| Resolution | 1920 x 1080 (Full HD) |
| Refresh Rate | 75 Hz |
| Response Time | 5 ms (GTG) |
| Aspect Ratio | 16:9 |
| Brightness | 250 cd/m² |
| Contrast Ratio | 1000:1 (static) |
| Viewing Angle | 178° (horizontal/vertical) |
| Connectivity | 1 x HDMI, 1 x VGA, 1 x Audio Out |
| VESA Mount | 75 x 75 mm |
| Power Supply | AC 100-240V, 50/60Hz |
| Power Consumption | Typical: 25W, Standby: <0.5W |
| Dimensions (with stand) | 24.2 x 18.1 x 7.5 inches |
| Weight (with stand) | 8.2 lbs |
| Cleaning Instructions | Use a soft, lint-free cloth slightly dampened with water. Do not use harsh chemicals. |
| Safety Features | Tilt adjustment, anti-glare coating, Kensington lock slot |
| Spare Parts Availability | Contact TESLA support for power adapter, stand, or other parts. |
Frequently Asked Questions - 27MC925BQ TESLA
User questions about 27MC925BQ TESLA
0 question about this device. Answer the ones you know or ask your own.
Ask a new question about this device
Download the instructions for your Monitor in PDF format for free! Find your manual 27MC925BQ - TESLA and take your electronic device back in hand. On this page are published all the documents necessary for the use of your device. 27MC925BQ by TESLA.
USER MANUAL 27MC925BQ TESLA
natural_image
Exterior view of a Tesla monitor with a black screen and visible 'TESLA' branding on the front panel (no additional text or symbols)22MC625BF
24MC625BF
27MC625BF
27MC925BQ
USER MANUAL
NOTE
This device is intended for household use exclusively. Professional and/or commercial use of a device intended for household purposes shortens its working life and has a negative effect on the device's performance characteristics.
IMPORTANT SAFETY INSTRUCTIONS
- Read these instructions carefully before using this equipment and keep them for future reference.
• Always handle the monitor with care when moving it. - This appliance is intended for domestic household use only and should not be used for any other purpose or in any other application, such as for non-domestic use or in a commercial environment.
- Allow at least a 10 cm gap all around the product.
- Place the monitor in a well ventilated area. Do not place anything on the monitor that prevents heat dissipation.
- Avoid exposing the monitor to direct sunlight or another heat source. Turn the screen away from direct sunlight to reduce glare.
- Store the LCD display in a room with a temperature between -20^ - 60^ (-4°F - 140°F). Permanent damage may result if the LCD display is stored outside of this range.
- Do not install near heat sources such as radiators, heat registers, stoves, or other devices that produce heat.
- Do not place the LCD display near a window. Exposure to rain, moisture, or direct sunlight can cause serious damage to when the device.
- Do not press on the LCD screen. Excessively forceful pressing can cause permanent damage to the display.
- Do not remove the case or attempt to repair the machine by yourself. All maintenance tasks should be performed by an authorized technician.
- Avoid touching the screen. Skin oils are difficult to remove.
- If smoke, an abnormal noise, or a strange odor is present, immediately switch the monitor off.
- Protect the power cord from being tread upon or pinched, particularly at the plug. Be sure that the power outlet is located near the monitor so that it is easily accessible.
- Only use attachments/accessories specified by the manufacturer.

To prevent possible hearing damage, do not listen at high volume levels for long periods.

For indoor use only


To reduce the risk of electrical shock, do not open the unit. No user serviceable parts inside. Refer servicing to qualified service personnel.

This symbol indicates that a dangerous voltage constituting a risk of electric shock present within this unit.

This symbol indicates that there are important operating and maintenance instructions in the literature accompanying this unit.
PACKAGE CONTENTS
Please check the following items are present when you unpack the box and save the packing materials in case you need to transport the monitor in the future.
- LCD monitor
- AC power cable
- Stand base + Stand body
- HDMI cable
- Warranty card
- Screws
- Cover plate
- User manual
- Power adapter
ASSEMBLING THE STAND
- Lay the monitor on a cloth with the LCD panel facing down to prevent the LCD panel from being damaged. Fix the stand body to the back of the monitor with the screws.
- Fix the stand base to the stand body by tightening the screw.
- Attach the cover plate by pressing it onto the stand body.

natural_image
Line drawing of a monitor front panel with a stylus and control buttons, showing no text or symbolsCONNECTIONS
22MC625BF

24MC625BF - 27MC625BF

27MC925BQ


natural_image
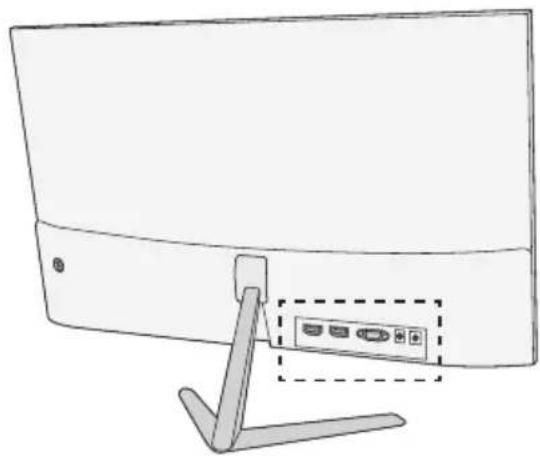
Line drawing of a monitor with a stand and two ports, no text or symbols present
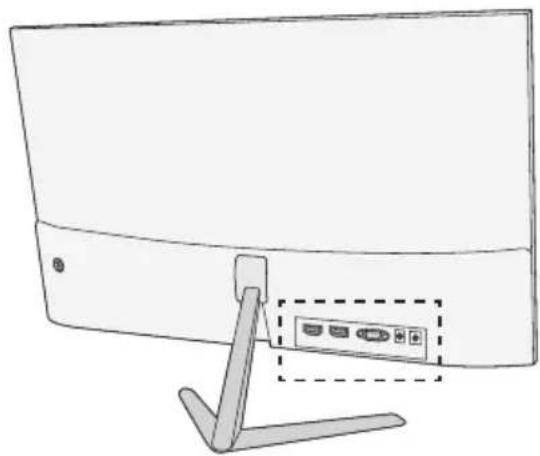
Make sure both the monitor and computer are switched off.
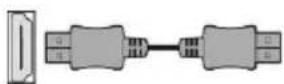
1 HDMI connection

Connect your PC to the monitor using the supplied HDM cable. The connection transmits digital video and audio signals from your PC to the monitor.
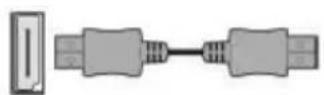
2 Display Port
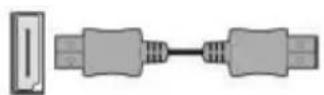
Connect your PC to the monitor using the DisplayPort cable. The connection transmits digital video and audio signals from your PC to the monitor. Display Port cable is not included.
3 VGA connection

Connect your PC to the monitor using a D-Sub (15-pin) cable. This cable is not included.
4 Earphones connection
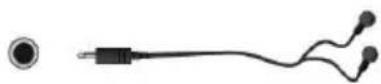
You can connect your earphones to the earphone socket of the monitor. The earphones are not included.
5 Power connection

natural_image
Simple line drawing of a cable and plug connecting a power outlet (no text or symbols)The illustration is for your reference only.
- Connect the supplied power cord to the adapter.
- Insert one end into the power jack on the back of the monitor.
- Plug the other end of the adapter into the mains socket.
6 USB

Only for charging your phones. Output power 5V, 1A.
Turn on the monitor first, then the computer.
ADJUSTING THE ANGLE
natural_image
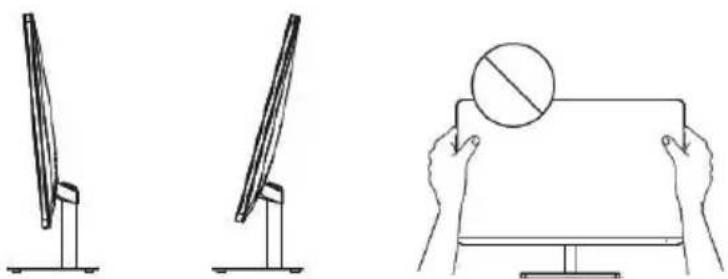
Three line drawings showing different viewing angles: a flat-screen monitor, a flat-screen screen with a circular button, and a hand holding a blank board (no text or symbols)- Drawings are for reference only and please refer to the actual monitor.
- The angle of the screen can be adjusted forward 5^ or backward 15^ for a comfortable viewing experience.
- Be careful not to touch or press the screen area when adjusting the angle of the monitor.
USERS CONTROLS
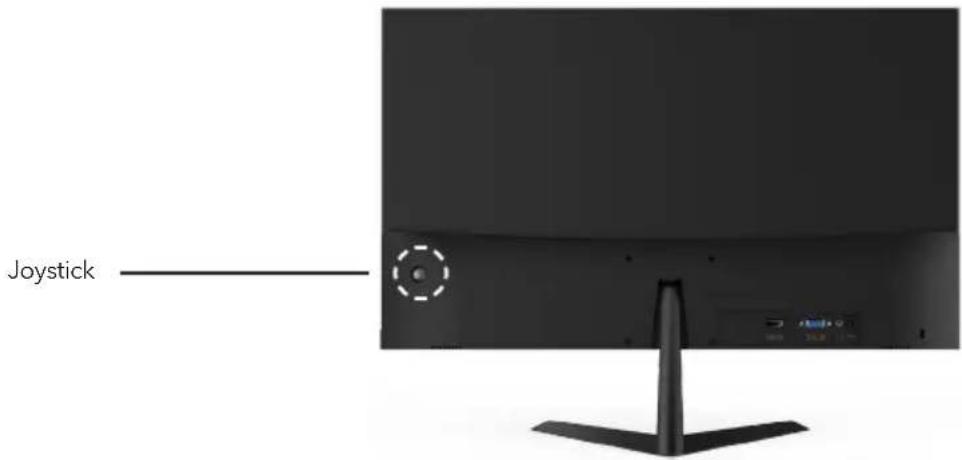
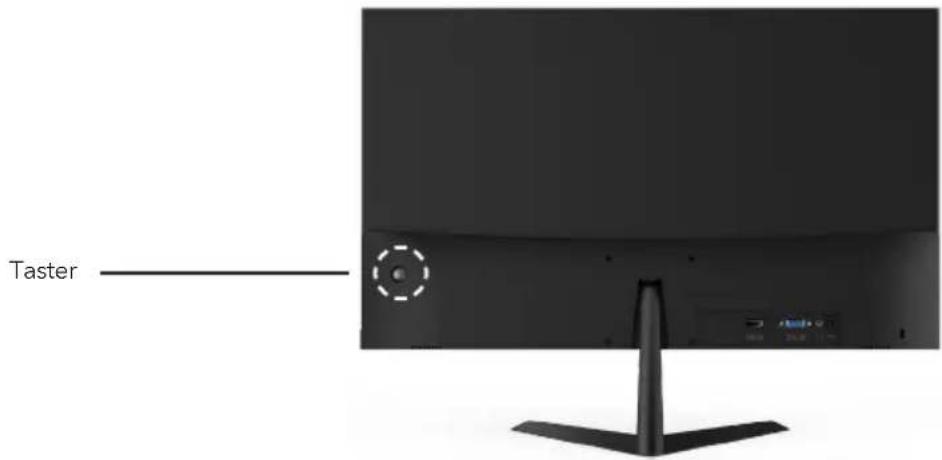
- To view the OSD menu, press the joystick button at the back of the monitor.
- Configure the options by moving the joystick up/down/left/right.
| Button Action Description | ||||
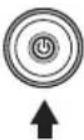 | Press this button. | Long Press for power off, Short Press for power on / menu.The below table shows the monitor status as indicated by the light located on the joystick button. | ||
| Light Monitor Status | ||||
| Blue Power on | ||||
| Red Stand by mode / No signal | ||||
| No light Power off | ||||
←  → → | ← | Push left Exit from the main menu or return to the upper menu. | ||
| → | Push right Enable the main menu or select the menu item. | |||
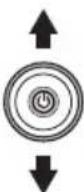 | ↑ | Push up Select menu items or increase the setting values of the selected menu item. | ||
| ↓ | Push down Select menu items or decrease the setting values of the selected menu item. | |||
| Menu Description | ||
| Input Source | VGA | Changes input signal to VGA HDMI or DP.HDMI |
| DP | ||
| Brightness/contrast | Brightness Adjusts the color contrast and brightness of the screen. | |
| Contrast Adjusts display contrast | ||
| Black Level Adjust display black level | ||
| Sharpness Set display sharpness | ||
| Picture Mode | Preset color modes | |
| DCR | DCR is the ratio between the brightest white and the darkest black produced by a monitor display. DCR increases contrast ratio by automatically adjusting the backlight based on image content. | |
| Color Setting | Color Temperature | Select color temperature mode or allow manual color configuration |
| Picture Quality Setting | Saturation Adjust display saturation | |
| Low Blue Light Blue light reduction adjustment | ||
| Gamma Set gamma | ||
| Color gamut DCIP3/Adobe/sRGB | ||
| HDR Auto/HDR 2084/OFF | ||
| Display | Aspect Ratio Set screen aspect ratio | |
| AMD FreeSync Turn AMD FreeSync on/off | ||
| Overdrive | Adjusts the response time. The image can be blurred if the user turns on the Overdrive. | |
| Audio | Mute Turn mute mode on/off | |
| Volume Adjusts the volume of earphones output. | ||
| Image setup | Auto config. | / |
| Auto color | / | |
| H-Position | 0 - 100 | |
| V-Position | 0 - 100 | |
| Clock | 0 - 100 | |
| Phase | 0 - 100 | |
| OSD | Language Allow users to choose from available languages | |
| OSD H-position | Horizontally adjusts the OSD position. | |
| OSD V-position Vertically adjusts the OSD position. | ||
| OSD Transparency | Adjusts the OSD transparency value. | |
| OSD Time out | Automatically turns off On Screen Display (OSD) after a preset period of time. | |
| Other | Off Timer | The monitor will automatically power off after a preset period of time (1 ~ 24 hours). The default off time is 4 hours. To disable this feature, select the value Off. |
| Reset | Restores the default settings. | |
* Depending on the monitor model, the user interface may differ
- To return to the upper menu, to set other menu items, move the joystick left.
- If you want to exit from the OSD menu, move the joystick left until you exit.
TROUBLESHOOTING
If you have problems with your monitor, please check the table below for a possible solutions.
| Problem Possible Solution | |
| No picture visible • Check if the monitor is turned on.• Check if the power cord is properly connected to the monitor.• Check if the signal cable is properly connected at the back of the monitor.• Check if the computer system is switched on and in power saving/standby mode.• Using the OSD menu, adjust brightness and contrast. | |
| Wrong or abnormal colors | • If any color (red, green, blue) is missing, check the signal cable to make sure it is securely connected. Loose or broken pins in the cable connector could cause an improper connection.• Connect the monitor to another computer. |
CLEANING AND MAINTENANCE
Cleaning the LCD monitor screen:
- Turn off the LCD monitor and unplug the power cord.
- Spray a non-soluble cleaning solution onto a cloth and gently wipe the screen.
- Never spill any liquid directly onto or into the screen or its case.
- Do not use any ammonia- or alcohol-based cleaners on the LCD monitor screen or case.
- We didn't responsible for damage caused by the use of any ammonia or alcohol-based cleaners.
ABANDONMENT OF WASTE EQUIPMENT FOR EU HOUSEHOLD USERS
This symbol on the product or on its packaging indicates that the product must not be disposed of with other household waste. When disposing of used devices, it is your responsibility to bring it to a collection point that recycles used electrical and electronic equipment. The separate collection and recycling of used devices at the time of disposal helps to conserve natural resources and ensures that they are recycled in a manner that protects human health and the environment. For more information about recycling points for used devices, please contact your local city office, household waste disposal service, or the shop where you purchased the product.

natural_image
Symbol of a trash bin with crossed lines indicating no waste or restriction, and a solid black rectangle below (no text or labels)NAPOMENA
Ovaj uređaj je namijenjen isključivo za kućnu upotrebu. Profesionalna i/ili komercijalna upotreba uređaja namijenjenih za upotrebu u domaćinstvu skraćuje životni vijek i negativno utiče na karakteristke uređaja.
SIGURNOSNE UPUTE
- Detaljno pročitajte ovo uputstvo prije korištenja ove opreme i sačuvajte ga za buduću upotrebu.
- Pažljivo rukujte monitorom za vrijeme premiještanja.
- Ovaj uređaj je namijenjen isključivo za kućnu upotrebu i ne smije se koristiti u druge svrhe ili primjene kao što su vanjske upotrebe ili komercijalne svrhe.
- Ostavite najmanje 10 cm razmaka oko proizvoda.
- Postavite monitor u dobro prozračenoj prostoriji. Ne ostavljate na monitor ništa što spriječava disipaciju toplote.
- Izbjegavajte direktno izlaganje monitora suncu ili drugim izvorima toplote. Okrenite monitor dalje od diretknog sunca da biste izbjegli odsjaj.
- Postavite LCD zaslon u sobi temperature između -20 °C i 60°C (-4°F - 140°F). Trajno oštećenje se može dogoditi ako se LCD zaslon ostavi van ovih ograničenja.
- Ne postavljajte monitor blizu izvora toplote kao što su radijatori, ventilacije, peći ili drugi uređaji koji proizvode toplotu.
- Ne postavljajte LCD zaslon pored prozora. Izlaganje kiši, vlažnosti ili direktnom suncu može uzrokovati uređaju ozbiljna oštećenja.
- Ne pritišćite LCD zaslon. Naglo i pretjerano pritiskanje može prouzrokovati stalna oštećenja na zaslonu.
- Ne uklanjajte kućište i ne pokušavajte sami popravljati uređaj. Održavanje treba biti urađeno od strane ovlaštenog tehničara.
- Izbjegavajte dodirivanje zaslona. Otisci prstiju na zaslonu se teže odstranjuju.
- Ako se pojavi dim, neobičan zvuk ili miris, odmah isključite monitor.
- Zaštitite kabl za napajanje od gaženja ili pritiskanja, posebno kada je uključen u utičnicu. Uvjerite se da je utičnica za napajanje postavljena blizu monitora za lakši pristup.
- Koristite isključivo dodatke/pribore navedene od strane proizvođača.

natural_image
Line drawing of a monitor front panel with a stylus and control buttons, showing no text or symbolsPRIKLJUČIVANJA
22MC625BF

24MC625BF - 27MC625BF

27MC925BQ


natural_image
Line drawing of a monitor with a stand and two ports, no text or symbols present
Uvjerite se da su i monitor i kompjuter isključeni.
natural_image
Simple line drawing of a cable and plug connecting a CD to an electrical outlet (no text or symbols)Ilustracija je namijenjena samo za referencu.
- Priključite kabl za napajanje na adapter.
- Priključite jedan kraj kabla u utičnicu za napajanje na poledini monitora.
- Priključite i drugi kraj adaptera u utičnicu.
6 USB

natural_image
Three line drawings showing different viewing angles: a flat, angled, and a hand holding a blank board with a circle (no text or symbols)- Ilustracije su namijenjene samo za referencu.
- Ugao zaslona može se podesiti za 5° prema naprijed i 15° unazad za ugodnije posmatranje.
- Budite pažljivi da ne dodirujete niti pritišćete zaslon za vrijeme podešavanja ugla monitora.
KORISNIČKE KONTROLE
- Za pregled OSD menija, dodirnite dugme za džojstik na poledini monitora.
- Podesite opcije promjerajući džojstik prema gore/dole/lijevo/desno.

| Dugme Postupak Opis | ||||
| Dodirni ovo dugme. | Duže pritisnite za isključivanje, kraće pritisnite za uključivanje/ meni.Tabela ispod pokazuje status monitora označen lampicom koja se nalazi na dugmetu za džojstik. | ||
| Svjetlo Status monitora | ||||
| Plava Uključeno | ||||
| Crvena Način mirovanja / Nema signala | ||||
| Nema svjetla Isključeno | ||||
 | → | ← | Pritisni lijevo Izadite iz glavnog menija ili se vratite na gornji meni. | |
| → | Pritisni desno Osposobite glavni meni ili izaberite stavku menija. | |||
 | ↑ | Pritisni gore | Izaberite stavke menija ili povećajte vrijednosti podešavanja odabrane stavke menija. | |
| ↓ | Pritisni dole | Izaberite stavke menija ili umanjite vrijednosti podešavanja odabrane stavke menija. | ||
natural_image
Symbol of a trash bin with crossed lines indicating no waste or restriction, and a solid black rectangle below (no text or labels)ЗАБЕЛЕЖКА
natural_image
Line drawing of a monitor with a lever and adjustment knob, no text or symbols presentВРЪЗКИ
22MC625BF

24MC625BF-27MC625BF

27MC925BQ

natural_image
Line drawing of a monitor with a stand and two buttons inserted, no text or symbols present
natural_image
Simple line drawing of a cable and plug connecting a CD to an electrical outlet (no text or symbols)natural_image
Three line drawings showing different viewing angles: a flat-screen monitor, a flat-screen screen with a circular button, and a hand holding a blank board (no text or symbols)natural_image
Symbol of a trash bin crossed with no text or numbers, representing waste sorting or disposal (no text present)ΣΗΜΕΙΩΣΗ
natural_image
Line drawing of a monitor with a lever and adjustment knob, no text or symbols presentΣΥΝΔΕΣΕΙΣ
22MC625BF

24MC625BF - 27MC625BF

27MC925BQ

natural_image
Line drawing of a monitor with a stand and two buttons inserted, no text or symbols present
natural_image
Simple line drawing of a cable and plug connecting a CD to an electrical outlet (no text or symbols)natural_image
Three line drawings showing different viewing angles: a flat, angled, and a hand holding a blank board with a circle (no text or symbols)natural_image
Symbol of a trash bin crossed with no visible text or labelsNAPOMENA
VAŽNA SIGURNOSNA UPUTSTVA
natural_image
Line drawing of a monitor with a lever and adjustment knob, no text or symbols presentPRIKLJUČCI
22MC625BF

24MC625BF-27MC625BF

27MC925BQ


natural_image
Line drawing of a monitor with a stand and two buttons, no text or symbols present
natural_image
Simple line drawing of a cable and plug connecting a CD to an electrical outlet (no text or symbols)natural_image
Three line drawings showing different viewing angles: a flat-screen monitor, a flat-screen screen with a circular button, and a hand holding a blank board (no text or symbols)- Crteži su samo za referencu, za ostalo pogledajte monitor.
- Kut zaslona može se podesiti 5° naprijed ili 15° natrag kako bi slika bila ugodnija za oči.
- Pazite da ne dodirnete ili pritisnete zaslon prilikom podešavanja kuta monitora.
TIPKE
natural_image
Symbol of a trash bin crossed with no text or labels, accompanied by a black rectangular block below (no text or symbols present)MEGJEGYZÉS
natural_image
Line drawing of a monitor front panel with a stylus and control buttons, showing no text or symbolsCSATLAKOZÓK
22MC625BF

24MC625BF-27MC625BF

27MC925BQ

natural_image
Line drawing of a monitor with a stand and two ports, no text or symbols present
natural_image
Symbol of a trash bin crossed with no text or labels, accompanied by a blank rectangular block below (no text or symbols present)ЗАБЕЛЕШКА
natural_image
Line drawing of a monitor with a lever and adjustment knob, no text or symbols presentКОНЕКЦИИ
22MC625BF

24MC625BF - 27MC625BF

27MC925BQ


natural_image
Line drawing of a monitor with a stand and two buttons inserted, no text or symbols present
natural_image
Simple line drawing of a cable and plug connecting a CD to an electrical outlet (no text or symbols)natural_image
Three line drawings showing different viewing angles: a flat-screen monitor, a flat-screen screen with a circular button, and a hand holding a blank board (no text or symbols)natural_image
Symbol of a trash bin with no text or labels, crossed by two diagonal lines and a solid rectangle below (no text or symbols present)NOTĂ
natural_image
Line drawing of a monitor with a handle and control panel, showing no text or symbolsCONECTARE
22MC625BF

24MC625BF-27MC625BF

27MC925BQ


natural_image
Line drawing of a monitor with a stand and two ports, no text or symbols present
natural_image
Simple line drawing of a cable and plug connecting a CD to an electrical outlet (no text or symbols)natural_image
Three line drawings showing different viewing angles: a flat, angled, and a hand holding a blank board with a circle (no text or symbols)natural_image
Back view of a modern computer monitor with a stand and control panel (no visible text or symbols)natural_image
Symbol of a trash bin crossed with no text or labels, accompanied by a black rectangular block below (no text or symbols present)OPOMBA
natural_image
Line drawing of a monitor front panel with a stylus and control buttons, showing no text or symbolsPOVEZAVE
22MC625BF

24MC625BF - 27MC625BF

27MC925BQ


natural_image
Line drawing of a monitor with a stand and two ports, no text or symbols present
Prepričajte se, da sta monitor in računalnik izklopljena.
1 Povezava HDMI
natural_image
Simple line drawing of a cable and plug connecting a CD to an electrical outlet (no text or symbols)natural_image
Three line drawings showing different viewing positions: a flat-screen monitor, a flat-screen monitor with a circular symbol, and a hand holding a blank screen (no text or symbols present)natural_image
Back view of a modern computer monitor with a stand and control panel (no visible text or symbols)natural_image
Symbol of a trash bin with crossed lines indicating no waste or restriction, and a solid black rectangle below (no text or labels)NAPOMENA
VAŽNA BEZBEDNOSNA UPUTSTVA
- Pre upotrebe ove opreme pažljivo pročitajte uputstva i sačuvajte ih radi dalje upotrebe.
- Prilikom pomeranja pažljivo rukujte monitorom.
- Ovaj uređaj je namenjen samo za kućnu upotrebu i ne bi trebalo da se koristi u druge svrhe, ili da ima drugačiju primenu, poput upotrebe van kuće ili u poslovnom okruženju.
- Obezbedite najmanje 10 cm praznog prostora oko proizvoda.
- Monitor postavite u dobro provetren prostor. Na monitor nemojte postavljati ništa što može sprečiti gubitak toplote.
- Nemojte izlagati monitor direktnoj sunčevoj svetlosti ili drugom izvoru toplote. Okrenite ekran od direktne sunčeve svetlosti kako bi se smanjio odsjaj.
- Čuvajte LCD ekran u prostoriji u kojoj je temperatura između -20°C - 60°C (-4°F - 140°F). Može doći do trajnog oštećenja ukoliko se LCD ekran čuva izvan ovog temperaturnog opsega.
- Ne postavljajte ga u blizini izvora toplote kao što su radijatori, grejalice, peći ili drugi uređaji koji proizvode toplotu.
- Ne postavljajte LCD ekran u blizini prozora. Izlaganje kiši, vlagi ili direktnoj sunčevoj svetlosti može izazvati ozbiljna oštećenja na uređaju.
- Ne pritiskajte LCD ekran. Preterano snažno pritiskanje može izazvati trajno oštećenje ekrana.
- Ne uklanjajte kućište i ne pokušavajte sami da popravite uređaj. Sve poslove održavanja obavlja ovlašćeno tehničko lice.
- Izbegavajte dodirivanje ekrana. Ulja za kožu se teško uklanjaju.
- Ukoliko se pojavi dim, neobična buka ili čudan miris, odmah isključite monitor.
- Zaštitite kabl za napajanje od gaženja ili priklještenja, posebno na utikaču. Obezbedite da se utičnica nalazi u blizini monitora tako da je lako dostupna.
- Koristite isključivo dodatke/pribor koji je proizvođač naveo.

natural_image
Line drawing of a monitor front panel with a stylus and control buttons, showing no text or symbolsPRIKLJUČCI
22MC625BF

24MC625BF - 27MC625BF

27MC925BQ


natural_image
Line drawing of a monitor with a stand and two ports, no text or symbols present
Uverite se da su i monitor i računar isključeni.
1 HDMI priključak

Povežite svoj računar sa monitorom pomoću obezbeđenog HDM kabla. Priključak prenosi digitalne video i audio signale sa vašeg računara na monitor.
2 Display Port
Povežite svoj računar sa monitorom pomoću DisplayPort kabla. Priključak prenosi digitalne video i audio signale sa vašeg računara na monitor. Display Port kabl nije uključen u pakovanje.
3 VGA priključak

natural_image
Simple line drawing of a cable and plug connecting a CD to an electrical outlet (no text or symbols)natural_image
Three line drawings showing different viewing angles: a flat-screen monitor, a flat-screen screen with a circular button, and a hand holding a blank board (no text or symbols)- Crteži služe samo kao referenca, a za ostalo pogledajte monitor.
- Ugao ekrana se može podesiti 5° unapred ili 15° unazad kako bi slika više prijala oku.
- Pazite da ne dodirnete ili ne pritisnete ekran prilikom podešavanja ugla monitora.
KOMANDE
- Za prikaz OSD menija, pritisnite taster džojstika na poledini monitora.
- Konfigurišite opcije pomeranjem džojstika gore/dole/levo/desno.
| Taster Postupak Opis | ||||
| Pritisnite taster. | Dugi pritisak za isključivanje, kratak pritisak za uključivanje/ meni.Tabela u nastavku prikazuje status monitora, na koji ukazuje lampica koja se nalazi na tasteru džojstika. | ||
| Lampica Status monitora | ||||
| Plava Uključeno | ||||
| Crvena Režim mirovanja/Nema signala | ||||
| Bez lampice Išključeno | ||||
| ← → | ← | Pritisak ulevo Izlazak iz glavnog menija ili povratak na gornji meni. | ||
| → | Pritisak udesno Omogućavanje glavnog menija ili izbor stavke menija. | |||
| ↑ | Pritisak na gore | Izbor stavke menija ili povećavanje vrednosti podešavanja izabrane stavke menija. | |
| ↓ | Pritisak na dole | Izbor stavke menija ili smanjivanje vrednosti podešavanja izabrane stavke menija. | ||
| Meni Opis | ||
| Izvor signala | VGA | Menja izvor signala u VGA HDMI ili DP.HDMI |
| DP | ||
| Osvetjenje/kontrast | Osvetljenje Podešava kontrast boje i osvetljenje ekrana. | |
| Kontrast Podešava kontrast ekrana | ||
| Nivo crne boje | Podešava nivo crne boje ekrana | |
| Oštrina | Podešava oštrinu prikaza | |
| Režim slike | Unapred podešeni režimi boja | |
| DCR | DCR je odnos između najsvetlije bele i najtamnije crne, koju proizvodi ekran monitora. DCR povećava odnos kontrasta automatskim podešavanjem pozadinskog osvetljenja na osnovu sadržaja slike. | |
| Podešavanje boje | Toplina boje | Odabir režima topline boje ili omogućavanje ručne konfiguracije boja |
| Kvalitet slike Podešavanja | Saturacija Podešavanje | saturacije ekrana |
| Slaba plava svetlost Podešavanje smanjenja plave svetlosti | ||
| Gama Gama podešavanje | ||
| Paleta boja DCIP3/Adobe/sRGB | ||
| HDR Auto/HDR 2084/ISKLJUČENO | ||
| Ekran | Proporcija širine i visine | Podešavanje odnosa širine i visine ekrana |
| Dinamičko osvežavanje AMD FreeSync | Podešavanje AMD FreeSync na uključeno/isključeno | |
| Prekoračenje | Podešavanje vremena odgovora. Slika može biti zamućena ako korisnik uključi Prekoračenje. | |
| Audio | Tihi režim Pokretanje režima tišine pritiskom na uključeno/isključeno | |
| Jačina zvuka Podešavanje jačine zvuka izlaza za slušalice. | ||
| Postavke slike | Horizontalni položaj / | |
| Vertikalni položaj / | ||
| Sat 0 - 100 | ||
| Faza 0 - 100 | ||
| Auto konfiguracija 0 - 100 | ||
| Auto boja 0 - 100 | ||
| OSD meni | Jezik | Omogućavanje korisnicima izbora dostupnih jezika |
| OSD H. Položaj | Podešavanje horizontalnog položaja menija. | |
| OSD V. Položaj | Podešavanje vertikalnog položaja menija. | |
| OSD Transparentnost | Podešavanje vrednosti transparentnosti menija na ekranu. | |
| OSD Vremensko ograničenje | Automatsko isključenje prikaza na ekranu (OSD) nakon unapred podešenog vremenskog perioda. | |
| Ostalo | Tajmer za isključivanje | Monitor će se automatski isključiti nakon unapred podešenog vremenskog perioda (1 ~ 24 sata). Podrazumevano vreme isključenja je 4 sata. Da biste onemogućili ovu funkciju, izaberite vrednost isključeno. |
| Ponovno podešavanje | Vraća podrazumevana podešavanja. | |
\*U zavisnosti od modela monitora, korisnički interfejs se može razlikovati
- Da biste se vratili u gornji meni, kako biste podesili druge stavke menija, pomerite džojstik na levo.
- Ako želite da izadete iz menija na ekranu, pomerite džojstik na levo.
REŠAVANJE PROBLEMA
Ako imate problema sa monitorom, pogledajte tabelu u nastavku sa mogućim rešenjima.
| Problem Moguće rešenje | |
| Nema slike • Proverite | da li je monitor uključen.• Proverite da li je kabl za napajanje pravilno povezan sa monitorom.• Proverite da li je signalni kabl pravilno povezan na pozadini monitora.• Proverite da li je računarski sistem uključen i u režimu uštede energije/mirovanja.• Koristeći OSD meni, podesite osvetljenost i kontrast. |
| Pogrešne ili neuobičajene boje | • Ako nedostaje bilo koja boja (crvena, zelena, plava), proverite signalni kabl da biste se uverili da je bezbedno povezan. Labave ili polomljene iglice u priključku kabla mogu dovesti do nepravilnog spoja.• Povežite monitor na drugi kompjuter. |
ČIŠĆENJE I ODRŽAVANJE
Čišćenje ekrana LCD monitora:
natural_image
Symbol of a trash bin crossed with no text or labels, accompanied by a black rectangular block below (no text or symbols present)TESLA
Technology for all
- USER MANUAL
- NOTE
- IMPORTANT SAFETY INSTRUCTIONS
- PACKAGE CONTENTS
- ASSEMBLING THE STAND
- CONNECTIONS
- HDMI connection
- Display Port
- VGA connection
- Earphones connection
- Power connection
- USB
- ADJUSTING THE ANGLE
- USERS CONTROLS
- TROUBLESHOOTING
- CLEANING AND MAINTENANCE
- ABANDONMENT OF WASTE EQUIPMENT FOR EU HOUSEHOLD USERS
- NAPOMENA
- SIGURNOSNE UPUTE
- PRIKLJUČIVANJA
- KORISNIČKE KONTROLE
- ЗАБЕЛЕЖКА
- ВРЪЗКИ
- ΣΗΜΕΙΩΣΗ
- ΣΥΝΔΕΣΕΙΣ
- VAŽNA SIGURNOSNA UPUTSTVA
- PRIKLJUČCI
- TIPKE
- MEGJEGYZÉS
- CSATLAKOZÓK
- ЗАБЕЛЕШКА
- КОНЕКЦИИ
- NOTĂ
- CONECTARE
- OPOMBA
- POVEZAVE
- Povezava HDMI
- VAŽNA BEZBEDNOSNA UPUTSTVA
- HDMI priključak
- VGA priključak
- KOMANDE
- \*U zavisnosti od modela monitora, korisnički interfejs se može razlikovati
- REŠAVANJE PROBLEMA
- ČIŠĆENJE I ODRŽAVANJE
- TESLA
- Technology for all
Brand : TESLA
Model : 27MC925BQ
Category : Monitor