NAV 103 - Browser AUDIOVOX - Free user manual and instructions
Find the device manual for free NAV 103 AUDIOVOX in PDF.


| Product Type | GPS Navigation Device |
| Brand | Audiovox |
| Model | NAV 103 |
| Display Size | 3.5 inches |
| Dimensions | 95 x 70 x 20 mm |
| Weight | 180 g |
| Power Source | 12V DC (cigarette lighter adapter) |
| Battery Type | Rechargeable Lithium-Ion |
| Battery Life | Up to 3 hours |
| GPS Antenna | Built-in |
| Mapping | Preloaded maps of North America |
| Points of Interest | Built-in POI database |
| Route Planning | Turn-by-turn voice guidance |
| Screen Type | Color TFT touchscreen |
| Mounting | Windshield suction mount |
| Memory Card Slot | SD card slot for map updates |
| Operating Temperature | 0°C to 60°C |
| Languages | English, French, Spanish |
| Maintenance | Clean with a soft, dry cloth |
| Safety | Use only approved mounts; do not obstruct driver view |
| Spare Parts | Contact Audiovox customer support |
| Repairability | Serviceable by authorized technicians only |
Frequently Asked Questions - NAV 103 AUDIOVOX
User questions about NAV 103 AUDIOVOX
0 question about this device. Answer the ones you know or ask your own.
Ask a new question about this device
Download the instructions for your Browser in PDF format for free! Find your manual NAV 103 - AUDIOVOX and take your electronic device back in hand. On this page are published all the documents necessary for the use of your device. NAV 103 by AUDIOVOX.
USER MANUAL NAV 103 AUDIOVOX
2.3.4 Farbprofil in Tunnel
2.3.4 Farbprofil in Tunnel
User Data Management
Navigations software NAV 103
Navigation software NAV 103
Copyright note
The product and the information contained herein is subject to change without prior notification.
This manual may not, in whole or in part, be reproduced or transmitted in any form either electronically or mechanically, including photocopying and recording, without the express written consent of Nav N Go Kft..
© 2010 - Nav N Go Kft. All rights reserved.
Data Source © 2006-10 Tele Atlas. All rights reserved. This material is proprietary and the subject of copyright protection, database right protection and other intellectual property rights owned by Tele Atlas or its suppliers. The use of this material is subject to the terms of a license agreement. Any unauthorized copying or disclosure of this material will lead to criminal and civil liabilities.
Thank you for choosing Audiovox navigation as your door-to-door in-car navigator. Read the Quick Start Guide first and start using Audiovox navigation right away. This document is the detailed description of the software. You can easily discover Audiovox navigation while you are using it; however, we still recommend that you read this manual to understand the screens and the features of Audiovox navigation.
Table of contents
1 Warnings and Safety information 4
2 Getting started with AUDIOVOX Navigation Software 4
2.1 Buttons and other controls on the screen 5
2.1.1 Using keyboards 6
2.2 Using the map 6
2.2.1 Checking the details of a map location 6
2.2.2 Manipulating the map 7
2.2.3 Status information and hidden controls on the map 9
2.2.4 Using the Cursor (the selected map location) 12
2.3 AUDIOVOX Navigation Software concepts 12
2.3.1 Smart Zoom 12
2.3.2 Position markers 12
2.3.2.1 Current GPS position and Lock-on-Road 12
2.3.2.2 Returning to normal navigation 13
2.3.2.3 Selected location (Cursor) 13
2.3.2.4 Original position in the Cursor menu 13
2.3.3 Daytime and nightcolour schemes 13
2.3.4 Colour scheme in tunnels 13
2.3.5 Route calculation and recalculation 13
2.3.6 Itinerary 14
2.3.7 Route demonstration 15
2.3.8 POI (Points of Interest) 15
2.3.9 Speed limit warning 15
2.3.10 TMC (Traffic Message Channel) 15
3 Navigating with AUDIOVOX Navigation Software 15
3.1 Selecting the destination of a route 16
3.1.1 Selecting the Cursor as the destination 16
3.1.2 Entering an address or part of an address 16
3.1.2.1 Entering an address (Europe) 16
3.1.2.2 Entering an address if house numbering is restarted 17
3.1.2.3 Entering an address without knowing the district/suburb 17
3.1.2.4 Selecting an intersection as the destination 18
3.1.2.5 Selecting a city centre as the destination 18
3.1.2.6 Entering an address with a postal code 19
3.1.2.7 Tips on entering addresses quickly 19
3.1.3 Selecting the destination from your Favourites 19
3.1.4 Selecting the destination from the POIs 20
3.1.5 Selecting the destination from the History 20
3.2 Creating a multi-point route (inserting a via point) 21
3.3 Creating a multi-point route (appending a new destination) 21
3.4 Editing the route 21
3.5 Watching the simulation of the route 22
3.6 Pausing the active route 22
3.7 Deleting the next via point from the route 22
3.8 Deleting the active route 22
3.9 Saving a route 22
3.10 Loading a saved route 22
4 Reference Guide 23
4.1 Map screen 23
4.1.1 Icons on the map 25
4.1.1.1 GPS position quality indicator 26
4.1.1.2 Status indicator strip 26
4.1.1.3 Next two route events (Turn Preview fields) 26
4.1.2 Objects on the map 27
4.1.2.1 Streets and roads 27
4.1.2.2 3D object types 28
4.1.2.3 Elements of the active route 28
4.1.3 Cursor menu 29
4.1.4 Avoid menu 29
4.1.5 Position menu 31
4.1.6 Route Information screen 31
4.1.7 Trip Information screen 32
4.1.8 Quick menu 33
4.1.9 GPS Data screen 34
4.2 Find menu 36
4.3 Route menu 36
4.4 Manage menu 37
4.4.1 Manage Saved Routes 37
4.4.2 Manage History 37
4.4.3 Manage POIs 39
4.4.4 Manage Favourites 39
4.4.5 User Data Management 39
4.5 Settings menu 39
4.5.1 Map Screen settings 40
4.5.2 Navigation settings 41
4.5.3 Route Planning options 41
4.5.4 Regional settings 42
4.5.5 Menu settings 43
4.5.6 TMC settings 43
4.5.7 Warning settings 44
5 Glossary 44
6 End User Licence Agreement 45
1 Warnings and Safety information
Audiovox navigation is a navigation system that helps you find your way to your destination with a connected GPS receiver. Audiovox navigation does not transmit your GPS position; others cannot track you.
It is important that you look at the display only when it is safe to do so. If you are the driver of the vehicle, we recommend that you operate Audiovox navigation before you start your journey. Plan the route before your departure and stop if you need to change something in the route.
Audiovox navigation has a Safety Mode: if you turn on Safety Mode, you cannot change anything in Audiovox navigation while the vehicle is moving at a speed of 10 km/h (6 mph) or higher. Unless only passengers operate Audiovox navigation, we strongly encourage you to turn on Safety Mode.
You must obey the traffic signs and follow the road geometry. If you deviate from the route that Audiovox navigation recommended, Audiovox navigation changes the instructions accordingly. Never place mobile devices where it obstructs the driver's view, where it is in the deployment zone of an airbag or where it might cause injuries in an accident.
For more information, consult the End User Licence Agreement (page 45).
2 Getting started with Audiovox navigation
Audiovox navigation is optimised for in-car use. You can use it easily by tapping the screen buttons and the map with your fingertips. Audiovox navigation can plan routes throughout the whole installed map set; you do not need to change maps or switch to a poorly detailed general map to navigate between map segments or countries.
| Tasks Instructions | |
| Handling | You do not need a stylus to use Audiovox navigation. Tap the buttons and the map with your fingertips. |
| Double tapping the screen | You do not need to tap the screen twice for any action. With buttons and controls, a single tap is enough. |
| Tapping and holding the screen | You do not need this to access the basic navigation functions. Tap and keep pressing the following buttons to reach extra functions:Tap and hold on the Map screen: you can set the minimum and maximum zoom level of Smart Zoom.Tap and hold any of the buttons on the Map screen: you can set or reset the zoom value of the button (2D map).Tap and hold any of the buttons on the Map screen: you can set or reset the tilt and zoom values of the button (3D map).Tap and hold in and menu screens: the Navigation menu appears.Tap and hold on keyboard screens: you can delete several characters quickly.Tap and hold in ing lists: you can turn the page continuously.Tap and hold the buttons in the Quick menu to open screens from the Manage menu or the Settings menu related with the function of the button. |
| Gestures (drag&drop) | You do not need gestures to access the basic navigation features. You need to drag and drop the screen only in cases like:Moving the handle on a slider.Moving the map: grab the map, and move it in the desired direction.Shortcut to open the Map screen: slide your finger from the bottom right corner to the bottom left corner on any screen.Shortcut to open the Navigation menu: slide your finger from the top left corner to the bottom left corner on any screen. |
2.1 Start using Audiovox navigation
When Audiovox navigation is started the first time, you need to do the following:
- Select the written language of the application. Later you can change it in Settings (page 42).
- Select the language and speaker used for voice guidance messages. Later you can change it in Settings (page 42).
- After this, the Navigation menu appears and you can start using Audiovox navigation.
The Navigation menu:

The typical way of using Audiovox navigation is to select a destination, and start navigating. You can select your destination in the following ways
- Use the selected location on the map (the Cursor) (page 16).
- Enter a full address or a part of an address, for example a street name without a house number or the names of two intersecting streets (page 18).
- Enter an address with postal code (page 19). This way you do not need to select the name of the settlement and the search for street names might be faster as well.
- Use a saved location:
• a Favourite (page 19) - a POI (page 20)
• the History of previously set destinations and waypoints (page 20)
2.2 Buttons and other controls on the screen
When you are using Audiovox navigation, you usually tap buttons on the touch screen.
You only need to confirm selections or changes in Audiovox navigation if the application needs to restart, it needs to perform a major reconfiguration, or you are about to lose some of your data or settings. Otherwise, Audiovox navigation saves your selections and applies the new settings without confirmation as soon as you use the controls.
| Type Example | Description How to use | ||
Button Tap it to initiate a function, to open | a new screen, or to set a parameter. | Tap it once. | |
| Icon Shows status information. Some icons also function as a button. Tap them once. | ton. Tap them once. | ||
List When you need to select from  | several options, they appear in a list. | Turn the page with the and buttons and tap the value that you want. | |
Slider When a feature has several differences | rent unnamed values, Audiovox Navigation shows an indicator on a gauge that displays and sets a value from a range. | Drag the handle to move the slider to its new position.Tap the slider where you want the handle to appear; the thumb jumps there. | |
Switch When there are only two choices, a | checkmark shows whether the feature is enabled. | Tap it to turn the switch on or off. | |
2.3.1 Using keyboards
| Type Example Description How to use | |||
Virtual keyboard Alphabetic and alphanumeric key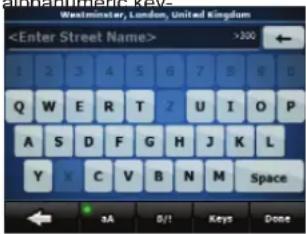 | boards to enter text and numbers. | Each key is a touch screen button. | |
You only need to enter letters or numbers in Audiovox navigation when you cannot avoid it. You can type with your fingertips on the full-screen keyboards and you can switch between various keyboard layouts, for example ABC, QWERTY, or numerical.
| Task Details | ||
| Switching to another keyboard layout, for example from a Latin QWERTY keyboard to a Greek keyboard |  Tap types. Tap types. | the list of available keyboard |
| Correcting your entry on the keyboard | Remove the unneeded character(s): tap  Tap and hold the button to delete the entire input string. Tap and hold the button to delete the entire input string. | |
| Entering a space, for example between a first name and a family name or in multi-word street names | Tap Space | |
| Entering symbols | Tap to switch to a keyboard of symbol characters. | |
2.4 Using the map
The map screen is the most frequently used screen of Audiovox navigation. It can be accessed
Map
from the Navigation menu by tapping
For further information about the map screen, see page 23.
2.4.1 Checking the details of a map location
- If you are interested in the details of your current position during navigation:
- Check the bottom line of the map. It shows the current street and house number information.

- For further details, tap to open the Position menu.
Info
- Tap Info The address, the coordinate and the list of nearby POIs will be displayed.
- You can check the details of any other location by selecting it on the map:
- Tap the map anywhere to open the map control buttons.

- Tap the desired location on the map. The Cursor ( ) appears there. The address of the location is displayed at the bottom of the map.

-
For further details, tap to open the Cursor menu.
-
Tap Info address, the coordinate and the list of nearby POIs will be displayed.
- It is even easier if you select the desired point in the Find menu. Then the Cursor menu opens automatically. You only need to tap the button.
Info
2.4.2 Manipulating the map
Position markers on the map:

- Current GPS position:

- Selected location (Cursor):
The following controls help you modify the map view to best suit your actual needs. Most of these controls appear only if you tap the map once, and disappear after a few seconds of inactivity
| Action Button(s) | Description | |
| Moving the map with drag&drop No buttons You can move the map into any direction: tap and hold the map, and move your finger to the direction in which you want to move the map. If GPS position is available and you have moved the map, the button appears. Tap this button to return to the GPS position. | ||
| Opening/closing map control buttons |  | Tap this button to show or hide the following map control buttons:• Zoom in/out• Rotate left/right (3D map only)• Tilt up/down (3D map only)• Zoom preset buttons (2D map only)• Tilt and zoom preset buttons (3D map only)• Return to GPS position button• Smart Zoom button |
| Zooming in and out Changes how much of the map is displayed on the screen. Audiovox uses high-quality vector maps that let you see the map at various zoom levels, always with optimised content. It always displays street names and other text with the same font size, never upside-down, and you only see the streets and objects that you need. Map scaling has different limits in 2D and in 3D map view modes. | ||
| Tilting up and down Changes the vertical view angle of the map in 3D mode. | ||
Rotating left and right Changes the horizontal view angle of the map in 3D  | mode.When GPS position is available, Audiovox navigation always rotates the map so its top faces your direction of travel (Track-Up orientation). You can turn away from Track-Up with these buttons.If GPS position is available and you have rotated themap the  on appears. Tap this button to re-enable the automatic map rotation. on appears. Tap this button to re-enable the automatic map rotation. | |
Viewing modes Gives you the following map perspectives in  | Audiovox navigation:classic top-down view (2D)perspective view (3D)The value always shows the mode the button switches to: If you are in 2D mode, you can see the button and you need to tap it to switch to 3D mode. button and you need to tap it to switch to 3D mode. | |
Smart Zoom Audiovox navigation can automatically rotate, scale  | and tilt the map and give you the optimal view:When you are approaching a turn, Audiovox navigation zooms in and raises the view angle to let you easily recognise your manoeuvre at the next junction.If the next turn is at a distance, Audiovox navigation zooms out and lowers the view angle to show you the road in front of you.Tap this button onceto enable Smart Zoom.Tap&hold the buttonto set the zoom limits of Smart Zoom. | |
| Returning to normal navigation (back to the GPS position with automatic map rotation) |  | Tap this button to move the map back to the current GPS position. If the map has been rotated in 3D mode, automatic map rotation is also re-enabled. |
Zoom preset buttons (available in Advanced mode only) Tap one of the preset buttons to set the zoom level to  | a fix, predefined value. Smart Zoom is disabled.These buttons are available in 2D mode.Tap&hold any of the buttonsto set its value to the current zoom level, or to reset it to its original value. | |
GB
| Action Button(s) | Description | |
| Tilt and zoom preset buttons (available in Advanced mode only) |  | Tap one of the preset buttons to set the tilt and zoom levels to fix, predefined values. Smart Zoom is disabled. These buttons are available in 3D mode.Tap&hold any of the buttons to set its value to the current tilt and zoom levels, or to reset it to its original value. |
Kartenmaßstab Audiovox navigation Software shows the scale | of the map in 2D mode. | |
| Icon Information Details Action | ||||
| There is no active route in Advanced mode | If there is no route to be navigated in Advanced mode, this icon appears in the Turn Preview field. | Tap this area to open Find. | ||
 |  | There is no valid GPS position If an | active route exists, and there is no valid GPS position, the view of the sky above you is shown with coloured dots for each satellite. Some dots need to turn green to be able to navigate. | Tap this area to open the Route Information screen |
 | If the icon is a static picture, route calculation is needed | GPS position and an active route are available, but automatic off-route recalculation is switched off, and you deviated from the route. | Tap this area to make Audiovox recalculate the recommended route. | |
 | If the icon is animated, route calculation is in progress | Audiovox navigation is calculating or recalculating the route. | Nothing happens if you tap this area of the screen. | |
 |  | Next route event (next manoeuvre) | GPS position and an active route are available, and you navigate the recommended route. This area gives you information about the type and distance of the next route event. | Tap this area to open the Route Information screen. |
2.4.3 Status information and hidden controls on the map
The following information appears in the rounded field in the top left corner, the Turn Preview field. When tapping this area, the result depends on the information currently shown.
The following area appears next to the above described rounded area.
When tapping this area, the result depends on the information currently shown.
| Icon Information Details Action | ||||
 | There is no valid GPS position If there is no valid GPS position, this symbol appears here. | Tap this area to open the GPS Data screen to check the signal status or the connection settings. | ||
 | Traffic restriction. When GPS position is available, but there is no route to be navigated, the traffic restriction of the upcoming intersection is shown here if there is any. | Nothing happens if you tap this area of the screen. | ||
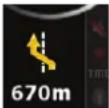 |  | Second route event (manoeuvre after the next manoeuvre) | When GPS position and an active route are both available, this field shows the route event that follows the next route event shown in the above described area. | Tap this area to open the Itinerary screen with the turn by turn guidance instructions. |
 | Stops the running simulation This icon appears during Route Simulation. | Tap this area to stop the simulation. | ||
 | Route recalculation progress | During route recalculation, this field shows the recalculation progress between 0% and 100%. | Nothing happens if you tap this area of the screen. | |
 | Indicator strip - sounds muted/enabled - TMC-status | Nothing happens if you tap this area of the screen. | ||
The following symbols appear in the Indicator strip:
| Icon Description | |
| The sound output of Audiovox navigation is muted. | |
| The sound output of Audiovox navigation is enabled. | |
| TMC | No TMC receiver is connected or TMC is turned off. |
| TMC | A TMC receiver is connected and a radio station with TMC broadcast is received. |
| There are new, unread TMC events. | |
| A part of the route is bypassed based on TMC events. | |
| A part of the route is mentioned in TMC events but could not be bypassed (for example, the destination is on a congested street). |
Subject to technical changes
The following information can be seen in the three data fields shown on the map screen. Tap this area to open the Trip Information screen where you can select which values to be shown in these three fields.
When there is no active route, these fields show the following information: current speed, compass and the current time of day.
| Icon Type More information | ||
 | Compass Shows the direction of your heading both when the map is automatically rotated (3D) and when the map is always facing North (2D). | |
 | Speed information There are speed values that can be shown:• Current speed• Speed limit on the current road | |
 | Time information There are time values that can be shown:• Current GPS time• Time remaining to reach the destination• Time remaining to reach the next via point• Estimated arrival time at the destination• Estimated arrival time at the next via point | |
 | Distance information There are distance type values that can be shown:• Distance remaining to reach the destination• Distance remaining to reach the next via point• Current altitude | |
The next area is the GPS position quality indicator field. Tap this area to open the Quick menu (page 33).
| Icons Status for More information | ||
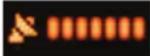 | GPS position quality A higher number of lit bars indicates better GPS position accuracy. | |
2.2.4 Using the Cursor (the selected map location)
First, place the Cursor at the desired map location with one of the following options:
- Use the Find menu to select a location. The map returns with the selected point (the Cursor) in the middle, and the Cursor menu appears with the available options.
- Tap the screen and tap again to place the Cursor at the desired location. Now tap to open the Cursor menu.
You can perform the following actions:
| Button Action | ||
| [02BD] Set as Start | In the active route, uses the Cursor as the start point by replacing the current GPS position | |
| Coordinate Display Format | In the active route, uses the Cursor as the destination by replacing the previous destination | |
 Insert as Via Insert as Via | In the active route, uses the Cursor as a via point (an intermediate destination) preceding the destination | |
| Continue | In the active route, uses the Cursor as the destination while keeping the previous destination as a via point | |
 Routing Methods Routing Methods | Shows the different routes calculated by the available routing methods.Choose the one that suits your needs the best | |
| [DB0Y] Save as POI | Saves the Cursor as a POI | |
| [4DK8] Add to Favourites | Saves the Cursor as a Favourite location | |
| [WZ5D] Place Pin | Marks the map with a Pin at the Cursor | |
| [Y4HS] Info | Opens a screen with the name, address and coordinate information of the Cursor, and the list of POIs near it | |
2.3 Audiovox Navigation Software concepts
2.3.1 Smart Zoom
Smart Zoom provides much more than just a usual automatic zoom feature:
- While following a route calculated by Audiovox Navigation Software: when approaching a turn, it will zoom in and raise the view angle to let you easily recognise your manoeuvre at the next junction. If the next turn is at a distance, it will zoom out and lower the view angle to be flat so you can see the road in front of you.
- While driving without an active route in Audiovox Navigation Software: Smart Zoom will zoom in if you drive slowly and zoom out when you drive at high speed.
Enabling Smart Zoom
Tap the map to let the map control buttons appear, and then tap to enable Smart Zoom.
Fine-tuning Smart Zoom
Tap the map to let the map control buttons appear, and then tap and hold 📄 to open the Smart Zoom Settings window. Modify the zoom limits of Smart Zoom if necessary.
2.3.2 Position markers
2.3.2.1 Current GPS position and Lock-on-Road
When your GPS position is available, AUDIOVOX Navigation Software marks your current position with the icon on the map.

The -icon is aligned to the nearest road to suppress GPS position errors. The direction of the icon is one of the directions of the route.
To use the current GPS position, tap Position, the Position menu appears and you can save the GPS position as one of the following:
- a Favourite
• a POI - a map marker Pin
2.3.2.2 Returning to normal navigation
When GPS position is available, and you have moved the map (the

icon is moving or is not even visible), or you have rotated the map in 3D

button appears. Tap it to move the map back to the GPS position and re-enable Track-up map orientation (automatic map rota-
NOTE!
Even if you move the map while you are driving, AUDIOVOX Navigation Software continues navigating if there is an active route: it plays the voice instructions and displays the turn preview icons according to your current GPS position.
2.3.2.3 Selected location (Cursor)
If you select a location in the Find menu, or you tap the map when the map control buttons are visible, the Cursor appears at the selected point on
the map. AUDIOVOX Navigation Software displays the Cursor with a radiating red dot ( ) to make it visible at all zoom levels, even when it is in the background of a 3D map view.

e Cursor menu appears and you can use the Cursor as one of the following:
• the start point of a route
- a via point in a route
• the destination of a route
You can also search for POIs around the Cursor. Or you can save the location of the Cursor as:
- a Favourite
• a POI
- a map marker Pin
2.3.2.4 Original position in the Cursor menu

) shows the Cursor position the menu was opened with.

When the Cursor menu is open, a special icon (
You can move and zoom the map, and you can set the Cursor to a different place. The usual Cursor (appears, and the buttons of the Cursor menu initiate actions for this new location.
To return to the original Cursor position, tap 📋, he map jumps back to the position with which the Cursor menu was opened, and the cursor icon appears again.
2.3.3 Daytime and nightcolour schemes
Audiovox Navigation Software uses different colour schemes during the day and during the night.
• Daytime colours are similar to paper road maps.
- The night colour schemes use dark colours for large objects to keep the average brightness of the screen low.
Audiovox Navigation Software offers different daytime and night colour schemes. It can also switch automatically between the daytime and the night scheme based on the current time and GPS position a few minutes before sunrise, when the sky has already turned bright, and a few minutes after sunset, before it becomes dark.
2.3.4 Colour scheme in tunnels
When entering a tunnel, the colours of the map change. All buildings disappear, the large objects (such as surface waters or forests) and the empty areas between roads become black. However roads and streets keep their original colours from the daytime or night colour scheme currently used. After leaving the tunnel, the original colours return.
2.3.5 Route calculation and recalculation
AUDIOVOX Navigation Software calculates the route based on your preferences:
- Route calculation method:
- Fast
- Short
- Economical
Road types:
- Easy
- Vehicle types :
• Car
- Taxi
- Bus
- Emergency vehicles
- Bicycle
- Pedestrian
- Road types
- Unpaved Roads
- Permit Needed
- Motorways
- Toll Roads
- Charge Roads
- Ferries
• Cross-border Planning
AUDIOVOX Navigation Software automatically recalculates the route if you deviate from the proposed itinerary.
If your hardware supports TMC: Depending on the type of the TMC event, AUDIOVOX Navigation Software also recalculates the route if a TMC event concerns a part of the recommended route. For further information about Route Planning options, see page 41.
2.3.6 Itinerary
The Itinerary is the list of the route events, that is, the driving instructions.

When you are on the Map screen, you can display the Itinerary in one of the following ways:
- Tap the area between the Turn preview and the Travel data fields where the symbol of the second next manoeuvre is displayed (for example)

- Tap the following buttons:


Itinerary
You have the following options on the Itinerary screen:
| Button Description | ||
| Any of the list items Opens the map with the selected manoeuvre in the middle. | ||
 | Changes the detail level of the Itinerary. The levels are as follows:Detailed Instructions: all intersections are listedItinerary: only significant intersections (the ones announced in voice guidance) are listedRoad list: the list of the roads used while navigating the route. | |
 |  | Moves between pages for additional list items.. |
When the map is open with a manoeuvre in the middle:
| Button Description | ||
 | Zooms in the map. | |
 | Zooms out the map. | |
 |  | Moves the map to show the previous or next manoeuvre. |
 | Opens a screen where you can the selected manoeuvre. | |
2.3.7 Route demonstration
A simulation drives you through the route, following the driving instructions (page 22). You can use it, for example, to see which bridge AUDIOVOX Navigation Software planned for the route; if you do not want to take that bridge, you can avoid it. Route demonstration can be started from the
Route menu by tapping the
Simulate
2.3.8 POI (Points of Interest)
A point of interest (POI) is a location that someone might find useful or interesting. AUDIOVOX Navigation Software is delivered with thousands of POIs and you can also create your own POIs in the application. POI locations are marked on the map with special icons. POI icons are quite large so you can easily recognise the symbol. The icons are also semi-transparent: they do not cover the streets and intersections behind them. POIs are grouped into several levels of categories and subcategories. The icon of a POI that comes with the map shows the symbol of the POI category. If you save your own POI, you can select an icon for it independently of the POI category you have put it in.
Saving POIs
To save a POI, place the Cursor ( ) at the desired location, then tap the following buttons: , , More Options... Save as POI
POIs manage
You can select which POI groups to show and which ones to hide on the map, and from which zoom levels POI icons are visible. At the same place you can manage your saved POIs. A saved POI can be renamed, moved to a different POI group, its icon can be changed, or a phone number and additional information can be added to it. Tap the
following buttons:


More Options...

Save as POI
2.3.9 Speed limit warning
Maps sometimes contain information about the speed limits of the road segments. This information may not be available for your region (ask your local dealer) or may not be fully correct for all roads on the map.
You can configure AUDIOVOX Navigation Software to warn you if you exceed the current limit. Tap the following buttons:



Warn When Speeding
When you exceed the speed limit, the following happens:
- Visible Warning: A symbol with the speed limit appears in the corner of the map (for example:
- Audible Warning: A voice message is played using the selected voice guidance profile.

2.3.10 TMC (Traffic Message Channel)
This feature is available only if your hardware supports TMC.
AUDIOVOX Navigation Software can provide you with even better routes if Traffic Message Channel (TMC) information is available. TMC is a specific application of the FM Radio Data System (RDS) used for broadcasting real-time traffic and weather information. TMC is enabled by default in AUDIOVOX Navigation Software.
NOTE:
TMC is not a global service. It may not be available in your country or region. Ask your local dealer for coverage details.
If public TMC data is broadcast at your location, Audiovox navigation automatically takes into account the TMC data received. You do not need to set anything in the program. The receiver will automatically search the FM radio stations for TMC data, and the decoded information will immediately be used in route planning. The moment Audiovox navigation receives traffic information that may affect your route, the program will warn you that it is recalculating the route, and navigation will continue with a new route that is optimal considering the most up-to-date traffic conditions. If necessary, you can change the settings related to TMC, or select a specific radio station to receive.
Tap the following buttons


3 Navigating with Audiovox Navigation
You can set up your route in Audiovox Navigation in several ways:
- if you need a simple route (a route with only one destination, without any intermediate via points), you can select the destination and start navigating to it right away
- you can plan a multi-point route
- you can also plan a route independently of your current GPS position or even without GPS reception
3.1 Selecting the destination of a route
Audiovox navigation offers you several ways of choosing your destination and via points (intermediate destinations):
- Use the selected location on the map (the Cursor) (page 16).
- Enter a full address or a part of an address, for example a street name without a house number or the names of two intersecting streets (page 18).
- Enter an address with postal code (page 19). This way you do not need to select the name of the settlement and the search for street names might be faster as well.
- Use a coordinate (page 36)
- Use a saved location:
• a Favourite (page 19) - a POI (page 20)
• the History of previously set destinations and waypoints
Tip!
If you are going to use a route later, save it before you start navigating. Tap the following buttons:


Save Route
3.1.1 Selecting the Cursor as the destination
- Locate your destination on the map: move and scale the map as needed (page 7)
- Tap the location that you want to select as your destination. The Cursor ( ) appears.
- Tap to open the Cursor menu.
- The map appears with the selected point in the middle. Tap Set as Destination from the Cursor menu. The route is then automatically calculated, and you can start navigating.
Tip!
If you know that you will use a destination later, when the Cursor menu appears, save it as a POI, or put it on the list of your Favourites first. The Cursor menu returns automatically with the same point. Now you can use it as a route point.
3.1.2 Entering an address or part of an address
If you know at least a part of the address, it is the quickest way to select the destination of the route.
Using the same screen, you can find an address by entering:
• the exact address, including house number
• the centre of a settlement
- an intersection
• the midpoint of a street
- any of the above, starting the search with the postal code (page 19)
3.1.2.1 Entering an address (Europe)
In some countries, states are not used in addressing. After selecting the country, the next step is to define the settlement. There are four lines on the screen:
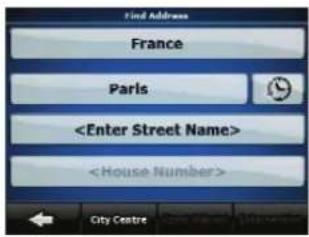
The procedure is explained starting from the Navigation menu.
- Tap the following buttons:


a) By default, Audiovox navigation proposes the country and settlement where you are. If needed, tap the button with the name of the country, and select a different one from the list.
- If needed, change the settlement:
• To select the settlement from the list of recently used ones, tap the button.
• To enter a new settlement:
e button with the name of the settlement, or if you have changed the country/state, tap
- Start entering the settlement name on the keyboard.
- Get to the list of search results:
• After entering a couple of characters, the names that match the string appear in a list.

e list of results before it appears automatically.
1c) Pick the settlement from the list.
4. Enter the street name:
- Tap
- Start entering the street name on the keyboard
- Get to the list of results:
- After entering a couple of characters, the names that match the string appear in a list.

e list of results before it appears automatically.
- Pick the street from the list.
5. Enter the house number:
- Tap
-
Enter the house number on the keyboard
-
Tap Done entering the address
6. The map appears with the selected point in the middle.
- Tap: from the Cursor menu. The route is then automatically calculated, and you can start navigating.
3.1.2.3 Entering an address if house numbering is restarted
There are long roads where the house numbering is restarted at some point. This way the same house number can appear twice or even more times on the same road. If this is the case, after giving the house number, you need to select the appropriate address by the district/suburb information. The procedure is explained starting from the Navigation menu:


- Tap the following buttons:
a. By default, Audiovox Navigation proposes the country/state and settlement where you are. If needed, tap the button with the name of the country/state, and select a different one from the list.
b. If needed, change the settlement:
• To select the settlement from the list of recently used ones, tap the button.
• To enter a new settlement:
c. Tap the button with the name of the settlement, or if you have changed the country/state, tap
d. Start entering the settlement name on the keyboard.
e. Get to the list of search results:
• After entering a couple of characters, the names that match the string appear in a list.
- Tap, to open the list of results before it appears automatically.
f. Pick the settlement from the list.
4. Enter the street name:
a. Tap
b. Start entering the street name on the keyboards.
c. Get to the list of results:
- After entering a couple of characters, the names that match the string appear in a list.
Done
e list of results before it appears automatically.
• Tap
d. Pick the street from the list.
5. Enter the house number:
a. Tap
b. Enter the house number on the keyboard
c. Tap to mention entering the address
6. A list appears with the matching addresses. Tap the desired one.
- The map appears with the selected point in the middle. Tap 1, from the Cursor menu. The route is then automatically calculated, and you can start navigating.
3.1.2.4 Entering an address without knowing the district/suburb
Long roads can run across several districts or suburbs. You may not know if a particular house number is in which of them. In this case, follow the instructions below:
The procedure is explained starting from the Navigation menu.


a. Tap the following buttons:
b. By default, Audiovox Navigation proposes the country/state and settlement where you are. If needed, tap the button with the name of the country/state, and select a different one from the list.
c. If needed, change the settlement:
• To select the settlement from the list of recently used ones, tap the button.
• To enter a new settlement

- Tap the button with the name of the settlement, or if you have changed the country/state, tap
- Start entering the settlement name on the keyboard.
- Get to the list of search results:
- After entering a couple of characters, the names that match the string appear in a list.
- Tap Done the list of results before it appears automatically.
- Pick the settlement from the list.
4. Enter the street name:
- Tap
-
Start entering the street name on the keyboard
-
Get to the list of results:
• After entering a couple of characters, the names that match the string appear in a list
Done
- Tap to open the list of results before it appears automatically.
Search in All
- Instead of picking one of the streets, tap
5.Enter the house number:
- Tap
- Enter the house number on the keyboard.
Done
-
Tap to which entering the address.
-
A list appears with the matching addresses. Tap the desired one.
-
The map appears with the selected point in the middle. Tap

Set as Destination
from the Cursor menu. The route is then automatically calculated, and you can start navigating.
3.1.2.5 Selecting an intersection as the destination
The procedure is explained starting from the Navigation menu.


-
Tap the following buttons
-
By default, Audiovox navigation proposes the country/state and settlement where you are. If needed, tap the button with the name of the country/state, and select a different one from the list.
-
If needed, change the settlement

• To select the settlement from the list of recently used ones, tap the button.
• To enter a new settlement:
a. Tap the button with the name of the settlement, or if you have changed the country/state, tap
b. Start entering the settlement name on the keyboard.
c. Get to the list of search results
• After entering a couple of characters, the names that match the string appear in a list.
Done
- Tap Done the list of results before it appears automatically.
d. Pick the settlement from the list
- Enter the street name:
a. Tap
b. Start entering the street name on the keyboard.
c. Get to the list of results:
• After entering a couple of characters, the names that match the string appear in a list.
Done
- Tap is open the list of results before it appears automatically.
d. Pick the street from the list.
Intersection
- Tap the
- If only a few intersecting streets exist, their list appears immediately.
• In case of a longer street, a keyboard screen appears. Start entering the name of the intersecting street on the keyboard.
As you type, if the matching streets can be shown on one screen, their list appears automatically.
-
Tap the desired intersecting street in the list.
-
The map appears with the selected point in the middle. Tap culated, and you can start navigating.

Set as Destination
from the Cursor menu. The route is then automatically cal-
3.1.2.6 Selecting a city centre as the destination
The City Centre is not the geometric centre of the settlement but an arbitrary point the map creators have chosen. In towns and villages, it is usually the most important intersection; in larger cities, it is an important intersection.
The procedure is explained starting from the Navigation menu


-
Tap the following buttons:
-
By default, Audiovox navigation proposes the country/state and settlement where you are. If needed, tap the button with the name of the country/state, and select a different one from the list.
-
If needed, change the settlement:
• To select the settlement from the list of recently used ones, tap the button.

• To enter a new settlement:
a. Tap the button with the name of the settlement, or if you have changed the country/state, tap
b. Start entering the settlement name on the keyboard.
c. Get to the list of search results:
• After entering a couple of characters, the names that match the string appear in a list.

- Tap you open the list of results before it appears automatically.
d. Pick the settlement from the list.
City Centre
-
Tap the
-
The map appears with the selected point in the middle. Tap from the Cursor menu. The route is then automatically calculated, and you can start navigating.
3.1.2.7 Entering an address with a postal code
All of the above address searching possibilities can be performed with entering the postal code instead of the settlement name. Find below an example with a full address:
The procedure is explained starting from the Navigation menu.


-
Tap the following buttons:
-
By default Audiovox Navigation proposes the country/state and settlement where you are. If needed, tap the button with the name of the country/state, and select a different one from the list.
-
Tap the button with the name of the settlement, and enter the postal code:
-
Start entering the postal code on the keyboard.
-
Get to the list of results
• After entering a couple of numbers, the ones that are a match appear in a list.
-
Pick the settlement from the list.
-
Enter the street name:
a. Tap
b. Start entering the street name on the keyboard
c. Get to the list of results:
• After entering a couple of numbers, the ones that are a match appear in a list.
Done
- Tap up to open the list of results before it appears automatically.
d. Pick the street from the list.
- Enter the house number:
a. Tap
b. Enter the house number on the keyboard
Done
c. Tap to finish entering the address.
- The map appears with the selected point in the middle.

The route is then automatically calculated, and you can start navigating.
3.1.2.8 Tips on entering addresses quickly
- When you are entering the name of a settlement or a street, Audiovox Navigation only displays those characters that appear in possible search results. The other characters are greyed out.
- When entering the settlement name or the street name, tap the Done ; button after a couple of letters; Audiovox Navigation lists the items that contain the character set.
- You can speed up finding an intersection:
- Search first for the street with a less common or less usual name; fewer letters are enough to find it.
- If one of the streets is shorter, search for that one first. You can then find the second one faster.
- You can search for both the type and the name of a road. If the same word appears in several names, for example in the name of streets, roads and avenues, you can obtain the result faster if you enter the first letter of the street type: For example, enter Pi A to obtain Pine Avenue and skip all Pine Streets and Pickwick Roads.
- You can also search in postal codes. This is useful when a street name is common and it is used in several districts of a city.
3.1.3 Selecting the destination from your Favourites
You can select a location that you have already saved as a Favourite to be your destination.
The procedure is explained starting from the Navigation menu.


-
Tap the following buttons:
-
Tap the Favourite that you want to set as your destination.
-
The map appears with the selected point in the middle. Tap culated, and you can start navigating.

Set as Destination
from the Cursor menu. The route is then automatically cal-
3.1.4 Selecting the destination from the POIs
You can select your destination from the POIs included with Audiovox Navigation or from the ones you have previously created. The procedure is explained starting from the Navigation menu.


Find POI
- Tap the following buttons:
- Select the area around which the POI should be searched:

• The POI will be searched around a given address

- The map appears with the Cursor in the middle. Modify the location of the Cursor if necessary, then tap . The POI will be searched around the given location.


• The POI will be searched around the current GPS position.

• The POI will be searched around the destination of the active route.

The POI will be searched not around a given point but by the size of the detour it means from the active route. This can be useful if you search for a later stopover that causes only a minimal detour. For example upcoming petrol stations or restaurants.
- You can narrow the search with the following:
- Select the POI group (e.g. Accommodation), and after that, if needed, select the POI subgroup (e.g. Hotel or Motel).
• To find the POI by its name, tap
Search keyboard to enter a part of the name.

- To list all POIs in a given POI group, tap L. When finally the list of results appear, you can sort the list:


• : sort the list by the distance to drive on route from your current position (available when you search along the active route)

• Use the list by the size of the needed detour (available when you search along the active route)
-
Tap the desired POI in the list.
-
The map appears with the selected point in the middle. Tap from the Cursor menu. The route is then automatically calculated, and you can start navigating.
3.1.6 Selecting the destination from the History
The destinations that you have set earlier appear in the History. The procedure is explained starting from the Navigation menu.


Find Coordinate
-
Tap the following buttons:
-
If necessary, turn the page with
-
Tap the desired item.
-
The map appears with the selected point in the middle. Tap

Set as Destination
3.2 Creating a multi-point route (inserting a via point)
Multi-point routes are created from simple routes, so a route must be active first. One of the ways of expanding the route is to keep the destination, and to add via points (intermediate destinations).
- Select a new location as you did in the previous sections. This will be the additional destination in the route.
- The map appears with the selected point in the middle, and the Cursor menu opens automatically.
- Tap to add the point as an intermediate destination preceding the final destination of the route.
- To add more points to the route, repeat the above steps as many times as you like.
If you insert a via point in a route that is already a multi-point route, you will automatically be taken to the Edit Route screen where you can determine the position of the intermediate route point. When you enter the screen, the new via point is placed as the last via point before the final destination. The new point is the selected point in the list.
You have the following options:
| Button Action | |
| The selected point moves up in the list (becomes a via point to be reached earlier). Tap this button repeatedly, and the point becomes the start point of the route. | |
| The selected point moves down in the list (becomes a via point to be reached later). Tap this button repeatedly, and the point becomes the final destination of the route. | |
| The route is reversed. The start point becomes the destination, the destination becomes the start point, and all via points are to be reached in the opposite order than before. | |
| Optimise | The route is optimised. The start point and the destination remain at their position, but the via points are reordered to make the shortest possible route. |
| Remove | The selected point is removed from the route. The route remains as it was before adding the new point. |
Every time a new point is added, the route is recalculated automatically, and you can start navigating right away.
3.3 Creating a multi-point route (appending a new destination)
Multi-point routes are created from simple routes, so a route must be active first. One of the ways of expanding the route is to add a new destination. The previous destination becomes the last via point of the route.
-
Select a new location as you did in the previous sections. This will be the additional destination in the route.
-
The map appears with the selected point in the middle, and the Cursor menu opens automatically.
-
Tap , to open the full Cursor menu with the additional functions.
-
Tap , to add the point as a new final destination demoting the previous one to the last intermediate destination.
-
To add more points to the route, repeat the above steps as many times as you like.
Every time a new point is added, the route is recalculated automatically and you can start navigating right away.
3.4 Editing the route
Tap the following buttons:


The list of route points appear with the start point at the top of the list and the final destination at the bottom. If several via points exist, you might need to scroll between pages.
Tap one of the route points in the list. You have the following options:
| Button Action | |
| The selected point moves up in the list (becomes a via point to be reached earlier). Tap this button repeatedly, and the point becomes the start point of the route. | |
| The selected point moves down in the list (becomes a via point to be reached later). Tap this button repeatedly, and the point becomes the final destination of the route. | |
| The route is reversed. The start point becomes the destination, the destination becomes the start point, and all via points are to be reached in the opposite order than before. | |
| The route is optimised. The start point and the destination remain at their position, but the via points are reordered to make the shortest possible route. | |
| The selected point is removed from the route. |
The list of route points appear with the start point at the top of the list and the final destination at the bottom. If several via points exist, you might need to scroll between pages.
3.5 Watching the simulation of the route
The procedure is explained starting from the Map screen.
- Tap the following buttons:

- The Route menu appears:

3 Tap to turn the simulation at normal speed and with voice guidance instructions announced.

- The simulation can be aborted any time by tapping
3.6 Pausing the active route
You do not need to pause the active route: when you start driving again, Audiovox Navigation Software restarts the voice instructions from your position.
3.7 Deleting the next via point from the route
The easiest way to delete the upcoming route point (the next via point) is to open the Route Information screen by tapping the Turn Preview field

( ) is the Map screen, and then tapping


Route Info

You have another option. Tap the following buttons:
3.8 Deleting the active route
The easiest way to delete the active route is to open the Route Information screen by tapping the Turn Preview field( ) on the Map screen,
and then tapping

other option. Tap the following buttons: , ,


Note!
If via points exist in the active route, you cannot delete the route immediately on the Route Information screen. Tap , repeatedly until

all via points disappear and the Route Tap it to cancel the whole route.
3.9 Saving a route
The procedure is explained starting from the Map screen.
- Tap the following buttons:


Save Route
- Enter a name for the saved route, and then tap
Done
When you save a route, AUDIOVOX Navigation Software not only saves the route points but the whole itinerary:
- The saved route might have been influenced by TMC information. When you later use the route, it appears as it was saved. But if it needs to be recalculated, the current TMC information will be used in the new route.
- If you updated your map since you first saved the route, AUDIOVOX Navigation Software recognises the change, and recalculates the driving instructions according to the latest available map information.
- AUDIOVOX Navigation Software deletes from the route any via points that you already left behind during navigation together with the road segments used to reach it. To avoid this, if you want to save the route, you need to save it before you start navigating.
3.10 Loading a saved route
The procedure is explained starting from the Map screen.


Load Route
- Tap the following buttons:
- Tap the route you wish to navigate.
- GPS position, you need to confirm whether you want to stop navigating from the current GPS position to use the start point of the loaded route.
- If you choose this option, automatic off-route recalculation will be disabled.
- If you choose to keep the current GPS position as the start point, the route will be recalculated starting from your current position.
- The map appears, and you can start navigating.
4 Reference Guide
On the following pages you will find the description of the different menu screens of Audiovox Navigation Software.
The Navigation menu:
Audiovox Navigation Software starts with the Navigation menu. From there you can access the following screens:
| Screen Button Description | ||
| Map |  | The Map screen. |
Find Selecting the destination (for example an address or  | a POI) or using the search engine of Audiovox Navigation Software for any other reason (for example to look for the phone number of a POI). | |
Route Managing the active route (obtaining information  | about it, changing or deleting it or parts of it) or planning a route without GPS reception | |
Manage Managing user data, such as saved locations  | Favourites, Pins, and History items), and Saved Routes. | |
Settings Managing the behaviour of Audiovox Navigation  | Software, for example the map layout during navigation, the used languages or the warnings. | |
4.1 Map screen
Audiovox Navigation Software is primarily intended for land navigation. That is why maps in Audiovox Navigation Software look similar to paper road maps. However, Audiovox Navigation Software provides much more than regular paper maps: you can customise the look and the content of the map. The most important and most often used screen of Audiovox Navigation Software is the Map screen.
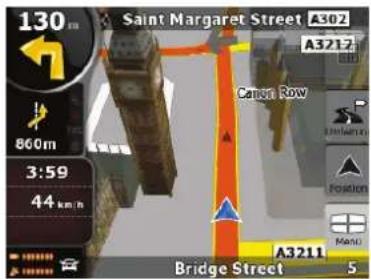
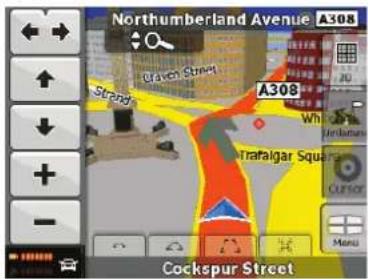
During navigation, the screen shows route information and trip data (left screenshot), but when you tap the map, additional buttons and controls appear for a few seconds (right screenshot). Most parts of the screen behave as buttons.
| Icon Name Action | ||
 | Turn Preview, that is, the next route event | Opens the Route Information screen |
 | Second upcoming route event Opens the Itinerary | |
 | Trip data Opens the Trip Information screen | |
 | GPS position quality Opens the Quick menu | |
| Top row Next street n/a. | ||
| Bottom row Current street and house numbers | on left and righ | n/a. |
 | Map view modes Switches between 2D and 3D map modes | |
 | Menu Opens the Navigation menu | |
 | Detour Opens the Avoid screen, offering ways | to avoid parts of the route |
 | Position menu (appears when navigating a route) | Opens the Position menu |
 | Cursor menu (appears when there is no GPS position or the Cursor is not at the current GPS position) | Opens the Cursor menu |
 | Open/Close Map control buttons Tap this button | to show or hide the following map control buttons:Zoom in/outRotate left/right (3D map only)Tilt up/down (3D map only)Zoom preset buttons (2D map only)Tilt and zoom preset buttons (3D map only)Return to GPS position buttonSmart Zoom button |
 | Rotate left, rotate right Tilts the 3D map | |
 | Tilt up, tilt down Tilts the 3D map | |
 | Zoom in, zoom out Scales the map | |
 | Return to GPS position (appears when GPS position is available and you have moved the map) | Tap this button to move the map back to the current GPS position. If the map has been rotated in 3D mode, automatic map rotation is also reenabled. |
 | Enable Smart Zoom (replaces the previous button if there is no GPS position or the map has not been moved) | Tap this button once to enable Smart Zoom.Tap&hold the button to set the zoom limits of Smart Zoom. |
 | Zoom preset buttons Tap one of the preset buttons to set the zoomlevel to a fix, predefined value. Smart Zoom is disabled. These buttons are available in 2D mode.Tap&hold any of the buttons to set its value to the current zoom level, or to reset it to its original value. | |
 | Tilt preset buttons Tap one of the preset buttons to set the tilt andzoom levels to fix, predefined values. Smart Zoom is disabled. These buttons are available in 3D mode.Tap&hold any of the buttons to set its value to the current tilt and zoom levels, or to reset it to its original value. | |
 | Current GPS position (on nearest road) | n/a. |
 | Cursor (selected map location) | n/a |
 | Lane information n/a | |
| Orange Linie Active route n/a. | ||
 | Map scale (2D map only) n/a | |
4.1.1 Icons on the map
There are several status icons on the map. Most of them also function as a button. The information they provide is as follows:
• GPS position quality
• Sound status (muted or enabled)
• TMC reception and processing status
4.1.1.1 GPS position quality indicator
This area is a status indicator, and also acts as a button that opens the Quick menu. GPS reception quality shows the current accuracy of the position information.
| Icon Description | ||
 | Audiovox Navigation Software has no connection to the GPS receiver:GPS navigation is not possible.Devices with a built-in GPS receiver are permanently connected. On such devices, the icon does not appear in normal circumstances. | |
 | Audiovox Navigation Software is connected to the GPS receiver, but the signal is too weak and the receiver cannot determine the GPS position.GPS navigation is not possible. | |
 | Only a few satellites are received. Position information is available, but elevation (altitude) cannot be calculated.GPS navigation is possible, but the position error may be significant. | |
 | Altitude information is available, the position is a 3D position.GPS navigation is possible. | |
4.1.1.2 Status indicator strip
This is a multiple status indicator. It indicates the following status information on a single strip:
| Icon Description | |
 | The sound output of AUDIOVOX Navigation Software is muted. |
 | The sound output of AUDIOVOX Navigation Software is enabled. |
 | No TMC receiver is connected or TMC is turned off. |
 | A TMC receiver is connected and a radio station with TMC broadcast is received. |
 | There are new, unread TMC events. |
 | A part of the route is bypassed based on TMC events. |
 | A part of the route is mentioned in TMC events but could not be bypassed (for example, the destination is on a congested street). |
4.1.1.3 Next two route events (Turn Preview fields)
There are two fields reserved on the Map screen to display the next two manoeuvres (route events that are listed in the Itinerary). Both the type of the event (turn, roundabout, exiting motorway, etc.) and its distance from the current GPS position is displayed. Most of these icons are very intuitive and you also know them as road signs. The following table lists some of the frequently shown route events. The same symbols are used in both fields:
| Symbol Description | |
| Turn left. | |
| Turn right. | |
| Turn back. | |
| Bear right. | |
| Turn sharp left. | |
| Keep left. | |
| Continue straight in the intersection. | |
| Enter roundabout. The number of the exit is shown in the circle, but only for the next turn. | |
| Enter motorway. | |
| Exit motorway. | |
| Board ferry. | |
| Leave ferry. | |
| Approaching the next via point. | |
| Approaching the destination. |
In certain situations when route events are not important, these fields show other useful pieces of information. They are described here: page 10
4.1.2 Objects on the map
4.1.2.1 Streets and roads
Audiovox Navigation Software shows the streets in a way that is similar to how the paper road maps show them. Their width and colours correspond to their importance: you can easily tell a motorway from a small street.
Tip! If you prefer not to see street names during navigation, turn them off (page 40)
4.1.2.2 3D objects types
To enable or disable 3D visualisation on the map, tap the following buttons:



3D Settings
| Typ Description | |
| 3D landmarks Landmarks are 3D artistic or block representations of prom | nent or well-known objects. 3D landmarks are only available in selected cities and countries. |
| Elevation model Hills and mountains are shown in the background of the | 3D map view,and illustrated by colour on the 2D map. |
| Elevated roads Complex intersections and vertically isolated roads (such as overpassesor underground tunnels) are displayed in 3D. | |
| 3D buildings Full 3D city building data that represents actual building size | and positionon the map. Building data is limited to the city centres of major cities in Europe. |
| 3D-Gelände 3D terrain map data shows changes in terrain, elevations or | depressionsin the land when you view the map, and use it to plot the route map in 3Dwhen you navigate. |
4.1.2.3 Elements if the active route
Audiovox Navigation Software shows the route in the following way:
| Symbol Name Description | ||
 | Current GPS position Your current position displayed on the map. This is not the exact GPS position. The arrow is put on the nearest road. | |
 | Cursor (selected map location) | The location selected in the Find menu, or a map point selected by tapping the map. |
 | Start point The first point of the route. The first point of the route.Normally if GPS position is available, it is the start point of the route. If there is no valid GPS position, Audiovox Navigation Software uses the last known GPS position as the start point.When you are using a saved route, Audiovox Navigation Software asks you if you want to use your GPS position or the first point in the saved route as the start point.You can also modify the start point in the Cursor menu. If you do so, automatic off-route recalculation needs to be turned off to keep the selected point as the start point. If automatic off-route recalculation is disabled for any of the above, tapping the icon in the Turn Preview field not only initiates route recalculation from 44 Symbol Name Descriptionthe current GPS position, but it will re-enable the automatic off-route recalculation as well. | |
4.1.3 Cursor menu
As soon as you select one point in the Find menu, the map appears with the Cursor menu, a menu with possible actions for the selected point.
| Icon Name Description | ||
 | Via point | A via point is an intermediate destination. You can place as many via points as you want. |
 | Destination (end point) The last point of the route, the final destination. | |
| Route colour The route always stands out with its colour on the map, both in daytime and in night colour mode. The active leg of the route is always displayed in a brighter shade than the inactive (upcoming) legs. | ||
| Active leg of the route The section of the route on which you are driving. If you have not added any via points (only a destination), the entire route is the active leg. If you have added via points, the active leg is the part of the route from your current location to the next route point (the next via point, or the destination if there are no more via points to reach). | ||
| Inactive legs of the route The future sections of the route; each of them becomes active when you reach the via point at its beginning. | ||
| Streets and roads that are excluded from the navigation | You can choose whether you want to use or avoid certain road types (page 41). However, when Audiovox Navigation Software cannot avoid such roads, the route will include them and it will show them in a colour that is different from the route colour. | |
4.1.4 Avoid menu
This screen contains quick detour possibilities during navigation. It can be opened directly from the
map screen by tapping

You have the following options:
- Tap any of the distance buttons if you want to bypass a part of the route starting from the next intersection..
Delete Avoids
used the above function before, tap this button to clear the restrictions from the map.
Alternatively when you tap the map, control buttons appear. Tap again to place the Cursor, a radiating red dot. Now tap Cursor, and the Cursor menu opens with a list of options.
In order to show a part of the map with the Cursor menu, it contains only a few buttons first. Tap More Options... to get all the options.
| Icon Description | |
| Closes the Cursor menu, and returns to the previous screen. | |
| Zooms out the map. | |
| Zooms in the map. | |
 | With the Cursor menu open, you can still move or scale the map, and tap the map anywhere to place the Cursor to a new location, but when you use this button, the Cursor jumps back to the place where it was at the time when you opened the Cursor menu. |
 | Displayed at the Cursor if it is at the same location with which the Cursor menu was opened. |
 | Displayed at the Cursor if it has been relocated since the Cursor menu was opened. |
| [Y2HB] | Opens a new screen with the address and coordinate of the Cursor, and the list of nearby POIs. |
| More Options... | Opens the full-screen Cursor menu with all the possible options. |
| Set as Destination | A new route is calculated with the Cursor as the destination. The previous route is deleted. |
| Remove Destination | If the Cursor is at or near the destination, this button replaces the previous one, and deletes the current destination from the route. The last via point is promoted as destination, or if there are no via points, the route is deleted. |
| Insert as Via | The Cursor is added to the active route as an intermediate route point, a point to be reached before the destination. If there is already a via point in the route, the Edit Route screen opens to let you decide where the new via point is to appear in the route. |
| Remove Via | If the Cursor is at or near one of the via points, this button replaces the previous one, and deletes the selected via point from the route. The route is recalculated without the deleted point. |
| Continue | The Cursor is appended at the end of the route as the new destination. The previous destination is demoted, and becomes the last via point. |
| Routing Methods | This button is similar to the button, but a new screen opens, and the route is calculated with all the possible route calculation methods (Fast, Short, Economical and Easy). Observe the results, and choose one of the routes to navigate. |
| Set as Start | The Cursor becomes the start point of the route. This means that the route is not started from the current GPS position, and Automatic Off-route Recalculation needs to be turned off to keep the selected point as the start point. |
| Remove Start | If the Cursor is at or near the selected start point, this button replaces the previous one and deletes the start point from the route. The current GPS position is used again as the start point, and Automatic Off-route Recalculation is re-enabled. |
| Save as POI | The Cursor is saved as a user POI. Select the POI group and give a name for the POI, then select a suitable icon, enter a phone number, and additional information if you like. |
4.1.5 Position menu
When you follow the recommended route on the map (the Cursor is the current GPS position), the Position menu replaces the Cursor menu. It does not contain buttons that modify the current route, as the GPS position is not useful as a route point.

To open the Position menu, tap
4.1.6 Route Information screen
The Route Information screen has all the data and some of the functions you need while you navigate. There are two ways to open this screen:

- It can be opened directly from the Map screen by tapping the Turn Preview field (


- From the Navigation menu, tap the following buttons:

In the top section of the screen you see information about the current route. The fields on this screen are continuously updated while you keep the screen open. When you open the screen, all fields contain information about reaching your final destination. Tap any of the fields to see data on the via points starting from the first one through the final destination again.
You have the following data and functions on this screen:
| Name Description | Function | |
| Route line The upper part of this screen shows your planned route as a horizontal line. Its leftmost point is the start of the route, the rightmost one is the final destination, and you can see your via point flags along the line, spaced in proportion to their distance. | Tap this field to change the content of all data fields to via point information. | |
| Estimated Arrival Shows the estimated arrival time at the final destination of the route based on information available for the remaining segments of the route. The calculation cannot take into account traffic jams and other possible delays. | Tap this field to change the content of all data fields to via point information. | |
| Distance Left Shows the distance you need to travel on the route before reaching your final destination. | Tap this field to change the content of all data fields to via point information. | |
| Time Left Shows the time needed to reach the final destination of the route based on information available for the remaining segments of the route. The calculation cannot take into account traffic jams and other possible delays. | Tap this field to change the content of all data fields to via point information. | |
| Method This field shows how the route was calculated. It displays the Route Calculation Method: Fast, Short, Easy or Economical. | Tap this field to change the content of all data fields to via point information. | |
| Warning icons In these square fields graphical symbols are displayed in case warnings are attached to the planned route. These are warnings, so icons always show information for the whole route, even if the data fields display values from your current position to a via point only. | Tap any of the icons for an explanation. | |
| Settings | Opens the Route Planning options screen from theSettings menu. | |
| Skip Next Via | Appears only if at least one via point exists. Deletes the next via point from the route. | |
| Delete Route | Appears only if there are no via points in the route. Deletes the active route. | |
4.1.7 Trip Information screen
The Trip Information screen has both route and travel data you might need during your journey. It can be opened directly from the Map screen by


The fields on this screen are continuously updated while you keep the screen open.
When you open the screen, all route data fields contain information about reaching your finaldestination. Tap and the fields concerning your route display data for the next via point. Tap the button repeatedly to toggle between the two options.
| Name Description Function | ||
| or | Shows whether the route data fields show information about the final destination (checked flag) or about the next via point (yellow flag). | |
| Field next to the flag Shows the name or number of the current street or road. | ||
| Turn Preview Shows the type and distance of the next route event. Tap this field to show it on the map screen in one of the Trip Data fields. | ||
| Compass Shows the current heading. Tap this field to show it on the map screen in one of the Trip Data fields. | ||
| Speedometer Shows the current speed both graphically and as a number. | Tap this field to show it on the map screen in one of the Trip Data fields. | |
| Distance Remaining Shows the distance you need to travel on the route before reaching your final destination. | Tap this field to show it on the map screen in one of the Trip Data fields. | |
| Arrival Time Shows the estimated arrival time at the final destination of the route based on information available for the remaining segments of the route. The calculation cannot take into account traffic jams and other possible delays. | Tap this field to show it on the map screen in one of the Trip Data fields. | |
| GPS-Times Shows the current time corrected with time zone offset. The accurate time comes from the GPS satellites, and the time zone information comes from the map or it can be set manually in Regional settings. | Tap this field to show it on the map screen in one of the Trip Data fields. | |
| Altitude Shows the elevation if it is provided by the GPS receiver. | Tap this field to show it on the map screen in one of the Trip Data fields. | |
| Speed Limit Shows the speed limit of the current road if the map contains it. | Tap this field to show it on the map screen in one of the Trip Data fields. | |
| Trip Computer | Opens a new screen with three resettable Trip Computers. | |
| Next Via Point | Tap this button to change the content of the Route Data fields to show information about the next via point. | |
| Destination | If you tap the previous button, this one replaces it. Tap this button and the Route Data fields show information about the final destination again. | |
You have the following data and functions on this screen:
Most of the fields on this screen have a symbol next to them. This symbol

shows whether the field it is attached to is shown on the map as a
| Symbol Description | ||
| This value is not shown on the map screen. | ||
| This value appears on the map screen in the Trip Data area. This is the value at the top. | ||
| This value appears on the map screen in the Trip Data area. This is the value in the middle. | ||
| This value appears on the map screen in the Trip Data area. This is the value at the bottom. | ||
Trip Data. It also shows the position of the data as follows:
| Name Description | |
 | Pauses the trip currently shown on the screen. Values on the screen stop changing. |
 | This button replaces the previous one if it has been activated. Tap it to re-sume collecting trip data. |
 | Resets all counters of the currently shown trip. Collecting trip data is re-started only when AUDIOVOX Navigation Software receives a position from the GPS. |
| Cycles through all trips. |
4.1.8 Quick menu
The Quick menu is a selection of controls that are frequently needed during navigation.
It can be opened directly from the Map screen by tapping

| Name | Main function (single tap) | Function (tap and hold) |
 | If you only adjust the volume, you need to use this button to return to the Map screen.. | Opens the Navigation menu. |
 | Mutes all sounds of Audiovox Navigation Software. Push and hold to open Sound settings. | |
 | Switches between the daytime and night colour schemes manually. This will not disable the automatic switching between the two schemes: the other colour scheme returns at the next scheduled time. | Push and hold to open Opens Colour Profiles settings. |
 | 3D buildings can be displayed on the map. Use this switch to suppress them temporarily. | Push and hold to open Opens 3D Settings. |
 | Opens the GPS Data screen with satellite information, data coming from the GPS receiver. | No action. |
 | When a TMC receiver is connected to AUDIOVOX Navigation Software, this button opens the list of TMC messages, and provides access to the TMC Settings and the radio station settings screens. | No action. |
4.1.9 GPS Data screen
Tap the following buttons: see the status of GPS rec
open the

n and to

| Symbol Colour Name Description | |||
 | Green GPS position quality indicator | Audiovox Navigation Software has a connection to the GPS receiver and GPS position information is available in 3D: Audivox Navigation Software can calculate both your horizontal and vertical GPS position. | |
 | Yellow GPS position quality indicator | Audiovox Navigation Software has a connection to the GPS receiver and GPS position information is available in 2D: only the horizontal position is calculated, Audivox Navigation Software cannot calculate your vertical GPS position. | |
 | Grey GPS position quality indicator | Audiovox Navigation Software has a connection to the GPS receiver but GPS position information is not available. | |
 | Red GPS position quality indicator | Audiovox Navigation Software has no connection to the GPS receiver. Since the device has a built-in GPS receiver, this status should not appear under normal circumstances. | |
| Symbol Colour | Name Description | ||
 | Green, blinking GPS connection quality indicator | Audiovox Navigation Software is connected to the GPS receiver. | |
 | Yellow, blinking GPS connection quality indicator | Audiovox Navigation Software has no connection to the GPS receiver but it is still trying to establish a connection. | |
 | Red, blinking GPS connection quality indicator | Audiovox Navigation Software has no connection to the GPS receiver and is not trying to establish a connection. | |
| Sky view circle The virtual sky shows | the visible | part of the sky above you, with your position as the centre. The satellites are shown at their current positions. The GPS receives data from both the green and yellow satellites. Signals from the yellow satellites are only received, while green ones are used by the GPS receiver to calculate your current location. | |
| n/a. Coordinates Your current GPS position in | WGS84 format. | ||
| n/a. Status bar for the satellites Dark | bars are for the yellow and lit | bar are for the green satellites. The more satellites your GPS tracks (the green ones), the better is your calculated position. | |
4.2 Find menu


Select the destination of your route. Tap the following buttons:
| Button Description Reference | ||
 | If you know at least a part of the address, this is the quickest way to find the location. | page 16 |
 | You can select your destination from the thousands of POIs included with Audiovox Navigation Software or from the ones you have previously created. | page 20 |
 History History | The destinations that you have already entered in Audiovox Navigation Software are available in the History list. | page 20 |
 Find Coordinate Find Coordinate | You can select your destination by entering its coordinates. | page 20 |
 Favourites Favourites | You can select as your destination a location that you have already saved as a Favourite. | page 19 |
4.3 Route menu


Save, load and edit your routes. Tap the following buttons::
| Button Description Reference | ||
 | Opens a screen with useful route data. | page 22 |
 | You can browse the driving instructions that Audiovox Navigation Software follows during navigation. You can exclude manoeuvres or streets to adjust the route to your preferences. | page 14 |
 | You can modify the route: remove route points or change their order. | page 21 |
 | Erase the active route with all its route points (start point, via points and destination). If you later decide that you need the same route, you will have to rebuild it from scratch. | page 22 |
 | You can save the active route for later use. page 22 | |
 | You can load a previously saved route for navigation. page 22 | |
 | Opens the Route settings screen with controls to modify the vehicle, the road types used for route calculation, or the route calculation method. | page 41 |
 | You can run a demonstration of the route at normal speed. | |
4.4 Manage menu
You can manage the content that AUDIOVOX Navigation Software stores. Tap the following buttons:

| Button Description | Reference | |
 | Renaming or deleting saved routes page 37 | |
 | Deleting History items page 37 | |
 | Renaming or deleting Favourites | page 39 |
 | Creating, updating or deleting POIsCreating, updating or deleting POI groupsModifying POI visibility settings | page 37 |
4.4.1 Manage Saved Routes
You can manage the previously saved routes. Tap the following buttons:
| Button Description | |
| Button with the name of the saved route Opens the selected route for editing | |
 | Deletes the selected route |
 | Clears the list of saved routes |
 | Moves between pages for additional list items |
4.4.2 Manage History
You can manage the list of locations you used lately. Tap the following buttons:


History
| Button Description | |
 | Deletes the selected item in the list of Favourites. |
 | Clears the list of Favourites. |
 | Moves between pages for additional list items. |
4.4.3 Manage POIs
You can manage your POIs, and set POI visibility for both your POIs and the ones that came with the prodcut.
Tap the following buttons


POI
| Button / Icon Description | |
| Button with the name of the POI group Opens the list of the subgroups of | this POI group. The new list behaves the same as this one. |
| Button with the name and address of a POI item Opens the selected POI | for editing. Only the POIs you have created appear in this list. |
| Edit | Opens the selected POI group for editing. |
| My POI | Tap to filter the list to contain only the POIs that you saved. |
| All | Tap to see all POIs in the list. |
| New Group | Creates a new POI group at the given group level. |
| Moves between pages for additional list items. | |
| This POI group is not shown on the map. | |
| This POI group and all its subgroups are shown on the map. | |
| This POI group and some of its subgroups are shown on the map. | |
| This POI group contains POIs that you saved. |
| Button Description | |
| Off | Items in the POI group will not be shown on the map. |
| Close Medium | The distance buttons set the zoom level from which the items in the POI group will be shown on the map. |
| Same Visibility in Subgroups | Subgroups under the edited POI group will inherit the visibility settings of the POI group. |
| Button with the icon of the POI group Tap this button to select a new icon for the POI group. | |
| Delete | Deletes the edited POI group. You are only allowed to remove POI groups that you have created. |
When a POI item is open for editing:
| Button Description | |
| Button with the name of the POI Tap this button to rename the POI. | |
| Button with the icon of the POI Tap this button to select a new icon for the POI. | |
| Tap this button to enter a telephone number for the POI. | |
| Tap this button to enter additional information for the POI. | |
| Delete | Tap this button to delete the selected POI. |
| Change Group | Tap this button to move the POI to another POI group or subgroup. |
Subject to technical changes
4.4.4 Manage Favourites
You can manage the list of your Favourites. Tap the following buttons:


| Button Description | |
| Deletes the selected item in the list of Favourites. | |
| Clears the list of Favourites. | |
| Moves between pages for additional list items. |
4.4.5 User Data Management
You can manage the data you have saved (Pins, POIs, Favourites, and History) and the settings you have made in the program. Tap the following
buttons:


User Data Management
| Button Description | |
| Remove Pins Map locations can be marked with Pins using the |  button in the Cursor menu. Tap this button to remove all your Pins from the map. button in the Cursor menu. Tap this button to remove all your Pins from the map. |
| Backup User Data All user data and the current settings will be saved on the | the inserted memory card. There is always one backup file. If you perform a backup later, the previous backup will be overwritten with the new information. |
| Restore User Data All user data and settings will be overwritten with the information stored in the backup file. Data and settings created after the latest backup will be lost. | |
| Delete User Data All user data will be deleted, and settings will return to their factory defaults. | |
| Reset All Settings All settings will return to their factory defaults, but no user data will be deleted. | |
4.5 Settings menu


You can configure the program settings, and modify the behaviour of AUDIOVOX Navigation Software. Tap the following buttons:
The Settings menu has two pages of submenus. Tap to access the other options.


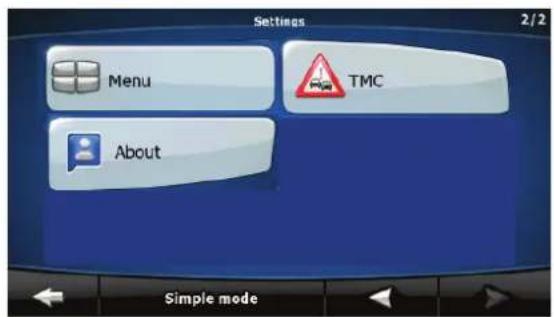
| Button Description Referenz | ||
 | You can fine-tune the appearance and content of the Map screen. page 40 | |
 | You can control how AUDIOVOX Navigation Software behaves during navigation. | page 41 |
 | These settings determine how routes will be calculated. page 41 | |
 | These settings allow you to customise the application for your local language, measurement units, time and date settings and formats, as well as to choose the voice guidance profile you prefer. | page 42 |
 | You can modify the look and behaviour of the Menu screens. page 43 | |
 | You can set up the connection to the TMC receiver. If the TMC receiver is working, you can select the radio station to be received. | page 44 |
 | You can enable speed warning. page 44 | |
 | This screen has no navigation feature. It merely provides information about the maps and licenses included with your navigation system. | |
4.5.1 Map Screen settings


Map Screen
You can fine-tune the appearance and content of the Map screen. Tap the following buttons:
| Button Description | |
| 3D Settings Use 3D settings to determine which of the present 3D objects are shown on the map, and adjust the level of 3D visual detail. The options are as follows:Landmarks: Landmarks are 3D artistic or block representations of prominent or well-known objects. 3D landmarks are only available in selected cities and countries.Elevated Roads: Complex intersections and vertically isolated roads (such as overpasses or underground tunnels) are displayed in 3D.Building Visibility: Full 3D city building data that represents actual building size and position on the map. Building data is limited to the city centres of major cities in the US and Europe.Terrain Detail Level: 3D terrain map data shows changes in terrain, elevations or depressions in the land when you view the map, and use it to plot the route map in 3D when you navigate. | |
| Colour Profiles Audiovox Navigation Software is able to show the map and the menus in different colours during the day and during the night. Select the colour profiles to be used in each mode, and select the automatic or manual switching between the daytime and night colour profiles. | |
| Elevation on 2D Map | 2D maps can also display 3D information. These top-down maps can display elevation by colours and shading. |
| Show Street Names | Street names and POI icons can be disturbing on the map during navigation. With this switch you can suppress these map elements when AUDIOVOX Navigation Software is following your position on the map. If you move the map, both the street names and POI icons reappear immediately. |
| Lane Information | Some maps contain lane information to help you position your car in the upcoming intersection. This setting tells AUDIOVOX Navigation Software whether to display this information at the top or at the bottom of the map. |
4.5.2 Navigation settings


Navigation
You can control how AUDIOVOX Navigation Software behaves during navigation. Tap the following buttons
| Button Description | |
| Keep Position on Road | This feature allows car drivers to always correct GPS position errors by matching the vehicle position to the road network. By turning off this feature you also turn off the GPS position error filtering. The position shown on the map will be subject to all position errors and position fluctuations. |
| Off-route Recalculation | This switch tells AUDIOVOX Navigation Software whether to automatically recalculate the route when you deviate from it. If this feature is turned off, you need to initiate route recalculation manually otherwise navigation will be stopped until you return to the originally recommended route. Setting another point than the current GPS position as the start point of the active route will automatically disable this feature. |
| Restore Lock-to-Position | If you have moved or rotated the map during navigation, this feature moves the map back to your current GPS position and re-enables automatic map rotation after the given period of inactivity. |
| Automatic Overview | This feature switches the map view to Overview mode when the next route event is at a distance. Overview is a zoomed out 2D view to let you see the surrounding area. You have the following controls for Automatic Overview:Turn Distance for Overview: The map view will be switched to Overview mode if the next route event is at least as far as this value.Default Zoom Level: Overview mode will appear with this zoom level. You can scale the map in Overview mode but next time Overview appears again, this zoom level will be applied. |
4.5.3 Route Planning options


These settings determine how routes will be calculated. Tap the following buttons:
| Button Description | |
| Road Types Used for Route Planning | To let the route fit your needs, you can also set which road types are to be considered for or to be excluded from the route, if possible. Excluding a road type is a preference. It does not necessarily mean total prohibition. If your destination can only be accessed using some of the excluded road types, they will be used, but only as much as necessary. In this case a warning icon will be shown on the Route Information screen, and the part of the route not matching your preference will be displayed in a different colour on the map. |
| Route Calculation Method You can choose from different route types. The routing method can also be chosen while creating the route: when the destination is selected, tap in the Cursor menu. | |
| Use Traffic Information (available only if your hardware supports TMC) | When TMC messages are received, this setting tells Audiovox Navigation Software whether to use that information in route planning. |
| Recalculate to Avoid Traffic (available only if your hardware supports TMC) | This setting determines how AUDIOVOX Navigation Software uses the received TMC information in route recalculation:Automatic: When route recalculation becomes necessary based on the received TMC events, Audiovox Navigation Software recalculates the route automatically.Manual: When route recalculation becomes necessary based on the received TMC events, Audiovox Navigation Software notifies you, but you can decide whether to recalculate the route or not.Disabled: TMC events are only taken account when the route is recalculated in an off-route situation. |
Road Types Used for Route Planning:
| Type Description | |
| Motorways You might need to avoid motorways when | you are driving a slow car or you are towing another vehicle. |
| Unpaved roads Audiovox Navigation Software excludes | es unpaved roads by default: unpaved roads can be in a bad condition and usually you cannot reach the speed limit on them. |
| Charge roads Charge roads are pay roads where you | can purchase a pass or vignette to use the road for a longer period of time. They can be enabled or disabled separately from toll roads. |
| Permit needed You might need a permit or permission | from the owners to use certain roads or to enter certain areas. Audiovox Navigation Software excludes these roads from the route calculation by default. |
| Ferries Audiovox Navigation Software includes ferries | in a planned route by default. However, a map does not necessarily contain information about the accessibility of temporary ferries. You might also need to pay a fare on ferries. |
| Crossborder planning In some cases the route calculated | according to your other navigation and route preferences would lead through another country. If you wish to always stay within the same country, turn this option off. |
Route Calculation Method types:
| Option Description | |
| Fast Gives the quickest possible route if you can travel at or near the speed limit on all roads. Usually the best selection for fast and normal cars. | |
| Short Gives a route that has the smallest total distance of all possible routes between the route points. Usually practical for slow vehicles. | |
| Economical | Combines the benefits of Fast and Short: Audiovox Navigation Software calculates as if it were calculating the Fast route, but it takes other roads as well to save fuel. |
| Easy Results in a route with fewer turns. With this option, you can make Audiovox Navigation Software to take, for example, the motorway instead of series of smaller roads or streets. | |
4.5.4 Regional settings
These settings allow you to customise the application for your local language, measurement units, time and date settings and formats, as well as to
choose the voice guidance profile you prefer. Tap the following buttons:


Regional
| Button | Description |
| Program Language | This button displays the current written language of the Audiovox Navigation Software user interface. By tapping the button, you can select a new language from the list of available languages. The application will restart if you change this setting; you are asked to confirm this. |
| Voice Profile | This button shows the current voice guidance profile. By tapping the button, you can select a new profile from the list of available languages and speakers. Tap any of these to hear a sample voice prompt. Just tap OK when you have selected the new spoken language. |
| Units | You can set the distance units to be used by the program. Audiovox Navigation Software may not support all the listed units in some voice guidance languages. If you select a measurement unit not supported by the chosen voice guidance language, a warning message will appear. |
| Set Date & Time Format | You can set the date and time format. Various international formats are available. |
| Time and Time Zone Settings | You can access time and time zone settings. Audiovxo Navigation Software helps you with correcting the device time to the ever accurate GPS time. AUDIOVOX Navigation Software can also help you set the time zone based on your current GPS position. |
Time and Time Zone Settings:
| Button Description | |
| Auto Time Correction to GPS | Use this feature to synchronise the clock of your device to the highly accurate time provided by the GPS receiver. |
| Use Auto Time Zone Use this feature to synchronise the time zone of the clock of your device to the time zone based on your current GPS position. This is useful if you travel abroad. | |
| Set Time Zone Set time zone manually if you do not want to synchronise the time zone automatically. This allows you to use Auto Time Correction and apply a time zone offset to obtain the desired time. | |
| Compare GPS and device times | The current time of the GPS receiver and the device clock are displayed. Please note that the GPS clock is only available with GPS reception. This allows you to check whether any correction is needed. |
4.5.5 Menu settings


Menu
You can modify the look and behaviour of the Menu screens. Tap the following
4.5.6 TMC settings
| Button Description | |
| Background You can choose the image to be used as the menu background image. | |
You can set up the connection to the TMC receiver. If the TMC receiver is working, you can select a radio station to be received. Tap the


following buttons: If there is no TMC receiver connected to AUDIOVOX navigation Software, you have the following options.
| Button | Description |
| No TMC Hardware Found! The first line of the screen informs you about the connection status of the GPS receiver. Connecting the TMC receiver is automatic in Audiovox Navigation Software, so normally you will not need this screen of settings at all. | |
| Protocol The communication protocol used between the TMC receiver and the application. | |
| Port | The communication port used between the TMC receiver and the application. |
| Baud Rate | The communication speed used between the TMC receiver and the application. |
| Autodetect | Tap this button and let Audiovox Navigation Software find and connect to the TMC receiver. |
With a TMC receiver already connected, the content of the screen is different:
| Button Description | |
| Use Auto-tuner | If Auto-tuner is enabled, the tuner of Audiovox Navigation Software sweeps through the FM CCIR radio band searching for a TMC signal. The first station with TMC data will be used automatically. When no TMC signal is available, the tuner keeps on searching. Turn off Autotuner to select a radio station manually. |
| When Auto-tuner is turned off, search for the desired radio station manually with these buttons. | |
| Exclude This Station | Push this button to put the currently received FM radio station on an exception list, and make Audiovox Navigation Software search for another station instead. |
| Show Excluded Stations | This button opens the list of radio stations previously excluded. You can re-enable any or all of the excluded stations. |
4.5.7 Warning settings



You can enable speed warning. Tap the following buttons:
| Button Description | |
| Warn When Speeding | aps may contain information about the speed limits of the road segments. Audiovox Navigation Software is able to warn you if you exceed the current limit. This information may not be available for your region (ask your local dealer), or may not be fully correct for all roads in the map. This setting lets you decide whether you wish to receive the warnings. You can set the relative speeding level at which the application warns you (100% represents the current speed limit):In Built-up Areas: in cities and townsElsewhere: at all other locationsThere are two types of warnings. You can turn them on or off independently:Audible Warning: A voice message is played using the selected voice guidance profile.Visible Warning: A symbol with the speed limit appears in the corner of the map (for example: ). |
Active route
The currently navigated route. You can save and load routes in AUDIOVOX Navigation Software, but only one route can be active at any given time, and it is always active until you delete it, reach your destination or you quit AUDIOVOX Navigation Software. See also: Route.
City Centre
The City Centre is not the geometric centre of the settlement but an arbitrary point the map creators have chosen. In towns and villages, it is usually the most important intersection; in larger cities, it is an important intersection.
GPS accuracy
Several factors have impact on the deviation between your real position and the one given by the GPS device. For example, signal delay in the ionosphere or reflecting objects near the GPS device have a different and varying impact on how accurately the GPS device can calculate your position.
Map
AUDIOVOX Navigation Software works with digital maps which are not simply the computerised versions of traditional paper maps. Similarly to the paper road maps, the 2D mode of digital maps show you streets, roads, and elevation is also shown by colours. In 3D mode, you can see the altitude differences, for example valleys and mountains, elevated roads, and in selected cities 3D landmarks and 3D buildings are also displayed. You can use digital maps interactively: you can zoom in and out (increase or decrease the scale), you can tilt them up and down, and turn them left and right. In GPS-supported navigation, digital maps facilitate route planning.
North-up map orientation
In North-up mode the map is rotated so its top always faces North. This is the orientation in 2D map view mode and in Overview mode. See also: Track-up map orientation.
Overview mode
You can instruct AUDIOVOX Navigation Software to automatically switch to Overview mode if the next route event is in a distance. In Overview mode the map is shown in 2D but scaled down to a predefined zoom level. When you approach the next route event, the previous 2D or 3D map view returns automatically.
Route
A series of destinations to be reached one after the other. A simple route contains one start point and only one destination. Multi-point routes contain one or more via points (intermediate destinations). The last route point is the final destination and the route is cut into different legs (from one destination to the next).
Scheme
AUDIOVOX Navigation Software comes with different colour schemes for the map for daytime or night use. Schemes are custom graphic settings for the map and they can have different colours for streets, blocks or surface waters in 2D and 3D modes, and they display shades or shadows in different ways in 3D mode.
One daytime scheme and one night scheme is always selected. AUDIOVOX Navigation Software uses them when it switches from day to night and back.
Track-up map orientation
In Track-up mode the map is rotated so its top always points in the current driving direction. This is the default orientation in 3D map view mode. See also: North-up map orientation.
6 End User Licence Agreement
1 The contracting parties
1.1 Contracting parties to this Agreement are, on the one hand:
Nav N Go Kft. (23 Bérc utca, H-1016 Budapest, Hungary; Hungarian reg.no.: 01-09-891838) as
Licensor
and
the legal user (as defined in Section 2) of the object of this Agreement according to Section 4, hereinafter referred to as User on the other hand (hereinafter jointly referred to as Parties).
2 Conclusion of the Agreement
2.1 The Parties hereby acknowledge that this Agreement shall be concluded by implicit conduct of the Parties, without a signature of the Parties.
2.2 The User hereby acknowledges that following the lawful acquisition of the software product constituting the object of this Agreement (Section 4), any degree of use, installation to a computer or other hardware, installation of such hardware into a vehicle, pressing of the "Accept" button displayed by the software during installation or use (hereinafter referred to as Actions of Use) shall be deemed as implicit conduct resulting in the conclusion of the Agreement between the User and the Licensor.
2.3 This Agreement shall by no means entitle persons who unlawfully acquire, use, install on a computer, install in a vehicle or utilise in any manner whatsoever the Software Product.
2.4 The End User Licence Agreement between the Parties shall be concluded with terms set forth in this Agreement.
2.5 The time of conclusion of this Agreement is the time of executing the first Action of Use (commencement of use).
3 Applicable law
3.1 In issues not regulated by this Agreement, the jurisdiction of the Republic of Hungary shall be applicable, with specific reference to the Act No. 4 of 1959 on the Civil Code (CC) and to Act No 76 of 1999 on Copyrights (CA).
3.2 This agreement is issued in NOTE TO TRANSLATOR - PLEASE INSERT YOUR LANGAUGE and in Hungarian. In case of dispute the Hungarian text shall prevail.
4 The object of the Agreement
4.1 The object of this Agreement shall be the navigation guidance software product of Licensor (hereinafter referred to as Software Product).
4.2 The Software Product shall include the operating computer program, its complete documentation, and the map database belonging thereto.
4.3 Any form of display, storage, coding, including printed, electronic or graphic display, storage, source or object code of the Software Product, or any other as yet undefined form of display, storage, or coding, or any medium thereof shall be deemed as part of the Software Product.
4.4 Error corrections, additions, updates used by the User as defined in Section 2 following the conclusion of this Agreement shall also be deemed as part of the Software Product.
5 Owner of copyrights
5.1 The Licensor - unless contractual or legal regulations state otherwise - is the exclusive owner of all material copyrights vested in the Software Product.
5.2 Copyrights extend to the whole Software Product and its parts separately as well.
5.3 The owner(s) of the copyrights of the map database forming part of the Software Product is (are) natural person(s) or corporate entity(ies) as listed in the Appendix to this Agreement or in the
"About/Map" menu item of the operating computer program (hereinafter referred to as Database Owner). Licensor hereby states that Licensor has obtained sufficient usage and representation rights from the Database Owner in order to utilise and give into further utilisation the map database as set forth in this Agreement.
66
5.4 In the conclusion and execution of this Agreement the Database Owner is represented by Licensor in relations to the User.
5.5 By concluding this Agreement, Licensor shall withhold all rights vested in the Software Product, except for those that the User is entitled to according to explicit legal regulations or that of this Agreement.
6 Rights of the User
6.1 The User is entitled to install the Software Product on one hardware device (desktop, handheld, portable computer, navigation device) at a time, and to run and use one copy thereof.
6.2 The User is entitled to make one security copy of the Software Product. However, if the Software Product is operational after installation without the use of the original media copy, then the original media copy is deemed to be a security copy. In all other cases, the User is only entitled to use the security copy if the original media copy of the Software Product has become unsuitable for proper and legal use without any doubt, such state thereof being supported by acceptable proof.
7 Limitations of use
7.1 The User is not entitled
7.1.1 to duplicate the Software Product (to make a copy thereof);
7.1.2 to lease, rent, lend, distribute, transfer it to a third person with or without a consideration;
7.1.3 to translate the Software Product (including translation (compilation) to other programming languages);
7.1.4 to decompile the Software Product;
7.1.5 to modify, extend, transform the Software Product (in whole or in part), to separate it into parts, compose it with other products, install it in other products, utilise it in other products, not even with the aim of achieving interoperability with other products;
7.1.6 apart from using the computer program, to obtain information from the map database included in the Software Product, to decompile the map database, to use, copy, modify, extend, transform the map database in whole or in part or the group of data stored therein, or to install it in other products, utilise it in other products, not even with the aim of achieving interoperability with other products;
8 Non-warranty, limitation of responsibility
8.1 Licensor hereby informs the User that although the greatest care was taken in producing the Software Product, yet with respect to the essence of the Software Product and the technical limitations, the Licensor does not warrant for the Software Product being completely error-free, and the Licensor is not bound by any contractual obligation by which the Software Product obtained by the User should be completely error-free.
8.2 The Licensor does not warrant that the Software Product is suitable for any purpose defined either by the Licensor or the User, and does not warrant that the Software Product is capable of interoperating with any other system, device or product (e.g. software or hardware).
8.3 The Licensor does not assume any responsibility for damages incurred due to an error in the Software Product (including errors of the computer program, the documentation and the map database).
8.4 The Licensor does not assume any responsibility for damages incurred due to the Software Product not being applicable for any defined purpose, or the error or lack of interoperability there of with any other system, device or product (e.g. software or hardware).
8.5 The Licensor shall hereby also draw the attention of the User with
great emphasis to the fact that while utilising the Software Product in any form of transportation, observing the traffic regulations and rules (e.g. use of obligatory and/or reasonable and suitable security measures, proper and generally expected care and attention in the given situation, and special care and attention required due to utilising the Software Product) is the exclusive responsibility of the User; the Licensor shall not assume any responsibility for any damages occurred in relation to utilising the Software Product during transportation.
8.6 By concluding this Agreement, the User shall especially acknowledge the information stated in Section 8 above.
67
9 Sanctions
9.1 The Licensor hereby informs the User that according to regulations of the CA, should the Licensor find its rights to be breached, the Licensor may
9.1.1 claim the acknowledgement of such breach by court;
9.1.2 claim ceasing the breach and ordering the person under breach from continuing such;
9.1.3 claim that the person under breach give proper compensation (even by way of publicity, to the expense of the person under breach);
9.1.4 claim the return of the increase of assets due to the breach;
9.1.5 claim ceasing the breaching situation, the restitution of the state before the breach, to the expense of the person in breach, and may claim the destruction of instruments and materials used for the breach, and that of the objects created by the breach;
9.1.6 claim damages.
9.2 The Licensor hereby also informs the User that the breach of copyrights and related rights is a crime according to Act IV of 1978 on the Hungarian Criminal Code, which may draw as a sanction a sentence of two years in prison in basic cases and up to eight years in prison in qualified cases.
9.3 For disputes arising from this Agreement, the parties hereby agree on the exclusive competence of - depending on value and title disputed - either the Central Court of Budapest Districts (Pesti Központi Kerületi Bíróság) or the Municipal Court of Budapest (Fővárosi Bíróság).
D
Congratulations! You have made a wise selection in becoming the owner of a Audiovox Mobile Video equipment. Due to high quality Audiovox products have earned an excellent reputation through the western world. And this high quality standard enables us to grant a 2-years warranty for Audiovox Mobile Video products.
The equipments are checked and tested continuously during the entire production process. In case you have problems with your Audiovox Mobile Video equipment, kindly observe the following:
- The 2-years guarantee period commences with the purchase of the component and is applicable only to the original owner.
- During the guarantee period we will rectify any defects due to faulty material or workmanship by replacing or repairing the defective part at our discretion. Further claims, and in particular those for price reduction, cancellation of sale, compensation for damages or subsequential damages, are excluded. The guarantee period is not altered by the fact that we have carried out guarantee work.
- Unauthorized tampering with the equipment will invalidate this guarantee.
- Consult your authorized dealer first, if guarantee service is needed. Should it prove necessary to return the component to the factory, please insure that • the component is packed in original factory packing in good condition • the quality control card has been filled out and enclosed with the component, • your enclose your receipt as proof of purchase.
- Excluded from the guarantee are: • Illuminates • Wear parts • Shipping damages, either readily apparent or concealed (claims for such damages must be lodged immediately with forwarding agent, the railway express office or post office). • Scratches in cases, metal components, front panels, etc. (You must notify your dealer directly of such defects within three days of purchase.) • Defects caused by incorrect installation or connection, by operation errors (see operating instructions), by overloading or by external force. • Equipments which have been repaired incorrectly or modified or where the case has been opened by persons other than us. • Consequential damages to other equipments. • Reimbursement of cools, without our prior consent, when repairing damages by third parties • batteries and battery packs.
F
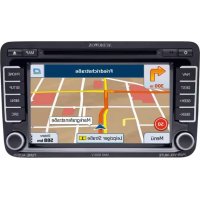
- Farbprofil in Tunnel
- Navigation software NAV 103
- Copyright note
- Table of contents
- Warnings and Safety information
- Getting started with Audiovox navigation
- Start using Audiovox navigation
- Buttons and other controls on the screen
- Using the map
- Map
- Checking the details of a map location
- Info
- Manipulating the map
- Status information and hidden controls on the map
- Using the Cursor (the selected map location)
- Audiovox Navigation Software concepts
- Smart Zoom
- Enabling Smart Zoom
- Fine-tuning Smart Zoom
- Position markers
- Current GPS position and Lock-on-Road
- Returning to normal navigation
- NOTE!
- Selected location (Cursor)
- Original position in the Cursor menu
- Daytime and nightcolour schemes
- Colour scheme in tunnels
- Route calculation and recalculation
- Itinerary
- Route demonstration
- POI (Points of Interest)
- Saving POIs
- POIs manage
- Speed limit warning
- TMC (Traffic Message Channel)
- NOTE:
- Navigating with Audiovox Navigation
- Selecting the destination of a route
- Tip!
- Selecting the Cursor as the destination
- Entering an address or part of an address
- Entering an address (Europe)
- The procedure is explained starting from the Navigation menu.
- Enter the street name:
- Enter the house number:
- The map appears with the selected point in the middle.
- Entering an address if house numbering is restarted
- A list appears with the matching addresses. Tap the desired one.
- Entering an address without knowing the district/suburb
- 5.Enter the house number:
- Selecting an intersection as the destination
- Selecting a city centre as the destination
- City Centre
- Entering an address with a postal code
- Done
- Tips on entering addresses quickly
- Selecting the destination from your Favourites
- Selecting the destination from the POIs
- Selecting the destination from the History
- Creating a multi-point route (inserting a via point)
- Creating a multi-point route (appending a new destination)
- Editing the route
- Watching the simulation of the route
- Pausing the active route
- Deleting the next via point from the route
- Deleting the active route
- Saving a route
- Loading a saved route
- Reference Guide
- The Navigation menu:
- Map screen
- Icons on the map
- GPS position quality indicator
- Status indicator strip
- Next two route events (Turn Preview fields)
- Objects on the map
- Streets and roads
- 3D objects types
- Elements if the active route
- Cursor menu
- Avoid menu
- Delete Avoids
- Position menu
- Route Information screen
- Trip Information screen
- Quick menu
- GPS Data screen
- Find menu
- Route menu
- Manage menu
- Manage Saved Routes
- Manage History
- Manage POIs
- Manage Favourites
- User Data Management
- Settings menu
- Map Screen settings
- Navigation settings
- Route Planning options
- Regional settings
- Menu settings
- TMC settings
- Warning settings
- Active route
- GPS accuracy
- North-up map orientation
- Overview mode
- Route
- Scheme
- Track-up map orientation
- End User Licence Agreement
- D
- F
Brand : AUDIOVOX
Model : NAV 103
Category : Browser