
KM 1583 - Hi-Fi System Krüger&Matz - Free user manual and instructions
Find the device manual for free KM 1583 Krüger&Matz in PDF.


| Product Type | Hi-Fi System |
| Model | KM 1583 |
| Brand | Krüger&Matz |
| Dimensions (Main Unit) | Approx. 360 x 140 x 260 mm |
| Weight (Main Unit) | Approx. 4.5 kg |
| Power Supply | AC 220-240V, 50/60 Hz |
| Power Consumption | 40 W (standby <1 W) |
| Speaker Output Power | 2 x 20 W RMS |
| Supported Media | CD, CD-R/RW, MP3 via USB, FM radio |
| Bluetooth | Yes, version 5.0 |
| USB Port | 1 x USB 2.0 for MP3 playback |
| Audio Input | 3.5 mm auxiliary input |
| Frequency Response | 60 Hz - 20 kHz |
| Remote Control | Yes, included |
| Main Functions | CD player, FM tuner, Bluetooth streaming, USB playback, auxiliary input, timer, alarm |
| Display | LCD with backlight |
| Care and Cleaning | Clean with soft dry cloth; avoid liquids and abrasives |
| Safety Precautions | Do not expose to moisture; use only supplied power adapter |
| Spare Parts | Remote control, power adapter available via service center |
| Repairability | Repairs should be performed by qualified service personnel only |
| General Information | Designed for home use; FM antenna included |
Frequently Asked Questions - KM 1583 Krüger&Matz
User questions about KM 1583 Krüger&Matz
0 question about this device. Answer the ones you know or ask your own.
Ask a new question about this device
Download the instructions for your Hi-Fi System in PDF format for free! Find your manual KM 1583 - Krüger&Matz and take your electronic device back in hand. On this page are published all the documents necessary for the use of your device. KM 1583 by Krüger&Matz.
USER MANUAL KM 1583 Krüger&Matz
CLASS 1 LASER PRODUCT
Achtung:
Rückseitige Ansicht

- QUELLE
natural_image
Illustration of a blue ergonomic device with directional arrows indicating motion (no text or symbols)
natural_image
Diagram of a device with a blue cylindrical component inserted into a housing (no text or symbols visible)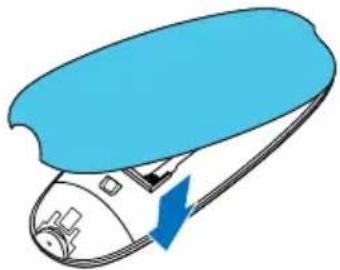
natural_image
Illustration of a blue and white object with a blue arrow indicating direction (no text or symbols)Hinweis:
Anschließen
Hinweis:
natural_image
Line drawing of a remote control with a hand pointing to a button (no text or symbols)natural_image
Line drawing of a remote control with a hand pointing to the right button (no text or symbols)| PBC |
| Aspect Ratio |
| Angle |
| Repeat |
| Goto |
For your safety....28
Hearing safety....29
Product Overview....30
The Unit....30
Remote Control Overview....31
Installation of Batteries....32
Remote Control Operation Range......32
Connection....33
Connecting the Speakers....33
Connect through composite video to the TV..33
Connect through HDMI to the TV....33
Connect FM antenna....33
Connect an external audio device....34
Connect a USB storage device....34
Connect the AC power....34
Switching ON / OFF....34
Basic operation....35
Adjust volume level....35
Mute sound....35
Select a preset sound effect....35
Adjust brightness of display panel......35
Disc Operation....36
Play a disc....36
Use the disc menu....37
Select an audio language....37
Select a subtitle language....37
Display play information....37
Play control....37
To skip....38
Search forward/backward....38
Slow-motion play....38
Zoom in/out image....39
Picture view options....39
DVD Menu Options....40
General setup....40
Video setup....40
Audio setup....41
Preferences....41
Listen to the radio....42
Tune to a radio station....42
FM MODE....42
Program radio stations ....42
Tune to a preset radio station....43
Play from USB....44
Play a file....44
Play from Bluetooth device....44
Other features....45
Set the clock....45
Set alarm timer....45
Set sleep timer....46
Specifications....47
Troubleshooting....48
Before Use
Thank you for purchasing this system. Please read these operating instructions before operating the unit. The operating instructions should be retained for future reference.
For your safety

Before operating this system, check the voltage of this system to see if it is identical with the voltage of your local power supply.
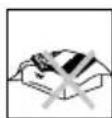
Don't obstruct the ventilation openings of the equipment with items such as newspaper, table-cloths, curtains, etc.. Overheating will cause damage and shorten the life of the equipment.

When you disconnect the power cord, always pull the plug, never the cable.

NEVER let anyone especially children push anything into holes, slots or any other opening in the case - this could result in a fatal electrical shock;

Protect the power cord from being walked on or pinched, particularly at plugs, convenience receptacles, and the point where they exit from the device.

Never hitting the product use the sharp objects.
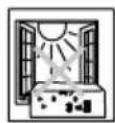
Never place the product and accessories near naked flames or other heat sources, including direct sunlight.
Laser Product
This product is equipped with low power laser equipment. For your own safety do not remove any covers or take the product apart. Repair work must be carried out by qualified personnel.
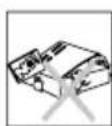
To avoid electric shock, do not open the cabinet. Refer all servicing to qualified service personnel.
CLASS 1 LASER PRODUCT
Caution:
This product is equipped with low power laser equipment inside, for your safety, don't open the laser radiation protective equipment. Don't look at the laser radiation district when the equipment is operating.
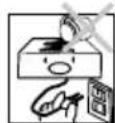
Never expose the product and accessories to rain or water. Never place liquid containers, such as vases, near the product.
CAUTION
RISK OF ELECTRIC SHOCK DO NOT OPEN

WARNING:
TO PREVENT FIRE OR SHOCK HAZARD, DO NOT EXPOSE THIS APPLIANCE TO DRIPPING OR SPLASHING.

This symbol indicates that dangerous voltage constituting a risk of electric shock is present within this unit.
CAUTION:
TO REDUCE THIS RISK OF ELECTRIC SHOCK DO NOT REMOVE COVER (OR BACK), NO USER SERVICEABLE PARTS INSIDE, REFER SERVICING TO QUALIFIED SERVICE PERSONNEL.

This symbol indicates that there are important operating and maintenance instructions in the literature accompanying this unit.
Hearing safety
Listen at a moderate volume.
* Using headphones at high volume can impair your hearing. This product can produce sounds in decibel ranges that may cause hearing loss for a normal person, even for exposure less than a minute. The higher decibel ranges are offered for those that may have already experienced some hearing lose.
* Sound can be deceiving. Over time your hearing “comfort level” adapts to higher volumes of sound. So after prolonged listening, what sounds “normal” can actually be loud and harmful to your hearing. To guard against this, set your volume to a safe level before your hearing adapts and leave it there.
To establish a safe volume level:
* Set your volume control at a low setting.
* Slowly increase the sound until you can hear it comfortably and clearly, without distortion.
Listen for reasonable periods of time:
* Prolonged exposure to sound, even at normally “safe” levels, can also cause hearing lose.
* Be sure to use your equipment reasonably and take appropriate breaks.
Be sure to observe the following guidelines when using your headphones.
* Listen at reasonable volumes for reasonable periods of time.
* Be careful not to adjust the volume as your hearing adapts.
* Do not turn up the volume so high that you can't hear what's around you.
* You should use caution or temporarily discontinue use in potentially hazardous situations. Do not use headphones while operating a motorized vehicle, cycling, skateboarding, etc.; it may create a traffic hazard and is illegal in many areas.
The Unit
Front View:
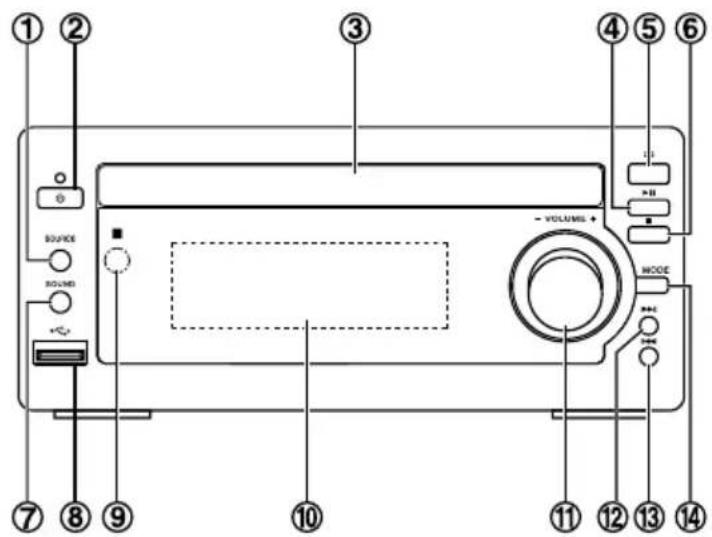
Rear View:

- SOURCE
- Select a source.
- ⏻STANDBY
- Turn on the apparatus, switch to standby mode.
- Disc compartment
- Start or pause play.
- Open or close the disc tray.
- Stop play.
- SOUND
- Select a preset sound setting.
- USB socket.
- R sensor
- Detect signals from the remote control. Always point the remote control at the IR sensor
- Display panel
- Show current status.
-
- VOLUME +
- Adjust volume.
-
Adjust time.
- Skip to the next track, title, or file.
- Select a programmed radio station.
- Skip to the previous track, title, or file.
- Select a programmed radio station.
- MODE
- Select play modes.
- In FM mode, toggle between mono and stereo sound output.
- DC 15V ⊖ ⊕ ⊕
- Connect the AC Adaptor
- SPEAKER OUT 4Ω
- Connect the speakers.
- FM ANTENNA
- Improve FM reception.
- AUX IN L/R
- Connect an external audio device.
- VIDEO
- Connect the TV
- HDMI
- Connect the TV
- Bluetooth antenna.
Remote control

1. ⏻STANDBY
- Turn on the apparatus, switch to standby mode.
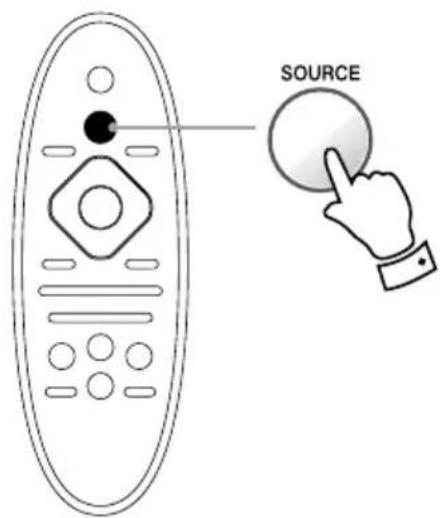
2. SOURCE
- Select a preset sound setting.

- Access the home menu.
4. AUDIO/▲
- DVD: elect a language
- For menus: navigate up
- Move an enlarged picture up
- Invert (up/down) a picture.


- Search in a track or disc.
- Tune to a radio station.
- For menus, navigate left/right.
- Move an enlarged picture left/right.
- Rotate (anti-clockwise/clockwise.) a picture.
6. SUBTITLE/
- Select a subtitle language
- For menus: navigate down.
- Move an enlarged picture down.
- Invert (left/right) a picture.
7.
- Start or pause play.
8.
- Skip to the previous/next title, chapter or track
- Select a preset radio station.
9. ZOOM
- For pictures or video: zoom in/out.
10. /
- Adjust the volume.
- Adjust time.
- During timer setting, select a source.
11.
- Select a preset sound setting
12. CLOCK/PROG
- Set the clock.
- Display the clock.
- Program radio stations.
13. MENU
- For video discs: access or exit the disc menu.
- For video discs with playback control (PBC): turn on/off PBC.
14. OK
- Confirm a selection.
15.
- Stop play.
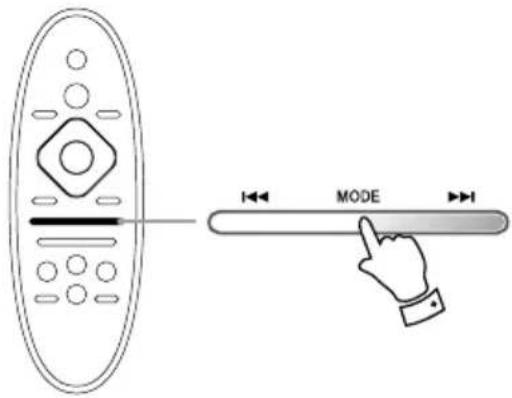
16. MODE
- Select play modes.
- In FM mode, toggle between mono and stereo sound output.
17. DISPLAY/DIM
- Display play information on a connected TV.
- In standby mode select a brightness level for the display screen.
18. SLOW
- For video discs: select a slow play mode.
19.
- Mute or restore volume.
20. TIMER/SLEEP
- Set the sleep timer.
- Set the alarm timer.
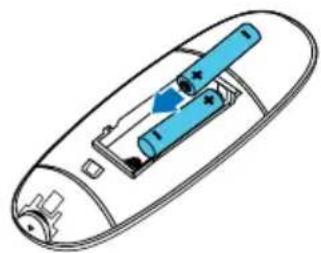
Installation of Batteries
-
Press and hold ▼ at the back of the remote control to open the back cover.
-
Insert two AAA batteries with correct polarity (+/-) as indicated.
-
Close the battery compartment.

Note:
* About half a year of normal operation can be expected when using standard batteries.
* When the batteries are exhausted, the remote will not function. Replace both batteries at the same time with new ones.
* Don't mix old and new batteries.
* Don't mix different types of batteries.
* When the unit is not used for a long period of time, remove the batteries to avoid damage caused by battery leakage and corrosion.
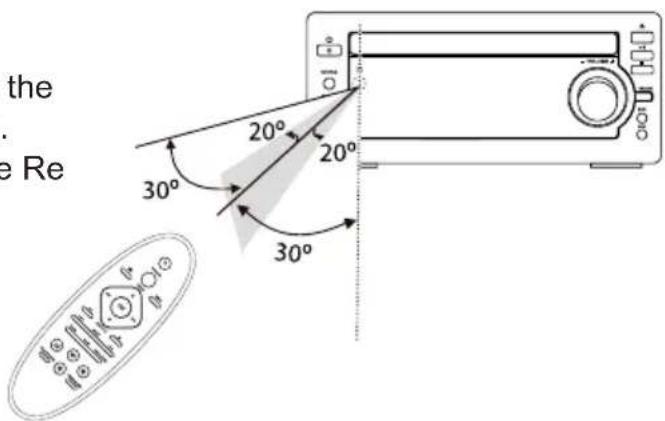
Remote Control Operation Range
- Aim the Remote Control directly at the remote sensor (IR) on the front panel.
- Do not put any objects between the Remote Control and the unit while operating the unit.
Connection
Caution: Please turn off all the equipment power before connecting.
Connecting the Speakers

Connect the cable with a white head to the (-) terminals and cable with a red head to the (+) terminals.
Connect through HDMI to the TV

Connect an HDMI cable to the HDMI socket on this unit and the HDMI input socket on the TV.
Connect FM antenna
- Connect the supplied FM wire antenna to the FM Antenna socket on the unit.
Connect through composite video to the TV

Connect the video cable to the VIDEO socket on this unit and the video input socket on the TV.

- If reception is poor, connect the outside antenna.

Note:
Before attaching a 75 ohm coaxial lead (the kind with a round wire going to an outside antenna), disconnect the supplied FM wire antenna.
Caution:
To avoid noise, keep antennas away from the system, the connecting cord and the AC power cord.
Connect an external audio device
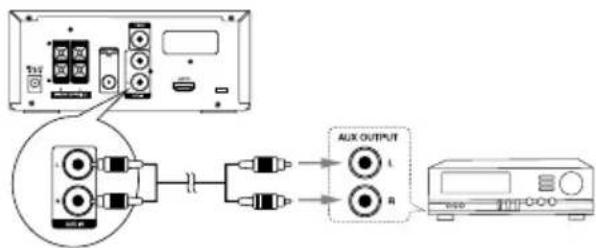
flowchart
graph TD
    A["Input Audio System"] --> B["Amplifier"]
    B --> C["AUX OUTPUT"]
    C --> D["Display Unit"]
    style A fill:#f9f,stroke:#333
    style D fill:#ccf,stroke:#333
Connect audio cables to the AUX-IN(L and R) sockets on the back of the unit and the audio output sockets on the external audio device.
Connect a USB to range device

Insert the USB storage device.
Connect the AC power

Insert the AC adapter's DC plug into the unit, then insert one side of AC power cord into AC adapter and other side into a wall outlet, and your system is at your command!
Caution:
Be sure to unplug the power cord from the outlet when going away or when the system is not in use for an extended period of time.
Switching ON / OFF
When you first connect the unit to the DC Jack, the unit will be in standby mode.
- Press the standby button to switch the unit on. The word "HELLO" will show in the display.
- Press the standby button again to switch the unit back to standby mode.
The words "BYE BYE" will scroll across the display.
Basic operation
Adjust volume level
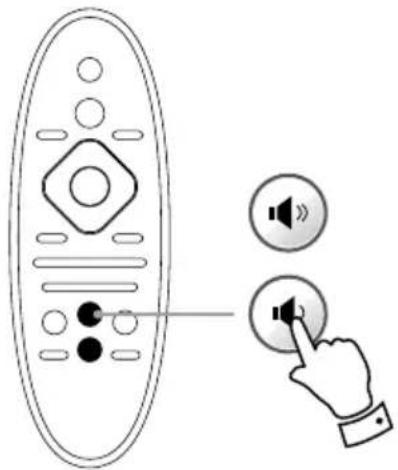
Press 🔊 button to decrease the volume level. Press 🔊 button to increase the volume level.
(You can also operate the knob „-VOLUME+” on the panel of unit.)
Mute sound

Press button to mute/unmute sound.
Select a preset sound effect

natural_image
Line drawing of a remote control with buttons and a hand pointing to a button (no text or symbols)Press button .Repeatedly to select your desired sound effect:
Balanced
Bright
Warm
Powerfull
Clear
Adjust brightness of display panel

In standby mode, press DIM repeatedly to select different levels of brightness for the display panel.
Disc Operation
Caution!
- Never look at the laser beam inside the unit.
- Risk of product damage! Never play discs with accessories such as disc stabilizer rings or disc treatment sheets.
- Never put any objects other than discs into the disc compartment.
Play a disc
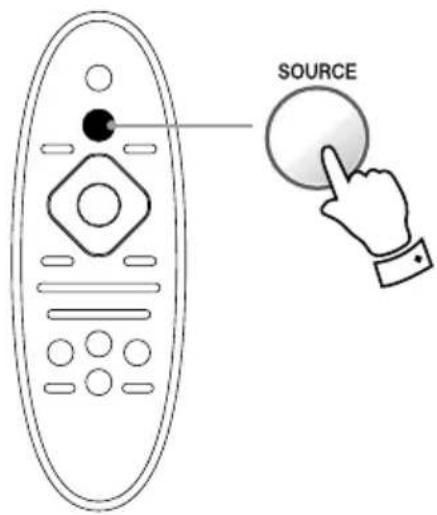
Press SOURCE button repeatedly to select the DVD source. (You can also operate the key „SOURCE" on the panel of unit.)


Press ▲button on the unit to open the disc tray then place the disc on the disc tray (with the printed side up). Press this button again to close the disc tray, the unit will read the disc and the disc type will display on the TV screen. The disc should play automatically.

- In stop mode, press ▶ button to start playing the disc.
- When playing disc, press ▶ button to temporarily stop the playing, press the button again, it will continue to play. (You can also operate the key ,”on the panel of unit.)
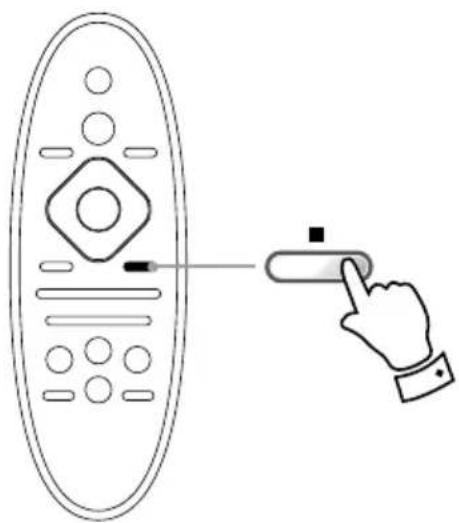
natural_image
Line drawing of a remote control with a hand pointing at it (no text or symbols)When playing DVD or VCD disc, press ■ button to stop playing, the unit will store the last playing time in the memory automatically, then press▶button, the unit will resume to last memory time and continue playback automatically. If you press ■ button twice to stop the disc playing. (You can also operate the key ■' on the panel of unit.)
Use the disc menu

* When you load a DVD/(S)VCD disc, a menu may be displayed on the TV screen. Press MENU button to access or exit the menu manually.
* For VCD with PlayBack Control (PBC) feature, Press MENU button to enable/disable PBC.
- When PBC is enabled, the menu screen is displayed.
- When PBC is disabled, normal play is resumed.
Select an audio language

* When playing a the Video CD, you can choose STEREO, Mono Left or Mono Right audio output by pressing AUDIO button.
* When playing DVD disc recorded with several languages, you can repeatedly press AUDIO button to select one of language to play.
Select a subtitle language
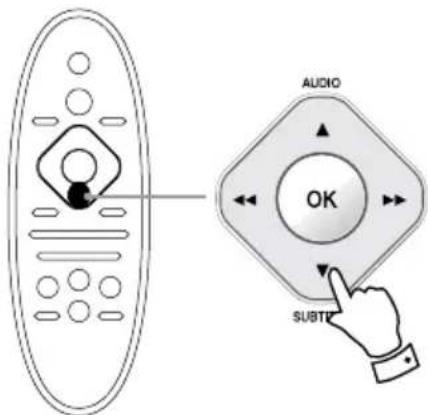
When you are playing the DVD disc, you can repeatedly press SUBTITLE button to select the subtitle language to display on the TV screen if available.
Display play information

When you are playing the DVD disc, you can repeatedly press SUBTITLE button to select the subtitle language to display on the TV screen if available.
Play control Select repeat/shuffle play

- During play, press MODE button to access playback control menu.
| PBC |
| Aspect Ratio |
| Angle |
| Repeat |
| Goto |
- Use ▼, buttons to select the "REPEAT" options.
- Press ▶ button to access sub options, then use ▼, ▶ button to select the sub option.
- Press OK button to confirm the selection.
* If playing a audio disc, press MODE button repeatedly to select a play option. (e.g.: repeat one, repeat all, shuffle, and so on.)
Select a camera angle
- During play, press MODE button to access playback control menu.
- Use ▼ buttons to select the "ANGLE" options.
- Press ▶ button to access sub options, then use ▼, button to select a camera angle.
- Press OK button to confirm the selection.
Search by time or title/chapter/track number
- During play, press MODE button to access playback control menu.
- Use ▼ buttons to select the "GOTO" options.
- Press ▶ button to access sub options.
- Use ▼ buttons to select the title number, chapter number, track number, or time field.
- Press OK button to confirm the selection.
To skip

* During play, press button to skip to the previous chapter, title or track.
* During play, press button to skip to the next chapter, title or track.
(You can also operate the key ", " on the panel of unit.)
Search forward/backward
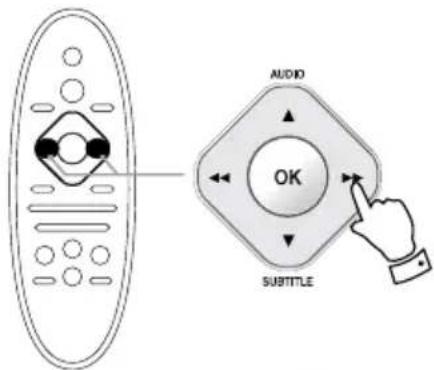
During play, press / buttons repeatedly to select a search speed, press to resume play at normal speed.
Slow-motion play
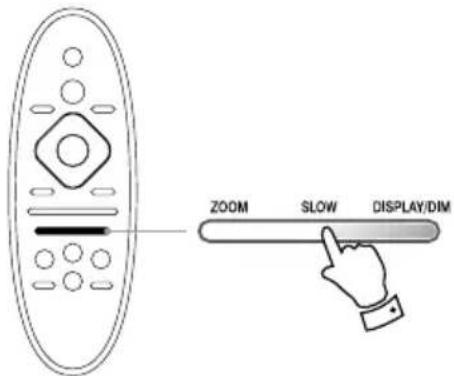
During play, press SLOW button repeatedly to select a slow play option, press ▶to resume play at normal speed.
Note: The sound is muted.
Zoom in/out image
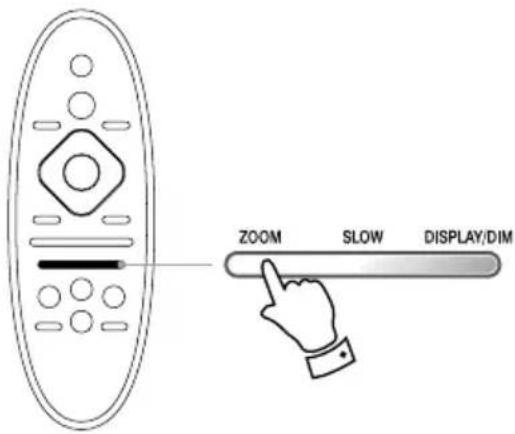
During video/picture play, press ZOOM button repeatedly to zoom in/out the image, press ▶to resume play.
Note:
When the image is zoomed in, you can press ▼,▲,◀buttons to pan through the image.
Picture view options
-
Place the disc (the disc is recorded in picture) on the disc tray (with the printed side up), the unit will read the disc and play it automatically.
-
Press, button to go to the previous/next picture.
Press ▼button to invert (up/down) a picture.
Press ▲button to invert (left/right) a picture.
Press button to rotate the picture clockwise.
Press button to rotate the picture anti-clockwise.
- Press ▲button to stop play.
DVD Menu Options
- Press 🔊 button to display the home menu.

- Select to access the system menu
| General | Disc Lock | · Unlock | |
| OSD Language | · Auto(Eng) | ||
| Video | Auto Standby | · On | |
| Audio | |||
| [6STY] | Preference | ||
Note:
* You cannot change a menu option that is grayed out.
* To return the previous menu, press button. To exit the menu, press again.
General setup
In the general setup page options include: Disc Lock, OSD Language, Auto Standby.
* Disc Lock
Lock or unlock a disc.
* OSD Language
Select the preferred language for onscreen display.
* Auto Standby
Enable this feature to automatically switch to Eco-power standby mode after 15 minutes of inactivity.
Video Setup
In the video setup page options include: TV System, TV Display, Picture Setting, HD JEPG, HDMI Setup.
- TV System
Change this setting if the video is not displayed correctly. By default, this setting matches the most common setting for TVs in your country.
- TV Display
The TV format determines the aspect ratio of display according to the type of TV you have connected.
- Picture Setting
Select a predefined set of picture color settings
- HD JEPG
Enjoy untouched and uncompressed JPEG pictures at its original resolution when you you connect this product and the TV with an HDMI cable.
- HDMI Setup
When you connect this apparatus and TV with an HDMI cable, select the best HDMI video setting that your TV supports.
- Resolution
Select a resolution for high definition videos.
- HDMI Deep Color
Create vivid images with more color details when the video content is recorded in Deep Color and the TV supports this feature. simultaneously.
- [Sys Audio Control]: If system audio control is enabled, the audio of the connected device is output through your apparatus speakers automatically when you play the device.
- [Audio Mapping]: If system audio control does not work, map the connected device to the correct audio input connector on your apparatus.
- Wide Screen
Select a display format for wide screen videos.
- CustomerLink Setup
This unit supports CustomerLink which uses the HDMI CEC (Consumer Electronics Control) protocol. You can use a single remote control to control CustomerLink compliant devices that are connected through HDMI.
* CustomerLink
Enable or disable the
CustomerLink feature.
* 1 Touch Play
After you enable this feature, the connected HDMI CEC TV automatically switches to the HDMI input channel when you play a disc.
* 1 Touch Standby
After you enable this feature, you can press and hold standby button on the remote control of this unit to switch all connected HDMI CEC devices to standby mode simultaneously.
* Sys Audio Control
When you play audio that is routed from the connected devices, this unit switches to the corresponding audio source automatically.
After you enable this feature, proceed to „Audio Mapping” to scan and map all the connected devices.
* Audio Mapping
When you map the audio input correctly, this unit switches to the audio from the played device automatically.
Note:
- You must turn on the HDMI CEC operations on the TV/ devices before you can enjoy the CustomerLink controls. See the TV/devices manual for details.
- This unit does not guarantee 100% interoperability with all HDMI CEC compliant devices.
Audio setup
In the audio setup page options include: HDMI Audio, Audio Sync, Sound Mode, Night Mode.
- HDMI Audio
Select the HDMI audio setting when you connect this product and the TV with an HDMI cable.
- Audio Sync
Set the delay time for audio output when you play a video disc.
- Sound Mode
Turn off or select your preferred sound mode.
- Night Mode
Make loud sound level softer and soft sound level louder so that you can watch the DVD movies at a low volume, without disturbing others.
Preferences
In the preferences setup page options include: Audio, Subtitle, Disc Menu, Parental Control, PBC, Password, Version Info, Default.
- Audio
Select the preferred audio language for disc play. - Subtitle
Select the preferred subtitle language for disc play. - Disc Menu Select the preferred disc menu language.
- Parental Control
Restrict access to discs that are unsuitable for children. These types of discs must be recorded with ratings.
• PBC
Play VCD interactively according to the menu screen.
- Password
This setting allows you to change the password for parental control. The default password is 000000.
- DivX Subtitle
Select a character set that supports the DivX subtitle.
- Version Info
Display the software version of this device.
- Default
Reset all the settings to factory default, except for the password and parental settings.
Listen to FM radio
Caution:
Before listening to the radio, please check if FM antennas are correctly connected.
Tune to a radio station

Press SOURCE button repeatedly to select the TUNER source. (You can also operate the key „SOURCE” on the panel of unit.)
FM MODE
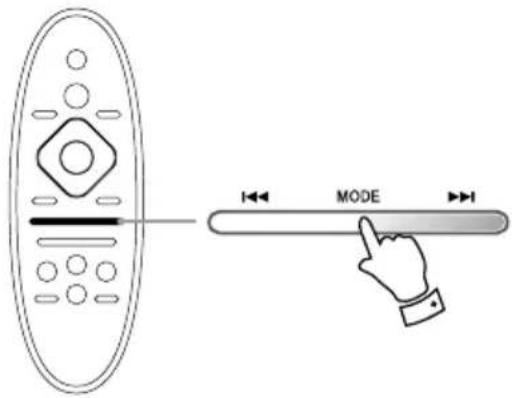
Press MODE button to select the Stereo or MONO channel to receive the FM radio mode, it can get the best effect.

- Press ▶ buttons repeatedly to move from frequency to frequency until you find the station you want.
- Press and hold ▶ buttons for one second or more, the frequency will change up automatically until the next station is found.
(You can also operate the key ,”,”▲ on the panel of unit.)
Program radio stations
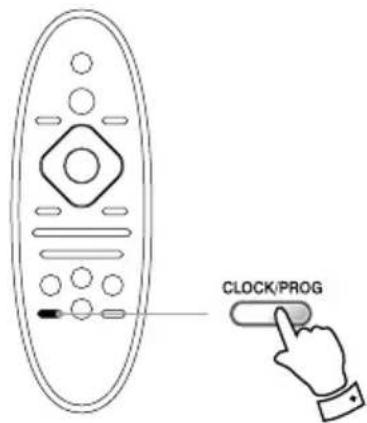
You can store the well tuned station by pressing PROG button. (You can preset up to 20 FM stations.)
- Automatically
press and hold PROG button for more than two seconds to activate automatic programming. All available stations are programmed in the order of waveband reception strength.
- Manually
- Tune to a radio station, and then press PROG button to activate programming.
- Use a button to select the preset number.
- Press PROG button again to store the station.
Note:
If the system is unplugged or if a power failure occurs, the preset stations will remain stored in the memory.
Tune to a preset radio station

Press I, buttons repeatedly to select a preset number. (You can also operate the key I, on the panel of unit.)
Play from USB Play from Bluetooth device
- Connect a USB storage device.
- Press SOURCE button repeatedly to select the USB source. The unit starts playing automatically. The user interface is displayed.
(You can also operate the key „SOURCE” on the panel of unit.)
Caution:
- The effective operation range between the speaker and your Bluetooth device is approximately 10 meters.
- Compatibility with all Bluetooth devices is not guaranteed.

Play a file
- Press ▼, ▲buttons to selected file name.
-
Press OK button to confirm to starts playing.
-
Press SOURCE button repeatedly to select the BT source.
(You can also operate the key „SOURCE” on the panel of unit.) - Activate your Bluetooth device and select the search mode.
- „KM1583” will appear on your Bluetooth device. Select „KM1583” and enter „0000” for the password if necessary.
- Start music play on your Bluetooth device, you can use this unit to control the function to your Bluetooth device.
- Press 🔊, 🔊 buttons to increase or decrease the volume.
- Press ▶ button to temporarily stop the playing, press the button again, it will continue to play.
Other features
Set the clock

- In standby mode, press and hold CLOCK button for 1 seconds or more, the time format [24H] or [12H] is blink.

- Press 🔊, 🔊 buttons to select a time format.
- Press CLOCK button to store the setting, and the hour digits blink.
- Press 🔊, 🔊 buttons to set the hour.
- Press CLOCK button to store the setting, and the minute digits blink.
- Press 🔊, 🔊 buttons to set the minute.
- Press CLOCK button to confirm the setup.
Note:
* If a power failure occurs or the unit is disconnected from the mains, the clock setting will be lost.
Set alarm timer
- Make sure that you have set the time correctly.
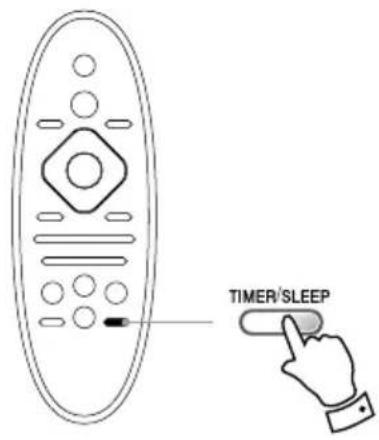
- In standby mode, press and hold TIMER button for 1 seconds or more, the source displayed and begin to blink.

- Press 🔊, 🔊 buttons to select a source: DISC, USB, TUNER.
- Press TIMER button to confirm, and the hour digits blink.
- Press 🔵, 🔵 buttons to set the hour.
- Press TIMER button to confirm, and the minute digits blink.
- Repeat steps 5-6 to set the minute, alarm volume.
To deactivate or re-activate an alarm timer
In standby mode, press the TIMER button to activate or deactivate timer.
- If timer is activated, " ⊕ is displayed.
- If timer is deactivated, “☐” is disappeared.
Note:
* If disc/USB source is selected and the audio cannot be played, TUNER is activated automatically.
Set sleep timer

- When the unit is turned on, press SLEEP button repeatedly to select a set period of time (in minutes): 10, 20, 30, 45, 60, 75, 90
To deactivate sleep timer
Press the SLEEP button repeatedly until [SLEEP OFF] is displayed.
Specyfication
Main unit
Power adaptor input....100-240V\~ 50-60Hz, 1.2A
Power adaptor output....15V=3A
Power Consumption....28W
AUX input sensitivity....≤ 600mV
Signal to Noise Ratio....≥ 50dB
THD....≤ 0.7%
Dimensions....160(W)×78(H)×278(D)mm
Composite Video Output....1 VP-P
Horizontal resolution....≥ 500 line
FM Tuning Range....87.5 - 108 MHz
FM noise limit sensitivity....≤ 20μV
FM S/N.....≥ 46dB
Output Power....25W×2
Frequency Response....50Hz - 20kHz(±3dB)
Signal to Noise Ratio≥ 65dB
Impedance....4 Ω
Speaker
SpeakerImpedance....4Ω
Input Power....25W
Frequency Response....50Hz - 20kHz
Sensitivity....80 ± 4dB
Dimensions....130(W)×205(H)×176(D)mm
Remote control
Range....6m
Angle....±30°
Note: Design and specifications are subject to change without prior notice.
Troubleshooting
If you are having a problem with your system, check this list for a possible solution before calling for service.
If you can not solve the problem from the hints give here, or the system has been physically damaged, call a qualified person, such as your dealer, for service.
No power
- Ensure that the AC cord of the apparatus is connected properly.
- Ensure that there is power at the AC outlet.
- As a power-saving feature, the system switches off automatically 15 minutes after track play reaches the end and no control is operated.
Remote control does not work
- Before you press any function button, first select the correct source with the remote control instead of the main unit.
- Reduce the distance between the remote control and the unit.
- Insert the battery with its polarities (+/- signs) aligned as indicated.
- Replace the battery.
- Aim the remote control directly at the sensor on the front of the unit.
No disc detected
- Insert a disc.
- Check if the disc is inserted upside down.
- Wait until the moisture condensation at the lens has cleared.
- Replace or clean the disc.
- Use a finalized CD or correct format disc.
No picture
- Check the video connection.
- Turn on the TV to the correct Video-In channel.
Black and white or distorted picture
- The disc does not match the TV color system standard (PAL/NTSC).
- Sometimes a slight picture distortion may appear. This is not a malfunction.
- Clean the disc.
The aspect ratio of the TV screen cannot be changed even though you have set the TV display format.
- The aspect ratio if fixed on the loaded DVD disc.
- The aspect ratio may not be changed for some TV systems.
No sound or poor sound
- Adjust the volume.
- Check that the speakers are connected correctly.
- Check if the stripped speaker wires are clamped.
Disc does not play
- Insert a readable disc and ensure that the label side faces up.
- Check the disc type, color system and regional code.
- Check for any scratches or smudges on the disc.
- Press button to exit the system setup menu.
- Disable the password for parental control or change the rating level.
- Moisture has condensed inside the system. Remove the disc and leave the system turned on for about an hour. Disconnect and reconnect the AC power plug, and then turn on the system again.
- As a power-saving feature, the system turns off automatically 15 minutes after disc play reaches the end and no control is operated.
Audio or subtitle languages cannot be set
- The disc is not recorded with sound or subtitles in multiple languages.
- The audio or subtitle language setting is prohibited on the disc.
Poor radio reception
- Increase the distance between the unit and your TV or VCR.
- Fully extend the FM antenna.
Cannot display some files in USB device
- The number of folders or files in the USB device has exceeded a certain limit. This phenomenon is not a malfunction.
- The formats of these files are not supported.
USB device not supported
- The USB device is incompatible with the unit. Try another one.
Music playback is unavailable on this unit even after successful Bluetooth connection.
- The device cannot be used to play music through this unit wirelessly.
The audio quality is poor after connection with a Bluetooth-enabled device.
- The Bluetooth reception is poor. Move the device closer to this unit or remove any obstacle between them.
Cannot connect with this unit.
- The device does not support the profile files required for this unit.
- The Bluetooth function of the device is not enabled. Refer to the user manual of the device to find out how to enable the function.
- This unit is not in pairing mode.
- This unit is already connected with another Bluetooth-enabled device.
Disconnect that device and then try again.
English

Correct Disposal of This Product (Waste Electrical & Electronic Equipment)
(Applicable in the European Union and other European countries with separate collection systems) This marking shown on the product or its literature, indicates that it should not be disposed with other household wastes at the end of its working life. To prevent possible harm to the environment or human health from uncontrolled waste disposal, please separate this from other types of wastes and recycle it responsibly to promote the sustainable reuse of material resources. Household users should contact either the retailer where they purchased this product, or their local government office, for details of where and how they can take this item for environmentally safe recycling. Business users should contact their supplier and check the terms and conditions of the purchase contract. This product should not be mixed with other commercial wastes for disposal
Made in China for LECHPOL Zbigniew Leszek, Miętne, 1 Garwolińska Street, 08-400 Garwolin.


Spis treści
Przed użyciem....52
CLASS 1 LASER PRODUCT
Uwaga:
natural_image
Illustration of a blue industrial vacuum cleaner with airflow arrows (no text or symbols)natural_image
Diagram of a remote control panel with a blue cylindrical device inside, showing no text or symbols.natural_image
Illustration of a blue ergonomic device with a blue cover and directional arrow (no text or symbols)Uwagi:
Uwaga:
natural_image
Line drawing of a remote control with a hand pointing to a button (no text or symbols)natural_image
Illustration of a hand pressing a button on a remote control panel (no text or symbols)natural_image
Illustration of a hand interacting with a remote control panel and a finger pointing at it (no text or symbols present)| PBC |
| Aspect Ratio |
| Angle |
| Repeat |
| Goto |
Wymiary....160(W)×78(H)×278(D)mm
sensor on the front of the unit.
Nie wykryto dysku
CLASS 1 LASER PRODUCT

Vedere din spate

- SURSA
- selectati o sursa de semnal
-
ⒷSTANDBY - porniti aparatul, comutati pe modul Standby ( in asteptare)
-
Compartiment discuri
4.
- Porniti sau intrerupeti redarea
5.
- Rotiti o imagine (in sens invers acelor de ceasornic/in sensul acelor de ceasornic)
6. SUBTITRARE/
- Selectati limba subtitrarii
- Pentru meniuri: navigati in jos
- Mutati o imagine marita in jos
natural_image
Illustration of a blue ergonomic device with directional arrows indicating motion or movement (no text or symbols)- Introduceti 2 baterii AAA respectand polaritatea corecta (+/-) asa cum este indicat.
natural_image
Diagram of a device control panel with blue components and directional arrows (no text or symbols)natural_image
Illustration of a blue and white object with a blue arrow indicating direction (no text or symbols)Nota:
Nota:
Inainte de a atasa un cablu coaxial de 75 ohmi (de tipul cu fir rotund, conectat la o antena de exterior), deconectati antena FM furnizata.
Atentie: Pentru a evita zgomotul, tineti antena departe de sistem, cablul de conectare si cablul de alimentare AC.
Introduceti dispozitivul USB in slot-ul corespunzator.
natural_image
Line drawing of a remote control with buttons and a hand pointing to a button (no text or symbols)natural_image
Line drawing of a remote control with a hand pointing to a button (no text or symbols)natural_image
Line drawing of a remote control with a hand pointing at the button (no text or symbols)La redarea DVD sau disc VCD,
Pentru a opri redarea, apasati tasta ■Unitatea stocheaza in mod automat ultima durata de redare, apasati apoi butonul ▶laparatul va relua ultima durata de redare si va continua automat redarea.
Pentru a opri redarea, apasati de doua ori butonul de redare al discurilor ■(Puteti de asemenea utiliza tasta „■ de pe panoul frontal)

| PBC |
| Aspect Ratio |
| Angle |
| Repeat |
| Goto |
- Apasati tastele 1, in mod repetat pentru a schimba frecventa pana ajungeti la postul de radio dorit.
- Apasati si tineti apasate butoanele timp de o secunda sau mai mult, frecventa se va schimba automat pana la gasirea urmatorului post radio.
(De asemenea puteti apasa tastele „„” ▲ de pe panoul frontal)
Modul FM
Puteti schimba postul de radio cu un semnal puternic prin apasarea tastei PROG. (Un numar maxim de 20 de posturi de radio pot fi stocate).
- Memorarea automata a posturilor radio
Apasati in mod repetat tasta I, pentru a selecta un numar presetat. (Puteti de asemenea utiliza tasta I, de pe panoul frontal)
line
| X | Y | |---|---| | 0.0 | 0.0 | | 0.1 | 0.1 | | 0.2 | 0.2 | | 0.3 | 0.3 | | 0.4 | 0.4 | | 0.5 | 0.5 | | 0.6 | 0.6 | | 0.7 | 0.7 | | 0.8 | 0.8 | | 0.9 | 0.9 | | 1.0 | 1.0 | | 1.1 | 0.9 | | 1.2 | 0.8 | | 1.3 | 0.7 | | 1.4 | 0.6 | | 1.5 | 0.5 | | 1.6 | 0.4 | | 1.7 | 0.3 | | 1.8 | 0.2 | | 1.9 | 0.1 | | 2.0 | 0.0 |To see more product visit: http://www.krugermatz.com
Krüger&Matz is a registered trademark

- CLASS 1 LASER PRODUCT
- Achtung:
- Rückseitige Ansicht
- Anschließen
- Before Use
- For your safety
- Laser Product
- Caution:
- CAUTION
- WARNING:
- Hearing safety
- The Unit
- Front View:
- Rear View:
- Remote control
- ⏻STANDBY
- SOURCE
- AUDIO/▲
- SUBTITLE/
- 7.
- 8.
- ZOOM
- /
- 11.
- CLOCK/PROG
- MENU
- OK
- 15.
- MODE
- DISPLAY/DIM
- SLOW
- 19.
- TIMER/SLEEP
- Installation of Batteries
- Note:
- Remote Control Operation Range
- Connection
- Connect FM antenna
- Switching ON / OFF
- Basic operation
- Disc Operation
- Caution!
- Use the disc menu
- Select an audio language
- Select a subtitle language
- Display play information
- Play control Select repeat/shuffle play
- Select a camera angle
- Search by time or title/chapter/track number
- To skip
- Search forward/backward
- Slow-motion play
- Zoom in/out image
- Picture view options
- DVD Menu Options
- General setup
- Video Setup
- Audio setup
- Preferences
- Listen to FM radio
- - Automatically
- - Manually
- Tune to a preset radio station
- Play from USB Play from Bluetooth device
- Play a file
- Other features
- Set the clock
- Set alarm timer
- To deactivate or re-activate an alarm timer
- Set sleep timer
- To deactivate sleep timer
- Specyfication
- Main unit
- Speaker
- Troubleshooting
- No power
- Remote control does not work
- No disc detected
- No picture
- Black and white or distorted picture
- The aspect ratio of the TV screen cannot be changed even though you have set the TV display format.
- No sound or poor sound
- Disc does not play
- Audio or subtitle languages cannot be set
- Poor radio reception
- Cannot display some files in USB device
- USB device not supported
- Music playback is unavailable on this unit even after successful Bluetooth connection.
- The audio quality is poor after connection with a Bluetooth-enabled device.
- Cannot connect with this unit.
- English
- Correct Disposal of This Product (Waste Electrical & Electronic Equipment)
- Spis treści
- Uwaga:
- Nie wykryto dysku
- Vedere din spate
- SUBTITRARE/
- Nota:
Brand : Krüger&Matz
Model : KM 1583
Category : Hi-Fi System