
MCU-5301 - Hi-Fi System DENVER - Free user manual and instructions
Find the device manual for free MCU-5301 DENVER in PDF.


| Product Type | Hi-Fi System |
| Model | MCU-5301 |
| Brand | Denver |
| Dimensions (approx.) | 250 x 250 x 150 mm |
| Weight (approx.) | 2.5 kg |
| Power Supply | AC 230V ~ 50/60Hz |
| Power Consumption | 30W |
| Output Power (RMS) | 20W + 20W |
| Media Playback | CD, CD-R, CD-RW, MP3 |
| Radio Tuner | FM (87.5-108 MHz) |
| Bluetooth | Yes, version 5.0 |
| USB Port | Yes, for MP3 playback |
| Auxiliary Input | 3.5mm jack |
| Remote Control | Included |
| Display | LED screen |
| Speaker Type | Two-way bass reflex |
| Frequency Response | 60 Hz - 20 kHz |
| Impedance | 4 ohms |
| Alarm Clock | Yes, with snooze |
| Sleep Timer | Yes |
| Equalizer Presets | Rock, Pop, Classic, Jazz |
| Maintenance | Clean with dry soft cloth; do not use liquids |
| Safety Precautions | Do not expose to moisture or direct sunlight |
| Reparability | Contact authorized service center; no user-serviceable parts |
Frequently Asked Questions - MCU-5301 DENVER
User questions about MCU-5301 DENVER
0 question about this device. Answer the ones you know or ask your own.
Ask a new question about this device
Download the instructions for your Hi-Fi System in PDF format for free! Find your manual MCU-5301 - DENVER and take your electronic device back in hand. On this page are published all the documents necessary for the use of your device. MCU-5301 by DENVER.
USER MANUAL MCU-5301 DENVER
natural_image
Modern desktop computer monitor with dual monitors and control panels, next to a remote control unit (no visible text or symbols)PLEASE READ THIS USER MANUAL COMPLETELY BEFORE OPERATING THIS UNIT AND RETAIN THIS BOOKLET FOR FUTURE REFERENCE.
TO PREVENT FIRE OR SHOCK HAZARD, DO NOT USE THIS PLUG WITH AN EXTENSION CORD, RECEPTACLE OR OTHER OUTLET UNLESS THE BLADES CAN BE FULLY INSERTED TO PREVENT BLADE EXPOSURE. TO PREVENT FIRE OR SHOCK HAZARD, DO NOT EXPOSE THIS APPLIANCE TO RAIN OR MOISTURE.
natural_image
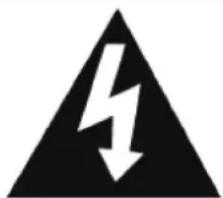
Black triangular warning symbol with a lightning bolt inside, indicating electrical hazard (no text)The lightning flash with arrowhead symbol, within an equilateral triangle is intended to alert the user to the presence of uninsulated dangerous voltage within the product is endosure that may be of sufficient magnitude to constitute a risk of electric shock to persons.
CAUTION
RISK OF ELECTRIC SHOCK DO NOT OPEN
CAUTION: TO REDUCE THE RISK OF ELECTRICSHOCK, DO NOT REMOVE COVER (OR BACK). NO USER-SERVICEABLE PARTS INSIDE. REFERSERVICING TO QUALIFIED SERVICE PERSONEL.
natural_image
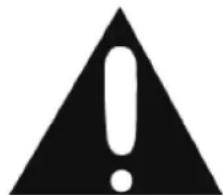
Black triangular warning symbol with exclamation mark (no text or numbers)The exclamation point within an Equilateral triangle is intended to Alert the user to the presence of Important operating and Maintenance(servicing) instructions In the literature accompanying the Appliance.
The Caution Marking is located at the back enclosure of the apparatus.
The Rating plate is located at the back enclosure of the apparatus
IMPORTANT SAFETY INSTRUCTIONS
- Read these instructions.
- Keep these instructions.
- Heed all warnings.
- Follow all instructions.
- Do not use this apparatus near water.
- Cleaning-Unplug this product from the wall outlet before cleaning. Do not use liquid cleaners or aerosol cleaners. Clean only with dry cloth.
- Do not block any ventilation openings. Install in accordance with the manufacturer's instructions.
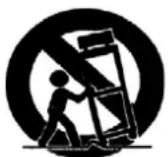
- Do not place this product on an unstable cart, stand, tripod, bracket, or table. The product may fall, causing serious injury to a child or adult, and serious damage to the product. Use only with a cart, stand, tripod, bracket, or table recommended by the manufacturer, or sold with the product. Any mounting of the product should follow the manufacturer's instructions, and should use a mounting accessory recommended by
the manufacturer. A product and cart combination should be moved with care-quick stops, excessive force and uneven surfaces may cause the product and cart combination to overturn. - Do not install near any heat sources such as radiators, heat registers, stoves, or other apparatus (including amplifiers) that product heat.
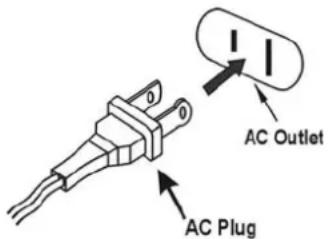
- Do not defeat the safety purpose of the polarized or grounding-type plug. A polarized plug has two blades with one wider than the other. A grounding type plug has two blades and a third grounding prong. The wide blade or the third prong is provided for your safety. If the provided plug does not fit into your outlet, consult an electrician for replacement of the obsolete outlet.
- Protect the power cord from being walked on or pinched particularly at plugs, convenience receptacles, and the point where they exit from the apparatus.
- Only use attachments/accessories specified by the manufacturer.
- Unplug this apparatus during lightening storms or when unused for a long periods of time.
- Refer all servicing to qualified service personnel. Servicing is required when the apparatus has been damaged in any way, such as power-supply cord or plug is damaged, liquid has been spilled or objects have fallen into the apparatus, the apparatus has been exposed to rain or moisture, does not operate normally, or has been dropped.
- This appliance shall not be exposed to dripping or splashing water and that no object filled with liquids such as vases shall be placed on the apparatus.
- Do not overload wall outlet. Use only power source as indicated.
- Use replacement part as specified by the manufacturer.
- The product may be mounted to a wall only if recommended by the manufacturer.
- Upon completion of any service or repairs to this product, ask the service technician to perform safety checks.
- Power Sources - This product should be operated only from the type of power source indicated on the marking label. If you are not sure of the type of power supply to your home, consult your product dealer or local power company. For products intended to operate from battery power, or other sources, refer to the operating instruction.
- Object and Liquid Entry - Never push objects of any kind into this product through openings as they may touch dangerous voltage points or short-out parts that could result in a fire or electric shock. Never spill liquid of any kind on the product.
- Damage Requiring Service - Unplug this product from the wall outlet and refer servicing to qualified service personnel under the following conditions:
a) When the power-supply cord or plug is damaged,
b) If liquid has been spilled, or objects have fallen into the product,
c) If the product has been exposed to rain or water,
d) If the product does not operate normally by following the operating instructions. Adjust only those controls that are covered by the operating instructions as an improper adjustment of other controls may result in damage and will often require extensive work by a qualified technician to restore the product to its normal operation.
e) If the product has been dropped or damaged in any way, and
f) When the product exhibits a distinct change in performance - this indicates a need for service.
- Main plug is used as disconnect device and it should remain readily operable during intended use. In order to disconnect the apparatus from the mains completely, the mains plug should be disconnected from the mains socket outlet completely.
- Battery shall not be exposed to excessive heat such as sunshine, fire or the like.
- Excessive sound pressure from earphones and headphone can cause hearing loss.
CAUTION:
TO PREVENT ELECTRIC SHOCK,
MATCH WIDE BLADE OF AC PLUG TO WIDE SLOT.
FULLY INSERT.
SAVE THESE INSTRUCTIONS
CAUTION
CLASS 1 LASER PRODUCT
CLASS 1 LASER PRODUCT APPAREIL LASER DE CLASSE 1 PRODUCTO LASER DE CLASE 1
CAUTION INVISIBLE LASER RADIATION WHEN OPEN AND INTERLOCKS DEFEATED. AVOID EXPOSURE TO BEAM

natural_image
Warning symbol with a triangular triangle containing a black silhouette of a sunburst or explosion (no text or numbers)This product contains a low power laser device.
Follow the advice below for safe operations.
ON PROTECTION AGAINST LASER ENERGY EXPOSURE
- As the laser beam used in this compact disc player is harmful to the eyes, do not attempt to disassemble the casing.
- Stop operation immediately if any liquid or solid object should fall into the cabinet.
- Do not touch the lens or poke at it. If you do, you may damage the lens and the player may not operate properly.
- Do not put anything in the safety slot. If you do, the laser diode will be ON when the CD door is still open.
- If the unit is not to be used for a long period of time, make sure that all power sources are disconnected from the unit. Remove all batteries from the battery compartment.
- This unit employs a laser. The use of controls or adjustment or performance of procedures other than those specified here may result in exposure to hazardous radiation.
Should any trouble occur, remove the power source and refer servicing to qualified personnel.
COMPLIANCE WITH FCC REGULATIONS
This equipment has been tested and found to comply with the limits for a Class B Digital Device, pursuant to Part 15 of the FCC Rules. These limits are designed to provide reasonable protection against harmful interference in a residential installation. This equipment generates, uses and can radiate radio frequency energy and, if not installed and used in accordance with the instructions, may cause harmful interference to radio communications. However, there is no guarantee that interference will not occur in a particular installation. If this equipment does cause harmful interference to radio or television reception, which can be determined by turning the equipment off and on, the user is encouraged to try to correct the interference by one or more of the following measures:
- Reorient or relocate the receiving antenna.
- Increase the separation between the equipment and receiver.
- Connect the equipment into an outlet on a circuit different from that to which the receiver is connected.
- Consult the dealer or an experienced radio/TV technician for help.
WARNING
Changes or modifications to this unit not expressly approved by the party responsible for compliance could void the user's authority to operate the equipment.
PROTECT YOUR FURNITURE!!
This system is equipped with non-skid rubber 'feet' to prevent the product from moving when you operate the controls. These 'feet' are made from non-migrating rubber material specially formulated to avoid leaving any marks or stains on your furniture. However certain types of oil based furniture polishes, wood preservatives, or cleaning sprays may cause the rubber 'feet' to soften, and leave marks or a rubber residue on the furniture.
To prevent any damage to your furniture we strongly recommend that you purchase small self-adhesive felt pads, available at hardware stores and home improvement centers everywhere, and apply these pads to the bottom of the rubber ‘feet’ before you place the product on fine wooden furniture.
LOCATION OF CONTROLS
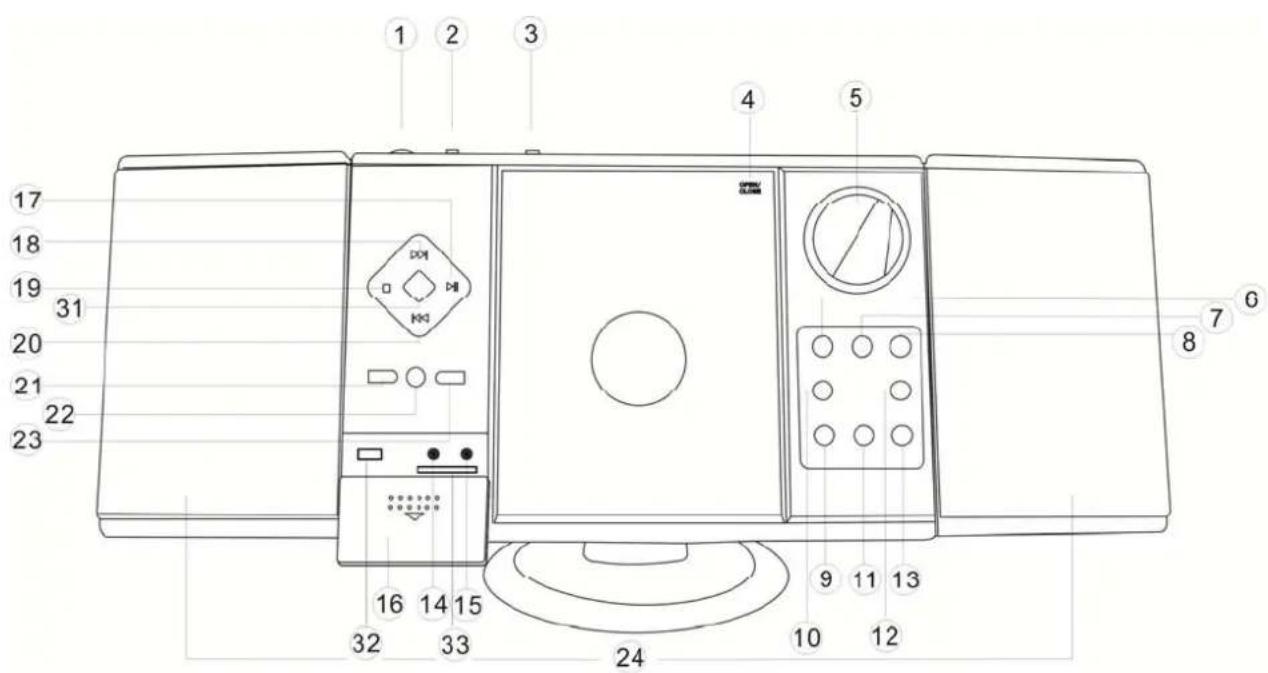
| 1. TUNING CONTROL | 18. SKIP/SEARCH FORWARD ➕ BUTTON |
| 2. BAND SELECTOR (AM/FM/FM STEREO) 19. STOP | BUTTON |
| 3. FUNCTION SELECTOR (AUX/RADIO/CD/ALARM) | 20. SKIP/SEARCH BACKWARD ➕ BUTTON |
| 4. CD DOOR (OPEN/CLOSE) 21. REPEAT/PROG(PROGRAM) BUTTON | |
| 5. LCD DISPLAY 22. REMOTE SENSOR | |
| 6. VOLUME CONTROL (-) BUTTON 23. ALBUM BUTTON | |
| 7. VOLUME CONTROL (+) BUTTON 24 SPEAKERS | |
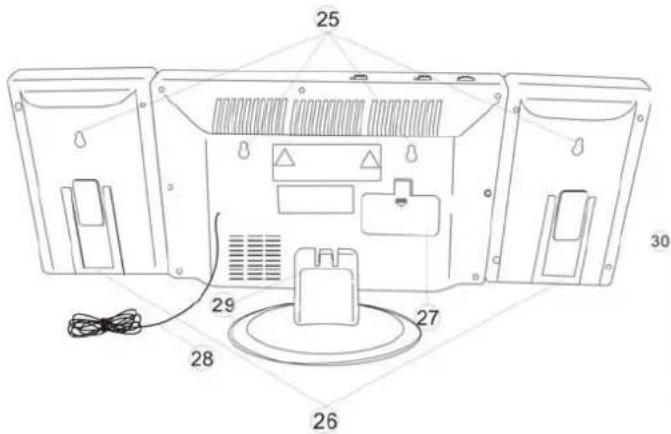
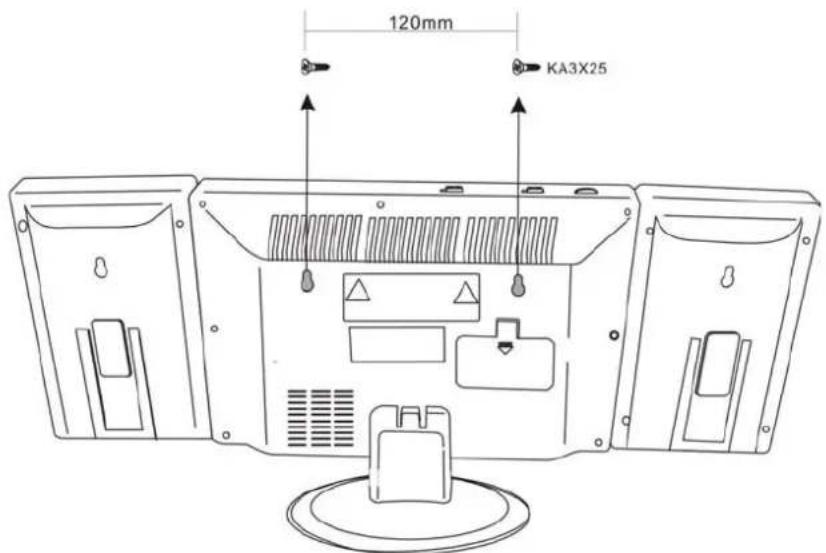
| 8. POWER ON/OFF BUTTON 25 HANGER HOLES | |
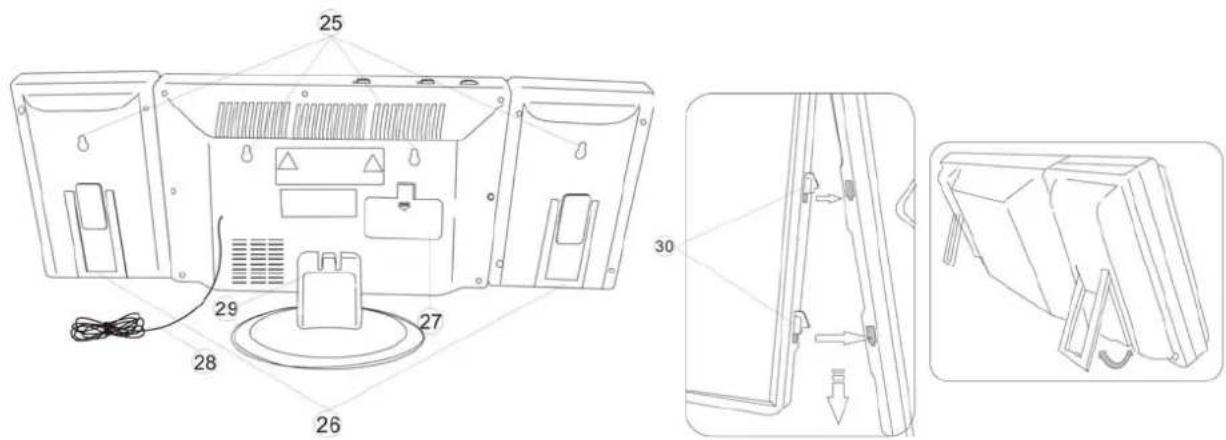
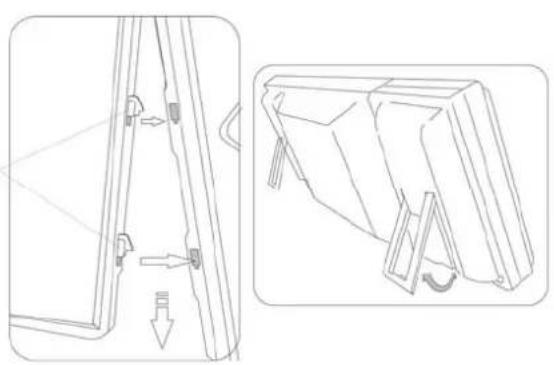
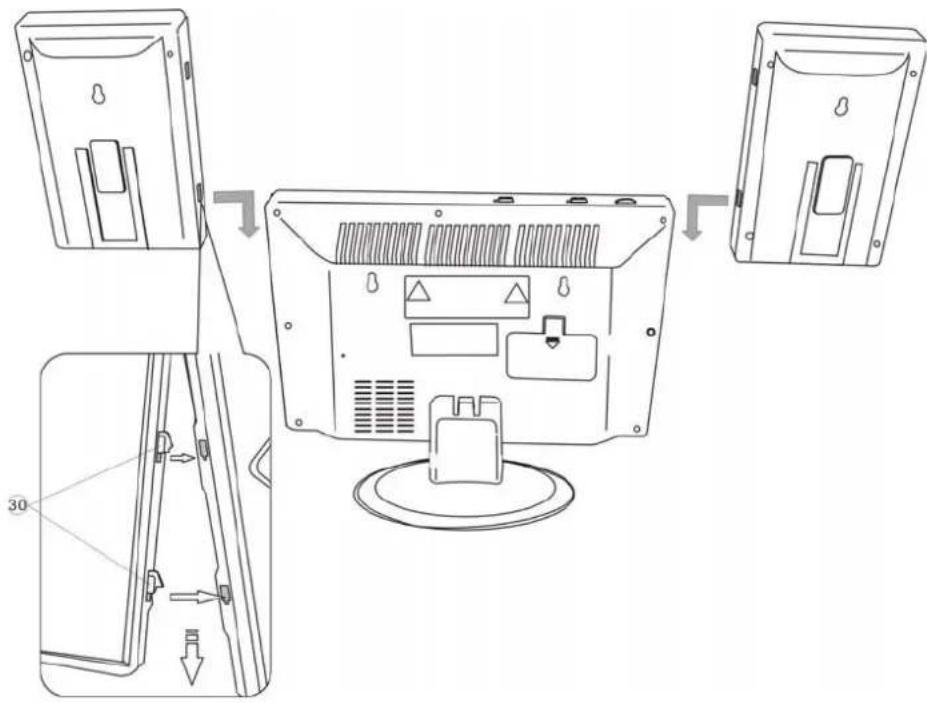
| 9. TIME BUTTON 26 FOLD OUT SPEAKER STANDS | |
| 10. ALARM SET BUTTON 27 BATTERY COMPARTMENT DOOR | |
| 11. HOUR BUTTON 28 FM ANTENNA | |
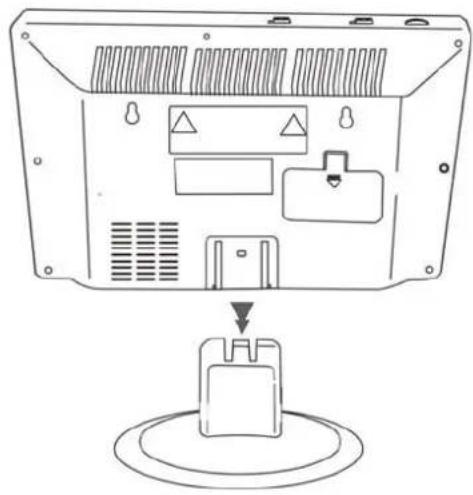
| 12. ALARM ON/OFF 29 STAND | |
| 13. MIN.(MINUTE) BUTTON | 30 SPEAKER HANGER TABS |
| 14. STEREO HEADPHONE JACK 31 CD/USB/SD SHIFT | |
| 15. AUX IN JACK 32 USB SLOT | |
| 16. DOOR 33 SD CARD SLOT | |
| 17. PLAY/PAUSE BUTTON | |
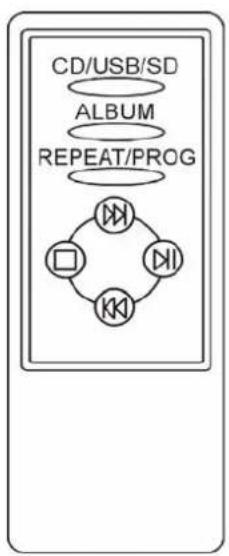
REMOTE CONTROL UNIT
INSTALLING THE STAND
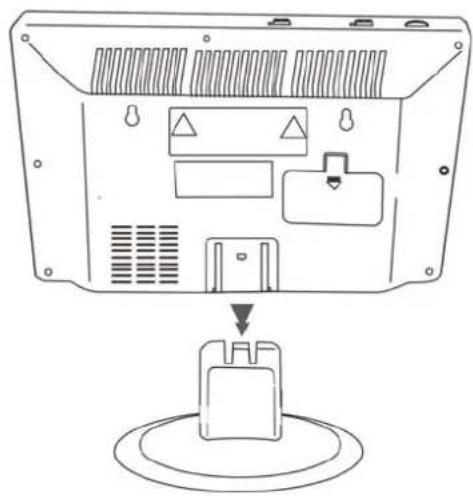
natural_image
Diagram of a device rear panel with labeled ports and a 3D printer base (no text or symbols)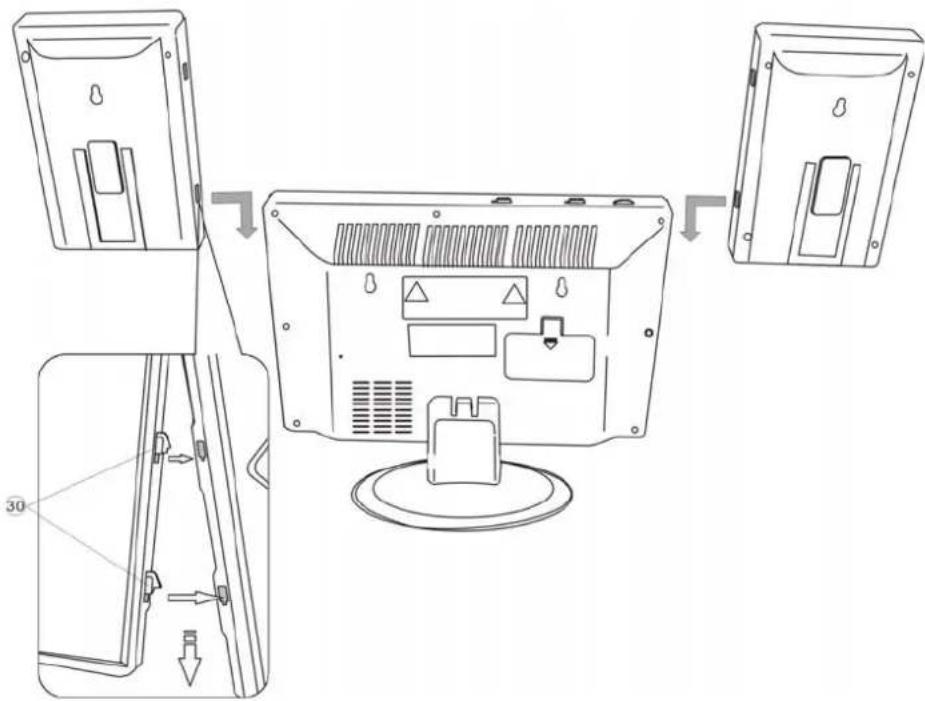
WALL MOUNTING
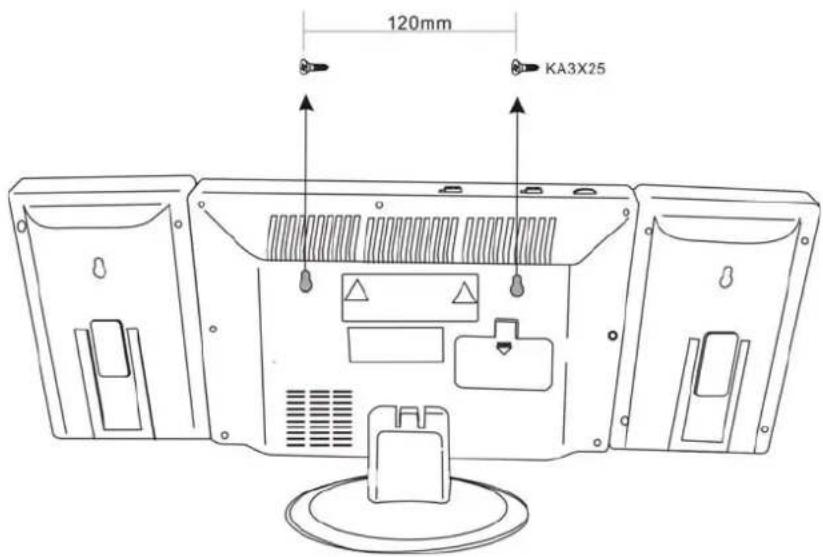
IMPORTANT NOTES
Avoid installing the unit in locations described below:
- Places exposed to direct sunlight or close to heat radiating appliances such as electric heaters.
- Dusty places.
- Places subject to constant vibration.
• Humid or moist places.
POWER SOURCES
This Music System operates on 220V\~50Hz. Do not attempt to operate the radio on any other power source. You could cause damage to the unit and void your warranty.
Please be sure the power outlet you plug this unit into is working and receives constant (unswitched) power. The System is also equipped with a battery back-up system for the clock that is powered by 2 pieces of "AA" (UM-3) size batteries (Not included).
Note: The batteries may be installed as a backup option to maintain the clock time if electrical power fails. In the event of power outage, the clock time will not be displayed, however the clock will continue to operate so current time will be maintained.
The remote control unit it is designed to operate on 2 x "AAA" (UM-4) size batteries (Not included).
GETTING STARTED
A. INSTALLING BACK UP BATTERIES INTO THE SYSTEM
- Remove the BATTERY DOOR.
- Install 2 x "AA" (UM-3) batteries (not included) according to the polarity diagram inside the battery compartment.
- Close the BATTERY DOOR.
B. INSTALLING BATTERIES INTO THE REMOTE CONTROL
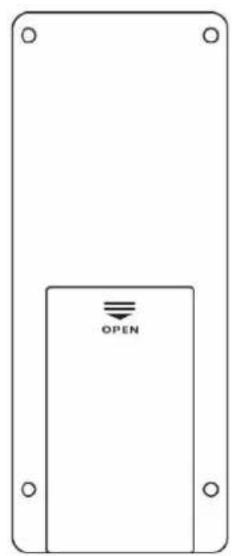
- Turn over the remote control, and remove the battery door.
- Install 2 x "AAA" (UM-4) size batteries (not included) according to the polarity diagram inside the battery compartment.
- Close the battery door.
IMPORTANT: Be sure that the batteries are installed correctly.
Wrong polarity may damage the unit and void the warranty. For best performance and longer operating time, we recommend the use of good quality alkaline-type batteries.
BATTERY CARE
I. Do not mix old and new batteries.
II. Do not mix alkaline, standard (carbon-zinc) or rechargeable (nickel-cadmium) batteries.
III. If the unit is not to be used for an extended period of time, remove the battery. Old or leaking battery can cause damage to the unit and may void the warranty.
IV. Do not dispose of batteries in fire, batteries may explode or leak.
AC OPERATION
- Plug the AC POWER CORD into a 110V AC \~ 60Hz outlet.
- Press the POWER BUTTON to turn the unit on. The LCD DISPLAY will light up.
- To turn off the unit press the POWER BUTTON again. The LCD DISPLAY will go "Off".
USING THE REMOTE CONTROL CORRECTLY
Note: The Remote Control is only for operating the CD Player.
- Point the Remote Control at the Infrared SENSOR (IR) (#22) located on the front of the System.
● The functions of the remote buttons are the same as the corresponding controls on the main unit. - The performance of the Infrared SENSOR may be degraded causing unreliable operation if there is strong ambient light source in the same room.
● The recommended effective distance for remote operation is about 10-15 feet.
SETTING THE CLOCK
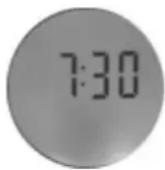
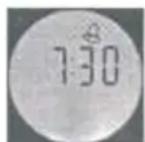
The clock has to be set before using the system for the first time. When you connect the System to the AC outlet for the first time the clock display will show "12:00" and will need to be set. For example set the clock time at 7:30 AM.
- Press and hold the TIME button and repeatedly press the HOUR button to set the correct Hour.
- Press and hold the TIME button and repeatedly press the MIN button to set the correct Minute.
NOTE
There is a PM INDICATOR located on the left-hand side of the clock display. Be sure to observe the PM indicator when setting the time to make sure the time is set correctly for AM or PM. If the PM indicator appears, the time displayed is "PM". If the PM indicator is not shown, the time displayed is "AM".
RADIO OPERATION
- To turn the radio on, press the POWER BUTTON once. The LCD DISPLAY lights up.
- Slide the FUNCTION SELECTOR to the "RADIO" position.
- Slide the BAND SELECTOR to your desired band (AM, FM or FM ST.).
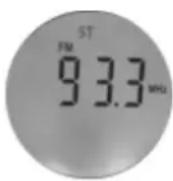
- Turn the TUNING CONTROL to your desired radio station. The radio frequency appears in the LCD DISPLAY.
- Adjust the sound level by pressing the VOLUME buttons (+/-).
- To turn off the radio, press the POWER BUTTON again. The LCD DISPLAY will go "off".
FM STEREO RECEPTION
With the BAND SELECTOR in the "FM ST" position, the FM Stereo Indicator "ST" will light up when listening to a strong station that is broadcasting in "Stereo".
Slide the BAND SELECTOR to the FM position when the FM stereo reception is weak. The reception may be improved, but the sound is monaural (MONO).
TIPS FOR BEST RECEPTION
AM – The AM antenna is located inside the cabinet of the main unit. If AM reception is weak, change the position of cabinet until the internal antenna picks up the strongest signal,
FM – During FM reception, always keep the FM Wire Antenna fully extended. If FM reception is weak try repositioning the FM Wire Antenna until you find the strongest signal.
CD PLAYER OPERATION
NOTE: This unit not only plays commercial compact discs but also self-compiled CD-RW discs.
- Because of non-standardized format definition/production of CD-R/RW, playback quality & performance is not guaranteed.
- Manufacturer is not responsible for the playability of CD-R/RW due to recording conditions such as PC performance, writing software, media properties etc.
- Do not attach a label or seal to either side of the CD-R/RW disc. It may cause a malfunction.
PLAY MODE
- Turn on the Music System by pressing the POWER BUTTON. The LCD DISPLAY goes "On".
- Slide the FUNCTION SELECTOR to the "CD" position. Flashing "-" will be displayed in the LCD DISPLAY while the Player is reading the table of contents (TOC) on the CD. "No" will be displayed if no disc is loaded.
- Open the CD DOOR by pressing the CD DOOR at the "OPEN/CLOSE" mark located on the CD door, load a CD with the label side facing upward and then close the CD door.
- Playback will start from track 1 once the Player has finished reading the TOC. The PLAY/PAUSE INDICATOR “▶” will appear steadily on the LCD DISPLAY.
- While playing, press the PLAY/PAUSE ▶ II BUTTON to pause, the PLAY/PAUSE INDICATOR “▶” will flash. Press the PLAY/PAUSE ▶ II BUTTON again to resume playing.
- Adjust the VOLUME BUTTONS (+/-) to the desired volume level.
REPEAT MODE
REPEAT 1
When the REPEAT BUTTON is pressed once, the REPEAT 1 Indicator, 'REP 1', will appear in the LCD DISPLAY. The current track will be played repeatedly
REPEAT ALL
When the REPEAT BUTTON is pressed twice, the REPEAT INDICATOR, "REP ALL" will light in the LCD DISPLAY. The whole disc will be played continuously.
To Cancel Repeat Function: Press the REPEAT BUTTON until the repeat indicator is off.
SKIP AND SEARCH MODE
-
During Play or Pause mode, tap the SKIP FORWARD "◀" or SKIP BACKWARD "◀" BUTTON to go to the next track or go back to the beginning of the current track.
-
During playback, press and hold the SEARCH FORWARD "▶" or SEARCH BACKWARD "◀" Buttons to search within the current track with audible high speed playback.
PROGRAM PLAY MODE
This function allows music tracks to be played in a programmed sequence.
NOTE: Program can only be set in STOP mode.
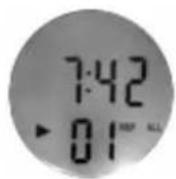
- Press the PROG BUTTON once. Both the Program No, "01", and PROGRAM INDICATOR, "PROG" will flash in the DISPLAY.
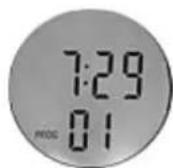
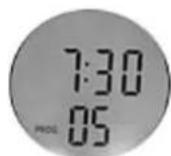
- Press the SKIP FORWARD "▶" or SKIP BACKWARD "◀" BUTTON to select the track to be programmed. For example track no. 5 is selected. The PROGRAM INDICATOR "PROG" will flash to prompt for confirmation.
-
Press the PROGRAM BUTTON again to store the selection. The Program No. will advance to "02" and flash together with the PROGRAM INDICATOR, "PROG", to prompt for the next input.
-
Press the SKIP FORWARD "▶" or SKIP BACKWARD "◀" BUTTON to select the track to be programmed. For example the second selection is track no. 8. The PROGRAM INDICATOR "PROG" will flash to prompt for confirmation.
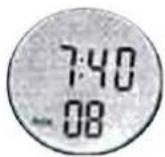
-
Press the PROGRAM BUTTON again to store your second selection. You may repeat steps #2 to #4 to program up to 20 tracks. As soon as you have entered the 20th track, the LCD DISPLAY will automatically show the programmed tracks one by one in their correct sequence starting from the first. At the end of program review, the Program No., "01", and the PROGRAM INDICATOR, "PROG" will both flash in the LCD DISPLAY.
-
Press the PLAY/PAUSE ▶ II BUTTON to complete and start program play in the programmed sequence.
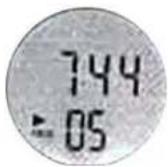
- You may tap SKIP FORWARD "▶" BUTTON to go directly to other tracks ahead during program play and press SKIP BACKWARD "◀" BUTTON twice to go back to previous track(s).
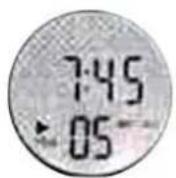
- You may use the REPEAT function to repeatedly play a certain track (Repeat 1) or all tracks in the program (Repeat All).
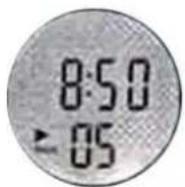
-
The Player will stop when all the programmed tracks have been played through once. To replay program play, press the PROGGRAM Button followed by the PLAY/ PAUSE ▶ II Button.
-
To cancel program play, press the STOP ■ BUTTON twice while program play is running or open the CD DOOR in stop mode.
- Press ALBUM Bottom to choose the album. Press CD/USB/SD SHIFT BOTTM to change the sound source.
- To turn the Player off, press the POWER BUTTON. The LCD DISPLAY backlight will go "off".
You can play other music sources (iPod, MP3 player or other digital audio player) through the speakers of this System by connecting the AUX IN Jack to your external player's LINE OUT jack or headphone jack.
- The AUX IN and PHONES JACKS are covered by the DOOR (#16). Slide the DOOR downwards
- Plug one end of an audio cable into the AUX IN Jack and the other end of the cable to the line out or headphone jack of your digital audio player.
- Set the FUNCTION SELECTOR to the "AUX" position.
- Press the POWER BUTTON to turn on the System. The LCD DISPLAY goes "On".
- Play your digital audio player.
- Adjust the VOLUME on the external audio player and the System until you reach a comfortable listening level.
- Turn the System and your audio player off when you have finished listening and then unplug the audio cable.
USING HEADPHONES (NOT INCLUDED)
Inserting the plug of your headphones into the System's PHONES JACK will enable you to listen to the CD, radio or other music sources in private. When using headphones, the speakers will be automatically disconnected.
ALARM OPERATION
SETTING THE WAKE UP TIME
- Press and hold the AL SET BUTTON and repeatedly press the HOUR BUTTON to set the correct wake up Hour.
- Press and hold the AL SET BUTTON and repeatedly press the MINUTE BUTTON to set the correct wake up Minute.
NOTE
There is a PM INDICATOR located in the left-hand side of the clock display. Be sure to observe the PM indicator when setting the alarm to make sure the alarm time is set correctly for AM or PM. If the PM indicator appears in LCD DISPLAY, the alarm will be "PM". If not, the alarm time will be "AM".
TURNING ALARM FUNCTION ON/OFF
- Press the AL.ON/OFF Button once to turn the alarm function on. The ALARM INDICATOR, "♀" will appear in the DISPLAY.
- Press the AL.ON/OFF Button again to turn the alarm function off. The ALARM INDICATOR, "☐" will disappear in the DISPLAY.
CHECKING THE WAKE UP TIME
Whenever you want to check the wake up time, simply press the AL SET BUTTON. The display will change from current time to wake up time. Release the AL SET BUTTON to return to current time.
WAKE TO RADIO
- Press the POWER BUTTON to turn on the System. The LCD DISPLAY lights up.
- Press the AL.ON/OFF Button once to turn on the alarm function. The ALARM INDICATOR, 🔒, will light up.
- Slide the FUNCTION SELECTOR to "RADIO" and the BAND SELECTOR to AM, FM or FM ST as desired.
- Tune to your desired station, and adjust the volume level that you wish to hear when the wake up time is reached then press the POWER BUTTON again to turn off the System. Reconfirm the wake up time setting by tapping the AL SET BUTTON.
- At the selected wake up time the radio will turn 'On' and remain 'On' until it is turned off.
- If you do not want the alarm to turn the radio on the following day, press the AL.ON/OFF Button again to turn off the alarm function. The ALARM INDICATOR, 🔒, goes off.
WAKE TO CD
- Press the POWER BUTTON to turn on the System. The LCD DISPLAY lights up.
- Press the AL.ON/OFF Button once to turn on the alarm function. The ALARM INDICATOR will light up.
- Slide the FUNCTION SELECTOR to "CD" to start playback.
- Adjust the volume level that you wish to hear when the wake up time is reached then press the POWER BUTTON again to turn off the System.
- At the selected wake up time the radio will turn 'On' and remain 'On' until it is turned off.
- If you do not want the alarm to turn the System on the following day, press the AL.ON/OFF Button again to turn off the alarm function. The ALARM INDICATOR, 🔒, goes off.
WAKE TO ALARM
- Set the FUNCTION SELECTOR to the "ALARM" position.
- At the selected wake up time the alarm will sound for 3 minutes and turn off automatically.
- If you do not want the alarm to turn on the following day, press the AL.ON/OFF Button again to turn off the alarm function. The ALARM INDICATOR, 🔒, will go off.
CARE AND MAINTENANCE
- Clean your unit with a damp (never wet) cloth. Solvent or detergent should never be used.
- Avoid leaving your unit in direct sunlight or in hot, humid or dusty places.
- Keep your unit away from heating appliances and sources of electrical noise such as fluorescent lamps or motors.
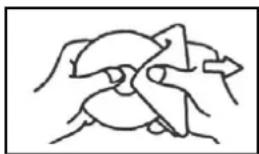
- If drop-outs or interruptions occur in the music during CD play, or if the CD fails to play at all, its bottom surface may require cleaning. Before playing, wipe the disc from the center outwards with a good soft cleaning cloth.
natural_image
Simple line drawing of a hand holding a windmill (no text or symbols)TROUBLESHOOTING GUIDE
If you experience difficulties in the use of this music system please check the following or call 1 800 777 5331 for Customer Service and Support.
| Symptom Possible Cause Solution | ||
| Noise or sound distorted on AM or FM broadcast | - Station not tuned properly for AM or FM.- FM: FM Wire antenna is not extended.- AM: The bar antenna is not positioned correctly | - Retune the AM or FM broadcast station.- FM: Extend the FM Wire antenna.- AM: Reposition the unit until the best reception is obtained. |
| AM or FM no sound - Unit not in “RADIO” function mode.- Volume set at minimum | - Slide FUNCTION SELECTOR to “RADIO” position.- Increase Volume. | |
| CD player will not play - Unit not in CD function mode.- CD is not loaded properly.- If the CD is self-compiled, the media used may not be compatible with the player. | - Select CD function mode.- Load CD with label side up.- Use better quality blank media and retest. | |
| CD skips while playing - | Disc is dirty or scratched. - Wipe CD with | clean cloth or useanother disc. |
| Intermittent sound from CD player | - Dirty or defective disc- Dirty pick up lens- Player is subject to excessive shock or vibration | - Clean or replace the defective disc.- Use a CD lens cleaning disc to clean the lens.- Relocate the player away from shock or vibration. |
| Sound appears distorted at high volume levels | - Volume control is set to maximum. - Adjust Volume Control to a lower comfortable level. | |
| No Alarm | Alarm is not activated | Check that Alarm indicator “” appears in the Display. |
| Incorrect Alarm time | Make sure AM or PM is set correctly. | |
natural_image
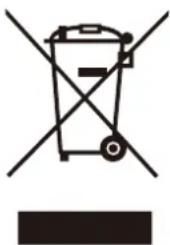
Symbol of a trash bin crossed with a diagonal line and a horizontal bar below (no text or labels)Electric and electronic equipment contains materials, components and substances that can be hazardous to your health and the environment, if the waste material (discarded electric and electronic equipment) is not handled correctly.
Electric and electronic equipment is marked with the crossed out trash can symbol, seen below. This symbol signifies that electric and electronic equipment should not be disposed of with other household waste, but should be disposed of separately.
All cities have established collection points, where electric and electronic equipment can either be submitted free of charge at recycling stations and other collection sites, or be collected from the households. Additional information is available at the technical department of your city.
ALL RIGHTS RESERVED
COPYRIGHT DENVER ELECTRONICS A/S

WWW.DENVER-ELECTRONICS.COM
Imported by:
Inter Sales A/S
Stavneagervej 22
8250 Egaa
Denmark
WARNUNG
KLASSE 1 LASERPRODUKT
natural_image
Technical line drawing showing two views of a mechanical assembly with mounting brackets and a hook (no text or symbols)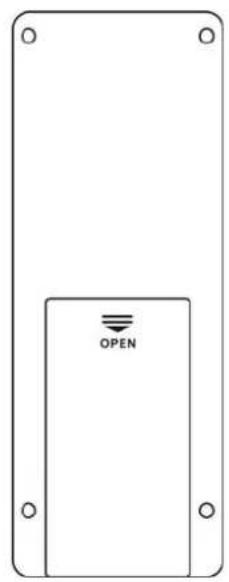
natural_image
Diagram of a device rear panel with labeled components and a circular base component (no text or symbols)LAUTSPRECHER INSTALLIEREN
WICHTIGE HINWEISE
natural_image
Symbol of a trash bin crossed with a diagonal line and a horizontal bar below (no text or labels)- CAUTION
- RISK OF ELECTRIC SHOCK DO NOT OPEN
- IMPORTANT SAFETY INSTRUCTIONS
- CAUTION:
- SAVE THESE INSTRUCTIONS
- CLASS 1 LASER PRODUCT
- ON PROTECTION AGAINST LASER ENERGY EXPOSURE
- COMPLIANCE WITH FCC REGULATIONS
- WARNING
- PROTECT YOUR FURNITURE!!
- POWER SOURCES
- GETTING STARTED
- INSTALLING BACK UP BATTERIES INTO THE SYSTEM
- INSTALLING BATTERIES INTO THE REMOTE CONTROL
- BATTERY CARE
- AC OPERATION
- USING THE REMOTE CONTROL CORRECTLY
- Note: The Remote Control is only for operating the CD Player.
- SETTING THE CLOCK
- NOTE
- RADIO OPERATION
- FM STEREO RECEPTION
- TIPS FOR BEST RECEPTION
- CD PLAYER OPERATION
- PLAY MODE
- REPEAT MODE
- REPEAT 1
- REPEAT ALL
- SKIP AND SEARCH MODE
- PROGRAM PLAY MODE
- USING HEADPHONES (NOT INCLUDED)
- ALARM OPERATION
- SETTING THE WAKE UP TIME
- TURNING ALARM FUNCTION ON/OFF
- CHECKING THE WAKE UP TIME
- WAKE TO RADIO
- WAKE TO CD
- WAKE TO ALARM
- CARE AND MAINTENANCE
- TROUBLESHOOTING GUIDE
- ALL RIGHTS RESERVED
- COPYRIGHT DENVER ELECTRONICS A/S
- WWW.DENVER-ELECTRONICS.COM
- WARNUNG
- WICHTIGE HINWEISE
Brand : DENVER
Model : MCU-5301
Category : Hi-Fi System