RS64 - External hard drive Digittrade - Free user manual and instructions
Find the device manual for free RS64 Digittrade in PDF.

User questions about RS64 Digittrade
0 question about this device. Answer the ones you know or ask your own.
Ask a new question about this device
Download the instructions for your External hard drive in PDF format for free! Find your manual RS64 - Digittrade and take your electronic device back in hand. On this page are published all the documents necessary for the use of your device. RS64 by Digittrade.
USER MANUAL RS64 Digittrade
| NTFS FAT32 HFS+EXT3 | ||||
| Win 98 X L, S X X | ||||
| Win NT, 2000, ME, XP, Vista | L, S L, S X X | |||
| Mac OS X L L, S L | S X | |||
| Linux L L, S X L, S | ||||
natural_image
Symbol of a trash bin crossed with two diagonal lines, no text or labels presentContents
The Device 33
Connection to USB 2.0 Port 34
Connection to USB 1.1 Port 35
Switching-On 36
Locking and Unlocking the Hard Drive 36
Partitioning / Formatting using Windows 37
Partitioning / Formatting using MAC OS X 42
Partitioning / Formatting using Linux 45
The choose of file system 49
Technical Specifications 51
RFID-Transponder 52
Triple Protection 53
Data Security and Disclaimer 54
FAQ - Frequently Asked Questions 55
WEEE Statement
57
The Device
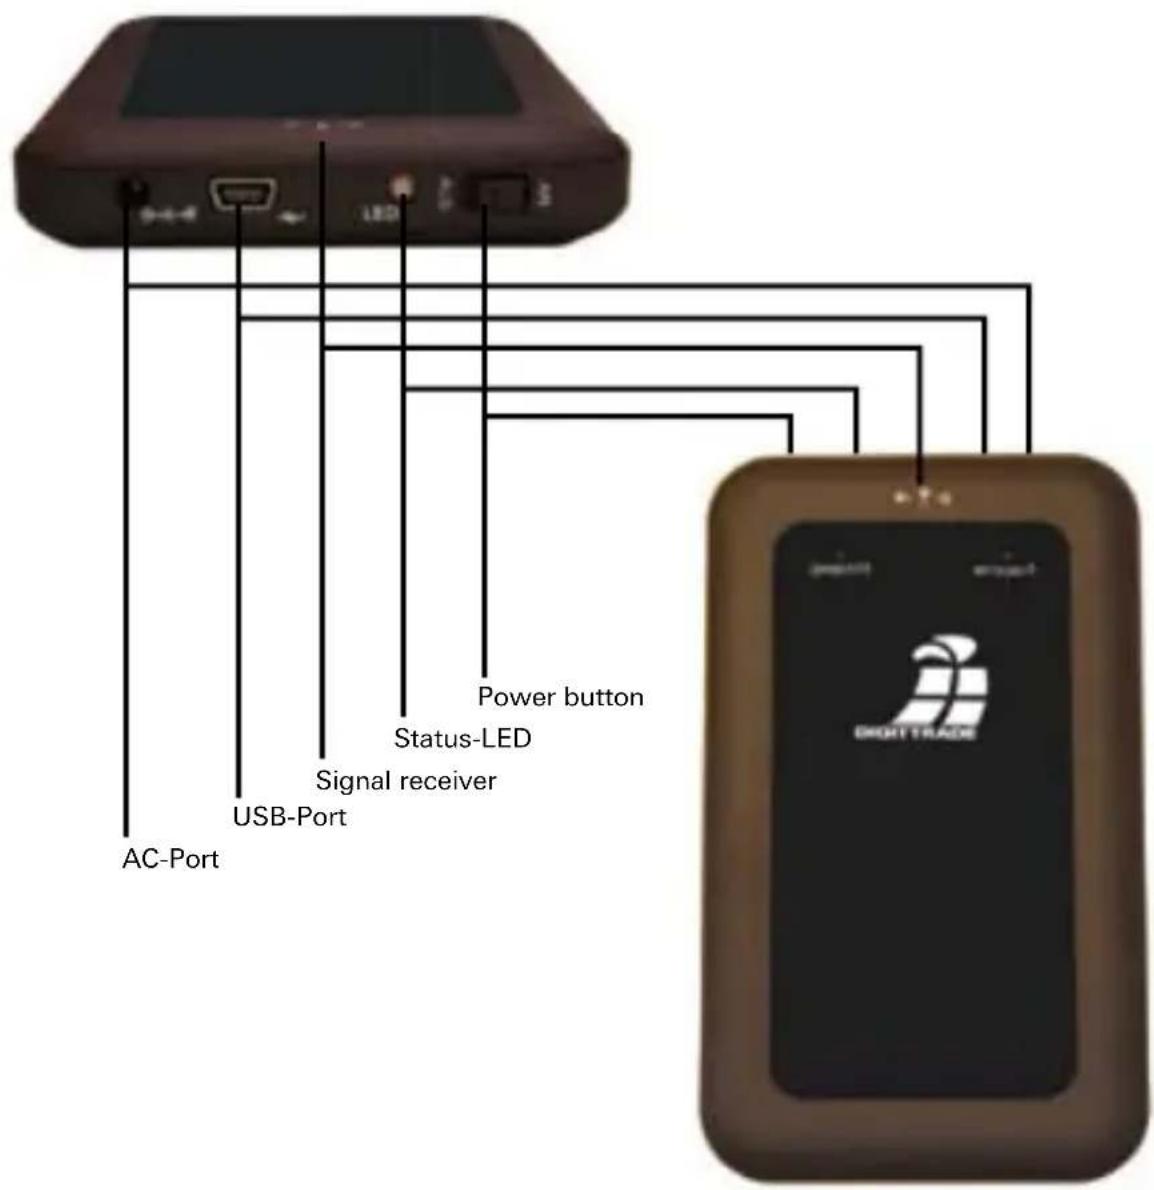
Connection to USB 2.0 Port
Connect the DIGITTRADE Security Hard Drive to your PC using the USB cable included in delivery. Please use therefore the A-plug as shown on the picture.
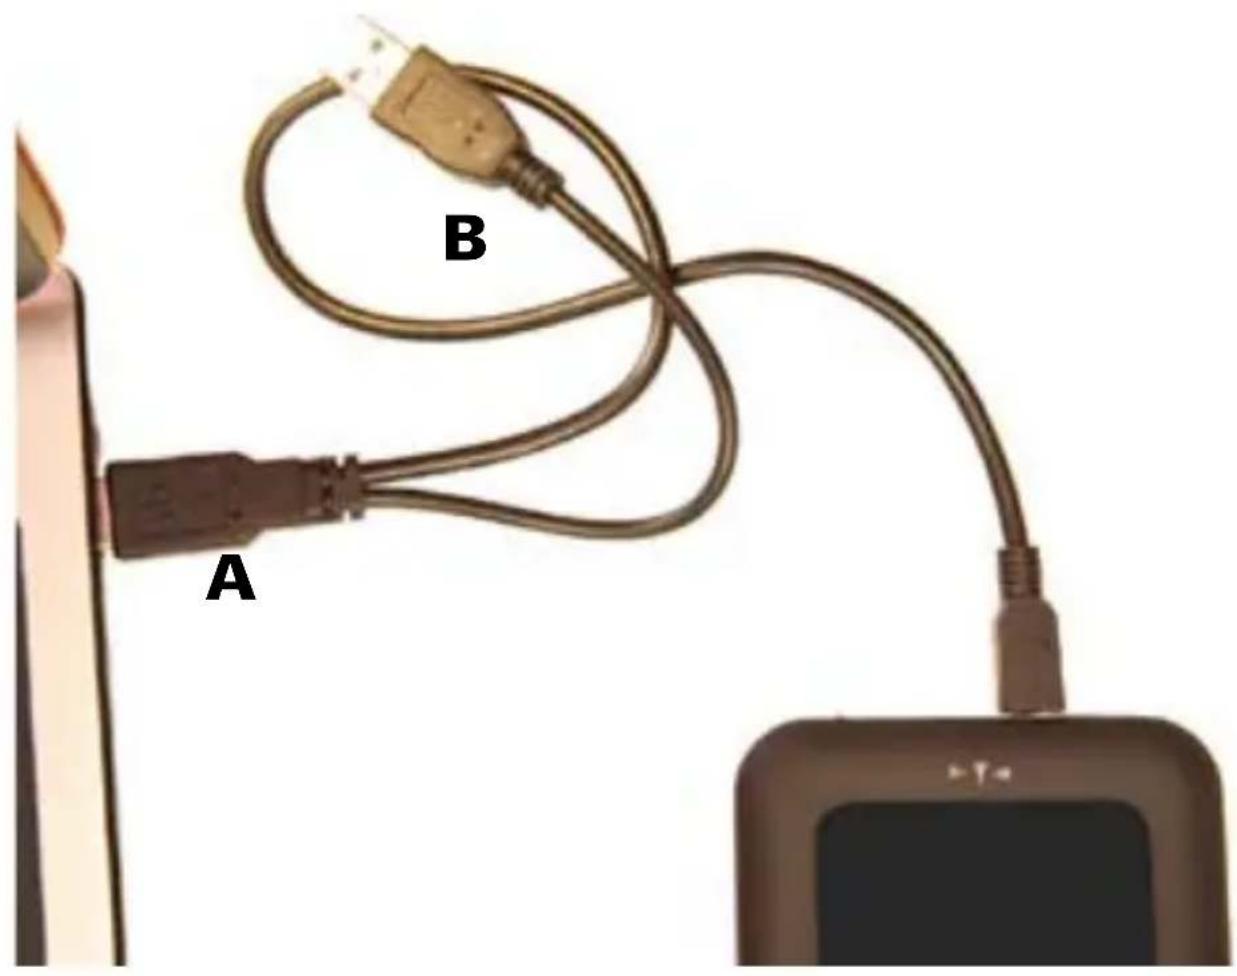
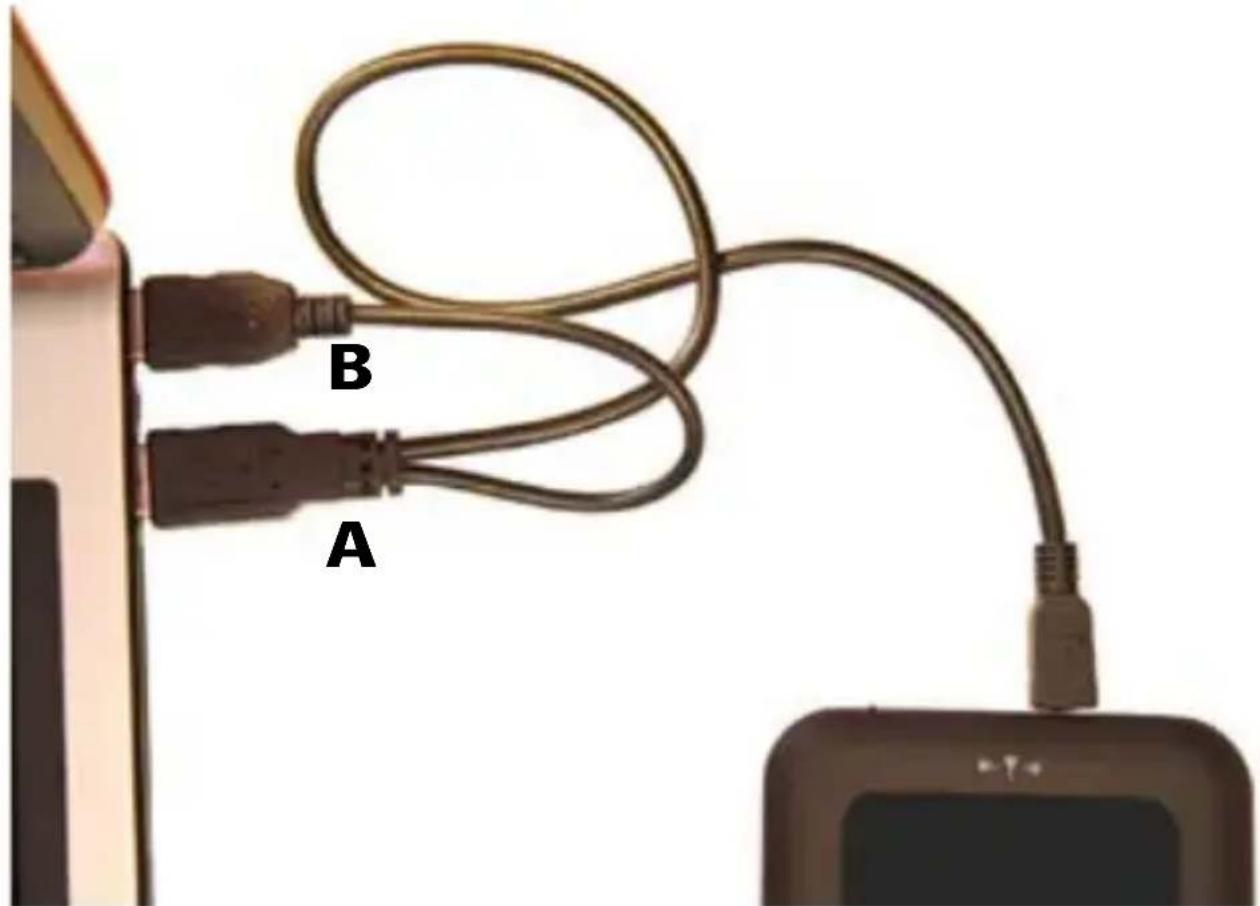
Connection to USB 1.1 Port
Connect the DIGITTRADE Security-Hard Drive to your PC using the USB cable included in delivery. Please note that the A- and B - plugs have to be connected as shown on the picture
natural_image
Close-up of a cable with labeled points A and B connecting to a smartphone (no text or symbols on the cable itself)Note: The hard drive will only be identified by the system, if it is turned on and unlocked. (see chapter "Locking and unlocking of the hard drive", p.8)
Switching-On
Move the control lever to "An" (on). The LED status will turn on green light.
Locking and Unlocking the Hard Drive
To avoid unauthorized access to your sensitive data the DIGITTRADE Security Hard Drive is always locked and needs to be unlocked for use.
Hold one of the two enclosed RFID keys above the reception symbol of the hard drive.
The hard drive will be unlocked, if you hear a short acoustic signal and the green LED “entsperrt” (unlocked) flashes.
The hard drive will be identified by the system. If you unplug the hard drive from the system it will be unlocked again. Your data will immediately be protected against unauthorized access.
Note: The hard drive also can be locked by holding the key again over the reception symbol or by turning it off.
Partitioning / Formatting using Windows
Please follow the instructions to customise the file system, partition size and number of partitions.
- Go to “control panel” and double click on “Administrative Tools”.
- Open the “Computer Management” and choose “Disk Management”.
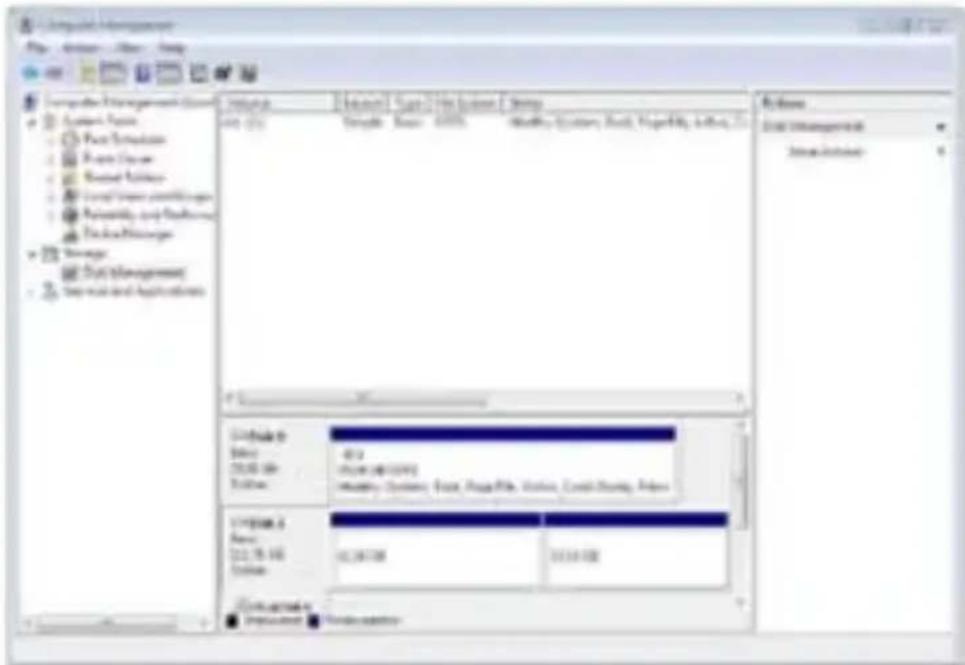
- Choose with your mouse the external hard drive and open the context menu using the right mouse button.
- choose the menu item "Formatting" to format the hard disk
Note: All data will be deleted irrevocably and cannot be restored after formatting.
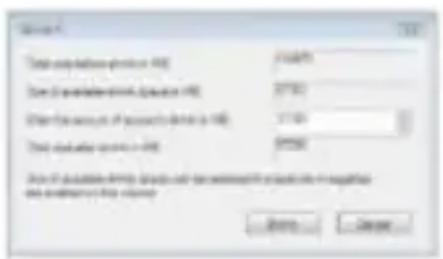
To partition the hard drive choose the item "Shrink Volume".
- Type in the desired memory capacity (in MB).
- An unassigned field will be shown in the administration display.
- Mark this unassigned field with the mouse and open the context menu with the right mouse button and choose the item "New Simple Volume".
The partitioning assist will appear.
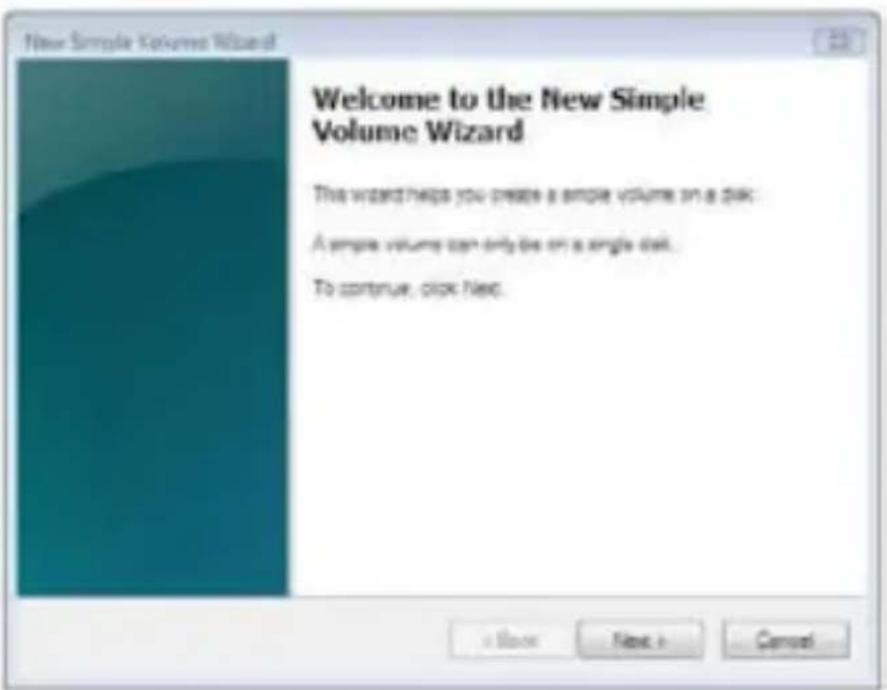
- Click on "Next".
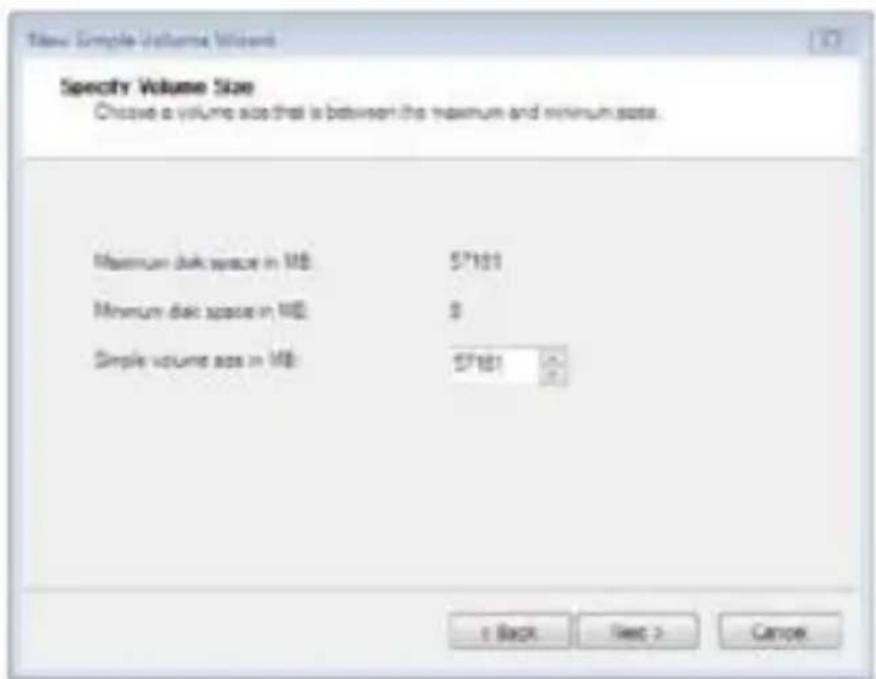
- Type in the desired size of the partition in MB and click on "Next".
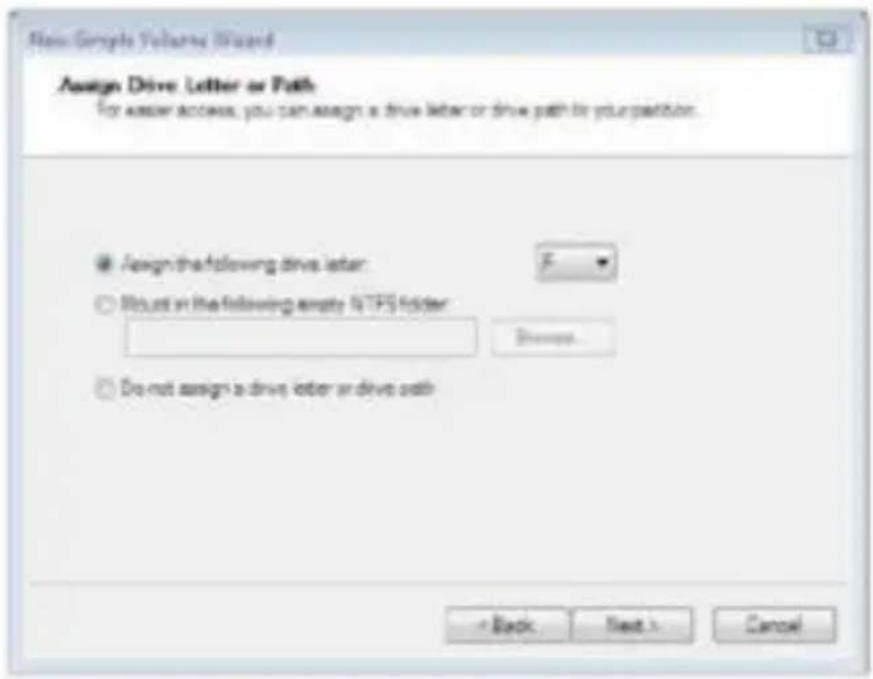
- Choose a drive letter for the partition.
- Click on "Next".
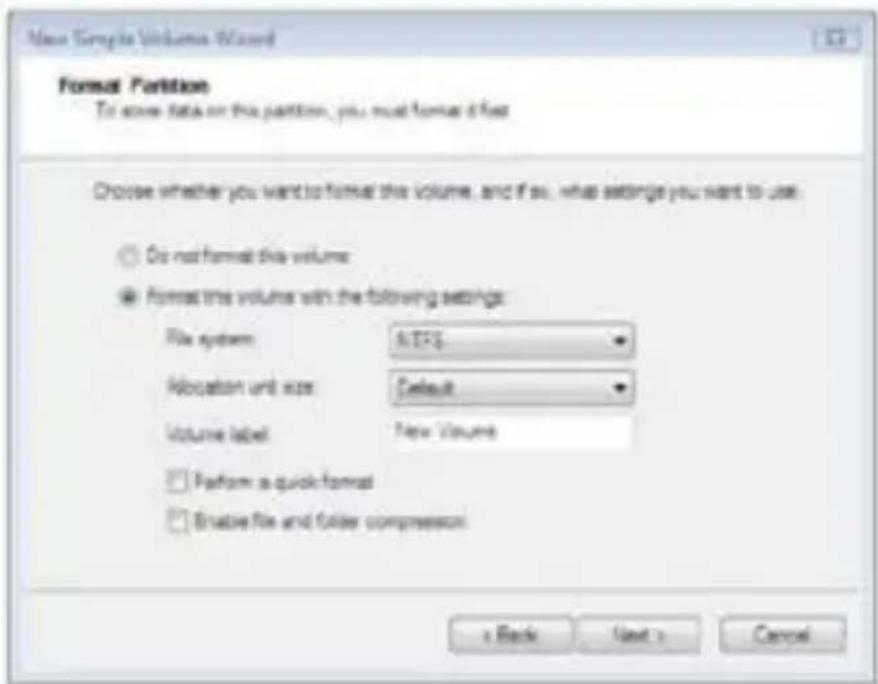
- Choose the desired file system, the type of formatting and click on "Next".
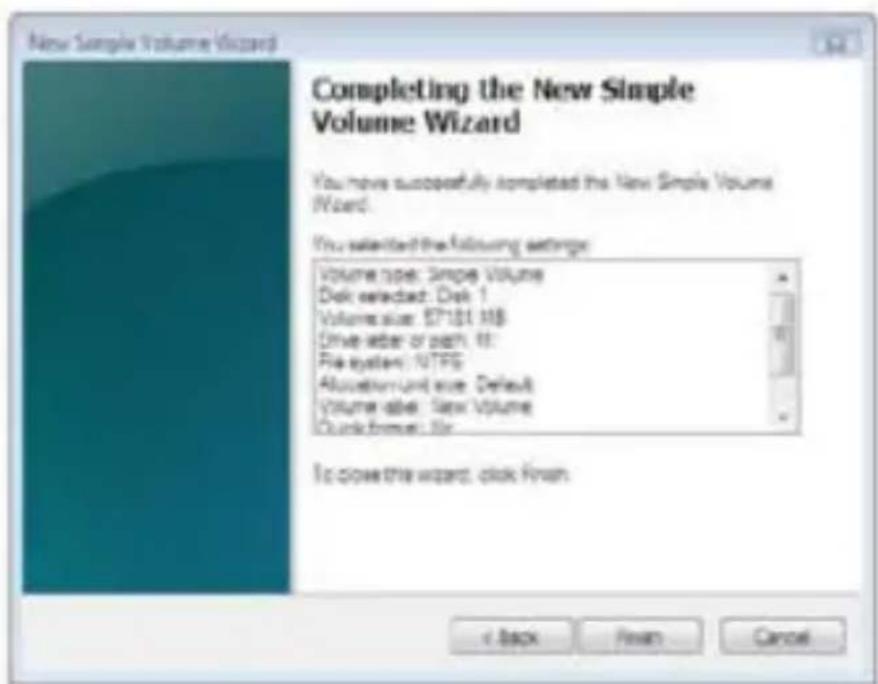
- The partitioning will be finished now, confirm this action by clicking on "Finish".
Note: The newly partitioned field will be formatted now. After the formatting is completed the new partition will automatically be identified by the system.
Partitioning / Formatting using MAC OS X
Please follow the instructions to customise the file system, partition size and number of partitions.
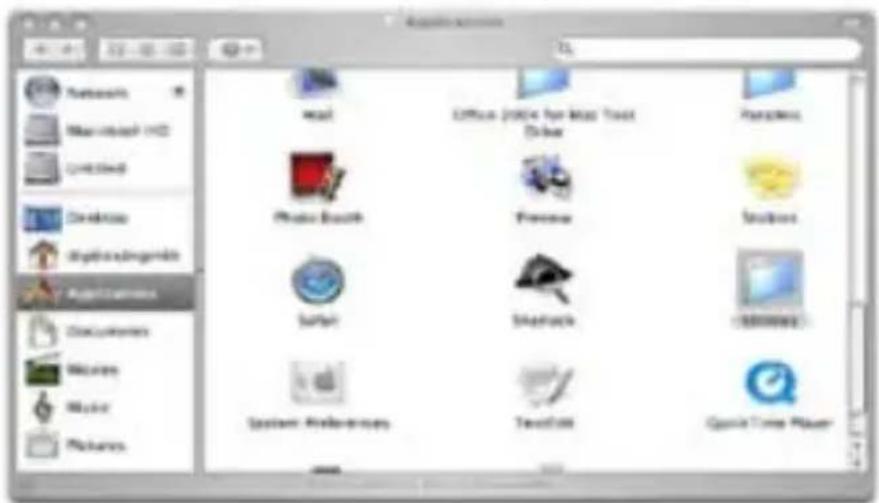
- Select "Utilities" from "Applications".
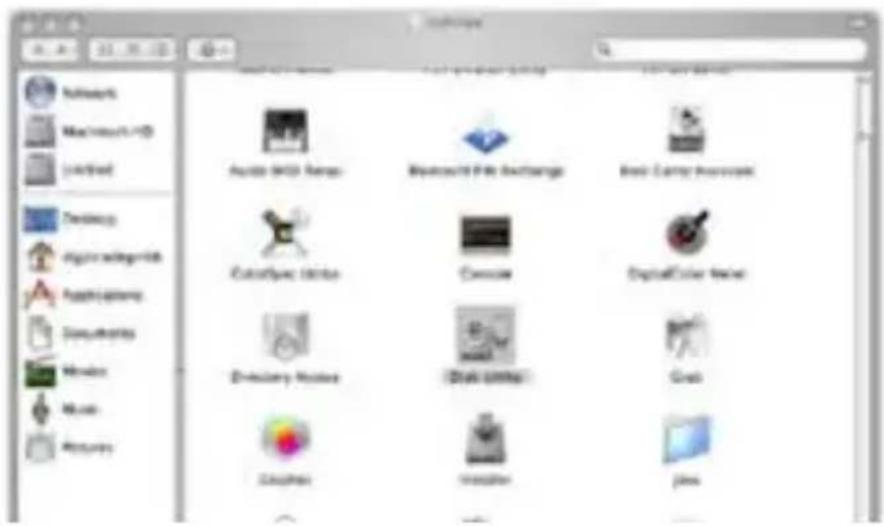
- Choose "Disk Utility".
- Choose from the left drive overview the external hard drive.
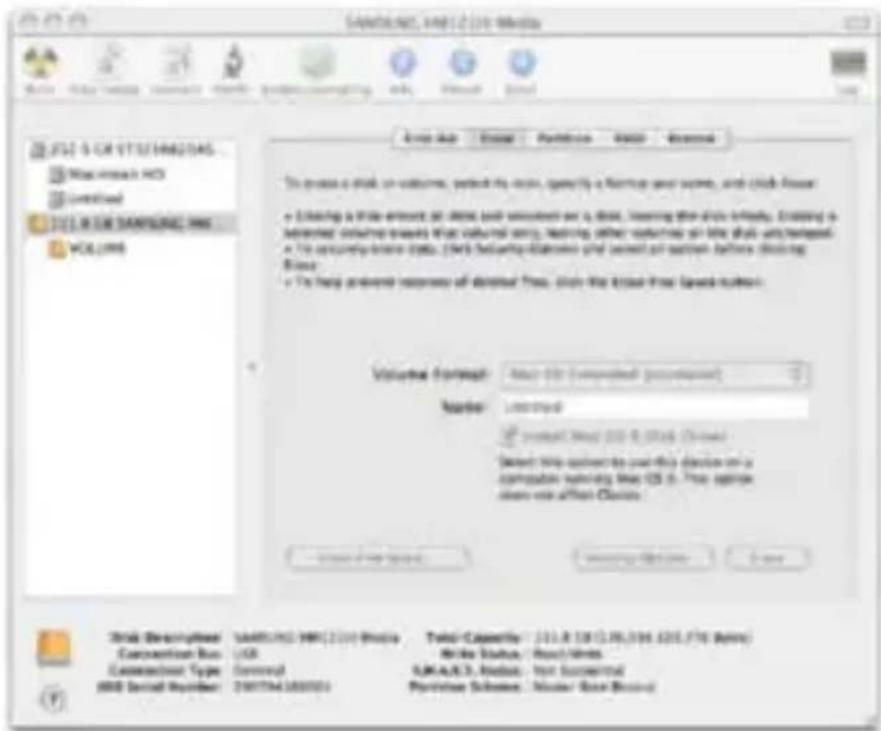
- Choose from the main index the option "Partition".
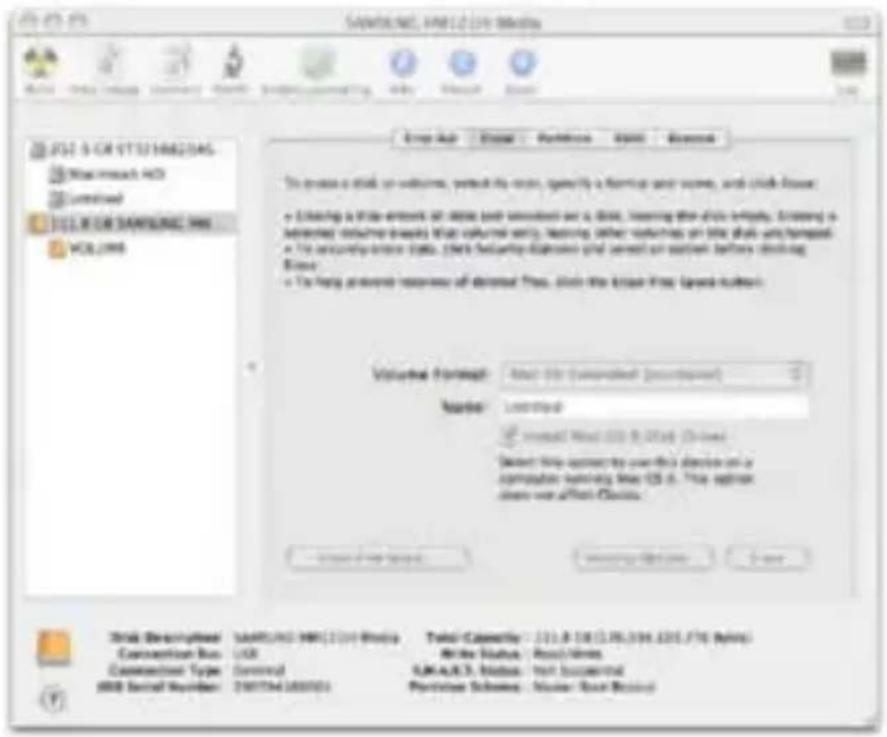
- In this menu you can change partition sizes, delete partitions or create new partitions.
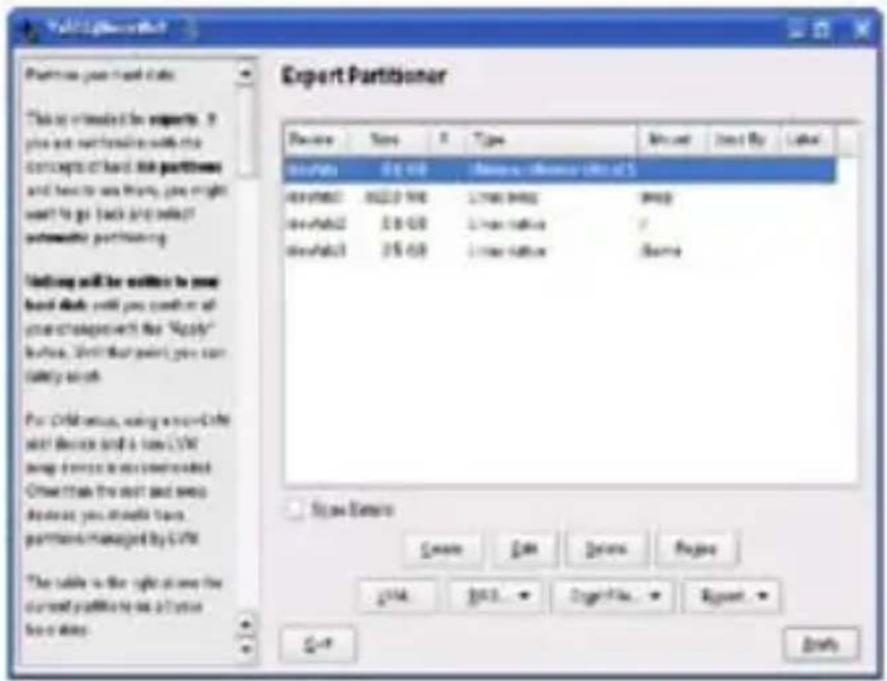
Partitioning / Formatting using Linux
It is possible to divide the hard drive in several partitions. The instruction below is described on the base of YaST and Suse Linux. This procedure is similar under other Linux distributions.
- First open YaST. If necessary, you will need to authenticate yourself.
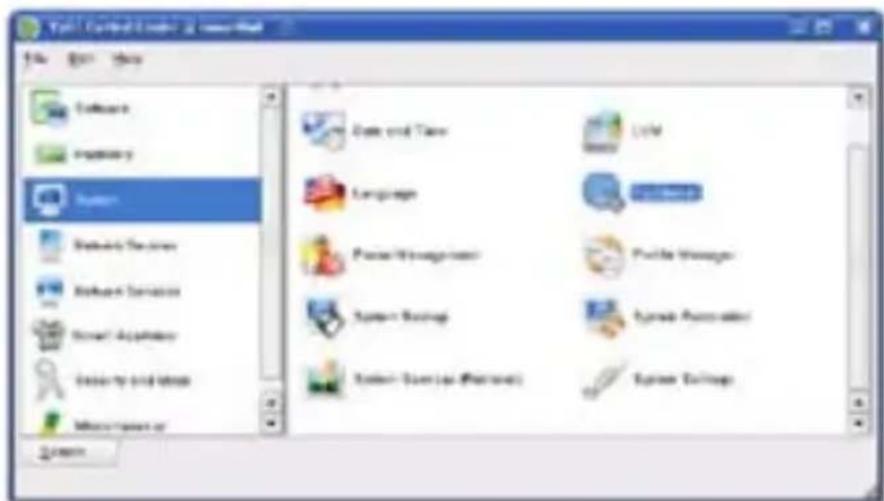
- Choose from the left side "System" and from the right field "Partitioner".
- For security reasons a window will open and you will be asked whether you are familiar with the partitioning. Confirm this with "Yes".
- The volume table of your system will appear.
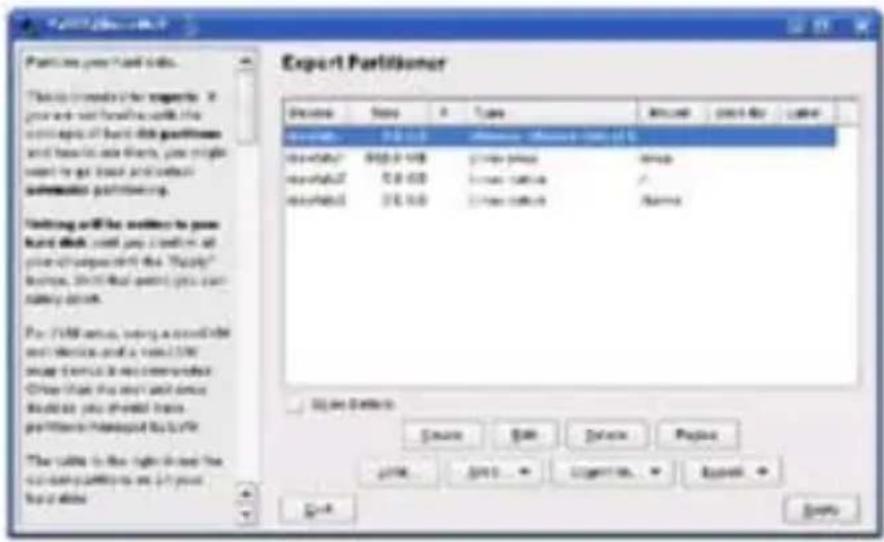
- Now you can choose the desired volume, partition it or edit or delete already existing partitions.
- To delete the standard NTFS partition please click on it and afterwards on "Delete".
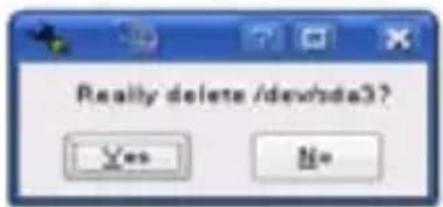
- You will be asked whether you really want to delete the partition. Make sure you have chosen the correct partition and confirm with a click on "Yes".
Note: If you delete the partition, you will delete irrevocably all files stored on it.
- To create a new partition in the free space of your volume click on "Create".
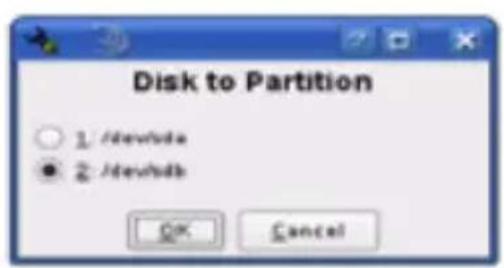
- Choose a volume to create the new partition.
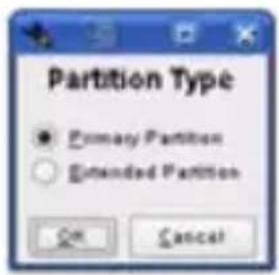
- You will be asked which type of partition you want to create. It is recommended to use “Primary Partition
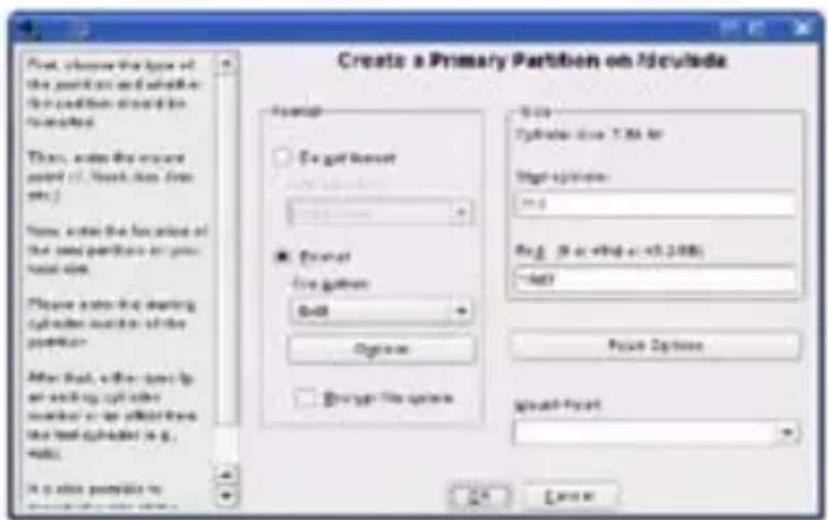
- In this window you decide features of the partition. You can choose between different file systems and sizes and if necessary you can configure a mountingpoint for Linux. Confirm your configuration with "OK".
Note: It is possible to encrypt your hard disk here additionally, but this may reduce the performance.
- Formatting works similarly. Choose the desired partition and click on "Edit".
- Tick on "Formatting" and choose the adequate file-system. Confirm your configurations with "OK".
- Click on "Apply" that your modifications operate.
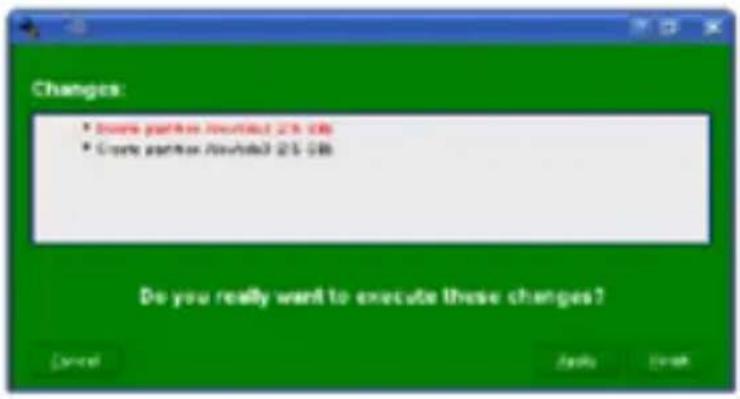
- All modifications will be shown in a new window. Make sure all the modifications are correct and confirm the configurations by clicking on "Apply".
Note: If you are not sure which file system or partition size to choose, we recommend taking the automatically entered values.
The choose of file system
- In the table below you can see the compatibility between operating systems and file systems.
| NTFS F | AT32 H | FS+ EXT3 | ||
| Win 98 X R, W X X | ||||
| Win NT, 2000, ME, XP, Vista | R, W R | W X X | ||
| Mac OS X R R, W R, W X | ||||
| Linux R R, W X R, W | ||||
R - reading W - writing X - no compatibility
With additional programs it could be possible to read or write on file systems, on which it usually is not possible.
The DIGITTRADE Security Hard Disk is at the time of delivery already preformatted in the NTFS file system. In the table above you can see the compatibility of NTFS to your operating system. Should NTFS not be suitable to your operating system, you will have to format the hard drive again (see chapter: “Partitioning / formatting”, p.10).
For windows users we recommend using NTFS. For Mac OS X is HFS+ the most powerful file system and for Linux you should use EXT3. Naturally, it is also possible to format the
DIGITTRADE Security Hard Drive with every other file system. This does not affect the security features. If you want to use the hard drive using different operating systems, we recommend to use the FAT32 file system, since it can be read and written by almost every operating system. However, it will cause reductions in the maximum file size and partition size. Furthermore there will be performance differences.
Technical Specifications
Interface: S-ATA 150
Capacity: 80 GB - 500 GB
Spindle Speed: 5400 RPM
Data transfer rate: USB 2.0 max 480 MBits/s
USB 1.1 max 12 MBits/s
Access Time: 12 ms
Buffer Memory: 8192 KB
Acoustic Idle: 24 dBA
Computers and hard drive manufacturers convert differently from Byte to KByte, MByte and GByte.
Hard drive manufacturers calculate in the metric
system (1 kByte = 10^3 Byte = 1000 Byte) and computers use due to their construction the dual system (1 kByte = 2^10 Byte = 1024 Byte). The outcomes of this are the following differences in the representation of the memory capacity.
| HDD Manufacturer True Capacity | |
| 80 GB 74,51 GB | |
| 160 GB 149,01 GB | |
| 250 GB 232,83 GB | |
| 320 GB 298,02 GB | |
| 500 GB 465,66 GB | |
Only hard drives of leading manufacturers of proprietary goods are assembled.
RFID-Transponder
RFID (Radio Frequency Identification) is the identification via electromagnetically waves. The RFID system contains of a transponder, which is included in an object and a reader for the readout of the transponder identification.
Triple Protection
RFID Access Control
The Access to the DIGITTRADE Security Hard Drive is protected using a 128-Bit encryption according to AES by RFID.
S.M.A.R.T.-Lock Hard Drive Interlock
The enclosure uses the SMART function of the hard disk. It creates independently an ATA password. This ATA protection is activated automatically if the DIGITTRADE Security Hard Drive is locked by the key, unplugged from the computer, it is turned off or if the hard disk is removed out of the enclosure. The deactivation is associated to unlocking the hard drive using the RFID key.
Data Encryption
Data stored on the hard drive will be encrypted additionally using a manufacturer's algorithm to advance the security.
Data Security and Disclaimer
We recommend storing continuously the data saved on the DIGITTRADE Security Hard Drive on other storage media. This will protect you against a total data loss. The DIGITTRADE GmbH is not liable for data loss and thereby emerging costs and damages.
Storage of the Keys
There are two keys included in delivery of the DIGITTRADE Security Hard Drive for the encryption of the data using RFID. The unlocking of the hard drive is only possible with one of these two keys. If a defect or a loss occurs, please contact us immediately. A replacement key will be provided for you with costs. Please keep one of the keys in a safe spot, since it will be needed for the production of the replacement key.
If you lose both of the keys or they are defective, a reproduction of the key will be associated with an explicit higher complexity.
Furthermore it is necessary to send us your fully completed Owner's Certificate. Only with this an abuse of the key reproduction can be excluded.
Please advise us immediately if a loss or theft of your hard drive occurs. Thereby a reproduction of the key can be avoided.
FAQ - Frequently Asked Questions
The system does not identify the hard drive.
Please check whether the hard drive was unlocked by the key enclosed and whether the power button is turned on "AN" (on). Please check also whether the USB cable is connected correctly (see chapter: "Connection to USB 2.0/1.1 port", p.5).
I cannot write any files on the hard drive.
Please check whether the hard drive was formatted with the correct files system for your operating system. The NTFS file system can only be used by Windows users (see chapter: "The Correct File System", p.29).
I lost one or both keys.
Please contact immediately our support:
Telephone: +49/ 345/ 2317353
E-mail: beratung@digittrade.de
For detailed information visit our support center on www.digittrade.de.
We will gladly answer your questions on the telephone: (0049) 345/ 2317353 or by e-mail: beratung@digittrade.de.
WEEE Statement
According to the EC directive, waste electrical and electronic equipment (WEEE) must not be disposed as municipal wastes.
To avoid the spread of the contained fabric components in your environment and to save natural resources we would like to ask you to hand this product after its economic life time only to a collecting point for WEEE in your area.
Thanks to these measures, materials of your product can be reused environmentally friendly.
natural_image
Symbol of a trash bin crossed with two diagonal lines, no text or labels present© 2009 DIGITTRADE GmbH
Deutsch
This user manual is protected by copyright and may not be copied (also not in parts) without a written permission of DIGITTRADE GmbH.
DIGITTRADE GmbH
Ernst-Thälmann-Strasse 39
06179 Holleben Germany
Fon +49/3 45/2 31 73 53
Fax +49/345/6138697
Web www.digittrade.de
E-Mail beratung@digittrade.de