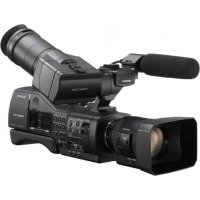
CVX-V18NS - Video camera SONY - Free user manual and instructions
Find the device manual for free CVX-V18NS SONY in PDF.
Download the instructions for your Video camera in PDF format for free! Find your manual CVX-V18NS - SONY and take your electronic device back in hand. On this page are published all the documents necessary for the use of your device. CVX-V18NS by SONY.
USER MANUAL CVX-V18NS SONY
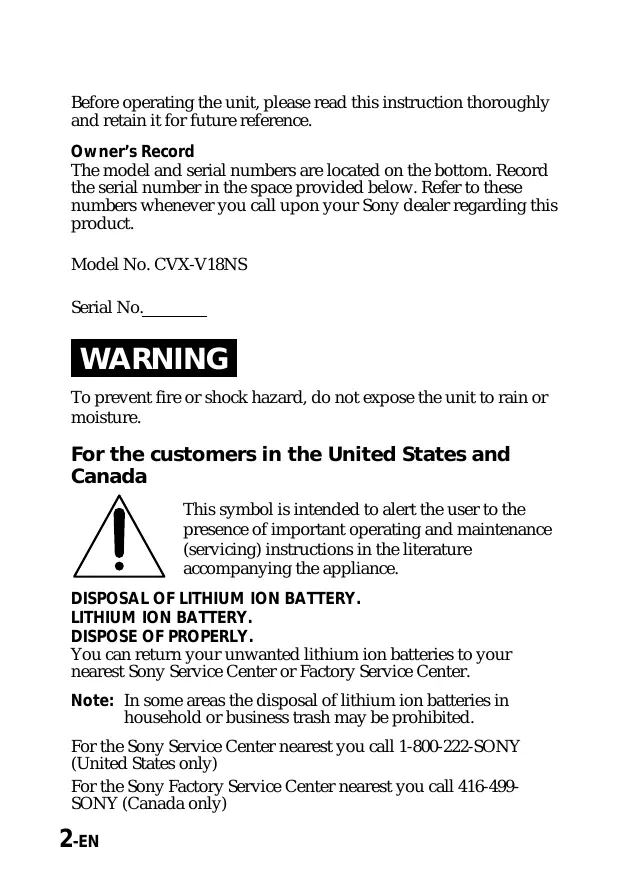
©1999 by Sony Corporation Before operating the unit, please read this instruction thoroughly and retain it for future reference. Owner’s Record The model and serial numbers are located on the bottom. Record the serial number in the space provided below. Refer to these numbers whenever you call upon your Sony dealer regarding this product. Model No. CVX-V18NS Serial No. WARNING To prevent fire or shock hazard, do not expose the unit to rain or moisture. For the customers in the United States and Canada This symbol is intended to alert the user to the presence of important operating and maintenance (servicing) instructions in the literature accompanying the appliance. DISPOSAL OF LITHIUM ION BATTERY. LITHIUM ION BATTERY. DISPOSE OF PROPERLY. You can return your unwanted lithium ion batteries to your nearest Sony Service Center or Factory Service Center. Note: In some areas the disposal of lithium ion batteries in household or business trash may be prohibited. For the Sony Service Center nearest you call 1-800-222-SONY (United States only) For the Sony Factory Service Center nearest you call 416-499SONY (Canada only) 2-EN Caution: Do not handle damaged or leaking lithium ion battery. For the customers in the United States CAUTION You are cautioned that any changes or modifications not expressly approved in this manual could void your authority to operate this equipment. Note: This equipment has been tested and found to comply with the limits for a Class B digital device, pursuant to Part 15 of the FCC Rules. These limits are designed to provide reasonable protection against harmful interference in a residential installation. This equipment generates, uses, and can radiate radio frequency energy and, if not installed and used in accordance with the instructions, may cause harmful interference to radio communications. However, there is no guarantee that interference will not occur in a particular installation. If this equipment does cause harmful interference to radio or television reception, which can be determined by turning the equipment off and on, the user is encouraged to try to correct the interference by one or more of the following measures: – Reorient or relocate the receiving antenna. – Increase the separation between the equipment and receiver. – Connect the equipment into an outlet on a circuit different from that to which the receiver is connected. – Consult the dealer or an experienced radio/TV technician for help. For the customers in Germany Directive: EMC Directive 89/336/EEC. 92/31/EEC This equipment complies with the EMC regulations when used under the following circumstances:
- Light-industry district ATTENTION The electromagnetic fields at the specific frequencies may influence the picture and sound of this camera. 3-EN Features
- Precision CCD with 470,000 pixel for CVX-V18NS and 570,000 pixel for CVX-V18NSP.
- Macro function 10 mm close-up shooting ability.
- The supplied adaptor allows connection to the DSR-V10/V10P VCR.
- Video/audio and S-Video outputs allow connections to other video equipment. 4-EN Table of contents Features .................................................................................................. 4 Identifying the parts ............................................................................. 6 Connections ........................................................................................... 8 Connecting the camera to the main unit .................................... 8 Connecting this unit to the Video Cassette Recorder (VCR) ........................................ 9 Using this unit as a single video camera .................................. 11 Resetting the date and time ............................................................... 14 Recording ............................................................................................. 16 Recording on a VCR .................................................................... 16 Using the zoom feature .............................................................. 19 Using as the NightShot camera ................................................. 21 Using various features ....................................................................... 22 Shooting in the dark (NightShot) .............................................. 22 Adjusting the exposure ............................................................... 23 Making your own title ................................................................ 24 Superimposing a title .................................................................. 25 Selecting the shutter speed ......................................................... 27 Changing the mode settings ...................................................... 29 Selecting the mode setting of each item ................................... 30 Turning off the screen display except date, time and menu ......................................................................... 32 Displaying the date ..................................................................... 32 Displaying the time ..................................................................... 32 Precautions .......................................................................................... 33 Specifications ....................................................................................... 35 5-EN Identifying the parts
6 VIDEO/AUDIO OUTPUT
jacks @¢ Connector 2 EXPOSURE button 7 ZOOM button 8 NEAR/FAR button Camera @∞ Lens 9 FOCUS switch !º Battery pack/adaptor mounting surface !¡ +/– button !™ EXEC button !£ BATT lamp !¢ DISPLAY button !∞ DATE button !§ TIME button !¶ MIC (PLUG IN POWER) jack Connect an external microphone (not supplied). !• NIGHTSHOT switch !ª POWER switch @º POWER lamp 7-EN Connections The DSR-V10/V10P VCR can be connected to this unit. The VCR supplies power to this unit. When using this unit as a single video camera, connect this unit to a TV or VCR using the A/V connecting cable (not supplied). Refer to the operating instructions supplied with the equipment to be connected. Connecting the camera to the main unit Insert the camera plug to the connector on the main unit while aligning the arrow mark of the camera plug and main unit connector. To remove the camera Remove the camera by pulling the plug out while holding the plug lock. If you attempt to remove the camera without holding the plug lock, the plug and connector will be damaged. 8-EN Connecting this unit to the Video Cassette Recorder (VCR) The recommended VCR to be connected to this unit is the Sony DSR-V10/V10P. The DSR-V10 is used in the sample illustration. (1) Open the LCD screen on the VCR and remove the jack cover. (2) Attach the supplied adaptor to the VCR. 9-EN Connections (3) Attach this unit to the supplied adaptor. When removing this unit from the adaptor [a] Slide the RELEASE button on this unit in the direction of the arrow. When removing the adaptor from the VCR [b] Slide the RELEASE button on the adaptor in the direction of the arrow. [a] [b] 10-EN Notes
- When this unit is not connected to the VCR, be sure to attach the jack cover on the VCR for jack protection. The procedure for attaching the jack cover is same as the procedure for attaching the adaptor.
- The camera cable and the extension cable (not supplied) can only be connected to this model. Never connect to any other equipment. Using this unit as a single video camera (1) Attach a charged battery pack (not supplied) to this unit. The AC-V700 or AC-VQ800 power adaptor can be used to supply power from an AC power source when using the DK-415 connecting cable. 11-EN Connections (2) Connect other video equipment using the A/V connecting cable (not supplied). Use an appropriate audio/video connecting cable to connect this unit to other video equipment. If the other video equipment has an S VIDEO jack, connect the S VIDEO jack instead of the yellow (video) jack. A clearer picture can then be obtained. VIDEO OUTPUT jack S VIDEO jack
OUTPUT jacks : Signal flow S VIDEO connecting cable (not supplied) To the S VIDEO input jack To the video/audio input jacks Other equipment 12-EN A/V connecting cable (not supplied) Notes
- If howling is heard from the speakers when using an external microphone, lower the volume level of the connected equipment or move the microphone away from the speakers.
- When using the extension camera cable (not supplied), supply power with the AC power adaptor or DC power adaptor. Do not use the battery pack.
- Up to 3 extension camera cables (1 cable: 10 m, not supplied) can be connected together to form one cable. The total length between the head of camera lens and the end of extension cables is approx. 33 m.
- When removing the camera, be sure to pull the plug out while holding the plug lock. Otherwise, the plug and connector will be damaged. 13-EN Resetting the date and time You can reset the date and time in the menu system. (1) Press MENU to display the menu. (2) Press +/– to select ETC, then press EXEC. (3) Press +/– to select CLOCK SET, then press EXEC. (4) Press +/– to adjust the desired year, then press EXEC. (5) Set the month, day, hour and minute by pressing +/– and EXEC. (6) Press MENU to erase the menu display. 1, 6 (MENU) 2, 3, 4, 5 (+/–, EXEC) To correct the date and time setting Repeat the above procedure. To check the preset date and time Press DATE to display the date indicator. Press TIME to display the time indicator. When you press the same button again, the indicator goes off. 14-EN The year changes as follows:
1999 ˜ 2000 N · · · · n 2029 Notes on the time indicator CVX-V18NS: The internal clock of this unit operates on a 12-hour cycle.
- 12:00 AM Stands for midnight.
- 12:00 PM Stands for noon. CVX-V18NSP: The internal clock of this unit operates on a 24-hour cycle. 15-EN Recording Pictures shot with this unit can be recorded onto a VCR, etc. Refer to the operating instructions supplied with the video equipment to be connected. Recording on a VCR The recommended VCR to be connected to this unit is the Sony DSR-V10/V10P. The DSR-V10 is used in the sample illustration. (1) When recording sound, connect an external microphone (not supplied). Connect an external microphone to the MIC (PLUG IN POWER) jack. The MIC (PLUG IN POWER) jack can also be connected to the plug-in-power microphone. MIC (PLUG IN POWER) jack External microphone (not supplied) 16-EN (2) Turn on the power of the DSR-V10/V10P. The POWER lamp on the DSR-V10/V10P lights up. (3) Turn on the power of this unit. The POWER lamp on this unit lights up. (4) Insert a cassette into the DSR-V10/V10P and start recording.
- Contents of the recording cannot be compensated if recording is not made due to a malfunction of this unit, video tape, etc.
- When using this unit connected to a VCR, note that all the displayed characters and icons will be recorded. 17-EN Recording Recording time with the battery pack Possible usage time (min.) Battery pack Using with the DSR-V10/V10P Stand alone use NP-F750 80 (70) 610 (550) NP-F950 130 (115) 930 (830) When using a fully charged battery pack (Full charge), the numbers indicate the remaining recording time . When using a normally charged battery pack (Normal charge), the numbers in parentheses indicate the remaining recording time. Notes on the battery pack
- When the battery runs low, the BATT lamp lights up, and when the battery is empty, the BATT lamp goes off.
- When the power of the battery pack attached to the video equipment which is connected to this unit runs low, the POWER lamp on this unit goes off and then the power turns off automatically.
- When the NP-F330, NP-F530 or NP-F550 is used, the recording time may be shorter, or recording may not be performed. We recommend using a battery pack with a longer battery life.
- Depending on the type of battery, the BATT lamp may not light even when the battery runs low. 18-EN Using the zoom feature This camera is equipped with zoom. When using the zoom, adjust manually. “T” side: for telephoto (subject appears closer) “W” side: for wide-angle (subject appears farther away) ZOOM When you shoot a subject using a telephoto zoom If you cannot get a sharp focus while in extreme telephoto zoom, move ZOOM to the “W” side until the focus is sharp. You can shoot a subject that is at least about 2 5/8 feet (about 80 cm) away from the lens surface in the telephoto position, or about 1/2 inch (about 1 cm) away in the wide-angle position. 19-EN Recording Notes on digital zoom
- More than 18x zoom is performed digitally, and the picture quality deteriorates as you go toward the “T” side. If you do not want to use the digital zoom, set the D ZOOM function to OFF in the menu system.
- The right side [a] of the power zoom indicator shows the digital zooming zone, and the left side [b] shows the optical zooming zone. If you set the D ZOOM function to OFF, the [a] zone disappears.
Using as the NightShot camera The NightShot function enables you to shoot a subject in a dark place. Use this function to record a clear picture without light. This function may record picture nearly in monochrome. Using the NightShot Light When you set IR LIGHT to ON in the menu system, the picture will be more clear. IR Light rays are infrared and are therefore invisible. The maximum range of IR Light is about 16 feet (about 5 meters) when SLOW SHTR (SHUTTER) is set to MANUAL. When you set SLOW SHTR to AUTO in the menu system, the range of IR light is extended. Notes on the NightShot
- When you keep setting NIGHTSHOT to ON in normal recording, picture may be recorded in incorrect/unnatural color.
- If focusing is difficult with the autofocus mode when using the NightShot function, focus manually. 21-EN Using various features Shooting in the dark (NightShot) Slide NIGHTSHOT to ON. appears on the monitor screen. NIGHTSHOT To cancel the NightShot function Slide NIGHTSHOT to OFF. Notes on the Nightshot
- You cannot adjust the exposure while using the Nightshot function.
- You cannot use the shutter with a shutter speed higher than the normal speed. (Normal shutter speed: 1/60 for NTSC or 1/50 for PAL). 22-EN Adjusting the exposure Adjust the exposure manually under the following cases. - The background is too bright (back lighting) - Insufficient light: most of the picture is dark - Bright subject and dark background - To record the darkness faithfully (1) Press EXPOSURE. (2) Press +/– to adjust the brightness. 1 (EXPOSURE) 2 (+/–) To return to automatic exposure mode Press EXPOSURE again. Shooting with the sun behind the subject If the light source is behind your subject, or in the following situations, the subject will be recorded too dark.
- The subject is indoors and there is a window behind the subject.
- Bright light sources are included in the scene.
- When shooting a person wearing white or shiny clothes in front of a white background, the face will be recorded too dark. 23-EN Using various features Making your own title You can make your own title of 20 characters. (1) Press TITLE to display the title menu. (2) Press +/– to select , then press EXEC. (3) Press +/– to select the column of the desired character, then press EXEC. (4) Press +/– to select the desired character, then press EXEC. (5) Repeat step 3 and 4 until you finish the title. (6) For finishing the titling work, press +/– to select [SET], then press EXEC. 1 (TITLE) 2, 3, 4, 5, 6 (+/–, EXEC) Note You can not enter over 20 characters title. To delete a title In step 3, press +/– to select [M] then press EXEC. The last character is erased. Repeat this step until all characters are deleted. 24-EN Superimposing a title You can select the color and position of the title to superimpose on the screen or even make it blink. (1) Press TITLE to display the title menu. (2) Press +/– to select , then press EXEC. (3) Press +/– to select the color or position, then press EXEC. (4) Press +/– to select the desired item, then press EXEC. (5) Repeat step 3 and 4 until the title is arranged as desired. (6) Press EXEC again to complete the setting. (7) When you want to stop recording the title, press TITLE. 1, 7 (TITLE) 2, 3, 4, 5, 6 (+/–, EXEC) 25-EN Using various features Note on superimposing a title If you have not created a custom title, “– – – – ...” appears on the monitor screen. Title color changes as follows :
WHITE ˜ YELLOW ˜ VIOLET ˜ RED ˜ CYAN
˜ GREEN ˜ BLUE Title positions You can select from among 11 positions vertically or 24 positions horizontally. Title blinking selection changes as follows: ON˜OFF Notes on the title
- Depending on position of the title, both of date and time or either of them is not displayed.
- When a long title is positioned on the right side of the screen, the whole title may not be completely displayed. 26-EN Selecting the shutter speed The shutter speed can be selected using the SHUTTER button. (1) Press SHUTTER. (2) Press +/– to select the shutter speed. 1 (SHUTTER) 2 (+/–) To adjust the shutter speed automatically Press SHUTTER again. 27-EN Using various features CVX-V18NS CVX-V18NSP SETTING SHUTTER SPEED SETTING SHUTTER SPEED
1/10000 28-EN Changing the mode settings You can change the mode settings in the menu system to further enjoy the features and functions of the camera. (1) Press MENU to display the menu. (2) Press +/– to select the desired icon in the left side of the menu, then press EXEC. (3) Press +/– to select the desired item, then press EXEC. (4) Press +/– to select the desired mode, and press EXEC. If you want to change the other modes, repeat steps 3 and 4. If you want to change the RETURN and press EXEC, other items, select then repeat steps from 2 to 4. (5) Press MENU or select display. icon to erase the menu 1, 5 (MENU) 2, 3, 4 (+/–, EXEC) 29-EN Using various features Selecting the mode setting of each item CAMERA1 SET menu D ZOOM
- Switches the digital zoom ON or OFF.
- Switch ON when using the digital zoom. The digital zoom will enlarge any picture which cannot be sufficiently enlarged with the normal zoom. However, note that the picture quality deteriorates when using the digital zoom compared with the normal zoom. AF SENS.
- Switches the auto focus sensor setting to HIGH or LOW.
- Switch to HIGH to record fast-moving subjects clearly. SLOW SHTR
- Switches the SLOW SHUTTER setting to MANUAL or AUTO.
- Switch to AUTO to record subjects in dark environments clearly. IR LIGHT
- Switches the IR LIGHT ON or OFF.
- Switch ON to record subjects in dark environment clearly when using the NIGHTSHOT function without lighting. 30-EN CAMERA2 SET menu STEADYSHOT
- Switches the STEADYSHOT ON or OFF.
- Switch ON to reduce camera shake even when using the zoom function. MIRROR
- Switches the MIRROR mode ON or OFF.
- Switch ON to reverse left and right. 16:9 WIDE
- Toggles the ratio of the monitor screen between OFF, CINEMA and 16:9 FULL.
- CINEMA Pictures recorded on CINEMA will appear normal on a wide-screen TV however, when played on a normal-screen TV, black bands will appear across the top and bottom of the screen.
- 16:9 FULL Pictures recorded on 16:9 FULL will appear normal on a wide-screen TV however, when played on a normal-screen TV, the picture will appear horizontally compressed. ETC menu CLOCK SET
- Sets the built-in clock. 31-EN Using various features Turning off the screen display except date, time and menu Press DISPLAY. To resume the screen display Press DISPLAY again. Displaying the date Press DATE. To turn off the date Press DATE again. Displaying the time Press TIME. To turn off the time Press TIME again. DISPLAY DATE TIME 32-EN Precautions On the jacks and cords
- Be sure that nothing metallic comes into contact with the metal part of the jacks. If this happens, a short may occur and the unit may be damaged.
- Always clean the jacks.
- Do not forcibly pull or tug on the cord. On usage and storage
- Never leave the unit exposed to high temperatures, such as near a heater, in a car parked in the sun or under direct sunlight. This may cause the casing to deform, and the unit to malfunction.
- Do not get sand or dust into the unit. When you use the unit on a sandy beach or in a dusty place, protect it from the sand or dust. Sand or dust may cause the unit to malfunction, and sometimes this malfunction cannot be repaired.
- Keep the unit away from strong magnetic fields. Recording may not perform normally.
- Do not operate the unit for long periods of time tightly confined, such as wrapped in a bag. Doing so may cause heat to build up and result in malfunction of the unit. Brightness of the subject If the brightness of the subject exceeds the illumination range, the image may not be displayed clearly. Prohibition on inappropriate usage Do not focus on a stationary or bright subject for a long period of time. The CCD color filter may be damaged. Transportation Do not aim the lens towards a strong light source, such as the sun while transporting. The CCD color filter may be damaged. 33-EN Precautions On shooting If you aim the lens towards a strong light source, such as the sun, a shadow or "ghost" may appear in the picture. Care of this unit Clean the unit body with a cloth lightly moistened with water, and then wipe the moisture with a dry soft cloth. 34-EN Specifications System Video signal CVX-V18NS: NTSC color CVX-V18NSP: PAL colour Image device 1/4 inch color CCD, CVX-V18NS: 470,000 pixel (total) CVX-V18NSP: 570,000 pixel (total) Lens f=4.1-73.8 mm, x18 power zoom F1.4-2.9 filter ø37mm Minimum illumination
0 lux (when using IR light) Illumination range
Recommended illumination more than 100 lux Power requirement
Power consumption approx. 2.2 W When using IR light: approx. 3.2 W Operating temperature 0ºC to 40ºC (32ºF to 104ºF) Storage temperature –20ºC to +60ºC (–4ºF to 140ºF) Dimensions (w x h x d) Camera: approx. 63 x 66 x 115 mm (2 1/2 x 2 5/8 x 4 5/8 in.) Main unit: approx. 50 x 59 x 110 mm (2 x 2 3/8 x 4 3/8 in.) Cord length approx. 3 m Mass Camera: approx. 343 g (12 oz) Main unit: approx. 153 g (5 oz) MIC input jack Stereo minijack 0.388 mV Low impedance with DC 2.5 to
kilohms Output jacks Video output Phono jack (1) Luminance signal: 1 Vp-p, 75 ohms, unbalanced Audio output Phono jacks (2: stereo L and R) 327 mV (at output impedance 47 kilohms), impedance less than