
CDR800 - Cd player/recorder PHILIPS - Free user manual and instructions
Find the device manual for free CDR800 PHILIPS in PDF.
| Product Type | CD Player/Recorder |
| Dimensions (W × H × D) | 435 × 122 × 347 mm |
| Weight | 5.0 kg |
| Power Consumption | 18 W (on), < 0.65 W (standby) |
| Frequency Response | 2 Hz – 22,050 Hz |
| Signal-to-Noise Ratio (playback) | 115 dB (A-weighted) |
| Dynamic Range (playback) | 98 dB |
| Total Harmonic Distortion (playback) | -96 dB |
| Signal-to-Noise Ratio (recording) | 94 dB |
| Dynamic Range (recording) | 94 dB |
| Laser Type | GaAlAs semiconductor laser |
| Laser Wavelength | 775–795 nm (at 25°C) |
| Laser Output Power | 2.5 mW (playback), 35 mW (write) |
| Optical Digital Input | 12–96 kHz |
| Compatible Discs | Audio CD, CD-R, CD-RW, MP3 (CD-ROM with .mp3 files) |
| Main Functions | DLR Recording, Automatic Level Control (ALC), Title Programming, CD Text Editing, A-B Loop Editing, Random and Repeat Playback |
| Maintenance and Cleaning | Soft, slightly damp, lint-free cloth; do not use cleaning agents |
| Safety | Invisible laser radiation when open; do not open the casing (risk of electric shock) |
| Included Accessories | 2 analog audio cables, power cord, 2 AA batteries, remote control |
| Operating Temperature | 5–35°C |
Frequently Asked Questions - CDR800 PHILIPS
User questions about CDR800 PHILIPS
0 question about this device. Answer the ones you know or ask your own.
Ask a new question about this device
Download the instructions for your Cd player/recorder in PDF format for free! Find your manual CDR800 - PHILIPS and take your electronic device back in hand. On this page are published all the documents necessary for the use of your device. CDR800 by PHILIPS.
USER MANUAL CDR800 PHILIPS
Audio CD Recorder / 3 CD Changer
text_image
CDR-800Important notes for users in the U.K.
Mains plug
This apparatus is fitted with an approved moulded 13 Amp plug. To change a fuse in this type of plug proceed as follows:
1 Remove fuse cover and fuse.
2 Fix new fuse which should be a BS1362 5 Amp, A.S.T.A. or BSI approved type.
3 Refit the fuse cover.
If the fitted plug is not suitable for your socket outlets, it should be cut off and an appropriate plug fitted in its place.
If the mains plug contains a fuse, this should have a value of 5 Amp. If a plug without a fuse is used, the fuse at the distribution board should not be greater than 5 Amp.
Note: The severed plug must be disposed to avoid a possible shock hazard should it be inserted into a 13 Amp socket elsewhere.
How to connect a plug
The wires in the mains lead are coloured with the following code: blue = neutral (N), brown = live (L).
As these colours may not correspond with the colour markings identifying the terminals in your plug, proceed as follows:
- Connect the blue wire to the terminal marked N or coloured black.
- Connect the brown wire to the terminal marked L or coloured red.
- Do not connect either wire to the earth terminal in the plug, marked E (or e) or coloured green (or green and yellow).
Before replacing the plug cover, make certain that the cord grip is clamped over the sheath of the lead - not simply over the two wires.
Copyright in the U.K.
Recording and playback of material may require consent. See Copyright Act 1956 and The Performer's Protection Acts 1958 to 1972.
Norge
Read carefully the information located at the back plate of your CD recorder/player and enter below the Serial N°. Retain this information for future reference.
Model N°. CDR800
Serial N°....
Index
Enlish 4
Fraçais 26
Español 48
Deutsch 71
Addendum CDR-800 / CDR-802
| The following text contains updated information in addition to the supplied instruction manual. | |
| Loading discs, page 13 | |
| MP3 discs only | When loading an MP3-CD, there will be no upcounting of tracks and the volume name will not be shown.When displaying album or track names, [ ] and the disc tray number or [ ] are not displayed (in order to display the name better). |
| Changing discs during play/recording | It is not possible to open the CD changer during recording. |
| Playing, page 13 | |
| Playing | During playback of an MP3 disc, pressing DISPLAY will display the album number, track number and track name.When playback of an MP3 disc is stopped, [ ] and the disc tray number or [ ] are not displayed but only the first track name of the current album (in order to display the name better). |
| Playing, page 14 | |
| MP3 Disc navigation | During playback, press DISPLAY to display the album number, track number and track name. |
| Track selection and playback | When rotating the ◀ EASY JOG ►, the display shows TRACK together with the track number. |
| Playing, page 15 | |
| Shuffle and repeat | Please ignore the note about MP3 discs during shuffle play.REPEAT DISC is not possible for an MP3 disc.REPEAT TRACK is not possible during SHUFFLE. |
| Programming, page 16 | |
| Programming track numbers | A program with MP3 tracks can only be created from one CD. |
| About recording, page 17 | |
| Adjusting the record level | The record level from the internal changer can only be adjusted during recording. |
| Special features, page 23 | |
| Text edit (on CD recorder only) - Deleting and substituting a characterYou do not have to press YES to confirm deleting or substituting a character. | |
Addendum CDR-800 / CDR-802
Environmental information ....5
Specifications ....5
Supplied accessories....5
Discs for recording....5
Discs for playback....5
Some words about MP3....6
Maintenance....6
Disc handling 6
Controls 7
Display
Display indications....8
Connections....9
Installation
Setup recommendations....9
Connections general 9
Analog connections....10
Digital connections....10
Power supply/Mains....11
Demo mode 11
Remote control
Inserting batteries in the remote control....12
Remote control commands....12
Loading discs....13
Playing
Playing 13
Track selection and searching....14
MP3 Disc navigation....14
Shuffle and repeat....15
CD text display....15
Programming
Programming track numbers....16
Changing a program....16
Clearing a program....16
Making a program for recording....16
About recording
Basic information 17
Direct Line Recording (DLR)....17
Auto Level Control (ALC)....17
Adjusting the record level 17
Internal recording
Recording single track....18
Recording an entire CD....18
Recording a program....18
Further recording possibilities....19
External recording
Analog or digital recording....20
Automatic track increment....20
Recording with automatic start....20
Manual recording....21
(Un)finalizing, erasing
Finalizing CDR & CDRW discs....21
Unfinalizing CDRW discs....22
Erasing from a CDRW disc 22
Special features
Text edit (on CD recorder only) 23
A-B editing (on CD changer only) 24
Troubleshooting 25
Environmental information
All redundant packing material has been omitted. We have done our utmost to make the packaging easily separable into three mono materials: cardboard (box), polystrene foam (buffer) and polyethylene (bags, protective foam sheet).
Your set consists of materials which can be recycled if disassembled by a specialized company. Please observe the local regulations regarding the disposal of packing materials, exhausted batteries and old equipment.
As an ENERGY STAR® partner, Philips has determined that this product meets the ENERGY STAR® guidelines for energy efficiency.

Specifications
Subject to modification without notice.
General
Power consumption....18 W
Power consumption in Standby ....../< 0.65 W
Operating temperature....5-35°C
Weight....5.0 kg
Dimensions....435 × 347 × 122 mm
Audio
Frequency response.....2Hz-22.050 Hz
Playback S/N (A-weighted)....115 dB
Playback S/N.... 110 dB
Playback Dynamic Range....98 dB
Playback Total Harmonic Distortion....- 96 dB
Channel separation....105 dB
Recording S/N (A-weighted) 94 dB
Recording S/N digital without SRC......equal to source
Recording Dynamic Range 94 dB
RecordingTotal Harmonic Distortion + noise......- 86 dB
Digital/Optical input....12-96 kHz
Laser
Type......Semiconductor laser GaAlAs
Wave length....775-795 nm (at 25°C)
Output power......2.5 mW (Read,) 35 mW (Write)
Beam divergence....60 degrees
The type plate is located at the back of the set.
This product complies with the radio interference requirements of the European Union.
CAUTION
Use of controls or adjustments or performance of procedures other than herein may result in hazardous radiation exposure or other unsafe operation.
Supplied accessories
- 2 Analog audio cables (with red and white plugs)
- Mains cable
- 2 batteries for the remote control, size AA
- Remote control
Discs for recording
For recording, make sure to use special audio discs only. These discs are marked with “Digital Audio” and the logos shown below.
There are two different types of audio discs for the use on this CD recorder:
- CD-Audio Recordable (CDR) discs
These discs can be recorded on once and play in all standard CD players and CD recorders, when they are finalized.

- CD-Audio ReWritable (CDRW) discs
These discs can be recorded on, erased and re-recorded many times and play in CDRW compatible CD players and CD recorders, when they are finalized.

– All Philips CD players and CD recorders with the sticker shown here are CDRW compatible.

To ensure proper working of the set we recommend the use of Philips audio CDR and audio CDRW discs only.
Note: Do not use a computer CDR or CDRW as recording will not work!
Recording is permissible insofar as copyright or other rights of third parties are not infringed upon.
In certain countries including the UK and certain Commonwealth countries, use of the product as shown or suggested in this user manual may require the permission of copyright holders.
Discs for playback
For playback on this CD changer and CD recorder you can use following audio discs:
- All pre-recorded audio CDs
- All audio CDR and audio CDRW discs
- MP3-CDs (CD-ROMs with MP3 tracks) - make sure filename ends with .mp3
Note: CDR(W) discs that are not finalized can only be played in the CD recorder tray.
CAUTION
INVISIBLE RADIATION WHEN OPEN.
AVOID EXPOSURE TO BEAM.
Note: This warning is located inside the enclosure.
General information
Some words about MP3
The revolutionary new music compression technology MP3 (MPEG Audio Layer-3) enables to shrink down original digital audio sound data with a factor of up to 10 without losing significant sound quality. This allows you to record up to 10 hours of CD-like quality music on a single CD-ROM.
Making your own MP3-CD
Basically there are two sources for MP3 music on CD. You can either create (“rip”) it from your own digital audio CDs or download legal MP3 music from the Internet.
Record (“burn”) the music from your hard disc on CD-ROM with your home PC (make sure filename ends with .mp3). Once finished, you can play your MP3-CD on this set and enjoy the music.
Data rate
The data rate is of great importance with MP3. It indicates how fast bits are transferred.
Stereo music on a CD shows a data rate of about 1400 kilobits per second (kbps). To achieve a good MP3 quality a bit rate of 128 kbps is recommended.
As the encoding rate is user-selectable, make sure to reach this data rate for MP3 as recordings less than 128 kbps will suffer from a degradation in sound quality.
Recording
Downloading MP3 files from the Internet or ripping songs from your own digital audio CDs is a delicate process, also influenced by the quality of the encoder program and speed of your PC. This may sometimes result in “drop-outs” which you may experience while listening to your MP3-CD.
In any case make sure to use a recording speed not faster than indicated on the CD-ROM and avoid running other programs simultaneously on your PC during the recording process.
It is not possible to "burn" an MP3-CD on this CD recorder.
It is not possible to record from an MP3-CD.
Supported formats
Following formats are supported on this
CD recorder/changer:
- Disc format: ISO 9660 or Joliet
- Filename: .mp3 (tracks), .m3u or .pls (playlists)
- Bit rate: 32–320 kbps (128 kbps advised) or variable bit rate
Note: Use the ISO 9660 disc format when burning the CD-ROM. UDF disc format (e.g. "DirectCD" or "WinOnCD") is not supported.
Maintenance
Clean the set with a soft, slightly dampened lint-free cloth. Do not use any cleaning agents as they may have a corrosive effect.

text_image
Warning symbol with crossed-out black lines and plastic bottle illustrationsDo not expose the set, batteries or CDs to humidity, rain, sand or excessive heat (caused by heating equipment or direct sunlight).
The lenses may cloud over when the set is suddenly moved from cold to warm surroundings. Playing a CD(RW) is not possible then. Leave the set in a warm environment until the moisture evaporates.
Disc handling
For recording it is very important to use dust and scratch free discs.
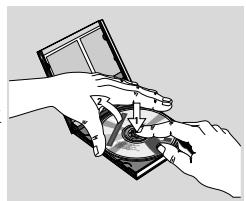
To take a CD(RW) out of its box easily, press the centre spindle while lifting the CD(RW). Always pick up a CD(RW) by the edge and put it back after use. Never write on a CD or attach a sticker to it. Write only on the printed side of a CDR or CDRW, and only with a soft felt-tipped
natural_image
Illustration of hands using a handheld device to adjust or install a circular component (no text or symbols visible)To clean a CD(RW), wipe it in a straight line from the centre toward the edge using a soft, lint-free cloth. A cleaning agent may damage the disc!
natural_image
Illustration of a hand pressing a button on a circular object (no text or symbols)
text_image
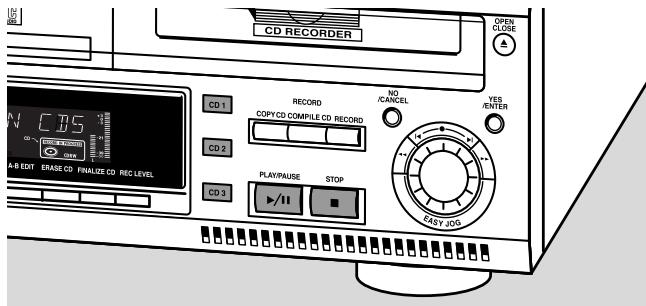
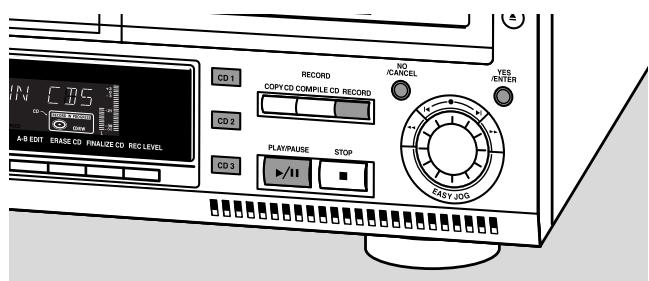
PHILIPS CD RE CORDER OPEN CLOSE POWER AUX CD-R PHONES LEVEL MAKE OWN CBS DISPLAY SHuffle PROGRAM CD TEST/ A-B EXIT ERASE CD FINALIZE CD REC LEVEL CD1 CD2 CD3 RECORD COPY CD COMPILE CD RECORD NO/CANCEL PLAY/PAUSE STOP REC CD5 YES/GENERAL 15 16 17 18 19 20 21 22 23 24 25 26 27 28 29Controls
General
① POWER
switches the CD recorder/changer ON and OFF
STANDBY indicator
lights up when the set is in Standby
④ AUX
selects external input
⑤ CDR
selects CD recorder
⑥ Display
information screen
⑧ IR sensor
receives signals from the remote control
⑨ CD 1,2,3
selects CD changer and switches to CD 1, 2 or 3
⑪ NO/CANCEL
cancels a selection
⑭ YES/ENTER
confirms a selection
15 PHONES
socket for headphones
⑯ LEVEL
headphones volume control
⑰ DISPLAY
selects display information
⑱ SHUFFLE
plays discs in changer and recorder or program in random order
⑲ PROGRAM
opens/closes program memory
⑳ CD TEXT/edit
- makes CD text scroll over display once
- opens Text Edit mode
25 PLAY/PAUSE ▶/II
starts play/interrupts play/recording
②6 STOP ■
stops playback or recording
27
- searches backward - controls the cursor in various menus
28 EASY JOG
selects next/previous menu item or track
29
- searches forward - controls the cursor in various menus
CD changer
② CD CHANGE
selects next disc in CD changer
③ OPEN/CLOSE ▲
opens/closes changer tray
⑦ Disc tray
②1 A-B EDIT
opens A-B Edit mode to create your own 'tracks'
CD recorder
⑩ Recording keys
COPY CD - selects high speed with auto finalize recording mode
COMPILE CD - selects high speed recording mode/opens program memory
RECORD - selects other recording modes
⑫ Disc tray
⑬ OPEN/CLOSE ▲
opens/closes recorder tray
⑳ ERASE CD
erases recordings on CDRW
23 FINALIZE CD
finalizes/unfinalizes disc
⑳ REC(ording) LEVEL
enables the EASY JOG key to set the recording level control
Display
Display indications
General
flowchart
graph TD
    A["1 STEP"] --> B["2 O"]
    B --> C["3 TOTAL"]
    C --> D["4 TOTAL"]
    D --> E["5 RECORD"]

    subgraph Flash Elements
        F["6 DISC"] --> G["7 Shuffle PROGRAM"]
        G --> H["8 Repeat ALL DISC"]
        H --> I["9 CD TEXT EDIT TRACK"]
        I --> J["10 MP 3 PLAYLIST X SPEED"]
        J --> K["11 CD DIG OPT LINE"]
        K --> L["12 RECORD IN PROGRESS FINALIZE CDRW"]
    end

    style F fill:#f9f,stroke:#333
    style G fill:#ccf,stroke:#333
    style H fill:#cfc,stroke:#333
    style I fill:#fcc,stroke:#333
    style J fill:#cff,stroke:#333
    style K fill:#ffc,stroke:#333
    style L fill:#fcf,stroke:#333
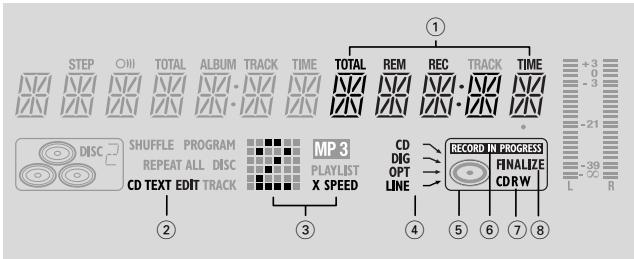
① STEP
indicates the number of tracks in a program
② O)))
remote control active
③ TOTAL TIME - total time of recording source
TRACK - track number
ALBUM - album number (MP3)
TOTAL TRACK - total amount of tracks on the disc
④ TRACK TIME - track time
REM TRACK TIME - remaining track time
TOTAL REM TIME - total remaining time
⑤ L/R ==
indicates the audio signal level

- CD(s) inserted in compartment 1, 2 and/or 3
⑦ SHUFFLE - plays tracks in random order
PROGRAM - flashes during programming/ lights in program mode
REPEAT ALL - lights up when all tracks on all discs in the set are repeated/when a program is repeated
REPEAT DISC - lights up when a complete disc is repeated
REPEAT TRACK - lights up when a track is repeated CD TEXT - CD TEXT available
⑧ Status matrix
- playback
- pause
- fast search forward
- fast search backward
- stop
⑨ MP3
CD selected contains MP3 files
⑩ PLAYLIST
playlist of MP3 album selected
⑪ DIG(ital) - coaxial digital input selected
OPT(ical) - optical digital input selected LINE - analog line input selected
⑫ - CD inserted
CD Changer
text_image
STEP ○) TOTAL ALBUM TRACK TIME TOTAL REM REC TRACK TIME +3 -3 -21 -39 L -57 R DISC SHUFFLE PROGRAM MP 3 CD REPEAT ALL DISC PLAYLIST FINALIZE CD TEXT EDIT TRACK X SPEED OPT CDRW LINE LINE LINE LINE LINE LINE LINE LINE LINE LINE LINE LINE LINE LINE LINE LINE LINE LINE LINE LINE LINE LINE LINE LINE LINE LINE LINE LINE LINE LINE LINE LINE LINE LINE LINE LINE LINE LINE LINE LINE LINE LINE LINE LINE LINE Line① - CD changer selected
② DISC ☐ - disc in play or selected
③ EDIT TRACK
lights up when the A-B- Edit feature is activated
CD recorder
flowchart
graph TD
    A["STEP"] --> B["○"]
    B --> C["TOTAL"]
    C --> D["ALBUM"]
    D --> E["TRACK"]
    E --> F["TIME"]
    F --> G["TOTAL"]
    G --> H["REM"]
    H --> I["REC"]
    I --> J["TRACK"]
    J --> K["TIME"]
    K --> L["+3"]
    L --> M["-3"]
    M --> N["-21"]
    N --> O["L"]
    P["CD TEXT EDIT TRACK"] --> Q["CD DIG OPT LINE"]
    Q --> R["RECORD IN PROGRESS"]
    S["MP 3 PLAYLIST X SPEED"] --> T["LINE"]
    U["SHUFFLE PROGRAM REPEAT ALL DISC"] --> V["CD TEXT EDIT TRACK"]
    W["①"] --> X["②"]
    X --> Y["③"]
    Y --> Z["④"]
    Z --> AA["⑤"]
    AA --> AB["⑥"]
    AB --> AC["⑦"]
    AC --> AD["⑧"]
① TOTAL REM RECTIME - remaining recording time
REM RECTIME - remaining time on CDR(W)
REM TIME - remaining time when finalizing/erasing
② CD TEXT EDIT
lights up when the Text Edit feature is activated
③ Status matrix
- recording active (flashes)
1 X SPEED - normal speed recording
2 X SPEED- double speed recording
④ CD ↘ - internal recording activated
DIG(ital) → - digital input selected for external recording
OPT(ical) → - optical input selected for external recording
LINE → - analog input selected for external recording
⑤ - CD recorder selected
⑥ RECORD IN PROGRESS
lights during recording
⑦ CD - CD inserted (a pre-recorded CD or finalized CD-R or CD-RW disc)
CD R - unfinalized CD R disc inserted
CD RW - unfinalized CD RW disc inserted
⑧ FINALIZE
lights up during finalizing a recording, or when the disc will be finalized after the current recording
text_image
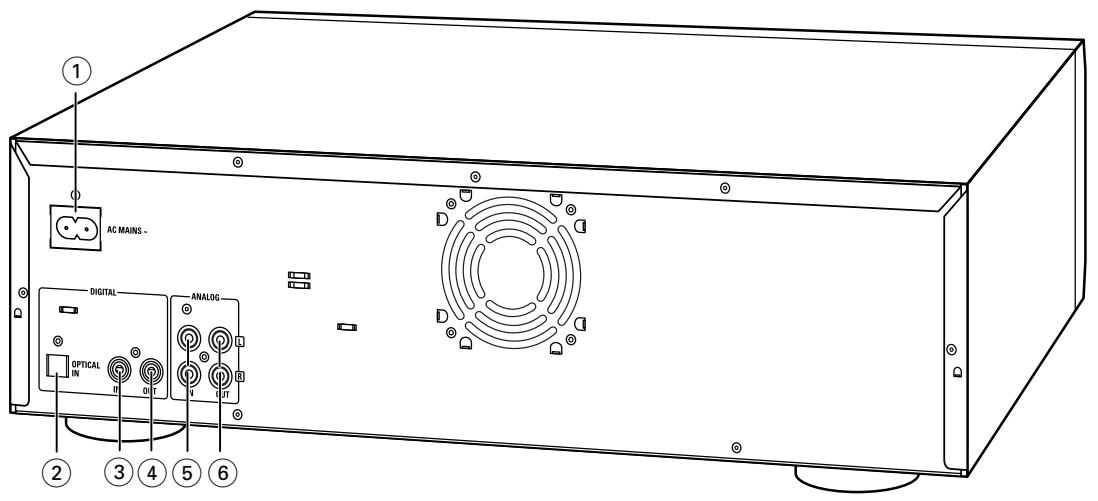
AC MAINS - DIGITAL ANALOG OPTICAL IN 0 0 V UT 2 3 4 5 6Connections
① connection to the mains
② OPTICAL IN
connects to the digital optical output of an external digital source (CD player, DVD, DAT, etc.), so you can record from this source (RUX OPTICAL)
③ DIGITAL IN
connects to the digital coaxial output of an external digital source (CD player, DVD, DAT, etc.), so you can record from this source (RUX DIGITAL)
④ DIGITAL OUT
connects to the digital coaxial input of an amplifier/receiver, so you can listen to playback of the set via the amplifier/receiver
⑤ ANALOG IN
connects to the line (analog) output of an amplifier/receiver or other analog source (tape deck, tuner etc.), so you can record from this source (RUX ANALOG). For recording from a record player both recorder and record player should be connected to an amplifier/receiver
⑥ ANALOG OUT
connects to the line (analog) input of an amplifier/receiver, so you can listen to playback of the set via the amplifier/receiver
Setup recommendations
- Place the set on a solid, vibration free surface.
- Make sure there is sufficient space around the set to prevent overheating.
- Do not place the set near a source of heat or in direct sunlight.
- Do not use the set under extremely damp conditions.
- If the set is placed in a cabinet, make sure that a 2.5 cm space remains free on all sides of the CD recorder for proper ventilation.
- Active mobile phones near to the set may cause malfunctions.
- Place the set below your receiver.
Connections general
NEVER MAKE OR CHANGE CONNECTIONS WITH THE POWER SWITCHED ON
For playback on both recorder deck and changer deck the set should be connected to your amplifier/receiver. For this the following outputs are present:
– Digital coaxial output (DIGITAL OUT);
– Analog output (ANALOG OUT).
For external recording the following inputs are present:
– Digital optical input (OPTICAL IN);
– Digital coaxial input (DIGITAL IN);
– Analog input (ANALOG IN).
These inputs can be connected to the corresponding output(s) of your amplifier/receiver or directly to the corresponding output(s) of the external source. Record players cannot be connected directly to the set.
The connections you make will depend upon the possibilities your audio equipment offers and how you are going to use the set. Please refer to the user manuals for your other audio equipment first.
Digital recordings (optical or coaxial) give the best performance in audio and usability.
If possible, always make both digital and analog connections. In this way you can always make analog recordings when digital recording is not possible.
Installation
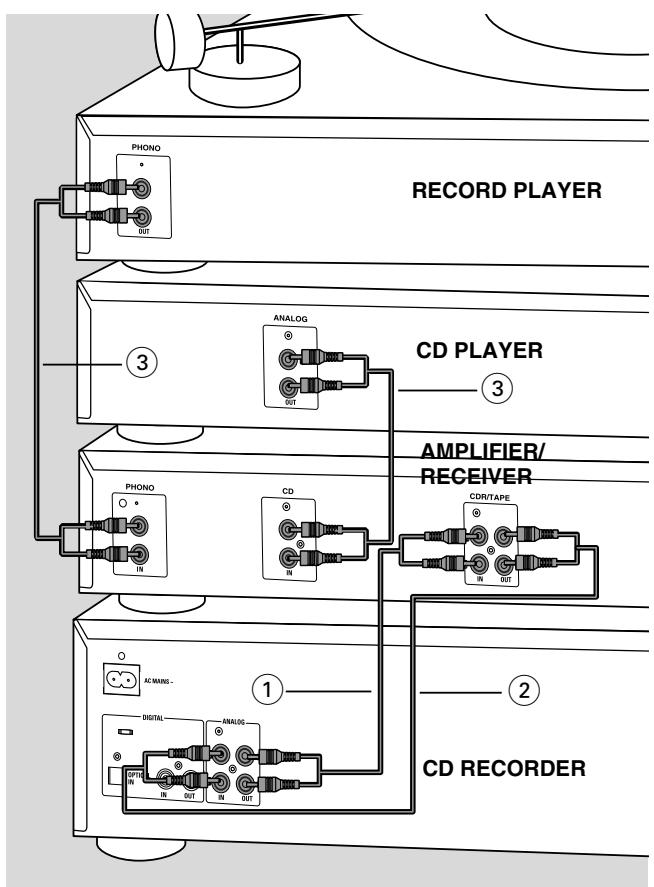
Analog connections
These connections are required for playback and recording via an amplifier/receiver, equipped with an analog in- and outputs.
flowchart
graph TD
    A["RECORD PLAYER"] --> B["PHONO"]
    A --> C["ANALOG"]
    A --> D["CD PLAYER"]
    A --> E["AMPLIFIER/RECEIVER"]
    A --> F["CD RECORDER"]
    B --> G["PHONO"]
    B --> H["CD"]
    C --> I["CDR/TAPE"]
    D --> J["AC/WANG-"]
    E --> K["CD RECORDER"]
    F --> L["CD RECORDER"]
    style A fill:#f9f,stroke:#333
    style B fill:#ccf,stroke:#333
    style C fill:#ccf,stroke:#333
    style D fill:#ccf,stroke:#333
    style E fill:#ccf,stroke:#333
    style F fill:#ccf,stroke:#333
1 Connect supplied audio cable between the ANALOG OUT-sockets on the set and the ANALOG input sockets of the amplifier/receiver (TAPE IN, CD-R, AUX or PLAY IN). Insert the red plugs into the R sockets, and the white plugs into the L sockets.
2 Connect supplied audio cable between the ANALOG IN-sockets on the set and the analog outputs of the amplifier/receiver (CDR OUT, TAPE OUT, AUX OUT, REC OUT etc.).
Insert the red plugs into the R sockets, and the white plugs into the L sockets.
3 Connect all other components of your system (tape deck, CD player, tuner, record player etc.) via their ANALOG OUT-sockets to the appropriate analog input sockets of the amplifier/receiver (CD IN, TUNER IN, AUX IN, PHONO IN etc.).
→ Any analog device, connected to the amplifier/receiver can now be used as recording source (AUX ANALOG).
Digital connections
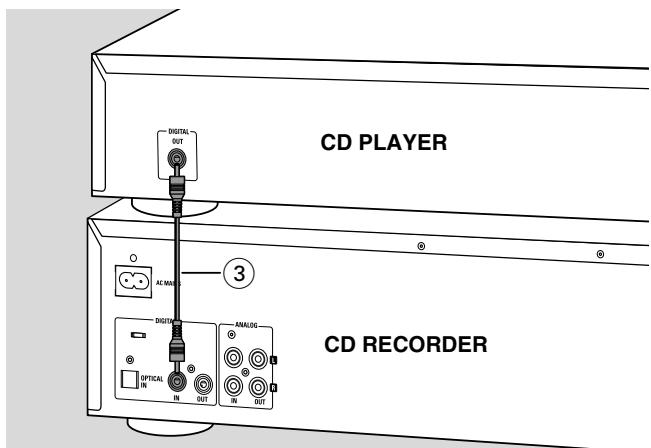
Direct digital coaxial connection
This connection is required for direct recording from a digital coaxial source (e.g a CD player, DVD, DAT).
text_image
CD PLAYER 3 CD RECORDER1 Connect a digital coaxial cable between the DIGITAL IN-socket on the set and the DIGITAL OUT socket of the digital source.
→ Recording can now be done via the digital coaxial input (AUX DIGITAL).
Direct digital optical connection
This connection is required for direct recording from a digital optical source (e.g. a CD player, DVD, DAT).
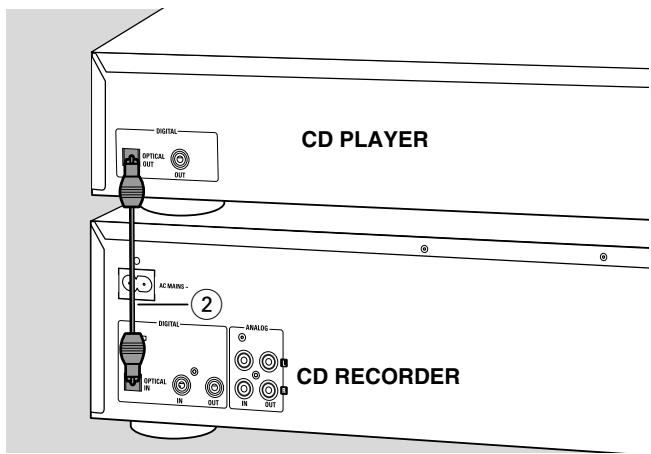
text_image
CD PLAYER DIGITAL OPTICAL OUT OUT AC MANG - 2 DIGITAL ANALOG- OPTICAL IN IN OUT IN OUT CD RECORDER1 Remove the dust caps from the digital optical connections of both source and CD recorder. Keep the caps in a safe place.
2 Connect an optical fibre-optic cable between the OPTICAL IN socket of the set and the OPTICAL OUT socket of the source.
Make sure you insert both plugs fully, until a click is heard.
→ Recording can now be done via the digital optical input (RUX OPTICAL).
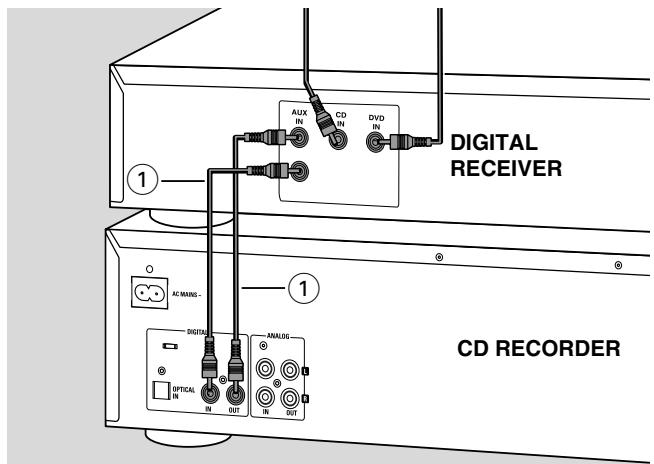
Digital coaxial connections via a digital receiver
If you have a receiver with digital coaxial in- and outputs, these connections allow you to make digital recordings from various sources, connected to the receiver.
text_image
DIGITAL RECEIVER CD RECORDER 1 1 AC/WAMS - DIGIT ANALOG OFFICAL IN OUT IN OUT1 Connect a digital coaxial cable between the DIGITAL IN- and OUT sockets on the set and e.g. the (digital) AUX in- and output sockets on the digital receiver.
→ Any digital device, connected to the digital input sockets of the digital receiver (e.g. CD and DVD) can now be used as recording source.
Power supply/Mains
text_image
AC NAME - DIGITAL FINAL OPTICAL OUTThe type plate is located on the rear of the set.
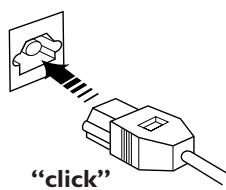
1 Check whether the mains voltage as shown on the type plate corresponds to your local mains voltage. If it does not, consult your dealer or service organisation.
2 Make sure all connections have been made before switching on the mains supply.
3 Connect the mains cable supplied to AC MAINS \~ and to the wall socket. This switches on the mains supply.
4 Press POWER to switch on the set.
→ WELCOME TO PHILIPS AUDIO will be displayed.
Press POWER again to switch off the set.
When the set is switched off, it is still consuming some power. To disconnect the set from the mains completely, remove the mains plug from the wall socket.
Demo mode
The demo mode displays various features of the set and will start automatically when no key has been pressed for several minutes or during Standby mode.
To cancel demo mode
- Keep STOP ■ on the set pressed for at least 5 seconds.
→ The demo mode is cancelled permanently.
Remote control
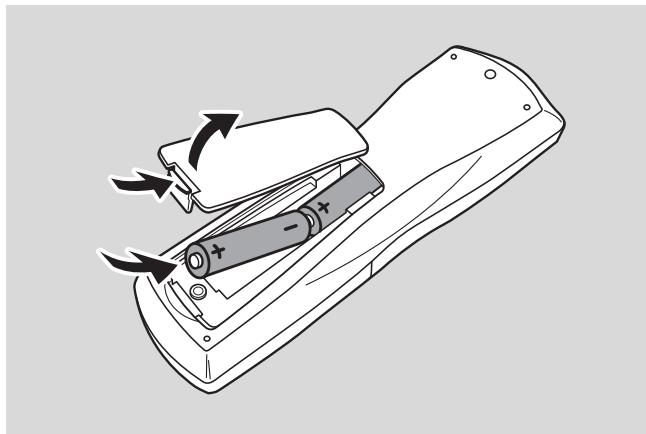
Inserting batteries in the remote control
natural_image
Line drawing of a handheld device with arrows indicating motion or rotation, no text or symbols present1 Open the battery compartment cover.
2 Insert 2 batteries (AA, LR6 or UM-3; as supplied) as shown.
3 Replace the cover.
Note: We recommend you use 2 batteries of the same type and condition.
Batteries contain chemical substances, so they should be disposed of properly.
Note: Unless stated otherwise all controls are on the front of the recorder. When provided on the remote control, you can also use the corresponding buttons, after selecting CD recorder or CD changer.
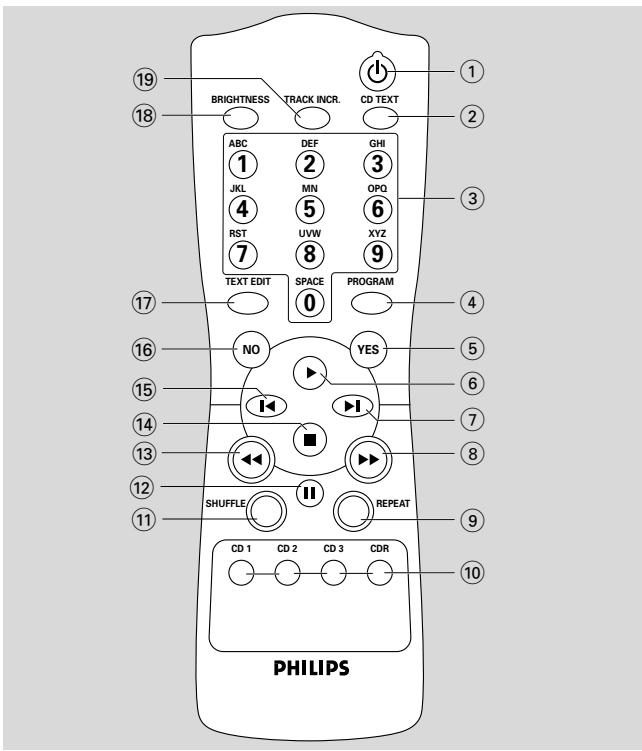
Remote control commands
① ⏻
switches to Standby
② CD TEXT
scrolls CD text
③ Number/alphabet keys 0 - 9
- selects a track by number
- selects character for text input
SPACE - inserts space during text input
④ PROGRAM
opens/closes program memory
⑤ YES
confirms a selection
⑥ ▶
starts playback
⑦
selects next menu item or track
⑧
- searches forward
- cursor control in various menus
⑨ REPEAT
repeat play
text_image
BRIGHTNESS TRACK INCR. CD TEXT ABC DEF GHI 1 JKL MN OPQ 4 RST UVW XYZ 7 8 9 TEXT EDIT SPACE PROGRAM 0 NO YES I II SHUFFLE REPEAT CD 1 CD 2 CD 3 CDR PHILIPS⑩ CD 1,2,3
selects disc in CD changer
CDR
selects CD recorder
⑪ SHUFFLE
plays all discs or program in random order
⑫ II
interrupts playback/recording
13
- searches backward
- cursor control in various menus
14
stops playback or recording
15
selects previous menu item or track
⑯ NO
cancels a selection
⑰ TEXT EDIT
opens Text Edit mode
⑱ BRIGHTNESS
sets the brightness of the display
⑲ TRACK INCR(ement)
- selects automatic track increment mode
- increments track number during recording
Loading discs
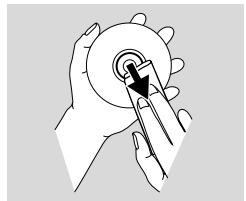
natural_image
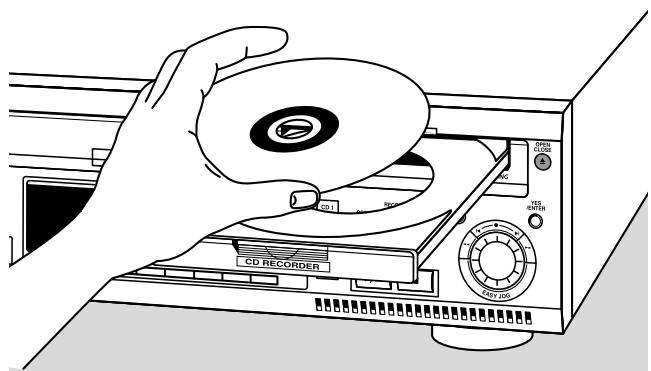
Illustration of a hand holding a CD or DVD disc next to an open CD recorder device (no text or symbols visible)Important!
1) This set is designed for regular CD(RW)s.
Therefore, do not use any accessories such as disc stabilizer rings or CD treatment sheets, etc. as offered on the market, because they may cause jamming of the changer mechanism.
2) Do not load more than one disc into one tray.
1 CD changer: Press OPEN/CLOSE ▲ to open the disc compartment.
→ OPEN CHANGER lights up.
CD recorder: Press OPEN/CLOSE ▲ to open the disc tray.
→ OPEN COR lights up.
Note: Opening the changer disc compartment or recorder disc tray will clear any program present.
2 CD changer: Insert CDs in the two outer disc trays, label side up.
○ To insert a third disc press CD CHANGE.
→ The CD carousel tray will rotate once.
CD recorder: Insert a disc in the tray, label side up.
3 CD changer: Press OPEN/CLOSE ▲ again or gently push the compartment to close it.
→ READING is displayed.
→ The display will show CD, the number of the the last selected tray, its number of tracks and total playing time.
CD recorder: Press OPEN/CLOSE ▲ again or gently push the tray to close it.
→ READING is displayed.
→ If an unfinalized disc is inserted, INITIALIZING is displayed.
→ The display will show the type of disc inserted, its number of tracks and the total playing time of the disc.
MP3 discs only:
→ READING is displayed, followed by a continuous upcounting of tracks and MP3 lights up.
→ [ ], the disc tray number or [ ] and the first album name are displayed.
Changing discs during play/recording
1 Press OPEN/CLOSE ▲ to open the disc compartment.
→ OPEN CHANGER lights up.
2 The CDs in the two outer disc trays can be changed while play or recording continues.
Playing
text_image
CD RECORDER OPEN CLOSE A N CBS CD 1 RECORD NO IANCEL YES ENTER COPY/CD COMPLE/CD RECORD CD 2 PLAY/PAUSE STOP CD 3 CABY JOS1 Press CDR, CD 1, 2 or 3 to select the required disc.
2 Press PLAY/PAUSE ▶/II to start play.
→ [DR, [D] 1, 2 or 3, the number of the current track and elapsed playing time are displayed.
○ Press DISPLAY repeatedly to display:
→ track number, remaining playing time of current track;
→ track number, remaining playing time of disc;
→ track number, actual playing time of current track;
→ for MP3 discs, pressing DISPLAY will only display album name and elapsed playing time.
3 To stop play, press STOP ■.
→ [DR, [O] 1, 2 or 3, the number of tracks and the total playing time of the disc appear on the display.
→ when an MP3 disc was playing, [ ], the disc tray number or [ ] and the first album name are displayed.
○ To interrupt play temporarily, press PLAY/PAUSE ▶/II.
→ The time where playback is interrupted is blinking.
○ To continue play, press PLAY/PAUSE ▶/□ again.
Playing
Track selection and searching

text_image
JUN CDS A-8 EDIT ERASE CD FINALIZE CD REC LEVEL CD1 CD2 CD3 RECORD COPY/CD COMPILE CD RECORD NO CANCEL YES RENTER PLAY/PAUSE STOP EASY LOGTrack selection in STOP mode
1 First select the required disc with CDR, CD 1, 2 or 3.
2 Rotate the ◀ EASY JOG ▶I control to select the required track number:
3 Press PLAY/PAUSE ▶/II to start playing.
Track selection during play
1 Rotate the ◀ EASY JOG ▶I control to select the required track number.
→ Play skips to the beginning of the selected track.
Notes:
Track numbers can also be selected with the ◀▶ keys or the numerical keys on the remote control (for 2- or 3-digit track numbers, press the keys in rapid succession).
For tracks on another disc, first select the required disc by pressing CD 1, CD 2, CD 3 or CDR.
Searching during play
1 Hold down ◀◀ or ▶▶.
→ The set first searches backwards or forwards with sound at low volume, then speeds up with sound muted.
2 Release the button at the desired passage.
→ Normal playback continues.
Note: During palyback of a MP3 track, or Shuffle, Repeat Track or Programmed play, search is restricted to within the track being played at the time.
MP3 Disc navigation
text_image
WN CBS CD1 RECORD COPY CD COMPILE CD RECORD CD2 NO /CANCEL YES /ENTER A-B EDIT ERASE CD FINALIZE CD REC LEVEL CD3 PLAY/PAUSE STOP FASY JOOSTrack selection is done differently during playback of MP3 CD's. Unless otherwise indicated operation of all other functions is the same for both MP3 CDs as well as for normal CD(RW)s.
Album selection and playback
1 Rotate the ◀ EASY JOG ▶I control to select the required album number, then release the control.
→ The display shows ALBUM together with the album number.
→ The album name is scrolled as soon as you release the ◀ EASY JOG ▶I control.
2 Press PLAY/PAUSE ▶/II to start play from the selected album.
Track selection and playback
1 Select the required album and press YES.
2 Rotate the ◀ EASY JOG ▶I control to select the required track number, then release the control.
→ The display shows TRACK together with the track number.
→ The track name is scrolled as soon as you release the ◀EASY JOG ▶I control.
3 Press PLAY/PAUSE ▶/II to start play from the selected track.
○ If NO is pressed, the recorder returns to album selection mode.
Notes:
At the end of your album selection you will recognize an album called VARIOUS. This album contains all tracks, which have not been saved in an album when making the MP3-CD.
If you wish to play a playlist, select it directly by rotating the
◀ EASY JOG ▶I control and then pressing PLAY/PAUSE ▶/II.
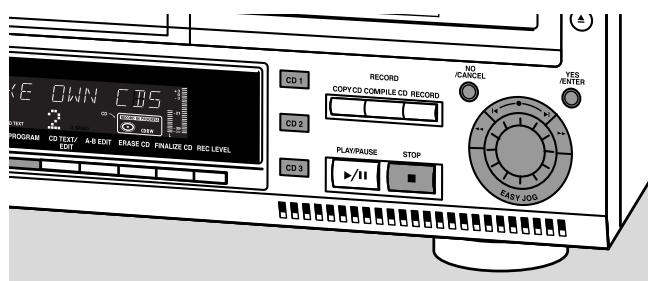
Shuffle and repeat

text_image
CD CHANGE POWER/ STANDBY AUX CD-R PHONES LEVEL MAKE OWN CBS DISPLAY SKRUFFLE PROGRAM CO TEXT/ EBIT A-B EDIT ERASE CD FIPlaying tracks in random order (Shuffle)
1 Press SHUFFLE before or during play.
→ All tracks of loaded discs in both changer and recorder (SHUFFLE ALL) or the tracks in the program (SHUFFLE PROGRAM) are played in random order.
2 Press SHUFFLE again to return to normal play.
Note: When an MP3 disc is encountered during shuffle play only the tracks on the MP3 disc will be played in random order. After the last track has been played, shuffle play will continue with the next disc.
Repeating disc(s), a track or a program
1 Press REPEAT on the remote control repeatedly during play to select:
→ REPEAT TRACK: the current track will be repeated;
→ REPEAT DISC: the current disc will be repeated;
→ REPEAT ALL: all discs in the set or all discs/tracks in the program will be repeated.
2 To return to normal play, press REPEAT on the remote control one or more times until:
→ The REPEAT label disappears from the display.
Note: REPEAT DISC is not possible during SHUFFLE or while playing a program.
CD text display
text_image
E DOWN CBS PROGRAM CO TEXT/ EDIT A-B EDIT ERASE CD FINALIZE CD REC LEVEL CD 1 RECORD COPY CD COMPILE CD RECORD NO /CANCEL YES /ENTER CD 2 PLAY/PAUSE STOP CD 3 EASY JOGThis feature allows to display information such as album title or track title contained on a specially encoded CD.
○ Make sure to insert a CD with CD text.
→ CD TEXT is shown and the album title and album artist's name is scrolled once.
CD text when playback is stopped
Press CD TEXT/edit to see the following information, which will be scrolled once (if available):
- Album artist's name
- Album title
CD text during playback
Press CD TEXT/edit to see the following information, which will be scrolled once (if available):
- Track artist's name
- Track title
ID3-tag
This feature allows the display of information such as album title or track title contained on an MP3-track.
○ If you created an ID3-tag on your MP3-CD, press
CD TEXT/edit during playback to display the following ID3-tag information:
- Album title
- Track artist's name
- Track title
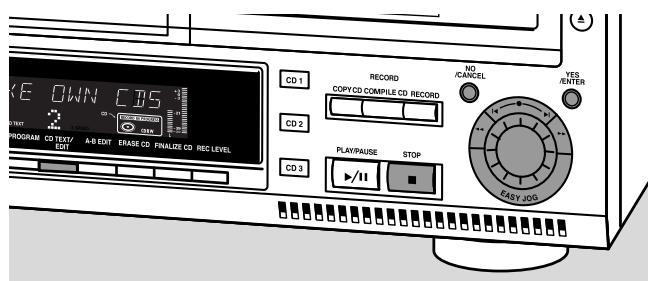
Programming
Programming track numbers
text_image
E DOWN CDS PROGRAM CD TEXT/ EOT A-B EDIT ERASE CD FINALIZE CD REC LEVEL CD1 CD2 CD3 RECORD COPY CD COMPILE CD RECORD PLAY/PAUSE STOP NO /CANCEL YES /ENTER EASY JOG- A program can be composed of tracks in both changer and recorder deck.
- Any track can be stored more than once with a maximum of 99 tracks.
- If you exceed the maximum of 99 tracks the display shows PROGRAM FULL.
1 Load the desired disc(s) in the disc tray(s).
2 Select the first required disc by pressing CD 1, CD 2, CD 3, or CDR.
3 Press PROGRAM.
→ PROGRAM starts blinking and PROGRAM is displayed.
4 Rotate the ◀EASY JOG ▶I control to select the required tracknumbers on the selected disc and store each track by pressing YES.
For normal Audio CD(RW) discs only:
○ If you wish to store all tracks of the selected disc, rotate the
◀ EASY JOG ▶I control to select RLL and press YES to store the complete disc in the memory.
→ The number of programmed tracks (STEP), PROG and the total program time are displayed.
5 Select and store all required CD's and/or tracks in the same way.
6 Press PROGRAM to end programming.
→ PROGRAM stays shown and the program is currently available.
Changing a program
1 If necessary press STOP ■.
2 Press PROGRAM to enter Program mode.
Erasing tracks
3 Select the tracknumbers you wish to erase with ◀◀ or ▶▶ and erase each number by pressing NO.
→ [CERRED] is displayed briefly.
→ The next programmed track number will move up to this position and is displayed together with the step number and the total program time.
Adding tracks
3 Rotate the ◀ EASY JOG ▶I control to select the tracknumbers you wish to add to the program and store each track by pressing YES.
→ The number of programmed tracks (STEP), PROG and the total program time are displayed.
4 Press PROGRAM to end programming.
→ PROGRAM stays shown and the program is currently available.
Clearing a program
1 If necessary press STOP ■.
2 Press NO.
→ CLEAR PROG ? is displayed.
3 Press YES to clear the program.
→ PROG CLEARED will be displayed and PROGRAM goes off.
Making a program for recording
If the program is used for recording only tracks from discs in the changer should be programmed. Also see chapter "Recording a program".
Basic information
We will describe:
- Recording from internal CD changer
- Recording from an external source
- Finalizing CDR(W) discs:
Finalizing a CDR(W) disc is a simple procedure, necessary to:
– play a recorded CDR on a standard CD player;
- play a recorded CDRW on a CDRW compatible CD player.
- Unfinalizing CDRWdiscs:
Necessary to add new recordings to the disc or to erase the disc.
- Erasing from CDRWdiscs
☐ The recording procedure is the same for CDR and CDRW discs. Make sure that the CDR(W) is absolutely free of scratches and dust particles.
- It is advisable to use a CDRW disc for your first try.
For recordings, the minimum track length is 4 seconds. You can record up to a maximum of 99 tracks on a disc. The minimum of recording time left on the disc is 7 seconds. Else, DISC FULL is displayed and you cannot enter into the record mode. If the length of the source material is longer than the remaining recording time on the CDR(W) DOES NOT FIT is displayed.
- CD TEXT on the original CD is recorded automatically. When a track with copy protected text is encountered TEXT PROTECT will be displayed.
Copyright protection
The Serial Copy Management System (SCMS) prevents the making of a digital copy from a digital copy. The system allows making a digital recording from the original, however in some countries this may require the authorization of copyright holders.
When you try to record a copy protected material from an external source, COPY PROTECT will be displayed. No further digital recording is possible then.
When you try to record a copy protected material from the internal CD changer no digital recording is possible, however the CD recorder will automatically switch to analog recording. It is not possible to copy an MP3-CD.
Remarks on recording
○ Recording can be stopped manually by pressing STOP ■ otherwise recording will stop automatically.
During recording the elapsed recording time can be checked by pressing DISPLAY.
Direct Line Recording (DLR)
The CD recorder is equipped with the high-performance Direct Line Recording (DLR) technique. It ensures a perfect recording of the source material, meaning a true “bit for bit” recording. DLR will not be active, when ALC is used or when the record level is adjusted.
Auto Level Control (ALC)
Auto Level Control ensures that the tracks on the recorded disc have a similar volume level. Always the already recorded tracks of the CDR(W) disc will be taken as reference for the volume level of the following recordings.
Auto level control becomes automatically active, when:
- COMPILE CD is being used,
- a disc, a track or a track edit is being high speed recorded and the CDR(W) has recordings on it, or
- a program (consisting from more than one disc) from the CD changer is being high speed recorded.
Auto level control will not become active, when:
- using COPY CD,
– making recordings from an external source, or - making normal recordings in listen mode.
Switching ALC permanently off
1 If necessary press STOP ■ to stop playback.
2 Press CDR to select the CD recorder.
3 Press REC LEVEL to select:
→ ALC OFF: ALC is permanently switched off.
To enable ALC press REC LEVEL again to select:
→ RLC ON: ALC is enabled.
Adjusting the record level
text_image
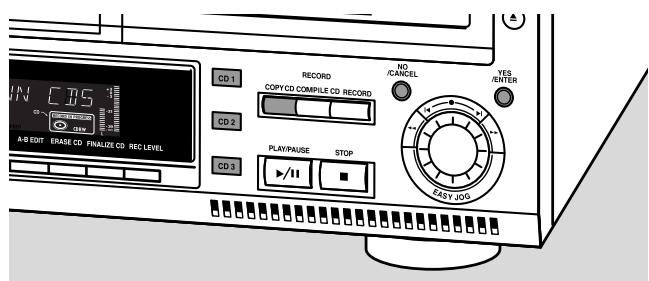
IN CBS CD1 RECORD COPY CD COMPILE CD RECORD NO/CANCEL YES/ENTER CD2 PLAYPAUSE STOP EASY IOS CD3 A-B EDIT ENASE CD FINALIZE CD REC LEVELYou can adjust the reference record level for both digital and analog recordings from the internal changer as well as from external sources. This is also possible when ALC is active. This feature can also be used for fading your recordings in or out.
1 Select the recording source with CD1, CD2 or CD3 for internal recording or with AUX for external recording.
2 Press REC LEVEL on the set to enable the ◀EASY JOG ▶I control to adjust the record level.
3 Rotate the ◀ EASY JOG ▶I control to the left to adjust the desired record level.
→ The actual record level (in dB) will be displayed.
Note: The loudest sounds on the source should not reach 0 dB maximum (first red level).
Internal recording
Recording a single track
text_image
IN CDS A/B EDIT ENASE CD FINALIZE CD REC LEVEL CD 1 CD 2 CD 3 RECORD COPY CD COMPILE CD RECORD NO /CANCEL YES /ENTER PLAY/PAUSE STOP EASY JOGSRecording a single track during playback
1 Make sure the CDR(W) is absolutely free of scratches and dust particles and insert it into the CD recorder tray.
2 Play your desired track on the CD changer.
3 Press RECORD on the set to enter the recording menu.
→ REC TR and the tracknumber are displayed.
4 Press either:
YES to start recording,
→ The arrow lights, RECORD IN PROGRESS is shown, playback and recording start from the beginning of the selected track and the actual recording time left starts to count down.
or
NO to continue playback.
Do not forget to finalize!
Recording an entire CD
text_image
CN CN A/B EDIT ERASE CD FINALIZE CD REC LEVEL CD 1 RECORD NO /CANCEL YES /ENTER CD 2 COPY CD COMPILE CD RECORD CD 3 PLAY/PAUSE STOP FAST JOGHigh speed recording and automatic finalizing of the current disc
1 Make sure the CDR(W) is absolutely free of scratches and dust particles and insert it into the CD recorder tray.
2 Select the required disc by pressing CD1, CD2 or CD3.
3 Press COPY CD to enter into the record mode.
→ The arrow and the YES key start blinking. The remaining recording time of the CDR(W), the total playing time of the source CD and RECORD CD1 (or 2,3) ? are displayed.
4 Press YES to start recording and finalizing.
→ The arrow lights, RECORD IN PROGRESS and FINALIZE are shown, high speed recording and finalizing start and the actual recording time left starts to count down.
Note: If a program was already available before pressing COPY CD, this will be ignored. PROGRAM goes off and the current disc will be recorded. After finishing the recording, PROGRAM is shown and the program is available again.
Do not forget to finalize!
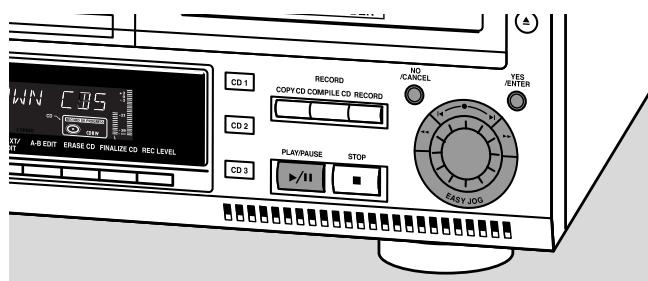
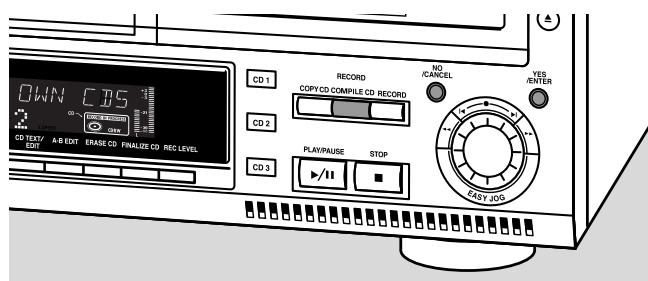
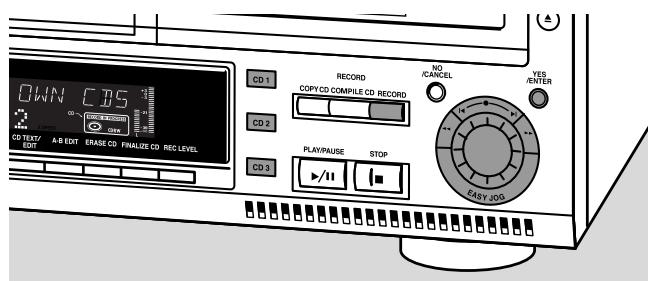
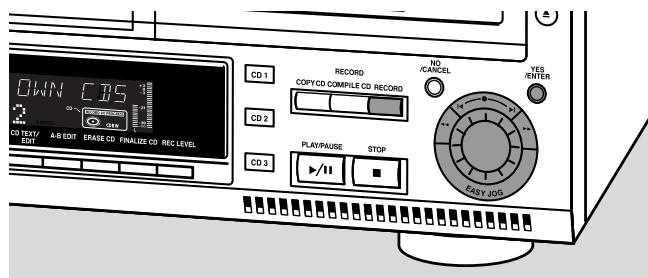
Recording a program
text_image
OWN CD5 CD TEXT/ EDIT A-B EDIT ERASE CD FINALUS CD REC LEVEL CD 1 RECORD COPY CD COMPILE CD RECORD CD 2 PLAY/PAUSE STOP CD 3 NO /CANCEL YES /RENTER EASY JOGHigh speed recording and automatic finalizing (optional) of the current program
1 Make sure the CDR(W) is absolutely free of scratches and dust particles and insert it into the CD recorder tray.
2 Select and store all desired tracks in the CD changer memory (see “Programming track numbers”).
3 Press COMPILE CD to enter into the record mode.
→ The arrow starts blinking. The remaining recording time of the CDR(W), the total playing time of the program and REC PROG ? are displayed.
Note: If no program is available and you press COMPILE CD, you enter immediately into the program menu. Start programming and return to the record mode by pressing PROGRAM or COMPILE CD.
4 Press either:
NO to change the program.
→ PROGRAM starts blinking. Now you can change the program (see “Programming”) and return to the record mode by pressing COMPILE CD.
or
YES to confirm recording.
→ AUTO FINAL ? is displayed.
5 Press either:
YES, if the CDR(W) is to be finalized after recording, or
NO, if the CDR(W) is not to be finalized after recording.
→ The arrow lights, RECORD IN PROGRESS is shown, high speed recording and finalize (if selected) start and the actual recording time left starts to count down.
Do not forget to finalize!
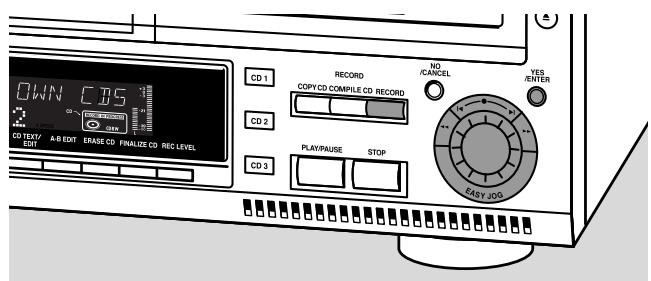
Further recording possibilities
text_image
OWN CDS CD TEXT/ EDIT A-B EDIT ERASE CD FINALIZE CD REC LEVEL CD 1 RECORD COPY CD COMPILE CD RECORD NO /CANCEL YES /REFER CD 2 PLAY/PAUSE STOP CD 3 EASY JOGHigh speed recording of an entire disc, a track, a program or a A-B edit
1 Make sure the CDR(W) is absolutely free of scratches and dust particles and insert it into the CD recorder tray.
2 Press either CD 1, CD 2 or CD 3 to select the disc you wish to record from.
3 Press RECORD on the set to enter into the recording menu.
4 Rotate the ◀ EASY JOG ▶I control to select one of the following high speed record modes:
If a disc from the CD changer is selected:
→ REC CD × FAST ?: for high speed recording of an entire disc.
○ Continue with step 5.
→ REC TR FAST ?: for high speed recording of a track.
○ Press YES to confirm.
○ Rotate the ◀ EASY JOG ▶I control to select the required track.
→ REC TR NN ? is displayed.
○ Continue with step 6.
If a program is available:
→ PROG FAST ?: for high speed recording of the selected program.
If a A-B edit is available (see "A-B Editing"):
→ A-B FAST ?: for high speed recording of the A-B track.
5 Press YES to confirm your selection.
→ The arrow starts blinking. The remaining recording time of the CDR(W), the total recording time of the CDR(W) and either RECORD [01 (or 2,3)?, REC PROG ? or REC A-B ? are displayed.
6 Press YES to start high speed recording.
→ The arrow lights, RECORD IN PROGRESS is shown, high speed recording starts and the actual recording time left starts to count down.
Do not forget to finalize!
Normal recording and listening of an entire disc, a track, a program or a A-B edit
1 Make sure the CDR(W) is absolutely free of scratches and dust particles and insert it into the CD recorder tray.
2 Select the required disc by pressing CD1, CD2 or CD3.
3 Press RECORD to enter the recording mode.
4 Rotate the ◀ EASY JOG ▶I control to select one of the following normal record options:
If CD changer is selected:
→ REC [D] × ?: for listening to the entire disc during normal recording.
○ Continue with step 5.
→ REC TRACK ?: for listening to the track during normal recording.
○ Press YES to confirm.
○ Rotate the ◀ EASY JOG ▶I control to select the required track.
→ REC TR NN ? is displayed. ○ Continue with step 6.
If a program is available:
→ REC PROG ?: for listening to the program during normal recording.
If a A-B edit is available (see "A-B Editing"):
→ REC A-B ?: for listening to the A–B track during normal recording.
5 Press YES to confirm your selection.
→ The arrow starts blinking. The remaining recording time of the CDR(W), the total recording time of the CD, track or program and RECORD? are displayed.
6 Press YES to start recording.
→ The arrow lights, RECORD IN PROGRESS is shown, normal speed recording starts and the actual recording time left starts to count down.
Do not forget to finalize!
External recording
Analog or digital recording
When making recordings from an external source, we recommend to do analog recording only if digital recording is not possible. Digital recording will usually result in better sound quality.
See chapter “Connections” to see which connections are required.
If a digital source is selected:
→ In case no digital signal is received, the input label (DIG or OPT) starts flashing and NO SIGNAL is displayed.
○ Press DISPLAY to display the input sample rate (SRC XX, X KHZ).
→ BIT PERFECT is displayed when an exact CD standard signal is received which can be recorded with Direct Line Recording.
Automatic track increment for analog sources
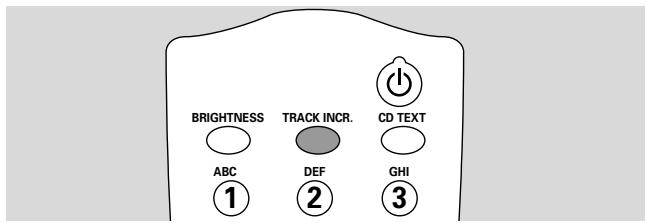
text_image
BRIGHTNESS ABC ① TRACK INCR. DEF ② CD TEXT GHI ③When digitally recording from a CD player/changer (internal or external) track increments are automatically taken over from the source. When recording from analog sources (RUX ANALOG), track increment is done, based on silences (pauses) in the source material. Select one of the following settings with the TRACK INCR(ement) key on the remote control:
→ [I', II', I]: when recording from CD, DAT, DCC or DVD;
→ TAPE/TUNER: when recording from a cassette deck or tuner;
→ TURNTABLE: when recording from a record player,
→ MANUAL: switches the function off.
Default setting is TAPE/TUNER.
Notes:
Auto track increment is dependant on the quality of the source material and therefore not always possible.
Track numbers can always be incremented manually by pressing TRACK INCR(ement) on the remote control during recording. The minimum track length is 4 seconds.
Track numbers cannot be changed after recording.
Recording with automatic start
text_image
CD TEST/EDJ A-B EDT ERASE CD FINALIZE CD REC LEVEL 0WN CDS CD 1 RECORD COPY CD COMPILE CD RECORD NO /CANCEL YES /ENTER CD 2 PLAY/PAUSE STOP CD 3 EASY JOGRecording with automatic start from an external source
1 Make sure the CDR(W) is absolutely free of scratches and dust particles and insert it into the CD recorder tray.
2 Press repeatedly AUX to select the input for the external source you want to record from.
→ AUX DIGITAL is displayed if the digital coaxial input (DIGITAL IN) is selected.
→ AUX OPTICAL is displayed if the digital optical input (OPTICAL IN) is selected.
→ AUX ANALOG is displayed if the analog input (ANALOG IN) is selected.
3 Press RECORD on the set to enter into the recording menu.
4 Rotate the ◀ EASY JOG ▶I control to select either:
→ AUX [☐ ] ?: for recording with synchronised start of an entire disc;
→ AUX TRACK ?: for recording with synchronised start of a single track.
5 Press YES to confirm your selection.
→ PRESS PLAY ON EXTERNAL SOURCE is displayed.
6 Start playback on the external source you wish to record from.
→ The CD recorder starts to record simultaneously and RECORD IN PROGRESS is shown. The remaining recording time of the CDR(W) is displayed.
Note: If you start recording within a track, recording starts at the beginning of the next track or after a silence for analog sources.
7 If a digital source is selected:
→ After the recording process, the CD recorder stops automatically.
Note: Recordings from DAT or DCC will automatically stop after 20 seconds silence.
If an analog source is selected:
→ After the recording process, the CD recorder stops after a silence of 20 seconds on the source material.
○ To stop manually, press STOP ■ on the set.
→ RECORD IN PROGRESS goes off.
Do not forget to finalize!
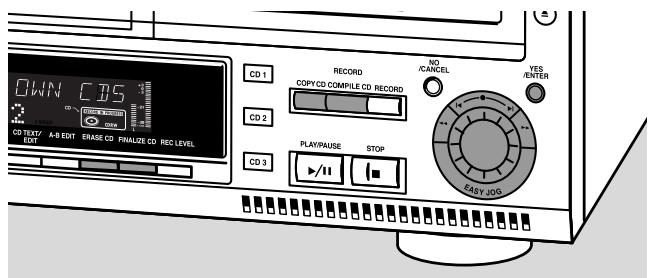
External recording
(Un)finalizing, erasing
Manual recording
text_image
DOWN CBS CD 1 RECORD COPY CD COMPILE CO RECORD NO CANCEL YES ENTER CD 2 PLAY/PAUSE STOP CD 3 EASY JOG CO TEXT/EBIT A/B EDIT ERASE CD FINALIZE CD REC LEVELManual recording from an external source
This feature enables you to manually start and stop a recording from any external source. You can use manual recording for recording live music, or for particular music like classical music which cannot be recorded with automatic start.
1 Make sure the CDR(W) is absolutely free of scratches and dust particles and insert it into the CD recorder tray.
2 Press repeatedly AUX to select the input for the external source you want to record from.
→ AUX DIGITAL is displayed if the digital coaxial input (DIGITAL IN) is selected.
→ AUX OPTICAL is displayed if the digital optical input (OPTICAL IN) is selected.
→ AUX ANALOG is displayed if the analog input (ANALOG IN) is selected.
3 Press RECORD on the set to enter the recording menu.
4 Rotate the ◀ EASY JOG ▶I control to select the record type.
→ AUX MANUAL ?: for manual start of recording.
5 Press YES to confirm your selection.
→ PREPARING is displayed.
→ RECORD ? is displayed, followed by AUX and the remaining recording time of the CDR(W). Both messages will be swapped continuously.
6 Start playback on the external source in order to set the optimal recording level on the CD recorder (see “Adjusting the Record Level”).
7 Stop playback on the external source.
8 Go to the beginning of the desired track.
9 Press YES and simultaneously start playback on the external source.
→ The CD recorder starts to record and RECORD IN PROGRESS is shown. The remaining recording time left of the CDR(W) is displayed.
Note: If CHECK INPUT is flashing, check the digital connection.
10 To stop recording, press STOP ■ on the set.
→ UPDATE is displayed and RECORD IN PROGRESS goes off.
Do not forget to finalize!
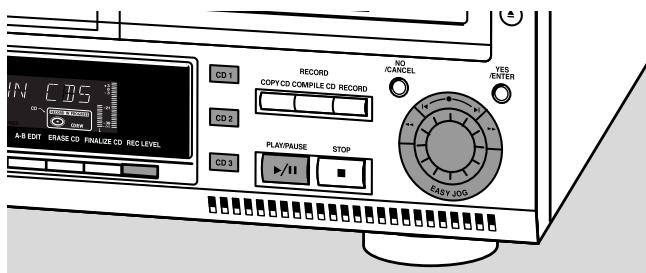
Finalizing CDR & CDRW discs
text_image
CD0 CD CD TEXT/EXT A-B EXT ERASE CD FINALIZE CD REC LEVEL CD 1 RECORD COPY CD COMPILE CD RECORD NO/ CANCEL YES/ ENTER CD 2 PLAY/PAUSE STOP CD 3 FAST JOOGFinalizing a CDR(W) disc is a simple procedure, necessary to:
– play a recorded CDR on a standard CD player;
- play a recorded CDRW on a CDRW compatible CD player;
– avoid further unwanted recordings on a disc;
– avoid erasure of tracks on a CDRW.
Notes:
Finalizing will take about 2 minutes.
After finalization of the CDR(W), CDR(W) changes to CD on the display.
During finalization no other operating commands can be executed.
After finalizing no more recording is possible on a CDR.
Auto finalizing
When you use either COPY CD or COMPILE CD, your recordings will be finalized automatically (see. "High speed recording and automatic finalizing").
Manual finalizing when recording is in progress
1 Press FINALIZE CD on the set during recording.
→ AUTO FINAL ? is displayed.
2 Press YES to confirm.
→ FINALIZE is shown. The finalization will start after recording and the actual finalizing time left will start to count down.
Manual finalizing when recording is stopped
1 Insert the CDR(W) you want to finalize in the CD recorder tray.
2 Press CDR to select the CD recorder.
3 Press FINALIZE CD on the set.
→ FINALIZE CD ? is displayed.
4 Press YES to start finalizing.
→ FINALIZE is shown, FINAL is displayed and the actual finalizing time left starts to count down.
(Un)finalizing, erasing
Unfinalizing CDRW discs
If you want to record (or erase) on (from) an finalized CDRW, you have to unfinalize it first.
Notes:
Unfinalizing will take approximately 2 minutes.
After unfinalizing of the CDRW, CD changes to CDRW on the display.
1 Insert the CDRW you want to unfinalize in the CD recorder tray.
2 Press CDR to select the CD recorder.
3 Press FINALIZE on the set.
→ UNFINALIZE CD ? is displayed.
4 Press YES to start unfinalizing.
→ UNFINAL is displayed and the operation time left starts to count down.
Erasing from a CDRW disc
It is possible to erase one or more tracks (starting from the end of the last track) or the entire CDRW. Erasing is only possible on unfinalized CD-RW discs. If you try to erase a finalized CD-RW, the disc will be unfinalized first before it will be erased.
Erasing an entire CDRW
1 Insert the CDRW you want to erase in the CD recorder tray.
2 Press CDR to select the CD recorder.
3 Press ERASE CD to enter into the erasing menu.
→ ERASE DISC lights up.
4 Press YES.
→ ERASE ? lights up.
5 Press YES to start erasing.
→ ERASE is displayed and the operation time left starts to count down.
Erasing one or more tracks
1 Insert the CDRW you want to erase in the CD recorder tray.
2 Press CDR to select the CD recorder.
3 Press ERASE CD to enter into the erasing menu.
→ ERASE DISC lights up.
4 Rotate the ◀ EASY JOG ▶I control until the display shows:
→ ERASE TR and the track number (e.g. 10 +) light up.
5 Rotate the ◀ EASY JOG ▶ control to select the track number(s) you wish to erase.
6 Press YES.
→ ERASE ? lights up and the remaining disc time and the remaining number of tracks are shown on the display.
7 Press YES to start erasing.
→ ERASE lights up and the operation time left starts to count down.
Note: When erasing more tracks, the tracks to be erased must be selected in sequence, starting from the last recorded track. Example: The CDRW has 5 tracks recorded on it. Now, you can erase track 5 and 4. You can also erase track 5, 4 and 3, however you cannot erase track 5 and 3!
Text edit (on CD recorder only)
text_image
OWN CBS CD1 RECORD NO / /CANCEL YES / /ENTER CD2 COPY CD COMPLE CD RECORD CD3 PLAY PAUSE STOP play/II EASY JOG GRAM CD TEXT/ EDIT A/B EDIT ERASE CD FINALIZE CD REC LEVELStoring text in STOP mode
After you have recorded your CDR(W) you can enter text, e.g. names for discs and tracks. The text will be displayed during playback on this set and other sets with the CD Text feature. You can enter up to 60 characters per text field. Only use an unfinalized CDR or CDRW (finalized CDRW must be unfinalized first).
1 If necessary press STOP ■.
2 Press CDR to select the CD recorder.
3 Press CD TEXT/edit to enter into the CD text edit menu.
→ CD TEXT EDIT is blinking and CD TEXT EDIT is displayed.
4 Rotate the ◀ EASY JOG ▶I control to select either:
→ ALBUM ARTIST: for editing the CD artist;
→ ALBUM TITLE: for editing the CD title;
→ ARTIST TR 1 or (2,3,...): for editing the artist of track 1 or (2,3,...);
→ TITLE TR 1 or (2,3,...): for editing the title of track 1 or (2,3,...).
5 Press YES to confirm the selection.
→ The place where the first character can be entered is blinking.
6 Rotate the ◀ EASY JOG ▶I control to select a character. You can also select characters with the ◀ ▶I keys or the alphabet keys on the remote control.
→ After selecting a character, the cursor automatically moves to the next position.
7 Repeat step 6 for adding further characters.
8 Press YES to save the characters that have been selected and to exit to the last position in the text editing menu.
→ UPDATE is displayed.
Auto copied text
When an artists name has been stored for a track, it will be copied automatically into the next track.
○ Press either:
YES to confirm the copied text.
or
NO to delete the copied text and to enter a new one.
Inserting a space
1 Press ◀◀ or ▶▶ to move to the position where the space is to be inserted.
→ The position starts blinking.
2 Press YES to confirm the position of the insert character.
→ A space will be inserted, text will move to the right.
- You can also use the SPACE button on the remote control to insert a space.
Deleting and substituting a character
1 Press ◀◀ or ▶▶ to move to the characters position to be deleted or substituted.
→ The character starts blinking.
If you want to delete the character:
2 Press NO.
→ The character is deleted and the text is shifted one position to the left.
If you want to substitute the character:
2 Rotate the ◀ EASY JOG ▶I control to select a new character.
3 Press YES to confirm the selection.
○ To change another character press ◀◀ or ▶▶.
Erasing text
Text erasing is only possible when the CDR(W) is not finalized yet. A finalized CDRW needs to be unfinalized first.
1 Press CD TEXT/edit to enter into the text edit menu.
→ CD TEXT EDIT starts blinking and CD TEXT EDIT is displayed.
2 Rotate the ◀ EASY JOG ▶I control to select the text erase menu.
→ ERASE TEXT is displayed.
3 Press YES to confirm.
4 Rotate the ◀ EASY JOG ▶ control to select either:
→ ALL TEXT CD: all text of the selected will be erased in one step.
→ ALL TEXT TR NN: all text of the selected track will be erased in one step.
→ [ ] TITLE: album title and album artist of the selected CD will be erased in one step.
5 Press YES to start erasing.
Erasing from the memory
When the text memory of your CD recorder is full, the messages MEMORY FULL and FINALIZE DISC will be displayed. If you still want to add a new disc to the text memory, you have either to erase another disc from the memory or you have to finalize another disc.
Special features
A-B editing (on CD changer only)
text_image
DOWN CBS CD1 RECORD COPY CD COMPILE CD RECORD NO /CANCEL YES /ENTER CD2 PLAY/PAUSE STOP CD3 EASY IOD CHAM CD TEXT/ A-B EDIT ERASE CD FINALIZE CD REC LEVELYou can create a “track” by marking a passage of music within one track on the current disc. This new “track” can be used for recording or playing. The minimum track length is 4 seconds.
Note: You can only make an A-B edit for a normal Audio CD(RW).
1 Press A-B EDIT on the set.
→ EDIT TRACK starts blinking, TRACK and the current track number ? are displayed.
2 Rotate the ◀ EASY JOG ▶I control until the desired track number is displayed.
3 Press YES to confirm the selected track.
→ FROM A = XX : XX and the track time will be displayed. The first 4 seconds of the track will be played continuously. The initial position of marker A is always the start of the chosen track.
To fast forward to the desired start position press ◀◀ or ▶▶ on the set.
To fine tune the position then rotate the EASY JOG ▶I control.
4 Press YES or A-B EDIT to confirm the position of marker a.
→ TO B = xx : xx and the new “track” time will be displayed. The first 4 seconds before marker position B until marker position B will be played continuously. The initial position of marker B is always the position of marker A plus 4 seconds.
To fast forward to the desired stop position press ◀◀ or ▶▶ on the set.
To fine tune the position rotate the ◀EASY JOG ▶I control.
5 Press YES or A-B EDIT to confirm the marked passage.
→ EDIT TRACK is shown, A- B and the track edit time are displayed.
→ The new “track” will be stored.
○ Press PLAY/PAUSE ▶/■ to play the "track".
○ Press RECORD to record the "track" (also see "Recording").
Note: A-B EDIT can also be pressed during play. The Track Edit procedure will then start from the position where A-B EDIT was pressed.
Clearing the A-B edit
1 Press NO during stop.
→ CLEAR A-B ? is displayed.
2 Press YES to clear the markers.
→ The markers A-B are cleared.
Note: If you open the CD changer tray the A-B edit is deleted.
Troubleshooting
WARNING
Under no circumstances should you try to repair the set yourself as this will invalidate the guarantee.
Do not open the set as there is a risk of electric shock.
If a fault occurs, first check the points listed, before taking the set for repair. If you are unable to solve a problem by following these hints, consult your dealer or service centre.
Laser safety
This unit employs a laser. Only a qualified service person should remove the cover or attempt to service this device, due to possible eye injury.
| Problem | Solution: |
| No power | - ensure that the ON/OFF button is on: the set is in standby mode, press any key to activate it- ensure that the mains cable is plugged in correctly |
| No sound | - check the audio connections- try using a different source on the amplifier |
| Remote control does not work | - first select the right source on the remote control- point the remote control directly at the set |
| Will not record | - clean the disc- check if CDR(W) is an unfinalized disc- check that the disc is recordable and replace if necessary- the disc is not an AUDIO disc (WRONG DISC) |
| Recording is distorted | - make sure the recording level is correct |
| Recorded tracks do not start or stop at the correct time or tracks have been merged together | - try another auto track setting- check if there are at least 2.7 seconds silence in between the tracks (analog recording only)- insert track increments manually with the remote control |
| 20 second pause between recordings | - see “Recording with automatic start” |
| Recorded disc does not play in other standard CD player | - finalize the CDR(W)- insert the CDRW in a CDRW compatible player |
| Stops during recording | - use Philips audio CDR(W)s- in case recording process is interrupted (power loss, mechanical shock), start recording again with a new disc |
| Missing directories on MP3-CD | - only albums with playable files will be shown |
| INSERT DISC indication | - replace or clean the disc- insert a CD(RW), label upwards- wait until the lens has cleared |
| USE AUDIO CD indication | - insert a digital audio disc marked with “Digital audio” and the special logo |
| CHECK INPUT indication | - select the correct input- make sure the digital source is switched on- make sure the connection cable is properly connected |
| Unexpected start of Demo mode (automatic display of recorder features) | - Keep STOP ■ on the set pressed for at least 5 seconds to cancel Demo mode permanently |
| Set does not react | - unplug the set, then replug it |
Table des matières
Généralités
(Dé)finalisation, effacement
Stereo music on a CD shows a data rate of about 1400 kilobits per second (kbps). To achieve a good MP3 quality a bit rate of 128 kbps is recommended. As the encoding rate is user-selectable, make sure to reach this data rate for MP3 as recordings less than 128 kbps will suffer from a degradation in sound quality.
Enregistrement
finalizes/unfinalizes disc
⑳ REC(ording) LEVEL
flowchart
graph TD
    A["1 STEP"] --> B["2 O(1)"]
    B --> C["3 TOTAL"]
    C --> D["4 TOTAL"]
    D --> E["5 TIME"]

    subgraph MP3
        F["CD DIG OPT LINE"] --> G["RECORD IN PROGRESS FINALIZE CDRW"]
    end

    subgraph SHUFFLE PROGRAM
        H["REPEAT ALL DISC CD TEXT EDIT TRACK"] --> I["8"]
    end

    subgraph MP3 PROGRAM
        J["PLAYLIST X SPEED"] --> K["9"]
    end

    subgraph RECORD IN PROGRESS
        L["L"] --> M["R"]
    end
① STEP
text_image
AC MAINS - DIGITAL ANALOG OPTICAL IN IT V JT ① ② ③ ④ ⑤ ⑥Connexions
text_image
AC/MARKS DIGITAL ANNUOS OPTICAL IN OUT IN OUTnatural_image
Line drawing of a handheld device with arrows indicating motion or rotation, no text or symbols presenttext_image
Diagram showing hands holding a CD recorder with an open disc, labeled with ports like 'CD RECORDER' and 'OFFICE'.Important!
(Dé)finalisation, effacement
(Dé)finalisation, effacement
text_image
AC MAINS - DIGITAL OPTICAL IN ANALOG ① ② ③ ④ ⑤ ⑥Conexiones
text_image
REPRODUCTOR DE CD DIGITAL OPTICAL OUT OUT AC N/AING - DIGITAL OPTICAL IN IN OUT IN ANALOG 2 GRABADOR DE CDtext_image
AC MAINS DIGITAL ANALOG OPTICAL IN OUT OUTnatural_image
Line drawing of a handheld device with a battery and directional arrows indicating motion (no text or symbols)natural_image
Illustration of a hand holding a CD or DVD disc next to an open CD recorder device (no text or symbols visible)¡Importante!
→ Aparece PRESS PLAY ON EXTERNAL SOURCE.
Manual finalizing when recording is stopped
→ TITLE TR 1 or (2,3,...): for editing the title of track 1 or (2,3,...).
Direct-Line-Recording (DLR)....84
Digital coaxial connections via a digital receiver
text_image
AC MAINS - DIGITAL ANALUS OPTICAL OUT IN IN OUTnatural_image
Diagram of a handheld device with battery and arrow indicators (no text or symbols)text_image
Diagram showing a hand holding a CD or DVD disc next to a CD recorder device with labeled ports and control knobs.Wichtiger Hinweis!
→ CD TEXT EDIT starts blinking and CD TEXT EDIT is displayed.
CLASS 1 LASER PRODUCT