
MIO 42 - Oven Scandomestic - Free user manual and instructions
Find the device manual for free MIO 42 Scandomestic in PDF.


| Product Type | Built-in Electric Oven |
| Model | MIO 42 |
| Brand | Scandomestic |
| Dimensions (H x W x D) | 595 x 595 x 568 mm |
| Oven Capacity | 72 Liters |
| Weight | Approx. 32 kg |
| Power Supply | 220-240 V, 50/60 Hz, 16 A |
| Total Power Consumption | 2.8 kW |
| Heating Methods | Conventional, Fan-assisted, Grill, Bottom Heat |
| Temperature Range | 50°C - 250°C |
| Control Type | Rotary knobs and analog timer |
| Interior Light | Yes |
| Cleaning System | Enamel interior, easy-clean coating |
| Safety Features | Child lock, automatic shut-off, cooling fan |
| Energy Class | A+ |
| Accessories Included | 1 baking tray, 1 wire shelf, 1 grill rack |
| Installation Type | Built-in under counter or in column |
| Spare Parts Availability | Available via Scandomestic service network |
| Repair Index | 7.5 / 10 |
| Warranty | 2 years |
Frequently Asked Questions - MIO 42 Scandomestic
User questions about MIO 42 Scandomestic
0 question about this device. Answer the ones you know or ask your own.
Ask a new question about this device
Download the instructions for your Oven in PDF format for free! Find your manual MIO 42 - Scandomestic and take your electronic device back in hand. On this page are published all the documents necessary for the use of your device. MIO 42 by Scandomestic.
USER MANUAL MIO 42 Scandomestic
natural_image
Simple line drawing of a trash bin with no text or symbols
natural_image
Pure electrical circuit lines without any symbolsnatural_image
Simple diagram with a circle, three dots labeled 3, 2, and 1, no text or symbols present.natural_image
Line drawing of a hand holding a small object with a ruler, no text or symbols presentnatural_image
Pure technical line drawing of a mechanical joint or bracket (no text or symbols)220-240 V, AC 15 W

natural_image
Pure diagram of a mechanical component with directional arrows, no text or symbols presentFigur 1
natural_image
Line drawing of a hand holding a curved object with a ruler, no text or symbols presentFigur 2
VEDLIGEHOLDELSE OG RENG∅RING
Frakobl apparatet.
natural_image
Symbol of a trash bin crossed with a diagonal line, representing no waste or discharge (no text or labels)Thank you for relying on our products. We aim to allow you to optimally and efficiently use this environment-friendly product produced in our modern facilities under precise conditions with respect to sense of quality in total.
We advise you to read these operating manual thoroughly before using the midi oven and keep it permanently so that the features of the mini oven you have purchased will stay the same as the first day for a long time and serve in an optimum efficient way.
NOTE:
This Operating Manual is prepared for multiple models. Your appliance may not feature some functions specified in the manual.
The product images are schematic.
This product has been produced in modern environment-friendly facilities without adversely affecting nature. “Complies with AEEE Regulation.”
CONTENT
Warnings 4
Electrical Connection and Safety 7
Explanation of the Oven and the Control Panel 7
Technical Specifications 8
Cooking Chart.... 11
Operation of the Oven 11
If Your Oven is not Working.... 12
Oven lamp 12
Maintenance and Care 12
Using yoghurt curing and Steam cleaning function 13
Compliance with AEEE regulations and Waste Disposal 14 Packaging Information 15
(*) option
WARNINGS
WARNINGS
This appliance is manufactured in accordance with the safety regulations. Operation against the rules cause harm both to the person and the appliance.
Do not put any flammable, ignitable materials or material that may melt or deform due to the heat inside the oven against possible risks even when your appliance is not operated.
Appliance is not designed to be set from remote or to be remotely operated.
Door surface may reach high temperatures when the appliance is operated.
Do not pour cold water to the tray or inside the oven while the surface of the appliance is still hot. Surface of the appliance may get damaged as a result of the sudden change in the temperature, and it may cause scaldings.
Long term intense use of the appliance may require extra ventilation, for example, opening a window, or a better ventilation, such as increasing the mechanical ventilation level. Put curtains, tulles, paper or any flammable (ignitable) material away from the appliance before starting to use the appliance. Do not put ignitable or flammable materials on or in the appliance.
Keep an eye on the children in the vicinity of the appliance.
This appliance is not intended to be used by people with physical, sensory and mental disabilities (including children) or those who have not adequate experience and knowledge regarding its use, unless they are under the supervision of a person responsible for the safety of the appliance.
Appliance may be used by children above age of 8 persons with limited physical, perceptual or mental abilities or persons with a lack of experience and knowledge if they are supervised or given instructions on the operation of the appliance and any relevant risks they may be encountered.
Children should not tamper with the appliance.
Cleaning and user maintenance of the appliance shall not be performed by unattended children.
Appliance shall be very hot while it is being operated or after a short while when it is operated; do not touch heater surfaces, and let children to touch these surfaces.
Keep the appliance and cord away from children under 8. Children shall be supervised to ensure that they do not play with the appliance.
This appliance is suitable for use at home and similar environments.
Do not apply pressure on the oven door with heavy objects when the door is open; do not lean, place heavy objects on the door or handle the appliance by holding its door.
Use your appliance for cooking and heating your meal only. Do not use your appliance for unintended purposes (heating the room, for commercial purposes etc.). Ensure that the appliance is unplugged before replacing the lamp of your appliance to prevent a risk of electric shock.
The usage life of this product is 10 (ten) years.
ELECTRICAL CONNECTION AND SAFETY
Your appliance requires a current of 16 Amperes. Have the appliance installed by qualified persons, if required.
Your appliance is designed for a power supply of 230 V, 50Hz. If your mains supply specifications are different from the specified values, contact qualified persons.
Electrical connection of your appliance shall only be performed with earthed outlets installed as per the regulations. Contact authorized service if an earthed outlet is not available where the appliance shall be placed. Manufacturer is not responsible for damages caused by unearthed outlets.
If the mains cord (plugged cord) is damaged, this cord must be replaced by the importer or its service agent or an equally qualified personnel to prevent a hazardous situation.
Power cord of your appliance shall not come into contact with the hot components of the appliance.
EXPLANATION OF THE OVEN AND THE CONTROL PANEL

1
Control buttons 7- Oven pedestals
2 Inner boiler of the oven
8- Control panel
3 Oven body
4 Hotplate (option*)
10- Rectangular tray
5 Handle
11- Wire grill
6 Oven glass door
TECHNICAL SPECIFICATIONS

Timer:
Grill Heater
Enables adjusting of cooking time. When the set time has expired, timer shall cut off the power of the heaters and provide a warning with a tingling sound. Set the timer, program and thermostat buttons to "0" to turn off your appliance.
When the timer is set to , it shall operate indefinitely.
Thermostat:
Thermostat ensures a temperature from 40 to 220^ inside the oven. Used with oven program function button. When the temperature in your oven reaches the set value, the thermostat will break the circuit and thermostat light will go off. If the temperature drops below the set temperature, the thermostat will be activated and the indicator light will illuminate.
Programmer:
Allows you to select oven functions. Functions are described in the next section. The function selection button and oven thermostat button shall be set to a desired temperature rate. Otherwise selected function button does not operate. Hotplate and oven functions do not operate simultaneously.
Chicken roast function:
Only chicken roast motor operates. Provides chicken roast by rotating the skewer. Grill heater can also be used for roasting.
Hotplate Programmer:
Enables selection of Hotplate (Cooking Plate) functions.
Hotplates can be controlled from a single button or individual buttons. Does not operate with oven functions simultaneously.

Operation of the Oven
Functions
Oven functions may change based on the model each mini-midi oven may not include all of the specified oven functions.
Upper and Lower Heating

Upper and Lower heating are activated. The food is cooked simultaneously from top and bottom. It is applicable for instance for cooking cake, patty or cakes or stew in moulds or containers. Use a single tray for cooking.
Lower heating

Only lower heating are activated. It is applicable for instance to bake pizza or food that requires to be browned on the lower section.
Turbo fan backed up with Grill

Grill heater
operates
with
fan
motor
simultaneously. Suitable for meatballs, chicken and pastry to be roasted.
Grill

The grill cooker is used to grill meats such as steaks, sausages and fish. Place tray to the lower rack and put water inside the tray while
High heating

Only upper heatingOnly upper heating are activated. Thanks to the turbo fan feature, the heat is dispersed homogeneously inthe oven. It is applicable for instance for cooking cake, patty or cakes or stew in moulds or containers. Use a single tray for cooking. are
Turbo fan supported lower heating

Lower heating operates with fan motor simultaneously. The hot air is dispersed homogeneously in the oven. To cook the bottom parts of crispy pita or spicy pancake.
Turbo fan supported upper and lower heating

Turbo fan, upper and lower heating are activated simultaneously. Thanks to the turbo fan feature, the heat is dispersed homogeneously in the oven. It is applicable for instance for cooking cake, patty or cakes or stew in moulds or containers. Use a single tray for cooking.
Properties
External width 532 mm
External depth 458.5 mm
External height (*) 331.5 /353.5 mm
Internal width 395 mm
Internal depth 390 mm
Internal height 196.5 mm
Thermostat 40-220°C
Timer (*) 0-90 minutes
Bottom heater 650 W
Top heater 650 W
Grill heater (*) 1300 W
Supply voltage 220-240V, \~ 50/60HZ.
(•): This feature is only available on some models.
COOKING CHART
Below you may find the information about the food we have tested in our laboratories to determined their cooking times. Cooking times may vary as per mains voltage, quality, amount of the ingredients to be cooked, and the temperature. Meals you cook using these values may not appeal to your tastes. You may discover different values by making experiments to achieve different flavours and results that appeal to your taste.
| Food | Thermostat setting (°C) | Cooking time (min.) | Shelf order |
| Cookie | 170-180 | 25-30 | Center |
| Cake | 170-190 | 30-40 | Center |
| Pie | 180-220 | 40-50 | Center |
| Muffin | 160-180 | 30-40 | Center |
| Pasta (baked) | 190-210 | 20-30 | Center |
| Fish | 220-MAX | 30-40 | Center |
| Lamb | 220-MAX | 90-120 | Center |
| Mutton | 220-MAX | 90-120 | Center |
| Veal | 220-MAX | 90-120 | Center |
| Turkey | 220-MAX | 45-55 | Center |
| Poultry | 220-MAX | 75-100 | Center |
| Defrost | 60-120 | 55-60 | Center |
"Pre-heat your oven before cooking."
You may consider the time required until the temperature light is turned off for the first time as the pre-heating time."
Connect the plug to the earthed outlet. Bring the timer to manual or automatic cooking position. Set the thermostat to a proper temperature as per the values in the cooking chart. If you have set the timer to manual, you shall hear a warning sound at the end of cooking.
Some smoke and odour may occur while the protective materials on the heaters harden during the first operation of your oven. This is normal and not a manufacturing fault.
Thawing:
Remove the food to be thawed from its container and place it on the grill. Slide the rectangular tray under the grill to collect dripping water.
Thus, thawed food shall not be kept inside its thawed water. Do not use thawed water (for health purposes) and discharge it.
You may use thawing feature as specified in the cooking chart,
Using ( ) functions during defrost is recommended.
As the thawing times vary as per the weight of the food, check it once in a while. Do not cook using the rectangular and circular trays at the same time in the oven. We recommend you to pre-heat your oven 8 to 10 minutes before cooking. This oven is intended for household cooking only. Do not use for other purposes.
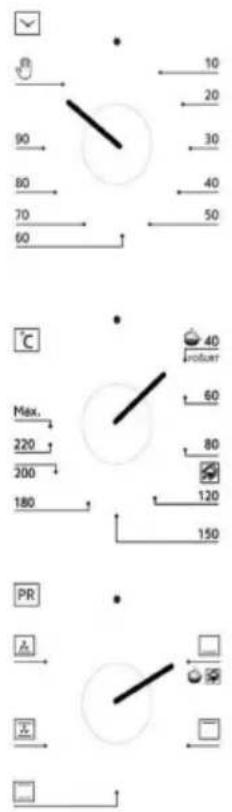
FERMENTING YOGHURT
Select yoghurt mode from thermostat section while the oven is
empty, set the switch to lower resistance, pre-heat for 10 minutes and start fermenting at somewhere else.
For fermenting, we boil the raw milk we have purchased at 90^ for 10-15 minutes, and then cool it down to 43 - 45^ (yeasting temperature). Add yeast with a ratio of 1 % - 3 % add stir slowly while the milk is at this temperature. Put the yeast added milk to the 1st shelf of the pre-heated oven without closing its lid and close the oven
door and set the timer to manual. After 5 hours, remove the fermented yoghurt from the oven and keep it at room temperature for 15-20 minutes, and keep the yoghurt without shaking it for 1 day at 4°C in a refrigerator. After 1 day, yoghurt is ready to be consumed. Bon appetite.
STEAM CLEANING
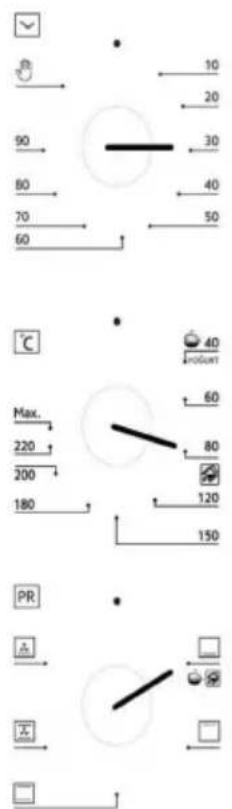
This allows cleaning of the dirt that is softened by the steam occurred inside the oven without using chemicals. Remove all accessories from the oven. Put 2 glasses of water inside the square tray, and place the tray to the bottom shelf.
Bring the thermostat to steam cleaning mode. Set the timer to 30 minutes.
Bring the switch to lower resistance mode. After operating the oven for 30 minutes, open the door and wipe the inner surface of oven with a damp cloth.
(*): This feature is only available on some models.
Please check if the power cord is plugged to the outlet securely.
Check the electrical installation.
Check the fuse.
Check for any damage to the power cord. Contact the authorized dealership if the issue is not resolved.
OVEN LAMP (\*)
Replacement of the Oven Lamp
WARNING: To avoid electric shock, ensure that the device circuit is open before changing the lamp.
(Open circuit means that the power is cut-off.)
Cut off the power supply of your appliance first, and ensure that the it is cooled down.
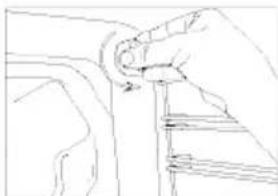
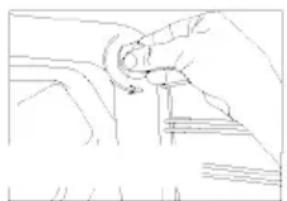
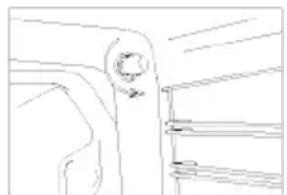
Remove the glass protector by rotating as shown in the figure. Using plastic gloves may help you if you have difficulty in rotating it.
Then, remove the lamp by rotating it, and install the new lamp with the same specifications. Replace the glass protector, plug the appliance and complete the replacement procedure. You can now use your oven.
Type G9 Bulb

natural_image
Line drawing of a hand adjusting a mechanical component (no text or symbols)natural_image
Pure diagram of a mechanical component with arrows indicating direction (no text or symbols)Type E14 Bulb

natural_image
Pure technical line drawing of a mechanical component without any text, numbers, or symbols220-240 V, AC 15 W
natural_image
Line drawing of a hand holding a small object, possibly a tool or component, with no visible text or symbols.Figure 1 Figure 2
MAINTENANCE AND CLEANING
Unplug your appliance.
Appliance may be very hot while it is being operated or after a short while when it is operated. In this case, do not touch hot parts.
Do not clean the interior parts, door, tray and other parts of the oven with tools such as bristle brushes, steel wool or knives. Do not use abrasive and scratching detergents.
Does not contain the dangerous and prohibited materials indicated in "Waste Electrical and Electronic Equipment Control Regulation". Complies with AEEE Regulations.
natural_image
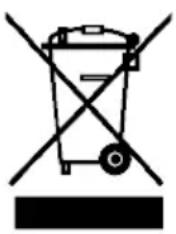
Symbol of a trash bin crossed with a diagonal line, no text or numbers presentThis product was manufactured from recyclable and reusable high quality parts and materials. Therefore, do not dispose of this product with other domestic wastes at the end of its life cycle. Take it to a collection point for electrical and electronic equipment. You can ask your local administration about these collection
points.
You can help protect the environment and natural resources by delivering the used products for recycling. Before disposing of the product, cut the power cord and render it non-functional for children's safety.
PACKAGE INFORMATION
The product's packaging is made of recyclable materials, in accordance with the National Legislation. Do not dispose the packaging waste with the household waste or other wastes, dispose it to the packaging collection areas specified by local authorities.
Bästa kund,
1
natural_image
Line drawing of a hand holding a small object, possibly a tool or device, with no visible text or symbols.natural_image
Pure diagram of a mechanical component with arrows indicating direction (no text or symbols)Bild 1 Bild 2
Typ E14-glödlampa
natural_image
Pure technical line drawing of a mechanical component without any text, numbers, or symbols220-240 V, AC 15 W

natural_image
Line drawing of a hand holding a small object, possibly a tool or component, with no visible text or symbols.UNDERHÅLL OCH RENGÖRING
Koppla ur enheten.
natural_image
Symbol of a trash bin crossed with a diagonal line, no text or numbers present


- VEDLIGEHOLDELSE OG RENG∅RING
- NOTE:
- CONTENT
- WARNINGS
- ELECTRICAL CONNECTION AND SAFETY
- TECHNICAL SPECIFICATIONS
- Timer:
- Thermostat:
- Programmer:
- COOKING CHART
- FERMENTING YOGHURT
- STEAM CLEANING
- OVEN LAMP (\*)
- Replacement of the Oven Lamp
- MAINTENANCE AND CLEANING
- PACKAGE INFORMATION
- UNDERHÅLL OCH RENGÖRING
Brand : Scandomestic
Model : MIO 42
Category : Oven