
LF 015 I - Dishwasher FAGOR - Free user manual and instructions
Find the device manual for free LF 015 I FAGOR in PDF.


| Product Type | Built-in Dishwasher |
| Dimensions (H x W x D) | 85 x 60 x 55 cm |
| Net Weight | 45 kg |
| Power Supply | 220-240 V ~ 50 Hz |
| Rated Power | 2000 W |
| Energy Class | A+ |
| Water Consumption | 10 L per cycle |
| Number of Place Settings | 13 |
| Noise Level | 52 dB(A) |
| Number of Wash Programs | 6 |
| Half Load Option | Yes |
| Delay Start | Up to 24 h |
| Child Lock | Yes |
| Flood Protection | Integrated safety system |
| Filter Type | Self-cleaning microfilter |
| Adjustable Racks | Yes, height-adjustable |
| Salt and Rinse Aid Indicator | Yes |
| Interior Light | No |
| Repair Index | 6.5 / 10 |
Frequently Asked Questions - LF 015 I FAGOR
User questions about LF 015 I FAGOR
0 question about this device. Answer the ones you know or ask your own.
Ask a new question about this device
Download the instructions for your Dishwasher in PDF format for free! Find your manual LF 015 I - FAGOR and take your electronic device back in hand. On this page are published all the documents necessary for the use of your device. LF 015 I by FAGOR.
USER MANUAL LF 015 I FAGOR
natural_image
Interior scene of a modern living room with a person reading on a sofa, washing machines, and a lamp in the background (no visible text or symbols)
bar
| Category | Value | |---|---| | Category 1 | 100 | | Category 2 | 100 | | Category 3 | 100 | | Category 4 | 100 | | Category 5 | 100 | | Category 6 | 100 | | Category 7 | 100 | | Category 8 | 100 | | Category 9 | 100 | | Category 10 | 100 | | Category 11 | 100 | | Category 12 | 100 | | Category 13 | 100 | | Category 14 | 100 | | Category 15 | 100 | | Category 16 | 100 | | Category 17 | 100 | | Category 18 | 100 | | Category 19 | 100 | | Category 20 | 100 | | Category 21 | 100 | | Category 22 | 100 | | Category 23 | 100 | | Category 24 | 100 | | Category 25 | 100 | | Category 26 | 100 | | Category 27 | 100 | | Category 28 | 100 | | Category 29 | 100 | | Category 30 | 100 | | Category 31 | 100 | | Category 32 | 100 | | Category 33 | 100 | | Category 34 | 100 | | Category 35 | 100 | | Category 36 | 100 | | Category 37 | 100 | | Category 38 | 100 | | Category 39 | 100 | | Category 40 | 100 | | Category 41 | 100 | | Category 42 | 100 | | Category 43 | 100 | | Category 44 | 100 | | Category 45 | 100 | | Category 46 | 100 | | Category 47 | 100 | | Category 48 | 100 | | Category 49 | 100 | | Category 50 | 100 | | Category 51 | 100 | | Category 52 | 100 | | Category 53 | 100 | | Category 54 | 100 | | Category 55 | 100 | | Category 56 | 100 | | Category 57 | 100 | | Category 58 | 100 | | Category 59 | 100 | | Category 60 | 100 | | Category 61 | 100 | | Category 62 | 100 | | Category 63 | 100 | | Category 64 | 100 | | Category 65 | 100 | | Category 66 | 100 | | Category 67 | 100 | | Category 68 | 100 | | Category 69 | 100 | | Category 70 | 100 | | Category 71 | 100 | | Category 72 | 100 | | Category 73 | 100 | | Category 74 | 100 | | Category 75 | 100 | | Category 76 | 100 | | Category 77 | 100 | | Category 78 | 100 | | Category 79 | 100 | | Category 80 | 100 | | Category 81 | 100 | | Category 82 | 100 | | Category 83 | 100 | | Category 84 | 100 | | Category 85 | 100 | | Category 86 | 100 | | Category 87 | 100 | | Category 88 | 100 | | Category 89 | 100 | | Category 90 | 100 | | Category 91 | 100 | | Category 92 | 100 | | Category 93 | 100 | | Category 94 | 100 | | Category 95 | 100 | | Category 96 | 100 | | Category 97 | 100 | | Category 98 | 100 | | Category 99 | 100 | | Total (Total) |ÍNDICE / ÍNDICE / TABLE OF CONTENT / INHALT
ESPAÑOL
USING THE APPLIANCE - A FEW PRACTICAL TIPS 61
APPLIANCE MAINTENANCE AND CLEANING 73
TROUBLESHOOTING 75
DEUTSCH
INSTALLATION UND MONTAGE 79
natural_image
Close-up of a hand holding a small object against a dark background, with faint grid lines and partial text visible (no legible signage or symbols)
natural_image
Close-up of a hand holding a white rectangular object over a patterned background (no visible text or symbols)
natural_image
Close-up of a hand holding an object, possibly a tool or device, with no visible text or symbols.
natural_image
Close-up of a white electronic device with black edges and a small label (no visible text or symbols)IMPORTANTE
natural_image
Close-up of a mechanical sensor or gauge device with a cylindrical head and base, no visible text or symbols.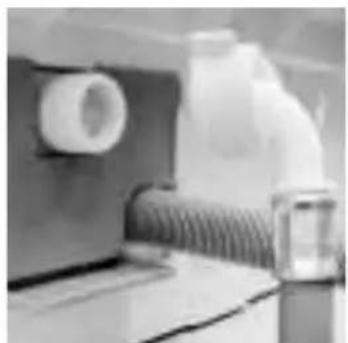
natural_image
Close-up of a mechanical component with a coiled spring and cylindrical housing (no visible text or symbols)b
natural_image
Front view of a white kitchen appliance with control panel and side door (no visible text or symbols)
natural_image
Person using a handheld paper filter on a large appliance (no visible text or symbols)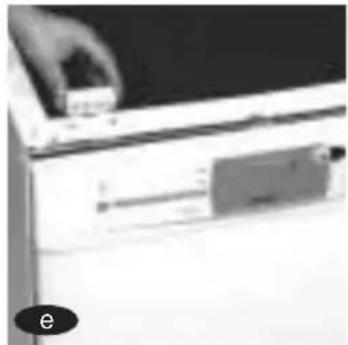
natural_image
Close-up of a hand holding a small object over a device (no visible text or symbols)
natural_image
Close-up of hands cleaning a wall with a tool, no visible text or symbolsg
natural_image
Front view of a white washing machine with control panel and buttons (no visible text or symbols)
natural_image
Close-up of a hand using a printer to press or install a printer on a white filing cabinet (no visible text or symbols)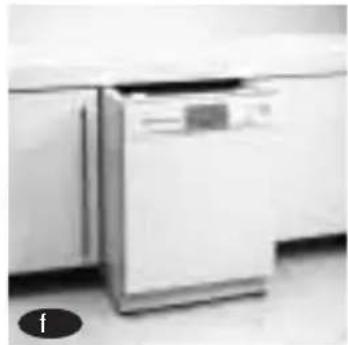
natural_image
Black and white photo of a kitchen appliance with a white front panel and two side cabinets (no visible text or symbols)
natural_image
Close-up of a hand holding a small object near a white cabinet (no visible text or symbols)natural_image
Close-up of hands using a tool on a surface, with an inset showing hand positioning (no visible text or symbols)
natural_image
Close-up of hands installing or adjusting a wall corner component (no visible text or symbols)
natural_image
Close-up of hands using a tool to apply material or equipment (no visible text or symbols)
natural_image
Close-up of a hand pressing down on a white plastic sheet (no visible text or symbols)natural_image
Exterior view of a white refrigerator with a handle and label 'a' (no visible text or symbols on the device itself)
natural_image
Close-up of a hand holding a white rectangular appliance with a label, no visible text or symbols on the device itself.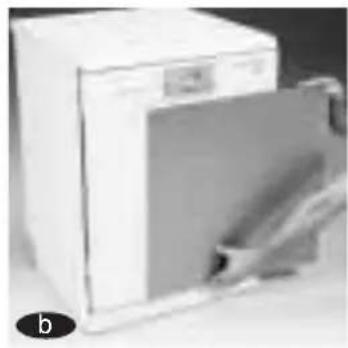
natural_image
Exterior view of a white kitchen appliance with a door open, no visible text or symbols
natural_image
White disposable water dispenser with lid and front panel, no visible text or symbolsnatural_image
Exterior view of a modern kitchen appliance with a white front panel and handle (no visible text or symbols)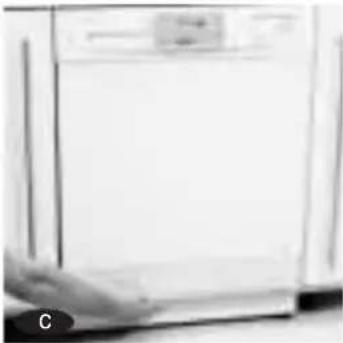
natural_image
Exterior view of a modern office building (no signage)
natural_image
Close-up of hands holding a pen, writing on paper (no visible text or symbols)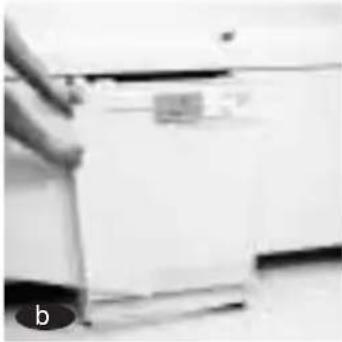
natural_image
Close-up of a hand holding a printer with a label, no visible text or symbols on the device itself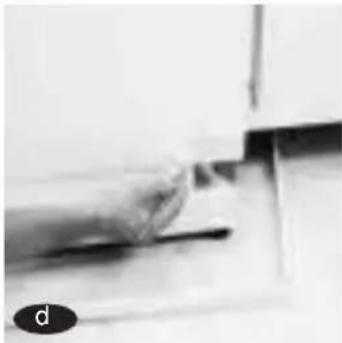
natural_image
Close-up of a hand inserting a small object into a rectangular frame (no visible text or symbols)
natural_image
Hand holding a handheld electric drill bit with a black barrel, against a plain white background (no text or symbols visible)
natural_image
Exterior view of a modern kitchen appliance with a large white cabinet and side rails (no visible text or symbols)INTEGRACIÓN
Para instalar un lavavaji-llas integrable:
a
natural_image
Close-up of a hand pressing down on a flat surface with a small rectangular object, no visible text or symbols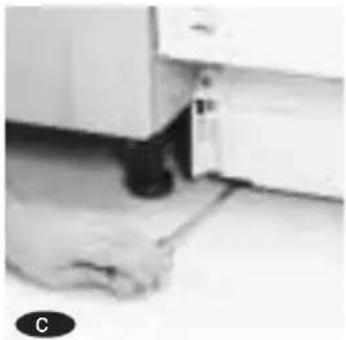
natural_image
Close-up of hands operating a laptop with a small device attached (no visible text or symbols)
natural_image
Hand inserting a component into a kitchen appliance (no visible text or symbols)
natural_image
Close-up of a hand using a pen to apply liquid onto a surface, with no visible text or symbols.
natural_image
Close-up of a person's hand holding a transparent surface with an upward arrow, no visible text or symbols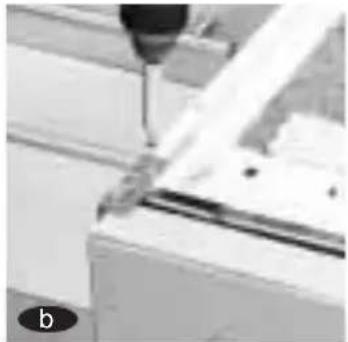
natural_image
Close-up of a mechanical component with a tool inserted, no visible text or symbols
natural_image
Close-up of hands installing or adjusting a wall-mounted component (no visible text or symbols)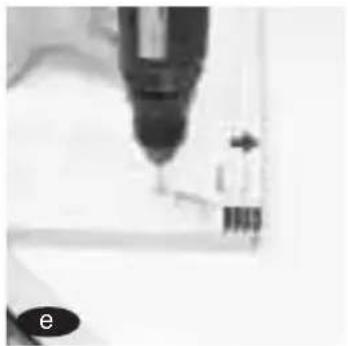
natural_image
Close-up of a precision tool tip interacting with a small mechanical component (no visible text or symbols)
natural_image
Close-up of hands cleaning a kitchen appliance (no visible text or symbols)
natural_image
Close-up of a laboratory glassware unit with a white cylindrical object on top, no visible text or symbolsIMPORTANTE
natural_image
Close-up of a mechanical component or tool with no visible text or symbols
natural_image
Industrial equipment setup with pipes and scaffolding (no visible text or symbols)
natural_image
Exterior view of a modern kitchen appliance with a cloth partially visible (no signage or text)
natural_image
Exterior view of a modern office building (no signage)IMPORTANTE
natural_image
Close-up of a hand pressing a button on a white surface, no visible text or symbols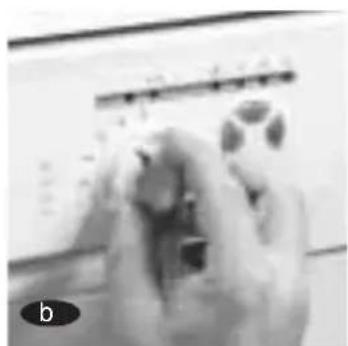
natural_image
Close-up of hands holding a small object, possibly a tool or device, with no visible text or symbols.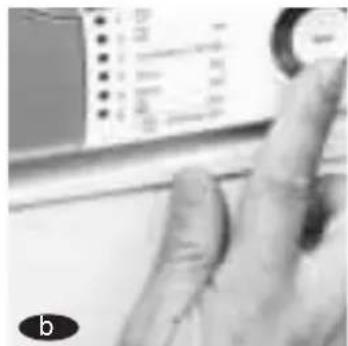
natural_image
Close-up of hands pressing a button on a washing machine (no visible text or symbols)USO DEL APARATO Y CONSEJOS PRÁCTICOS
natural_image
Close-up of a mechanical gear or dial with visible teeth and central hub (no text or symbols)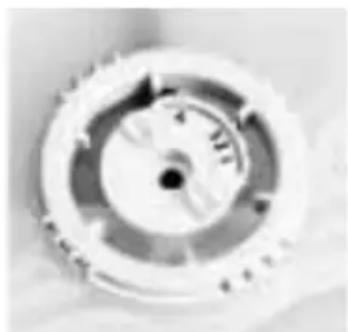
natural_image
Close-up of a mechanical gear or dial with no visible text or symbolsnatural_image
Close-up of a circular mechanical component with a central hole (no visible text or symbols)REGULADOR Modelo C

| Grados franceses | 0-13 HF | 14-38 HF | 39-50 HF | 51-63 HF | 64-100 HF |
| Grados alemanes | 0-7 DH | 8-21 DH | 22-28 DH | 29-35 DH | 36-56 DH |
| Posición delregulador de sal | 0 | 1 | 2 | 3 | 4 |
| DUREZA | blandasin sal | normal | media | dura | muydura |
DÓNDE PONER LA SAL

natural_image
Close-up of a mechanical component or tool with no visible text or symbols
natural_image
Close-up of a metallic mechanical component with a circular opening and flange, no visible text or symbols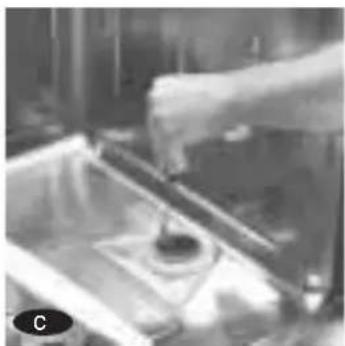
natural_image
Close-up of a hand pouring liquid into a container with a small bowl (no visible text or symbols)
natural_image
Close-up of a hand pressing down on a metal tray with small objects, no visible text or symbolsnatural_image
Close-up of a white electronic device with four labeled buttons (s, circle, star, dot) and no readable text or symbols.IMPORTANTE
natural_image
Close-up of a computer mouse control panel with icons for size, zoom, and button (no readable text or symbols)
natural_image
Close-up of a mechanical component with two rectangular parts and a central display (no visible text or symbols)
natural_image
Close-up of stacked electronic components or modules (no visible text or symbols)
natural_image
Close-up of a mechanical component with coiled spring-like structures and internal components (no visible text or symbols)PARA 13 CUBIERTOS PARA 12 CUBIERTOS
natural_image
Close-up of coiled metal pipes with internal components (no visible text or symbols)EN-50242

natural_image
Close-up of a mechanical component with coiled spring and housing (no visible text or symbols)POSICIÓN VERTICAL

natural_image
Close-up of a mechanical device with internal components and a circular ring, no visible text or symbolsPOSICIÓN HORIZONTAL

natural_image
Black and white photo of a warehouse interior with metal shelving units (no visible text or symbols)
natural_image
Close-up of coiled metal pipes with directional arrows indicating flow or movement (no text or symbols)CARGA DE PLATOS
IMPORTANTE
natural_image
Black-and-white photo of a computer monitor with multiple screens and a mouse on top (no visible text or symbols)
natural_image
Black-and-white photo of stacked food items including eggs and a tray, with no visible text or symbols.PARA 13 CUBIERTOS PARA 12 CUBIERTOS

natural_image
Black and white photo of stacked circular objects with horizontal stripes, no visible text or symbolsEN-50242

natural_image
Close-up of a textured surface with intersecting lines and patterns (no visible text or symbols)
natural_image
Close-up of mechanical components and gears (no visible text or symbols)
natural_image
Abstract pattern of intersecting lines and squares with no discernible text or symbols


natural_image
Black-and-white photo of a transparent container with several white circular objects arranged in rows (no visible text or symbols)natural_image
Close-up of a computer monitor with visible screen and keyboard (no text or symbols)
natural_image
Close-up of a hand interacting with a transparent screen displaying abstract wave patterns (no text or symbols visible)b Cestillo superior modelo B:
natural_image
Close-up of a hand holding a screwdriver with a curved tool, no visible text or symbols
natural_image
Close-up of a hand holding a small electronic component with an arrow indicating rotation (no visible text or symbols)3
natural_image
Close-up of a hand pointing at a small electronic component (no visible text or symbols)
natural_image
Close-up of a hand holding a small white object with a hexagonal cutout, against a plain background (no text or symbols visible)6 DESARROLLO DEL PROGRAMA DE LAVADO
natural_image
Close-up of a mechanical component with a stop handle and a circular ring, no visible text or symbols
natural_image
Close-up of a kitchen rotary knob with control buttons and a dial (no visible text or symbols)
natural_image
Close-up of a computer monitor with a screen and control panel (no visible text or symbols)IMPORTANTE
natural_image
Close-up of a kitchen appliance with a circular mark and control buttons (no readable text or symbols)natural_image
Person washing hands in a stainless steel kitchen sink with a faucet (no visible text or symbols)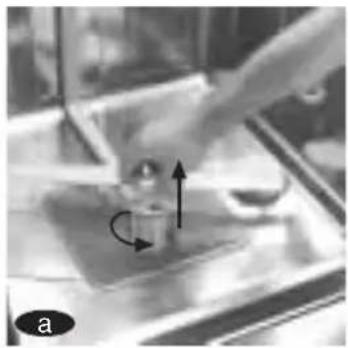
natural_image
Close-up of a laboratory procedure showing a hand holding a sample with an arrow indicating motion (no text or symbols visible)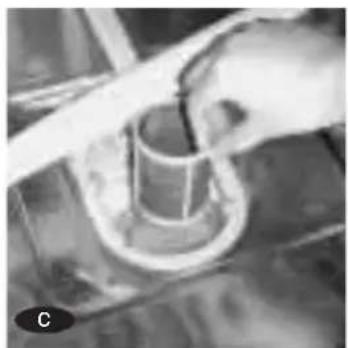
natural_image
Close-up of a hand holding a cylindrical object with a side panel, possibly a container or mechanical component (no visible text or symbols)d
natural_image
Close-up of a hand pouring liquid into a container with a small bowl, no visible text or symbols
natural_image
Close-up of hands pressing down on a small object in a transparent container (no visible text or symbols)en su asiento.
natural_image
Close-up of a mechanical component with blurred background (no visible text or symbols)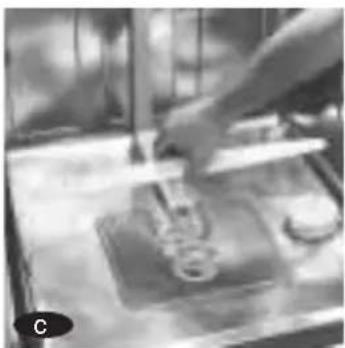
natural_image
Close-up of hands using a handheld tool to press or inspect a mechanical component (no visible text or symbols)natural_image
Close-up of a metal mesh structure with grid patterns, no visible text or symbols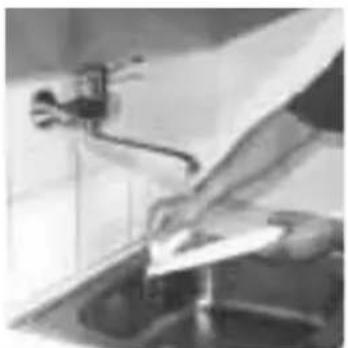
natural_image
Person washing a kitchen sink with a hand near the sink (no visible text or symbols)IMPORTANTE
natural_image
Hand cleaning a white washing machine with a cloth (no visible text or symbols)IMPORTANTE
natural_image
Black and white abstract image with grid lines and partial shapes, no visible text or symbols
natural_image
Close-up of a hand holding a white rectangular object over a blurred background with faint text (no legible symbols)
natural_image
Close-up of a hand holding an object, possibly a pen or tool, with no visible text or symbols.
natural_image
Close-up of a white electronic device with black handle and control panel (no visible text or symbols)IMPORTANTE
natural_image
Close-up of a mechanical pressure sensor or gauge device with a cylindrical head and flange (no visible text or symbols)
natural_image
Close-up of a wall-mounted hose and a plastic bag, no visible text or symbolsb
IMPORTANTE
natural_image
Front view of a white kitchen appliance with control panel and side buttons (no visible text or symbols)
natural_image
Close-up of a hand pressing down on a white appliance lid (no visible text or symbols)
natural_image
Close-up of a hand holding a small object over a white electronic device (no visible text or symbols)
natural_image
Close-up of hands holding a small object near a wall, possibly a device or tool (no visible text or symbols)natural_image
Front view of a white washing machine with control panel and buttons (no visible text or symbols)
natural_image
Person handling a printer or scanner device with a paper lid (no visible text or symbols)
natural_image
Black and white photo of a kitchen appliance with a white stainless steel refrigerator and two other cabinets (no visible text or symbols)
natural_image
Close-up of a hand holding a small object near a window (no visible text or symbols)natural_image
Close-up of hands using a tool on a surface, with an inset showing hand positioning near a window (no visible text or symbols)
natural_image
Close-up of hands installing or adjusting a wall-mounted component (no visible text or symbols)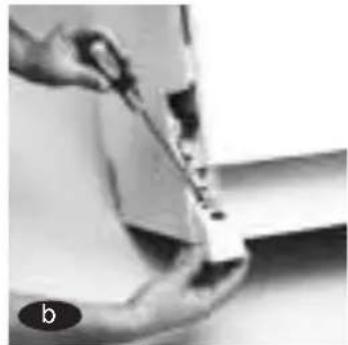
natural_image
Close-up of hands using a tool to apply material or equipment (no visible text or symbols)
natural_image
Close-up of a hand holding a white rectangular electronic device (no visible text or symbols)5
natural_image
Exterior view of a white refrigerator with a handle, labeled 'a' in the corner (no other text or symbols visible)
natural_image
Close-up of a white appliance with a blue lid and attached cable, no visible text or symbols
natural_image
Exterior view of a white kitchen appliance with a door open, showing internal components (no visible text or symbols)
natural_image
Exterior view of a white disposable water dispenser appliance (no visible text or symbols)natural_image
Black and white photo of a refrigerator with a hand extending its side (no visible text or symbols)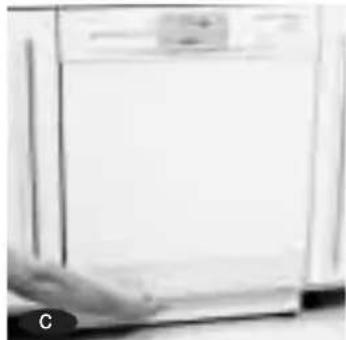
natural_image
Exterior view of a modern office building (no signage)
natural_image
Close-up of hands holding a document or paper with a pen, no visible text or symbols
natural_image
Close-up of a hand holding a white paper airplane, no visible text or symbols
natural_image
Close-up of a hand holding a pen, partially visible with a small object on the surface (no text or symbols)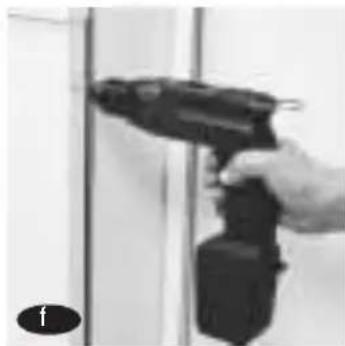
natural_image
Hand holding a handheld electric drill bit with a black trigger, against a plain wall (no text or symbols visible)
natural_image
Exterior view of a modern kitchen appliance with double doors and a digital display (no visible text or symbols)INTEGRAÇÃO
natural_image
Close-up of hands operating a mechanical device with a rectangular component (no visible text or symbols)
natural_image
Close-up of a hand operating a sewing machine (no visible text or symbols)
natural_image
Hand inserting a small component into a kitchen appliance (no visible text or symbols)
natural_image
Close-up of a hand using a pipette to apply liquid onto a surface (no text or symbols visible)
natural_image
Close-up of hands cleaning a glass door with an upward arrow (no text or symbols visible)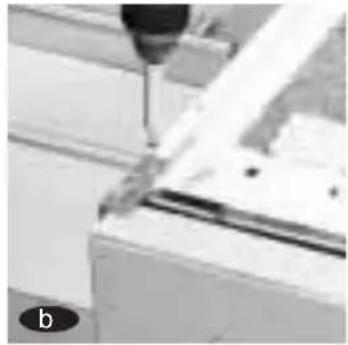
natural_image
Close-up of a mechanical component with a pointed tool inserted, no visible text or symbols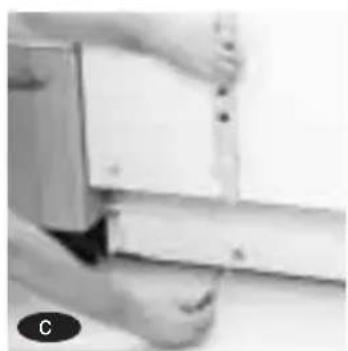
natural_image
Close-up of hands installing or adjusting a wall-mounted component (no visible text or symbols)
natural_image
Close-up of a precision tool tip interacting with a mechanical component (no visible text or symbols)
natural_image
Person cleaning a kitchen appliance with hand on front (no visible text or symbols)
natural_image
Close-up of a laboratory glassware rack with a white cylindrical object on top (no visible text or symbols)IMPORTANTE
natural_image
Close-up of a mechanical component or tool with no visible text or symbols
natural_image
Exterior view of a modern office building (no signage)
natural_image
Close-up of industrial machinery components with no visible text or symbols
natural_image
Exterior view of a modern office building (no signage)IMPORTANTE
natural_image
Close-up of a hand pointing at a small circular object on a white surface, with no visible text or symbols.

natural_image
Close-up of gloved hands holding a small object, with a blurred background showing indistinct shapes (no readable text or symbols)
natural_image
Close-up of a hand pressing down on a washing machine drum (no visible text or symbols)natural_image
Close-up of a mechanical component with no visible text or symbols, labeled 'REGULADOR Modelo B' at bottom (no other readable text or symbols)natural_image
Close-up of a circular mechanical component with a label 'REGULADOR Modelo C' below it (no other text or symbols visible)natural_image
Close-up of a mechanical component or tool with no visible text or symbols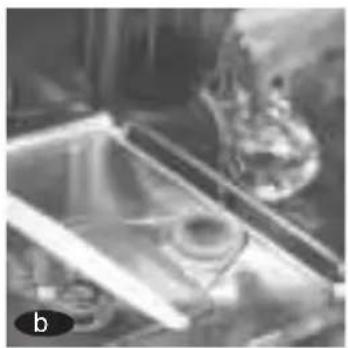
natural_image
Close-up of a metallic mechanical component with a circular opening, possibly part of a tool or device (no visible text or symbols)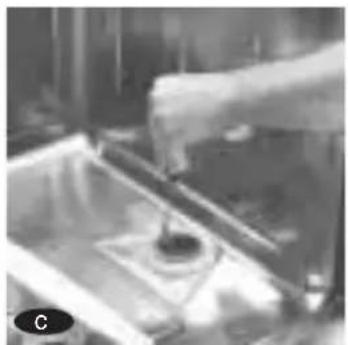
natural_image
Close-up of a hand using a tool to interact with a dark object in a container (no visible text or symbols)
natural_image
Close-up of a hand using a tool to interact with a small object on a metal tray (no visible text or symbols)natural_image
Close-up of a white electronic device with four icons: a stylus, a circle, a sunburst, and a dot (no readable text or symbols)IMPORTANTE
natural_image
Close-up of a hand using tweezers to apply material to small circular objects (no visible text or symbols)
natural_image
Close-up of a computer mouse control panel with buttons and a circular button (no readable text or symbols)natural_image
Close-up of a mechanical component with two rectangular parts, possibly a housing or enclosure, placed on a transparent surface (no visible text or symbols)
natural_image
Close-up of a mechanical component with a small circular feature, possibly part of a device or tool (no visible text or symbols)
natural_image
Close-up of a metallic heating element with coiled copper pipes and internal components (no visible text or symbols)PARA 13 TALHERES PARA 12 TALHERES
natural_image
Close-up of a mechanical component with coiled spring-like structures and internal components (no visible text or symbols)EN-50242

natural_image
Close-up of a mechanical component with coiled springs and housing (no visible text or symbols)POSIÇÃO VERTICAL
natural_image
Architectural model of a building with large windows and exposed structural elements (no visible text or symbols)POSIÇÃO HORIZONTAL

natural_image
Exterior view of a modern office building (no signage)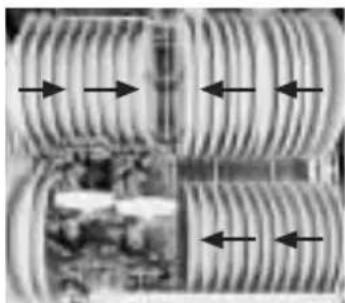
natural_image
Close-up of coiled metal pipes with directional arrows indicating flow or movement (no text or symbols)COLOCAÇÃO DE PRATOS
IMPORTANTE
natural_image
Black-and-white photo of a mechanical device with multiple cylindrical components and a spherical component, no visible text or symbols.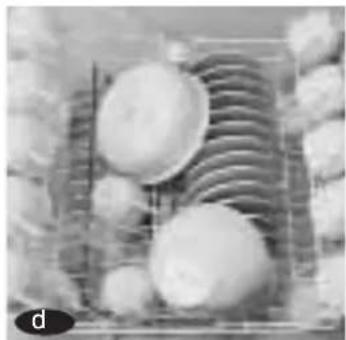
natural_image
Black-and-white photo of a tray with multiple round objects and a grid-like structure, possibly food or machinery (no visible text or symbols)
natural_image
Black-and-white photo of three spherical objects on a textured surface, possibly bottles or containers (no visible text or symbols)PARA 13 TALHERES PARA 12 TALHERES
EN-50242

natural_image
Close-up of a textured surface with intersecting lines and patterns (no visible text or symbols)
natural_image
Black-and-white photo of a grid-patterned surface with no visible text or symbols
natural_image
Close-up of a mechanical assembly with gears and shafts (no visible text or symbols)

natural_image
Exterior view of a modern office building (no signage)natural_image
Aerial view of a building complex with two upward-pointing arrows indicating direction (no visible text or symbols)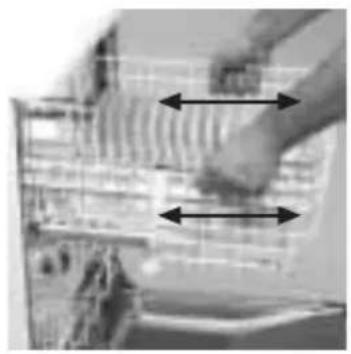
natural_image
Close-up of a hand interacting with a computer monitor displaying sound wave signals (no text or symbols visible)b
Cesto superior modelo B:
natural_image
Close-up of a hand holding a screwdriver with a circular head and arrow indicator (no text or symbols visible)
natural_image
Close-up of a hand holding a small object with an arrow indicating rotation (no visible text or symbols)natural_image
Close-up of a hand pointing at a small object on a white surface, no visible text or symbols
natural_image
Close-up of gloved hands holding a small object, with a soccer ball visible on the screen (no text or symbols)BOTÃO COMANDO GIRATÓRIO
natural_image
Close-up of a hand holding a soccer ball (no visible text or symbols)natural_image
Close-up of a mechanical component with a stop lever and a circular ring, no visible text or symbols
natural_image
Close-up of a kitchen rotary knob with control knobs and a dial (no visible text or symbols)
natural_image
Close-up of a computer monitor with a black screen and control buttons, no visible text or symbols on the screen or background.IMPORTANTE
natural_image
Close-up of a kitchen appliance with a circular mark highlighting a button (no visible text or symbols)natural_image
Person washing hands in a stainless steel kitchen sink (no text or symbols visible)
natural_image
Close-up of a mechanical component with directional arrows indicating motion (no visible text or symbols)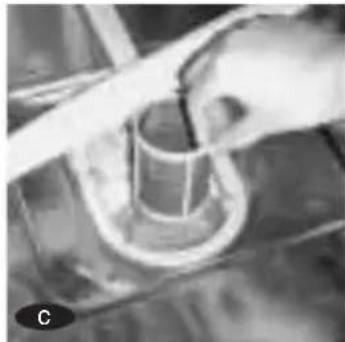
natural_image
Close-up of a hand using a tool to press or install a cylindrical component on a surface (no visible text or symbols)d
natural_image
Close-up of a hand pouring liquid into a container with a small container inside (no visible text or symbols)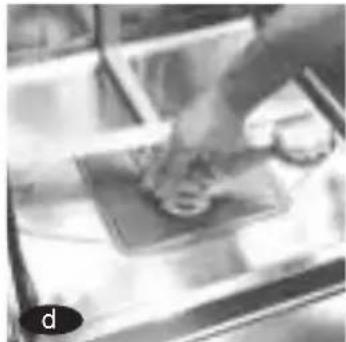
natural_image
Close-up of a hand pressing down on a tray with a small object, no visible text or symbolsnatural_image
Black-and-white photo of a person sitting on a bench with blurred background (no visible text or symbols)
natural_image
Close-up of hands using a tool to press or inspect a mechanical component (no visible text or symbols)natural_image
Close-up of a mesh grid structure with no visible text or symbols
natural_image
Person washing a kitchen sink with a hand near the sink (no visible text or symbols)IMPORTANTE
natural_image
Hand cleaning a white washing machine with a cloth (no visible text or symbols)IMPORTANTE
natural_image
Silhouette of a person holding a tool or object, no text or symbols present1 PROBLEMAS TÉCNICOS OU FUNCIONAIS
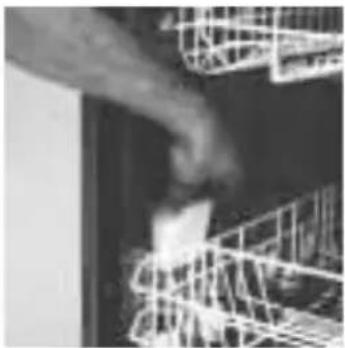
Remove the internal protection: polystyrene wedges for holding the racks firm.
natural_image
Black and white abstract image with faint grid lines and a dark rectangular shape, no visible text or symbols.
natural_image
Close-up of a hand holding a white rectangular object over a blurred background with faint grid lines (no readable text or symbols)
natural_image
Close-up of a hand holding an object, possibly a pen or tool, with no visible text or symbols.
natural_image
Close-up of a white electronic device with black handle and control panel (no visible text or symbols)IMPORTANT
The specifications label is on the top edge of the interior of the door. This label must never be removed, since it provides information about the exact model of the dishwasher, required power supply, serial number and warranty.
2 CONNECTION TO THE PLUMBING
The water connection pipe is located on the back of the dishwasher:
a
Connect the pipe to the water inlet, tighten the connection nut and make sure it is securely connected to the appliance.

natural_image
Close-up of a mechanical sensor or gauge device with a cylindrical base and flange (no visible text or symbols)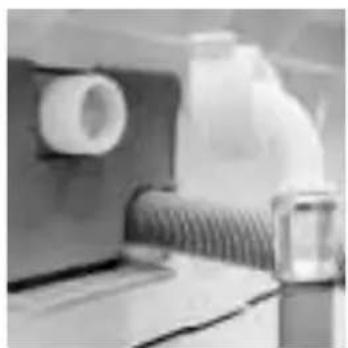
natural_image
Close-up of a mechanical component with a coiled spring and plastic housing (no visible text or symbols)b
The hose must run between the wall and the bottom space at the back of the dishwasher (b1) so that it is not squashed or overstretched.
There should be a fixed water outlet drain at a distance of between 25 and 100 cm from the floor.
Make sure that the outlet pipe is not too rigid, bent or squashed.


If your dishwasher has a hot water inlet, connect the pipe to the hot water tap. In this case, the maximum temperature must not exceed 60°C.
Bear in mind that this type of water supply may affect the washing and drying capacity of the appliance.
IMPORTANT
It is very important for the bend pipe of the outlet hose is located securely in water outlet so that it cannot disconnet. The operating water pressure (minimum and maximum) must be between 0,5-10 bar (0,05-1 megapascals MPa).
3
ELECTRICAL CONNECTION
Please refer to the specification label on the top edge of the door before making the electrical connections. Make sure that the power voltage connected to the plug socket is as shown on the label.

IMPORTANT
It is very important for the dishwasher to be connected to an earthed plug socket. The electrical installation, plug, socket, fuses or circuit breaker and meter must be capable of the maximum power shown on the specifications label. If the power cable is damaged, it must be replaced exclusively by the manufacturers, after-sales service (TAS) or authorised personnel. If the appliance is to be recess-mounted and integrated, the plug must be accessible after installation.
4
LEVELLING AND POSITIONING
LEVELLING
The dishwasher must stand firmly on the floor and be completely perpendicular. It must be levelled to correct any possible unevenness of the floor.
a For this, use a spirit level.
b First, level the appliance from back to front; then, level it from left to right. The dishwasher is level when the spirit level bubble is dead centre when placed in any direction.
POSITIONING
If the appliance is to be positioned under a work- ktop, top can be removed or left in position.n;
c If you want to remove the cover, you can do so by removing the two screws from the back of the cover;
d take out the counterweight at the back and, on some models, unfold the sheet of insulation;
e detach the top supports by pulling them towards the back.
Before siting the dishwasher, move it close to where it is to be sited and raise it by turning the back leg until there is a space of 3 mm between the top of the appliance and the base of the worktop.

natural_image
Front view of a white kitchen appliance with control panel and side door (no visible text or symbols)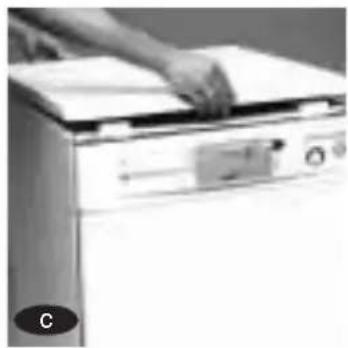
natural_image
Person using a handheld paper filter on a large appliance (no visible text or symbols)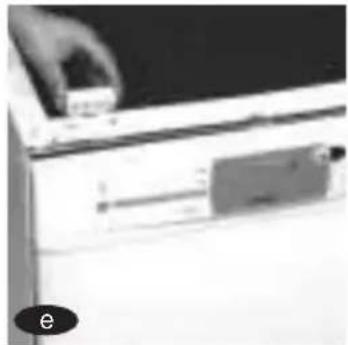
natural_image
Close-up of a hand holding a small object over a white surface, possibly a printer or scanner (no visible text or symbols)
natural_image
Person cleaning a wall with a tool, no visible text or symbols
natural_image
Front view of a white washing machine with control panel and buttons (no visible text or symbols)
natural_image
Close-up of a hand using a printer to press or install a printer onto a front panel (no visible text or symbols)
natural_image
Black and white photo of a kitchen appliance with two large cabinets, one on the floor and another on the wall (no visible text or symbols)
natural_image
Close-up of a hand holding a small object near a surface, with a cabinet and window in the background (no visible text or symbols)g Some integrated models include a rod for levelling the back legs from the front of the appliance.
Site the dishwasher and make sure that the pipes and cable are in the bottom space at the back of the dishwasher. Adjust it up to the worktop until the top of the appliance is in contact with the base of the kitchen worktop..
Fitting a dishwasher into a row of cup-boards.
When fitting the dishwasher into a row of kitchen cupboards with a continuos plinth:
a unscrew and remove the base;
b loosen and remove support legs;
c screw the adjustable legs into the dishwasher.
d Refit the base to the cupboards and, if necessary, make any haight adjustment to plinth to the required height to allow the dishwasher to fit properly behind.

natural_image
Close-up of hands using a tool on a surface, with an inset showing hand positioning (no visible text or symbols)
natural_image
Close-up of hands installing or adjusting a wall-mounted component (no visible text or symbols)
natural_image
Close-up of hands using a tool to apply or install a component, no visible text or symbols
natural_image
Close-up of a hand holding a white rectangular object, possibly a container or device, with no visible text or symbols.5 PANELLING and FITTING BUILT-IN DISHWASHERS
PANELLING
Simply fit the same de-cor panels or doors as the kitchen cupboards
to the dishwasher door. Said panels must be more than 4 mm thick.
a Remove the frame around the door by unfastening the screws.
b Cut the panel to size: 596 x 586 mm.
c Fit the decor panel or door
d To fasten the new decorative panel in place, screw the frame back on-to the door.

natural_image
Exterior view of a white rectangular kitchen appliance with a handle, labeled 'a' in the corner (no other text or symbols visible)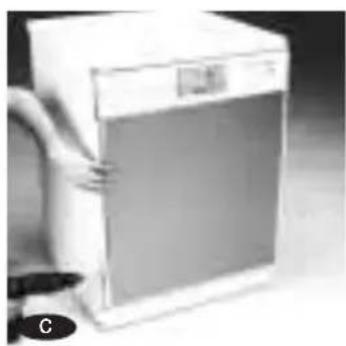
natural_image
Close-up of a white industrial machine with a hand holding the front panel, no visible text or symbols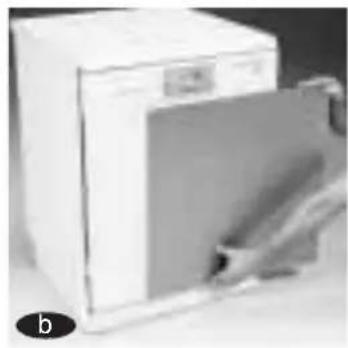
natural_image
Exterior view of a white kitchen appliance with a door open, showing internal components (no visible text or symbols)
natural_image
Exterior view of a white disposable water dispenser (no visible text or symbols)With models fitted, the height to which the door can be panelled
can be adjusted to the same height as the kitchen cupboards.
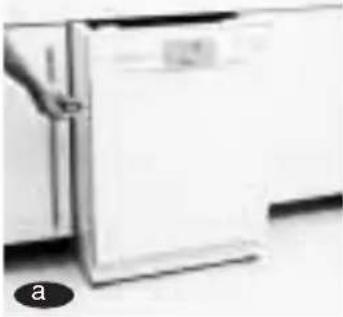
a
Remove the frame around the door by unfastening the screws.
b
Remove the decor panel from the dishwasher.
C
Adjust the plate at the bottom of the dishwasher door to the height of the kitchen cupboards.
d
Place the decor panel on the door, mark the required height and cut accordingly.
e
Place the decor panel on the frame and cut it to the same height as the decor panel.
f
Place the panel on the door, hold the frame in place and mark the position of the new holes on the door. Drill the holes with a 3.25 mm diameter bit (be careful not to drill too deep) and screw the frame into place.
natural_image
Exterior view of a modern kitchen appliance with a white front panel and handle (no visible text or symbols)
natural_image
Close-up of a white appliance with a hand partially visible, labeled 'C' at the bottom left (no other text or symbols)
natural_image
Close-up of hands using a tool on a mechanical component (no visible text or symbols)
natural_image
Close-up of a printer's front panel with a hand holding the paper (no visible text or symbols)
natural_image
Close-up of a hand holding a pen, poised to write on a surface (no visible text or symbols)
natural_image
Hand holding a black electric drill bit with a tool, next to a white door (no text or symbols visible)
natural_image
Exterior view of a modern kitchen appliance with white panels and black trim (no visible text or symbols)FITTING BUILT-IN DISHWASHERS
To install an integrated model dishwasher:
a
If the worktop is made of wood, place the plastic protection on it to prevent steam damage.
b
Fit the front brackets to the dishwasher so that it can be fixed to neighbouring units or the work surface (see point k, page 60).
C
Position the dishwasher in its space and adjust the height of the legs as shown in the POSITIONING chapter 4.
d
Using the supplied brackets, level the control panel height with the height of the kitchen cupboard drawer.
e
Put the template in position and mark the position of the holes.
f
Drill with a 2.5 mm diameter bit and screw the supports (curved side up) to the door.
g
Take the door door and fit the supports in the recesses in the door. Pull upwards until it comes into contact with the control panel and ensure that it is firmly in place.

natural_image
Close-up of a hand pressing down on a flat surface with a small rectangular object, no visible text or symbols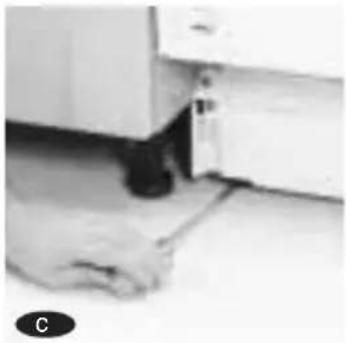
natural_image
Close-up of a hand pressing down on a surface near a white cabinet (no visible text or symbols)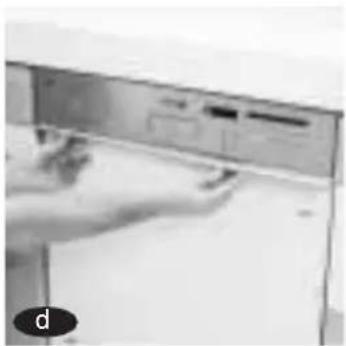
natural_image
Hand pressing down of a kitchen appliance (no visible text or symbols)
natural_image
Close-up of a hand holding a pen tip over a small object on a flat surface (no text or symbols visible)
natural_image
Close-up of a person's hand holding a wall-mounted device with an upward arrow, no visible text or symbols
natural_image
Close-up of a robotic arm operating a machine tool (no visible text or symbols)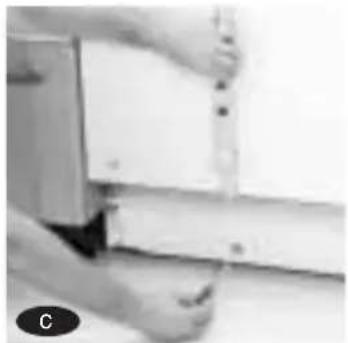
natural_image
Close-up of hands adjusting a wall-mounted tool, no visible text or symbols
natural_image
Close-up of a precision tool tip interacting with a small mechanical component (no visible text or symbols)
natural_image
Close-up of hands cleaning a kitchen appliance (no visible text or symbols)
natural_image
Close-up of a laboratory glassware unit with a white cylindrical object on top (no visible text or symbols)IMPORTANT
The maximum and minimum recommended weights for the door cover to be fitted on the dishwasher are as follows: Maximum: 6,5 kg Minimum: 3 kg
h
Open the dishwasher door slowly, holding the cover in position, and finally fasten it in place with the screws, making sure the panel stays in line with the door.
i
If the door springs are not strong enough, compensate the force required with the two additional screws supplied in the bag of accessories.
j
Fit the cupboard base and saw it down to the required height.
k
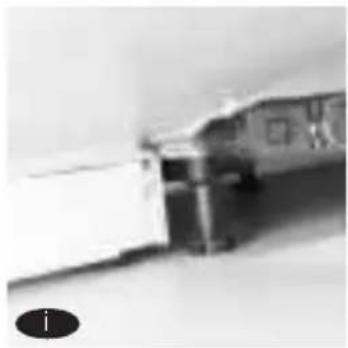
If the worktop is made of wood, fasten the dishwasher to it. If the worktop is made of granite, fasten the dishwasher to the cupboards at the side.
natural_image
Close-up of a syringe tip with a small object inside, no visible text or symbols
natural_image
Industrial equipment with pipes and scaffolding (no visible text or symbols)
natural_image
Exterior view of a modern kitchen appliance with a cloth cover and a knife handle (no visible text or symbols)
natural_image
Exterior view of a modern office building (no signage)IMPORTANT
If the dishwasher is to be fitted into the kitchen, leave at least two millimetres' space between the cupboards or appliances at either side of the dishwasher.
6
PRE-WASH
Once the dishwasher has been installed correctly, it should be first used on prewash programme:
a
Press the On/Off switch.
b
Select programme 1 (pre-wash), without utensils or detergent.
C
Press the Start/Pause button.
This is to check the installation, the connections and the drain outlet, as well as to completely wash the interior before running a wash programme


natural_image
Close-up of a hand pointing at a small object on a surface, with no visible text or symbols.


natural_image
Close-up of hands operating a washing machine with a rotary dial and control knob (no visible text or symbols)USING THE APPLIANCE - A FEW PRACTICAL TIPS
1 WATER HARDNESS, SALT, RINSE-AID AND DETERGENT
Adjusting water hardness. Before switching the dishwasher on, check the hardness of the water in your area. This information is available from your local water board, the town hall, the technical assistance service or you can use the Aquadur strip supplied in the bag of accessories.
You may not need to use salt. If this is the case, you can go straight to the section on Rinse-aid. Water contains lime. The higher the lime content, the harder the water. To prevent lime from damaging your dishwasher, it has a water softener to eliminate lime from water and clean it ready for the wash. This softener works with salt.
Controlling the salt level.
Depending on the model, dishwashers will have a manual or electronic salt level control.
MANUAL REGULATION
If there is a salt regulator like the one shown in the photographs (Mod. A-B) inside your dishwasher on the right-hand side, turn it to the number that corresponds to the hardness of the water in your area (see table).
To turn it to the correct position, use a coin (Mod. A) or a screwdriver (Mod. B).
natural_image
Close-up of a mechanical gear or dial with visible teeth and central hub (no text or symbols)
natural_image
Close-up of a mechanical gear or dial with no visible text or symbolsREGULATOR Model BREGULATOR M
| French degrees | 0-13 HF 14-38 HF 39-50 HF 51-63 HF 64-100 HF | ||||
| German degrees | 0-7 DH 8-21 DH 22-28 DH 29-35 DH 36-56 DH | ||||
| Position of the salt regulator | 0 | 1 | 2 | 3 | 4 |
| HARDNESS | soft no salt | normal | medium | hard | very hard |
ELECTRONIC REGULATION
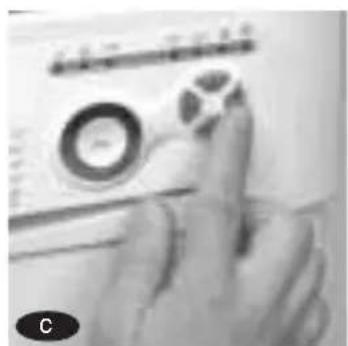
On some models, the salt regulator is electric (has no numbers: (see Mod. C in the photo) and is regulated from the control panel.
These models have 5 re- gulation positions.
-
Press the time reduction button for three seconds. The display shows a number preceded by the letter 'L' (L1).
-
Press the time reduction button to select the required salt level.
-
Enter the selection (check table) by pressing the Start/Pause button.


natural_image
Close-up of a circular mechanical component with a central hole and mounting base (no visible text or symbols)REGULATOR Model C
| French degrees | 0-13 HF | 14-38 HF | 39-50 HF | 51-63 HF | 64-100 HF |
| German degrees | 0-7 DH | 8-21 DH | 22-28 DH | 29-35 DH | 36-56 DH |
| Position of the salt regulator | 0 | 1 | 2 | 3 | 4 |
| HARDNESS | soft no salt | normal | medium | hard | very hard |
WHERE TO PUT THE SALT
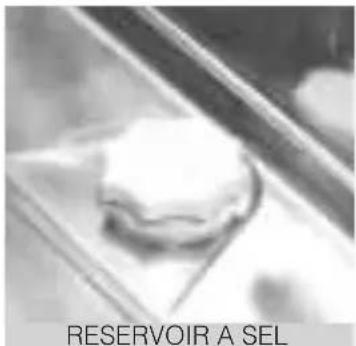
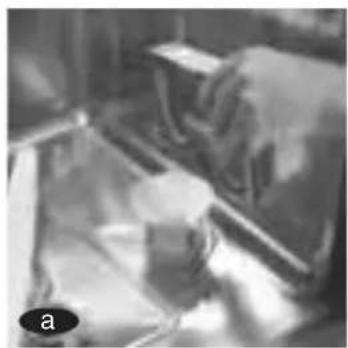
The first time you fill the salt container, you must:
a Pour in the salt but do not fill the container to the top.
b Top it up with water. c Stir with a spoon.
d Close the lid tight and clean the salt around the container.
When the salt container needs filling, you should always do it before a wash and not afterwards.
The dishwasher has a salt container in the bottom of the tub.
Important: use dishwasher salt only.
natural_image
Close-up of a mechanical component or tool with no visible text or symbols
natural_image
Close-up of a laboratory glassware setup with a vial and container (no visible text or symbols)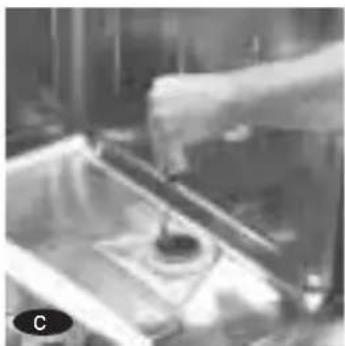
natural_image
Close-up of a hand pouring liquid into a container with a small bowl (no visible text or symbols)
natural_image
Close-up of a hand pressing down on a metal tray with small objects nearby (no visible text or symbols)When do I need to add salt?
Depending on the model, a window on the lid of the salt container or a light indicator on the front of the appliance show when salt is required.
It is recommended that you replace the used salt every fortnight rather than wait for the salt level indicator to light up.

natural_image
Close-up of a white circular button labeled 'WINDOW PILOT LIGHT' (no other text or symbols visible)
natural_image
Close-up of a white surface with four small icons: a sun, a circle with a dot, and a plus sign (no readable text or symbols)IMPORTANT
You should not use salt if your dishwasher does not need it. In this case, the pilot light will remain on at all times.
The rinse-aid helps drying and prevents drops of water from clinging to utensils after washing. The rinse-aid container is located on the inside of the door, next to the detergent container.
It has a 4-position dispenser for adjusting the amount of rinse-aid to the water quality (the dispenser is set at position 2 at the factory).
If you notice drops of water on utensils, increase the position of the rinse-aid dispenser. If the utensils have white or sticky lines, lower the position.

natural_image
Close-up of a hand using tweezers to apply material to small circular objects (no visible text or symbols)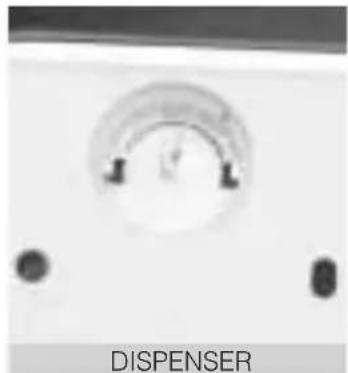
natural_image
Close-up of a Dispenser control panel with no visible text or symbols on the device itselfa Once the level of the dispenser has been set, fill the container to the top, but do not overfill it. If this occurs, clean the spillage with a cloth.

IMPORTANT
A greater amount of rinse-aid does not necessarily mean better results. In fact, too much rinse-aid can lead to water marks.
When do I need to add rinse-aid?
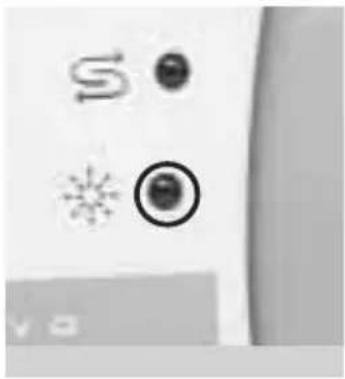
The dishwasher tells you when you need to add more rinse-aid. Depending on the model, there are two types of indicator: window or pilot light.

natural_image
Close-up of a computer control panel with icons for settings, stars, and buttons (no readable text or symbols)Transparent window next to the rinse-aid container lid. If the bottom of the window is a light colour, you need to add rinse-aid. If it is dark, there is sufficient rinse-aid in the container.
A pilot light on the front of the dishwasher indicates when the rinse-aid container needs to be topped up.
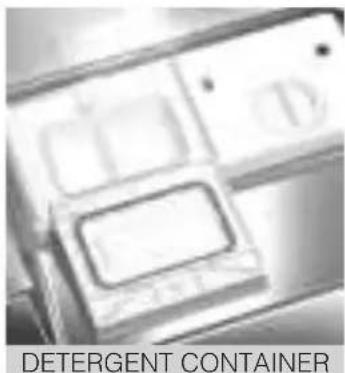
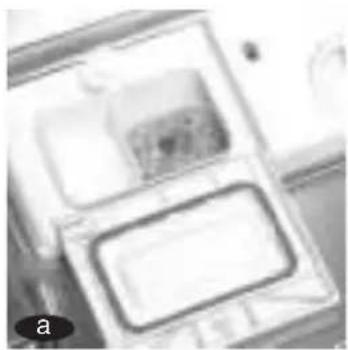
The detergent is poured into a container on the inside of the door, next to the rinse-aid container.
Tablet, powder and liquid detergent can be used.
The amount of detergent required is shown in the table on page 69.
natural_image
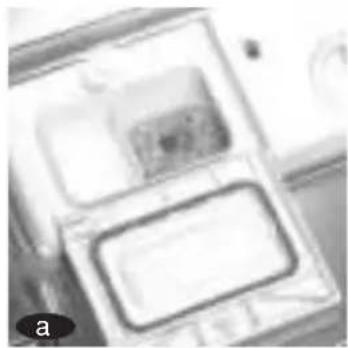
Close-up of a mechanical component with two rectangular parts, possibly a housing or enclosure, placed on a surface (no visible text or symbols)a Once the detergent has been poured in, close the lid.
b Some programmes require extra detergent, and should be placed in the space in the container lid.

natural_image
Close-up of a white electronic device with a small heart-shaped button, possibly a display or control panel (no visible text or symbols)ECOLOGICAL WASHING
Using more detergent and rinse-aid than necessary does not improve the results of your dishwasher and besides leading to higher costs, it has a negative effect on the environment.
2
TABLEWARE AND UTENSILS. TYPES AND POSITIONING
Not all utensils can be washed in a dishwasher. Do not attempt to wash items made of wood or earthenware or plastic that is not heat resistant.
Stainless steel cutlery can be washed easily; however, ensure that
silver cutlery does not come into contact as they may stain.
Items made of aluminium may fade in time.
Patterns on decorated porcelain may wear off if the quality is
not good. Check with the manufacturer of China.
Only wash glasses that are dishwasher-compatible.
Cut glass should not be washed in dishwasher.
IMPORTANT
Please make sure your utensils are dishwasher-compatible.
Placing the utensils in the dishwasher
It is very important to place the utensils correctly in the racks to guarantee a perfect wash.
a
The lower rack is for dirtier, more resistant items: pans, oven dishes and plates. Make sure there is sufficient space between each one for the jet of water. Pots must be placed upside down.
b
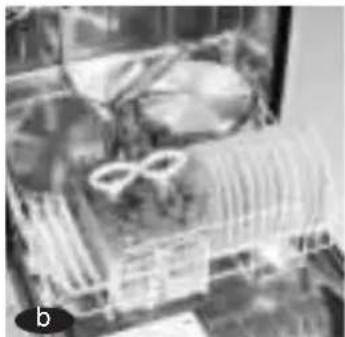
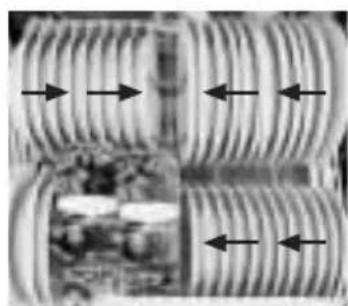
If your model has fold-down racks, you can use them in vertical position for washing plates or in horizontal position for large items such as saucepans.

natural_image
Close-up of a mechanical component with coiled spring-like structures and internal components (no visible text or symbols)FOR 13 PLACE SETTINGS FOR 12 PLACE SETTINGS EN-50242
natural_image
Close-up of a coiled industrial pipe or valve assembly (no visible text or symbols)12 PLACE SETTINGS EN-50242

natural_image
Close-up of a mechanical component with coiled spring-like structures and a circular ring feature (no visible text or symbols)VERTICAL POSITION

natural_image
Close-up of a laboratory apparatus with glassware and a pair of rings (no visible text or symbols)HORIZONTAL POSITION

natural_image
Exterior view of a modern office building (no signage)[Non-Text]
natural_image
Close-up of coiled metal pipes with directional arrows indicating flow or movement (no text or symbols)LOADING PLATES
IMPORTANT
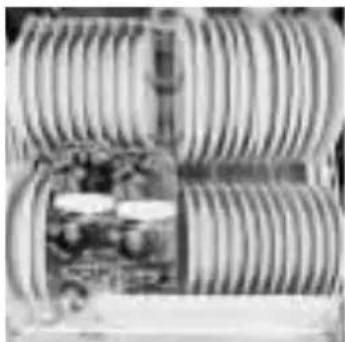
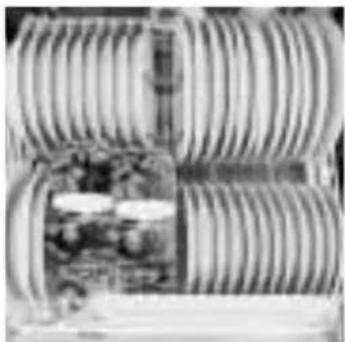
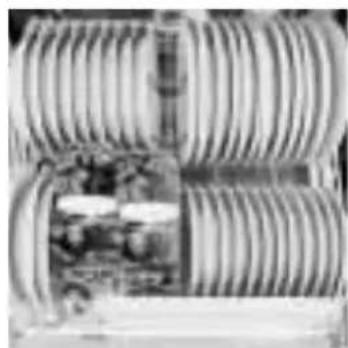
Bowls are placed on the left and plates on the right. Start loading plates from the outside of the rack to the inside. Plates should not be touching.
C
Les couverts, Except for knives, cutlery should be placed in the cutlery rack, with the handles at the bottom.
d
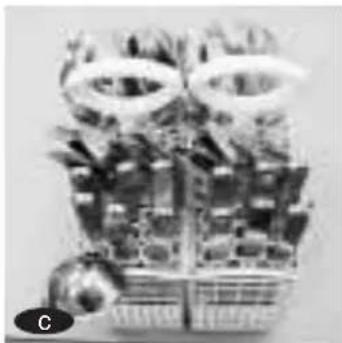
Place the more delicate items, such as cups, glasses, porcelain or crystal, and standard-size plates in the top rack. Long cutlery has a special place. There are also racks which, when vertical, are for holding wine glasses.
When you choose the Express programme, the Top load or Half-load function, the utensils should be placed in the top rack.
On the other hand, when you choose the Bottom load function, the utensils should be placed in the bottom rack only.
IMPORTANT
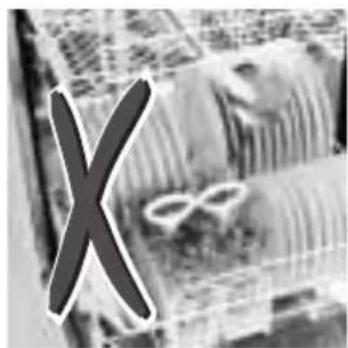
Make sure that, once the dishwasher has been loaded, the spray arms rotate without any obstructions and the cutlery does not interfere with the opening of the detergent compartment cover.
natural_image
Black-and-white photo of a mechanical device with multiple circular components and a spherical base (no visible text or symbols)
natural_image
Black-and-white photo of industrial equipment with large circular components and a grid-like structure (no visible text or symbols)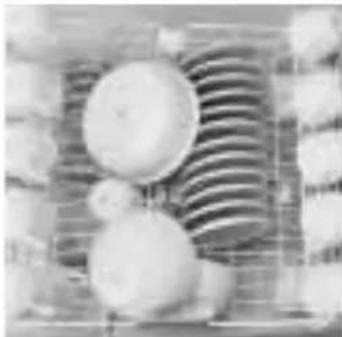
natural_image
Black and white photo of three spherical objects arranged in a patterned background (no visible text or symbols)FOR 13 PLACE SETTINGS FOR 12 PLACE SETTINGS EN-50242

natural_image
Close-up of a textured surface with intersecting lines and patterns (no visible text or symbols)
natural_image
Close-up of a textured surface with grid patterns and no visible text or symbols
natural_image
Close-up of mechanical gears and shafts in a workshop setting (no visible text or symbols)
natural_image
Exterior view of a modern office building (no signage)
natural_image
Exterior view of a modern office building (no signage)Adjusting the racks
The racks can be adjusted in accord with the load.
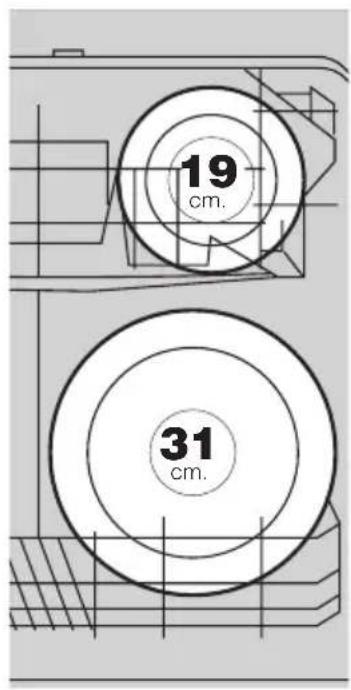
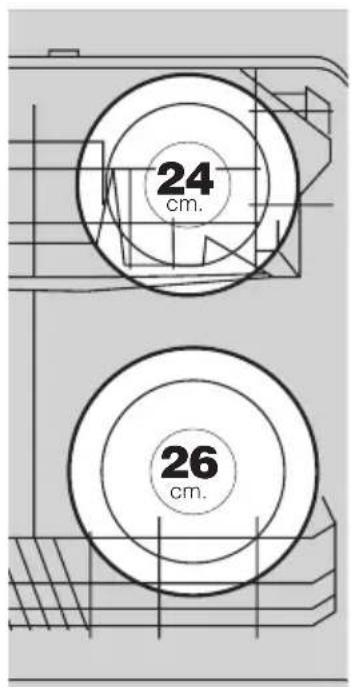
The top rack can be placed at two different heights for washing different-sized plates.
In the upper position, the top rack holds standard-size plates of up to 19 cm and the bottom rack holds plates of up to 31 cm. In the lower position, the top rack holds plates of up to 24 cm and the bottom rack holds plates of up to 26 cm.
a Top rack model A:
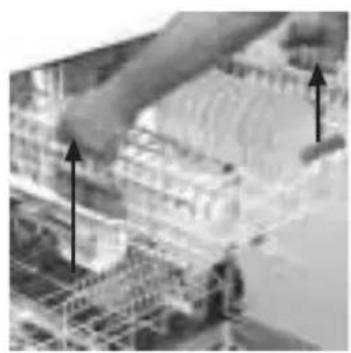
This can be adjusted without being removed from its rails, even when loaded with utensils. To raise or lower its position, pull the rack upwards by the side handles. Check that both sides are at the same height. If not, make them level.
b Top rack model B:
Remove the stop that prevents the rack wheels from coming out of the rails. Pull the rack towards you and take it out. Position the basket at the height required. Replace the stop in its original position making sure it fits right in longitudinally on the rail; you will hear a click when it locks in place.
natural_image
Architectural site view showing building facades and structural framework (no visible text or symbols)
natural_image
Close-up of a hand interacting with a device displaying a waveform or signal pattern (no text or symbols visible)
natural_image
Close-up of a hand holding a small electronic device with a curved arrow indicating motion (no visible text or symbols)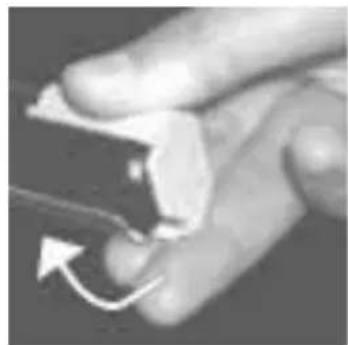
natural_image
Close-up of a hand holding a small object with an arrow indicating rotation (no text or symbols visible)3
SELECTING THE WASH PROGRAMME

flowchart
graph TD
    A["Innova"] --> B["Button ON/OFF"]
    A --> C["Pilot light ON/OFF"]
    A --> D["RINSE-AID"]
    A --> E["SALT PILOT"]
    A --> F["PROGRAMMES"]
    A --> G["STAGES"]
    A --> H["PROGRAMME SELECTOR"]
    A --> I["ADDITIONAL FUNCTION buttons"]
    A --> J["START/PAUSE button"]
    K["FAGOR"] --> L["88"]
    M["LE 31WIX"] --> N["LE 31WIX"]
    O["LE 31WIX"] --> P["LE 31WIX"]
To select the wash programme, proceed as follows:
a
Press the ON button on the front panel of the dishwasher (the corresponding pilot light comes on).
b
Select the wash programme using the push-button or the dial, depending on the model.
If you select the Express programme, also press the Express button (above).
On some models, a pilot light lights up to indicate the selected programme and on others, the programme number appears on the display, preceded by a 'P'.
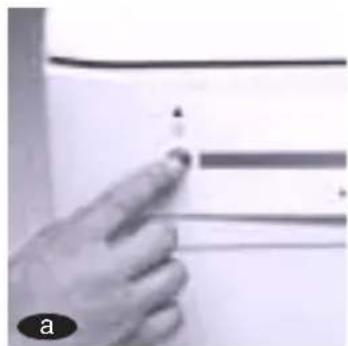
natural_image
Close-up of a hand pointing at a small object on a surface, with no visible text or symbols.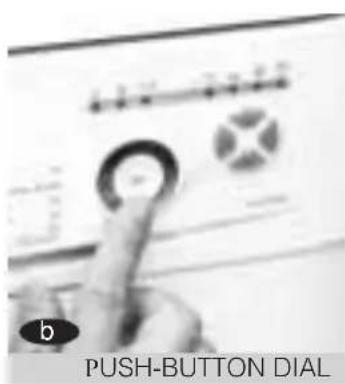

natural_image
Close-up of gloved hands holding a small object, with a soccer ball visible on the wall (no text or symbols)There are various programme types depending on the dishwasher model:
It is very important to choose the wash programme in accordance with the type and amount of utensils and level of soiling.
| Prewash P1 | Cold | For utensils not to be washed immediately | Withou detergent | 0,0007 KWh 3 litres | 7 |
| Intense P2 | 70 | For very dirty utensils and saucepans | 25+15 | 1,4 KWh 14 litres | 133 |
| Normal P3 | 65 | For dirty utensils | 25+5 | 1,2 KWh 14 litres | 130 |
| Auto** P3 | 55-65 | For dirty utensils | 25+5 | 1,2 KWh 14 litres | 130 |
| Economic** P4 | 50 | For slightly dirty utensils | 25+5 | 1,05 KWh 14 litres | 163 |
| Mixed P5 | 50 | For dirty delicate utensils | 25+5 | 0,87 KWh 14 litres | 95 |
| Quick P6 | 55 | For very slightly dirty utensils | 25 | 0,79 KWh 11 litres | 59 |
| Fast*** P7 | 40 | For very slightly dirty utensils in the top rack only | 20 | 0,3 KWh 7 litres | 25 |
25 g of powder non-concentrated detergent is the equivalent of one and a half flat soup spoons or one tablet of detergent.
For tablet or liquid detergent, follow the detergent manufacturer's recommendations.
* Values for a 60W motor and 12 place settings.
** In compliance with the EN-50242 standard, the economy wash programme takes longer than the other programmes; however, it consumes less energy and is more environment-friendly. A 3-send continuous beep and a light indicate the end of the programme.
*** The Express programme requires powder or liquid detergent, which dissolves easier.
Wash functions must always be selected after the wash programme has been selected. If the programme is changed during the selection, the previously selected functions are cancelled.
These functions make it possible to adjust the wash load, times and consumption to a maximum.
The additional functions available depend on the model:

Button: Time delay
This makes it possible to delay the start of the wash programme. Some models can delay the wash 3, 6 or 9 hours. In this case, when you press the time delay button, a pilot light comes on to indicate the chosen option.
On other models, it is possible to select the time you wish to delay the wash from 1 to 9 hours, at hourly intervals. This is ideal for cheap rate periods. On these models, when you press the time delay button, the display shows the number of hours you wish to delay the start of the wash.

Button: Time reduction
This reduces the wash and dry times. This option can be used with Intensive, Normal, Automatic and Economy programmes.

Button: Extra drying
This gives better drying results. It can be used with all programmes except the pre-wash and economy programme.

Button: Express (top)
For extra-quick washes: slightly dirty utensils in the top rack.
Button: Top/bottom load
Only half the dishwasher capacity is used. Top load, in the top rack, for more delicate utensils, and Bottom load, in the bottom rack, for sauce-pans or very dirty utensils. Valid for all programmes.

Button: Half-load
This washes half a load in the top rack only. Valid for all programmes.
IMPORTANT
If you change the programme or press the ON/OFF button while selecting the additional functions, all the functions selected are cancelled.
If the model has an Eco-Sensor, you can save 25% water with the Intensive or Normal programme. The Eco-Sensor detects how dirty the pre-wash water is and, if it is clean enough, it reuses it in the wash.
5 START-UP
When the dishwasher is on and the wash programme and additional functions have been selected, simply
press the start button.

natural_image
Close-up of a hand holding a soccer ball (no visible text or symbols)6 THE WASH PROGRAMME
Each active stage of the programme appears as the wash progresses.
The pilot lights above the programme dial or push-button show at what point in the process the dishwasher is at any given time.
Depending on the model, the stages are as follows:

natural_image
Close-up of a mechanical component with three holes and a ring, labeled 'STOP' (no readable text or symbols beyond labels)
natural_image
Close-up of a circular mechanical knob or dial with adjustment knobs and a handle (no visible text or symbols)a
wash / drying / end STOP.

b
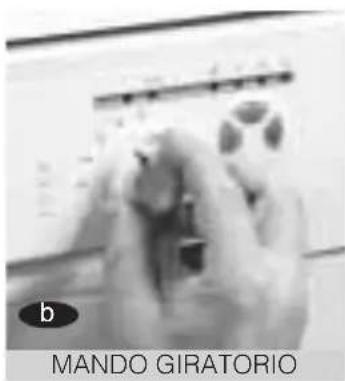
or working / end STOP

C
Models with a display show the time remaining for the programme to end.
natural_image
Close-up of a kitchen appliance with a dial and control panel (no visible text or symbols)IMPORTANT
Do not open the dishwasher door during the wash process. It could affect the programme.
When the dishwasher is in operation and...
- You wish to put another utensil in the dishwasher.
- Press the Pause button.
- Put the utensil in the dishwasher and/or change the wash programme.
- Press the Start button.
NOTE: For safety reasons the programme will restart after a few seconds.

- You wish to change the wash programme.
- Select the new programme and press the Start/Pause button

NOTE: the change affects the duration of the wash programme or involves the time delay option. In this case, press the ON/OFF button ( ⓘ ) to make any changes.
IMPORTANT
Remember that the Start/Pause button is not the ON/OFF button. If you press the ON/OFF button during the wash process, you will have to reprogramme the dishwasher.
7 END OF PROGRAMME
Once the programme has ended, the STOP pilot light comes on and a continuous beep sounds for 3 seconds.

natural_image
Close-up of a washing machine control panel with a circular indicator and brand logo (no readable text or symbols beyond branding)8 POWER CUTS
After a power cut, the dishwasher continues to work as normal from where it stopped (it has
a minimum memory of 12 hours, depending on model type).
9 BASIC TIPS
There a few things you should always bear in mind. If you do, your dishwasher will last longer and be more efficient.
a Fill the dishwasher: Try to make the most of your dishwasher's capacity. This will help you reduce water and electricity consumption and lead to quieter operation and be more economical.
b Position utensils correctly. For best quality washes, the spray arms should be able to spin freely. Likewise, the utensils should be positioned correctly to ensure that they are reached by the jet of water.
c Programme selection. Select the correct wash programme and additional functions as required.
d Cleaning. Clean the filters and spray arms every three months. Also check that they are correctly in place.
APPLIANCE MAINTENANCE AND CLEANING
You should perform the cleaning operations regularly so that your dishwasher will last longer.
You should do the following every three months:
- Clean the filter.
- Clean the spray arms.
- Clean the inside.
- Clean the outside.
This will make your dishwasher last longer.
IMPORTANT
If you are planning to be away for a long period, leave the dishwasher door open so that the air can circulate freely inside the machine.
1 CLEANING THE WASH FILTER
The filter is made up of two or three parts (depending on model type): interior filter, exterior filter and filter protector. It is located at the bottom of the dishwasher under the bottom rack.
a Take out the bottom rack, remove the interior filter by turning it anti-clockwise and pulling it upwards.
b Remove the exterior filter.
c Remove the filter protector (some models)..

natural_image
Person washing hands at a sink with a faucet (no text or symbols visible)
natural_image
Close-up of a laboratory procedure showing a hand pressing a sample with arrows indicating motion (no text or symbols visible)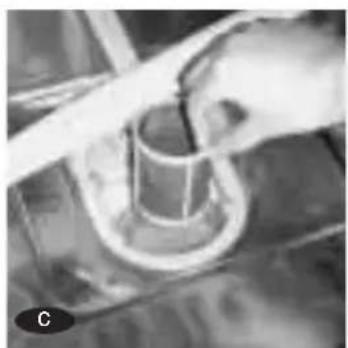
natural_image
Close-up of a hand using a tool to press a cylindrical component on a surface (no visible text or symbols)
natural_image
Close-up of a hand pouring liquid into a container with a small container nearby (no visible text or symbols)
natural_image
Close-up of a hand pressing down on a tray with a small object, no visible text or symbolsd It is essential that filters are put back in place correctly. Make sure the filter protector is in place. The exterior filter fits into position.
Put the interior filter in position and turn it clockwise as far as it will go.
2
CLEANING THE SPRAY ARMS
The third spray arm (some models), the top spray arm and the bottom spray arm must be cleaned every three months. Removing the spray arms:
a
Remove the third spray arm by pressing it upwards and unscrewing it.
b
The top spray arm fits on the top rack. To remove it, unscrew it.
C
Remove the bottom spray arm by loosening the bottom nut and then pulling the arm upwards.
They should be cleaned under running water using a non-abrasive sponge.
natural_image
Close-up of mechanical components or machinery with no visible text or symbols
natural_image
Close-up of hands using a handheld tool to press or inspect a mechanical component (no visible text or symbols)Check that the spray nozzles are clean. If they are blocked, they must be cleared. Fit the spray arms back in place
natural_image
Microscopic view of a lattice structure with repeating patterns (no text or symbols visible)
natural_image
Person washing a kitchen sink with a hand near the sink (no visible text or symbols)IMPORTANT
Before any cleaning or maintenance operations, unplug the dishwasher from the mains.
3
CLEANING THE INSIDE OF THE APPLIANCE
The dishwasher should be cleaned every three months to remove the dirt lodged in the appliance.
Instead of detergent, use appliance cleaner (follow the manufacturer's instructions).
4
CLEANING THE OUTSIDE OF THE APPLIANCE
Clean the outside with a cloth and soapy water. Use non-scratch and non-abrasive products. Dry with a cloth.
natural_image
Hand cleaning a white washing machine with a cloth (no visible text or symbols)IMPORTANT
For safety reasons, make sure the appliance is not in operation while it is being cleaned.
TROUBLESHOOTING
If you find a problem when using your dishwasher, you will probably be able to solve it by consulting the following section.
If this is not so, please contact the TECHNICAL ASSISTANCE SERVICE and be ready to provide as much information as possible.

natural_image
Silhouette of a person wearing a hard hat and holding a large object, standing on a dome-like surface (no text or symbols)1 TECHNICAL OR FUNCTIONAL PROBLEMS
When the dishwasher detects a malfunction, it will give you acoustic or visual warnings, depending on the model.
On the top edge of the dishwasher door, there is a table to identify possible problems.

(F1) Models with a display. These models identify the fault with the letter 'F' followed by a number from 1 to 9.
1 ••• Models without a display. When there is a malfunction, the dishwasher gives off a series of beeps, which stop for seven seconds and then start up again. You can identify the malfunction by counting the beeps (1 beep - door open; 2 beeps – no water at inlet; and so on).
To stop the beeps, press the Start/Pause button. Depending on the type of malfunction, contact the technical service about the problem.
| MALFUNCTION | MODEL WITH DISPLAY | MODEL WITHOUT DISPLAY |
| NUMBER OF BEEPS | ||
| Close the door F1 1 | ||
| Not entering F2 2 | ||
| Not leaking F3 3 | ||
| Flood F4 4 | ||
| Over heating F5 5 | ||
| Not heating F6 6 | ||
| Tem. no detect F7 7 | ||
| No pressure F8 8 | ||
| Not even | F9 9 |
- Why won't the dishwasher start?
This may be because:
- There is no power.
– It isn't plugged in correctly.
– The power fuses have blown. - The dishwasher is not connected to the mains.
- You haven't pressed the On/Off button (the pilot light for this button must be on continuously).
– The dishwasher door is not closed correctly. - You have not pressed the Start button.
- The dishwasher starts up but no water comes into the appliance
This may be because:
– There is no water supply.
- The stop tap is off.
The water inlet electrovalve filter is blocked.
- The water does not drain off and stays in the dishwasher
This may be because:
– The drain is blocked or badly fitted.
- The drainage pipe is blocked or kinked.
- The filters are blocked.
- The selected programme has not ended. Wait until it finishes.
- The low salt level pilot light does not go off
This may be because:
– A low salt level. Add salt and stir with a spoon.
- The water hardness is below 7DH, which means that salt is not necessary. In this case, the light will always be on.
- Traces of detergent are left in the dispenser or on the door.
This may be because:
– One of the utensils is preventing the dispenser from opening.
- The detergent is past its expiry date or is not appropriate.
– The spray arms rub on a dish.
– The spray arm nozzles are blocked.
- The detergent container was damp when the detergent was added. The container must be dry.
- Unusual foam appears:
- You have used detergent for washing dishes by hand instead of special detergent for dishwashers.
• The dishwashers uses a lot of salt.
This may be because:
- The lid to the salt container is not closed correctly.
- The salt consumption level is not at the correct setting.
• The dishwasher makes strange noises.
This may be because:
- The dishwasher was not installed correctly.
– The spray arms rub on a dish.
2
PROBLEMS WITH THE QUALITY OF THE WASH
- Remains of dirt or food on the utensils
This may be because:
- The wash filter is dirty, blocked or not correctly in place.
- The spray arm nozzles are dirty or the arms are blocked by a utensil.
- The detergent is inappropriate or there is an insufficient amount.
- The utensils are not positioned correctly. Some utensils are in contact with others.
– There are too many utensils in the racks. - The wash programme is inappropriate.
- The drain is blocked.
- The food remains on the utensils were too old and dry.
This may be because:
– There was not enough detergent or rinse-aid.
- The salt container lid is not closed correctly.
- The salt container has no water or salt.
- The water softener is not correctly adjusted to the water hardness level.
- You have used a phosphate-free detergent. Try with detergent containing phosphate..
This may be because:
– There is no rinse-aid.
–The rinse-aid control is not set correctly.
– The utensils are positioned incorrectly.
– The utensils have been taken out too soon.
– The wash programme is inappropriate.
- Glass or crystal comes out with a milky appearance or scratched.
This may be because:
– They are not dishwasher-compatible.
– The detergent is inappropriate.
• Glass or crystal comes out looking opaque
– There is not enough rinse-aid.
- The glasses and cutlery have a dull appearance and the glasses have a metallic shine.
- Too much rinse-aid.
- Utensils made of stainless or fine steel come out stained.
This may be because:
-They are not dishwasher-compatible.
– The utensils are positioned incorrectly.
- You have used too much detergent.
- The steel is low quality.
- There is too much salt in the wash water. Close the salt container lid correctly.
INFORMATION FOR THE CORRECT DISPOSAL OF ELECTRICAL AND ELECTRONIC APPLIANCES
When the appliance reaches the end of its service life, you should not dispose of it with the general domestic waste.
It can be taken free of charge to the local administrations' specific selective collection centres, or to distributors who provide this service.
Separating a domestic appliance before disposing of it means you will prevent possible negative consequences for the environment and health which may be given rise to by incorrect disposal, and it means the materials making it up can be treated and recycled, obtaining important savings on energy and resources.

To remind you that you must collaborate with a selective collection scheme, there is a symbol on the product warning you not to dispose of it in traditional refuse containers.
For further information, contact your local authority or the shop where you bought the product.
INSTALLATION UND MONTAGE
1 AUSPACKEN DES GESCHIRRSPÜLERS
natural_image
Close-up of a hand interacting with a grid-patterned object (no visible text or symbols)
natural_image
Close-up of a hand holding a white rectangular object over a patterned background (no visible text or symbols)
natural_image
Close-up of a hand holding an object, possibly a pen or tool, with no visible text or symbols.
natural_image
Close-up of a white refrigerator with black lid and side panel (no visible text or symbols)WICHTIG
natural_image
Close-up of a mechanical pressure sensor or gauge device with a cylindrical head and flange (no visible text or symbols)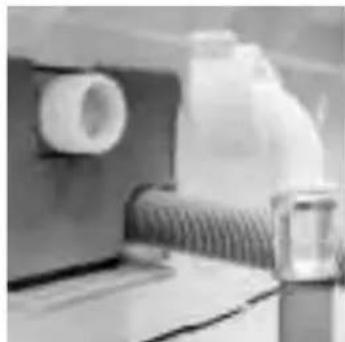
natural_image
Close-up of a mechanical component with a coiled spring and a cylindrical housing (no visible text or symbols)b
WICHTIG
natural_image
Front view of a white kitchen appliance with control panel and lid (no visible text or symbols)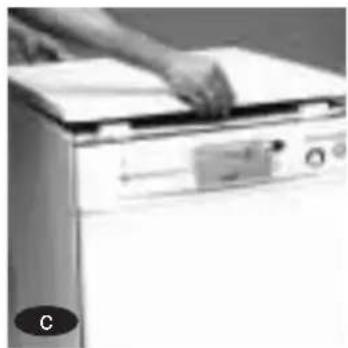
natural_image
Person cleaning a large appliance with a lid (no visible text or symbols)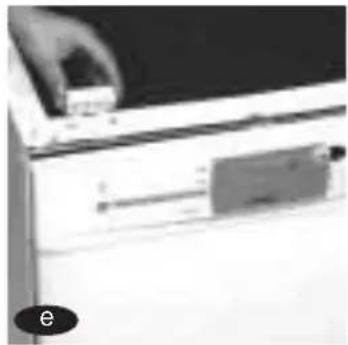
natural_image
Close-up of a hand holding a small object over a document or folder (no visible text or symbols)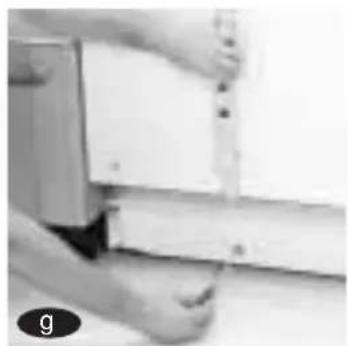
natural_image
Close-up of hands installing or adjusting a wall-mounted component (no visible text or symbols)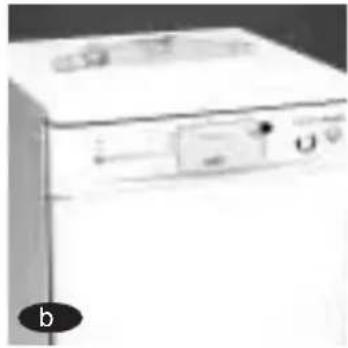
natural_image
Front view of a white washing machine with control panel and buttons (no visible text or symbols)
natural_image
Close-up of a printer with paper being placed on top (no visible text or symbols)
natural_image
Black and white photo of a kitchen appliance with two large cabinets, one on the floor and another on the wall (no visible text or symbols)
natural_image
Close-up of a hand holding a small object near a window (no visible text or symbols)natural_image
Close-up of hands using a tool on a surface, with an inset showing hand positioning (no visible text or symbols)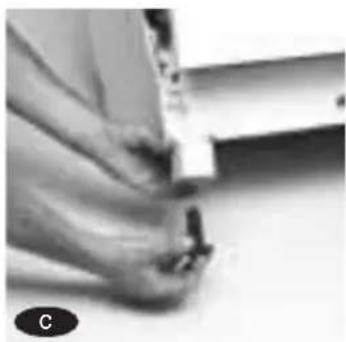
natural_image
Close-up of hands installing or adjusting a wall-mounted component (no visible text or symbols)
natural_image
Close-up of hands using a tool to apply material or equipment (no visible text or symbols)
natural_image
Close-up of a hand pulling a white rectangular object (no visible text or symbols)natural_image
Exterior view of a white refrigerator with a handle, labeled 'a' in the corner (no other text or symbols visible)
natural_image
Black-and-white photo of a white industrial machine with a cable inserted, no visible text or symbols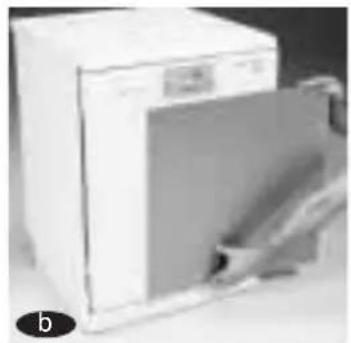
natural_image
Exterior view of a white kitchen appliance with a door and lid, partially open (no visible text or symbols)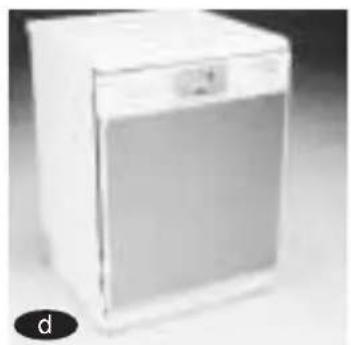
natural_image
White kitchen appliance with a label 'd' on the side (no visible text or symbols on the appliance itself)natural_image
Close-up of a refrigerator with a hand opening the door (no visible text or symbols)
natural_image
Close-up of a transparent container with a hand partially visible, labeled 'C' at the bottom left (no other text or symbols)
natural_image
Close-up of hands holding a sheet of paper, no visible text or symbols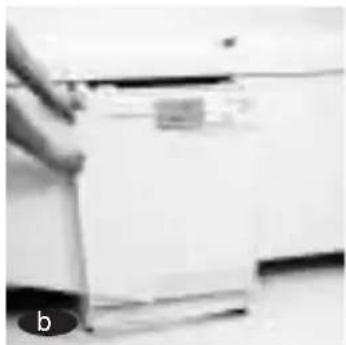
natural_image
Close-up of a hand holding a white object with a label 'b' in the corner (no readable text or symbols on the object itself)
natural_image
Close-up of a hand holding a pen, with no visible text or symbols
natural_image
Hand holding a black drill bit with a tool, next to a vertical panel (no visible text or symbols)
natural_image
Exterior view of a modern kitchen appliance with white cabinetry and black trim (no visible text or symbols)EINBAU
natural_image
Close-up of hands handling a small object over a flat surface, possibly a device or tool (no visible text or symbols)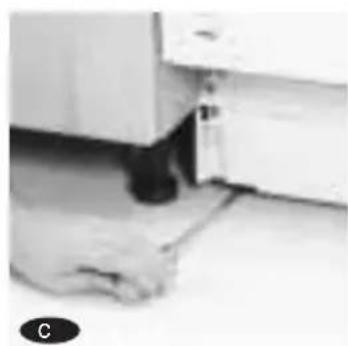
natural_image
Close-up of hands operating a sewing machine (no visible text or symbols)
natural_image
Hand pressing down of a kitchen appliance panel (no visible text or symbols)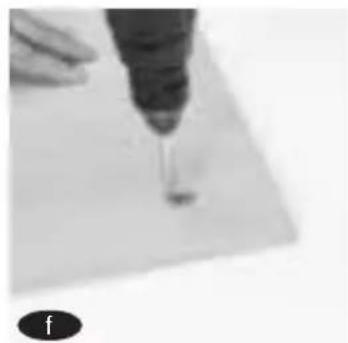
natural_image
Close-up of a hand holding a pen tip over a small object on a flat surface (no visible text or symbols)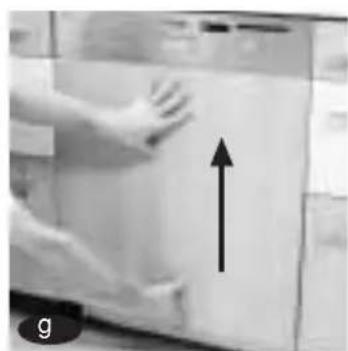
natural_image
Person applying a surface to a wall with an upward arrow, no visible text or symbols
natural_image
Close-up of a mechanical component with a pointed tip and a small rectangular feature, labeled 'b' in the corner (no readable text or symbols)
natural_image
Close-up of hands installing or adjusting a wall-mounted component (no visible text or symbols)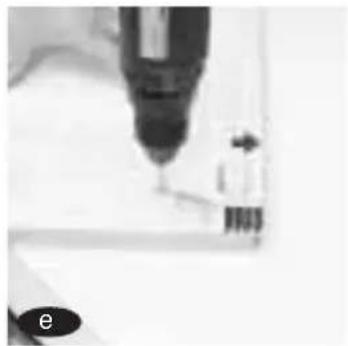
natural_image
Close-up of a precision tool tip interacting with a mechanical component (no visible text or symbols)
natural_image
Person cleaning a kitchen appliance with a hand on the door (no visible text or symbols)
natural_image
Close-up of a laboratory glassware unit with a white cylindrical object on top (no visible text or symbols)WICHTIG
natural_image
Close-up of a mechanical component or tool with no visible text or symbols
natural_image
Exterior view of a modern office building (no signage)
natural_image
Industrial machinery exterior view with visible pipes and structural elements (no text or symbols)
natural_image
Exterior view of a modern kitchen appliance (no visible text or symbols)WICHTIG
natural_image
Close-up of a hand pointing at a small object on a surface, possibly a device or tool (no visible text or symbols)
natural_image
Close-up of hands holding a soccer ball, with blurred background text (no legible symbols or text)
natural_image
Close-up of hands interacting with a computer monitor displaying a grid of icons (no readable text or symbols)
natural_image
Close-up of a hand pressing down on a washing machine (no visible text or symbols)natural_image
Close-up of a mechanical gear assembly with no visible text or symbols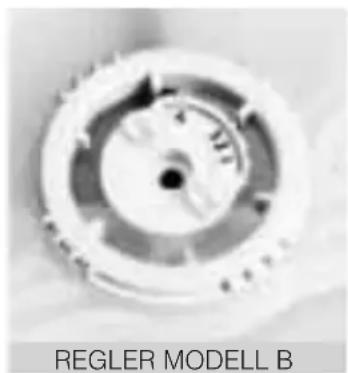
natural_image
Close-up of a mechanical component with no visible text or symbolsnatural_image
Close-up of a circular mechanical component with a central hole and mounting base (no visible text or symbols)REGLER Modell C
natural_image
Close-up of a person's hand holding a small object, possibly a device or tool, in a dimly lit environment (no visible text or symbols)
natural_image
Close-up of a laboratory glassware setup with a beaker and a tool, no visible text or symbols
natural_image
Close-up of a hand pouring liquid into a container with a small bowl (no visible text or symbols)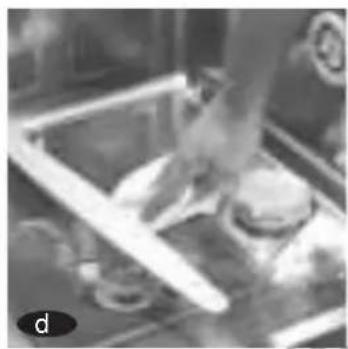
natural_image
Close-up of a hand pressing down on a metal tray with small objects, no visible text or symbolsnatural_image
Close-up of a circular mechanical component with a black outline, labeled 'SICHTFENSTER' below (no other text or symbols visible)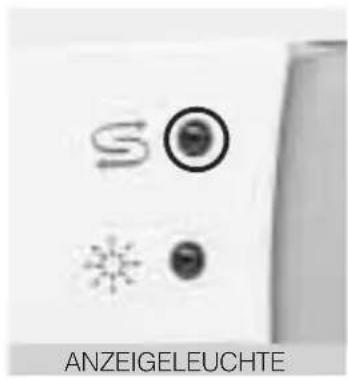
natural_image
Close-up of a hand using tweezers to apply material to a small cylindrical component (no visible text or symbols)
natural_image
Close-up of a white surface with a circular recess and a small dot, no visible text or symbols.
natural_image
Close-up of a computer control panel with icons for settings, stars, and a circle (no readable text or symbols)natural_image
Close-up of a kitchen appliance with a tray and front panel (no visible text or symbols)SPÜLMITTELBEHÄLTER
natural_image
Top-down view of a computer monitor with two blank display cases (no visible text or symbols)
natural_image
Close-up of a white electronic device with a small circular component, possibly a button or connector (no visible text or symbols)
natural_image
Close-up of a mechanical component with coiled spring-like structures (no visible text or symbols)

natural_image
Black-and-white photo of a mechanical assembly with labeled 'HORIZONTALE POSITION' at the bottom (no other text or symbols visible)
natural_image
Exterior view of a modern office building (no signage)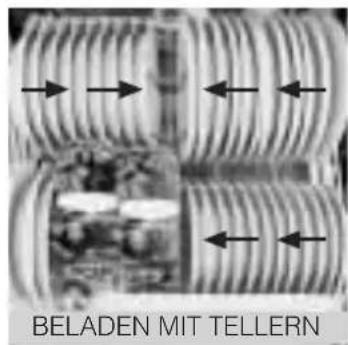
WICHTIG
natural_image
Black-and-white photo of a mechanical assembly with multiple components and a small sphere (no visible text or symbols)
natural_image
Close-up of a mechanical component with circular components and layered structure (no visible text or symbols)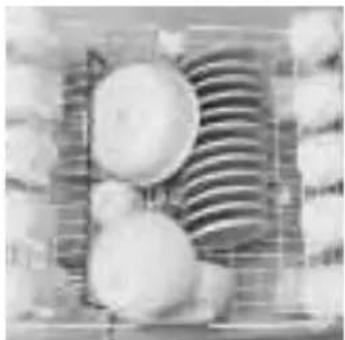
natural_image
Black-and-white photo of three white spherical objects arranged in a patterned box (no visible text or symbols)FÜR 13 GEDECKE FÜR 12 GEDECKE
EN-50242

natural_image
Aerial view of a dense urban area with grid-like streets and buildings (no visible text or symbols)
natural_image
Close-up of a textured surface with grid patterns and no visible text or symbols
natural_image
Close-up of mechanical components and parts, no visible text or symbols
natural_image
Black-and-white photo of a glass container with scattered white circular objects (no visible text or symbols)natural_image
Aerial view of a building complex with two upward-pointing arrows indicating direction (no visible text or symbols)
natural_image
Close-up of a hand interacting with a computer monitor displaying a waveform (no visible text or symbols)
natural_image
Close-up of a hand holding a small electronic device with a scroll wheel (no visible text or symbols)
natural_image
Close-up of a hand holding a small object with an arrow indicating rotation (no visible text or symbols)3
WAHL DES SPÜLPROGRAMMS

flowchart
graph TD
    A["Innova"] --> B["Programme"]
    B --> C["PHASEN"]
    C --> D["ZUSATZFUNKTIONEN"]
    D --> E["Taste START / PAUSE"]
    A --> F["LEUCHTDIODEN"]
    F --> G["LEUCHTDiode"]
    G --> H["KLARSPÜLER"]
    H --> I["Taste"]
    A --> J["FAGOR"]
    J --> K["BUOUX"]
    style A fill:#f9f,stroke:#333
    style B fill:#ccf,stroke:#333
    style C fill:#cfc,stroke:#333
    style D fill:#fcc,stroke:#333
    style E fill:#cff,stroke:#333
    style F fill:#ffc,stroke:#333
    style G fill:#cfc,stroke:#333
    style H fill:#fcc,stroke:#333
    style I fill:#ffc,stroke:#333
    style J fill:#cfc,stroke:#333
    style K fill:#fcc,stroke:#333
natural_image
Close-up of a hand pointing at a small object on a white surface, with no visible text or symbols.

natural_image
Close-up of hands holding a small object, possibly a tool or device, with no visible text or symbols.DRUCKTASTE DREHSCHALTER
natural_image
Close-up of a leaf with serrated edges and a diagonal line, no text or symbols visiblenatural_image
Close-up of a hand holding a soccer ball (no visible text or symbols)
6
ABLAUF DES SPÜLPROGRAMMS
natural_image
Close-up of a mechanical device with three switches and a circular component, no visible text or symbols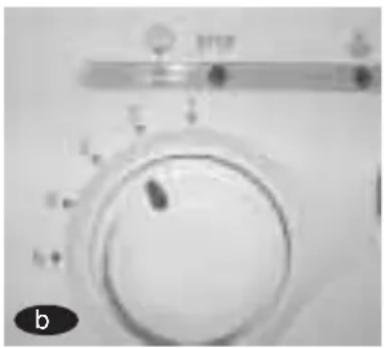
natural_image
Close-up of a kitchen rotary knob with control knobs and a dial (no visible text or symbols)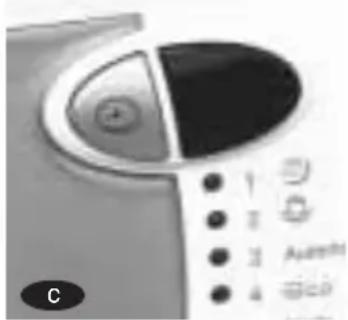
natural_image
Close-up of a computer monitor with a black screen and control buttons, no visible text or symbols on the screen or buttons.WICHTIG
natural_image
Close-up of a washing machine control panel with a circular indicator and brand mark (no readable text or symbols)natural_image
Person washing hands in a stainless steel kitchen sink (no visible text or symbols)
natural_image
Close-up of a laboratory procedure showing a hand pressing a sample with arrows indicating motion (no text or symbols visible)
natural_image
Close-up of a hand operating a cylindrical mechanical component with a base, no visible text or symbolsnatural_image
Close-up of a hand pouring liquid into a container with a small container on a tray (no visible text or symbols)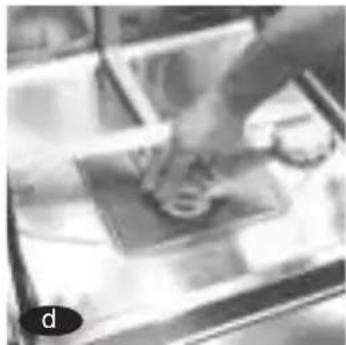
natural_image
Close-up of a hand pressing down on a small object in a transparent container (no visible text or symbols)natural_image
Black-and-white photo of a person sitting on a bench with blurred background elements (no visible text or symbols)
natural_image
Close-up of a hand using a tool to press or inspect a metal component on a workbench (no visible text or symbols)
natural_image
Close-up of a mesh grid structure with no visible text or symbols
natural_image
Person washing a kitchen sink with a hand near the sink (no visible text or symbols)natural_image
Hand cleaning a white kitchen appliance with a cloth (no visible text or symbols)WICHTIG
natural_image
Silhouette of a hammer striking a surface with a horizontal line (no text or symbols)1
TECHNISCHE ODER FUNKTIONSPROBLEME
- ÍNDICE / ÍNDICE / TABLE OF CONTENT / INHALT
- ESPAÑOL
- DEUTSCH
- IMPORTANTE
- b
- g
- INTEGRACIÓN
- a
- USO DEL APARATO Y CONSEJOS PRÁCTICOS
- DÓNDE PONER LA SAL
- b Cestillo superior modelo B:
- 3
- DESARROLLO DEL PROGRAMA DE LAVADO
- 5
- INTEGRAÇÃO
- Cesto superior modelo B:
- PROBLEMAS TÉCNICOS OU FUNCIONAIS
- IMPORTANT
- CONNECTION TO THE PLUMBING
- ELECTRICAL CONNECTION
- 4
- LEVELLING AND POSITIONING
- LEVELLING
- POSITIONING
- Fitting a dishwasher into a row of cup-boards.
- PANELLING and FITTING BUILT-IN DISHWASHERS
- PANELLING
- Simply fit the same de-cor panels or doors as the kitchen cupboards
- With models fitted, the height to which the door can be panelled
- C
- d
- e
- f
- FITTING BUILT-IN DISHWASHERS
- h
- i
- j
- k
- 6
- PRE-WASH
- USING THE APPLIANCE - A FEW PRACTICAL TIPS
- WATER HARDNESS, SALT, RINSE-AID AND DETERGENT
- Controlling the salt level.
- MANUAL REGULATION
- ELECTRONIC REGULATION
- WHERE TO PUT THE SALT
- When do I need to add salt?
- When do I need to add rinse-aid?
- 2
- TABLEWARE AND UTENSILS. TYPES AND POSITIONING
- Placing the utensils in the dishwasher
- Adjusting the racks
- a Top rack model A:
- b Top rack model B:
- SELECTING THE WASH PROGRAMME
- The additional functions available depend on the model:
- Button: Time delay
- Button: Time reduction
- Button: Extra drying
- Button: Express (top)
- Button: Top/bottom load
- Button: Half-load
- START-UP
- THE WASH PROGRAMME
- END OF PROGRAMME
- POWER CUTS
- BASIC TIPS
- APPLIANCE MAINTENANCE AND CLEANING
- CLEANING THE WASH FILTER
- CLEANING THE SPRAY ARMS
- CLEANING THE INSIDE OF THE APPLIANCE
- CLEANING THE OUTSIDE OF THE APPLIANCE
- TROUBLESHOOTING
- TECHNICAL OR FUNCTIONAL PROBLEMS
- - Why won't the dishwasher start?
- - The dishwasher starts up but no water comes into the appliance
- - The water does not drain off and stays in the dishwasher
- - The low salt level pilot light does not go off
- - Traces of detergent are left in the dispenser or on the door.
- - Unusual foam appears:
- • The dishwashers uses a lot of salt.
- • The dishwasher makes strange noises.
- PROBLEMS WITH THE QUALITY OF THE WASH
- - Remains of dirt or food on the utensils
- - Glass or crystal comes out with a milky appearance or scratched.
- • Glass or crystal comes out looking opaque
- - The glasses and cutlery have a dull appearance and the glasses have a metallic shine.
- - Utensils made of stainless or fine steel come out stained.
- INFORMATION FOR THE CORRECT DISPOSAL OF ELECTRICAL AND ELECTRONIC APPLIANCES
- INSTALLATION UND MONTAGE
- AUSPACKEN DES GESCHIRRSPÜLERS
- WICHTIG
- EINBAU
- WAHL DES SPÜLPROGRAMMS
- ABLAUF DES SPÜLPROGRAMMS
- 1
- TECHNISCHE ODER FUNKTIONSPROBLEME
Brand : FAGOR
Model : LF 015 I
Category : Dishwasher