
EBT - Uncategorized Ritter - Free user manual and instructions
Find the device manual for free EBT Ritter in PDF.


| Product Type | Coffee Grinder |
| Brand | Ritter |
| Model | EBT |
| Dimensions (H x W x D) | 30 x 18 x 22 cm |
| Weight | 2.8 kg |
| Power Supply | 220-240 V, 50/60 Hz |
| Power Consumption | 150 W |
| Grinding Mechanism | Conical burr grinder |
| Grind Settings | 30 levels |
| Bean Hopper Capacity | 250 g |
| Grounds Container Capacity | 150 g |
| Main Functions | Grind coffee beans, adjustable coarseness, single-dose operation |
| Control Type | Rotary knob and push button |
| Cleaning | removable burr and hopper, wipe with damp cloth |
| Maintenance | Clean after each use; descale every 3 months |
| Safety Features | Overload protection, non-slip feet, auto shut-off |
| Spare Parts Available | Burr set, hopper, container, gasket |
| Repairability | Modular design, DIY friendly |
| Cable Length | 1.2 m |
| Material | Stainless steel and BPA-free plastic |
| Warranty | 2 years |
Frequently Asked Questions - EBT Ritter
User questions about EBT Ritter
0 question about this device. Answer the ones you know or ask your own.
Ask a new question about this device
Download the instructions for your Uncategorized in PDF format for free! Find your manual EBT - Ritter and take your electronic device back in hand. On this page are published all the documents necessary for the use of your device. EBT by Ritter.
USER MANUAL EBT Ritter

8

9

10
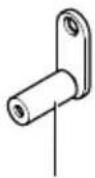
11
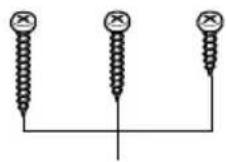
12

13

14

15
B

C
D

E

F

| de | Wissenswertes zum ritter Einbaubrottopf und Einbauanleitung | 2 |
| en | Everything you need to know about the ritter built-in bread bin and installation instructions | 6 |
| cs | Informace k vestavnému chlebníku ritter a návod k vestavbě | 10 |
| hu | Fontos információk a ritter beépíthető kenyértartóról és beépítési útmutató | 14 |
| pl | Co warto wiedzieć o chlebaku do zabudowy ritter oraz instrukcja montażu | 18 |
| ru | Встраиваемая хлебница. Необходимая информация для встраиваемой хлебницы ritter и Руководство по монтажу | 22 |
WISSENSWERTES ZUM RITTER EINBAUBROTTOPF AUS STEINGUT MIT FRISCHHALTE-FUNKTIONSDECKEL
EVERYTHING YOU NEED TO KNOW ABOUT THE RITTER EARTHEN-WARE BUILT-IN BREAD BIN WITH FUNCTIONAL KEEP-FRESH LID
Looked at statistically, each of us eats four slices of bread every day. All in all, this is equivalent to roughly half a pound a day. And this is a good thing, because bread - in particular wholemeal bread - is full of everything we need to eat in concentrated form. The shoots, husk and surface layers of the unhusked grain contain essential vitamins, mineral nutrients and fibres.
How long bread can be kept for depends on the type of bread and how it is to be stored. Mould is bread's worst enemy. And mould flourishes wherever there is heat. Complete loafs of bread, when stored correctly in the bread bin as in the Instructions for Use opposite, are hardly susceptible to mould. Complete loafs of bread are therefore not preserved using sorbic acid. However, it is different for bread that has already been sliced and packed. This is because the protective crust surround is missing. The slices provide a large area for mould fungus to attack.
In the ritter earthenware built-in bread bin, the bread is stored in a biologically correct and healthy manner. When in the ritter built-in bread bin, the bread undergoes a natural ageing process and the bread's inherent flavouring can then freely develop. The ritter built-in bread bin is the best place to keep your bread. Even after several days in the bin it will remain a healthy delicacy, full of nutrition and digestible.
The moisture released by fresh bread is absorbed by the lid of the bread bin and - depending on requirements - returned to the bread. This is why the lid is porous on its underside. It acts like a sponge. On the outside, it is just like the bread bin: glazed and suitable for storing food. The moisture stored in the lid cannot then evaporate. The bread's natural moisture content is retained for a longer period, thus preventing the bread from drying out too quickly.
Bread, as a natural food, needs oxygen for its natural ageing process. Holes at the side, which can also be used for picking the bin up, provide the necessary air circulation, thus preventing the bread from asphyxiating.
Earthenware is well known for its insulating properties against changing temperatures. The ritter earthenware built-in bread bin ensures that the bread temperature mainly remains at a uniform level. This is very important for biologically correct storage, because bread needs a temperature that remains constant.
INSTRUCTIONS FOR USE
Bread fresh from the oven must be properly cooled before being put into storage.
- Regularly remove any old bread crumbs and clean the bread bin using a damp cloth.
- Wipe down the bread bin occasionally using vinegar, this helps to prevent any mould from forming.
- Do not wrap the bread in anything before placing it into the bread bin.
WHAT TO DO...
if the bread dries out too quickly?
If the bread bin is still new or if it has not been used for an extended period, then it may be that the bread bin lid has not absorbed the necessary degree of moisture.
- The best thing to do, is place a bowl of water into the bread bin and leave it overnight.
The lid will then absorb the required moisture, which then in turn is released to the bread.
if mould starts to form?
This could be the case if there is too much moisture and an insufficient level of air replacement.
- Clean the bin using vinegar and place it for roughly one hour at approx. 250 degrees Celsius in the baking oven.
This will kill off any mould fungus.
Caution!
Place the bread bin into the cold baking oven and do not remove until after the cooling process is over!
If you should detect any mould in the lid itself, please contact the ritter Service.
One more small tip:
White bread products will go soft in the ceramics bread bin, but if you bake them for a few minutes they will be crisp and fresh again.
INSTALLATION INSTRUCTIONS
DELIVERY CONTENTS
Figure A:
| Pos. | Designation Number | |
| 1 | Bread bin 1x | |
| 2 | Bread bin lid 1x | |
| 3 | Supporting pipe 1x | |
| 4 | Fastening screw, preassembled 2x | |
| 5 | Fastening screw, preassembled 4x | |
| 6 | Lid carrier, preassembled 2x | |
| 7 | Ventilation bezel 1x | |
| 8 | Fastening angle 6x | |
| 9 | Baseplate 12x | |
| 10 | Side retaining bracket (supporting pipe bearing) | 2x |
| 11 | Lid supporting surface 1x | |
| 12 | Fastening screw | |
| - ASPA Pan Head 3.5 x 17 (without baseplates) | 9x | |
| - ASPA Pan Head 3.5 x 25 (for one baseplate) | 9x | |
| - ASPA Pan Head 3.5 x 30 (for two baseplates) | 9x | |
| 13 | Fastening screw 4x13 | 2x |
| 14 | Fastening screw 6x13.5 | 1x |
| 15 | Serrated lock washer | 3x |
| - | Drilling template | 2x |
PREPARATION
Remove all drawers that are located above the drawer intended for the bread bin.
MOUNTING FASTENING ANGLE FOR BREAD BIN
Figure B:
- Use a stop angle to mark out a right-hand reference line in the base of the drawer at a distance of 43 mm to the inside of the carcass.
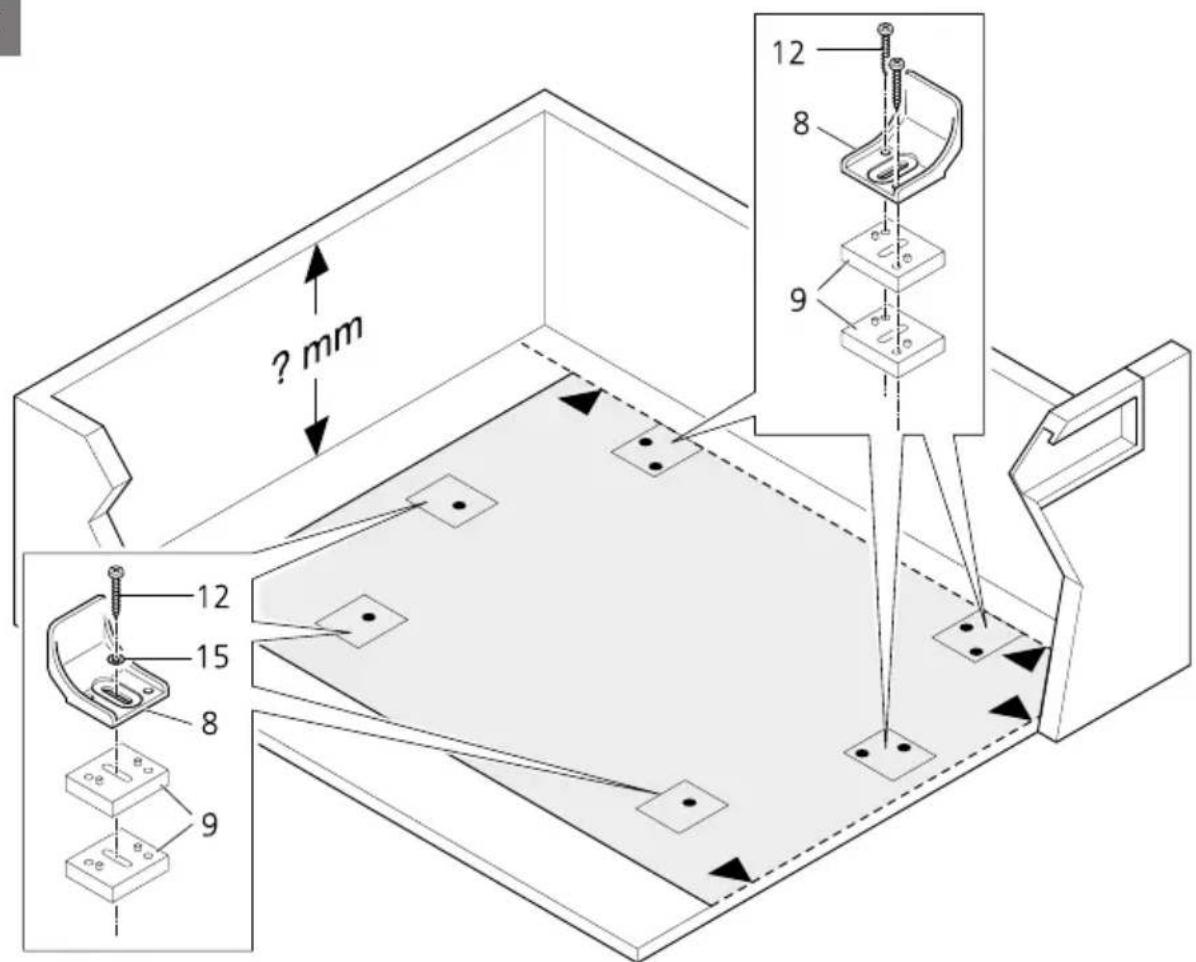
Figure C:
- Place the drill template, with the underside, onto the front of the drawer and with the right-hand side up against the reference line.
- Drill the holes with which the fastening angle (8) is to be mounted.
- Determine the maximum case height. If the height is in excess of 150 mm, the fastening angle must be fitted with a baseplate (9), if it is higher than 158 mm, two baseplates have to be used.
- Attach the two right-hand and the front fastening angles, using two fastening screws each (12).
- Attach the two left-hand and the rear fastening angles, using one fastening screw each (12) and a serrated lock washer (15). Do not tighten the screws yet so that the position of the fastening angles can still be adjusted.
- Mount the bread bin onto the fastening angle:
- The "ritter" emblem should be visible at the front.
- The bread bin should make contact with the right and front fastening angles.
- Position the adjustable fastening angles at the left and rear so that the bread bin can be inserted and removed easily, but with zero-clearance, if possible.
- Secure the position of the left-hand and rear fastening angles.
MOUNTING BREAD BIN LID FASTENINGS
- Place the bread bin (1) into the (inserted) drawer.
- Shorten the supporting pipe (3) to the correct length (inner carcass width minus 8 mm).
- If necessary, route the supporting pipe into the lid rack (6).
- Align the supporting pipe parallel to the bread bin lid (2) at a distance of 16mm (Figure D).
- Place the bread bin lid onto the bread bin:
- The "ritter" emblem should be visible at the front.
- The bread bin lid should contact the front of the drawer
Figure D:
- Pull the drawer out far enough, so that the supporting pipe makes contact with the front edge of the carcass side.
- Mark the upper edge of the supporting pipe on the left and right of the inside of the carcass.
- Remove the bread bin lid and the bread bin.
- Remove the drawer.
Figure E:
- Use the drill template and a centre punch to mark the following on the right-hand of the carcass interior:
– the holes for the right retaining bracket (10)
– the holes for the lid carrier (11)
Figure F:
- Use the drill template and a centre punch to mark the holes for the left retaining bracket (10) on the left of the carcass interior.
- Drill the marked holes ( 4.5 mm x 10 mm).
INSTALLING VENTILATION BEZEL
- Drill the hole for the ventilation bezel (7) (∅44 mm):
-on the rear side of the carcass -in the centre, level with the bread bin - Insert the ventilation bezel.
FINALISATION
- Insert the retaining brackets (10) into the bores and fasten them in place using the fastening screws (13).
- Insert the bread bin lid (2) with the supporting pipe (3) into the retaining brackets.
- Mount the lid carrier (11) using the fastening screw (14).
- Insert the drawer.
- Place the bread bin into the drawer.
- Check the position of the lid carrier:
- The lid carrier fits flush to the front of the bread bin
- The lid carrier must not contact the side of the bread bin when the drawer is pulled out
- If necessary, adjust the position of the lid carrier (6).
- Tighten all screws.
INFORMACE KE KAMENINOVÉMU VESTAVNÉMU CHLEBNÍKU RITTER S VÍKEM PRO UDRŽENÍ ČERSTVÉHO CHLEBA



- WISSENSWERTES ZUM RITTER EINBAUBROTTOPF AUS STEINGUT MIT FRISCHHALTE-FUNKTIONSDECKEL
- EVERYTHING YOU NEED TO KNOW ABOUT THE RITTER EARTHEN-WARE BUILT-IN BREAD BIN WITH FUNCTIONAL KEEP-FRESH LID
- INSTRUCTIONS FOR USE
- WHAT TO DO
- IF THE BREAD DRIES OUT TOO QUICKLY
- IF MOULD STARTS TO FORM
- CAUTION
- ONE MORE SMALL TIP
- INSTALLATION INSTRUCTIONS
- DELIVERY CONTENTS
- PREPARATION
- MOUNTING FASTENING ANGLE FOR BREAD BIN
- FIGURE B
- FIGURE C
- MOUNTING BREAD BIN LID FASTENINGS
- FIGURE D
- FIGURE E
- FIGURE F
- INSTALLING VENTILATION BEZEL
- FINALISATION
- INFORMACE KE KAMENINOVÉMU VESTAVNÉMU CHLEBNÍKU RITTER S VÍKEM PRO UDRŽENÍ ČERSTVÉHO CHLEBA
Brand : Ritter
Model : EBT
Category : Uncategorized