
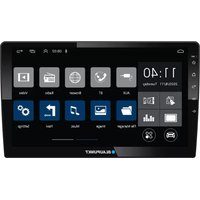
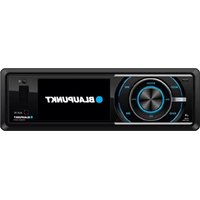
New Orleans 1000 DSP - Receiver BLAUPUNKT - Free user manual and instructions
Find the device manual for free New Orleans 1000 DSP BLAUPUNKT in PDF.
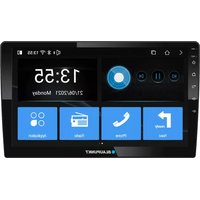


| Product Type | Car Audio Amplifier with DSP |
| Model | New Orleans 1000 DSP |
| Brand | Blaupunkt |
| Channels | 4 |
| RMS Power Output (4Ω) | 4 x 150 W |
| RMS Power Output (2Ω) | 4 x 250 W |
| Max Power Output | 1000 W |
| Digital Signal Processing (DSP) | Integrated with adjustable crossover, EQ, and time alignment |
| Frequency Response | 10 Hz - 30 kHz |
| Signal-to-Noise Ratio | > 100 dB |
| Input Sensitivity | 0.2 V - 6 V |
| Power Supply Voltage | 10 - 16 V DC |
| Dimensions (W x H x D) | 500 x 55 x 250 mm |
| Weight | 2.5 kg |
| Fuse Rating | 3 x 30 A |
| Operating Temperature | -20°C to 60°C |
| Protection Features | Overheat, short circuit, and overvoltage protection |
| Mounting | Vertical or horizontal in vehicle trunk or under seat |
| Included Accessories | Remote control, mounting screws, power connector, user manual |
Frequently Asked Questions - New Orleans 1000 DSP BLAUPUNKT
User questions about New Orleans 1000 DSP BLAUPUNKT
0 question about this device. Answer the ones you know or ask your own.
Ask a new question about this device
Download the instructions for your Receiver in PDF format for free! Find your manual New Orleans 1000 DSP - BLAUPUNKT and take your electronic device back in hand. On this page are published all the documents necessary for the use of your device. New Orleans 1000 DSP by BLAUPUNKT.
USER MANUAL New Orleans 1000 DSP BLAUPUNKT
Enjoy it.
Safety Notes
This car radio has been manufactured according to established safety guidelines. However, dangers may still occur if the safety notes in this manual are not observed. This manual is intended to familiarize the user with the car radio's important functions. Read this carefully prior to using the car radio. Keep this manual in an easily accessible location. In addition, observe the instructions of the devices used in conjunction with this car radio.
Road Safety
Always observe the following notes for road safety:
- The car radio must be used in a way that complements the safety of the user when driving the vehicle. It is recommended for the user to park at an appropriate location when operating the car radio. While driving, the user is not recommended to use applications that can be prone to distraction, e.g., streaming to media, etc.
- Radios with Navigation: The user is recommended to proceed with proposed driving routes only if it does not violate any traffic regulations. Local traffic signs and regulations always prevail over the routes proposed.
- The user is advised to keep the volume of the car radio at a moderate level for the protection of the ears and to increase the ability to hear any emergency warning signals (e.g., police and ambulance sirens). Do not increase the car radio volume while the car radio is muted as it is not audible. The car radio volume can be too loud when the car radio is unmuted.
General Safety Notes:
Observe the following for protection against injuries: This car radio is intended for installation and
operation in a vehicle with a 12V vehicle system voltage. Hence, the radio unit must be installed in a DIN slot. Observe the output limits of the car radio. Do not dismantle or modify the car radio. Installation and repairs, if necessary, should be performed by a specialist. We are not liable for any loss or damage caused or resulting from unauthorized disassembly or modification to the product.
This car radio's core components may result in damage when the car is driven on bumpy roads for a prolonged period of time or if it is used to play non-standard or severely damaged discs.
- Please do not operate the car radio under extreme temperature conditions (extremely high temperature or extremely low temperature); make sure that the temperature within the car ranges from -20°C to 70°C before you connect the car radio to the power supply.
- For abnormalities, please refer to the "Troubleshooting" section. If the problem cannot be resolved, please press the Reset button to recover its factory settings. Otherwise, please contact the respective installer/seller directly for help.
- As SD/USB file formats, codecs, bitrate, resolution, and other parameters available in the market are not all the same, there is no guarantee that this car radio can play all media file formats.
- Different cars may have different configurations. It is normal that some CAN-Bus functions cannot be enabled because they are not supported by the user's car or this car radio.
- Solvents, cleaning and scouring agents, as well as dashboard spray and plastics care products, may contain materials that can damage the surface and screen of the car radio. Use only a dry or slightly moistened cloth to clean the car radio surface and screen.
This manual may be updated from time to time without any notice. Visit www.blaupunkt.com for more info.
Disclaimer
In no event shall Blaupunkt be liable for any direct, indirect, punitive, incidental, special, or consequential damages to property or life, and whatsoever arising out of or connected with the use or misuse of our products.
USA & CANADA: This product is not intended for sale in the United States and Canada. If purchased in the U.S. or Canada, this product is purchased on an as-is basis. No warranty, whether expressed or implied, is provided in the U.S. or Canada.
Disposal Notes
Do not dispose of your old unit in the household trash!
Use the return and collection systems available to dispose of the old device.
Radios with Detachable Panel - Damage to the control panel
• Never drop the control panel. - Transport the control panel so that it is protected against impacts and the contacts cannot become dirty. - Do not expose the control panel to direct sunlight or another heat source. - Avoid direct skin contact
Scope of Delivery
- User Manual
- Connecting cables • AVN harness • 360 AVM (Optional)
- USB cables • External Microphone • GPS Antenna 4G Antenna

Functions
- Microphone
- Reset
When the machine is not working properly, press this button and the machine will return to the factory settings.
- Power Button
- Press to activate the system/mute volume
- Press and hold to turn off the system
- Home Button
- Back Button
- Volume Up
- Volume Down
Home Page
Main Interface
- Press button to return to the default main interface.
- Long press button to clear background running programs. • Slide left for more applications.
- Press button for all system applications.

- Press button for third-party applications.

Change Wallpaper
- Press button for changing wallpaper for main interface.


Change Icon Position
- Press and hold the select icon then it pops up, movable and can be located to new position.
Apps info
- Press and hold the activated icon, drag the icon to

Delete Apps
- Press and hold the activated icon, drag the icon to

Radio
To enter Radio Mode, touch the "Radio" icon on the Main Menu.

The detailed functions are described as follows:
- Radio scale
- Seek down
- Radio frequency
- Mono or Stereo, decided by the radio IC
- Displays LOC or DX
- Seek up
- Active RDS Function
- Preset Station List
- AM Band Switch button
- FM Band Switch button 11.-Press to non stop seek tuning, press again to cancel -Press and hold for switching the preset channels, press again to cancel
- Change between Locate and DX mode
- EQ and FAB setting
RDS (Radio Data System)
| TP | Shows the traffic station is on or not |
| AF | It can switch to stronger signal frequency when the current frequency is weak, but keep the contents same, only frequency different |
| TA | It can source the traffic info every minute, and stops to broadcast the traffic info once news come in. |
| PTY | To search by type |
Storing a Station
- Select a station. (Example: FM1 103.6MHz)
- Touch and hold the desired preset number (Example: P1) to store the radio station.
BT
Pre-pair BT
- Ensure the mobile phone supports Bluetooth function before pairing. Different mobile phones will have different transmission power. To get the best connection, the recommended distance range is 3m without any object obstruction. For the first user or after reinstalling the software, it is required to connect to the internet to fully register the Bluetooth.
Pairing
- Turn on the mobile phone's Bluetooth to set up. (Please refer to the instruction manual of the mobile phone on how to operate Bluetooth) "CAPE TOWN 900 DSP/1000 DSP" should appear on your available Bluetooth scanning list.
- Select "CAPE TOWN 900 DSP/1000 DSP" then insert password "0000", if password is required. Select confirm buttons when the pairing prompt message appears. It will appear in white colour on the Home Page when pairing is successful.
Delete Pairing
- In the registered Bluetooth device list, choose which device you want to delete and it will appear the confirmation to delete and select "OK" to continue.
Hands-Free Call
- Dial Panel
- Phone book
- Phone call record
- Device list
- Bluetooth settings
Multimedia Music Player
- Back to the folder
- Last tune
- Pause
- Next tune
- Cycle mode
- EQ settings
Video Player
- Back to the folder
- Last tune
- Pause
- Next tune
- Cycle mode
- Full screen
DSP Setting
EQ
- Setup Sound Effect - Flat, Pop, Rock, etc.

Curve
- Setup custom sound curve.

FAB
- Setup and set the sound balance.

Delay
- Setup and set the stereo and sound field delay.

Settings
Display
- Brake Bypass – Switches "OFF", the screen will display warning information if playing video. The warning screen will prevent the driver from watching videos while the vehicle is in motion.

General
- Select an option to access/setup.

Wi-Fi Setup
- Turn on the Wi-Fi and search the available networks.
- Select a hotspot to connect.

BT
- Manage BT devices.

Android Settings
• View and manage the Android settings.

Language Setup
System Info
• View the details of system.

Source volume level
- Set the volume level of each Source.

Factory
- Access Factory configuration.
Default Password: 8888

General
Power supply (12V)....10.5 V ~ 16 V DC Standby current....≤ 5mA Operating current....<12A Max. power output 4 x 50W Dimension (WxLxH) 230x130x45mm Weight....0.78kg Operation temperature....-20°C ~ 60°C Screen size 9.0/10.1 inch Resolution.... 1280 x 720 pixel Aspect ratio 4:3 / 16:9
FM Stereo Radio
Tuning range.... 87.5 - 108MHz
Preset memory stations....18
AM/MW Radio
Frequency range 522~1620KHz
Preset memory stations 12
Audio Specification
Frequency response 50Hz-15kHz
Parametric Equalizer....16-Band
Input
USB......Audio : MP3, CDA
Video : AVI, MP4
Aux-in.... RCA
BT
Hands-Free Calling: Accept/Hang Up/
Reject Call ......HFP
Phone Book Access PBAP
Audio Streaming....A2DP
Streaming Audio Control......AVRCP
Support for Bluetooth Headset......HSP

NOTE:
- Must connect 360 AVM rear cable, not support AHD rear and front camera cable, it will cause no picture show on the rear page.
360 Parking System
- Enter the Settings page, select Display > Camera Setting


- Select Set the camera hardware channel > AVM, then back to the Home page and will show a reboot window on the unit, please wait for the unit finish reboot.

- According the camera manual select the match parameter.

- After finish setting, return to home page, it will show a window said the unit need reboot. After finish reboot, it will show a 360 rear icon.
NOTE:
- If the window does not appear, please reboot the head unit manually.
Entering AVM
- Go to


- Press

to enter the 2D interface.

- Double-click the left side view, and a panoramic picture will appear.

Switch to 3D view

Left view distortion correction

Right view distortion correction

Front view distortion correction

Rear view distortion correction

Right view

Front view

Rear view

Left view

Left rear side view - 3D angle, showing the car's left rear view.
k. Front left side view - 3D angle, showing the car's front left view. l. Right rear side view - 3D angle, showing the car's right rear view. m. Left front side view - 3D angle, showing the car's left front view. n. Limit of front wheel width view angle - vertical view shown in the middle of the screen. o. Front wheel line width view angle - vertical view shown on the left side of the screen. p. Car front side - when the car's front radar sounds, click this to enter the front view. q. Car front side - when the car's rear radar sounds, click this to enter the rear view. r. Widthwise vertical view - when the car's rear radar sounds, click this to enter the rear view. s. Front triad screen, with more view angles. t. Rear triad screen, with more view angles.
- Press 2D to enter the 3D interface.

Double-click the left side view to display the panorama picture.
a. 3D switch to 2D view
b. Rear view
c. Front view
d. Rear view - 3D rear view
e. Front view - 3D rear view
f. Left rear side view - 3D angle, showing the car's left rear view.
g. Front left side view - 3D angle, showing the car's front left view.
h. Right rear side view - 3D angle, showing the car's right rear view.
i. Left front side view - 3D angle, showing the car's left front view.
j. Limit of front wheel width view angle - vertical view shown in the middle of the screen.
k. Front wheel line width view angle - vertical view shown on the left side of the screen.
- Car front side - when car front radar is sounding. Click this to enter front view.
m. Car front side - when car rear radar is sounding. Click this to enter rear view.
n. Widthwise vertical view - when car rear radar is sounding. Click this to enter rear view.
- Front triad screen, with more view angle.
p. Rear triad screen, with more view angle.
q. 3D Rotation
r. Take photo - supports talking photo during driving.
s. Setting
Setup
![graph TD A["ABC"] --> B["Car Model"] C["Calibration"] --> D["Viewangle"] E["DVR"] --> F["Settings"] G["About"] --> H["DeF"] style A fill:#f9f,stroke:#333 style C fill:#f9f,stroke:#333 style E fill:#f9f,stroke:#333 style G fill:#f9f,stroke:#333 style B fill:#ccf,stroke:#333 style D fill:#ccf,stroke:#…](/content/2026/05/1000815/images/149238a8880742e96e61f0301771e9d5f0f9836538fa60497da67bb68b6eb053.jpg)
A. Car Model
- More vehicles. Click to select car model.
- My garage (Sedan, SUV, MPV)
- Front view
- View angle mode (10°, 20°, 30°, 45°)
- Vehicle color
- Car mode
- License plate settings
B. Calibration
- Follow the video to finish calibration & also find a professional to finish view setting.
- Password: 8888


C. View Angle
- Follow the video to finish calibration & also find a professional to finish view setting.
- Password: 8888


D. DVR
- Access the driving record, photos and settings.

- Date
- Car driving video
- Driving photo
- Settings
- Clear all
- Show the record
- Delete the record

E. Settings
• 360 settings

- About

• Turning/Reversing settings

- Parking Line settings

• User Car/Model settings

Main Interface![graph TD A["① 2 3 4 5"] --> B["MPa<br>-°C<br>Normal"] C["⑥"] --> D["MPa<br>-°C<br>Normal"] E["⑦"] --> F["MPa<br>-°C<br>Normal"] G["Settings"] --> H["Parking"] style A fill:#f9f,stroke:#333 style C fill:#f9f,stroke:#333 style E fill:#f9f,stroke:#333 style G fill:#f9f,stroke:#333](/content/2026/05/1000815/images/61bc59ce1d49c896453f8a1463b7433a16114f6faab51cb0c99bf21e68f42c64.jpg)
- Display tire pressure
- Display tire temperature
- Display tire status: Normal/ High temperature/ Low pressure, etc
- Sensor signal: Turn to yellow when signal is abnormal
- Sensor voltage: Turn to yellow when voltage is low
- Enter the sensor ID pairing interface
- Enter the settings interface
Settings

- Set pressure units (Psi/kPa/Bar)
- Set temperature units (°C/°F)
- Set the low pressure alarm threshold to transmit a low pressure alarm when the tire pressure drops below the threshold
- Set the high pressure alarm threshold to transmit a high pressure alarm when the tire pressure exceeds the threshold
- Set the high temperature alarm threshold to transmit a high temperature alarm when the temperature exceeds the threshold
- Alarm Sound: Enable/Disable
- Show Spare Tire: Enable/Disable
- Show Floating Ball: Enable/Disable
Sensor ID Pairing
- Select a preferred tire

- Start sensor ID pairing status

- Sensor ID pairing process can be interrupted.

- The sensor ID pairing process will time out and exit when the sensor signal pairing takes more than 300 seconds.

- Sensor ID pairing is completed

Tire Exchange
- Select the two tires that need to be exchanged

- Confirm tire exchange

- Tire exchange is completed

Sensor Voltage
- Display the voltage values of each sensor

Main Interface
- Enter the settings interface
- Display tire number
- Display tire pressure
- Display tire temperature
- Set pressure units
- Set temperature units
Settings

- Set pressure units (Psi/kPa/Bar)
- Set temperature units (°C/°F)
- Set the low pressure alarm threshold to transmit a low pressure alarm when the tire pressure drops below the threshold
- Set the high pressure alarm threshold to transmit a high pressure alarm when the tire pressure exceeds the threshold
- Set the high temperature alarm threshold to transmit a high temperature alarm when the temperature exceeds the threshold
- Alarm Sound: Enable/Disable
Sensor ID Pairing
- Select on a preferred tire

- Start sensor ID pairing status

- Sensor ID pairing process can be interrupted.

- The sensor ID pairing process will be time out & exit, when the sensor signal pairing takes more than 300 seconds.

- Sensor ID pairing is completed

Tire Exchange
- Select the two tires that need to be exchanged

- Confirm tire exchange

- Tire exchange is completed

Vehicle Type
- Select the preferred vehicle type

- Confirm Selection

Sensor ID
- Display the ID numbers of each sensor

Sensor Voltage
- Display the voltage values of each sensor


| NO. | WIRE | A |
| 1 | BLACK | GND |
| 2 | RED | ACC |
| 3 | PINK | REVERSE |
| 4 | BROWN | KEY 1 |
| 5 | GREY/BLACK | FR- |
| 6 | GREY | FR+ |
| 7 | WHITE/BLACK | FL- |
| 8 | WHITE | FL+ |
| 9 | YELLOW | BATT 12V |
| 10 | ORANGE | ILL |
| 11 | BROWN/BLACK | KEY 2 |
| 12 | BLUE | ANT CONT |
| 13 | GREEN/BLACK | RL- |
| 14 | GREEN | RL+ |
| 15 | PURPLE | RR+ |
| 16 | PURPLE/BLACK | RR- |
| NO. | WIRE | B |
| 1 | BROWN | AMP+12V |
| 2 | RED | AUX-R |
| 3 | WHITE | AUX-L |
| 4 | BLUE | SIM-SIO |
| 5 | YELLOW | SIM-INT |
| 6 | WHITE | SIM-SCLK |
| 7 | GREEN | SIM-SRST |
| 8 | RED | SIM-PMU |
| 9 | RED | F-CAMERA |
| 10 | BLACK | MIC- |
| 11 | BLACK | GND |
| 12 | WHITE | RCA-L |
| 13 | RED | RCA-R |
| 14 | BLACK | GND |
| 15 | BLACK | GND |
| 16 | BLACK | GND |
| 17 | - | V-OUT |
| 18 | YELLOW | SUB |
| 19 | WHITE | AUX-V |
| 20 | RED | MIC+ |
| NO. | WIRE | C |
| 1 | - | L-TURN |
| 2 | - | GND |
| 3 | - | GND |
| 4 | - | GND |
| 5 | - | GND |
| 6 | - | 5V |
| 7 | - | R-TURN |
| 8 | - | 360 AHD-F |
| 9 | - | 360 AHD-R |
| 10 | - | 360 AHD |
| 11 | - | 360 AHD-L |
| 12 | - | 5V |
| NO. | WIRE | D |
| 1 | BLACK | GND |
| 2 | RED | RCA-RR |
| 3 | - | SPDIF |
| 4 | BROWN | CAN-TX |
| 5 | - | NC |
| 6 | WHITE | RCA-RL |
| 7 | BLACK | GND |
| 8 | PINK | CAN-RX |
| NO. | WIRE | E |
| 1 | RED | USB 5V |
| 2 | BLACK | GND |
| 3 | GREEN | USB-DP1 |
| 4 | WHITE | USB-DN1 |
| NO. | WIRE | F |
| 1 | RED | USB 5V |
| 2 | BLACK | GND |
| 3 | - | OTGDP |
| 4 | GREEN | USB-DP2 |
| 5 | WHITE | USB-DN2 |
| 6 | - | OTGND |
| NO. | WIRE | G |
| 1 | WHITE | TX |
| 2 | GREEN | RX |
| 3 | - | IR |
| 4 | RED | P14V |
| 5 | PINK | PARKING |
| 6 | WHITE | NC |
| 7 | BLACK | GND |
| 8 | YELLOW | CAM |
| 9 | BLACK | GND |
| 10 | WHITE | WIFI/BT-ANT |
If any of the following problems occur, please refer to Troubleshooting for possible solutions. Consult a Blaupunkt authorized dealer if the problem persists.
| Problems | Possible Causes | Solutions |
| Unable to start up | The car key is not inserted into the ignition; ignition is off. | Insert the car key and turn on the ignition. |
| Power Cable is not inserted into the main body. | Insert the power cable. | |
| Burnt power fuse . | Replace it with a new fuse. | |
| Drained car battery. | Charge or replace the car battery. | |
| No sound | Audio cables are not properly connected to the unit. | Ensure proper connection of the audio cables. |
| Mute setting is on. | Unmute the volume. | |
| Low volume. | Adjust the volume. | |
| No sound from front, rear, left & right speakers due to Fade-Balance settings. | Select Equalizer from Home Page to adjust setting. | |
| No rear-view reverse image | The rear camera is not appropriately connected with power supply. | Examine the camera's power supply connectivity. |
| Camera's signal line not plugged in. | Insert the camera's signal line into the interface port of this unit. | |
| Key light does not light | Check the headlight line connectionEnable the button light on Setup. |

Blaupunkt Car Entertainment - Asia Pacific Competence Centre
RO
CAPE TOWN 900 DSP
1 104 23 057 69 01
CAPE TOWN 1000 DSP
1 104 23 058 69 01
PALM SPRINGS 900 DSP
1 104 23 059 69 01
PALM SPRINGS 1000 DSP
1 104 23 060 69 01
- SAFETY NOTES
- ROAD SAFETY
- GENERAL SAFETY NOTES
- DISCLAIMER
- DISPOSAL NOTES
- RADIOS WITH DETACHABLE PANEL - DAMAGE TO THE CONTROL PANEL
- SCOPE OF DELIVERY
- FUNCTIONS
- MAIN INTERFACE
- CHANGE WALLPAPER
- CHANGE ICON POSITION
- APPS INFO
- DELETE APPS
- RADIO
- STORING A STATION
- BT
- PRE-PAIR BT
- PAIRING
- DELETE PAIRING
- DSP SETTING
- EQ
- CURVE
- FAB
- DELAY
- SETTINGS
- DISPLAY
- GENERAL
- WI-FI SETUP
- ANDROID SETTINGS
- SYSTEM INFO
- SOURCE VOLUME LEVEL
- FACTORY
- FM STEREO RADIO
- AM/MW RADIO
- AUDIO SPECIFICATION
- INPUT
- NOTE
- PARKING SYSTEM
- ENTERING AVM
- SETUP
- CALIBRATION
- VIEW ANGLE
- DVR
- SENSOR ID PAIRING
- TIRE EXCHANGE
- SENSOR VOLTAGE
- VEHICLE TYPE
- SENSOR ID
Brand : BLAUPUNKT
Model : New Orleans 1000 DSP
Category : Receiver