S0311 - Wandhalterung Ricoo - Kostenlose Bedienungsanleitung
Finden Sie kostenlos die Bedienungsanleitung des Geräts S0311 Ricoo als PDF.


Benutzerfragen zu S0311 Ricoo
0 Frage zu diesem Gerät. Beantworten Sie die, die Sie kennen, oder stellen Sie Ihre eigene.
Eine neue Frage zu diesem Gerät stellen
Laden Sie die Anleitung für Ihr Wandhalterung kostenlos im PDF-Format! Finden Sie Ihr Handbuch S0311 - Ricoo und nehmen Sie Ihr elektronisches Gerät wieder in die Hand. Auf dieser Seite sind alle Dokumente veröffentlicht, die für die Verwendung Ihres Geräts notwendig sind. S0311 von der Marke Ricoo.
BEDIENUNGSANLEITUNG S0311 Ricoo
text_image
Typ: 50311 Scope of the delivery Lieferumfang Plastic bag / Plastikbeutel ABC Wall screw Wandschraube 2 pcs/Stk. Concrete anchor Betorwand Döbel 2 pcs/Stk. M4 x 15MM 4 pcs/Stk. D Plastic stopper Kunststoff-Slopton 1 pcs/Stk. E Allen wrench Inbusschlüssel 1 pcs/Stk. Please note. The numbering on the plastic bag may differ. Sitz beachten die Durchmannierung auf dem Plastikbaut kann beschieden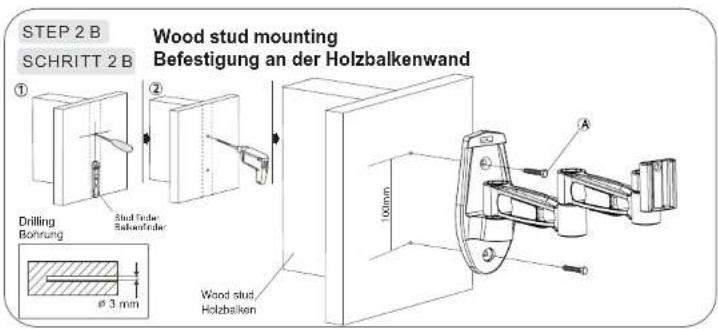
text_image
STEP 2 B SCHRITT 2 B Wood stud mounting Befestigung an der Holzbalkenwand Drilling Bohrung Stud fader Sahowfeder 100mm φ 3 mm Wood stud. Holzbalken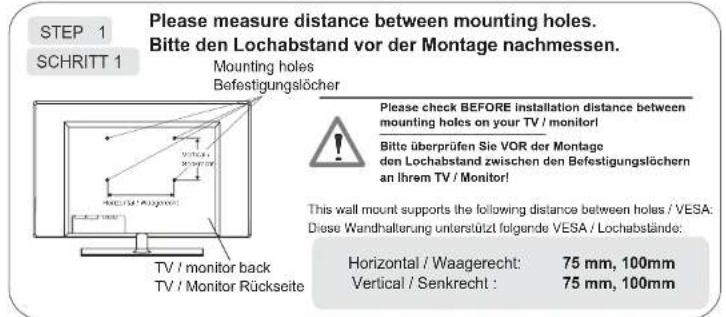
text_image
STEP 1 SCHRITT 1 Please measure distance between mounting holes. Bitte den Lochabstand vor der Montage nachmessen. Mounting holes Befestigungslöcher Please check BEFORE installation distance between mounting holes on your TV / monitor! Bitte überprüfen Sie VOR der Montage den Lochabstand zwischen den Befestigungslöchern an Ihrem TV / Monitor! This wall mount supports the following distance between holes / VESA: Diese Wandhalterung unterstützt folgende VESA / Lochabstände: Horizontal / Waagerecht: 75 mm, 100mm Vertical / Senkrecht : 75 mm, 100mm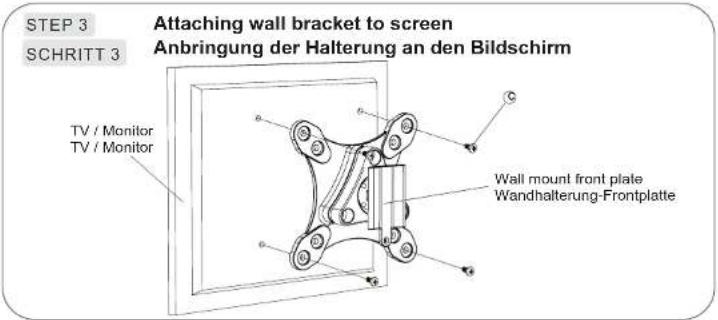
text_image
STEP 3 SCHRITT 3 Attaching wall bracket to screen Anbringung der Halterung an den Bildschirm TV / Monitor TV / Monitor Wall mount front plate Wandhalterung-Frontplatte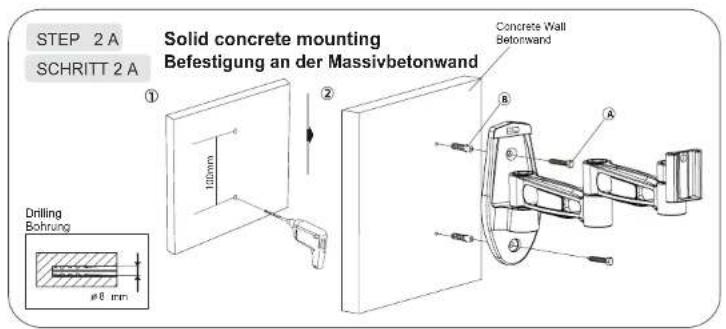
text_image
STEP 2 A SCHRITT 2 A Solid concrete mounting Befestigung an der Massivbetonwand Concrete Wall Betonwand Drilling Bohrung ø8 mm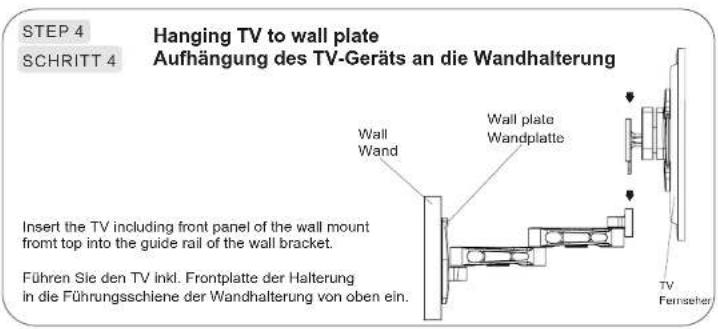
text_image
STEP 4 SCHRITT 4 Hanging TV to wall plate Aufhängung des TV-Geräts an die Wandhalterung Wall Wand Wall plate Wandplatte Insert the TV including front panel of the wall mount front top into the guide rail of the wall bracket. Führen Sie den TV inkl. Frontplatte der Halterung in die Führungsschiene der Wandhalterung von oben ein. TV FernscherSTEP 5
SCHRITT 5
Fixing of front panel Fixierung der Frontp
①
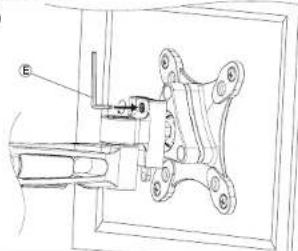
text_image
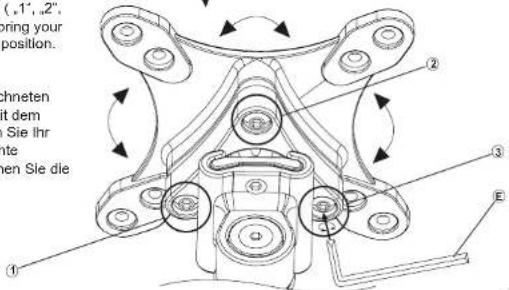
E ① ② ③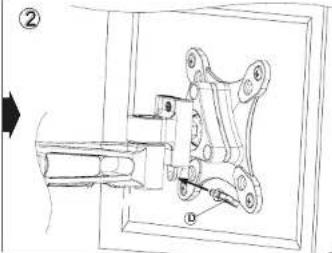
Additional options & Tilt adjustment Zusätzliche Optionen & Neigungsverstellung
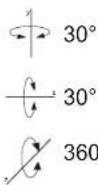
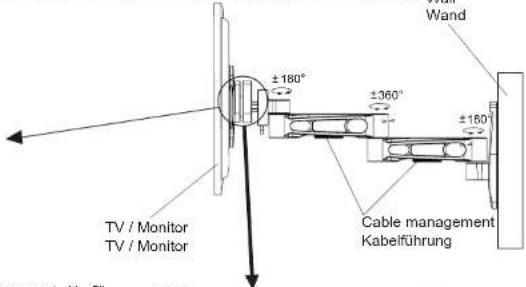
Lockern Sie die gekennzeichneten Schrauben („1“, „2“, „3“) mit dem Inbusschlüssel und bringen Sie Ihr TV/Monitor in die gewünschte Position. Anschließend ziehen Sie die Schrauben fest an.