
Electone D-30 - Tastatur YAMAHA - Gratis brugsanvisning og manual
Find enhedens vejledning gratis Electone D-30 YAMAHA i PDF-format.

Brugerspørgsmål om Electone D-30 YAMAHA
0 spørgsmål om dette apparat. Besvar dem du kender, eller stil dit eget.
Stil et nyt spørgsmål om dette apparat
Download vejledningen til din Tastatur i PDF-format gratis! Find din vejledning Electone D-30 - YAMAHA og tag din elektroniske enhed tilbage i hånden. På denne side er alle dokumenter nødvendige for brugen af din enhed offentliggjort. Electone D-30 af mærket YAMAHA.
BRUGSANVISNING Electone D-30 YAMAHA
D·3Q
GUIDE TO YOUR YAMAHA ELECTONE
Welcome to the Yamaha world of music. We are sure your selection of a Yamaha Electone was a wise one, and we want you to know that we will do everything possible to help you derive a lifetime of enjoyment from this fine musical instrument.
Please read this manual carefully to be sure you are familiar with each of the Electone's features and their expressive possibilities. In that way you and your Electone can become lifelong partners in musical creativity.
Contents
Page
Read the following before playing.... 1
This is Your Electone 2
Keyboards.... 3
Tone Levers, Preset Tone Levers (Organ Preset Ensemble), Brilliance. 4
Vibrato, (Touch Vibrato, Singing Vibrato), Upper 8', 4', 2' Sustain, Manual Balance, Upper 8', 4', 2' Attack. 5
Percussion, Upper Percussive, Repeat Speed, Reverb, Pedal Sustain, Expression Pedal, Master Volume. . . . 6
Auto Rhythm Section....7
Tremolo/Chorus 9
To Fully Enjoy Your D-30 10
Electone is not out of order if.... 11
Specifications 12
Read the following before playing
In general, treat your Electone with the same care you would any fine musical instrument. The following points are suggested for optimum enjoyment.
- Use only proper line voltage. Consult your Yamaha serviceman for changes.
As to British-Standard Model, its information is in 'Specifications' on page 12.
natural_image
Illustration of two hand gestures with heart symbols and a camera lens (no text or symbols present)- Never touch the inside parts by yourself.
natural_image
Illustration of a hand using a piano with a staff, no text or symbols present-
Always shut off the power after playing.
-
Clean keys, etc., with a damp cloth only. Never use solvents such as benzene; they will damage the finish.
- Shield the cabinet from direct sunlight, humidity and heat to protect the finish and joints.

natural_image
Cartoon illustration of a smiling printer with sun and smoke effects (no text or symbols)- Do not hit or scratch the cabinet with a hard object.
natural_image
Cartoon illustration of a person with a phone emitting sound waves (no text or symbols)- To open or close the fallboard grasp the front lip with both hands and slide gently. Never pull directly upwards. Do not place anything heavy on the fallboard.

natural_image
Simple line drawing of a mechanical device with springs and a tray, no text or symbols presentThis is Your Electone


Specifications subject to change without notice.
Keyboards
The D-30 has three keyboards. They have keys and octaves as follows:
Upper Keyboard
49 keys (4 octaves)
Lower Keyboard
49 keys (4 octaves)
Pedals
13 keys (1 octave)
The D-30 is designed to permit playing the melody on the upper keyboard with the right hand, the chords on the lower keyboard with the left hand, and bass notes on the pedals with the left foot.
All keys are arranged in the keyboard method layout shown below. Each white key has a name (from C to B), and the blacks are sharps or flats.
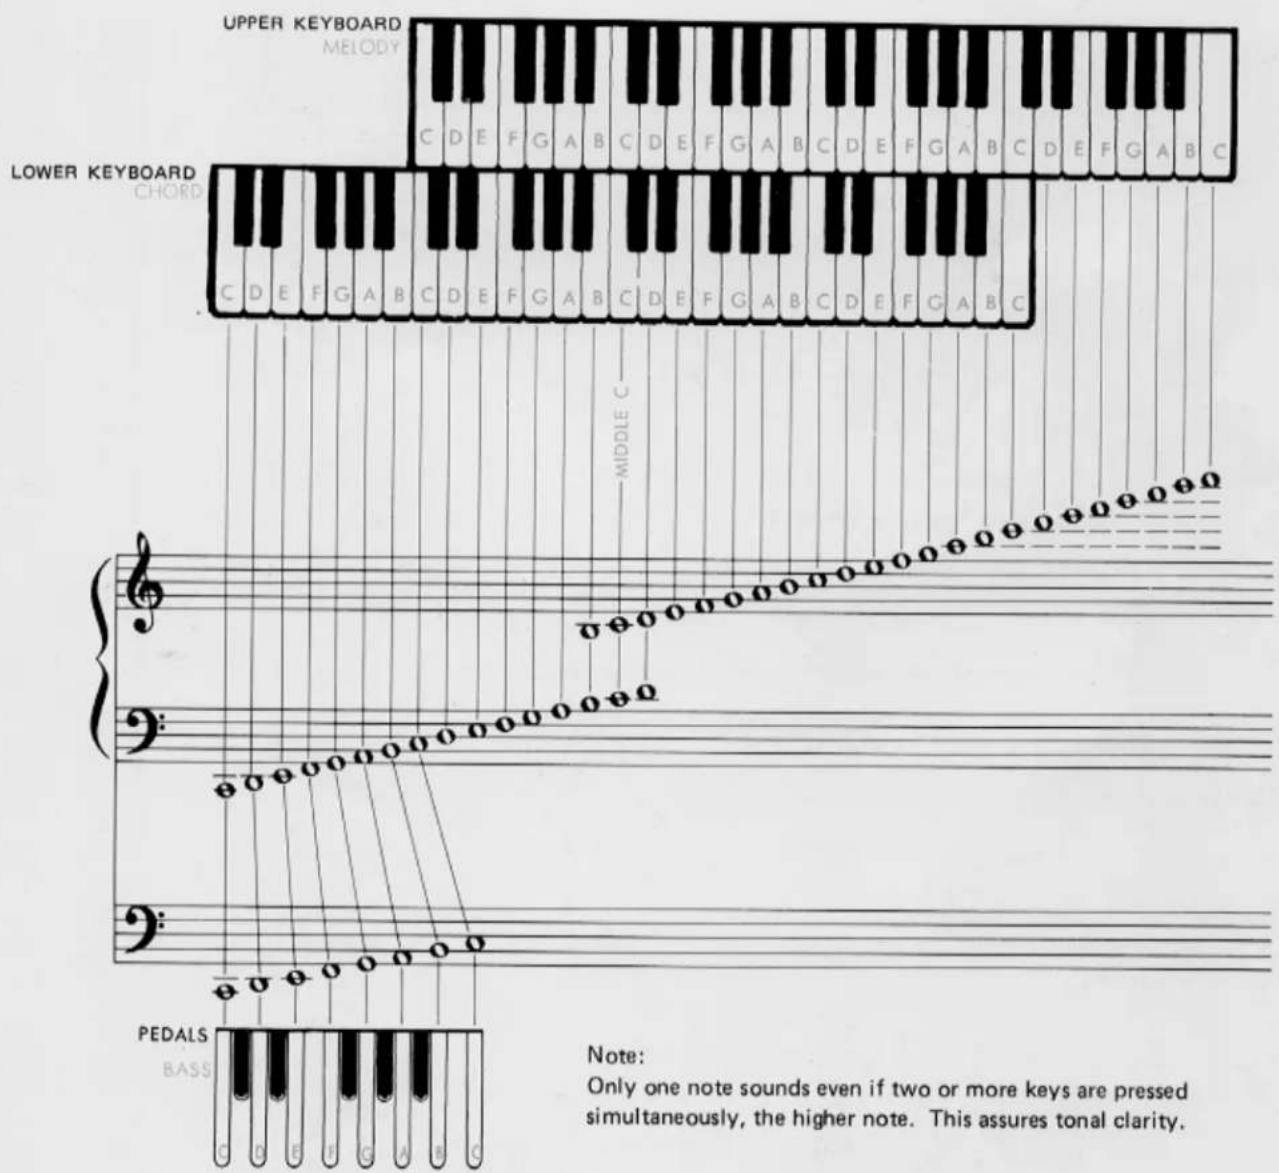
Note:
Only one note sounds even if two or more keys are pressed simultaneously, the higher note. This assures tonal clarity.
Tone Levers
On the panel above the upper keyboard are series of tone levers which control the Electone voices that will sound when the keys are depressed. They are divided into groups for upper, lower and pedals, so that different registrations can be set for each.
Upper Keyboard Levers 19 voices
Lower Keyboard Levers 8 voices
Pedal Levers 4 voices
Each lever provides two methods of control. One is by continuously moving the lever from off to full, to achieve the exact setting for that tone, and thus balancing the overall tone setting with perfect precision. Each lever also has two easy-to-feel click stops, at 1/3 and 2/3 positions. This lets you refind any setting with mathematical precision and no guesswork in a matter of seconds.
PITCHES OR FOOTAGES
The D-30 has five different pitch levels, indicated by the numbers 16', 8', 4', 2 ^2/3 ' and 2'. These are standard musical abbreviations showing the tone's pitch in relation to the fundamental (written note). An 8' tone will sound just as it has been written. As the numbers increase, the tones lower. A 16' tone will provide a tone exactly one octave lower than the written note.
Similarly, 4' tones are one octave higher than the written note, 2 ^2/3 ' tones are one octave and a fifth higher than the 8' fundamental.
natural_image
Cartoon character playing a stringed instrument with musical notes (no text or symbols)Preset Tone Levers
(PIANO, HARPSICHORD, VIBRAPHONE)
These tone levers call forth tone combinations of the various instruments they are named after. They should be used one at a time. If two or more levers are used at once, the one to the right will take precedence.
Note: During a staccato performance using a solo voice, tone decay effects will be heard. They can be created by using the Upper 8', 4', 2' tablet and knee lever. For a detailed explanation of this effect, see the Sustain section, page 5.
ORGAN PRESET ENSEMBLE
This lever permits combining the preset voice and upper keyboard voices for an ensemble effect.
Note: Use the upper keyboard tone lever settings to adjust the balance between them and the preset voice.
Brilliance
With this single, continuously-variable control you can pinpoint the degree of overall softness or clarity desired for any mood of music.


natural_image
Cartoon illustration of a man playing violin at a podium (no text or symbols)
Vibrato
Vibrato is a wavering of the tone. You will see violin and cello players use it freely by an oscillating motion of the left hand. It increases the emotional quality of the violin tone. This vibrato lever produces the same vibrato effect.
Note: If both the Vibrato and Touch Vibrato levers are switched on, Vibrato will take precedence.
TOUCH VIBRATO
This world-famous Yamaha exclusive gives the organist the same fingertip expression enjoyed by violinists. Switch on the lever and move your finger laterally on the key; the Electone will respond with a vibrato that translates your emotion into sound.
SINGING VIBRATO
This tablet will be used with the knee lever, the vibrato effect can be instantly controlled even during a performance. Switch on the tablet and push the knee lever a bit to the right for a light vibrato. Pushing farther to the right will deepen the vibrato.
Note: If Singing Vibrato, Vibrato and Touch Vibrato levers are all switched on, Singing Vibrato will take precedence.
Upper8',4',2'Sustain
When this is switched on, the sustain effect is evoked. As the name of the tab implies, only 8', 4' and 2' tones are affected. The length of such sustain is set by the Upper Sustain control.
Note: When combined with Upper Percussive, the Upper Percussive effect is cancelled.
KNEE LEVER
This lever is operated with the right knee for instantaneous implementation or stop of the sustain effect preset by the sustain control and selector, allowing passage-by-passage or even phrase-by-phrase sustain control precision.
Manual Balance
This control governs the volume strength of the upper and lower keyboards. It is normally left in the center position, but can be shifted to stress the melody or accompaniment in a selection or passage. This control can also be used to compensate for a higher number of total tone lever settings (which would ordinarily result in higher volume) on one of the two keyboards.
Upper 8', 4', 2' Attack
This tablet provides an effective rhythmical element, much like that of a string bass played pizzicato. It is particularly impressive in rhythmic works, and give greater definition to the beginning and end of notes. The 8', 4', 2' Attack tablet affects all upper keyboard 8', 4' and 2' voices.

natural_image
Cartoon illustration of two characters, one with curly hair and the other with a hat, standing near a table (no text or symbols present)Percussion
LOWER BRUSH, LOWER CYMBAL, PEDAL CYMBAL Provide lively brush (hissing snare drum brush) and cymbal percussion sounds with each lower keyboard or pedal note.
Upper Percussive
Changing the beginning of some or all notes can do wonders for lively selections. Your Electone's percussive effects provide subtle but important shading at the moment each note is heard. The special popping 4' and 2 ^3/8 ' percussive drive can be smoothly blended into all upper keyboard tones with two variable levers, and a separate lever regulates the length of decay for this effect.
Note: With percussive, use a staccato fingering. Each note should be played cleanly; slurred notes will diminish the percussive impact.

natural_image
Cartoon illustration of a hiker with a hat and backpack standing on a mountain peak (no text or symbols)Repeat Speed
Cuts and repeats each note just like the double-strumming effect of a mandolin. The lever provides continuous speed adjustment to create a full variety of different moods. Affects upper manual notes only.
Reverb
The reverberation effect, which makes your playing sound full and rich as if you were playing in a large hall, can be adjusted continuously and smoothly to suit your taste.
Pedal Sustain
This control provides continuous adjustment of the sustain effect on the pedals and allows the pedal note to continue to sound a few seconds after you have released it.

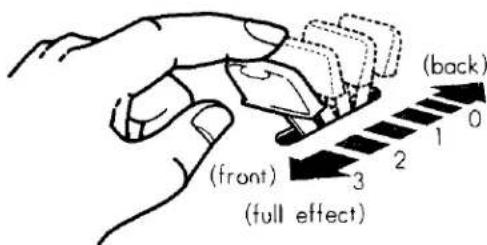
Expression Pedal
Push down the pedal to control the volume of each note or phrase. This pedal is extremely important for adding emotion to your playing. The pedal is balanced to stay in any position once set. Rest the entire right foot on the pedal and relax it, pressing with the toe to increase volume, with the heel to decrease it.
Master Volume
The master volume control adjusts the overall volume of the whole organ function, including the Electone voices and rhythm section voices.
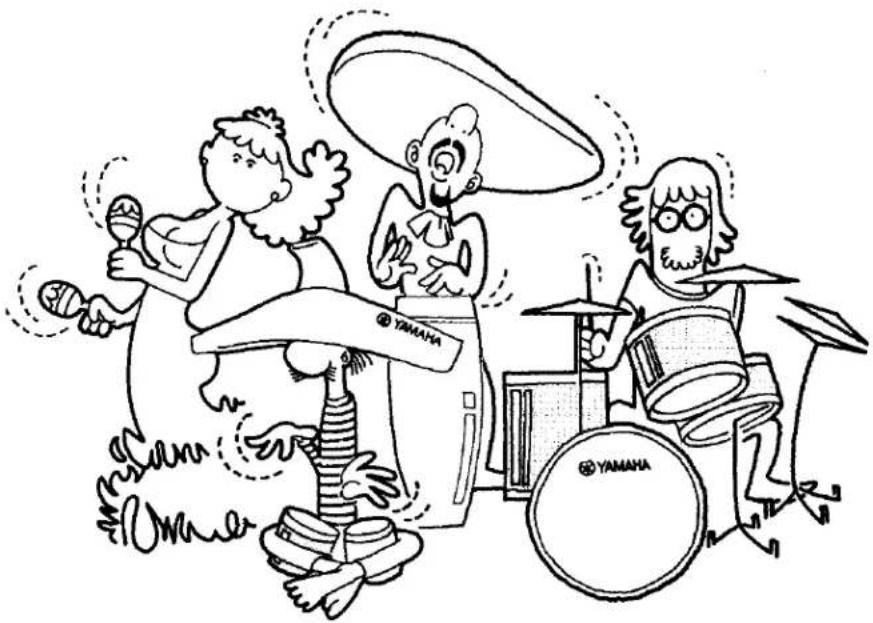
Auto Rhythm Section
natural_image
Cartoon illustration of three musicians playing with a YAMAHA guitar, no text or symbols presentThis section provides fourteen catchy rhythms, each one called forth by a simple button. You can also create more rhythm variations with the variation button. In addition to a combined volume and balance knob, tempo control and tempo indicator light, there are two other switches: ordinary Start and the Yamaha Synchro-Start which begins the rhythm accompaniment on the first beat of a measure when the first lower keyboard or pedal note is depressed. A foot switch fitted in the expression pedal housing lets you stop and restart the rhythm at any point during play.
NORMAL START
For instant rhythm at the beginning of a selection. Push the rhythm selector desired, then flick the Start switch on.
SYNCHRO-START
Select the rhythm, switch on the Synchro-Start and begin to play once you have the tempo established. The rhythm will begin as soon as you strike a lower keyboard or pedal note. This switch permits you to lead in with a rhythm-free melody at first if so desired.
You can switch off the Auto Rhythm with the foot switch.
When you wish to continue hearing the Auto Rhythm, be sure to switch on with the foot switch.

RHYTHM FOOT SWITCH
Once the rhythm is on, push this switch once to instantly stop it, once again to restart. It lets you stop and restart the rhythm in the middle of a selection without using your hand.
Note: If the foot switch has been used, be sure it is reset to normal after you finish playing your selection, and then make sure both Start and Synchro-Start switches are off. Otherwise you may turn on one of the switches in the middle of a new number only to find the rhythm still canceled.
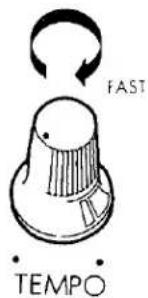

TEMPO
The tempo of the Auto Rhythm section can be adjusted by a continuous control knob. This is best accomplished by turning on the Synchro-Start switch.
Although no sound will be produced, the indicator lamp will flash each quarter note, letting you visually check the tempo while you adjust.
BALANCE
This control lets you balance the low rhythm sounds, such as drums, and the high sounds (i.e., cymbals) according to your taste and the selection. It can make a big difference even when using the same rhythm. Turn the knob to the right to accentuate the higher (treble) sounds, to the left for lower (bass). If you accentuate the treble sounds the rhythm becomes brighter.
Check the playing hints for specific settings.
VOLUME
Use it to balance the volume of the rhythm section and the keyboards. This volume is then varied during the selection by the expression pedal, just like that of the other tones.

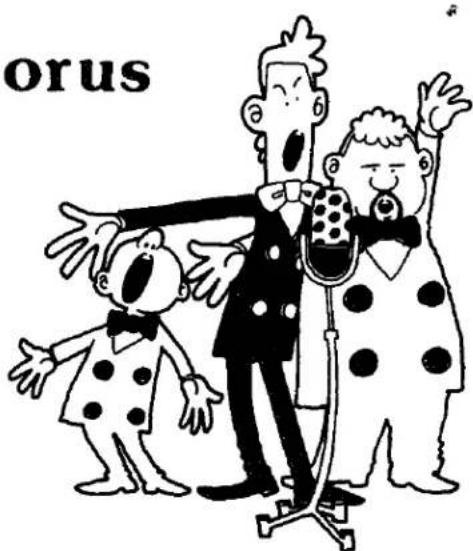
Tremolo/Chorus
natural_image
Cartoon illustration of a singer performing on stage with three singers in polka-dot costumes (no text or symbols)
flowchart
graph TD
    A["LOWER VOICE"] --> B["TREMOLD"]
    C["UPPER VOICE"] --> B["TREMOLD"]
    D["..."] --> B["TREMOLD"]

flowchart
graph TD
    A["CHORUS"] --> B["LOWER VOICE"]
    A --> C["UPPER VOICE"]
    A --> D["CHORUS"]
    B --> E["•"]
    C --> F["•"]
    D --> G["•"]
flowchart
graph TD
    A["FLUTE SPLIT"] --> B["TREMOLD"]
    B --> C["CHORUS"]
    C --> A
The Electone's special tremolo is produced by a rotary speaker that actually spins just behind the rotary speaker grille on the side of the cabinet.
The tremolo selector is complemented by a continuous tremolo speed control knob.
When the speed control is set to its maximum position, the Tremolo will turn the speaker at normal revolution. The Chorus will turn it at one revolution. Once either tablet is switched on, it takes several seconds for the rotary speaker to attain the standard speed. This is also true when switching to a slower speed (Tremolo to Chorus), the speed variation will be heard in the music.
If you wish an instant tremolo or chorus sound, be sure to switch on that tablet well in advance of the speaker selector. For special selections you can use this speed variation by switching the speaker on first, the Tremolo or Chorus switch later.
Note: Only Tremolo is produced when Tremolo and Chorus are switched on simultaneously.
UPPER VOICE
Lets you divert upper keyboard voices from the main to the rotary speaker.
LOWER VOICE
Does the same for lower keyboard voices.
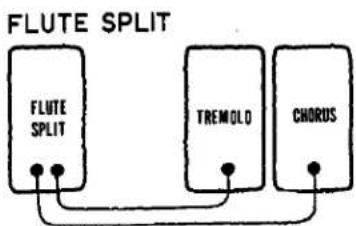
FLUTE SPLIT
This tablet feeds Flute voices of the upper and lower keyboards and preset combinations to the rotary speaker. Combined with other manual voices through the main speaker it creates a rich, singing blend.
Note: Only Flute Split is produced when Flute Split and Upper or Lower Voices are switched on simultaneously.
To Fully Enjoy Your D-30\*
HEADPHONE
A Yamaha headphone set (optional) can be plugged into the jack under the keyboard. With the headphone connected, the speaker is automatically shut off, allowing you to play or practice at any volume level without disturbing anyone.

EXP. IN
This jack accepts any sound source and reproduces it through the D-30's speakers.
Note: The volume of the sound source can be controlled by the expression pedal.
AUX OUT
For recording, connect the AUX OUT jack with the tapedeck's LINE IN jack. Control the recording levels on the tape deck.

AUX IN
For playback, connect the AUX IN jack with the tape-deck's LINEOUT jack. Control the playback levels on the tapedeck.

Note: These sound sources (tape recorder etc.) are not affected by the expression pedal.
TONE CABINET
These sockets are on the rear panel. Use it to connect a Yamaha Tone Cabinet, without any rewiring required.

Electone is not out of order If ...
- .....the set does not go on when the power switch is turned on. Check the following.
Is the AC plug fully inserted into the electric wall outlet? Reinsert it to be sure. Is there power coming from that outlet?
If there is power in the outlet but the Electone does not play, unplug the cord and contact your Yamaha dealer. There are NO USER SERVICEABLE PARTS inside.
- ..... a sound should occur the instant you turn on the switch.
This merely indicates normal operation consequent on a surge of electricity in the main amplifier.
- .....occasional unpleasant static occurs.
In the majority of such cases, the cause can be traced to the turning on or off of refrigerators, washing machines, electric pumps or other household appliances. Electrical faults in a neighboring outdoor neon sign may also be to blame.
If the cause is a fault in a neon or fluorescent lighting fixture, it should be repaired. When the cause is unknown, or in case of doubt, contact your Yamaha dealer.
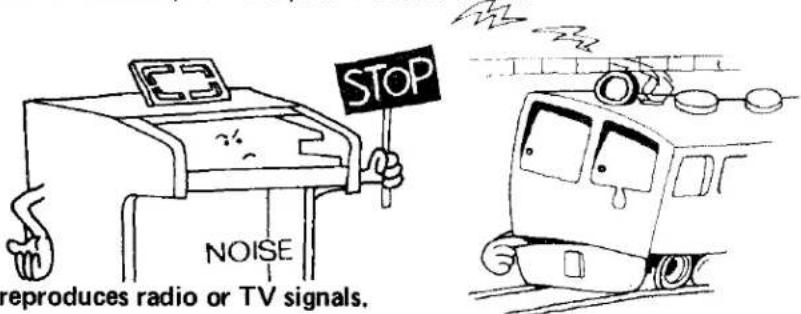
- ..... the Electone reproduces radio or TV signals.
If there is a powerful transmitter such as a radio station in the vicinity this can occur. Contact your Yamaha dealer.

- .....rattling (sympathetic vibration) occurs.
All materials have critical resonance frequencies at which they vibrate. The Electone's continuous tones will naturally cause other objects (windows, shelves, etc.) to vibrate.
natural_image
Illustration of a hand flexing a device with abstract musical notes and a screen, no text or symbols present- .....pedal notes sound too high, upper keyboard notes too low. This is especially noticeable when comparing the Electone with piano. Piano tones are combinations of harmonics and must interact with their surroundings, while Electone harmonics are simpler (multiples of the fundamental tone), requiring the Electone to be adjusted differently at the assembly stages.
Specifications
KEYBOARDS
Upper Keyboard 49 keys c\~c4 (4 octaves)
Lower Keyboard 49 keys C\~c3 (4 octaves)
Pedals 13 keys C1\~C (1 octave)
TONE LEVERS
Upper Keyboard
| Flute | 16' | Clarinet | 8' |
| Flute | 8" | Brass | 8' |
| Flute | 4" | Oboe | 8' |
| Flute | 235 ° | String | 8' |
| Flute | 2" | String | 4' |
| Trombone | 16' | String | 2 12 |
| Bassoon | 16' | Wah Brass |
Lower Keyboard
| Flute | 8' | Horn | 8' |
| Flute | 4' | Cello | 8' |
| Flute | 2' | Cello | 4' |
| Diapason | 8' | Cello | 2' |
| ials | |||
| Bass | 16' | Tuba | 8' |
| Bass | 8' | Bass Guitar | |
PRESET TONE LEVERS (UPPER)
Piano
Harpsichord
Vibraphone
EFFECT LEVERS
Brilliance
Vibrato
Touch Vibrato (Upper)
Percussive 4' (Upper)
Percussive 2 ^3/5 (Upper)
Percussive Length
Repeat Speed (Upper)
Organ Preset Ensemble
PERCUSSION LEVERS
Lower Brush
Lower Cymbal
Pedal Cymbal
EFFECT CONTROLS
Upper Sustain (8', 4', 2')
Pedal Sustain
Reverb
Manual Balance
EFFECT TABLET
Upper Sustain (8', 4', 2')
Singing Vibrato
Upper Attack (8', 4', 2')
TREMOLO SELECTORS
Flute Split
Upper Voice (Main/Rotary)
Lower Voice (Main/Rotary)
Tremolo
Chorus
AUTO RHYTHM SECTION
Rhythm Selectors
March Waltz
Swing Ballad
Slow Rock Jazz Rock I
Jazz Rock II Bolero
Tango Beguine
Rhumba Mambo
Bossanova Samba
Variation
Rhythm Controls
Rhythm Start
Synchro-Start
Rhythm Stop (Foot control)
Tempo
Volume
Tone Balance
Tempo Indicator Lamp
OTHER CONTROLS
Master Volume
Expression Pedal
Tremolo Speed Control
Knee Lever
Power Switch with Indicator
OTHER FITTINGS
Headphone Jack Roll-top Fallboard with
EXP IN Jack Auto Switch* and Lock
AUX IN Jack Music Rest
AUX OUT Jack Matching Bench with Music
Tone Cabinet Socket Storage Space
SPEAKERS
Main (3): 30cm (12"), 20cm (8"), 5cm (2")
Rotary (2): 16 x 23cm (6½ x 9"), 5cm (2")
CIRCUITRY
Solid State (Incl, LSIs)
Output Power:
Main 60 Watts (RMS)
Rotary 15 Watts (RMS)
Power Consumption: 160 Watts
Power Source: 50/60Hz AC
DIMENSIONS
Width: 114cm (45")
Depth: 70cm (27½")
Height: 94cm (37")
WEIGHT 104kg (229lbs.)
FINISH Natural American Walnut
* Not available on European models.
Specifications subject to change without notice.
Special Instructions for British-Standard Model
As the colours of the wires in the mains lead of the apparatus may not correspond with the coloured markings identifying the terminals in your plug, proceed as follows.
The wire which is coloured GREEN-and-YELLOW must be connected to the terminal in the plug which is marked by the letter E or by the safety earth symbol or coloured GREEN or GREEN-and-YELLOW.
The wire which is coloured BLUE must be connected to the terminal which is marked with the letter N or coloured BLACK.
The wire which is coloured BROWN must be connected to the terminal which is marked with the letter L or coloured RED.
IMPORTANT
THE WIRES IN THE MAINS LEAD ARE COLOURED IN ACCORDANCE WITH THE FOLLOWING CODE.
GREEN-AND-YELLOW: EARTH
BLUE: NEUTRAL
BROWN: LIVE
WARNING:
THIS APPARATUS MUST BE EARTHED.
SINCE 1987

YAMAHA
NIPPON GAKKI CO., LTD. HAMAMATSU, JAPAN


- D·3Q
- Contents
- Read the following before playing
- This is Your Electone
- Keyboards
- Tone Levers
- PITCHES OR FOOTAGES
- Preset Tone Levers
- ORGAN PRESET ENSEMBLE
- Brilliance
- Vibrato
- TOUCH VIBRATO
- SINGING VIBRATO
- Upper8',4',2'Sustain
- KNEE LEVER
- Manual Balance
- Upper 8', 4', 2' Attack
- Percussion
- Upper Percussive
- Repeat Speed
- Reverb
- Pedal Sustain
- Expression Pedal
- Master Volume
- Auto Rhythm Section
- NORMAL START
- SYNCHRO-START
- RHYTHM FOOT SWITCH
- TEMPO
- BALANCE
- VOLUME
- Tremolo/Chorus
- UPPER VOICE
- LOWER VOICE
- FLUTE SPLIT
- To Fully Enjoy Your D-30\*
- HEADPHONE
- AUX OUT
- TONE CABINET
- Electone is not out of order If ...
- Specifications
- PRESET TONE LEVERS (UPPER)
- EFFECT LEVERS
- PERCUSSION LEVERS
- EFFECT CONTROLS
- EFFECT TABLET
- TREMOLO SELECTORS
- Rhythm Controls
- OTHER CONTROLS
- OTHER FITTINGS
- SPEAKERS
- CIRCUITRY
- DIMENSIONS
- Special Instructions for British-Standard Model
- IMPORTANT
- WARNING:
Mærke : YAMAHA
Model : Electone D-30
Kategori : Tastatur