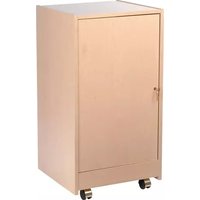
ERKD-12BR - Datorlåda Chief - Gratis bruksanvisning och manual
Hitta enhetens manual gratis ERKD-12BR Chief i PDF-format.


Användarfrågor om ERKD-12BR Chief
0 fråga om denna apparat. Svara på dem du kan eller ställ din egen.
Ställ en ny fråga om denna apparat
Ladda ner instruktionerna för din Datorlåda i PDF-format gratis! Hitta din manual ERKD-12BR - Chief och ta tillbaka ditt elektroniska enhet i hand. På denna sida publiceras alla dokument som behövs för att använda din enhet. ERKD-12BR av märket Chief.
BRUKSANVISNING ERKD-12BR Chief
Door Instruction Sheet for Elite Series Racks: ERK-12-20, ERK-16-20, ERK-20-20, ECRR-12-20, ECRR-16-20, ECRR-20-20
Step 1: The rear door is a solid melamine door with a lock in it. It is pre-drilled for the 2 chrome hinges supplied. The "dish" (round) portion of the hinge fits in the large round hole in the rear door, and the (2) #8 x 3/8" wood screws go into the appropriate pilot holes. See Illustration 1. The other part of the hinge attaches to the inside of the rack, at the rear. Before you attach this section, be sure to attach it to the correct side of the rack (you can install it so that the door swings either way). Locate the second hinge sections in the holes at the rear, tap them into the holes lightly (they can go in either direction), then run the attached screws in. You can put the door on later. Next, attach the "lock catch"-the small "L" shaped bracket- with 2 5/8" wood screws.
The front door is a smoked plexi-glass door, which mounts on either side (again, decide which direction works best for your location). When you know which way you'll hinge the door, mount the (2) brass door hinges on the inside of the front of the rack, on the side you've chosen. Be sure to mount them so that the openings are facing each other, so as to allow the door to fit between them. Screw them in place with the same #10 x 5/8" wood screws that you used for the rack rail, leaving the screw a bit loose, until you get the door in place. Slide the door between the hinges, then when it is all the way in, lightly tighten the screws on the door with a straight screwdriver, then tighten the hinge screws.
You should now stand the rack up and attach the rear door. This is done by placing the hinge section from the door on top of the section in the rack, and snapping the hinge together. To remove the door, simply pull on the release at the end of the hinge. Next, adjust the doors, so that they swing and lock correctly. The rear door has an adjustable hinge, which allows for left and right alignment, as well as in and out movement. Just turn the adjustment screws to see which screw moves the door in the correct direction. The front door should not require adjustment, but you can "tweek" it a bit of needed.
You also may need to remove the front door until you get your gear in the rack. To do this, loosen the "slotted" screw on each hinge to release the door.
Step 2: The last thing to do is to (carefully, with carpet or something soft) stand the rack upside-down, with the bottom facing up, and screw on the casters. You will see the (16) "pilot" holes. they are merely guides as to where to place the casters, and they only serve as a starting point for the wood screws to bite into the wood.
We suggest that the easiest method for installing the gear (although it may not always be practical), is to do this with the rack on its back, with the rear door locked, and the front door removed. If you can carefully place the gear in the rack, orient the gear so that the spacing seems right, then run all of the rack screws (not supplied) into the rails, loosely at first, then tighten after one more alignment check.


261 Buffalo Avenue
Paterson, N.J. 07503
Made with pride in the U.S.A.

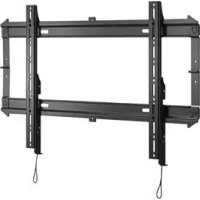
Märke : Chief
Modell : ERKD-12BR
Kategori : Datorlåda