
CLT-D5880 - Téléphone sans fil SANYO - Notice d'utilisation et mode d'emploi gratuit
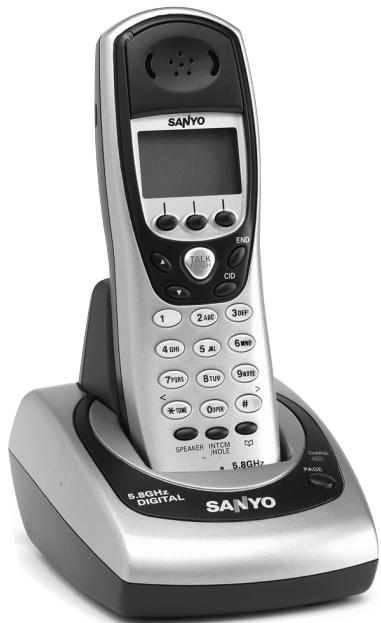
Retrouvez gratuitement la notice de l'appareil CLT-D5880 SANYO au format PDF.


| Type de produit | Téléphone sans fil 5,8 GHz |
| Marque | SANYO |
| Modèle | CLT-D5880 |
| Technologie | 5,8 GHz numérique |
| Affichage | Écran LCD avec animations |
| Fonctions principales | Mains-libres duplex, Identification de l'appelant et Call Waiting, Répertoire de 100 numéros, Intercom/Transfert d'appel (multipostes), Mode talkie-walkie, Baby monitor, 20 sonneries distinctives |
| Alimentation | Adaptateur secteur 9V CC (inclus) |
| Batterie | Accumulateur Ni-MH rechargeable (inclus) |
| Autonomie de la batterie | Environ 1 an avec usage normal |
| Portée | Jusqu'à 50 mètres en intérieur (estimation) |
| Langues d'affichage | Anglais, Français, Espagnol |
| Accessoires fournis | 1 combiné, 1 socle, 1 adaptateur secteur, 1 cordon téléphonique, 1 clip ceinture, 1 batterie rechargeable, 1 support mural |
| Entretien et nettoyage | Nettoyer les contacts de charge avec une gomme à crayon une fois par mois. Ne pas utiliser de produits chimiques. |
| Sécurité | Code de sécurité numérique anti-intrusion (plus de 10 millions de codes) |
| Réparabilité | Batterie remplaçable par l'utilisateur. Pour toute autre réparation, contacter un centre agréé SANYO. |
| Garantie | 1 an pièces et main-d'œuvre (SANYO Comfort Warranty) |
FOIRE AUX QUESTIONS - CLT-D5880 SANYO
Questions des utilisateurs sur CLT-D5880 SANYO
0 question sur cet appareil. Repondez a celles que vous connaissez ou posez la votre.
Poser une nouvelle question sur cet appareil
Téléchargez la notice de votre Téléphone sans fil au format PDF gratuitement ! Retrouvez votre notice CLT-D5880 - SANYO et reprennez votre appareil électronique en main. Sur cette page sont publiés tous les documents nécessaires à l'utilisation de votre appareil CLT-D5880 de la marque SANYO.
MODE D'EMPLOI CLT-D5880 SANYO
SANYO
INSTRUCTION MANUAL
CLT-D5880
CLT-D5882
CLT-D5883
5.8-GHz Cordless Telephone with Caller ID & Visual Call Waiting
IMPORTANT
Charge the handset battery pack for a full 15-20 hours before using your cordless handset for the first time.
SANYO Canada Inc.
www.sanyo.ca
Introduction
Congratulations on your purchase of the CLT-D5880/CLT-D5882/CLT-D5883 cordless telephone from SANYO.
This phone is designed for reliability, long life, and outstanding performance utilizing the latest in 5.8 GHz technology.
Note:
Some illustrations in this manual may differ from the actual unit for explanation purposes.
Features
● 5.8GHz Digital Expandable
● Hands-Free Duplex Speakerphone in the Handset
- Caller ID/Call Waiting Deluxe (subscribe through local telephone company)
● 100 programmable Memory Locations
● Trilingual Display Options (English, French and Spanish)
● Intercom/Call Transfer Between Handsets (for multi handsets)
● 20 Distinctive Ring Options (10 ringer tones and 10 melody ringers)
● Mute and Hold Features
● Walkie-Talkie Mode (for multi handsets)
● Room/Baby Monitoring (for multi handsets)
● Battery Level Indicator
- Clock Display
● Animation Displays
Your SANYO 5.8-GHz cordless telephone is a fine quality home communications product. It is carefully designed and produced by a world leader of consumer and industrial electronics equipment. With proper maintenance and care, it will provide you with years of enjoyment and convenience.
5.8-GHz Technology
The clearest channel is automatically selected for each transmission. The phone selects one of over 10,000,000 digital security codes for the handset and base.
These features enhance your phone's security and also prevent unauthorized calls as a result of your phone being activated by other equipment.
CONTENTS
Introduction.....inside front cover
Features.....inside front cover
Controls and Functions......E2
GETTING STARTED
Checking the Package Contents......E4
Setting Up the Phone....E4
Mounting the Base Unit On a Wall.....E9
USING THE INTERFACE
Display and Icons......E11
Soft Key Function ......E13
Main Menu Options.....E14
Setting Menu Options......E15
BASICS
Making and Receiving Calls......E24
Call Waiting ......E26
Placing a Call on Hold.....E26
Redialing a Call ......E27
Adjusting the Ringer, and
Earpiece and Speaker Volume......E28
Temporarily Muting the Ringer .....E28
Mute Microphone.....E28
Tone Dialing Switch-over.....E29
Traveling Out of Range ......E29
Privacy Mode......E29
Using One Touch
Voice Mail Access ......E30
DIRECTORY
Phonebook (Storing Phone Numbers,
Names, Distinctive Rings and
Speed Dial)......E31
Chain Dialing ......E32
Steps for Entering Names and
Special Characters.....E33
Viewing the Phonebook.....E35
Making Calls Using the Phonebook ...E36
Speed Dialing.....E36
Editing or Erasing a Stored Name,
Phone Number, Distinctive Ring and
Speed Dial.....E37
Copying Phonebook Locations
(CLT-D5882/CLT-D5883 only)......E38
CALLER ID FEATURES
Caller ID and CIDCW
(Caller ID on Call Waiting)......E39
Viewing the Caller ID List.....E41
Deleting a Caller ID Message ......E42
Using the Caller ID Message List......E43
Call Waiting Deluxe Features......E45
MULTI-HANDSET FEATURES
Using the Walkie-Talkie Mode
(CLT-D5882/CLT-D5883 only)......E46
3-Way Conferencing ....E47
Intercom/Call Transfer Feature ......E47
ADDITIONAL INFORMATION
Changing the Digital Security Code ...E49
Find Handset.....E49
Installing the Beltclip....E50
Optional Headset.....E50
Note on Power Sources.....E51
Troubleshooting ....E52
Technical Information......E54
THE SANYO
COMFORT WARRANTY .....E55
MAIN MENU FLOW CHART .....E57
Getting Started
Using the Interface
Basics
Directory
Caller ID Features
Multi-handset Features
Additional Information
Controls and Functions
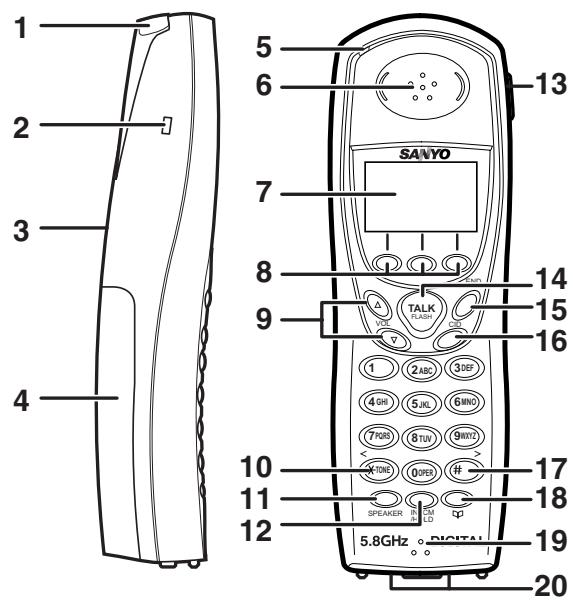
- Handset Antenna
- Beltclip Hole
- Speakerphone Speaker and Ringer
- Handset Battery Compartment
- New Message LED
- Handset Earpiece
- LCD Display
- Soft Keys
- VOL ▲ / ▼ (volume up/down)
-
*/TONE/<(left cursor)
-
SPEAKER
- INTCM (intercom) /HOLD
- Headset Jack Cover
- TALK/FLASH
- END
- CID (Caller ID)
-
/>(right cursor)
- 📋 (phonebook)
- Handset Microphone
- Handset Charging Contacts
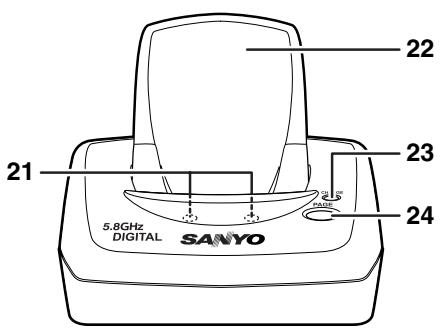
- Base Charging Contacts
- Base Antenna
- Base CHARGE LED
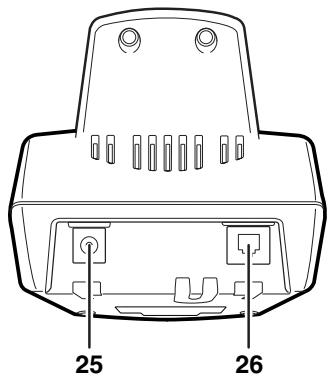
- PAGE
- DC IN 9V Jack
- TEL LINE Jack
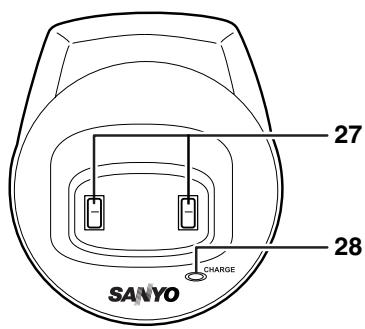
For multi-handset packs only
- Charging Contacts
- Charger CHARGE LED
- DC IN 9V Jack
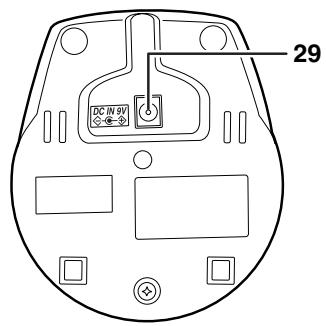
GETTING STARTED
Checking the Package Contents
Make sure you have received the following items in the package.
For CLT-D5880
- Base unit (1)
- AC adapter (1)
- Telephone cord (1)
- Handset (1)
- Rechargeable battery (1)
• This instruction manual (1) - Belt clip (1)
- Wall mount bracket (1)
- Battery order sheet (1)
For CLT-D5882
- Base unit (1)
- AC adapters (2)
- Telephone cord (1)
- Handsets (2)
- Rechargeable batteries (2)
• This instruction manual (1) - Belt clips (2)
- Charger (1)
- Wall mount bracket (1)
- Battery order sheet (1)
For CLT-D5883
- Base unit (1)
- AC adapters (3)
- Telephone cord (1)
- Handsets (3)
- Rechargeable batteries (3)
• This instruction manual (1) - Belt clips (3)
- Chargers (2)
- Wall mount bracket (1)
- Battery order sheet (1)
Setting Up the Phone
Do the following steps:
A. Choose the best location
B. Install the rechargeable battery pack into the handset
C. Connect the base unit and charge the handset
A. Choose the best location
Here are some important guidelines you should consider:
- The location should be close to both a phone jack and a continuous power outlet that is not switchable.
- Keep the base and handset away from sources of electrical noise such as motors, microwave ovens, and fluorescent lighting.
- The base should be placed in an open area for optimum range and reception.
- The base can be placed on a desk, tabletop, or mounted on a standard wall plate.
Note:
- If your home has specially wired alarm equipment connected to the telephone line, be sure that installing the system does not disable your alarm equipment. If you have questions about what will disable your alarm equipment, contact your telephone company or a qualified installer.
GETTING STARTED
B. Install the rechargeable battery pack into the handset
The handset is powered by a rechargeable battery pack.
The battery recharges automatically when the handset is placed in the base unit or charging cradle.
IMPORTANT
Use only the SANYO rechargeable battery pack supplied with your cordless telephone.
Charge the handset battery pack for at least 15-20 hours before using your new cordless telephone for the first time! To maximize the charge capacity of your battery pack, DO NOT plug the telephone cord into the base unit and wall jack until the battery is fully charged.
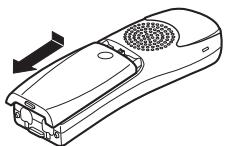
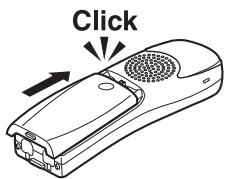
1 Press down on the handset battery case cover (use the finger indentation for a better grip) and slide the cover downward to remove.
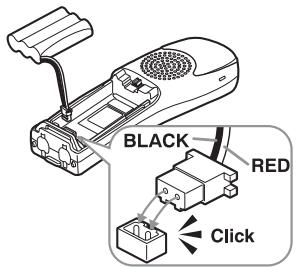
2 Plug the battery pack connector (red & black wires) into the jack inside the battery compartment. (The connector notches fit into the grooves of the jack only one way.) Match the wire colors to the polarity label in the battery compartment, connect the battery and listen for a click to ensure connection.
3 Make sure you have a good connection by pulling slightly on the battery wires. If the connection is secure, the battery jack will remain in place.
4 Place the battery case cover back on the handset by sliding it upwards until it clicks into place.
GETTING STARTED
Low Battery Alert
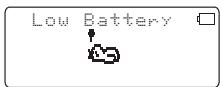
When the battery pack is very low and needs to be charged, the phone is programmed to eliminate functions in order to save power. If the phone is not in use, "Low Battery" appears on the LCD and none of the keys will operate.
If the phone is in use, "Low Battery" flashes and the handset beeps. Complete your conversation as quickly as possible and return the handset to the base unit for charging.
Note:
- Even when the battery pack is not being used, it will gradually discharge over a long period of time.
Cleaning the Battery Charging Contacts
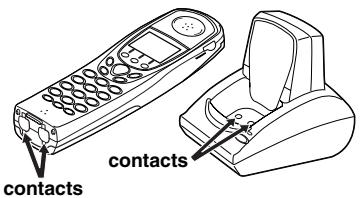
To maintain a good charge, it is important to clean the charging contacts on both the handset and the base unit once a month. Use a clean pencil eraser or superfine steel wool. Avoid touching the cabinet area of the phone or scratches may occur.
Caution: Do not use paint thinner, benzene, alcohol, or other chemical products. Doing so may discolor the surface of the telephone and damage the finish.
Terminology
- Talk Mode -
The handset is off the base and the TALK/FLASH key has been pressed, enabling a dial tone. - Standby Mode -
The handset is not in use, off the base, and the TALK/FLASH key has not been pressed. A dial tone is not present.
GETTING STARTED
C. Connect the base unit and charge the handset
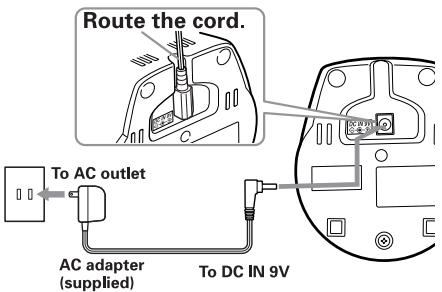
1 Connect the AC adapter to the DC IN 9V jack and to a standard 120V AC wall outlet.
2 Set the base on a desk or tabletop.
3 Place the handset in the base unit for 15-20 hours without interruption. The base unit's LED light (labeled CHARGE) illuminates once the handset is placed in the base. The LED light will illuminate whether the battery pack is connected or not.
If the base CHARGE LED light does not illuminate:
- Check to see if the AC adapter is plugged into the base unit and the electrical wall outlet properly.
- Check to see if the handset is sitting correctly in the base and making good contact with the base unit's charging contacts.
Notes:
- Connect the AC adapter to a continuous power supply.
- Place the base unit close to the AC outlet so that you can unplug the AC adapter easily.
- It is normal for the handset and base to get warm, when the handset is charging in the base unit.
IMPORTANT
- Use only the supplied SANYO AC adapter. Do not use any other AC adapter.
- Do not place the power cord so that it creates a trip hazard or where it could become damaged and create a fire or electrical hazard.
GETTING STARTED
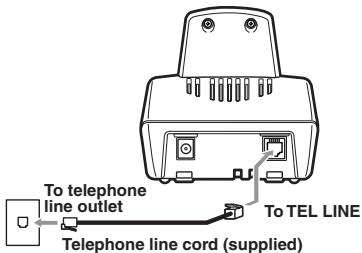
4 Once the handset battery pack is fully charged, connect the telephone line cord to the TEL LINE jack and to a telephone outlet.
Tip:
If your telephone outlet isn't modular, contact your telephone company for assistance.

Modular
Connecting the Charger (for CLT-D5882/CLT-D5883)
1 Connect the AC adapter to the DC IN 9V jack and to a standard 120V AC wall outlet.
2 Set the charger on a desk or tabletop, and place the handset in the charger with the keypad facing forward. (See "B. Install the rechargeable battery pack into the handset" on page E5.)
Note:
- Charge the handset battery pack for at least 15-20 hours before using your new cordless telephone for the first time.
Register the 2nd and 3rd units.
GETTING STARTED
Mounting the Base Unit On a Wall
Standard Wall Plate Mounting
This phone can be mounted on any standard wall plate.
1 Put the AC adapter and the telephone line cord through the hole on the wall mount adapter.
2 Plug the AC adapter into the DC IN 9V jack.
3 Plug the telephone line cord into the TEL LINE jack.
4 Slide the wall mount adapter into the notches on the base.
5 Plug the AC adapter into a standard 120V AC wall outlet. Hook the cord on the notch of the wall mount adapter.
6 Plug the telephone line cord into the telephone outlet. Hook the cord on the notch of the wall mount adapter.
7 Align the mounting slots on the base with the mounting posts on the wall. Then push in and down until the phone is firmly seated.
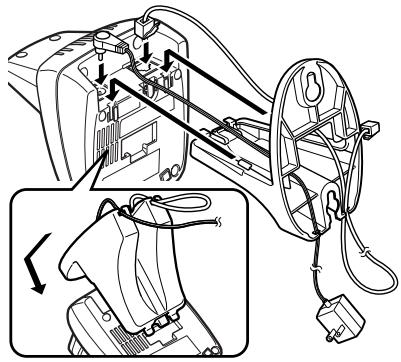
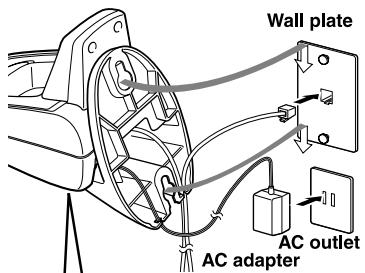
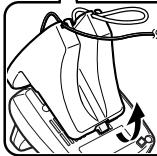
To remove, push up the tab on the wall mount adapter as shown.
IMPORTANT
DO NOT use an AC outlet controlled by a wall switch.
GETTING STARTED
Direct Wall Mounting
If you don't have a standard wall plate, you can mount your phone directly to the wall. Before doing this, consider the following:
- Avoid electrical cables, pipes, or other items behind the mounting location that could cause a hazard when inserting screws into the wall.
- Try to mount your phone within 5 feet of a working phone jack to avoid excessive cable lengths.
- Make sure the wall material is capable of supporting the weight of the base and handset.
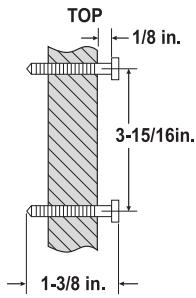
- Use #10 screws (minimum length of 1-3/8 inches) with anchoring devices suitable for the wall material where the base unit will be placed.
1 Insert two mounting screws into the wall, (with their appropriate anchoring device), 3-15/16 inches apart.
Allow about 1/8 of an inch between the wall and screw heads for mounting the phone.
2 Refer to steps 1 through 7 on page E9 to mount the telephone.
USING THE INTERFACE
Display and Icons
Example of the standby mode display
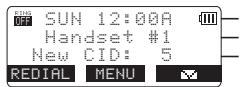
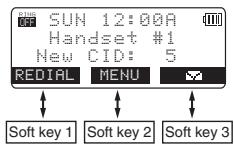
Ringer off icon (when the ringer is off) / day of the week and time / battery icon
Handset ID
Number of new Caller ID calls received
(If there are no new Caller ID messages, the Handset ID appears here.)
| Icon | Appears During | Description |
| Standby/Talk | Battery icons indicate the handset battery status. This icon changes depending on the battery status (empty, low, medium and full). | |
| Standby | The Ringer off icon indicates that ringer is turned off. | |
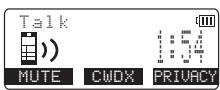
| Talk | The Mute icon appears when you mute the handset. | |
| Talk | The Speaker icon appears when the handset speaker phone is used. | |
| Talk | The Privacy icon appears when the Privacy Mode is turned on. |
USING THE INTERFACE
Animation Displays
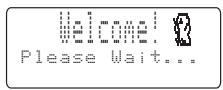
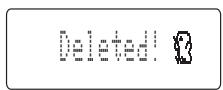
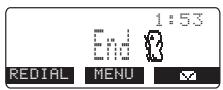
The handsets have a variety of animation displays. Below are examples of the animation screens and what they mean:
Turning on the phone
Deleting (Deleted!)
Hanging up the phone
Making a call
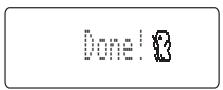
Confirmation (Done!)
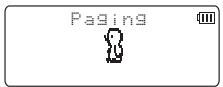
Find Handset/ Paging the Handset
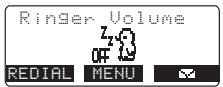
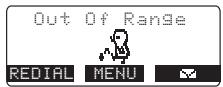
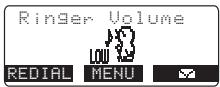
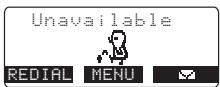
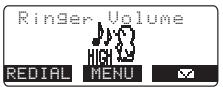
Also, the animation display changes depending on the ringer volume setting.
Out of Range
Unavailable
Low Battery
USING THE INTERFACE
Soft Key Function
"Soft" keys are keys that change function during the operation of the phone. There are three soft keys on each handset. Soft Keys allow you to:
- Access the main menu
- Access stored Caller ID messages
- Set up CIDCW options (Caller ID on Call Waiting)
- Redial one of the last three numbers dialed from the handset
- Store or edit phone numbers
- Access Voice mail waiting
Note: The soft keys will not appear while the handset is charging.
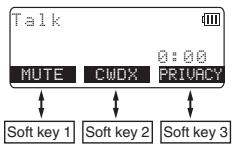
The function of each soft key is determined by the icon that appears directly above it. For example, when the handset is in standby mode, pressing soft key 1 will redial the last dialed number. When the handset is in talk mode, pressing soft key 1 will mute the microphone.
Complete information on the features controlled by the soft keys can be found under each feature.
In standby mode
In talk mode
USING THE INTERFACE
Main Menu Options
Your phone has five main menu options: Walkie-Talkie Mode, Room/Baby Monitor, Handset Setup, Global Setup and Deregister HS.
Default Settings
The default settings set from the factory match the features that most people use. You may not need to change them. However, there are a number of options you must set and entries you must make in memory to take full advantage of all the phone features. The table below lists the default settings.
| Function | Default Settings |
| Edit Voice Mail | None |
| Ringer Tone | Flicker |
| Distinctive Ring | On |
| Automatic Talk (Auto Talk) | Off |
| Anykey Answer | Off |
| Banner | " " |
| Language | English |
| Contrast | level 5 |
| Key Touch Tone | On |
| Animation Screen | On |
| Day & Time | SUN 12:00 AM |
| CIDCW | CW on/CWDX off |
| Area Code | None |
| Dial Mode | Tone |
| Voice Mail Tone | On |
Notes:
- For Global Setup and Deregister HS menu options, make sure the line is not in use and the handsets are within range of the base.
- Main menu flow chart is provided on page E57.
USING THE INTERFACE
Setting Menu Options
Below are some tips for using the software interface on your phone.
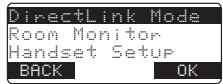
- Press the MENU soft key to access the main menu.
- Use VOL/▲ and VOL/▼ to scroll through options.
- Press the OK soft key to make a selection.
- Press the BACK soft key to return to the previous screen.
- Press END to exit the menu.
Walkie-Talkie Mode
In Walkie-Talkie mode, a pair of handsets can function as two-way radios. Walkie-Talkie mode allows two handsets to communicate with each other without the base unit or a telephone line. Use them at sporting events or while shopping to stay in contact with family members or friends. You must set both handsets to Walkie-Talkie mode to activate this feature.
Note:
- You must have at least two handsets to use Walkie-Talkie mode.
Using Walkie-Talkie Mode (for CLT-D5882/CLT-D5883)
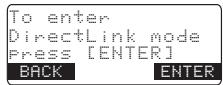
1 Press the MENU soft key and select the DirectLink Mode menu. To enter DirectLink mode press [ENTER] appears.
2 Press the ENTER soft key to enter Walkie-Talkie mode. You will hear a confirmation tone, and DirectLink Mode Complete appears.
3 To return to normal mode, press the CANCEL soft key and then the OK soft key, or return the handset to the cradle.
USING THE INTERFACE
Room/Baby Monitor
This feature allows you to monitor sounds in another room. Place a handset in the room you wish to monitor; it will function as a microphone. A second handset can be set to function as a remote speaker, allowing you to monitor sounds in the room.

Using Room/Baby Monitor
1 Press the MENU soft key and select the Room Monitor menu. To Room Monitor appears.
2 Select the handset you want to monitor by using VOL/▲ or VOL/▼.
3 Press the OK soft key.
RoomMonitor appears, and you hear sounds in the room where the handset is installed.
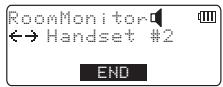
4 To turn off the Room Monitor, press the END soft key, or END.
Notes:
- This feature only works when the handset(s) is within the range of the base.
- You must have at least two handsets to use Room/Baby Monitor.
During room monitor, if you receive a call, you will hear beeps from the earpiece or speaker. Press TALK/FLASH to answer the call.
USING THE INTERFACE
Handset Setup
The following submenu options must be set separately for each handset.
Programming your Voice Mail Access Number
1 Press the MENU soft key. Select the Handset Setup menu, and then the Edit Voice Mail submenu. Edit U_mail No. appears.
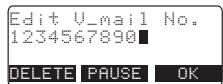
2 Enter your personal access number using the number keypad (0-9), */TONE/<, #/> , the DELETE soft key, or the PAUSE soft key (up to 20 digits).
3 Press the OK soft key. You will hear the confirmation tone.
To delete the current Voice Mail Access Number, delete all numbers in step 2 using the DELETE soft key and the OK soft key.
Selecting a Ringer Tone
Ringer Tone lets you choose from 10 ringer tones or 10 melodies:
- Ringers (Flicker, Clatter, Soft Alert, Wake Up, Light Bug, Beep Boop, Tone Board, Chip Chop, Party Clap, Reminder)
- Melodies (Beethoven's Symphony #9 [Beethoven9], For Elise [Elise], We Wish You A Merry Christmas [Merry-Xmas], Home Sweet Home [Hm Swt Hm], Lorri Song #6 [Lorri Song], When Irish Eyes Are Smiling [Irish Eyes], Aura Lee, Let Me Call You Sweet Heart [Sweetheart], Star Spangled Banner [Star Spngl], Old MacDonald [Old MacDld])
You must set the separate ringer tone on each handset.
1 Press the MENU soft key. Select the Handset Setup menu, and then the Ringer Tone submenu.
2 Press VOL/▲ or VOL/▼ to move the pointer. You will hear the ringer or melody as you scroll through the options.
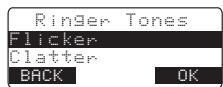
3 When you reach the ringer tone you want, press the OK soft key. You will hear a confirmation tone.
USING THE INTERFACE
Distinctive Ringer Setup
Distinctive Ringer allows you to assign a designated ring tone to a stored phonebook number (100 stored locations available). When a call is received and the Caller ID information matches the information in one of the phonebook memory locations, the phone uses the distinctive ring assigned to that particular caller. You can assign distinctive rings to multiple phonebook memory locations. Switching the setting to Distinctive Off disables distinctive ringing: all incoming calls will have a normal ring tone. Switching to Distinctive On activates all programmed distinctive ring memory locations.
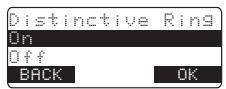
1 Press the MENU soft key. Select the Handset Setup menu, and then the Distinctive Ring submenu.
2 Press VOL/▲ or VOL/▼ to select On or Off.
3 Press the OK soft key. You will hear a confirmation tone.
Setting the Automatic Talk (Auto Talk)
Automatic Talk (Auto Talk) allows you to answer the phone simply by removing the handset from the cradle. You do not have to press any buttons to answer the call.
1 Press the MENU soft key. Select the Handset Setup menu and then the Automatic Talk submenu.
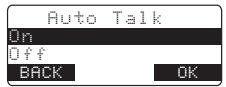
2 Press VOL/▲ or VOL/▼ to select On or Off.
3 Press the OK soft key. You will hear a confirmation tone.
Setting the Anykey Answer
Anykey Answer allows you to answer the phone by pressing any number key, ≠ /TONE/ < , or # / > on the handset.
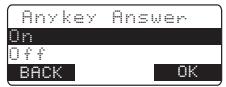
1 Press the MENU soft key. Select the Handset Setup menu, and then the Anykey Answer submenu.
2 Press VOL/▲ or VOL/▼ to select On or Off.
3 Press the OK soft key. You will hear a confirmation tone.
USING THE INTERFACE
Setting the True Banner
True Banner lets you customize the name your handset displays.
The name will be displayed on the LCD screen during standby mode, Intercom, Intercom Hold, Room Monitor and Copy Phonebook operation.
The banner name will be displayed on the receiving handset as well.

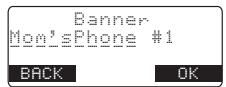
1 Press the MENU soft key. Select the Handset Setup menu, and then the Banner submenu.
2 Use the number keypad (0-9), */TONE/<, #/> , or the DELETE soft key to enter or edit the name.
3 Press the OK soft key. You will hear a confirmation tone.
Selecting a Language
Language selects which language the menu display will use. Choose from English, French, or Spanish.
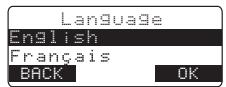
1 Press the MENU soft key. Select the Handset Setup menu, and then the Language submenu.
2 Press VOL/▲ or VOL/▼ to choose "English", "Français" (French), or "Español" (Spanish).
3 Press the OK soft key. You will hear a confirmation tone.
Adjusting the LCD Contrast
Contrast adjusts the handset LCD brightness. Choose one of the 10 levels for optimum viewing.
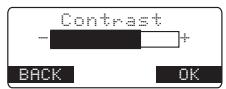
1 Press the MENU soft key. Select the Handset Setup menu and then the Contrast submenu.
2 Press VOL/▲ or VOL/▼ to adjust the contrast of the LCD (10 levels).
3 Press the OK soft key. You will hear a confirmation tone.
USING THE INTERFACE
Setting the Key Touch Tone
Key Touch Tone is the tone your keypad makes when keys are pressed. You can turn this tone on or off.
1 Press the MENU soft key. Select the Handset Setup menu and then the Key Touch Tone submenu.
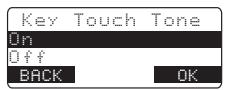
2 Press VOL/▲ or VOL/▼ to select On or Off.
3 Press the OK soft key. You will hear a confirmation tone.
Setting the Animation Screen
The Animation screen displays animation on the handset LCD. The animations will be displayed on the LCD screen during a call, ringer volume setting, when you hang up, and so on.
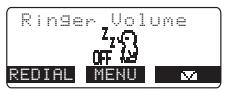
1 Press the MENU soft key. Select the Handset Setup menu and then the Animation Screen submenu.
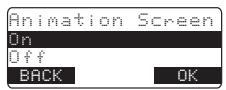
2 Press VOL/▲ or VOL/▼ to select On or Off.
3 Press the OK soft key. You will hear a confirmation tone.
See "Animation Displays" on page E12 for all the available screens.
USING THE INTERFACE
Global Setup
If you change one of the global settings, you change that setting for all registered handsets. Only one handset can change global settings at a time.
Setting Day and Time
Day & Time sets the day and time of your display.
1 Press the MENU soft key. Select the Global Setup menu, and then the Day & Time submenu option.
2 Press VOL/▲ or VOL/▼ to select the day of the week, and then the → soft key.
3 Press VOL/▲ or VOL/▼ to set hour, and then press the → soft key.
4 Press VOL/▲ or VOL/▼ to set minute, and then press the → soft key.
5 Press VOL/▲ or VOL/▼ to choose AM or PM, and then press the SAVE soft key. You will hear a confirmation tone.
Note:
- For setting the Day and Time, the idle time-out is extended to 2 minutes.
Setting CIDCW (Caller ID on Call Waiting)
Caller ID on Call Waiting (CIDCW) displays the name and number of an incoming call while you are on the line. Call Waiting Deluxe (CWDX) allows you to handle call waiting calls in seven different ways.
1 Press the MENU soft key. Select the Global Setup menu, and then the CIDCW submenu.
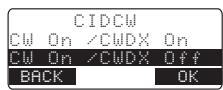
2 Press VOL/▲ or VOL/▼ to select CW On/CWX On, CW On/CWX Off, or CW Off/CWX Off, and then press the OK soft key. You will hear a confirmation tone.
USING THE INTERFACE
Setting the Area Code
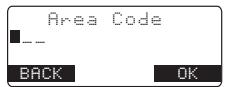
If you enter a 3-digit area code number in the "Area Code" option, your local area code does not appear in the Caller ID message. For calls received from outside your local area code, you will see a full 10-digit number.
1 Press the MENU soft key. Select the Global Setup menu, and then the Area Code submenu.
2 Press the number keypad (0-9) to enter a 3-digit area code.
3 Press the OK soft key. You will hear a confirmation tone.
Notes:
- If your calling area requires 10-digit dialing, do not program this option.
- If the area code has already been stored in memory, the stored area code will be displayed. To change it, use the DELETE soft key and number keys to enter the new area code.
Setting the Dial Mode
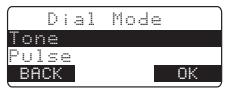
Sets the dial mode to tone or pulse. Most phone systems use tone dialing; the default setting is tone dialing. Set the dialing mode to match the dialing system used by your local phone service.
- If you are not sure of your dialing system, set the unit to tone dialing. Make a trial call. If the call connects, leave the setting as is; otherwise set the unit to pulse dialing.
- If your phone system requires pulse dialing and you need to send DTMF tones in certain situations during a call, you can switch over to tone dialing (refer to "Tone Dialing Switch-over" on page E29).
1 Press the MENU soft key. Select the Global Setup menu, and then the Dial Mode submenu.
2 Press VOL/▲ or VOL/▼ to select Tone or Pulse (the initial setting is Tone).
3 Press the OK soft key. You will hear a confirmation tone.
USING THE INTERFACE
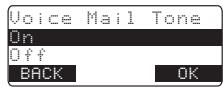
Setting Voice Mail Tone
Voice Mail Tone sets the voice mail tone. If your service does not support SDT message signal, set your VMWI (Visual Message Waiting Indicator) not to detect SDT message signal.
1 Press MENU soft key. Select the Global Setup menu, and then the Voice Mail Tone Submenu.
2 Press VOL/▲ or VOL/▼ to set the voice message indication (SDT message signal) to On or Off.
3 Press the OK soft key. You will hear a confirmation tone.
De-register the Handset
Deregister HS clears the handset's ID from the main base unit or the base ID from the handset. You will usually only deregister the handset if you are having a problem with your phone or if you need to change the digital security code. (see page E49).
1 In standby mode, select Deregister HS in the menu and press the OK soft key. Deregister HS? appears.
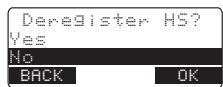
2 Press VOL/▲ to select Yes and then the OK soft key.
When de-registration is complete you will hear a confirmation tone, and Deregistration Complete appears.
3 After de-registering the handset, place the handset to the base to register. You must re-register the handset before you can use it.
BASICS
Making and Receiving Calls
With the handset's duplex speakerphone, you can have hands-free conversations.
The 📄 icon appears on the display screen during hands-free conversations.
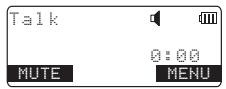
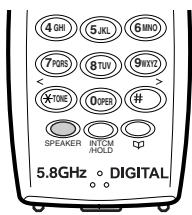
You can easily switch a call from normal conversation to hands-free conversation. To switch a call, press SPEAKER during the call.
Note:
- For best performance talk alternately with the caller in a quiet room. You can decrease the speaker volume if you or the other party has difficulty hearing.
BASICS
| From the Handset | ||
| Normal Conversation | Hands-free Conversation | |
| To answer a call | Handset On the CradlePick up the handset (Automatic Talk is: on) or pick up the handset and press TALK/FLASH (Automatic Talk is: off).Handset Off the CradlePress any number key, * /TONE/ < , or #/> (When Anykey Answer is on), or press TALK/FLASH. | Handset Off the CradlePress SPEAKER. |
| To make a call | Handset Off the Cradle1) Press TALK/FLASH.2) Listen for the dial tone.3) Dial the number.ORDial the number, and then press TALK/FLASH. | Handset Off the Cradle1) Press SPEAKER.2) Listen for the dial tone.3) Dial the number.ORDial the number, and then press SPEAKER. |
| To hang up | Press END or return the handset to the cradle. | |
| To enter a pause within the dialing sequence | When you dial the number in standby mode, press the PAUSE soft key. P appears in the display, which represents a pause. | |
Notes:
- To set "Auto Talk", see page E18 or to set "Anykey Answer", see page E18.
- The handset microphone is located at the bottom of the handset (see "Controls and Functions" on page E2). Position yourself as near to the handset as possible and speak clearly.
- If the line is in use by another handset(s), "Line In Use" appears in the display of all registered handsets that are not in use.
BASICS
Call Waiting
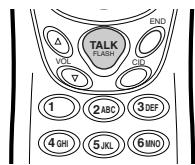
If you have Call Waiting service and a call waiting tone sounds while you are on a call, press TALK/FLASH on the handset to accept the waiting call. There is a short pause, and then you will hear the new caller. To return to the original caller, press TALK/FLASH again.
Note:
- You must subscribe through your local telephone company to receive Call Waiting or Caller ID on call waiting service.
Placing a Call on Hold
You can place a call on hold for 5 minutes. When 5 minutes has passed, the call is disconnected, and the phone returns to standby mode.
1 During a call, press INTCM/HOLD. The call will be put on hold.
Tip:
- If you leave a call on hold for more than 10 seconds, the display screen will read, Line On Hold.
2 To talk to the caller, press TALK/FLASH or SPEAKER on a handset. The phone will return back to the call.
Note:
- While a call is on hold, CIDCW can not be received.
BASICS
Redialing a Call
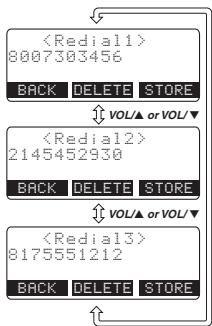
The last three phone numbers dialed can be quickly redialed from the handset. Redial numbers stored in the handset are independent from each other.
1 With the phone in standby mode, press the REDIAL soft key.
2 Press VOL/▲ or VOL/▼ to scroll through the last three dialed numbers.
3 Press TALK/FLASH or SPEAKER on the handset. The selected number is dialed.
4 To hang up, press END.
Deleting a Redial Record
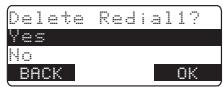
1 With the phone in standby mode, press the REDIAL soft key.
2 Press VOL/▲ or VOL/▼ repeatedly to display the number to be deleted.
3 Press the DELETE soft key.
4 Press VOL/▲ or VOL/▼ to choose Yes.
5 Press the OK soft key. The redialed number is deleted.
Storing a Redial Record
1 With the phone in standby mode, press the REDIAL soft key.
2 Press VOL/▲ or VOL/▼ repeatedly to display the number to be stored.
3 Press the STORE key. Store/Edit Name appears.
4 To complete the setting, follow the steps 3-8 in "Phonebook (Storing Phone Numbers, Names, Distinctive Rings, and Speed dial)" on page E31.
Notes:
- If the number exceeds 32 digits, only the first 32 digits are retained in redial memory.
- If the redial memory is empty, you will hear a beep.
BASICS
Adjusting the Ringer, and Earpiece and Speaker Volume
Ringer Volume
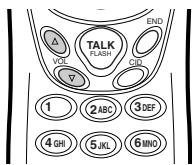
In standby mode, press the volume up key or volume down key on the handset to select one of three ringer volumes (Off, Low, or High).
Earpiece and Speaker Volume
You can select from among six volume levels on the handset. Pressing the volume up key or volume down key during a call will change the earpiece or speaker volume. This setting will remain in effect after the telephone call has ended.
If you press the volume up key when the earpiece is at the maximum volume level, an error tone sounds.
The error tone also sounds if you press the volume down key at the lowest volume.
Temporarily Muting the Ringer
You can mute the ringer individually on a handset. When the phone is ringing, pressing the MUTE soft key on the handset you want to mute. This mute will last for the current incoming call only. The ringer tone will return to the previous setting on the next incoming call.
Note:
- While charging a handset, you cannot mute the ringer tone for the handset.
Mute Microphone
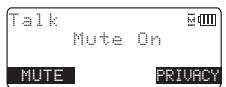
You can temporarily mute the microphone so that the caller cannot hear you. Press the MUTE soft key during talk mode (while the phone is in use) to mute the microphone. Mute On and 📄 appear in the display.
To cancel muting, press the MUTE soft key again.
Mute Off appears and disappears from the display.
BASICS
Tone Dialing Switch-over
If your telephone company requires pulse dialing, you can switch-over to tone dialing after the call connects. This feature is useful when you need tone dialing to use any automated menu systems, such as telephone bank tellers, telephone prescription refills, customer support menus, etc.
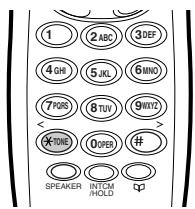
If your phone is set to pulse dialing mode, make your call normally.
Once your call connects, press the ≠ /TONE/ < key. Any digits you enter from then on will be sent as tone digits. When this particular call ends, the phone automatically returns to pulse dialing mode.

Traveling Out of Range
During a call, as you begin to move your handset too far from your base unit, noise may increase. If you pass the range limits of the base unit, you will hear a beep and see Out of Range on the display, and then the handset returns to standby mode.
Privacy Mode
Privacy prevents interruption from other registered handsets. This works only when the phone is in use.
Press the PRIVACY soft key on the handset during talk mode.
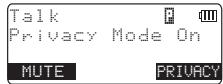
Privacy Mode On and ☐ appear in the display. To exit the Privacy Mode, press the PRIVACY soft key again when the Privacy Mode is on. Privacy Mode Off appears.
BASICS
Using One Touch Voice Mail Access
If you subscribe to voice mail service, you can use your phone to access your voice mailbox. The new message LED flashes whenever you have messages waiting in your voice mailbox.
Just program the handset with your access number, and you can get your messages at the touch of a button on the handset. (The voice mail service provider will supply you with the access number. This number may be simply a phone number. Refer to the provider's literature.)
To program or delete your Voice Mail Access Number, see page E17.
Dialing your Voice Mail Service
Once you've programmed your personal access number, you can dial your mailbox with the touch of a button. When you have messages, simply press the ☑ soft key. If you have not entered the access number or it has been deleted, when you press the ☑ soft key, No Number Stored To store number press [MENU] appears and you will hear a beep. The phone returns to standby mode.
Resetting the New Message LED
The LED flashes when you have new messages in the voice mail service. If the LED remains on after you've retrieved your messages, you may need to reset the indicators. With the phone in standby mode, press and hold PAGE on the base until the paging sound stops (about 5 seconds).
Note:
- You must subscribe to voice mail service from your telephone company in order to use this feature. The voice mail service company will provide you with the access number.
DIRECTORY
Phonebook (Storing Phone Numbers, Names, Distinctive Rings and Speed Dial)
You can store names and numbers in your phone's phonebook, search for names alphabetically, and dial phonebook entries with just a few key presses. You can store up to 100 numbers in each registered handset.
The phone uses the same memory locations to store phonebook entries and Caller ID messages. Empty phonebook locations are used to store Caller ID messages. For example, if you have stored 100 phonebook entries on your handset, the handset will not store Caller ID messages.
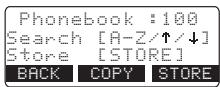
1 When the phone is in standby mode, press 📋. The following items appear:
(1st line) The number of the phonebook locations used
(2nd line) How to search (press the number keypad, VOL/▲ or VOL/▼)
(3rd line) How to store (press the STORE soft key)
(4th line) The BACK, COPY, and STORE soft keys
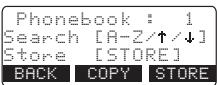
2 Press the STORE soft key, Store/Edit Name appears.
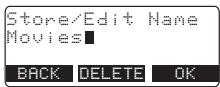
3 Enter the name (up to 16 characters) by using the number keypad (see the "Steps for Entering Names and Special Characters" on page E33).
If a name is not required, go to step 4.
4 Press the OK soft key to store the name; Store/Edit No. appears.
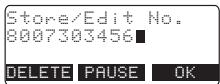
5 Use the number keypad, ≠ /TONE/ < , or #/ > to enter the phone number (up to 20 digits).
If you make an error, use the DELETE soft key to erase the incorrect digits. When you are finished, press the OK soft key to store the number.
DIRECTORY
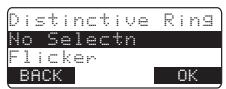
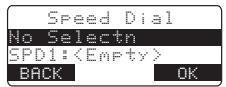
6 Distinctive Ring appears. Press VOL/▲ or VOL/▼ to move the pointer to one of the Distinctive Ring options and then press the OK soft key.
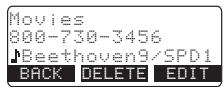
7 Speed Dial appears. Press VOL/▲ or VOL/▼ to move the pointer to select the Speed dial location (10 locations: SPD1-SPD0).
8 Press the OK soft key. You will hear a confirmation tone, and Done! appears in the display.
Notes:
- When the memory is full, you will hear a beep and Memory Full appears. You cannot store names and numbers.
- The pause key counts as one digit. Pressing the PAUSE soft key more than once increases the length of the pause between numbers. Each pause represents a 2 second delay.
- If you choose not to store a Distinctive Ring, simply select the "No Selectn" option.
- If you choose not to store the name/number as a Speed Dial, simply choose the "No Selectn" option.
- Selecting a speed dial location where a number is already stored releases the old number's speed dial setting. The new number will be stored in the speed dial location.
Chain Dialing
The memory locations in the handset are not limited to phone numbers. You can also store a group of numbers (up to 20 digits) that you need to enter once your call connects. This is referred to as Chain Dialing.
An example of this is a bank account number. Store the account number in one of the phonebook locations (refer to "Phonebook (Storing Phone Numbers, Names, Distinctive Rings and Speed Dial)" on page E31). When you call your bank and are prompted to enter the account number, scroll through your phonebook locations until you find your account number, and then press the DIAL soft key.
DIRECTORY
Steps for Entering Names and Special Characters
Refer to the letters on the number keys to select the desired characters.
With each press of a number key (0-9), the displayed character appears in the following order: Upper case letters first, lower case letters next and finally the number corresponding to the key.
| Number of times key is pressed | |||||||||
| keys | 1 | 2 | 3 | 4 | 5 | 6 | 7 | 8 | 9 |
| 1 | 1 | ||||||||
| 2 abc | A | B | C | a | b | c | 2 | ||
| 3 def | D | E | F | d | e | f | 3 | ||
| 4 ghi | G | H | I | g | h | i | 4 | ||
| 5 jkl | J | K | L | j | k | l | 5 | ||
| 6 mno | M | N | O | m | n | o | 6 | ||
| 7 pqrs | P | Q | R | S | p | q | r | s | ? |
| 8 tuv | T | U | V | t | u | v | 8 | ||
| 9 wxyz | W | X | Y | Z | w | x | y | z | 9 |
| 0 oper | & | ( ) | < | > | / | (blank) | - | - | |
| . | , | : | ? | ! | @ | ` | " | * | |
| # | 0 | ||||||||

If you make a mistake while entering a name
Use */TONE/< or #/> to move the cursor to the incorrect character.
Press the DELETE soft key to erase the wrong character, and then enter the correct character. To delete all characters press and hold the DELETE soft key.
DIRECTORY
For example, to enter Movies:
1 When the phone is in standby mode, press ☑ and the STORE soft key. Store/Edit Name appears.
2 Press 6 once, and then press #/> to move the cursor to the right.
3 Press 6 six times.
4 Press 8 six times.
5 Press 4 six times.
6 Press 3 five times.
7 Press 7 eight times.
8 When finished, press the OK soft key.
To continue to store the telephone number, proceed to step 5 in "Phonebook (Storing Phone Numbers, Names, Distinctive Rings, and Speed dial)" on page E31.
Note:
- If the next character uses the same number key, you must press #/> to move the cursor over. Otherwise the next time you press the number key, it changes the character that was previously set.
DIRECTORY
Viewing the Phonebook
Your phone stores names/numbers in the phonebook memory locations, and you can search names in alphabetical order. You can view the phonebook even while the phone is in use.
1 Press ☐. If you recall the phonebook during a call, the COPY and STORE soft key will not appear.
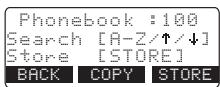
2 Press VOL/▲ or VOL/▼, or the number keypad to scroll through the phonebook locations. Phonebook locations appear in alphabetical order (from first to last when you press VOL/▼, from last to first when you press VOL/▲).
You can also use the letters on the number keys to select the first letter of the desired name. Press a number key (2-9 and 0) once for the first letter, twice for the second letter, and so on. The first location that begins with the letter you entered appears.
For example, to search for Dentist, press 3 once. Press VOL/▲ or VOL/▼, until the phonebook location is displayed.
3 To finish the viewing operation, press END (or the BACK soft key or TALK/FLASH during a call).
Note:
- During a call, don't press END on the handset or the call will be disconnected.
DIRECTORY
Making Calls Using the Phonebook
From Standby Mode
1 When the phone is in standby mode, select the phonebook location to dial (see "Viewing the Phonebook" on page E35).
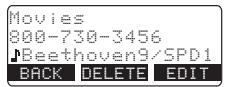
2 Press TALK/FLASH or SPEAKER on the handset. The displayed number is dialed.
3 To hang up press END.
From Talk Mode
1 Press TALK/FLASH or SPEAKER.
2 View the phonebook location to dial (see "Viewing the Phonebook" on page E35).
3 Press the DIAL soft key. The number in the displayed phonebook location is dialed.
4 To hang up press END.
Speed Dialing
If you store a phone number in a speed dial memory location (10 locations: SPD1 - SPD0), you can use the speed dialing feature. When the phone is in standby mode, press and hold a number key (0-9) associated with the speed dial until the phone number appears, and then press TALK/FLASH or SPEAKER. The number stored in the speed dial (SPD1 - SPD0) is dialed.
DIRECTORY
Editing or Erasing a Stored Name, Phone Number, Distinctive Ring and Speed Dial
1 When the phone is in standby mode, press 📋.
2 Press VOL/▲, VOL/▼, or the number keypad to select the phonebook locations (see "Viewing the Phonebook" on page E35).
a. Editing the Stored Data
1 When the phonebook location to be edited appears, press the EDIT soft key. Store/Edit Name appears.
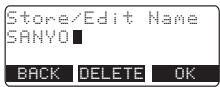
2 Follow the steps 3 to 7 under "Phonebook (Storing Phone Numbers, Names, Distinctive Rings, and Speed Dial)" on page E31 to complete the editing operation.
3 Press the OK soft key. You will hear a confirmation tone.
b. Deleting the Stored Data
1 When the phonebook location to be deleted appears, press the DELETE soft key. Delete Memory? appears.
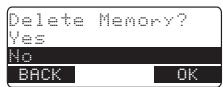
2 Press VOL/▲ to move the pointer to Yes.
3 Press the OK soft key. You hear a confirmation tone. Deleted! appears in the display.
DIRECTORY
Copying Phonebook Locations (CLT-D5882/CLT-D5883)
If you have two handsets, Copy Phonebook allows you to transfer stored phonebook locations from handset to handset so you don't have to manually re-enter names and numbers. You can transfer one memory (phonebook location) at a time, or all memory locations at once.
1 When the phone is in standby mode, press 📋.
2 Press the COPY soft key.
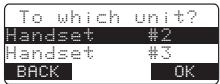
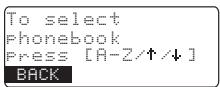
3 Press VOL/▲ or VOL/▼, to select the handset you want transfer the phonebook locations and then press the OK soft key.
4 Press VOL/▲ or VOL/▼ to select One Memory or All Memories: and then press the OK soft key.
If you select All Memories, Are you sure? appears on the display screen.
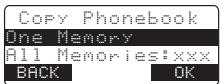
Press VOL/▲ to select Yes, and then press the OK soft key.
If you select One Memory, press VOL/▲ or VOL/▼, or the number key (2-9 and 0) to select the phonebook location you want to export and then press the COPY soft key.
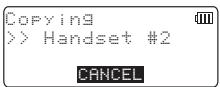
5 The phonebook locations will be transferred to the handset. Copying and the receiving handset name appear. When the transfer is completed Done! appears on the handset.
Notes:
- If the memory location on the receiving handset is full, and cannot store the phonebook locations, you will hear a beep.
- If an error occurs, the phonebook locations transferred before the error were stored in the receiving handset.
CALLER ID FEATURES
Caller ID and CIDCW (Caller ID on Call Waiting)
You must subscribe to Caller ID services through your local telephone provider to use these features.
When the telephone rings, the Caller ID feature allows you to view the caller's name, phone number, date and time of call. With CIDCW (Caller ID on Call Waiting), you will hear a call waiting tone while you are on a call, and the Caller ID data is displayed. To accept the waiting call, press TALK/FLASH on the handset. Additionally, you can dial a number stored in the Caller ID list or save data to your Phonebook locations.
Important:
Memory locations for Caller ID messages and Phonebook locations (including Speed Dials) are common; you can store up to 100 locations for each handset. A Caller ID message is not stored when you have stored 100 of the phonebook locations. When you have stored 100 of the phonebook locations and Caller ID messages in total, the earliest Caller ID message is overwritten.

1 When the Caller ID message is received, the display shows the caller's phone number along with the date and time. The incoming call information is stored in the Caller ID record. If the Caller ID service includes the caller's name, the name will appear in the display (up to 15 characters).
You may receive any one of the following messages:
When invalid data is received; Incomplete Data
When a private name is received; Private Name
When a private number is received; Private Number
When a unknown name is received; Unknown Name
When a unknown number is received; Unknown Number
2 When you pick up the phone, the display changes to Talk. (Automatic Talk feature is set to on).
CALLER ID FEATURES
Notes:
- If you answer a call before the Caller ID message is received (for example, before the second ring), the Caller ID message will not appear.
- When the call is received via a telephone company that does not offer Caller ID service, the caller's phone number and name does not appear. (This includes some international calls.)
- When the call is via a private branch exchange (PBX), the caller's phone number and name may not appear.
- The number of calls from the same Caller ID appears next to the received time. Once you view the new message, the number will be cleared and disappear.
- Data errors appear as "I."
CALLER ID FEATURES
Viewing the Caller ID List
You can view the Caller ID list through the handset during a call or when the phone is in standby mode.
1 Press CID.
The summary screen appears. The screen shows the number of new messages and total messages.
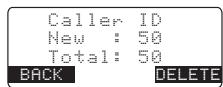
2 To view the Caller ID messages in historical order (from new to old or from old to new), repeatedly press VOL/▼ to scroll through the messages from the latest to the earliest, or VOL/▲ to scroll back through the messages.
To view the Caller ID messages with alphabetical search, press the number key pad (2-9 and 0) with the letter associated with the first letter of the desired message.
3 To finish the viewing operation, press END (or the BACK soft key or TALK/FLASH during a call).
Notes:
- Once you view the Caller ID list with alphabetical search, you cannot switch back to historical order (from new to old or from old to new) unless you exit and re-enter the operation.
- During a call, do not press END on the handset or the call will be disconnected.
CALLER ID FEATURES
Deleting a Caller ID Message
Deleting Information from the Caller ID List
1 When the phone is in standby mode, view the Caller ID information to be deleted (see "Viewing the Caller ID List" on page E41).
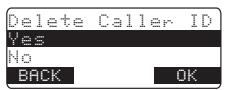
2 Press the DELETE soft key. Delete Caller ID appears.
3 Press VOL/▲ or VOL/▼ to choose Yes.
4 Press the OK soft key. You will hear a confirmation tone.
Deleting all Caller ID names/numbers
1 When the phone is in standby mode, press CID. Press the DELETE soft key. Delete All? appears.
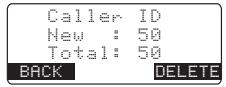
2 Press VOL/▲ to choose Yes.
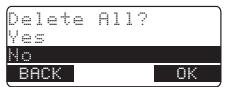
3 Press the OK soft key. You will hear a confirmation tone.
Note:
- Once the Caller ID data has been deleted, the information cannot be retrieved.
CALLER ID FEATURES
Using the Caller ID Message List
Calling a party from the Caller ID list
Standby Mode
1 When the phone is in standby mode, select the Caller ID message (see "Viewing the Caller ID List" on page E41).
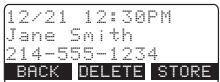
2 To have the phone dial a "1" before the displayed Caller ID number, press */TONE/<. To have the phone dial the stored area code before the displayed Caller ID number, press #/> .
3 Press TALK/FLASH or SPEAKER. The displayed phone number dials automatically.
Talk Mode
1 When the phone is in talk mode, select the Caller ID message you want to dial (see "Viewing the Caller ID List" on page E41).
2 Press the DIAL soft key, and the number will be dialed.
Storing Caller ID messages in the Phonebook
Messages shown in the Caller ID list can be stored in the phonebook. The phone number and name of the party on the Caller ID list can be stored in memory.
1 When the phone is in standby mode, select the Caller ID message to be stored.
Then press the STORE soft key. Store/Edit Name appears. If the Caller ID message is already stored in memory, you will hear a beep and This data is already stored!! appears. The number will not be stored.
2 To complete the setting, follow the steps 3-8 in "Phonebook (Storing Phone Numbers, Names, Distinctive Rings, and Speed dial)" on page E31.
CALLER ID FEATURES
Notes:
- When a long distance call has been set, "1" appears in the display.
- If the Caller ID message was received as a private/unknown number, or the message does not have the number, you cannot store the message in the Phonebook. If it was received as private/unknown name, the message will be stored as
. - Even if the 100 memory locations are full, the message will be stored in the Phonebook. However, the message will be erased from the Caller ID list.
CALLER ID FEATURES
Call Waiting Deluxe Features
Your phone gives you new options for call waiting. At the touch of a button, you can place the caller on hold, send them to your voice mail service, or conference them into your current call. You must subscribe to Call Waiting and Call Waiting Deluxe to use these features. Not all features are available in all areas. Check with your local telephone company for details.
1 When you receive a Call Waiting call, press the CWDX soft key for a list of options.
2 Press VOL/▲ or VOL/▼ or the number keypad (1-7) to select an option.
For example:
press VOL/▼ 4 times
press VOL/▼ 2 times
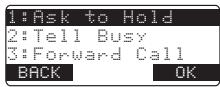
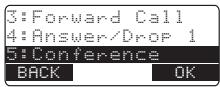
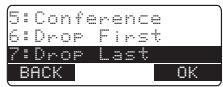
3 Press the OK soft key. A confirmation screen will appear, and the phone returns to the call.
Your phone is pre-programmed with seven call waiting options. You can select to ask the calling party to hold, send them a busy message, forward them to your voice mail, or answer and drop the first caller. You can also select to conference them into the current call or, at any time, choose to drop the first or drop the last caller. Check with your local telephone company for a full list of options.
Notes:
- To activate features and display the CWDX soft key, select CW On/CWDX On in the CIDCW option. See page E21.
- You can also answer a waiting call immediately by pressing TALK/FLASH, the first caller will be placed on hold. To return to the original caller, press TALK/FLASH again.
- If you don't press a key within 30 seconds while in the operation, the phone returns to the call.
- To return to the call, press the BACK soft key.
MULTI-HANDSET FEATURES
The features in this section require a minimum of two handsets to operate.
Using the Walkie-Talkie Mode
To use this feature, you must enter the handsets into Walkie-Talkie mode first. To enter Walkie-Talkie mode, see page E15.
Walkie-Talkie call
1 When the phone is in the Walkie-Talkie standby mode, press the DirectLink soft key (example of Walkie-Talkie from handset #1).
2 Select the handset to which you wish to Walkie-Talkie with by pressing the number keys (0-9). Your handset will then page the other handset.
3 On the receiving handset, press TALK/FLASH, the ANSWER soft key, or if Anykey Answer is on, press any number key, */TONE/<, or #/> .
4 When you finish your conversation, press END or the END soft key on either handset. Return the handset to the cradle, or press the CANCEL soft key and then the OK soft key to return to normal standby mode (cancelling Walkie-Talkie mode).
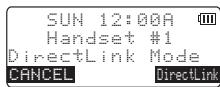
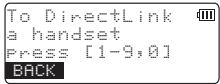
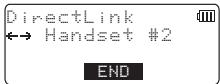
Notes:
- Handsets can be in Walkie-Talkie mode while other handsets are in use.
- While a handset is in a Walkie-talkie mode, it cannot be used to make or receive a call. Other handsets can still make or receive a call.
MULTI-HANDSET FEATURES
3-Way Conferencing
The phone permits 3-way conversations between 2 handsets and an outside line.
1 Initiate the call normally. Once the call is in progress, other people can join the call.
2 To join a conference call, press TALK/FLASH or SPEAKER on the other handset.
3 To leave a conference call, simply hang up as you normally would. All other parties will remain connected.
4 To end a conference call completely, all local parties must hang up. The conference call will also end when the calling party hang up.
Note:
- If the initial handset is in privacy mode, other handsets cannot join the call.
Intercom/Call Transfer Feature
If you have two or more handsets, you can use them as an intercom.
Also, you can place an outside call on hold and transfer the call to another handset.
Intercom
1 In standby mode, press INTCM/HOLD.
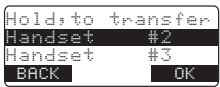
2 Select the handset you want to talk with within 30 seconds. To select the handset, press VOL/▲ or VOL/▼, and then press the OK soft key. If you select All, all other handsets will be paged. An intercom to
To cancel intercom, press the CANCEL soft key on the initiating handset.
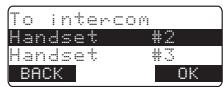
3 To answer the page, press TALK/FLASH, INTCM/HOLD, or the ANSWER soft key. If Anykey Answer is enabled, pressing a number key, ≠ /TONE/<, or #/> will answer the page.
If Automatic Talk is enabled, you can answer the page by simply picking up the handset.
4 To hang up the intercom call, press END or the END soft key on either handset.

MULTI-HANDSET FEATURES
Call Transfer Feature
1 During a call, press INTCM/HOLD on the handset.
2 Select a handset to transfer the call to within 10 seconds.
To select the handset, press VOL/▲ or VOL/▼, and then press the OK soft key. If you select All, all other handsets will be paged.
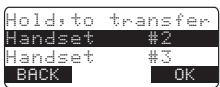
The call will automatically be placed on hold, and an intercom tone sounds.
To cancel the transfer, press the CANCEL soft key, and then TALK/FLASH or SPEAKER on the initiating handset.
3 To answer the page on a receiving handset, press TALK/FLASH, INTCM/HOLD, or the ANSWER soft key. If Anykey Answer is enabled, pressing a number key, ≠ /TONE/<, or #/ > will answer the page. If Automatic Talk is enabled, you can answer the page by simply picking up the handset.
4 To speak to the caller, press TALK/FLASH on the receiving handset.
Notes:
- If the party is busy or out of range, the handset returns to standby mode.
- If you receive an outside/intercom call or page while selecting the other handset, the operation will be cancelled.
- If the party does not answer within one minute, the operation is cancelled. Press TALK/FLASH or SPEAKER to return to the caller.
- During an intercom call, if you receive a call, you will hear a ringer tone from the earpiece. Press TALK/FLASH on either handset to answer the call.
ADDITIONAL INFORMATION
Changing the Digital Security Code
The digital security code is an identification code used to connect the handset and the base unit. Normally, setting the code is not necessary. In the rare situation that you suspect another cordless telephone is using the same security code, you can change the code. To change the digital security code:
1 In standby mode, select Deregister HS in the menu and press the OK soft key. Deregister HS? appears.
2 Press VOL/▲ to select Yes and then the OK soft key.
When de-registration is complete you will hear a confirmation tone, and Deregistration Complete appears.
3 After de-registering the handset, place the handset to the base to register. You must re-register the handset before you can use it.
Find Handset
To locate the handset, press PAGE on the base when the phone is in standby mode. All registered handsets beep for 60 seconds, and Paging appears on the handset display. To cancel paging, press any key on the handset or PAGE on the base.
Note:
- If the battery pack is completely drained, the handset will not beep when paging.
ADDITIONAL INFORMATION
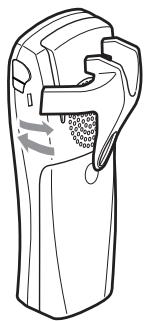
Installing the Beltclip
To attach the beltclip
Insert the beltclip into the holes on each side of the handset. Press down until it clicks.
To remove the beltclip
Pull either side of the beltclip to release the tabs from the holes.
Optional Headset
Your phone can be used with an optional headset. To use this feature, insert the headset plug into the headset jack. Your phone is ready for hands-free conversations.

ADDITIONAL INFORMATION
Note on Power Sources
Battery Replacement and Handling
When the operating time becomes short even after a battery is recharged, please replace the battery.
With normal usage, your battery should last about one year.
Warning: To avoid the risk of personal injury or property damage from fire or electrical shock, only use the SANYO battery model and SANYO adapter model specifically designated for this product.
RECYCLING NICKEL-METAL-HYDRIDE BATTERIES

NICKEL-METAL-HYDRIDE BATTERIES MUST BE DISPOSED OF PROPERLY.
Nickel-metal-hydride cells are used in the battery pack. Please take your used nickel-metal-hydride battery packs to a store that recycles nickel-metal-hydride batteries.
Power Failure
During the period that the power is off, you will not be able to make or receive calls with the telephone.
Caution
- Use only the specified SANYO battery pack.
- Do not remove the battery from the handset to charge it.
- Never throw the battery into a fire, disassemble it, or heat it.
- Do not remove or damage the battery casing.
ADDITIONAL INFORMATION
Troubleshooting
If your phone is not performing to your expectations, please try these simple steps first.
| Symptom | Suggestion |
| The CHARGE LED won't illuminate when the handset is placed in the cradle. | Make sure the AC adapter is plugged into the base or the charger (if you have more than one handset) and wall outlet.Make sure the handset is properly seated in the cradle.Make sure the charging contacts on the handset are clean. |
| The audio sounds weak. | Move the handset and/or base away from metal objects or appliances and try again.Make sure that you are not too far from the base. |
| Can't make or receive calls. | Check both ends of the base telephone line cord.Make sure the AC adapter is plugged into the base and wall outlet.Disconnect the AC adapter for a few minutes, and then reconnect it.De-register the handset (see "De-register the Handset" on page E23).Change the digital security code (see "Changing the Digital Security Code" on page E49).Make sure that you are not too far from the base.Make sure the line is not in use.If an outside call is already established, you cannot make another outside call. |
| The handset doesn't ring or receive a page. | Charge the batteries in the handset for 15-20 hours by placing the handset on the base or charging cradle.Make sure that you are not too far from the base.De-register the handset (see "De-register the Handset" on page E23).Change the digital security code (see "Changing the Digital Security Code" on page E49). |
| Unavailable appears in the display. | Make sure that another handset(s) is not in use, and try the phone again.Make sure that you are not too far from the base. |
ADDITIONAL INFORMATION
| Symptom | Suggestion |
| Severe noise interference. | Keep the handset away from microwave ovens, computers, remote control toys, wireless microphones, alarm systems, intercoms, room monitors, fluorescent lights, and electrical appliances.Move to another location or turn off the source of interference. |
| The Caller ID does not display. | The handset was picked up before the second ring.The call was placed through a switchboard.Call your local telephone company to verify your Caller ID service is current. There can be a problem with your Caller ID service. |
| You cannot register the handset to the base. | Charge the battery pack for 15-20 hours.De-register the handset (see "De-register the Handset" on page E23).Change the digital security code (see "Changing the Digital Security Code" on page E49). |
| The handset doesn't communicate with other handsets. | De-register the handset (see "De-register the Handset" on page E23).Change the digital security code (see "Changing the Digital Security Code" on page E49).Make sure that you have registered all handsets. |
| The handset can't join the conversation. | Make sure there are not 2 handsets already using the 3-way conference feature.Make sure that another handset is not in privacy mode. |
| Room Monitor feature does not work. | Make sure to place the handset(s) within the range of the base. |
ADDITIONAL INFORMATION
Technical Information
IMPORTANT SAFETY INSTRUCTIONS
When using your telephone equipment, basic safety precautions should always be followed to reduce the risk of fire, electric shock and injury to persons, including the following:
1 Do not use this product near water, for example, near a bath tub, wash bowl, kitchen sink or laundry tub, in a wet basement or near a swimming pool.
2 Avoid using a telephone (other than a cordless type) during an electrical storm. There may be a remote risk of electric shock from lightning.
3 Do not use the telephone to report a gas leak in the vicinity of the leak.
4 Use only the power cord and batteries indicated in this manual. Do not dispose of batteries in a fire. They may explode. Check with local codes for possible special disposal instructions.
SAVE THESE INSTRUCTIONS
Caution: Risk of explosion if battery is replaced by an incorrect type. Dispose of used batteries according to the instructions.
I.C. Notice
TERMINAL EQUIPMENT
NOTICE:
This equipment meets the applicable Industry Canada Terminal Equipment Technical Specifications. This is confirmed by the registration number. The abbreviation, IC, before the registration number signifies that registration was performed based on a Declaration of Conformity indicating that Industry Canada technical specifications were met. It does not imply that Industry Canada approved the equipment.
NOTICE:
The Ringer Equivalence Number (REN) for this terminal equipment is marked on the equipment itself. The REN assigned to each terminal equipment provides an indication of the maximum number of terminals allowed to be connected to a telephone interface. The termination on an interface may consist of any combination of devices subject only to the requirement that the sum of the Ringer Equivalence Numbers of all the devices does not exceed five.
RADIO EQUIPMENT
The term “IC:” before the radio certification number only signifies that Industry Canada technical specifications were met.
Operation is subject to the following two conditions: (1) this device may not cause interference, and (2) this device must accept any interference, including interference that may cause undesired operation of the device. "Privacy of communications may not be ensured when using this telephone".
THE SANYO COMFORT WARRANTY
WARRANTY APPLICATION
SANYO Communications products purchased new, unused in Canada through a SANYO Authorized Dealer are warranted against manufacturing defects in materials and workmanship for ONE YEAR covering parts and labour, from the date of purchase by the original retail purchaser. This warranty only applies in favour of the original retail purchaser of the warranted product.
SANYO CANADA INC.'S RESPONSIBILITY
During the warranty period, SANYO Canada Inc. will repair, or at our option, replace a Communications product which shows evidence of a manufacturing defect in materials or workmanship. Replacement PARTS are warranted for the remaining portion of the warranty period.
WHAT IS NOT COVERED
(a) Communications products purchased outside Canada.
(b) Communications products purchased in a used condition.
(c) Communications products purchased from non SANYO-authorized dealer.
(d) Communications products not intended for Canadian usage or products without appropriate Canadian regulatory approvals.
(e) Problems due to product set-up and installation.
(f) Adjustments that are outlined in the Operating Manual.
(g) Accessory items including antenna, and batteries,
(h) Damage in or due to transportation.
(i) Damage due to improper maintenance, accident, abuse, misuse or negligence.
(j) Damage caused by lightning and power surges.
ORIGINAL RETAIL PURCHASER'S RESPONSIBILITY
You, the original retail purchaser, must present your original, dated bill-of-sale together with this warranty to SANYO Canada Inc. or to an authorized SANYO Service Depot when you make a claim under this warranty.
You, the original retail purchaser, are responsible for any costs of TRANSPORTING the product to and from SANYO Canada Inc. or an authorized SANYO Service Depot. You also are responsible for the cost of any
MAINTENANCE necessary in respect of the product.
WARRANTY BECOMES VOID
This warranty becomes void if the product's serial numbers are altered or removed or if any repair to the product is made other than by SANYO Canada Inc. or by an authorized SANYO Service Depot.
LIMITATIONS
(a). SANYO Canada Inc. reserves the right to change or improve the design of the model of the product warranted hereunder without incurring any obligation to make any modifications to or to install any improvement in or on the product.
(b). In no event shall SANYO Canada Inc. or any of its Authorized Dealers be liable for special or consequential damage arising from the use of this product.
STATUTORY WARRANTIES
The above provisions do not preclude the operation of any applicable provincial statute which in certain circumstances may not allow some of the limitations and exclusions described in this Warranty. Where any terms of this Warranty are prohibited by such a statute, they shall be deemed null and void but the remainder of this warranty shall remain in effect.
HOW TO OBTAIN WARRANTY SERVICE
Please contact the SANYO Authorized Dealer from whom the product was purchased, or contact us directly at:
SANYO Canada Inc.
1-300 Applewood Cres.
Concord, Ont. L4K 5C7
(905) 760-9944
1-800-263-2244
SOS HELP LINE
At SANYO, fulfilling the needs of our customers is a priority. That's why we created our SOS customer service program that guarantees satisfaction.
NATIONWIDE CUSTOMER SUPPORT
SOS is there to help you. Our friendly and knowledgeable product specialists will quickly answer your questions about setup and use of SANYO telephone products. Simply call toll free from anywhere in Canada to connect to our no-charge, SOS support and service network:
1-800-263-2244
Or visit our website at www.sanyoservice.com, and click the Customer Relations button to get access to our FAQ's (Frequently Asked Questions) and other helpful features.
STAY-AT-HOME CONVENIENCE
It's a nuisance making another trip to the store when you're stuck. Now with SOS, all that's necessary is a quick call from your home for product assistance.
HASSLE-FREE EXCHANGE
Should your SANYO telephone require servicing due to a manufacturing defect during the warranty period, SANYO Canada will ship prepaid a replacement unit* within two business days after receiving your defective unit. Consumers are responsible for the shipping costs of the unit back to SANYO.
- For older, non-current models, replacement units may not be available, in which case our regular warranty conditions will apply.
GUARANTEED QUALITY
All SOS replacement sets are checked and serviced by factory-authorized technicians before being sent out. SOS means you never have to worry.
C.O.D. and/or Collect shipments will not be accepted.
Unit must be returned to SANYO in its original box with all accessories, i.e.: owner's manual, battery, adaptor, telephone cord, etc.
Main Menu Flow Chart
![graph TD A["SUN 12:00A Handset #1 New CID: 5 REDIAL MENU"] --> B["MENU"] B --> C["DirectLink Mode Room Monitor Handset Setup BACK OK"] C --> D["To enter DirectLink mode press [ENTER"] BACK ENTER] D --> E["SUN 12:00A Handset #1 DirectLink Mode CANCEL DirectLink"] C --> F["DirectLink Mode Room Monitor…](/content/2025/01/96706/images/9af0add3673e9b25357fc52309eb834996ef78523bc293719cfa7bf5cc2acf0d.jpg)
UP800DH (CLT-D5880) OM 1/24/06 3:39 PM Page 58
May be covered under one or more of the following U.S. patents:
| 4,797,916 | 5,381,460 | 5,426,690 | 5,434,905 | 5,491,745 | 5,493,605 |
| 5,533,010 | 5,574,727 | 5,581,598 | 5,650,790 | 5,660,269 | 5,661,780 |
| 5,663,981 | 5,671,248 | 5,696,471 | 5,717,312 | 5,732,355 | 5,754,407 |
| 5,758,289 | 5,768,345 | 5,787,356 | 5,794,152 | 5,801,466 | 5,825,161 |
| 5,864,619 | 5,893,034 | 5,912,968 | 5,915,227 | 5,929,598 | 5,930,720 |
| 5,960,358 | 5,987,330 | 6,044,281 | 6,070,082 | 6,125,277 | 6,253,088 |
| 6,314,278 | 6,418,209 | 6,618,015 | 6,671,315 | 6,714,630 | 6,782,098 |
| 6,788,920 | 6,788,953 | 6,839,550 | 6,889,184 | 6,901,271 | 6,907,094 |
| 6,914,940 |
UPZZ01800DZ(0)

SANYO Canada Inc.
Printed in China
- SANYO
- INSTRUCTION MANUAL
- 5.8-GHZ CORDLESS TELEPHONE WITH CALLER ID & VISUAL CALL WAITING
- IMPORTANT
- INTRODUCTION
- NOTE
- FEATURES
- 5.8-GHZ TECHNOLOGY
- CONTENTS
- GETTING STARTED
- USING THE INTERFACE
- BASICS
- DIRECTORY
- CALLER ID FEATURES
- MULTI-HANDSET FEATURES
- ADDITIONAL INFORMATION
- THE SANYO
- CONTROLS AND FUNCTIONS
- (RIGHT CURSOR)
- FOR MULTI-HANDSET PACKS ONLY
- CHECKING THE PACKAGE CONTENTS
- FOR CLT-D5880
- FOR CLT-D5882
- FOR CLT-D5883
- SETTING UP THE PHONE
- DO THE FOLLOWING STEPS
- CHOOSE THE BEST LOCATION
- INSTALL THE RECHARGEABLE BATTERY PACK INTO THE HANDSET
- LOW BATTERY ALERT
- CLEANING THE BATTERY CHARGING CONTACTS
- TERMINOLOGY
- CONNECT THE BASE UNIT AND CHARGE THE HANDSET
- NOTES
- TIP
- CONNECTING THE CHARGER (FOR CLT-D5882/CLT-D5883)
- MOUNTING THE BASE UNIT ON A WALL
- STANDARD WALL PLATE MOUNTING
- DIRECT WALL MOUNTING
- DISPLAY AND ICONS
- ANIMATION DISPLAYS
- SOFT KEY FUNCTION
- MAIN MENU OPTIONS
- DEFAULT SETTINGS
- SETTING MENU OPTIONS
- WALKIE-TALKIE MODE
- USING WALKIE-TALKIE MODE (FOR CLT-D5882/CLT-D5883)
- ROOM/BABY MONITOR
- USING ROOM/BABY MONITOR
- HANDSET SETUP
- PROGRAMMING YOUR VOICE MAIL ACCESS NUMBER
- SELECTING A RINGER TONE
- DISTINCTIVE RINGER SETUP
- SETTING THE AUTOMATIC TALK (AUTO TALK)
- SETTING THE ANYKEY ANSWER
- SETTING THE TRUE BANNER
- SELECTING A LANGUAGE
- ADJUSTING THE LCD CONTRAST
- SETTING THE KEY TOUCH TONE
- SETTING THE ANIMATION SCREEN
- GLOBAL SETUP
- SETTING DAY AND TIME
- SETTING CIDCW (CALLER ID ON CALL WAITING)
- SETTING THE AREA CODE
- SETTING THE DIAL MODE
- SETTING VOICE MAIL TONE
- DE-REGISTER THE HANDSET
- MAKING AND RECEIVING CALLS
- CALL WAITING
- PLACING A CALL ON HOLD
- REDIALING A CALL
- DELETING A REDIAL RECORD
- STORING A REDIAL RECORD
- ADJUSTING THE RINGER, AND EARPIECE AND SPEAKER VOLUME
- RINGER VOLUME
- EARPIECE AND SPEAKER VOLUME
- TEMPORARILY MUTING THE RINGER
- MUTE MICROPHONE
- TONE DIALING SWITCH-OVER
- TRAVELING OUT OF RANGE
- PRIVACY MODE
- USING ONE TOUCH VOICE MAIL ACCESS
- DIALING YOUR VOICE MAIL SERVICE
- RESETTING THE NEW MESSAGE LED
- PHONEBOOK (STORING PHONE NUMBERS, NAMES, DISTINCTIVE RINGS AND SPEED DIAL)
- CHAIN DIALING
- STEPS FOR ENTERING NAMES AND SPECIAL CHARACTERS
- IF YOU MAKE A MISTAKE WHILE ENTERING A NAME
- VIEWING THE PHONEBOOK
- MAKING CALLS USING THE PHONEBOOK
- FROM STANDBY MODE
- FROM TALK MODE
- SPEED DIALING
- EDITING OR ERASING A STORED NAME, PHONE NUMBER, DISTINCTIVE RING AND SPEED DIAL
- EDITING THE STORED DATA
- DELETING THE STORED DATA
- COPYING PHONEBOOK LOCATIONS (CLT-D5882/CLT-D5883)
- CALLER ID AND CIDCW (CALLER ID ON CALL WAITING)
- VIEWING THE CALLER ID LIST
- 1 PRESS CID
- DELETING A CALLER ID MESSAGE
- DELETING INFORMATION FROM THE CALLER ID LIST
- DELETING ALL CALLER ID NAMES/NUMBERS
- USING THE CALLER ID MESSAGE LIST
- CALLING A PARTY FROM THE CALLER ID LIST
- STANDBY MODE
- TALK MODE
- STORING CALLER ID MESSAGES IN THE PHONEBOOK
- CALL WAITING DELUXE FEATURES
- USING THE WALKIE-TALKIE MODE
- WALKIE-TALKIE CALL
- 3-WAY CONFERENCING
- INTERCOM/CALL TRANSFER FEATURE
- INTERCOM
- CALL TRANSFER FEATURE
- CHANGING THE DIGITAL SECURITY CODE
- FIND HANDSET
- INSTALLING THE BELTCLIP
- TO ATTACH THE BELTCLIP
- TO REMOVE THE BELTCLIP
- OPTIONAL HEADSET
- NOTE ON POWER SOURCES
- BATTERY REPLACEMENT AND HANDLING
- RECYCLING NICKEL-METAL-HYDRIDE BATTERIES
- NICKEL-METAL-HYDRIDE BATTERIES MUST BE DISPOSED OF PROPERLY
- POWER FAILURE
- CAUTION
- TROUBLESHOOTING
- TECHNICAL INFORMATION
- IMPORTANT SAFETY INSTRUCTIONS
- SAVE THESE INSTRUCTIONS
- I.C. NOTICE
- TERMINAL EQUIPMENT
- NOTICE
- RADIO EQUIPMENT
- THE SANYO COMFORT WARRANTY
- WARRANTY APPLICATION
- SANYO CANADA INC.'S RESPONSIBILITY
- WHAT IS NOT COVERED
- ORIGINAL RETAIL PURCHASER'S RESPONSIBILITY
- WARRANTY BECOMES VOID
- LIMITATIONS
- STATUTORY WARRANTIES
- HOW TO OBTAIN WARRANTY SERVICE
- SOS HELP LINE
- NATIONWIDE CUSTOMER SUPPORT
- 1-800-263-2244
- STAY-AT-HOME CONVENIENCE
- HASSLE-FREE EXCHANGE
- GUARANTEED QUALITY
Marque : SANYO
Modèle : CLT-D5880
Catégorie : Téléphone sans fil