XRDV32 - Lecteur multimédia MPMAN - Notice d'utilisation et mode d'emploi gratuit
Retrouvez gratuitement la notice de l'appareil XRDV32 MPMAN au format PDF.

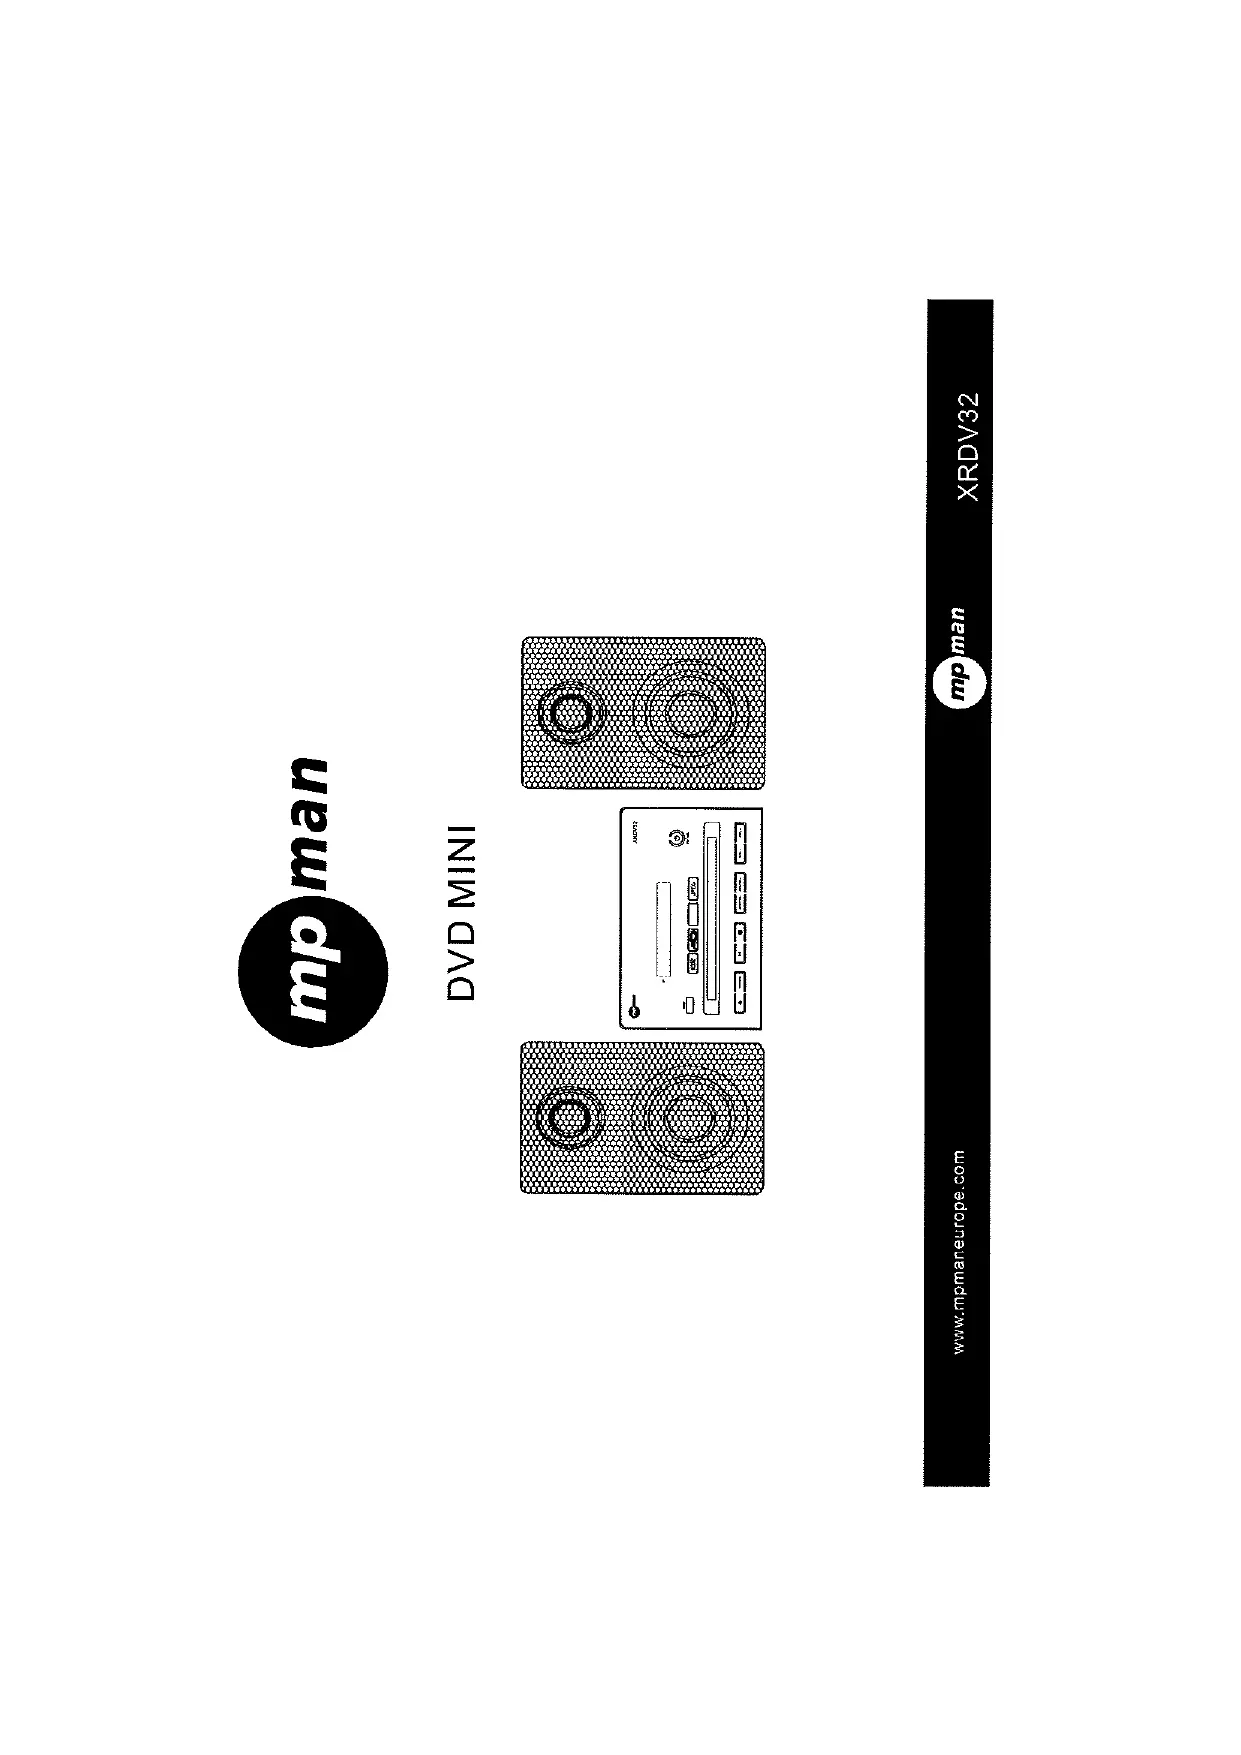
| Type d'appareil | Chaîne Hi-Fi DVD Mini |
| Lecture DVD | Oui |
| Compatibilité CD | Oui |
| Puissance de sortie | Non précisé |
| Nombre de haut-parleurs | 2 |
| Connectivité | Non précisé |
| Radio FM | Non précisé |
| Fonction USB | Non précisé |
| Fonction Bluetooth | Non précisé |
| Alimentation | Secteur |
| Dimensions | Compacte |
| Poids | Non précisé |
| Affichage | Non précisé |
| Télécommande | Non précisé |
| Formats audio supportés | Non précisé |
| Formats vidéo supportés | Non précisé |
FOIRE AUX QUESTIONS - XRDV32 MPMAN
Questions des utilisateurs sur XRDV32 MPMAN
0 question sur cet appareil. Repondez a celles que vous connaissez ou posez la votre.
Poser une nouvelle question sur cet appareil
Téléchargez la notice de votre Lecteur multimédia au format PDF gratuitement ! Retrouvez votre notice XRDV32 - MPMAN et reprennez votre appareil électronique en main. Sur cette page sont publiés tous les documents nécessaires à l'utilisation de votre appareil XRDV32 de la marque MPMAN.
MODE D'EMPLOI XRDV32 MPMAN

text_image
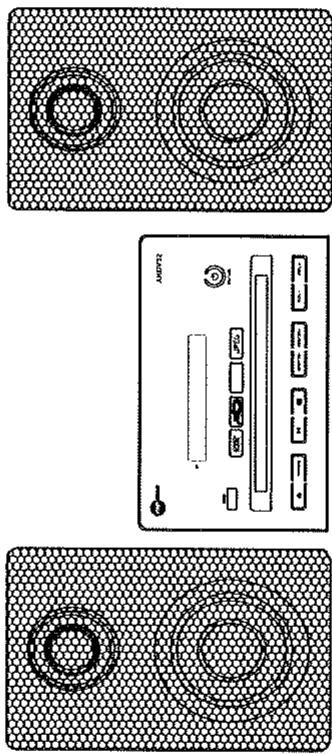
mp manDVD MINI
natural_image
Illustration of a two-tiered audio amplifier with two speakers and a control panel (no text or symbols visible)TABLE OF CONTENTS
| Features | 3 |
| For your attention | 3 |
| Safety instructions | 4 |
| Accessories | 4 |
| Panel | 5 |
| Remote Control | 6 |
| Insert Batteries | 7 |
| Connection | 8 |
| System Setup | 10 |
| Play | 12 |
| FM SETUP | 16 |
| CD/DVD disc Maintenance | 17 |
| Trouble shooting | 18 |
| Specification | 19 |
| End of Life Disposal | 20 |
FEATURES
Thank you for purchasing our product. Please go through this manual carefully before connection and operation. Please keep this manual for future reference. DVD MINI is a new generation home player which can produce high quality video and audio. Its performance is much better than that of any previous home video playing equipment. As the best signal source of home theatre system, It will give you the uppermost enjoyment!
-Dolby AC-3, MPEG4, PCM, MPEG.
-Hi-fi, 96kHz/24bit audio digital processor.
-Software intelligent upgrade
-High-resolution component video output, support future video equipment
-Coaxial digital audio output
-Super compatible with DVD/DVD+RW/DVD-RW/DVD+R/DVD-R/HDCD/CD/CD-R/MP3. - Decoding on single-chip technology, high reliability and stability, and super error correction.
-2 x 15W Speakers
-50 FM preset station
-Support USB.
FOR YOUR ATTENTION
IMPORTANT NOTES:
Please read through the manual carefully before connection and operation.
Do not open the cover or touch any internal components.
Turn off the power when the unit is not being used. (Unplug the power cord if the unit is not used for a long time). Don't expose this unit to direct sunlight. Keep away from any heating sources.
Don't expose this unit to rain or moisture.
Place the unit on a horizontal level. Keep the unit ventilated. Don't block the heat hole. Overheating may cause malfunction. Clean the cabinet with soft cloth. Detergent or alcohol is not recommended as it may damage the unit.
This book is only a guide for user's operation.
The apparatus shall not be exposed to dripping or splashing and that no object filled with liquids, such as vases, shall be placed on the apparatus.
Safety instructions
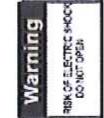
human body.
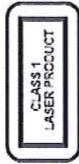
Laser
This Digital Video Disc Player employs a Laser System of the class 1.
- Make sure the device is shut down prior to opening player lid.
2.Do not open the appliance. Do not attempt to dismantle the appliance.
- In order to avoid any danger: Have service work only carried out by the manufacturer or an authorized service workshop.
-
Visible laser radiation when open and interlocks defeated.
-
Use of controls or adjustments or performance of procedures other than those specified herein may result in hazardous radiation exposure.
Accessories
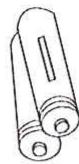
Battery
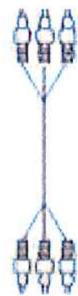
Audio/Video cable
Remote controller
User manual
www.mpmaneurope.com
Panel
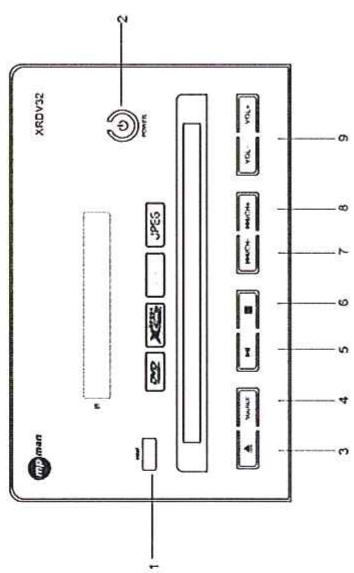
FRONT PANEL
text_image
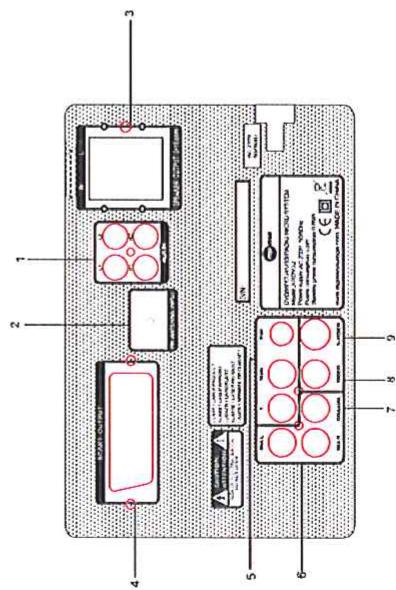
mp.man XRDV32 1 2 n POWER JPES 3 4 5 6 7 8 9REAR PANEL
text_image
Diagram of a device control panel with labeled components and warning labels in Chinese1 USB SOCKET
2 POWER BUTTON
3 OPEN BUTTON
4 SOURCE BUTTON
5 PLAY/PAUSE BUTTON
6 STOP BUTTON
7 PREVIOUS BUTTON
8 NEXT BUTTON
9 VOLUME BUTTON
1 AUDIO input
2 FM antenna input
3 Speaker output
4 SCART output
5 Component video output
6 MIX L/RAudio output
7 Coaxial digital audio output
8 Composite video output
9 S-video output
text_image
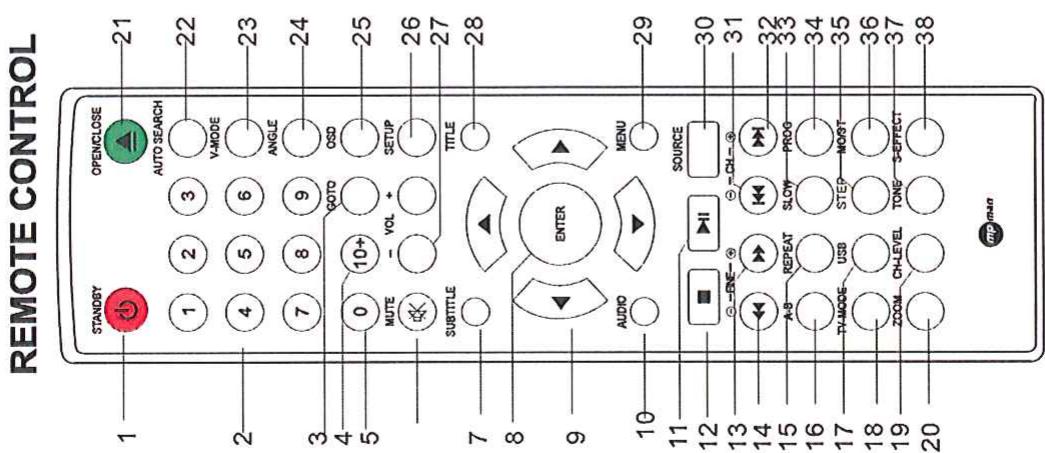
REMOTE CONTROL 1 STANDBY OPEN/CLOSE 21 AUTO SEARCH 22 V-MODE 23 ANGLE 24 GOTO QSD 25 0 MUTE VOL + SETUP 26 TITLE 27 SUBTITLE TITLE 28 ENTER AUDIO MENU 29 SOURCE 30 - ENE - CH- 31 32 REPEAT SLOW PROG 33 A-B TV-MODE USB STEP MOIST 34 USB MOIST 35 ZOOM CH-LEVEL TONE S-EFFECT 36 37 38 20 mp man- ANGLE button
- OSD button
- SETUP button
- VOL button
-
TITLE button
-
MENU button
- SOURCE button
- PREVIOUS button
- NEXT button
- SLOW button
- PROGRAM button
- STEP button
- MO/ST button
- TONE button
-
S-EFFECT button
-
STANDBY button
- Numbered buttons (1-9)
- GOTO button
- Double-digit button
- MUTE button
- Subtitle button
- ENTER button
- Cursor buttons (UP/DOWN/LEFT/RIGHT)
- AUDIO button
- PLAY/PAUSE button
- STOP button
- F.FWD button
- REW button
- REPEAT button
- A-B button
- USB button
- TV-MODE button
- CH-LEVEL button
- ZOOM button
- OPEN/CLOSE button
- AUTO SEARCH button
- Video Mode button
Insert Batteries
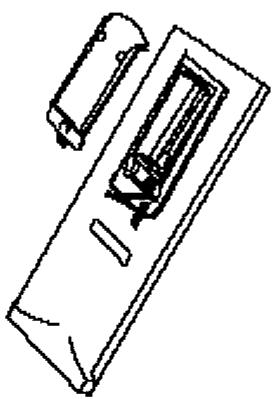
☐ Insert the batteries (not supplied) 2 x AAA type into the receptacle and insert the receptacle into the remote. ☐ For the best results, aim the remote towards at the player, screwing window. Stay within 8 meters and angles of 30 degrees or less.
☐ Under normal use the battery will last for one year.
☐ Remove battery during storage or when you are not using the DVD player for a long time.
natural_image
Line drawing of a rectangular device with internal components and a separate car (no text or symbols)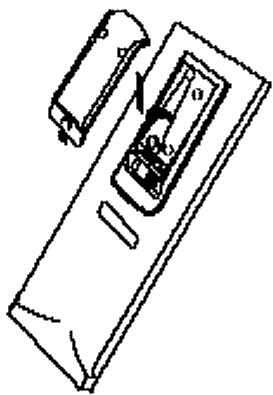
natural_image
Technical line drawing of a device casing with internal components and a separate housing (no text or symbols)Notes:
- Weak batteries can leak and several damage by the remote control.
2.Leaking out battery acid can damage your health.
- Remove the battery from the battery compartment as soon as it is exhausted or if the remote control is not going to be used for a longer
period of time.
4.Wipe up leaked out battery acid with a cloth.
5.In case of skin contact immediately wash the affected area.
- Seek medical advice if battery acid has been swallowed. In case of contact with your eyes wash out the eyes and seek medical advice.
CONNECTION
Video system connection
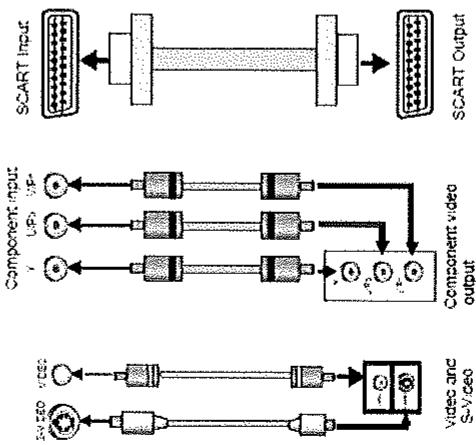
The following available video output for this unit .
Composite Video
Use the AV cable (yellow terminal) to connect composite video output of this unit to the TV/monitor video input
S-Video Use the S-video cable to connect the s-video output of this unit to the TV/monitor S-video input
Component Video (YUV)
Use 3 -core AV cable to connect the component output terminals of this unit to the corresponding TV/monitor input SCART
Use a 21_pin SCART cable to connect the SCART output to the TV/monitor SCART input terminal.
Notes:
Which connection depends on the TV/monitor input terminal. Don't use the all connections at one time, otherwise the picture will be affected. Only the physical connection conforms to the video setting can produce the normal picture
flowchart
graph TD
    A["Video and S-Video"] --> B["Component input"]
    B --> C["SCART Input"]
    C --> D["SCART Output"]
    style A fill:#f9f,stroke:#333
    style B fill:#ccf,stroke:#333
    style C fill:#cfc,stroke:#333
    style D fill:#fcc,stroke:#333
(reference to the Video Setup in System Setup).
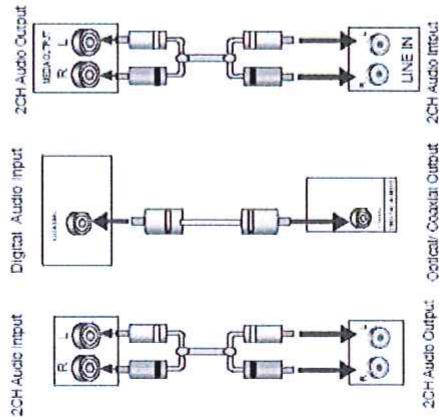
Audio connection system Two types of audio output systems: analog audio and digital audio. Analog audio includes 2-channel stereo output. Digital audio includes coaxial output.
Stereo Audio Output Use a pair of RCA cable (red for right /white for left) to connect the stereo audio output of this unit to the TV or a stereo input of power amplifier.
Coaxial Digital Audio Use the special coaxial cable to connect the coaxial output of this unit to the coaxial input of power amplifier.
LINE in
There are 2 line input, This unit has extra group of audio input terminals. You can input the analog stereo audio signals from extra devices as DVD, VCD, CD, VCR player, etc. Use the audio cable (red for right, white for left) to connect the stereo audio output terminals of an extra device to the stereo input terminals (LINE IN) of this unit. Its corresponding signal source is LINE, which can be available by pressing SOURCE button.
flowchart
graph TD
    A["2CH Audio Input"] --> B["2CH Audio Output"]
    C["Digital Audio Input"] --> D["Optical/Coaxial Output"]
    E["2CH Audio Output"] --> F["2CH Audio Input"]
    G["2CH Audio Output"] --> H["2CH Audio Output"]
    I["2CH Audio Output"] --> J["2CH Audio Output"]
    K["2CH Audio Output"] --> L["2CH Audio Output"]
    M["2CH Audio Output"] --> N["2CH Audio Output"]
    O["2CH Audio Output"] --> P["2CH Audio Output"]
    Q["2CH Audio Output"] --> R["2CH Audio Output"]
    S["2CH Audio Output"] --> T["2CH Audio Output"]
    U["2CH Audio Output"] --> V["2CH Audio Output"]
    W["2CH Audio Output"] --> X["2CH Audio Output"]
    Y["2CH Audio Output"] --> Z["2CH Audio Output"]
    AA["2CH Audio Output"] --> AB["2CH Audio Output"]
    AC["2CH Audio Output"] --> AD["2CH Audio Output"]
    AE["2CH Audio Output"] --> AF["2CH Audio Output"]
    AG["2CH Audio Output"] --> AH["2CH Audio Output"]
    AI["2CH Audio Output"] --> AJ["2CH Audio Output"]
    AK["2CH Audio Output"] --> AL["2CH Audio Output"]
    AM["2CH Audio Output"] --> AN["2CH Audio Output"]
    AO["2CH Audio Output"] --> AP["2CH Audio Output"]
    AQ["2CH Audio Output"] --> AR["2CH Audio Output"]
    AS["2CH Audio Output"] --> AT["2CH Audio Output"]
    AU["2CH Audio Output"] --> AV["2CH Audio Output"]
    AW["2CH Audio Output"] --> AX["2CH Audio Output"]
    AY["2CH Audio Input"] --> AZ["2CH Audio Output"]
    BA["2CH Audio Input"] --> BB["2CH Audio Output"]
    BC["2CH Audio Input"] --> BD["2CH Audio Output"]
    BE["2CH Audio Input"] --> BF["2CH Audio Output"]
    BG["2CH Audio Input"] --> BH["2CH Audio Output"]
    BI["2CH Audio Input"] --> BJ["2CH Audio Output"]
    BK["2CH Audio Input"] --> BL["2CH Audio Output"]
    BM["2CH Audio Input"] --> BN["2CH Audio Output"]
    BO["2CH Audio Input"] --> BP["2CH Audio Output"]
    BQ["2CH Audio Input"] --> BR["2CH Audio Output"]
    BS["2CH Audio Input"] --> BT["2CH Audio Output"]
    BU["2CH Audio Input"] --> BV["2CH Audio Output"]
    BW["2CH Audio Input"] --> BX["2CH Audio Output"]
    BY["2CH Audio Input"] --> BZ["2CH Audio Output"]
    CA["2CH Audio Input"] --> CB["2CH Audio Output"]
    CC["2CH Audio Input"] --> CD["2CH Audio Output"]
    CE["2CH Audio Input"] --> CF["2CH Audio Output"]
    CG["2CH Audio Input"] --> CH["2CH Audio Output"]
    CI["2CH Audio Input"] --> CJ["2CH Audio Output"]
    CK["2CH Audio Input"] --> CL["2CH Audio Output"]
Notes: The physical connection should accord to the audio output setup of this unit. Please refer to Audio Setup in System Setup.
SYSTEM SETUP
MENU OPERATION:
Press the SETUP key for the screen to show the setup page. In setup mode, press SETUP key again to quit the setup page. Press direction key to the desired item, press ENTER to confirm. (1) Some setup items are concerning the present modes. The items in gray can't be set up. (2) The setup is memorized and will be kept after the power has been turned off.
GENERAL SETUP PAGE
TV Display
Normal/PS: When the unit connects to the 4:3 TV set, the
wide-screen image shows on the full screen, but some part is cut off. Normal/LB: When the unit connects to the 4:3 TV set, the
wide-screen image shows and black bars appear on the top and
bottom of screen.
Wide: Use this item when the unit is connected with the wide-screen TV set.
ANGLE MARK
It will show the ANGLE mark when playing DVD disc with multi-angle
view if selection is ON (if supported by DVD).
OSD LANG
Select on-screen display language.
CAPTIONS
This function doesn't work when the disc is without captions. If the
caption is OFF, press SUBTITLE key on the remote controller to turn
the captions on. The default setup is CAPTION ON.
SCREEN SAVER If the SCREEN SAVER is set ON and the unit is switched or without
If the SCREEN SAVER is set ON and the unit is switched off without a disc playing for several minutes, a moving picture appears on the
a also playing for several minutes, a moving picture appears on the screen and the unit will go to standby mode after 20 minutes. You can
press the STANDBY key on the remote control to activate.
HDCD
You can select the digital filter at 44.1Khz or 88.2Khz and off.
LAST MEMORY
When this function is on, the unit can memorize the time elapsed from
the last time you played the disc. Then at the next playing, it will resume playing from the memorized time.
AUDIO SETUP PAGE
Speaker Setup DOWNMIX
LT/RT: The audio out is Left and Right channel formatting even if the original sound is 5.1CH format. STEREO : The audio out format is stereo even if the original sound is 5.1CH format.
SPDIF SETUP PAGE SPDIF OUTPUT
SPDIF OFF: no digital signal out( optical or coaxial output off ), only analog audio output . SPDIF/RAW: If this item is selected, setup SPDIF/RAW according to your preference. Spdif /PCM: In SPDIF/PCM mode, setup PCM digital out according to your preference.
DOLBY DIGITAL SETUP DUAL MONO
Stereo:set audio output to the stereo output.
L-mono:set audio output to the mono-left channel.
R-mono:set audio output to the mono-right channel.
Mix-mono:set audio output to the Mix mono channel.
TOMATO
DYNAMIC Select this to reduce the overall volume and still keep defined audio sound.
VIDEO SETUP PAGE
S-video:set video output to the S-Video.
YUV: set video output in analog component video format when connecting to Y/U/V terminals. RGB: set video output in Red/Green/Blue format when connecting to SCART terminals.
The following two items will not be available for some units: TV MODE
Set video output for Progressive and Interlace, It only be valid in component mode for YUV and RGB. Set YUV for Y, Pb, Pr progressive output when component is YUV set P_RGB progressive output in YUV when component is RGB. SHARPNESS: There are three optional output modes: HIGH\MEDIUM\LOW. BRIGHTNESS: Use the [<] or [>] arrow button to move the scroll and adjust the Brightness. CONTRAST: Use the [<] or [>] arrow button to move the scroll and adjust the contrast.
Notes::
If the video setting differs with the physical connection, the TV set may not have picture. In this case, you can RESET the machine, then keep pressing key [V-MODE] until the picture returns again.
PREFERENCE PAGE
TV TYPE
This unit is suitable for multiple kinds of TV systems. You can select one of the PAL, NTSC or AUTO. NTSC: set the output at NTSC system. PAL: set the output at PAL system.
AUTO: Automatically Set Video format output according to disc content format.
AUDIO, SUBTITLE, DISC MENU LANGUAGE SETUP These are the initial settings by your preference. If a set
PARENTAL default value works. These
The control level is for parents to control the content and protect children from violence and erotism. The level of the disc is higher than the setting level and can not be played.
DEFAULT
Reset to the initial factory setups
PASSWORD PAGE
Change the password. The initial factory password is 136900. You can set your own password. If you forget your own password, you can use 136900 as general password.
PLAY
| Symbol | Text | Symbol | Text | Symbol | Text |
| ▲ | OPEN/CLOSE | ▶|| | PLAY/PAUSE | ※ | MUTE |
| ■ | STOP | ◀◀ | FAST BACKWARD | ▶▶ | FAST FORWARD |
| ∅ | STANDBY | ◀◀ | PREVIOUS | ▶▶| | NEXT |
Basic operation
Open/close
Press OPEN/CLOSE button when power on, the disc tray is pushed out. Put the disc on the tray with the title faced up. Press
OPEN/CLOSE again to close the disc tray and the unit starts playing automatically. (Without auto-play function for mp3 and JPEG discs) Standby
When playing, press STANDBY button, the machine will be power-off and go to standby state; Press STANDBY again, the machine will be power-on and start playing. Warning: The power is not fully cut off at the standby state. If the machine will not be used for a long time, turn off the power by pressing the POWER button on the front panel
STEP
When playing DVD.VCD.disc. press STEP once, the picture is changed to next frame, press PLAY to resume normal play.
TITLE
2012
MENU
When playing DVD disc, press MENU once to return to sub-menu. Press MENU again to return to the main menu. Press V-MODE button to switch the video output mode(YUV-RGB-Video, ect.)
SOURCE
You can switch among various signal sources by pressing SOURCE button.
At DVD mode press the SETUP button, the on-screen setting menu will display on the TV screen.
TV-MODE
Press TV-MODE key to switch to the interface or progressive scan video output.
When playing DVD with more than one audio stream, press AUDIO to select what you desired.
SUBTITLE
[Non-Text]
ANGLE
When playing the disc with multi-angle, it's convenient to change the view angle.
1 2 3
4 5 6 7
8 9 0/10 10+
and then another digit key to select the track which number is 10 or more than 10. You can press digit keys at PROGRAM and MENU selection.
STOP
Who
play.
▶||
When playing the disc, press PLAY/PAUSE once to pause, press PLAY/PAUSE again to return to normal play.
TONE
[Non-Text]
CH-LEVEL
[Non-Text]
Press this button to select a channel then press VOL + or - buttons to adjust its level.
AUTO SEARCH
In tuner mode, press this buttons to scan all the available channels automatically,
◀ ▶
Press this button for quick forward search or quick rewind search. In FM mode press F.FWD/REW buttons to fine tune the frequency of the current station.
SLOW
When playing SVCD, VCD, DVD discs, press SLOW to select slow speed playing.(option)
◀◀▶▶
In FM mode CH PREV/NEXT buttons for manual adjustment of stations with strong signal.
When playing DVD disc, press PREV to the previous chapter.
When playing SVCD, VCD, CD disc, press PREV to the p
When playing DVD disc, press NEXT to the next chapter. When playing SVCD, CD disc, press NEXT to the next track.
PROGRAM
If the disc is with 2 or more tracks, chapters or titles, set up the playing order as your preference. Press this button to enter program menu. Press digit key to input the number of the track, title or chapter. If the programmed tracks are over ten, press NEXT to go on programming. (Maximum 20 programmable items)
use the up/down/left/right key to move the cursor to the START. Press ENTER to start PROGRAM play. When playing MP3 disc, NO program function! Press PROGRAM button once to enter DIRECTORY- PLAY mode, you can select program to play in the current directory; Press PROGRAM again to enter FILE-LIST mode, you can select program to play in the file list of whole disc.
MO/ST
USB
In FM mode, Press MO/ST buttons to switch to the STEREO or MONO audio.
Insert the USB or memory card device into the slot on the front panel. Press USB button to select the media, and press the direction button to select, press ENTER button to confirm
S. EFFECT
Press S.EFFECT button to change the surround sound (DSP) effect.
REPEAT
Press REPEAT button to repeat a title, chapter, track or the whole disc. When playing DVD disc, press REPEAT button continually, the TV screen shows chapter repeat, title repeat, all repeat, repeat cancel in turn When playing VCD, CD disc, the turn is track repeat, all repeat, repeat cancel. When playing MP3 disc, the turn is single repeat, directory repeat, repeat cancel.
A-B
When playing DVD, VCD, CD disc, press A-B button to repeat a certain contents.
Press A-B key on the start point (A) and the ending point (B) to select the repeat part. Press A-B the third time, cancel the A-B repeat and return to normal play.
GOTO
Press GOTO button to select title time, chapter time, track time to play. You can use digit keys input the goto time.
ZOOM
When playing DVD, VCD disc, press ZOOM to zoom in or zoom out the picture. In zoom in mode, press up/down/left/right to move the picture for viewing. The picture can not be moved in zoom out mode.
VOLUME
Press VOLUME + to adjust volume up Press VOLUME - to adjust volume down
Mute
Press MUTE button, no sound will give out and the mute symbol will display on the TV screen. Press MUTE again, MUTE OFF will display and the sound will resume.
OS D
Press the OSD button, the relative information of the disc will display on the TV screen.
PLAY PICTURE CD DISC Press up/down to select the desired picture.
FM SETUP
Press SOURCE butto
In FM mode press Al station automatically
When playing an MP3 disc, There is a menu screen on TV, press the or button to shift the cursor to select the track or folder, and press the [ENTER] button to play the selected track or folder (it need to enter the sub-folder to select the track and press the [ENTER] button to play for some MP3 discs).
Also use the digit button to select the track (for example: press [4] [5] two digit buttons and then, press the [ENTER] button to play 45th track, it need to enter the folder and select the current folder stack to play MP3).
There are two play mode for MP3 disc: folder and file play, the default mode is the folder play: press [PROG] button to select the mode. In the files play mode. The screen display the total track number and the current playing track, and use the digit button to select the track, or use the [] [] button to shift to the track and press the [ENTER] button to play the track.
USB:
Insert a USB drive in the USB port, then press USB button to play the readable files in it. Press USB button again to switch to the DVD mode
Note:do not support 2.5"HDD.
CD/DVD disc Maintenance
Handling discs
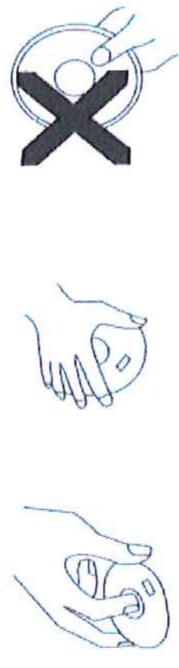
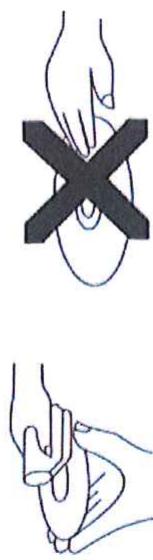
- When holding discs, please hold it by its rim.
- When holding discs, be sure the label side should be upwards
• Do not grasp the non-label side of the disc.
natural_image
Three line drawings showing hands performing different actions: grip, hand gesture, and cross symbol (no text or labels)Disc storage
- Never store disc in the place with high temperature, strong light or humidity. - Put the disc back to the case after playback.
Cleaning
- Wipe the discs from time to time using a soft cloth. Always wipe from the center towards the edge. - Do not use daily used detergent to clean the disc. - Protect discs against any fingerprint, do not stick or white anything on the surface of the disc.
natural_image
Illustration showing two hand positions: one with a curved object and the other with a black X symbol (no text or labels)TROUBLE SHOOTING
Before resorting to maintenance service, please kindly check by yourself with the following chart.
| Symptom | Cause(s) | Solution |
| No power | The power cord isn't connected | Connect the power cord properly |
| Fuse melting | Replace a same specification fuse! | |
| No picture | TV video setup isn't correct | Select the suitable setup |
| Player video setup isn't correct | Select the suitable setup | |
| Video cable isn't connected well | Connect the cable properly | |
| No sound | Audio cable isn't connected well | Connect the cable properly |
| Source select incorrect | Switch to the propersource | |
| Audio setup isn't correct | Select the suitable audio setup | |
| Distorted picture | Dirty disc | Clean the disc |
| In fast forward or fast rewind mode | Sometimes, the tiny distortion appears. It's normal | |
| Luminance unsteady or picture with noise | Anti-copy circuit influence | Connect the DVD unit to TV directly |
| Unable to play | Without disc | Load the disc |
| Disc is bad | Clean or replace the disc | |
| Disc is put upsidedown | Load the disc properly | |
| Dirty disc | Clean the disc | |
| There are menu on TV screen | Use SETUP to turn off menu | |
| Parental control is working | Set up parental offer change the setup | |
| Key malfunction | Power wave or other static interference. | Turn on/off the power and try again. |
| Remote control Doesn't work | Doesn't work | Point the remote control at the sensor |
| Remote control is too far from DVD unit | Operate the remote control within 7m | |
| Batteries are weak. | Replace the batteries | |
| Can't locate any channels in tuner mode | Antenna is not connected | Connect antenna |
| Source mode is not in tuner mode | Switch to tuner mode |
Specification
| Power supply | AC 230V/50/60Hz |
| Power consumption | Working mode <40W |
| Standby mode 0.85W | |
| TV system | PAL/NTSC |
| Laser wave length | 650nm, 780nm |
| Audio frequency range | DVD: 4Hz~22kHz (48kHz PCM)4Hz~44kHz (96kHz PCM)CD: 4Hz~20kHz |
| S/N ratio | >=80dB |
| Audio dynamic range | >=90dB |
| Output power | 2 x 15 Watts |
| Operating conditions | Temperature :0~40°C, operation flat, horizontal |
FM Specification
| Frequency range | 87.00M~108.00MHz |
| STEP Frequency | 50k Hz |
| ANT Input Impedance | 75Ω Unbalanced |
End of Life Disposal
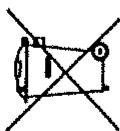

Warning! This logo set on the product means that the recycling of this apparatus comes within the framework of the Directive 2002/96/CE
of January 27, 2003 concerning the Waste of Electrical and Electronic Equipment (WEEE). This symbol means that used
electrical and electronic products should not be mixed with general household waste. There is a separate collection system for these products.
If you want to dispose of this equipment, please do not use the ordinary dust bin!
-The presence of dangerous substances in the electrical and electronic equipments can have potential consequences on the environment and human health in the cycle of reprocessing this product.
-Therefore, at the end of its lifetime, this product shall not be disposed with other non-recycled waste. Used electrical and electronic equipment must be treated separately and in accordance with legislation that requires proper treatment, recovery and recycling of used electrical and electronic equipment.
-Local authorities and resellers have set special procedures for the purpose of collecting and recycling this product (please contact your local authority for further details). You have the obligation to use the selective waste collection systems put in place by your local authority.
-If your used electrical or electronic equipment has batteries or accumulators, please dispose of these separately beforehand according to local requirements.
- By disposing.of this product correctly you will help ensure that the waste undergoes the necessary treatment, recovery and recycling and thus prevent potential negative effects on the environment and human health which could otherwise arise due to inappropriate waste handling.