
RC-196 - Télécommande DENON - Notice d'utilisation et mode d'emploi gratuit
Retrouvez gratuitement la notice de l'appareil RC-196 DENON au format PDF.

| Type de produit | Télécommande universelle |
| Marque | DENON |
| Modèle | RC-196 |
| Alimentation | 2 piles R6P/AA (1,5 V) |
| Portée | Environ 7 mètres (20 pieds) |
| Fonctions principales | Contrôle des composants audio DENON, apprentissage des codes, mémorisation des codes pré-réglés |
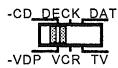
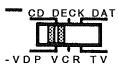
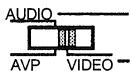
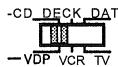
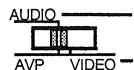
| Commutateur coulissant | Positions AUDIO/VIDEO avec sous-positions CD, DECK, DAT, VDP, VCR, TV |
| Capacité d'apprentissage | Jusqu'à 26 codes |
| Mémoire de codes | Codes pré-réglés pour de nombreuses marques (voir tableau) |
| Indicateurs lumineux | LED LEARNED/TX et START |
| Nombre de touches | Environ 30 touches |
| Entretien | Nettoyer avec un chiffon doux et sec. Ne pas utiliser de produits abrasifs. |
| Sécurité | Retirer les piles en cas de non-utilisation prolongée. Respecter la polarité. Ne pas exposer à l'humidité. |
| Compatibilité | Composants audio DENON et autres marques via apprentissage |
| Dimensions (estimées) | 200 x 60 x 25 mm |
| Poids (estimé) | 120 g |
FOIRE AUX QUESTIONS - RC-196 DENON
Questions des utilisateurs sur RC-196 DENON
0 question sur cet appareil. Repondez a celles que vous connaissez ou posez la votre.
Poser une nouvelle question sur cet appareil
Téléchargez la notice de votre Télécommande au format PDF gratuitement ! Retrouvez votre notice RC-196 - DENON et reprennez votre appareil électronique en main. Sur cette page sont publiés tous les documents nécessaires à l'utilisation de votre appareil RC-196 de la marque DENON.
MODE D'EMPLOI RC-196 DENON

REMOTE CONTROL UNIT
Following the procedure outlined below, insert the batteries before using the remote control unit.
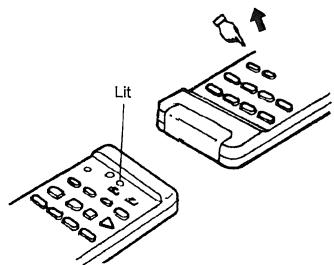
Range of operation of the remote control unit

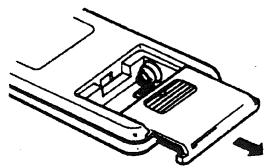
Inserting the batteries
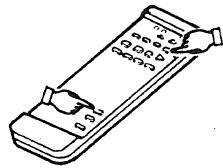
- Open the bottom cover of the remote control unit and remove the battery cover.
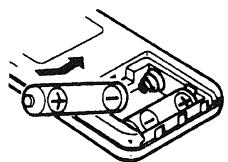
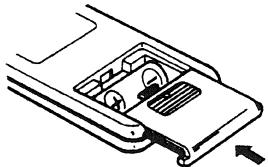
- Insert the two R6P/AA batteries, matching the and marks on the batteries with those in the case. Close the bottom cover until it clicks shut.
Point the remote control unit at the remote control sensor as shown on the diagram at the left.
NOTES:
- The remote control unit can be used from a straight distance of approximately 7 meters/20 feet, but this distance will shorten or operation will become difficult if there are obstacles between the remote control unit and the remote control sensor, if the remote control sensor is exposed to direct sunlight or other strong light, or if operated from an angle.
- Neon signs or other devices emitting pulse-type noise nearby may result in malfunction, so keep the set as far away from such devices as possible
NOTES
- Use only AA, R6P, UM-3 batteries for replacement.
- Be sure the polarities are correct. (See the illustration inside the battery compartment.)
- Remove the batteries if the remote control transmitter will not be used for an extended period of time.
- If batteries leak, dispose of them immediately. Avoid touching the leaked material or letting it come in contact with clothing, etc. Clean the battery compartment thoroughly before installing new batteries.
- Have replacement batteries on hand so that the old batteries can be replaced as quickly as possible when the time comes.
- The codes that have been learned may be lost if removed batteries are not replaced within about 5 minutes.
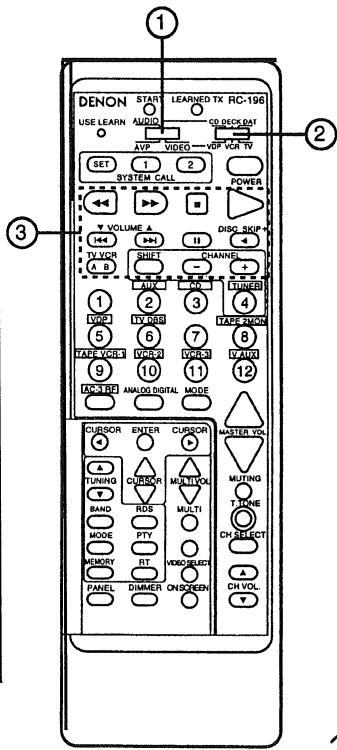
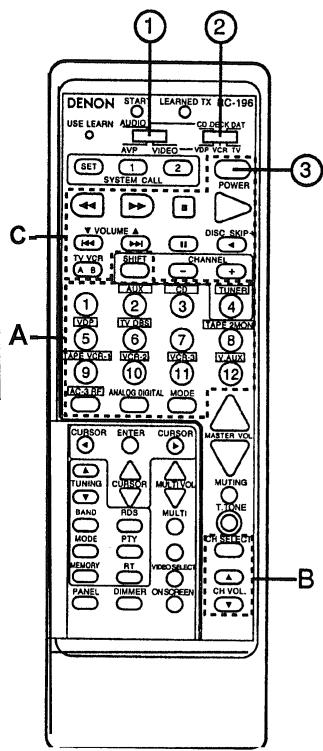
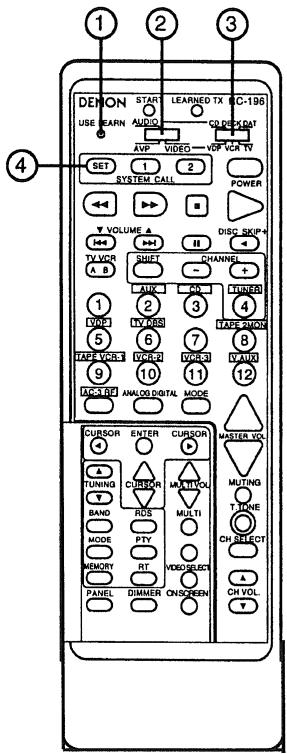
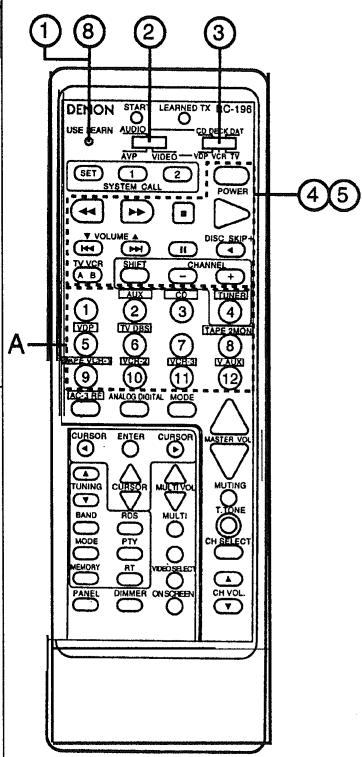
7-1 System code buttons
DENON remote-controllable audio components can be controlled using this unit's remote control unit. Note that some components, however, cannot be operated with this remote control unit
- Set to slide switch to "AUDIO" ("AVP").
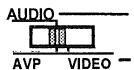
- Set the slide switch to the position for the component to be operated (CD, DECK or DAT).
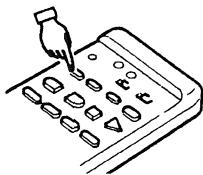
- Use the buttons shown below to operate the component. For details, refer to the respective component's manual.
a. For CD players and DATs
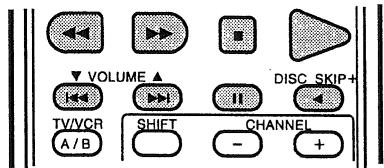
b. For tape decks
7-2 Preset memory
This remote control unit can be used to operate components of other manufacturers without using the learning function by registering the manufacturer of the component as shown on the diagrams below.
- Set the slide switch to "VIDEO".
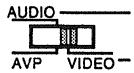
- Set the slide switch to the component to be registered (VDP, VCR or TV).
Ex.: To preset a VDP in the preset memory
Keep the POWER button pressed in when performing steps 3 and 4.
- Holding in the POWER button, press the button for the corresponding manufacturer in block A.
(Refer to Table 1.)
The LEARNED/TX LED flashes.
- Next, while holding in the POWER button, press the button for the code in block B. (Refer to Table 1.) The operation is completed when the LEARNED/TX LED lights.
- To continue registering other components, repeat steps 2 to 4.
Operation after components are registered
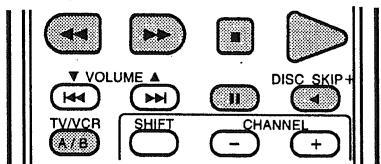
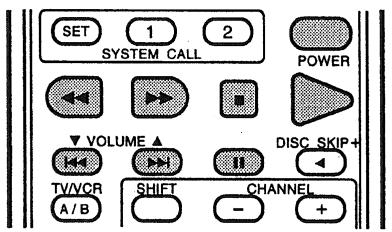
After components are registered, they can be operated using the buttons in block C shown below. For details, refer to the respective component's manual. Before operating the component, set slide switch ② to the position for that component.
- VDP
- VCR
- TV
"VDP"
Table 1: Combinations of Personal System Codes for Different Manufacturers
| A\B | CH SELECT | CH VOL. ▲ | CH VOL. ▼ |
| 1 | DENON A | DENON B | DENON C |
| 2 (AUX) | — | — | — |
| 3 (CD) | MITSUBISHI | — | — |
| 4 (TUNER) | PANASONIC | — | — |
| 5 (VDP) | — | — | — |
| 6 (TV/DBS) | SONY A | SONY B | SONY C |
| 7 | PIONEER | — | — |
| 8 (TAPE-2MON) | — | — | — |
| 9 (TAPE/VCR-I) | SANYO | — | — |
| 10 (VCR-2) | SHARP | — | — |
| 11 (VCR-3) | — | — | — |
| 12 (V.AUX) | PHILIPS | — | — |
| AC-3RF | RCA | — | — |
| ANALOG/DIGITAL | — | — | — |
| MODE | MAGNAVOX | — | — |
"VCR"
| A\B | CH SELECT | CH VOL. ▲ | CH VOL. ▼ |
| 1 | - | - | - |
| 2 (AUX) | HITACHI A | HITACHI B | HITACHI C |
| 3 (CD) | MITSUBISHI A | MITSUBISHI B | MITSUBISHI C |
| 4 (TUNER) | PANASONIC A | PANASONIC B | - |
| 5 (VDP) | JVC (VICTOR) A | JVC (VICTOR) B | - |
| 6 (TV/DBS) | SONY A | SONY B | SONY C |
| 7 | PIONEER | - | - |
| 8 (TAPE-2MON) | TOSHIBA A | TOSHIBA B | - |
| 9 (TAPE/VCR-I) | SANYO A | SANYO B | - |
| 10 (VCR-2) | SHARP A | SHARP B | - |
| 11 (VCR-3) | NEC A | NEC B | NEC C |
| 12 (V.AUX) | PHILIPS A | PHILIPS B | PHILIPS C |
| AC-3RF | RCA A | RCA B | - |
| ANALOG/DIGITAL | GENERAL ELECTRIC A | GENERAL ELECTRIC B | - |
| MODE | MAGNAVOX A | MAGNAVOX B | MAGNAVOX C |
"TV"
| A\B | CH SELECT | CH VOL. ▲ | CH VOL. ▼ | ||
| 1 | DENON | — | — | ||
| 2 (AUX) | HITACHI A | HITACHI B | — | ||
| 3 (CD) | MITSUBISHI A | MITSUBISHI B | MITSUBISHI C | ||
| 4 (TUNER) | PANASONIC | — | — | ||
| 5 (VDP) | JVC (VICTOR) | — | — | ||
| 6 (TV/DBS) | SONY | — | — | ||
| 7 | PIONEER | — | |||
| 8 (TAPE-2MON) | TOSHIBA | — | |||
| 9 (TAPE/VCR-I) | SANYO A | SANYO B | — | ||
| 10 (VCR-2) | SHARP | — | — | ||
| 11 (VCR-3) | NEC A | NEC B | NEC C | ||
| 12 (V.AUX) | PHILIPS A | PHILIPS B | PHILIPS C | ||
| AC-3RF | RCA A | RCA B | — | ||
| ANALOG/DIGITAL | GENERAL ELECTRIC A | GENERAL ELECTRIC B | — | ||
| MODE | MAGNAVOX A | MAGNAVOX B | MAGNAVOX C | ||
NOTE:
Preset memory function will not work for some models or some codes.
In such case, please use the learning function. (Page 20)
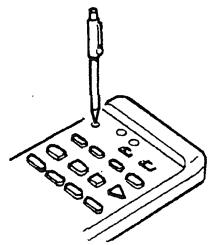
Clearing the Preset Memory
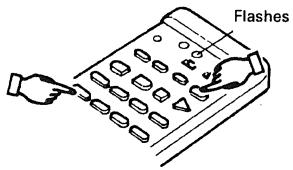
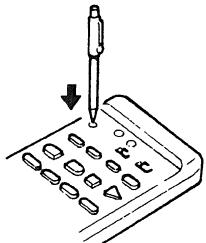
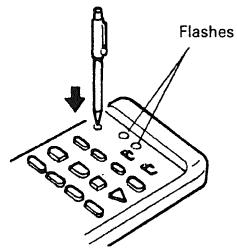
- Press the USE/LEARN selector button with the tip of a pen, etc., to set the learn mode.
- Set the slide switch to 'VIDEO'.
- Set the program switch to the side to be cleared.
Ex.: To clear the VDP preset memory
- Press the SYSTEM CALL SET button, and hold it in for at least four seconds.
- When both the START and LEARNED/TEX LEDs light simultaneously, all the stored codes are cleared.
7-3 Remote Control Unit Learning Function
Use the learning function to operate audio components manufactured by companies other than Denon and when your VCR or TV does not operate with the preset memory function.
- Press the USE/LEARN selector button with the tip of a pen etc., to set the learn mode. Both the START and LEARNED/TX indicators flash.
This unit's remote control unit
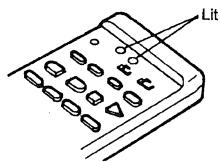
- Check that the START LED is lit, then press the button to be "learned" on the other remote control unit.
- Once the START LED turns off and the LEARNED/TX LED lights, release the button on the other remote control unit.
The two LEDs start flashing again.
- Set the program switch to the side to be "learned". Set to the AUDIO side for the CD, tape deck or DAT position, to the VIDEO side for the CDP, VCR or TV position.
- Set the program switch to the position to be "learned".

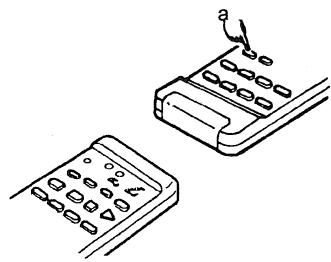
- Set the remote control units so they are facing each other, then press the button to be "learned" on this unit's remote control unit.

The indicator stops flashing and the START LED lights.
The learnable buttons are the buttons which can be operated with the DENON system codes for the CD player, DAT and tape deck, the buttons which can be operated with the preset memory for the VCR, VDP and TV. For the TV only, however, the buttons in the section indicated "A" on the diagram above can also be "learned". Use these to "learn" TV channels.
-
To "learn" other buttons, repeat steps 2 to 6.
-
Once the learning operation is completed, press the USE/LEARN selector button again. The two LEDs stop flashing and the learning mode is cancelled.
Check that the stored codes work properly.
- For instructions on resetting the "learned" codes, refer to "clearing the Preset Memory" on page 19.
-NOTES:
- Up to 26 codes can be "learned", but this number may be lower if the codes are long.
- If a non-learnable button is pressed or two or more buttons are pressed at once, the two LEDs will once again light when the button(s) is released.
- If the codes could not be stored, the LEARNED/TX LED does not light after the START LED turns off. For limited number of models, codes cannot be stored in RC-196.
- If the two LEDs start flashing rapidly after the START LED lights, this means that the memory is already full, and the code you have just attempted to store was not stored.
To "learn" that code, first perform the resetting operation.

Marque : DENON
Modèle : RC-196
Catégorie : Télécommande