DS1001CB1 - Support écran plat IIYAMA - Notice d'utilisation et mode d'emploi gratuit
Retrouvez gratuitement la notice de l'appareil DS1001CB1 IIYAMA au format PDF.
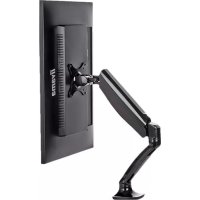
| Type de produit | Support écran plat (bras articulé) |
| Marque | IIYAMA |
| Modèle | DS1001CB1 |
| Compatibilité VESA | 75x75 mm et 100x100 mm |
| Méthodes de fixation | Serrage sur table (épaisseur 20-100 mm) ou passage en trou de table (épaisseur 20-90 mm) |
| Capacité de charge maximale | 8 kg |
| Matériaux | Acier et aluminium |
| Couleur | Noir |
| Rotation | 360° |
| Inclinaison | +90° / -45° |
| Pivotement | 180° |
| Réglage en hauteur | Via articulations (plage non spécifiée) |
| Gestion des câbles | Oui, cache-câbles intégré |
| Clé de réglage incluse | Clé Allen 5x5 |
| Poids net | 2,5 kg |
| Dimensions approximatives (LxPxH) | 500 x 200 x 100 mm |
| Garantie | 2 ans |
FOIRE AUX QUESTIONS - DS1001CB1 IIYAMA
Questions des utilisateurs sur DS1001CB1 IIYAMA
0 question sur cet appareil. Repondez a celles que vous connaissez ou posez la votre.
Poser une nouvelle question sur cet appareil
Téléchargez la notice de votre Support écran plat au format PDF gratuitement ! Retrouvez votre notice DS1001CB1 - IIYAMA et reprennez votre appareil électronique en main. Sur cette page sont publiés tous les documents nécessaires à l'utilisation de votre appareil DS1001CB1 de la marque IIYAMA.
MODE D'EMPLOI DS1001CB1 IIYAMA
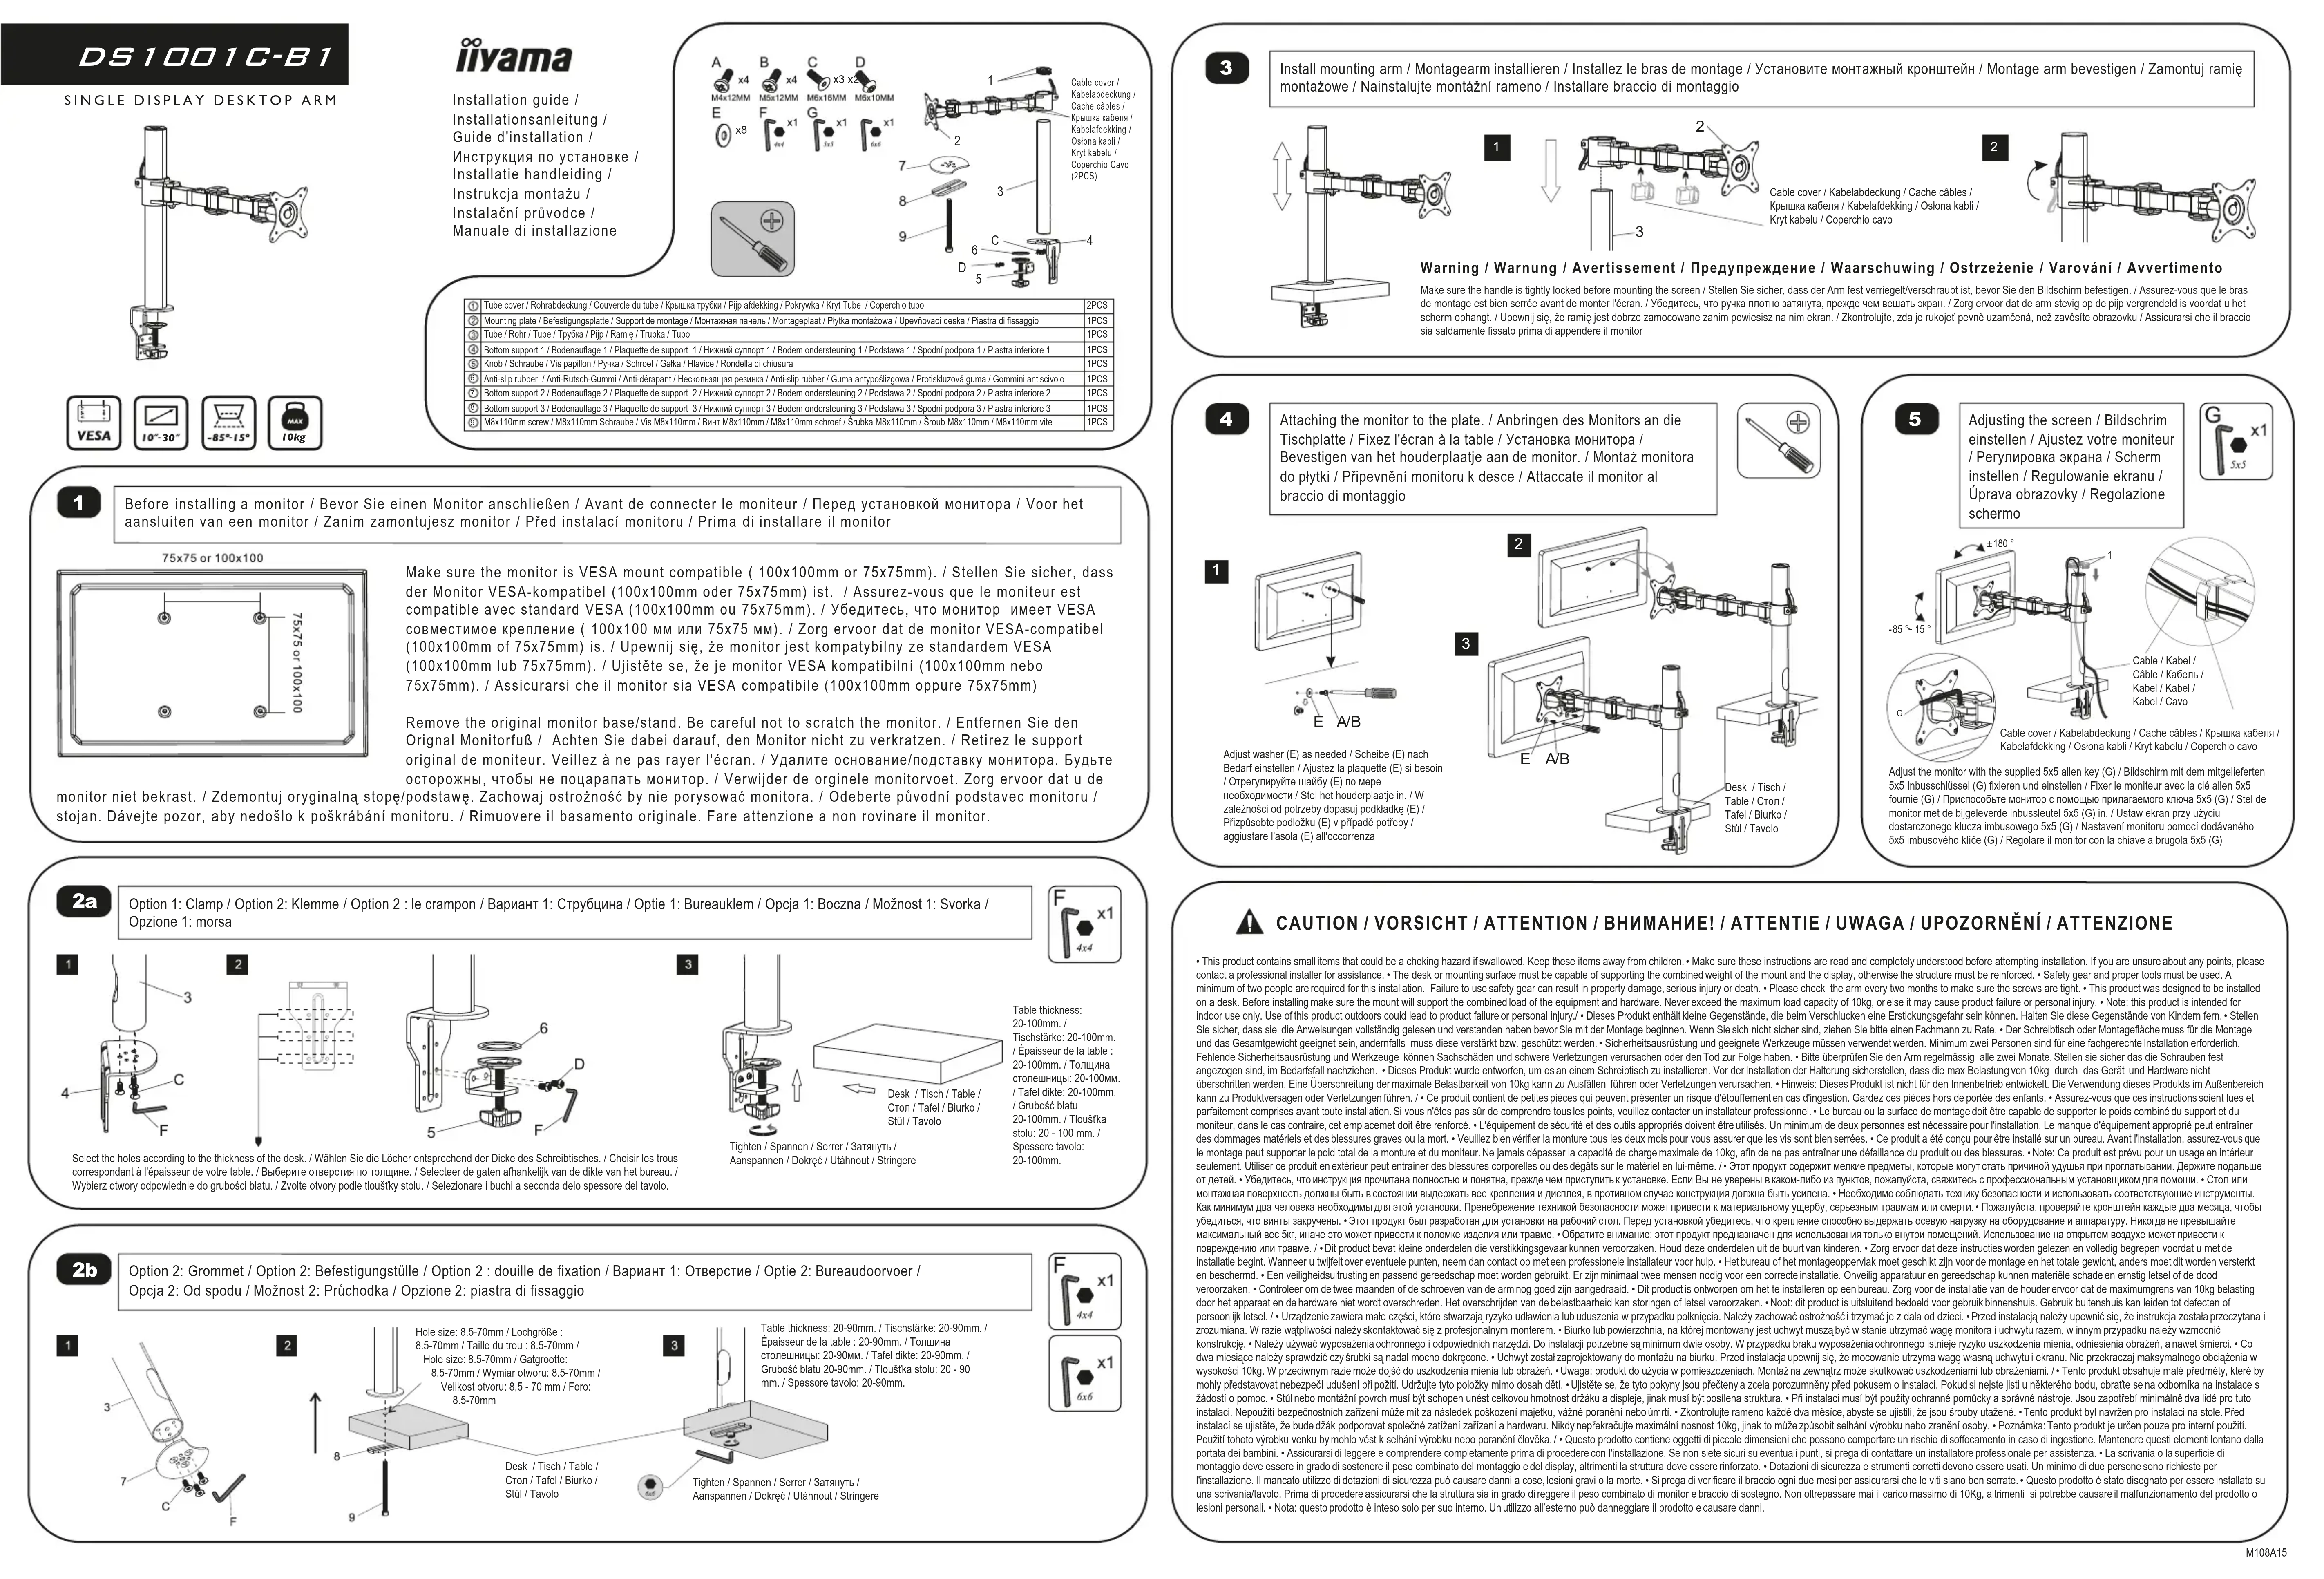
DS1001C-B1
SINGLE DISPLAY DESKTOP ARM


iiyama
Installation guide / Installationsanleitung / Guide d'installation / Инструкция по установке / Installatie handleiding / Instrukcja montażu / Instalační průvodce / Manuale di installazione
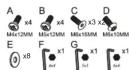

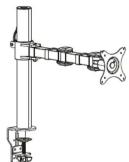
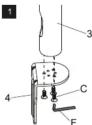
| 1 | Tube cover / Retrobankende / Couverde du tube / Kupuana Typhi / Pip atiekking / Ropikwai / Knit Tube / Copercito tubo | 2PCS |
| 2 | Mounting plate / Betlogungsplad / Support de montage / Monkawnaen nures / Montagestaat / Pyfika montazowa / Upowcefa deska / Plastia di fissaggio | 1PCS |
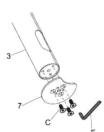
| 3 | Tube / Rod / Tube / Typhi / Pip / Rapin / Trunka / Tubo | 1PCS |
| 4 | Bottom support 1 (Bodenaluge) / Plaquette de support 1 / Hierowi-nymen 1 / Bodm ondentekeuning 1 / Podstala 7 / Spodni podpos / Plasta inferiore 1 | 1PCS |
| 5 | Kroft / Schrauter / Vis podpilon / Pines / Schnott / Galla / Sotro / Ronda / Tuba | 1PCS |
| 6 | Bottom support 2 (Bodenaluge) / Plaquette de support 2 / Hierowi-nymen 2 / Bodm ondentekeuning 2 / Podstala 7 / Spodni podpos / Plasta inferiore 2 | 1PCS |
| 7 | Bottom support 3 (Bodenaluge) / Plaquette de support 3 / Hierowi-nymen 3 / Bodm ondentekeuning 3 / Podstala 7 / Spodni podpos / Plasta inferiore 3 | 1PCS |
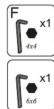
| 8 | Milk 10mm screw / Milk 10mm Schraute / Vis Milk10mm / Biem Milk10mm / Milk10mm screw / Šrukka Milk10mm / Snub Milk10mm / Milk10mm vite | 1PCS |

Before installing a monitor / Bevor Sie einen Monitor anschließen / Avant de connecter le moniteur / Перед установкой монитора / Voor het aansluiten van een monitor / Zanim zamontujesz monitor / Před instalaci monitoru / Prima di installare il monitor
75x75 or 100x100
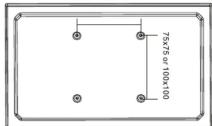
Make sure the monitor is VESA mount compatible (100x100mm or 75x75mm). / Stellen Sie sicher, dass der Monitor VESA-kompatibel (100x100mm oder 75x75mm) ist. / Assurez-vous que le moniteur est compatible avec standard VESA (100x100mm ou 75x75mm). / Убедитесь, что monitor имеет VESA совместимое krépление (100x100 mm или 75x75 mm). / Zorg ervoor dat de monitor VESA-compatibel (100x100mm of 75x75mm) is. / Upewnji się, że monitor jest kompatbilyne ze standardem VESA (100x100mm lub 75x75mm). / Ujistěte se, że je monitor VESA kompatibilní (100x100mm nebo 75x75mm). / Assicurarsi che il monitor sia VESA compatibile (100x100mm oppure 75x75mm).
Remove the original monitor base/stand. Be careful not to scratch the monitor. / Entfernen Sie den Original Monitorfuß / Achten Sie dabei darauf, den Monitor nicht zu verkratzen. / Retirez le support original de moniteur. Veillez à ne pas rayer l'écran. / Удалите основание/подставку монитора. Будьте осторожны, чтобы не поцаралать монитор. / Verwijder de orginele monitorvoet. Zorg ervoor dat u de /podstawę. Zachowaj ostrożność by nie porysować monitora. / Odeberte původní podstavec monitoru / onitoru. / Rimuovere il basamento originale. Fare attenzione a non rovinare il monitor.

Install mounting arm / Montagearm installieren / Installez le bras de montage / Установите монтажный кронштейн / Montage arm bevestigen / Zamontuj ramię montażowe / Nainstalujte montażni rameno / Installare braccio di montaggio
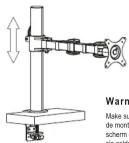
Warning / Warnung / Avertissement / Предупреждение / Waarschuwing / Ostrzeženie / Varování / Avvertimento Make sure the handle is tightly locked before mounting the screen / Steilen Sie sicher, dass der Arm fest verriegelt/Verschraubt ist, bevor Sie den Bildschirm befestigen. / Assurez-vous que le bras de montage est bien serrée avant de monter l'écran. / YJEDETICS, что pyrua плотno zatriynta, prejece dem bewaré skran. / Zorg ervoir dat al dem stervig de pipi vergrendel is voordat u het scherm ophang/. Ujepenij slei, ze ramte jest dobrze zamocowane zanim powiesisz na nim ekran. / Zkontrolujte, zda je rukojef pevmé uzamčená, než zavěslte obrazoviku / Asicurarsi che li braccia sia saldamente fissato prima di appendre il monitor.

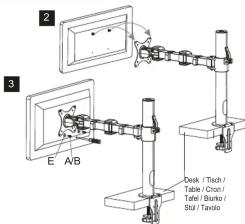
Attaching the monitor to the plate. / Anbringen des Monitors an die Tischplatte / Fixez l'écran à la table / Установка монитора / Bevestigen van het houderplaatje aan de monitor. / Montaż monitora do plytki / Pripevnění monitoru k desce / Attaccate il monitor al braccio di montaggio


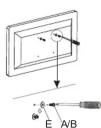
Adjust washer (E) as needed / Scheibe (E) nach Bedarf einstellen / Ajustez la plaquette (E) si bescin / Отрегулируйте шайбу (E) по мере необходимости / Stei het houderplaatje in. / W zależności od potrzeby dopasuj podkladkę (E) / Pfizpúsobte podłożku (E) v prípadě potřeby / aplustare įsola (E) all'acrompanza
text_image
2 3 E A/B Desk / Tisch / Table / Cron / Table / Storks / Stl / Torolo
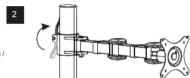
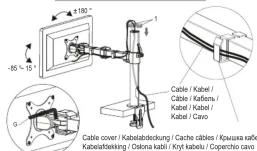
Adjusting the screen / Bildschrim einstellen / Ajustez votre moniteur / Pergyliровка экрана / Scherm instellen / Regulowanie ekranu / Úprava obrazovky / Regolazione schermo

text_image
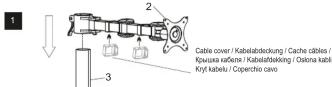
Cable cover / Kabelabdeckung / Cache cables / Kpuwura rabe Kabelafdeckung / Osiona kabi / Krý kabelu / Coperchio cavoAdjust the monitor with the supplied 5x5 alien key (G) / Bildschirm mit dem mitgelieferten 5x5 Inbusschlüssel (G) fixieren und einstellen / Fixer le moniteur avec la clé alien 5x5 fourie (G) / Prípotoscobýte monitror c помощью priñatánemog kluča 5x5 (G) / Stel de monitor met de bigeleverde inbussleutel 5x5 (G) in. / Ustaw ekran przy užyciu dostarczonego klucza imbusowego 5x5 (G) / Nastaveni monitoru pomocí dodávaného 5x5 imbusového klíče (G) / Regolare il monitor con la chiave a brugola 5x5 (G)

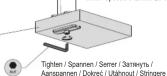
Option 1: Clamp / Option 2: Klemme / Option 2 : le crampon / Вариант 1: Струбцина / Optie 1: Bureauklem / Opcja 1: Boczna / Možnost 1: Svorka / Opzione 1: morsa


2

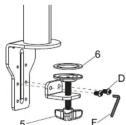

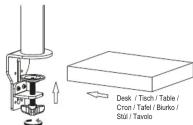
Table thickness: 20-100mm. / Tischstärke: 20-100mm. / Épaisseur de la table : 20-100mm. / Толщена стопевницьс 20-100mm. / Tafel dikte: 20-100mm. / Grubość blatu 20-100mm. / Tloušťka slolu: 20 - 100 mm. / Spessore tavolo: 20-100mm.
Select the holes according to the thickness of the desk. / Wählen Sie die Löcher entsprechend der Dicke des Schreibisches. / Choisir les trous correspondant à l'épaisseur de votre table. / Bubepwre oterpctnia no tonuane. / Selecteer de gaten afhankelijk van de dikte van het bureau. / Wybierz owory odpowiednie do grubości blatu. / Zvolte owory podle louftky stolu. / Selazionare i buchi a seconda delo spessore del tavolo.

Option 2: Grommet / Option 2: Befestigungstülle / Option 2 : douille de fixation / Вариант 1: Отверстие / Optie 2: Bureaudoorvoer / Opcja 2: Od spodu / Možnost 2: Prüchodka / Opzione 2: piastra di fissaggio

2


Table thickness: 20-90mm. / Tischstärke: 20-90mm. / Épaisseur de la table : 20-90mm. / Толщина столешницы: 20-90mm. / Tafel dikte: 20-90mm. / Grubość blatu 20-90mm. / Tloušfka stolu: 20 - 90 mm. / Spessore tavolo: 20-90mm.
CAUTION / VORSICHT / ATTENTION / BHI Hungary! / ATTENTIE / UWAGA / UPOZORNÉNÍ / ATTENZIONE
- This product contains small items that could be a choking hazard if swallowed. Keep those items away from children... 'Make sure these instructions are read and completely understood before attempting installation. If you are unsure about any points, please contact an professional install for assistance... The disk of mounting surface must be capable of supporting the combined weight of the mount and the display, otherwise the structure must be reinforced... 'Safthy gene and probe tools must be used. A variety of different types of tools can be used to support the use of the individual's tools. For example, it is not necessary to provide information on the use of the individual's tools. For example, it is not necessary to provide information on the use of the individual's tools. For example, it is not necessary to provide information on the use of the individual's tools. For example, it is not necessary to provide information on the use of the individual's tools. For example, it is not necessary to provide information on the use of the individual's tools. For example, it is not necessary to provide information on the use of the Individual's tools. For example, it is not necessary to provide information on the use of the Individual's tools. For example, it is not necessary to provide information on the use of the Individual's tools. For example, it is not necessary to provide information on the use of the Individual's tools. For example, it is not necessary to provide information on the use of the Individual's tools. For example, it is not necessary to provide information on the use of the Individual's tools. For instance, it is not necessary to provide information on the use of the Individual's tools. For example, it is not necessary to provide information on the use of the Individual's tools. For example, it is not necessary to provide information on the use of the Individual's tools. For example, it is not necessary to provide information on the use of the Individual's tools. For example, it is not necessary to provide information on the use of the Individual's tools. For example, it is not according to Section 10 (e.g., Section 11) and Section 12 (e.g., Section 13).