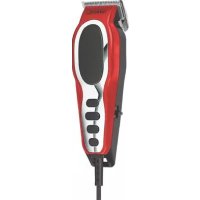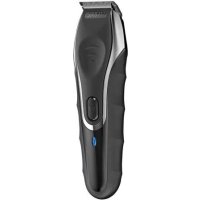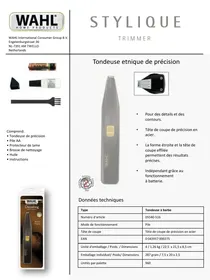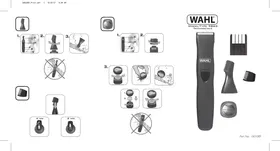
Clip N Rinse 9639 - Tondeuse WAHL - Notice d'utilisation et mode d'emploi gratuit
Retrouvez gratuitement la notice de l'appareil Clip N Rinse 9639 WAHL au format PDF.

| Caractéristiques techniques | Tondeuse WAHL Clip N Rinse 9639, moteur puissant, lames en acier inoxydable, 5 hauteurs de coupe réglables. |
|---|---|
| Utilisation | Conçue pour une coupe précise des cheveux, idéale pour un usage domestique ou professionnel. |
| Maintenance et réparation | Facile à nettoyer grâce à la fonction Clip N Rinse, lames amovibles pour un entretien simplifié. |
| Sécurité | Utiliser uniquement sur cheveux secs, éviter le contact avec l'eau pendant l'utilisation, respecter les consignes de sécurité fournies. |
| Informations générales | Poids léger, design ergonomique, garantie de 2 ans, accessoires inclus : peignes de guidage, brosse de nettoyage. |
FOIRE AUX QUESTIONS - Clip N Rinse 9639 WAHL
Questions des utilisateurs sur Clip N Rinse 9639 WAHL
0 question sur cet appareil. Repondez a celles que vous connaissez ou posez la votre.
Poser une nouvelle question sur cet appareil
Téléchargez la notice de votre Tondeuse au format PDF gratuitement ! Retrouvez votre notice Clip N Rinse 9639 - WAHL et reprennez votre appareil électronique en main. Sur cette page sont publiés tous les documents nécessaires à l'utilisation de votre appareil Clip N Rinse 9639 de la marque WAHL.
MODE D'EMPLOI Clip N Rinse 9639 WAHL
WAHL
Clip n Rinse+
Cordless Hair Clipper
Clip n Rinse+ Cordless Hair Clipper
Please read all instructions carefully to familiarize yourself with the Wahl Clip n Rinse+ Cordless Hair Clipper before using.
Save these instructions for further reference.
For any further assistance or information call customer services on
T:01227744330
or visit
W: www.wahl.co.uk
E: customer.servicese@wahl.co.uk
INDEX
IMPORTANT SAFEGUARDS
BEFORE USE
CUTTING HAIR
CLEANING AND MAINTENANCE
PRODUCT REGISTRATION
GUARANTEE
Page 3
Page 8
Page 8
Page 15
Page 17
Page 19
IMPORTANT SAFEGUARDS
When using this electrical appliance, especially when children are present, basic safety precautions should always be observed including the following.
TO REDUCE THE RISK OF FIRE AND INJURY
- This appliance can be used by children from aged 8 years and above and persons with reduced physical, sensory or mental capabilities, or lack of experience and knowledge, if they have been given
Clip n Rinse+ Cordless Hair Clipper
supervision or instruction concerning use of the appliance by a person responsible for their safety. Children should be supervised to ensure that they do not play with the appliance.
-
Switch off the appliance before putting on or taking off attachments and also before cleaning the appliance.
-
Never use your appliance without paying attention! Always unplug the unit when not in use, even for a moment.
Clip n Rinse+ Cordless Hair Clipper
- Do not operate the appliance with a broken cord or plug, or if the appliance malfunctions, or is dropped or damaged in anyway.
- Any servicing or repair must be performed by an authorized service representative.
- Do not use outdoors or in damp areas.
- Do not let the cord hang over the edge of the work surface or let it touch any hot surfaces.
Clip n Rinse+ Cordless Hair Clipper
-
The use of attachments that are not supplied by the manufacturer may cause fire, electric shock or injury and damage to the appliance.
-
To protect against risk of electrical shock, never immerse the unit or let it come into contact with water or any other liquids. Do not use the unit with wet hands. If the appliance should become wet, damp or fall in water, remove plug from mains socket immediately. Do not put your hands in the water.
-
Never carry the unit by its power cord.
- Use this appliance only for its intended purpose.
OPERATING INSTRUCTIONS
Charging Battery on Clipper:
Before the appliance is used for the first time, it should be charged for 16-18 hours.
- Connect your transformer into the bottom of your clipper.
- Plug the transformer into a compatible mains outlet.
- Ensure that the appliance switch is in the OF position. The appliance will only charge when it is switched off. During charging the indicator light will stay red.
- Only recharge when the performance noticeably drops. Over charging will not damage the appliance.
- When the battery is fully charged the appliance can be used for up to 45 minutes without mains connection.
BEFOREUSE
Before you cut hair
- Your clipper should be clean, oiled and in perfect working condition.
- Place a towel or cape around the neck, to cover clothing.
- Position the person whose hair is to be cut on a stool or chair, or so the top of the head is about even with your eye level.
- After combing the hair to remove all tangles, hold the clipper in a relaxed, comfortable grip, with the name plate under the palm near your index finger. The grip will help you maintain comfortable, accurate cutting control.
NOTE: To attach guide combs, hold the comb with the teeth up. Snap guide comb attachment firmly to the bottom of the clipper blade.
CUTTING HAIR
For Medium to Long Cuts
The first time you cut hair, cut only a small amount until you have become accustomed to how long each guide comb leaves the hair.
Always start by placing the largest guide comb
on the clipper, and then use the shorter combs if a shorter length is desired.
Remember between professional haircuts, the hair grows evenly all over the head and a light trimming at the lower neck and sides may be all that is needed to bring back that neat, well groomed look.
For Uniform Cutting, allow the clipper to cut its way through the hair. Do not force it through at a faster rate.
- Start by combing through the hair so it falls into its natural direction.
- Place the largest guide comb onto your clipper and start by trimming the sides from the bottom upwards. Hold the clipper lightly against the hair, with the teeth of the guide comb pointing up flat against the head. Slowly lift the clipper up and outward through the hair, cutting only a small amount at a time.
Repeat around sides and back of head.
If you desire shorter hair, either change to a shorter guide comb, or apply more pressure and less lift away from head with the present attachment.
This whole procedure requires practice, and it's always better to leave too much hair for the first few haircuts.
For the top of the head, you will give a fairly short cut if you use the #1 guide comb. With the teeth flat against the head, slowly start trimming from the front to the back. Again, it is better to leave the hair longer the first few haircuts.
For longer hair on top
By not using a guide comb, a longer cut can be achieved. Use either a barber or regular comb, and lift the hair on top of the head, cutting over the comb, or grasp the hair between the fingers and cut to desired length. Continue this procedure from the front to the back of the head, gradually cutting the hair shorter by reducing the space between the comb or the fingers and the head. Comb frequently to remove trimmed hair and check for uneven strands.
Tapering Around Ears
Using left and right ear guide combs.
By following the outline of the ear with the appropriate comb you achieve a gradual taper and blending without having to use multiple combs.
To Taper the Area Bordering the Left Ear Attach the left ear taper comb to your clipper and stand facing the left ear. While holding the clipper at a slight angle against the head, position the guide comb just back of the left ear at the hairline. Then move the clipper in a small half circle pattern around the left ear toward the front of the head. Depending on the length of hair you are working with you may need to take several strokes as you proceed around the ear. When doing so, slowly move the clipper upward and outward being mindful of the ear. This will allow you to guide hair into the comb towards the clipper blades.
NOTE: You may also achieve a tapering of sideburns by including the side burn area as you begin to move the clipper around the ear.
To Taper the Area Bordering the Right Ear Attach the right ear guide comb to your clipper. Stand facing the right ear and repeat the process described above for left ear.
Finish by outlining the area around the ear as described in the following section.
Outlining
No attachments are needed; push the taper lever up to close cut position. Comb hair into desired style. Starting between the ear and the sideburns, hold the clipper with the corner edge of the blade against the hairline. Slowly follow the desired outline of the hair over, around and behind the ears. For defining the sideburns and the back of the neck, hold the clipper upside down, against the skin at the desired length and move down.
Comb hair and check that sides are even. Check for uneven spots throughout the haircut.
Short Cuts
Starting with the longest guide comb, cut from the back of the neck to the crown. Hold the guide comb flat against the head and slowly move the clipper through the hair.
CHANGING THE BLADE SET
Ensure that the clipper is switched OFF.
The blade set can be removed by pressing down and away.
To replace your blade, place the blade set with the hook engaged into the slot in the housing and press down until it clicks into place.
Use the same procedure from the lower side to the upper side of the head. Then cut the hair against the direction in which it grows, from front to the crown.
To give a flat top look, the hair on the top of the head must be over the top of a flat top comb, rather than using the guide comb.
Use closer cutting guide combs to taper the hair down the neckline, as desired. Comb hair and check for uneven spots. Outline sideburns and neckline as previously described.
Using Your Personal Trimmer (Not Included in All Wahl Kits)
- Before trimming remove the protective cap and turn on the trimmer by pushing the switch up.
-
To trim hair from nose - make sure the nasal passages are clean. Slowly move the rotary head in and out of each nostril, no more than a 1/4 inch deep. Keep the side of the cutting head firmly against the skin to prevent a tickling sensation.
-
To trim hair from ears - make sure the outer areas of the ears do not contain any wax. Hold the ear flat with one hand and carefully insert rotary head no more than 14 inch into the outer ear. For hair growing on the outside of the ear, simply move the rotary head slowly along the edges of the ear.
WARNING: DO NOT INSERT THE ROTARY HEAD OR ANY OTHER FOREIGN OBJECT INTO THE INNER EAR.
BATTERY INSTALLATION
- With the attachment head attached, hold the trimmer head, and simply slide the bottom compartment downwards to reveal the battery compartment.
- Insert the AAA Battery negative end first (toward the cutting head).
- Replace the battery compartment cover
- Replace the battery as soon as you notice the trimmer running slower than normal, to avoid pulling of hairs.
CLEANING AND MAINTANENCE
Your Wahl Clipper and Trimmer blades were oiled and aligned before leaving our factory; however it is possible for the blades to get bumped out of alignment. Blades must be realigned if they have been removed for cleaning or replacement. To determine if realignment is necessary, compare your clipper blades with the below sketch.

OILING BLADES
The blades of your new clipper should be oiled before and after every use.
Simply place a few drops of Wahl Clipper oil on the teeth of the blades. Use only the Wahl Clipper Oil included in the pack. Due to the high speed of your Wahl clipper, the correct type of oil must be used. Do not use hair oil grease or any oil mixed with kerosene or any solvent, as the solvent will evaporate and leave thick oil, slowing down the blades. Wahl Clipper Oil is a very thin, natural oil which will not evaporate and slow down the blades.
IMPORTANT: Do not over Oil!
CLEANING YOUR NASAL TRIMMER
Periodically after use, turn the trimmer off and rinse the cutting head under warm, running water. For more thorough cleaning, remove the attached cutting head by turning it slightly counter clockwise. Then rinse the entire head under running water. After cleaning, replace desired head by turning it slightly clockwise and wipe the entire trimmer dry with a soft cloth. Always replace the protective cap after use.
WASTE ELECTRICAL & ELECTRONIC EQUIPMENT DIRECTIVE 2002/96/EC (WEEE)

At the end of this products life it should not be disposed of with general household waste.
Care should be taken to dispose of in a suitable manner in accordance with your Local Authority regulation.
PRODUCT REGISTRATION
Wahl are constantly developing and launching new products in the UK. We would like to understand your product needs and expectations and we value any comments you may have. As part of Wahl Customer Care, we are offering you the chance to be kept up to date with the latest product launches, innovations and special offers.
Please take a minute to register your product online at www.wahl.co.uk.
WIRING
WARNING: IF THE SUPPLY CORD IS DAMAGED IT MUST BE REPLACED BY THE MANUFACTURERS SERVICE AGENT OR A SIMILARLY QUALIFIED PERSON IN ORDER TO AVOID A HAZARD.
This product must only be used with the transformer supplied.
Should a replacement be required contact Wahl Customer Services on 01227 744330.
GUARANTEE
This product is guaranteed against defects in material and workmanship for a period of 3 years from the date of original purchase or receipt as a gift.
Should this product become defective during the guarantee period, return it to the store of purchase together with your proof of purchase for repair or replacement
Alternatively within the guarantee period you can return the product to Wahl (UK) Ltd who will repair any such defect or elect to replace the product or any part of it, without charge, provided that there is proof of purchase. Should a replacement be offered this will not extend the original guarantee period.
The guarantee becomes invalid in the case of misuse, alteration or repair by unauthorised persons.
This guarantee does not include blades, cables, shaver heads, foils and cutters etc., which are consumable parts.
This product is designed for domestic use only and use within a professional environment will invalidate the guarantee.
This guarantee in no way affects your rights under statutory law in the United Kingdom.
Wahl (UK) Ltd
Herne Bay Trade Park
Herne Bay
Kent
CT68JZ
www.wahl.co.uk
Customer Service T: 01227 744330
Form No.58917-200
Rev0 08-12