
DCR-TR7000E - Caméscope SONY - Notice d'utilisation et mode d'emploi gratuit
Retrouvez gratuitement la notice de l'appareil DCR-TR7000E SONY au format PDF.


| Type de produit | Caméscope numérique Digital8 |
| Marque | Sony |
| Modèle | DCR-TR7000E |
| Format d'enregistrement | Digital8 (compatible Hi8 et 8 mm standard) |
| Alimentation | Batterie InfoLITHIUM NP-F330 (7,2 V) ou adaptateur secteur AC-L10A |
| Temps de charge (batterie NP-F330) | 150 min (charge complète), 90 min (charge normale) |
| Temps d'enregistrement (batterie NP-F330) | Environ 100 min (continu), 55 min (typique) |
| Viseur | Viseur couleur électronique avec réglage dioptrique |
| Zoom optique | 20x (motorisé) |
| Zoom numérique | Activé au-delà de 20x (réglable dans le menu) |
| Fonctions spéciales | NightShot, Backlight, Fader, Effets d'image (Négatif, Sépia, N&B, Solarisation, Amincissement, Étirement, Pastel, Mosaïque), Effets numériques (Image fixe, Flash, Luminance, Traînée, Obturateur lent, Vieux film) |
| Programme AE | Spotlight, Portrait doux, Sports, Plage/Ski, Coucher de lune, Paysage |
| Stabilisateur | SteadyShot (désactivable) |
| Sorties vidéo | Composite (via câble AV), S-Vidéo, DV Out (i.LINK) |
| Sortie audio | Stéréo (via câble AV), casque (mini-jack) |
| Entrée microphone | Mini-jack (compatible plug-in power) |
| Accessoires fournis | Télécommande, adaptateur secteur, batterie NP-F330, câble A/V, dragonne, cache-objectif, étiquette pour cassette, pile bouton CR2025, piles pour télécommande |
| Consommation | Non spécifiée dans le manuel |
| Dimensions | Non spécifiées dans le manuel |
| Poids | Non spécifié dans le manuel |
| Entretien | Nettoyer avec un chiffon doux et sec. Éviter les solvants. Protéger de l'humidité. |
| Sécurité | Ne pas ouvrir le boîtier. Confier la réparation à un personnel qualifié. Éviter l'exposition à la pluie ou à l'humidité. |
| Réparabilité | Pièces détachées disponibles auprès de service agréé Sony. Réparation par personnel qualifié uniquement. |
FOIRE AUX QUESTIONS - DCR-TR7000E SONY
Questions des utilisateurs sur DCR-TR7000E SONY
0 question sur cet appareil. Repondez a celles que vous connaissez ou posez la votre.
Poser une nouvelle question sur cet appareil
Téléchargez la notice de votre Caméscope au format PDF gratuitement ! Retrouvez votre notice DCR-TR7000E - SONY et reprennez votre appareil électronique en main. Sur cette page sont publiés tous les documents nécessaires à l'utilisation de votre appareil DCR-TR7000E de la marque SONY.
MODE D'EMPLOI DCR-TR7000E SONY
Digital Video Camera Recorder
Operating Instructions
Before operating the unit, please read this manual thoroughly, and retain it for future reference.
HCTPYKUINI NO 3KCNJYATAUNI
Ipeed 3Kcnpnyatauene annapaTa BnHMaTeNbHO npOHTne, noKaanyicTa, daHHoe pyKOBoDCTBO n COxpaHraTe erO dJaJIbHeMIX CNpaBOK.
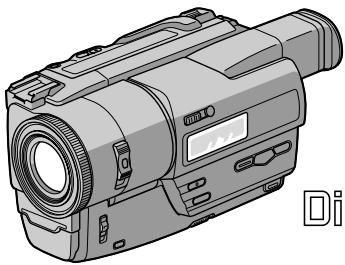
Digital Handycam
Digital8
DCR-TR7000E/TR7100E

InfoLITHIUM


English
Welcome!
Congratulations on your purchase of this Sony Digital Handycam camcorder. With your Digital Handycam you can capture life's precious moments with superior picture and sound quality.
Your Digital Handycam is loaded with advanced features, but at the same time it is very easy to use. You will soon be producing home video that you can enjoy for years to come.
WARNING
To prevent fire or shock hazard, do not expose the unit to rain or moisture.
To avoid electrical shock, do not open the cabinet.
Refer servicing to qualified personnel only.
For the customers in Germany
Directive: EMC Directive 89/336/EEC. 92/31/EEC
This equipment complies with the EMC regulations when used under the following circumstances:
Residential area
Business district
- Light-industry district (This equipment complies with the EMC standard regulations EN55022 Class B.)
ATTENTION
The electromagnetic fields at the specific frequencies may influence the picture and sound of this digital camcorder.
Pysckn
Добpo пожаловать!
I03dpaBnem BAc C npno6peTHeHm DaHNoi
BnuDeokamepbl Digital Handycam fnpMb1 Sony.
C nOmoobu Baew BnuDeokamepbl Digital
Handycam Bbl cMOxete 3aneaTneB doporne
Bam MTHOBENH JN3HN C npEBOCXoHbIM
kAueCTBOM N3O6paxeHn I 3Byka.
BaWa BnuDeokamepa Digital Handycam
OchauheHa yCOBepseHcTBoBaHHbIMN
fynKUqMnHO HO B TO Xe BPEm Eo OyHb IeKO
nonb3oBaTbcra. BCKope Bbl 6yJeTe co3daBaTb
ceMeHbIe BnuDeOpporpaMMbl, KOToPbIMN
CMoXeTe HaclaxJaTaTbCBA NocJeDyUoJIe
rOdbI.
PNEyPPEXDEHNE
Длп п dedotврашени BOЗгорань Или Опасночтп Зелковсякого удара He Выставлейу сапар на дождь Или Влагу.
Bo n36bexkhaHne nopaxeHHa 3JIeKTPnueckm TOKOM He OTKpbIbAte KOpnyc. 3a o6cnyxnbAHMe o6paTaBcT ToJbKO K KBaIIpNpuOBaHHomy o6cnyxNbAoUeMy nepcoHaNy.
BHIMMAHNE
3JIeKtpomarHHTbIe IONHa ONpeJeHHbIX YacTOTAX MOrYT BnIaTb Ha N3O6paXeHne I 3BvK, BOCpOn3BOIDIMoe DaHHo UcPpOBo BVdeOKaMepbl.

A946
Checking supplied accessories. 5
Quick Start Guide 6
Getting started
Using this manual 10
Step 1 Preparing the power supply..... 12
Installing the battery pack 12
Charging the battery pack 13
Connecting to the mains.. 17
Step 2 Inserting a cassette 18
Recording - Basics
Recording a picture 19
Shooting backlit subjects (BACK LIGHT) 25
Shooting in the dark (NightShot) ....26
Checking the recording
- EDITSEARCH / Rec Review 28
Playback - Basics
Connections for playback 29
Playing back a tape 33
Advanced Recording Operations
Photo recording. 38
Using the wide mode 41
Using the fader function 42
Using special effects - Picture effect. 45
Using special effects - Digital effect 47
Using the PROGRAM AE function 50
Adjusting the exposure manually 53
Focusing manually. 54
Inserting a scene 56
AdvancedPlaybackOperations
Playing back a tape with picture effects 58
Playing back a tape with digital effects .59
Quickly locating a scene using the zero set memory function 61
Searching a recording by date 62
Searching for a photo - Photo search/Photo scan 64
Editing on Other Equipment
Dubbing a tape 66
Customizing Your Camcorder
Changing the MENU settings 69
Resetting the date and time 78
Additional Information
Digital8 system, recording and playback 80
Changing the lithium battery in your camcorder 83
Troubleshooting 85
Self-diagnosis display 89
Warning indicators and messages. 90
Using your camcorder abroad 97
Maintenance information and precautions 98
Specifications 103
Quick Reference
Identifying the parts and controls 105
Quick Function Guide 114
Index 116
IpoBepka npinlaraeMbIX npnHaJnxHocTei 5
PykoBoCTBO no 6bICTpOmy 3anycky 8
IoproTOBka K 3KcnnyatauN
IcnoIb3OBAHne daHHoro pyKOBOdCTBa 10
IpyHKT 1 PoiDROTOBka NCTOCHKa PNTaHnA 12
UctaHOBka 6aTapeHoro 6Ioka.... 12
3apnka 6aTaapeHoro 6noka 13
POnDCoeDInHEnHe K CTeB0B po3eTKe 17
IyHKT 2 YcTaHObKa Kaccetbl 18
3aHcB - OCHOBHbIe NOJIOXeHnA
3ainnbc n3o6paXeHnna 19
CbeMka o6bekTOB c3aDnei noDCBeTkoi (BACKLIGHT) 25
Cbemka B TEMHOTe (Houhna cbemka) 26
Поберка запис - EDITSEARCH / Порсмотр запис 28
Bocnpon3BeJeHne - OChOBHbIe IOnIOXeHn
IopDcoeINHeHnA DnB BocnpOn3BeDeHnA 29
Bocnpon3BeDHeNJIeHTbl 33
YcoBepWeHCTBOBaHHbIe Onpaunn CbeMKn
ΦOTOCbEMKa 38
IcnoIb3OboAHe IuPOKoKpaHnHOpeXIMa 41
IcnoIb3OBAHnE cyHKmI FeIepa .... 42
INCIOJIb3OBAHHe CnEuaJIbHbIX 3ΦΦeKTOB -3ΦΦeKrN3o6paXeHnA 45
UcnoIb3OBAHnE CneuHaJIbHbIX 3ΦΦeKToB -LIOpOBoi 3ΦΦeKt 47
IcnoIb3OBAHHe cynKcIMN PROGRAM AE 50
Perynipobka 3Kcno3nBpyHyIO.....53
ФokycnopoBka BpyHyIO 54
BcTabka 3nizda .56
YcoBepWeHCTBOBaHHbIe OnpaCnBocPpON3BeDeHn
Bocnpoun3BeDeHneJeHTbIc3ΦΦeKTaMn 1306paXkEHN 58
Bocnpon3BeJeHHe JeHTbI C uNΦpOBoBIMn əΦΦeKtAmn .59
Бысторе OТыckeКане ЭпиЗда с помоцью фуннцип памгтни hyлево OTmetкn 61
Ponck 3ainnno no daTe 62
ПоИСК ФОТ - ФОТОПОИСК/ФОТOCKАнЮВАпЕ 64
MONTAX Ha dpyrgyio annapaTypy
IpeezanbcJeHTbl 66
BbINOJIHHeHne mHdINBnDyaJbHbIX yCTaHOBOK Ha BnDeOKaMepe
U3meHHeHne yCTaHObOK MENU 69
IpeyectaHOBka daTbI IN BpeMeHN 78
DOnOJIHnTeJIbHaI INΦOpMa cIa
LdpoBaCnCTema Digital8 3aIncbN BocPOn3BeDeHne 80
3aMeHaIHTneBOB6aTapeKnVBBaSei BundeOKaMepe 83
Поиск и устраненье Немправност.
91
INnIkaIcna cAmOHaarHocTnKn 95
PpeDynpexKaIOUne INDNKAtOpblI COo6uHnA 96
IcnoIb3OBAHnE BaueB BnDeokamepb 3a rpaHncei .97
INHOpMaZnI NO yXOy 3a annapaTOM n MepbI npedoctopoxKHOCTn 98
Texnueckne xapaKtepncnkn 104
OnepaTnBhBcnpaBOuHnK
O6o3haeHne yactei npereyIaTOpOB 105
PyKOBOIDCTBO NO 6bICTpbIM cyHKUAM 115
AJIΦaBHTbIy yKa3aTeIb 117
Checking supplied accessories
Пюверka приларых принадожносте
Make sure that the following accessories are supplied with your camcorder.
Y6eIntecb, YTO cIeIyUOuIe npHaIeJIeXHoCTn npIraIOTcK BaWei BIndeOkampe.
| 1 | 2 | 3 |
| 4 | 5 | 6 |
| 8 | 9 | 10 |
1 Wireless Remote Commander (1) (p. 110)
2 AC-L10A/L10B/L10C AC power adaptor (1), Mains lead (1) (p. 13)
3 NP-F330 battery pack (DCR-TR7000E)/ NP-F550 battery pack (DCR-TR7100E) (1) (p. 12, 13)
4 CR2025 lithium battery (1) (p. 83) The lithium battery is already installed in your camcorder.
5R6(size AA)battery for Remote Commander(2)(p.111)
6 A/V connecting cable (1) (p. 29)
7 Shoulder strap (1) (p. 107)
Lens cap (1) (p. 19)
9 21-pin adaptor (1) (p. 30)
10 Label sheet for cassette (1) Stick this label on the recorded cassette.
1 BecepnoBODHyI NyIbT dNCTaHcNoHHO ynpabJeHn (1) (cTp. 110)
2 CeTeBoi aIaIaTeP npeMeHHO Toka AC-L10A/L10B/L10C (1) (ctp. 13)
3 BaTapeHbIb6LoK NP-F330(DCR-TR7000E)/ BaTapeHbIb6LoK NP-F550(DCR-TR7100E) (1) (ctp. 12, 13)
4ЛитnevаябатуейкаCR2025(1)(cTp.83)Литnevаябатуейкауcke уcke yctaHOBJeHaВБашевида ekampe.
5 BaTapeiKa R6 (pa3Mepa AA) IyIyIbTa IInCTaHOnOHoro ynpabLeHn (2) (ctp. 111)
6 CoeHnHtBHyI Ka6bI ayDIO/BuDeo (1) (cTp. 29)
7Плочьов ременb(1)(cTp.107)
8 Kpblika oBbeKTHBa (1) (cTp. 19)
921-wTbIPbKOBbI aadantep (1) (ctp. 30)
10 3TNKeTka DnA Kaccetbl (1) HakJeIte 3Ty 3TNKeTky Ha Kaccety C 3aIINcbo.
Quick Start Guide
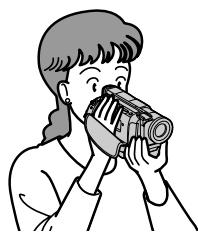
This chapter introduces you to the basic features of your camcorder. See the page in parentheses "() for more information.
1 Connecting the mains lead (p. 17)
Use the battery pack when using your camcorder outdoors (p. 12).
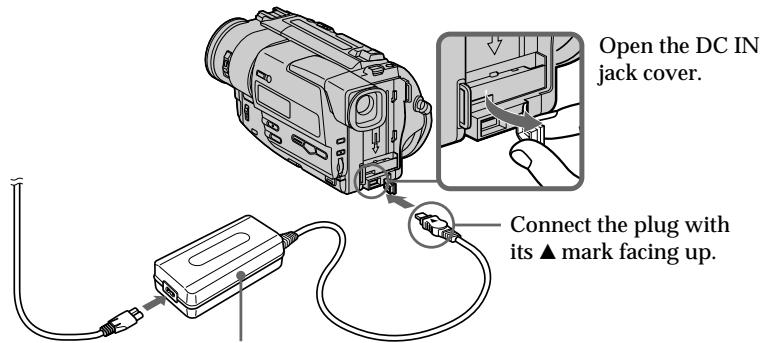
AC power adaptor (supplied)
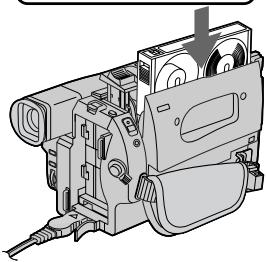
2 Inserting a cassette (p. 18)
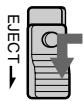
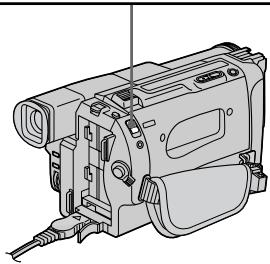
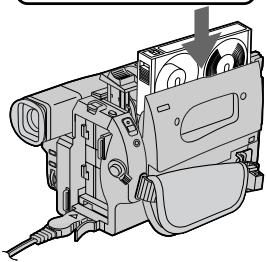
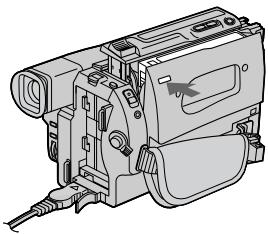
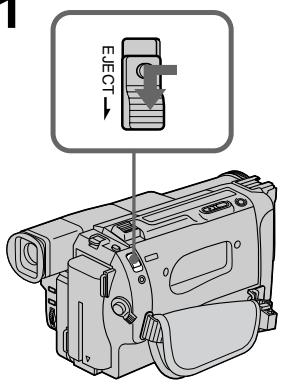
1 Slide EJECT in the direction of the arrow while pressing the small blue button.
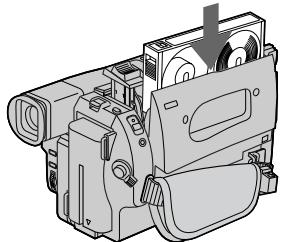
2 Insert a cassette into the cassette compartment with its window facing out.
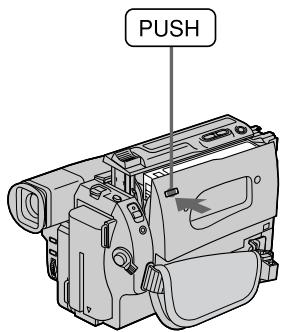
3 Close the cassette compartment by pressing the "PUSH" mark on the cassette compartment. The cassette compartment automatically goes down.
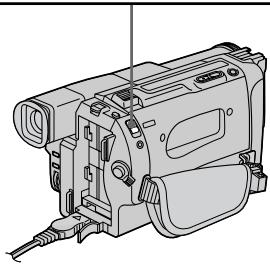
1 Remove the lens cap.
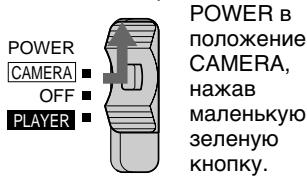
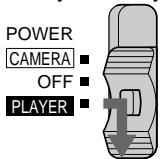
Set the POWER switch to CAMERA
POWER
CAMERA
OFF
PLAYER

while pressing the small green button.
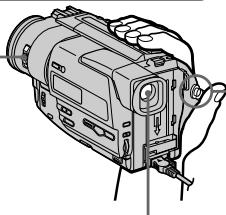
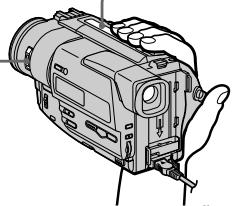
Viewfinder
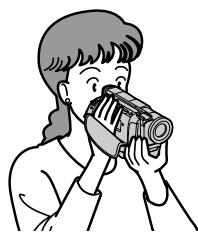
Use the viewfinder placing your eye against its eyecup.
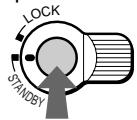
3 Turn STANDBY to STANDBY. The picture appears in the viewfinder.
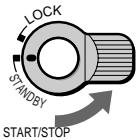
Press the red button. Your camcorder starts recording. To stop recording, press the red button again.
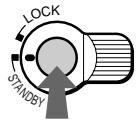
START/STOP
4
Monitoring the playback picture in the viewfinder (p. 21)
1 Set the POWER switch to PLAYER while pressing the small green button.
POWER
CAMERA
OFF
PLAYER

Press to rewind the tape.
REW

Press to start playback.
PLAY

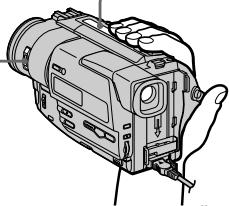
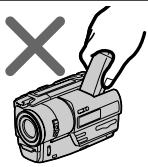
NOTE
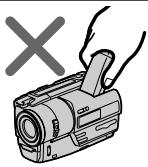
Do not pick up your camcorder by holding the viewfinder.
PykoBoIcTBo IIO 6bICTpOmy 3aIpycky
B daHnoI rnaBe npBbeHebI oCHOBHeIe cyHKmN BaSei BnDeOkampeI. IOpRo6HbIe CBeHeHn npBbeHeHbHa cTpaHnue B KpyrblIx CkO6Kax "( ).
1 Повсоевинец повoda злесгптогиТаня (ст. 17)
При пользовани вдевокамеров BHe пошени Испльзут eбатeн b6лok (ст. 12).
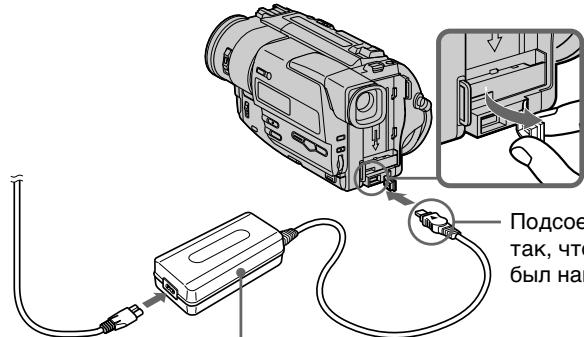
OtkpoTKe KpbIuKy rHe3da DC IN.
Tak, YTo6bI erO 3HaK ▲
6bI HanpaBLeH BBepx.
CTeB0n aAnTep nepemEnHOro TOKa (npunaeraeTc)
2 YctaHOBKa Kaccetbl (cTp. 18)
1пераевиньт перашичateльЕJECT В наразвели Стrelки, нажав MaileHbKyO сию Кногку.

BCTaBBTe kaccety B KACCtHbI OTcEK TaK, YTO6bl OKOuKO 6bJIO obroseHo hapxky.
3aKpoIte KaccTeHbIOTcE, HaxkAB MeTKy“PUSH"Ha KaccTeHOMOTcKe. KaccTeHbIOtCEK ABTomatUeCKN OncyTITCA.
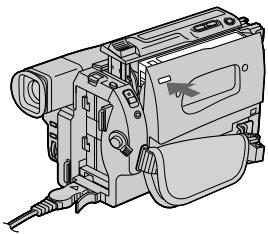
CHIMMITE KpbiUKy oBseKtNbA.
UyctahOBInTe nepeKlnOuataEnb
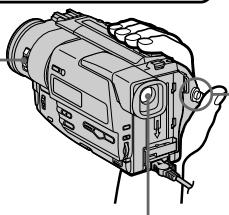
3ПовернITE рыаг STANDBYВпожжени STANDBY.Виюпскaitе погвсгИЗбржени.
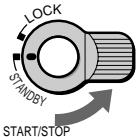
Haxmnte Kpauchyo KhoNky. Bawa BndeOkamepa NaHcT 3aInscb. Ipn octahOBKn 3aPiCn HaxMnte Kpauchyo KhoNky eue pa3.
START/STOP
BudonckateJIb
IcnoJIb3yIe BUNDOINCKaTeIb, npNCtABnB rna3 K Okynpa.
4
KoHTpoJIb BOCpOu3BODIMORO n3O6paXeHnB BVIOUcKaTeJIe (cTp. 21)
UctahOBInTe nepeKlnOuTaTeINb POWER B noJooXeHne PLAYER, HaxkAB MaJIeHbKyIO 3eJIeHyo KHOJIky.
2 HaxmTe KhoNky 4IJIe IpeMoTkn JIeHTbl.

3 HaxmTe KhONky 1nHaayana BOCnpOn3BedeHna.

ПРИМЕЧАНЕ
He noDnHMaIe BvIeOkaMepy, B3aBwInCb 3a BnuOnckaTeNb.
Using this manual
As you read through this manual, buttons and settings on your camcorder are shown in capital letters.
e.g. Set the POWER switch to CAMERA.
When you carry out an operation, you can hear a beep sound to indicate that the operation is being carried out.
Before using your camcorder
With your digital camcorder, you can use Hi8 video cassettes Hi8.
Your camcorder records and plays back pictures in Digital8 system. Also, your camcorder plays back tapes recorded in the Hi8 Hi3/standard 8 (analog) system. You, however, cannot use the functions in "Advanced Playback Operations" on page 58 to 65 for playback in the Hi8 Hi3/ standard 8 system. To enable smooth transition, we recommend that you do not mix pictures recorded in the Hi8 Hi3/standard 8 with the Digital8 system on a tape.
Note on TV colour systems
TV colour systems differ from country to country. To view your recordings on a TV, you need a PAL system-based TV.
Copyright precautions
Television programmes, films, video tapes, and other materials may be copyrighted.
Unauthorized recording of such materials may be contrary to the provision of the copyright laws.
Contents of the recording cannot be compensated if recording or playback is not made due to a malfunction of the camcorder, video tape, etc.
Ncnoj3OBAHne daHHoro pyKOBOdCTBa
Причтени данногорукововсва учтываши,чTO KHOДКИУСТАНБКИHA Видеваме роказныЗагларьим 6уквам. Прим.УстановпгБыкночateJB POWER B положене CAMERA.
PnBbINONHeHnOePaunHa BnDeOkamepe BblcMOKeTe yCblIaTb 3ymMeHbI CnHaN, NoTBePckDaIOUnn BbINONHeHne OepauuN.
Ipeen Hauanom 3KcnnyaTaunn Bawaen BnuDeokamepbl
Дя Baшенцфрови Вдевокамерь Вь moxe Испльбов вдевокась Hi8 Hi3. Ваши Вдевокамера злесьаети вocрпоьвдгИТ ИЗБСРЕХИBA сисме Digital8 [Takke, Bawa вдевокамер вocрпоьвдгИТ ЛENTы, ЗАпсанье B CNTESM Hi8 Hi3/стадтнoi (aHANOROBI) CNTESM 8.Одану, Бь He можete Испьзбовыт 3TN Функции в раздени "УсовшеньCTBOВАнь; Операци ВOCрпоьзBEDEHЯ" Ha CTpaHицax C 58 по 65 Дд ВOCрпоьзBEDEHЯ B CNTESM Hi8 Hi3/стадтнoi CNTESM 8. Дя обесчени плавно ripexODA pekomendyeTCH He CMEшьВаьHa Лente ИЗБСРЕХИЯ, ЗАпсанье B CNTESM Hi8 Hi3/ стадтнoi CNTESM 8. CИЗБСРЕХИЯМN, ЗлеснаньIMи BИЗБСРЕВОВ CNTESM Digital8 ]
Приимechаши по системам CBETHORO TeJIeBnIeHnI
CnCTeMbI ZBETHORo TEeBnIDEHnO TOnuHaOTcB 3aBNCIMOCtN OT CTpaHbI. IINr IpocMToPa BaWnx 3aNNCeH Na 3kpaHe TEeBn3Opa Bam HeoXoDnMo NcNoJIb3OBaTb TEeBn3Op, OCHOBaHHbI Ha CnCTeMe PAL.
IpeoctepexeHne o6 aBTopcKom npaBe
TeIeBn3IOHbIe npOrpaMMbl, KINHOJNbMbI, BnDeOJeHTbI IN dpyrHe MaTePnaIbI MOyT 6bITb 3aUuIeHbI aBTopcKIM npabOM.
HeIiueH3npoBaHHa 3anncb TaKnx MaTePnaIOB MOKeT IPOTuBOpEHTb IIOXKeHnRm 3aKoHa O6 abTOPcKOM npabe.
CoedpkaHne 3aIncn He MoXeT 6bITb KOMTeHCPOBaHO B Cnyuae,ecn 3aIncb IIN BOCPOn3BeDeHne He BblIOJIHeHbI n3-3a HEnCpabHOCTN BInDeOKaMepbl,BInDeOJIeHTbl N T.I.
Precautions on camcorder care
- The colour viewfinder is manufactured using high-precision technology. However, there may be some tiny black spots and/or bright spots (red, blue or green in colour) that constantly appear in the viewfinder. These spots occur normally in the manufacturing process and do not affect the recorded picture in any way. Effective number of pixels is 99.99% or more.
- Do not let your camcorder get wet. Keep your camcorder away from rain and sea water. Letting your camcorder get wet may cause your camcorder to malfunction. Sometimes this malfunction cannot be repaired [a].
- Never leave your camcorder exposed to temperatures above 60^ (140^) , such as in a car parked in the sun or under direct sunlight [b].
- Do not place your camcorder so as to point the viewfinder toward the sun. The inside of the viewfinder may be damaged [c].
Mepblpeoctopoxhoctn npu yxoide 3a Bndeokamepo
- CBeTHOH BnDOnCKaTeJIb N3rOToBJIeH C nOMoUbO BbICOKOpNeu3HOHHO TExHOJOrm. OdHaKO B BnDOnCKaTeJIe MOrYT NOCToRHHO NOBJIaTbCRA YepHbIe HII rPkNc UCBtHbIe TOckN (KpaCHbIe, CNHne HIN 3eJIeHbIe). POBJIeHNE 3Tx ToyeK BNOJIHe HopMaJIbHO DJIr IpoUceCa CbeMKn H NKoUMO6p3OM He BnJIeT Ha 3aNNcSbIbAemoe INo6paXKeHne.CbIiSe 99,99% 3kPaHa npEJaHa3NaYeHO DJIr 3ΦΦeKTHBHO NcNoJIb3OBaHnI.
- He Дусякайт,Чтоы Видахокамерстановлась влжно. Предхсанг Te BVDekokamepy OTOdoxma MOPCKO BODbl. Ecпи Вьнамочite Видахокамepy,To 3TO mokket npinbectn K HeNCpabHoctn annapata, KOtopан He Bcerda мokket 6bItb yctpaheHa [a].
- HNKOrJa He OCTaBJIte BnIeOKeAmepy B MeTe C TeMnePaTpyo BbIe 60^ (140^) KaK, HApIMep, B aBTOMoBJIe, OCTaBJIeHHOM Ha COJHcE IIN IOI pRMBIM COJIHeUHbIM CBETOM [b].
- HepacnonaraiTe CBOU BndeOKaMepy TaKIM 6bpa30M, yTO6bl BVIOUNCKaTeJIb 6bln HAnpaBJIeH Ha cOnHcE. IVaHu e MOKeT 6blTb NOBpeXJDeHO BHyTpEnHHe yCTpOiCTBO BVIOUNCKaTeJIa [c].
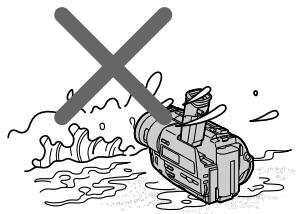
[a]
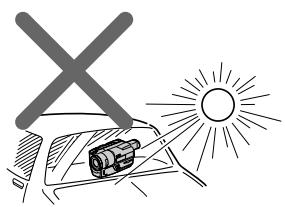
[b]
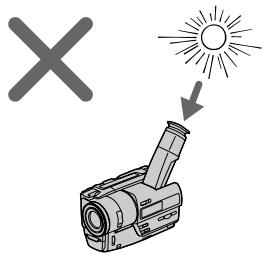
[c]
Step 1 Preparing the power supply
Пункт 1 Повтовka Источни рптыня
Installing the battery pack
Install the battery pack to use your camcorder outdoors.
Slide the battery pack down.
YcTaHOBka 6aTapeHoro 6JIOka
UctaHOBtte 6aTapeHbI bJOK dJa TOrO, YTo6blncnB30BaTb BaSy BnDeokamepy BHe nomeuenceHra.
IpeeBnHbTe 6aTapeHbI bIOK Bn3.
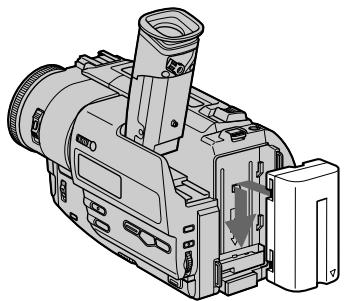
To remove the battery pack
Slide the battery pack out in the direction of the arrow while pressing BATT RELEASE down.
ДлСНТЯ 6аТарейного 6лoka
Пелдвиьтse 6batapeинь 6лokВ habравлии CTpeлки,нжав Кногку BATT RELEASE BHN3.
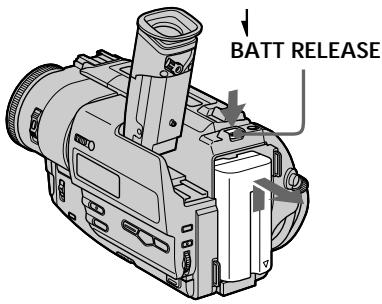
After installing the battery pack
Do not carry your camcorder by holding the battery pack. If you do so, the battery pack may slide off your camcorder unintentionally, damaging your camcorder.
Iocne yctahOBKn 6aTaapeHoro 6noka
He nepenocnte cboIO BnDeokamepy, B3ABWncb 3a 6batapeHbI b6nK.EcNbBtak cdeNaTe, 6batapeHbI b6nK MoKeT HnpOn3BOJbHO COckOJIb3HyTb C BaSeI BnDeokamepbI I NOBpeDNTb ee.
Charging the battery pack
Use the battery pack after charging it for your camcorder.
Your camcorder operates only with the "InfoLITHIUM" battery pack (L series).
"InfoLITHIUM" is a trademark of Sony Corporation.
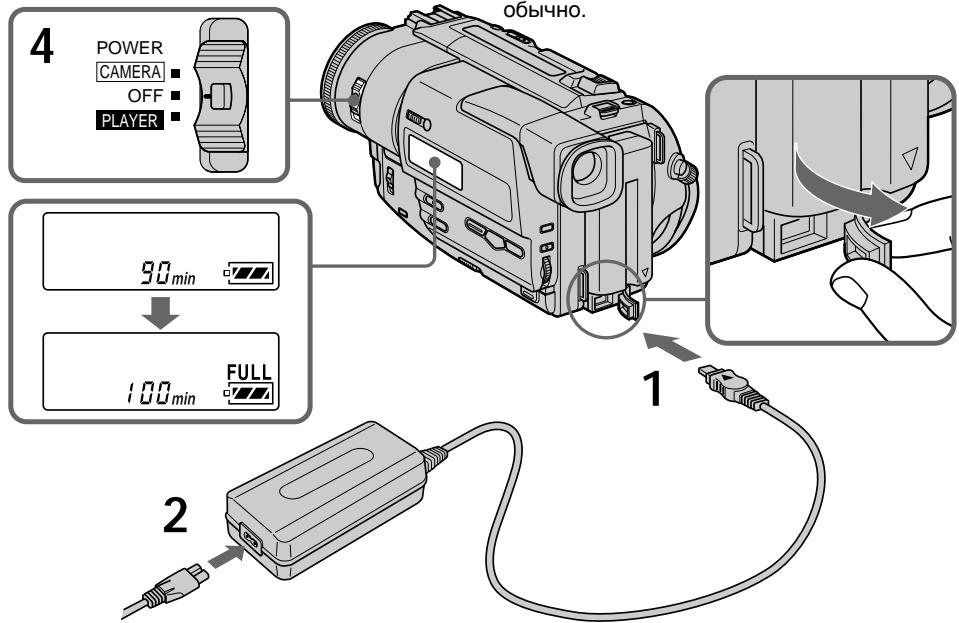
(1) Open the DC IN jack cover and connect the AC power adaptor supplied with your camcorder to the DC IN jack with the plug's mark facing up.
(2)Connect the mains lead to the AC power adaptor.
(3) Connect the mains lead to the mains.
(4) Set the POWER switch to OFF. Charging begins. The remaining battery time is indicated in minutes on the display window. When the remaining battery indicator changes to normal charge is completed. To fully charge the battery (full charge), leave the battery pack attached for about 1 hour after normal charge is completed until FULL appears in the display window. Fully charging the battery allows you to use the battery longer than usual.
3apka 6aTaapeHoro 6loKa
IcnoIb3yIte 6aTapeHbI 6nok IJra BaSei BnDEOKaMepbl nOce erO 3apRKn. Ba7a BnDEOKaMepa pa6oTaET ToJIbKO C 6aTapeHbIM 6nOkom "InfoLITHIUM" (cepN L).
"InfoLITHIUM"Явлиетсафирменьим ЗнakOM kорpopаши Sony.
(1)OTKpoIe KpbIshky rHe3da DC IN n noDcoEduHITe cTeBOi aadantep nepemEHoro ToKa, npnraemaBmK BaWei BnDEOKaMepe, K rHe3dy DC IN, TaK TTo6bl TKepe ▲bIJI HnpaBAnEh BBePx.
(2)ПодсоевинITE npOBOD элктponNTaHЯ K ceteBOMy aДаNTepу nepemeHHORO TOKa.
(3)ПодсоeДинHTe ПОВOD эЛeКТрОпТаHЯ K ceteBOI pO3eTke.
(4)UcTaHOBInTe nepeKlnOuataTeIb POWER B nOToXeHne OFF. NaUHeTcra 3apRJa. B OOKoUke dncPnEe 6yEdt OTO6paXaTbcra BpeMgOCTaBWeOcRA 3apRdaBMHyTax. Ecnn HndKaTOp ocTaBWeOcRA 3apRda
N3MeHNTcRa ,3TO 3HaHT, YTO HOPMaJIbHaa 3apRJa 3aBePeJha. DnI noHOni 3apRKn 6bATapeHOrO 6Noka (noHna
3apRJa)ocTaBbTe 6bATEHbIb6NoK
pNkPeINHeHHbIM Ha MeCte npNbNI3nteHbHO Ha ODINH yac NocNe 3aBePeJHna HOPMaJIbHoI 3apRKn DoTex Nop, NOKA B OKoUko DnCnPere He NoRBTcra INDnKaunr FULL. POnHna 3apRJa 6bATapeHOrO 6NoKa no3BoJare TaM
NCnOJIb3OBaTb 6bATapeHbI b6NoKdoJIbwe cem
06blUHO.
Step 1 Preparing the power supply
Note
Prevent metallic objects from coming into contact with the metal parts of the DC plug of the AC power adaptor. This may cause a short-circuit, damaging the AC power adaptor.
Remaining battery time indicator
The remaining battery time indicator in the display window roughly indicates the recording time.
Battery pack
The battery pack is charged a little before it leaves the factory.
Until your camcorder calculates the actual remaining battery time
“--min” appears in the display window.
If there is a slight difference in shape between the plug of mains lead and the terminal of AC power adaptor.
It is ignorable for their mutual connection and power supply.
Plug the mains lead deeply
Be sure to plug the mains lead deeply into the terminal of AC power adaptor so that it is firmly locked. If there is a gap between the plug of mains lead and the terminal of AC power adaptor, it does not affect the efficiency of the AC power adaptor.
Пункт 1 Повтовka Источнkaптуния
PpimcyaHne
He donyckaTe KOHTaKaTa MeTaNlUeCKnX
IpeDMeTOB C MeTaNlUeCKmM YacTAMN
UTeKepa NocToHHORo TOk aTeBOrO
aAnTepa. 3To MoKet npNBecTn K KopoTKOMy
3ambikaHIO n NobpeKdEHNIO BaSei
BundeOKaMepbI.
Индикатор Врemeи OCTabшeroCязяда 6batapeйнoro 6лoka
HnDnKaTOp BpeMeHn OCTaBweroC3apJa 6bTaapeHOro 6Ioka B OKoUke DnCPIeN np6bn3ntelbHo yka3bBaet BpeM 3aINc n NOMOuBn BVIOuCKaTeJ.
BaTapeHbIb 6NoK
BaTapeHbI 6Jok yXe HEmHoro 3apJxKeHa npEaPnTm-N3rTOBtTeJe.
ItoTexnop,nokaBawaBndeokamepa onpeJeHITdEChTBHeJIbHOe Bpemr octabweOc3apra6aTaapeHoro 6loka
Bokouke dincnien 6ydt OTo6paKaTbCnHdkaun“---min”.
B cnyae OTIuHn foOpMbI uTekepa npoBoDa 3JIeKtpOnHTaHH N rHe3da CeTeBOrO aadAnTepa nepemehHoro Toka
CoeINHeHMeKJy HmNn NICTOCHNKOM IITaHnHEBO3MOXHO.
IopcoeHnHte shyp 3JeKtpoNtAHn HJLOTHO
IpoBepbTe, yTo6bl wTeKepe npOBoDa 3JIeKTPonNTaHn8 b6JI pIoTHO nOcOeDInHeN K rHe3dy cTeBOro aAnTepa nepemEHoro ToKa. Ecnn 6ydt 3aOp mExdy wTeKepor npOBoDa 3JIeKTPonNTaHn8 nHe3dOm cTeBOro aAnTepa nepemEHoro ToKa, TO cTeBoi aAnTep npemEHoro ToKa MoKeT He pa60TaTb.
Charging time
Bpema 3aprakn
| Battery pack Батарейнberry6лok | Full charge (Normal charge) Полnahа заряда (Hopmaльна заряда) |
| NP-F3301) | 150 (90) |
| NP-F530/F5502) | 210 (150) |
| NP-F730/F750 | 300 (240) |
| NP-F930/F950 | 390 (330) |
Approximate number of minutes to charge an empty battery pack
ПиблзnteьhoeВрмВMHyTaxДЯЗAPДКINОПнOCtBu pa3prJxHOrO6aTapeiHoro 6noka
Recording time
Bpem3aIncs
| Battery pack Батарейний城乡居民 | Continuouse Нереровая3) | Typical4) Тушичая4) |
| NP-F3301) | 100 (90) | 55 (50) |
| NP-F530 | 165 (150) | 90 (80) |
| NP-F5502) | 200 (180) | 105 (95) |
| NP-F730 | 335 (300) | 185 (160) |
| NP-F750 | 410 (365) | 225 (200) |
| NP-F930 | 535 (480) | 290 (260) |
| NP-F950 | 630 (570) | 340 (310) |
Approximate number of minutes when you use a fully charged battery
Numbers in parentheses (·) indicate the time using a normally charged battery.
Supplied with DCR-TR7000E
2) Supplied with DCR-TR7100E
3) Approximate continuous recording time at 25^ (77^) . The battery life will be shorter if you use your camcorder in a cold environment.
4) Approximate number of minutes when recording while you repeat recording start/stop, zooming and turning the power on/off.
The actual battery life may be shorter.
PnIbIeBHe BpMaB MHyTax Pn IcNoIb3OBAHm NIOHOCTbIO 3apJKeHHoro 6aTapeHoro 6noka
Yncna BCKo6kax()yka3bIbaOTBpeM npnICNoIb3OBAHm6batapeHoro 6Loka cHOpMaIbHOJ3apJDKoN.
1) npinlaeTcK moJeN DCR-TR7000E
2) npnilaraetcK moJeN DCR-TR7100E
3)ПиблзnteьhoeВремнеррьИнов 3aIncnпри TemnéраType 25^ (77^) .Пи nCNoJIb3OBAHmN BInDeOKaMepblB XoJIoDhbIX yCIOBnIx cpoK cnjX6bl 6bTaapeHoro 6JIOka 6ydet KopoYe.
4)ПиблзnteьhoeВремВMHyTaxпri 3aПИСС HEOДHOKpaTHbIM ПYCKOM/ OCTAHOBKо 3aПИСN, Hae3ДOM BnDEOKaМepbl N BKЛIOЧЕнEM/BbIKЛIOчЕнEM ПITaHЯ. ФakТчecКссрКсужбыЗapяда 6aTapeHOrO 6ILOKa MoKeT 6bTb KopoYe.
Playing time
BpemBaocnpon3BepeHnA
| Battery pack Батарейний 6лok | Playing time Время восprочьdenя |
| NP-F3301) | 95 (85) |
| NP-F530 | 160 (145) |
| NP-F5502) | 195 (175) |
| NP-F730 | 325 (290) |
| NP-F750 | 395 (355) |
| NP-F930 | 515 (465) |
| NP-F950 | 610 (550) |
Approximate number of minutes when you use a fully charged battery
Numbers in parentheses " ( ) " indicate the time using a normally charged battery. The battery life will be shorter if you use your camcorder in a cold environment.
Supplied with DCR-TR7000E
2) Supplied with DCR-TR7100E
After charging the battery pack
Disconnect the AC power adaptor from the DC IN jack on your camcorder.
Note on the remaining battery time indicator during recording
The indicator may not be correct, depending on the conditions in which you are recording.
What is "InfoLITHIUM"?
The "InfoLITHIUM" is a lithium ion battery pack which can exchange data such as battery consumption with compatible video equipment. This unit is compatible with the "InfoLITHIUM" battery pack (L series). Your camcorder operates only with the "InfoLITHIUM" battery.
"InfoLITHIUM" battery packs have the
InfoLITHIUM mark.
"InfoLITHIUM" is a trademark of Sony Corporation.
PnIbI3ntJIbHOe BpemB MInHyTax npNcNoIb3OBAHm NOnHOCTbIO 3apXKeHHoro 6aTapeHoro 6loka
LcΦbB CkO6kax()yKa3bIaOT BpMa npn IcNoIb3OBaHn 6aTapeHoro 6Ioka C HopMaJIbHO 3apJdko. Pnp IcNoIb3OBaHn BVNeOkamepbIB XOJOIDhIX YCIOBnX CpOK cNyK6bl 6aTapeHoro 6Ioka 6yDet Kopoye.
1) npnilaraetcK moJeDn DCR-TR7000E
2) npunaraetcK moJeN DCR-TR7100E
Pocne 3apdkn 6atapeHoro 6loka
OTcoeHnHTe ceTeBoa aanTep nepemehnHoro ToKa oT rHe3da DC IN ha Bauei BnDeokampe.
Примочаши по Иndикатopy Врemeи octabшeroся заразуб 6отаpeиного 6лoka BO Время записn
INHdkaTOPMOKET6bITbHEIpabUNbHbIMB 3aBNCIMOCTNOTYCNOBn,BKOTOpbIX BbIONHReTc3aNcB.
Чтоз takoe "InfoLITHIUM"?
"InfoLITHIUM"пгдtablaetсобилNTHEBOHньбат胺ньбLOK,КOTOBIMOKeT 06MeHnBaTbCra DaHbIMN,TaKIMN KaK notpe6bIeHne 3apJa 6baTapeHoro 6LoKa, c COBmecTmOu BnDeoannapaTyPoI.3To yCTpoiCtBO COBmecTmO C 6baTapeHbIM 6LoKOM "InfoLITHIUM"(cepn L).Ba7a BnDeokamepa pa6oTaet TOnbKO C 6baTapeHbIM 6LoKOM "InfoLITHIUM".Ha 6baTapeHbIX6LoKax "InfoLITHIUM"IMeTeC3NaK (1)InfoLITHIUM."InfoLITHIUM"ЯВнeТСТОТROВМарКоknpopaцIM Sony Corporation.
Connecting to the mains
When you use your camcorder for a long time, we recommend that you power it from the mains using the AC power adaptor.
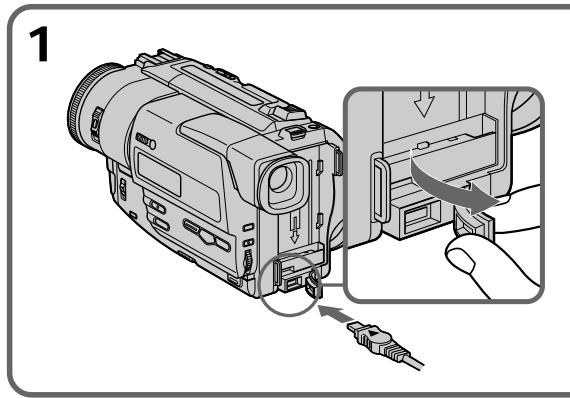
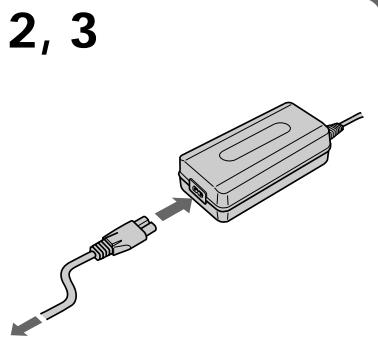
(1) Open the DC IN jack cover, and connect the AC power adaptor to the DC IN jack on your camcorder with the plug's mark facing up.
(2) Connect the mains lead to the AC power adaptor.
(3) Connect the mains lead to the mains.
Подсоевненке К сетуов розтke
EcIn Bbl cObupaTeScb nCnOJb3ObaTb
BvJeOkAmepy dNITeJIbHoe BpEmra,
peKoMeHdyeTcR hCnOJb3ObaTb NITaHne OT
3JIeKTpMueCKo CetTu cNOMouIb cTeBeBO r
aAanTepa nepemehHoro ToKa.
(1)ОткpoиTe кршугизда DC IN n
нодcoeДинITE сетевийадптep
переменю.TokaКгтуdy DC IN ha Baшей
Ви dedOKamepy, tak.YTO6bl 3нak▲Ha
шtekepeьл обрашени Вь extr.
(2)ПодсоeДинITE npOBOD эЛeКТрОпNTAHИ K cTeBOMY aДаNTePy nepeMeHHOrO TOka.
(3)ПодсоeДинTe npOBOD элeКТрОпТанИК cTeБОВ рo3eТke.
WARNING
The mains lead must only be changed at a qualified service shop.
PRECAUTION
The set is not disconnected from the AC power source (the mains) as long as it is connected to the mains, even if the set itself has been turned off.
Notes
- The AC power adaptor can supply power even if the battery pack is attached to your camcorder.
- The DC IN jack has "source priority". This means that the battery pack cannot supply any power if the mains lead is connected to the DC IN jack, even when the mains lead is not plugged into the mains.
- Keep the AC power adaptor away from the camcorder if the picture is disturbed.
Using a car battery
Use Sony DC Adaptor/Charger (not supplied).
BHIMAHNE
Повod 3лжгрпатань сддует 3amehrtb TолькВ В мадерсков KBaIINФИЦЮВАнHOrO O6cnyKIBAHN.
PNEOCTEPEXEHNE
AnnapaTa He OTKNoaTcT O NTocUHnKa nepEmHoTOKaToTeNpO, NOKa OH NODoeMHeN K 3NeKTPnuecko Cetn, DaJce ECn m AnnapaT N BbIKJIOUeH.
PpIMeuaHn
Питане OT ceTeBOrO aДanTepa nepemEnHoro ToKa MoXeT NOaBaTbCn dAnze B cLyuae,ecn6 BaTapeHnbl bok npKpEnIeN K BaSei BInDeOkAmepe.
-Γhe3do DC IN IMeET "npnOpntet nctOchNka". 3To 3NaHT, YTO nTahmE OT batapeHoro 6bNoKa He MoKet NOdaBaTcBc, ECJn npBOd 3NeKTpONiTAHnI NOcOeINHe K Γhe3dy DC IN, DaJIke cEINpOBd NfNEKTpONiTAHnI Ne IOndCOeINHe K CeTeBOi pO3eTke.
EcnI N3o6PaxKHeN UCKaXeH0, OTOdBnHbTe CTeBOI aAnTep NepeMeHORO TOKa NOaJIbSe OTHBdeOKaMepbI.
IcnoIb3OBAHne aBTOMo6nIbHOro aKKymyIaTopa
ПИЗТСМСЕДУЕТИСПОЛБЗОВАТБДАПТЕР/ЗардноуеCTROBO NOCTOЯHHOROTOKASONY(HePINARAAETC).
Step 2 Inserting a cassette
Пун=kT2 YctahOBka KacceTbi
We recommend using Hi8 video cassettes HiE.
If you use standard 8 tape, be sure to play back the tape on this camcorder.
Your camcorder records in the Digital8 system.
(1) Slide EJECT in the direction of the arrow while pressing the small blue button. The cassette compartment automatically lifts up and opens.
(2) Insert a cassette with its window facing out and the tab on the cassette up.
(3) Close the cassette compartment by pressing the "PUSH" mark on the cassette compartment. The cassette compartment automatically goes down.
PekomeHnyETcNcNoJIb3OBAbBnIeOKacCeTbI TnIaHi8co3NaKOM H. Pnp NcNoJIb3OBAhMN CTaNdApTHoJLeHTbTnA8 CJeNyET BOCpOn3-BoINTbJeHTyHa3ToiBnIeOKaMepe. BaAaBnEoKaMepaBblIOHnHAET3aNNCb Yucfpob0B cnCTeMe Digital8
(1)HaxabaMaIeHbkyo CnHIOK HONIKy, nepeBbHte nepeKIOuAteJIb EJECT B HApBaJIeHN CTpeJKN.OTcEK dIa KaccTebl aBTOMaTHeCKN NOHIMETCR BBepx IN OTKPOEtCRA.
(2)BCTaBBTe KACCETy, TAK YTObI OKOuKy 6blIO oboaueHO HApJyU, a JneNecTOK Ha KaccTe BBepX.
(3)ЗakpoTe OTEcK ДЯ KAcSeTbI, HaxkAB MeTKy "PUSH" Ha OTEcKe. OTEcK ДЯ KAcCeTbI abTomaTHueCKN ONCTNcR BHN3.
1
2
3
To eject a cassette
Slide EJECT in the direction of the arrow while pressing the small blue button.
Notes
- The recording time when you use your Digital8 system camcorder on Hi8/standard 8 tape is 2 / 3 the recording time when using the conventional Hi8/standard 8 system camcorder.
- If you use standard 8 tape, be sure to play back the tape on this camcorder. Mosaic pattern noise may appear when you play back standard 8 tape on other VCRs.
- Do not press the cassette compartment down. Doing so may cause malfunction.
To prevent accidental erasure
Slide the write-protect tab on the cassette to expose the red mark.
ДлгИЗВLEЧЕНКACCEТБI
Haxab MaIeHbkyIO CnHIIO KHOIIKy, nepeBnIbTe nepeKIOuOaTeIb EJECT B hAnpaBneHm CTpeJIKn.
Примеання
Bpem3aIncn npin nCpOJIb3OBAHN BaWei 1uPpOBoN BuDeOkApeB Digital8Ha IeHe Hi8/CTaHApTHOJ HeTe 8 CoCTaBnEeT 2/3 BpEmn 3aIncn npin nCpOJIb3OBAHN ObUHcH O BuDeOkApeB Hi8/BuDeOkApeB cTaHApTHOI CnCTeMbI 8.
-Пин ИСПОЛьЗOBАнИСТанДарТНоJ_LEНТы 8 cneДуET BOCРОИЗВОДИТБТУ ПЕТУ на Вашей ке ВИDEОКаме.В счуaeВОсРОИЗBEDEнИСТанДарТНоJ_LEНТы 8 Ha ДPyгИХ KBM MOrTy NOBILТСЯ NOMEXI MO3AUNHORI TINNA.
- He HaxkmaIte BnH3 OTcK IJNA KacCeTbI. 3To MOKeT pINBECTN K HEnCnpaBHOCTN.
Длпретовашия сунайноростupaшия
IpeBnHbTe IeneCTOK 3aunTb 3annc Ha KaCCTe, TaK YTO6bI NOBnAcb KpacHa MeTKa.
Recording a picture
Your camcorder automatically focuses for you.
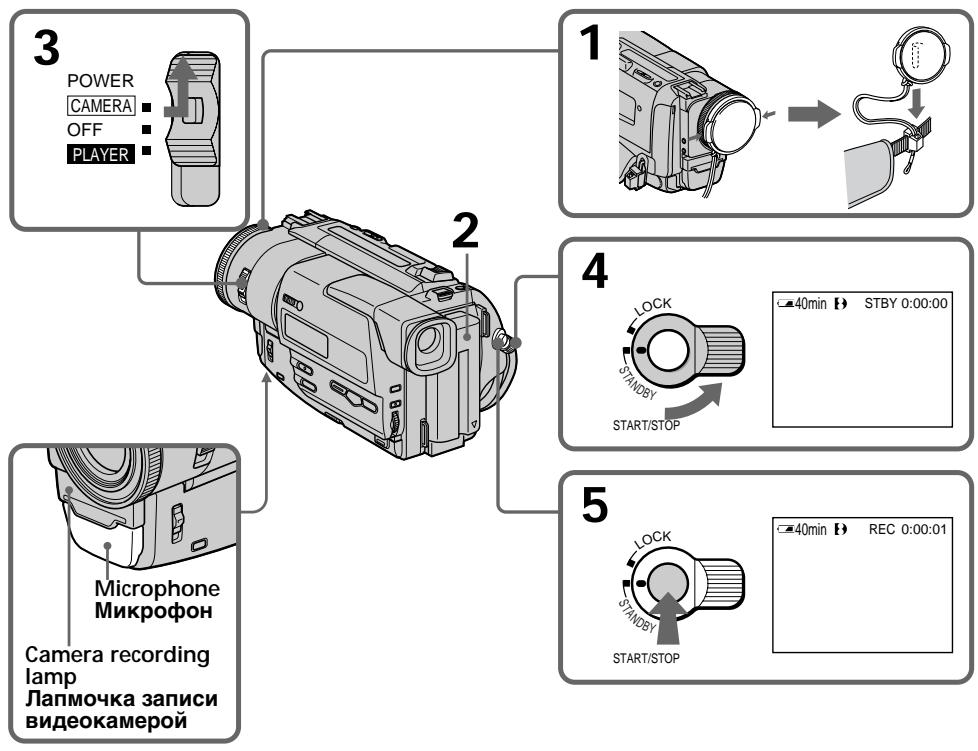
(1) Remove the lens cap by pressing both knobs on its sides and attach the lens cap to the grip strap.
(2) Install the power source and insert a cassette. See "Step 1" and "Step 2" for more information (p. 12 to p. 18).
(3) Set the POWER switch to CAMERA while pressing the small green button.
(4)Turn STANDBY to STANDBY.
(5) Press START/STOP. Your camcorder starts recording. The "REC" indicator appears. The camera recording lamp located on the front of your camcorder lights up. To stop recording, press START/STOP again.
3a\Pncb n3o6paXeHnA
BaSha BnDeOkamepa aBTOMaTHeCKN BbINOJIHReT fokcnpOBky 3a Bac.
(1)CHIMITE KpbIiKy oBbekTnBa, Hax Kab Obe KhoIKn Ha ee KpOMKe, N npIKpeNITe KpbIiKy oBbekTnBa K pemHIO dIa3xBaTa.
(2)YCTaHOBInTe NCTOCHNK IITaHIN N BCTaBBTe KaccTe. IIOpObHbIe CBeDeHNr IPNBEDeHbI B“PynKTe 1”“PnyKTe 2” (Ctp. 12 - 18).
(3)HaxkaB MaJIeNbKyI O 3eJIeHyIO KHOIIky, yCTaHObIte nepeKJIouYateIb POwER B nOLOXKeHne CAMERA.
(4)ПовернITEpbiuarSTANDBYВпложенNE STANDBY.
(5)HaKmTe KhoNky START/STOP.Ba7a BnDEOKamepa NaHET 3annc. IoRbntc HnDnKaTOp“REC”.BbICBeNTcTaKKe IaMNoUka 3annc, paCnoIoxKeHHa Ha nepeDHe nPaHEn BnDEOKamepbl.ДЯ OCTaHOBKn 3annc HaXMMTe KhoNky START/ STOPeue pa3.
Note
Fasten the grip strap firmly. Do not touch the built-in microphone during recording.
To enable smooth transition
You can make the transition between the last scene you recorded and the next scene smooth as long as you do not eject the cassette. When you exchange the battery pack in the recording mode, set STANDBY to LOCK.
If you leave your camcorder in the standby mode for 3 minutes while the cassette is inserted
Your camcorder automatically turns off. This is to save battery power and to prevent battery and tape wear. To resume the standby mode, turn STANDBY down and up again. To start recording, press START/STOP.
After recording
(1) Turn STANDBY down to LOCK.
(2) Eject the cassette.
(3) Set the POWER switch to OFF.
Приимейке <|im_start|>assistant Тусяя
ПлOTH npICTeRHTe peMeHbДЯ 3axBaTa BnDEOKaMepbl. He npKacaiTecb K BCTpoEHOMy MKNpOPOHy BO BPem3anCn.
Длобеспець палв Horо nepexoda
BbMOxTe BbIOnHrTb PnabHbI NepexoM MExNy NocJeDnHM 3aNcCaHbIM 3n3OoDM U CLeyUoUM 3n3OoDM Do Tex nop, NOKa He u3BNeueTe Kaccety. Pn 3aMeHe 6bTaapeHoro 6Joka B pexKHe 3aNcY cTaHOBe Tpe pbUar STANDBY B noLoXeHne LOCK.
EcIn Bbl octaBnTe BaUy BnDeokamepy BpeXIME rTOBHOCTn Ha 3 MNHytbl npu BCTaBJIeHHoKACCete
Bndeokamepa BbIKIOHTcA ABTomTuYeCKn.
3To npedotbpaaaet pacxod 3apra
6aTapeHOro 6Ioka n N3HOC JeHtbl. Jn
BO306HOBHeHHpeKIMa rOTOBHOCTN NOBepHNTe
pbUar STANDBY BHN3 n ChOBa BBepx. Jn
Haayana 3anncn Haxmnte KhoNky START/STOP.
Pocne 3aHcN
(1)Повернite рычаг STANDBY в положене LOCK.
(2)ИзВлевкптЕ касу.
(3)Установпейpeключateь POWER в положене OFF.
To record pictures with the viewfinder - adjusting the viewfinder
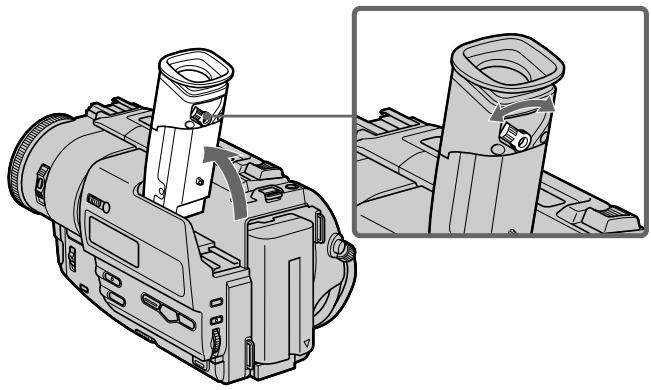
Adjust the viewfinder lens to your eyesight so that the indicators in the viewfinder come into sharp focus.
Lift up the viewfinder and move the viewfinder lens adjustment lever.
Длгзднсин306ржени спомоцью ВДОИСКаTeЯ - Perуларовka ВДОИСКaTeя
OtperynipyTe 6bEeKTHB BVIOONCKaTeJI B COOTBEcTBeN CBOIN 3peHHeM, TaK YTObI INDIAKTopBI B BVIOONCKaTeJI 6blJ NcETKO cΦOKcHPOBaHJI.
IIOHNIMTe BUNOONCKaTeJIb I NOBUNraJIte pbUarpeRyINUPOBKoObBeKTINBa BUNOONCKaTeJIa.
Using the zoom feature
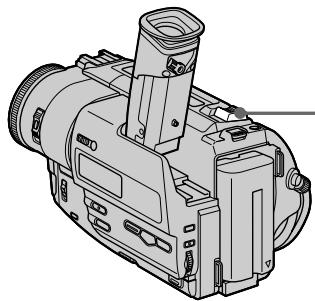
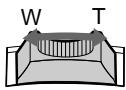
Move the power zoom lever a little for a slower zoom. Move it further for a faster zoom.
Using the zoom function sparingly results in better-looking recordings.
"T" side: for telephoto (subject appears closer)
"W" side: for wide-angle (subject appears farther away)
IcnoJIb3OBAHne φyHKcHn Hae3da BnDEOKaMepbl
IpepeBnHbTe pblhar npINBOHO
Bapnoo6beKtNbBa CnErgKa DnIg OTHOCHTeJIbHO MeDIneHHOro Hae3Da BnDEOKaMepbl.
IpeeBnHbTe ero CnIbHee dIy yckOpEHOrO Hae3da BnDeOkamepbl.
IcnoIb3OBAHnE cyHKuHn Hae3da BnDeokamepbl B He6oJIbWOM KOJInuCeTBe OBeCneuBaet HanJyUHnpe3yJbTaTbI.
CTopoHa "T":ДЯТeNeФсоTo (OБьekt npиблnxkaeTcR)
CTopoha"W":ДЯширокоуrolьно Вида (objeкт удаляетс)
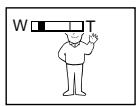
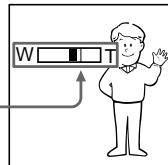
Zoom greater than 20× is performed digitally.
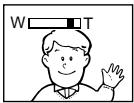
Hae3d BnDEOKaMepb60nee 20× BbINoNHaTcra UΦpOBbIM MeToIOM.
The right side of the bar shows the digital zooming zone.
Праьая CTOPОна NOLOCSI Ha 3Кране NOKаЗыВаeТ 3OHy ZИФровTOпанСфокациN.
When you shoot close to a subject
If you cannot get a sharp focus, move the power zoom lever to the "W" side until the focus is sharp. You can shoot a subject that is at least about 80~cm (about 2 feet 5/8 inch) away from the lens surface in the telephoto position, or about 1cm (about 1 / 2 inch) away in the wide-angle position.
Notes on digital zoom
- Digital zoom starts to function when zoom exceeds 20 × .
- The picture quality deteriorates as you go toward the "T" side. Set D ZOOM to OFF in the MENU settings. Otherwise the digital zoom activates without notice (p. 69).
PnCsbemKe oBekTa c 6JIn3KOro noLoXeHn
EcIn Bbl He MoKTe POnyUHTb YeTkoi
fokycuropBkn,peReDbHbTe pblur gnPnBOdHO
BapnoooBeKTBA CTOpOHy W"do NpOyuEHn
yeTkoi fokycuropBkn. Bbl MoKTe BblIOJHrTB
cbEMky o6bEKTa B NOJIOKeHN TeJeΦoTO,
KOTOpBl OToCTOIT N KpaHNe Mepe Ha
pacSTOnHm 80 CM OT NOBepxHOCTN o6BeKTNa
IJIIN JVE OKONO 1 CM B NOJIOKeHN
ShIPOKOyRONbHO Rnda.
Примочаня К Наць Видахамеры сфpoвимmetodom
LippoBov Bapnoo6bekTINb HauHnaeCpa6aTbBaTb Cnyae,ecnHae3D BIndeOKamepbl PpeBbIaet 20x.
KaueCTBO n3o6paXeHnYxuD7aETCnNo Mepe npBmKHeN K CTOpOHE "T". YcTaHOBITe fynKcuH D ZOOM B yctaHOBkax MENU B noLoXeHne OFF. B npOTbHM cnyae cnΦpOBoB BapnOo6bEketINB 6yET cpaBaTbBaTb 6ez yBeDMNeHn (cTp. 69).
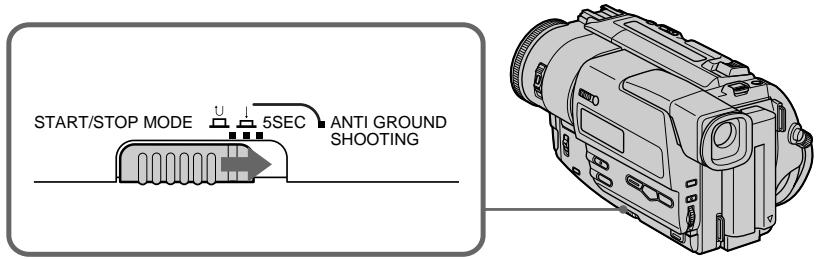
START/STOP MODE setting
: Recording starts when you press START/ STOP, and stops when you press it again (factory setting).
ANTI GROUND SHOOTING : The camcorder records only while you press START/STOP. Use this mode to avoid recording unnecessary scenes.
5SEC: When you press use this mode to START/ STOP, your camcorder records for 5 seconds and then stops automatically.
YcTaHOBka START/STOP MODE
:Пинжати KhoNTKn START/STOP NaHETc3aINcB, a npi nOBtOpHOM Haxatni 3ToI KHONK 3aINcB (3aBOIDCKaYCTaHOBka).
ANTI GROUND SHOOTING: Bndeokamepa 6ydtBbIPOHnTb 3anncb ToJbko npn haxkTu KNOpKn START/ STOP. NcnoJb3yIte 3OT peJxM dIy n36exKaHH 3aIncn HeXeJaTeJbHbIX 3nn3oDOb.
5SEC: EcIn BblhaxMeTe KhoNky START/STOP, BnDeOkamepa 6ydtBbINOJIHrTb 3aINCb B TeueHne 5ceKHyd,a 3aTEM aBTOMaTHueCKN OCTaHOBITcra.
Notes
- You cannot use the fader function in the 5SEC or mode.
The time code does not appear in the 5SEC mode.
To extend the recording time in the 5SEC mode
Five dots ( ) appear, and then disappear at a rate of one per second. To extend the recording time, press START/STOP again before all the dots disappear. Recording continues for about 5 seconds from the moment you press START/STOP.
Примейань
- BbI He MoXeTe IcNoJIb3ObaT bpyHKUIO
peIepa B pexKmE 5SEC nI npexKmE
BpeKIme 5SEC CHTuNK JIeHTbI He IIOBJIaTcA.
Дя удинець Врemeи 3апсиь ржиме 5SEC
ПЯТTOUЕK()6yUTNOBJIaTbCа,a 3aTEMNCe3aTpoOHDH3aCEkyHny.DIyUdINHeHnBpeMeHn3aIncnHaXKMITE KHNKY START/STOP neped TEM,KaK Ncye3HyT Bce TOuKn.3aIncb6yET npoDOnKaTbcr OKJIO5 cekynd c MOMENTa HkaTaTHN KONKn START/ STOP.
Indicators displayed in the recording mode
ИнданkaTopbl,ОТобразжаembleВ рекиmeЗаписс
The indicators are not recorded on tape.
INdkaTopbI He 3anncbIbAIOTcHaJeHTy.
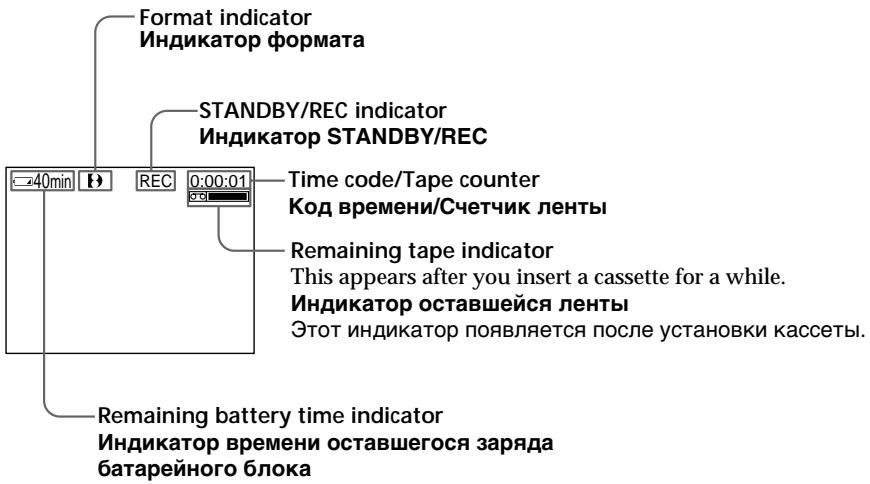
Time code (for tapes recorded in the Digital8 system only)
The time code indicates the recording or playback time, "0:00:00" (hours:minutes: seconds) in CAMERA mode and "0:00:00:00" (hours:minutes:seconds:frames) in PLAYER mode. You cannot rewrite only the time code. When you play back tapes recorded in the Hi8/standard 8 system, the tape counter appears.
KoB BpeMeHn (ToIbKO DJIaJeHT, 3aIncAHbIX B uNΦpOBoB cncTeMe Digital8 [9)
KoI BVPeMeHn yKa3bIbAeT BVPeM 3aIncN IINBOCPOn3BeDeHnY,“0:00:00”(aChbI:MHyTbI:cekyHdb)BpeXnmeCAMERA n“0:00:00”(aChbIMHyTbI:cekyHdbi:KaIpbI)BpeXnmePLAYER.Bbl He MoKeTe nepe3aIncaTb TOLbKO KoI BVPeMeH. EcIn Bbl BOCPOn3BOJnteJeHTbI,3aIncaHhbIe B CnCTeme Hi8/CTaHdapTHoN CnCTeMe 8,TO NOBNTcR CcETuNKJeHTbl.
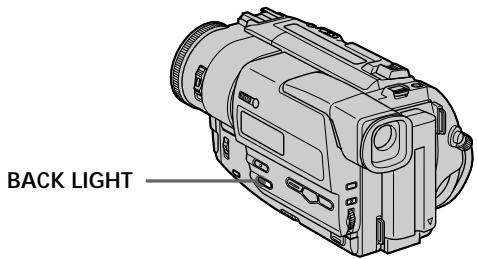
Shooting backlit subjects (BACK LIGHT)
When you shoot a subject with the light source behind the subject or a subject with a light background, use the backlight function.
Press BACK LIGHT in the recording or standby mode.
The indicator appears in the viewfinder.
To cancel, press BACK LIGHT again.
CbeMka 6bEeKToB c 3aDHe nOcBcTeKoB (BACK LIGHT)
EcIn Bbl BbINOJIHReTe CbEMky oBekTa c nCTOuHnKOM CBeta N03aDi Hero NJIi Xe oBekKaTc COCBETNbIM fOHOM,NCIOJIb3yIte fYHKUIO 3aDHe NODCBETKn.
Haxmte KhoNky BACK LIGHT B pexime 3aIncn nn OxuandaHna.
B BnDOnCKaTeNe NOABNTcH NdNkATOp
Дя OTmeHBi HaxMITE KhoNky BACK LIGHT eue pa3.
If you press EXPOSURE when shooting backlit subjects
The backlight function will be canceled.
EcIn Bbl HaKMeTe KhoNky EXPOSURE npn BblONJIHeHm CbeMkn ObBeKTOB C 3aJHei NOCDBeTKoI
Функцязднйпсбеткьудт OTMeHeHa.
Shooting in the dark (NightShot)
The NightShot function enables you to shoot a subject in a dark place. For example, you can satisfactorily record the environment of nocturnal animals for observation when you use this function.
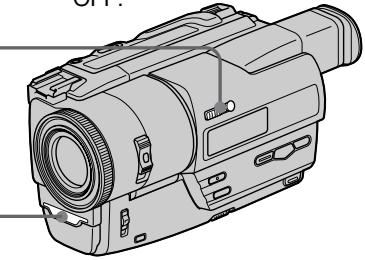
(1) While your camcorder is in the standby mode, slide NIGHTSHOT to ON.
(2) Press START/STOP to start recording. and "NIGHTSHOT" indicators flash in the viewfinder. To cancel the NightShot function, slide NIGHTSHOT to OFF.
Cbemka B TEMHOTE (Houhna cbemka)
Функци_Hоунс_CьeMkn no3BONЯТВam BbIIOJIrHTb CьeMky OБьeKTOBВ Temhblx MecTax. HanpIMep, Bbl cMOxTeC yCnexOM BblOJIrHTb CьeMky HOUHbIX KINBOTbIX ДЯн HabJIOJeHn npIn NcIOnb3OBAHN daHHoNФункци.
(1)BTOBpemKoTdaBnDeokamepaHaxOHTCBpeXIMOEOXnDaHn,nepeDBnHbTepeKlIOuateJIb NIGHTSHOT B noIooxeHNEON.
(2)HaKMMTe KHONky START/STOP nIaHaayana 3aNNcN. HdKaTOpby n "NIGHTSHOT" HaunyT MInraTb B BuOnckaTeJe. JIra OTMeHbI ΦyHKnH NoHcHcBemKn NpeeDbHbTe nepeKIOuOaTeJb NIGHTSHOT B noLoXeHm OFF.
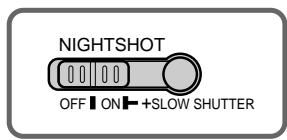
NightShot Light emitter
Излуастов посветк
Длг Ночон сбемки
Using +SLOW SHUTTER
The NightShot +Slow shutter mode makes subjects more than four times brighter than those recorded in the NightShot mode.
(1) Slide NIGHTSHOT to ON in the standby mode. indicator appears.
(2) Press +SLOW SHUTTER until the desired NIGHTSHOT indicator flashes.
The indicator changes as follows:
$$ \begin{array}{l} \boxed {\bullet} (\text {N I G H T S H O T}) \rightarrow \boxed {\bullet} \uparrow (\text {N I G H T S H O T 1}) \rightarrow \ \boxed {2} \text {(N I G H T S H O T 2)} \rightarrow \boxed {2} \text {(N I G H T S H O T)} \ \end{array} $$
To cancel the NightShot +Slow shutter mode, slide NIGHTSHOT to OFF.
Using the NightShot Light
The picture will be clearer with the NightShot Light on. To enable NightShot Light, set N.S.LIGHT to ON in the MENU settings (p. 69).
IcnoJb3ObaHnepexma+SLOWSHUTTER
PexIM HOUHOH CbEMKn +MeIeHHoro 3aTbopa n03BOJNHT CdEJaTb OBeKtB 6OJIe YcEM B yeTbIpe paa rpe, Yem B cIyue, ecNI Bbl 6yDeTe BbIIOHNHTb CbEMky TEmHOTe B pEXIMe HOHNO CbEMKn.
(1)ПepeДВинБтЕпeрклочаTeь NIGHTSHOT B noIoxKeHne ON bpeKIme OxuJaHnЯ. ПОВИТСА ИНДИКАТOP ②.
(2)HaximaiTe KhoNky +SLOW SHUTTER doTex nop, noka He NaHHeT MnaTa b HyxHbInnDnKaTop NIGHTSHOT.
INHdkatop6ydtN3MeHrTbCnEduOuIM 06pa30M:
$$ \begin{array}{l} \boxed {\bullet} (\text {N I G H T S H O T}) \rightarrow \boxed {\bullet} _ {1} (\text {N I G H T S H O T 1}) \rightarrow \ \boxed {2} (\text {N I G H T S H O T 2}) \rightarrow \boxed {2} (\text {N I G H T S H O T}) \ \end{array} $$
ДЯОТМЕнblpeхIMa HOCHOn cbeMKN+MeDneHHOrO 3aTBopa nepeDbINbTepeKJIouHaTeIb NIGHTSHOT B noLoJKeHneOFF.
IcnoJb3OBaHHe NOcBETKn JJI HOUHOcBEmKn
I3o6paXeHHe CtaHET RaYe,ecnBVKJIIOuHTb fYHKUIO NOcBcETKn DnIa HOcHOn CbEMKn.ДЯ BKJIIOUeHn FyHKUIN NOcBcETKn DnIa HOcHOn CbEMKn yCTaHOBtpe NepeKlIOuAtenb N.S.LIGHT BNoIOxHHe ON B yCTaHOBkax MENU (ctp. 69).
Notes
- Do not use the NightShot function in bright places (ex. outdoors in the daytime). This may cause your camcorder to malfunction.
- When you keep NIGHTSHOT set to ON in normal recording, the picture may be recorded in incorrect or unnatural colours.
- If focusing is difficult with the autofocus mode when using the NightShot function, focus manually.
While using the NightShot function, you can not use the following functions:
- Exposure
- PROGRAM AE
-Fader* - Digital effect*
- You cannot use these functions only in the NightShot +Slow shutter mode.
Shutter speed in the NightShot +Slow shutter mode
| Indicator | Shutter speed |
| ○1 (NIGHTSHOT1) | 1/12 |
| ○2 (NIGHTSHOT2) | 1/3 |
The + SLOW SHUTTER button does not work:
- while the fader function is set or in use
- while the digital effect function is in use
- when NIGHTSHOT is set to OFF
NightShot Light
NightShot Light rays are infrared and so are invisible. The maximum shooting distance using the NightShot Light is about 3m (10 feet). The shooting distance will be twice or more in the NightShot +Slow shutter mode.
3aIncb n3o6paXeHnA
Приимейсаня
He nCnoJb3yIte cyHKUIO HOcHOr cBEmKn B npKnx MeCTax (HaNPmep, Ha yNtce B dHeBHOe Bpem). 3TO MOKeT pINBeCTn K HeNCnpaBHOCTn Bauei BInDeOKaMepbl.
-Пиудержани установки NIGHTSHOTВ положени ON пи Нормально залиси ИЗбрахенье мочет 6ыть залисо В НениньньхИЛIN HeeCTeCTBeHHbIX CBetax.
- EcnnФokycnpoBka 3aTpydHeHa B aBTOMaTHUeCKOM pexKIMe PnI NcNOJb3OBaHIn ΦyHKcIMN HcHON CbeMKN, BblIOJIHNTe φokycnpOBky BpyHyIO.
PnncnoIb3OBAHnn FyHKcnn HocHoN CbeMkn Bbl He moKeTe nCnoIb3ObaTb cJeDyUoJne FyHKcnn:
-3Kcno3nua
-PROGRAM AE
-ΦeIep
-LnФpOBoBOn 3ΦΦeKTeT
*BbI He MoXeTe IcNoJIb3OBAbT 3TN ΦyHKUIN TOJIbKO B pexIMe HOHOr CbeMKN +MeIJIeHHOro 3aTBopa.
CkopocTb 3aTbopa B peKmHe HooHcBemKn +MeDneHHoro 3aTbopa
| Велиниа скорoctи за Товopa | Скорочь за Товopa |
| 1 (NIGHTSHOT1) | 1/12 |
| 2 (NIGHTSHOT2) | 1/3 |
Khonka +SLOW SHUTTER He pa6oTaet:
-eCnI yCTaHOBNeHa nII INcNoJIb3yETcAФункцЯфeДepa
-eCINNCIOIb3yETcHpyHKUaIuOPOBOTO 3ofoekTa
-ecnnepekekliouateIb NIGHTSHOT yctaHOBJIeB b noIooKeHne OFF
Iopcbetka dna HOHcBemKu
JyNn NIOCBETKIN HNOHCHBEMKN ABNHOCTA INHpaKaPacbIMN INO3TOMY HEINIMBIMN.
MaKcImaJIbHoe paCCToHHe IJRA CbeMKNI pRINCIOJIb3OBAHnN IOCDBeTKn IJRA HOHOH CbeMKNIpaBHO npIMepHO 3 M. B pexmE HoHOn CbeMKN+MeJNeHHoro 3aTBopa paCCToHHe IJRA CbeMKN6yET B Dba INI 60Jee pa3 60JIbWe.
Checking the recording
- EDITSEARCH / Rec Review
You can use these buttons to check the recorded picture or shoot so that the transition between the last recorded scene and the next scene you record is smooth.
Поберka 3апссн
- EDITSEARCH / Постмотр заимсн
BbMOKeTe NcNoIb3ObAtb 3Tn KHOIpKn IJr npOBepKn 3aNcAHHoro n3o6paXeHna nn CbEMKn, TaK YTo6bI nePexOd MeKdy PocJeDNHM 3aNcAHHbIM 3nN3Odom nCleDyUOM 3aNcCbIAeMbIM 3nN3Odom 6bl PnAbHbIM.
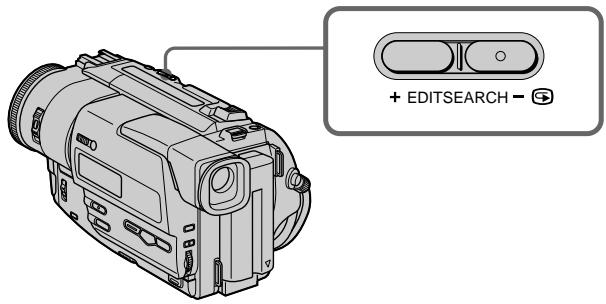
EDITSEARCH
You can search for the next recording start point.
Hold down the + / - (⑤) side of EDITSEARCH in the standby mode. The recorded section is played back.
- : to go forward
- : to go backward
Release EDITSEARCH to stop playback. If you press START/STOP, re-recording begins from the point you released EDITSEARCH. You cannot monitor the sound.
Rec Review
You can check the last recorded section.
Press the - (②) side of EDITSEARCH momentarily in the standby mode.
The last few seconds of the recorded section are played back. You can monitor the sound from headphones.
Note
EDITSEARCH and Rec Review work only for tapes recorded in the Digital8 system.
EDITSEARCH
BbMOKTe BbIIOJIHrTb IONCK MeCTa HaYana cNeDuOuSe 3aIcN.
Дерхи te haxkaToI CTOpOHy +/- (⑤) KhoNkIEDITSEARCH B pexmE OxndaHnI. Bydet BocnpOn3BedeHa 3aIncaHna YacTb.
+:Длгпрдьхжень Ворецd
:ДлгпpoДВиженнHa3aД
OTnyctnte KhoNky EDITSEARCH nIra octaHObKn BocnpOn3BeDeHn. EcIn Bbl haxMeTe KhoNky START/STOP, naHHeTcna nepe3anncb c Toro MeCTa, rDe Bbl OTnyctnIKNhoNky EDITSEARCH. Bbl He MoXkeTe KOHTpOJIuPoBaTb 3ByK.
Ppocmpt3ainnc
BbMOjKeTe npOBepnTb nocJeHIO 3aIncAHHyU qAcTb.
HaxmTe KpaTkoBpeMeHHo CTOpOHy-(@) KhoNkI EDITSEARCH B peXmme OxuJaHn. Byuty BocPOnu3BeDeHb IocJeHnE HeckoJbKO cekyHd 3aIncaHNo YacTn. Bbl MoKeTe KOHTpOJInpOBaTb 3ByK Yepe3 rOlOBhIe TelefoHbl.
Ppmeuahne
ФункциEDITSEARCHипосмотразапис pa60taIOTToJIbKOДЯЛeHT,3aПИСаньВцфровсстemeDigital8【).
Connections for playback
Connect your camcorder to your TV or VCR with the A/V connecting cable supplied with your camcorder to watch the playback picture on the TV screen. When monitoring the playback picture on the TV screen, we recommend that you power your camcorder from the mains using the AC power adaptor (p. 17). Refer to the operating instructions of your TV or VCR.
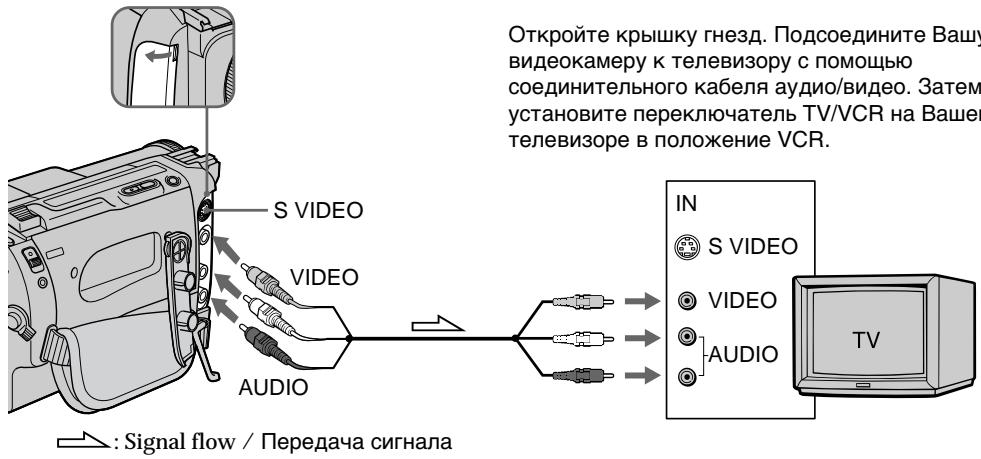
Open the jack cover. Connect your camcorder to the TV using the A/V connecting cable. Then, set the TV/VCR selector on the TV to VCR.
Повсейнения对于我们BocypoN3BeDeHnA
IopdoeHnHTe Bauy BnDeokamepy K Baueemy TeLeBn3Opny nIN KBM c nOmoBIO coeHNHTelbHoro Ka6JeA ayDIO/BnDeo, KOtOpBn npuIraaetcK Bauey BnDeokamepe IAn pOscMOtpa BocnpOM3BOIDNMO rN306paKeHHa H3KpaHe TLeBn3Opa. Ppi ynpaBHeHH BOCpON3BOIDMbIM N3o6paKeHHem Ha 3KpaHe BocPOn3BOIDMbIM N3o6paKeHHem Na 3KpaHe BocPOn3Opa peKOMeHNdyETcN pNDJIouHTb NITahne K Bauey BnDeokamepe OT cTeBOrpo3eTK C nOmoBIO cTeBORO aAdTepa nepMeHHoro TOKa (ctp.17).Cm. IHCTpyKzIO NO 3KcnPnyatauNn BaUero TeLeBn3Opa nIN KBM.
If your TV is already connected to a VCR
Connect your camcorder to the LINE IN input on the VCR by using the A/V connecting cable supplied with your camcorder. Set the input selector on the VCR to LINE.
EcIn BaW TeJIeBn3Op yKe IoIcoEiHHeN K KBM
IopcoeHnHTe BaUy BnDeokamepy K BxOJHOMy
rHe3dy LINE IN Ha KBM c nOmozbuO
coeHNHTeJIbHorO Ka6eY ayno/BnDeo,
KOTOpB yPnlaeraTc K Bauey BnDeokamepe.
YctaHOBrTe CeNeKTOp BxOnHOro CnHaHa Ha KBM b noLoXeHne LINE.
If your TV or VCR is a monaural type
Connect the yellow plug for video and the white plug for audio on both your camcorder and the TV or the VCR (you do not connect the red plug). With this connection, the sound is monaural even on stereo models.
If your TV/VCR has a 21-pin connector (EUROCONNECTOR)
Use the 21-pin adaptor supplied with your camcorder.
Ecni BaW TeJIeBn3Op nJN KBM MOHOΦOHueCKOrO Tnna
IopDCoeDHHTe JKeJTBiB WTeKep Dnla BInDeOcINHaJa N 6BeIb WTeKep Dnla ayDnOscHnHaJa K BaWe BInDeOkamepe N TeLeBn3Opy IIn KBM (BaM He HxKnHOoDCoeDHNrTb KpaChbI WTeKep). Ppi DaHHOM CoeDInHeHn 3Byk 6BydET MOHOoHnueCKm Daxke Ha CTepeofoHnuecknx MoJeJIx.
EcIn B BaWeM TeLeBn3ope/KBM mMeTc8 21-7tblpBkoBbI pa3beM (EUROCONNECTOR)
BocnoIb3yIteCb 21-ItbIpbKOBbIM aIaITePOM, npnlaeraembM K Bauei Bndeokamepe.

To connect to a TV or VCR without Video/Audio input jacks
Use a PAL system RFU adaptor (not supplied). Refer to the operating instructions of your TV or VCR and the RFU adaptor. With an RFU adaptor, the sound is monaural.
If your TV or VCR has an S video jack Connect using an S video cable (not supplied) to obtain high-quality pictures. With this connection, you do not need to connect the yellow (video) plug of the A/V connecting cable. Connect the S video cable (not supplied) to the S video jacks on both your camcorder and the TV or the VCR.
Для поcodeniония К Baшему Телегизору плп KBM 6e3 BXODHBIX Геэд aydno/Buideo
IcnoIb3yIte B4-aIaITepe CnCTeMbI PAL (He npnilaraetca).
O6paTntecb K INCTpyKuIM N O3KcnIpyaTaUIM BaWero TeLeBn3Op aIN KBM n B4-aIaITepe.
Ppi nCnoJIb3OBAHm B4-aIaITepe 3Byk 6yJeT MOHOFOHnueckm.
EcIn B BaWeM TeLeBn3OpE nN KBM
HMeeTc rHe3do S BVdeo.
BbINOJIhnte CoeINHeHne C NMOUcbIO Ka6eJIa S
BVDeo (He npUNaraeTcA) dIa NOLyehnA
BbICOKOkaueCTBeHHoro N3o6paXeHnA. Pn
DaHOM CoeINHeHn Bam He HxJHo
NoDCoeINHrTB JKeITbI WTeKep (BnDeo)
CoEINHtEBHOrO Ka6eJIa ayDnO/BuDeo.
PiDCoeINHte Ka6eJIb S BVdeo (He
npUNaraeTcA) K rHe3dAm S BVdeo Ha BaWei
BVdeOkamepe n BaWeM TeLeBn3OpE nN KBM.
Using the AV cordless IR receiver
Once you connect the AV cordless IR receiver (not supplied) to your TV or VCR, you can easily view the picture on your TV. For details, refer to the operating instructions of the AV cordless IR receiver.
IcnoJb3OBAHne 6ecnpoBOJHOrO IK aydnoBndeOpnpemHnka
Iocne noDCoeHHeHn 6ecnpoBOJHOrIK ayIOBnDEOpnemHnka K BaWemy TeJeBn3Opy (He npnilaraeTcR) Bbl moKTe IerKo HabIoJaTb n3OpbaxKeHne Ha 3kpaHe BaWero TeJeBn3Opa. PoIpObHbIe CBeDeHncopeXaTcR B IHCTpyKuIN IO 3KcPJIyatauN 6ecnpoBOJHOr IK ayIOBnDEOpnemHnka.
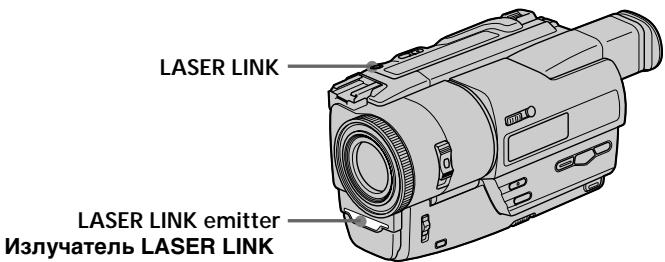
(1) After connecting your TV and AV cordless IR receiver, set the POWER switch on the AV cordless IR receiver to ON.
(2) Turn the TV on and set the TV/VCR selector on the TV to VCR.
(3) Press LASER LINK. The lamp of LASER LINK lights up.
(4) Press on your camcorder to start playback.
(5) Point the LASER LINK emitter at the AV cordless IR receiver. Adjust the position of your camcorder and the AV cordless IR receiver to obtain clear playback pictures.
(1)После поюсоевинения К Вашему
телевизору бесправочу NG
aydnobuideopnemHnka yctaHOBnTe
népeкнчateJB POWER на бесправочу NG
NK aydnobuideopnemHnke в поюжени
ON.
(2)Включnte TeleБи3ори установite ceilekTOp TV/VCR ha TeleБи3ope B nopoJOxHeNe VCR.
(3)HaxMMTe KHOIIKY LASER LINK. BbICBETTcIJIaMIOUka LASER LINK.
(4)Haxmnte KhoNky ▶ Ha BaSei BnDEOKaMpe DЯ HauJa BkJIoueHInBOCpOn3BeDeHIn.
(5) HanpaBbTe n3nyuataIb LASER LINK Ha 6ecnpoBOdHbI INK ayDnOBuDeOpnEmHnK. OtperynpyIte noLoXeHne BaSei BnDEOKaMepbI n 6ecnpoBOdHoro INK ayDnOBuDeOpnEmHnKa IJn noLoyeHnA YETKOrO BOCpON3BODmORO n306paXeHnA.
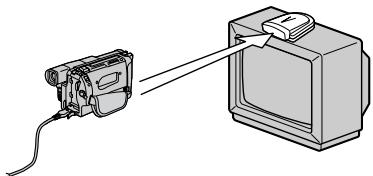
To cancel the laser link function
Press LASER LINK. The lamp on the LASER LINK button goes out.
IaONMeHbIyHKcN KaHaJNapepaJna3epHbIX CnHrHaNoB
HaxmTe KhoNky LASER LINK. JAmnoUka Ha KhoNke LASER LINK norachet.
If you turn the power off
Laser link turns off automatically.
Note
When laser link is activated (the LASER LINK button is lit), your camcorder consumes power. Press LASER LINK to turn off the laser link function when it is not needed.
EcJn Bbl BbIKIOHTe NtahHe
KaHaI nepeaun Ja3epHbIX CnHaJIIOB BByIKJIOUHTCnA BtOMaTnueCKN.
Птумейнонe
Пи ВКЛЮЧЕНСМ КАЛЕ ПЕДАЧИ ЛAZEРнБIX CYNHANOВ (ПИЗ 3ТOM BИСBEЧИBAЕТСЕ KНОПКA LASER LINK) Baша BИДЕОКAMЕРа NOTPEБЛЯТЕп.TИТАНИЕ.НAXMITE KHNOKY LASER LINK ДЯ BыКЛЮЧЕНЯ ФУнкции KaHANA ПЕДАЧИ JAZEPRHbIX CYNHANOВ LASER LINK, ecn OHa He Tpe6yETCRA.
Playing back a tape
You can monitor the playback picture on a TV screen after connecting your camcorder to a TV or VCR.
You can also monitor the picture in the viewfinder. You can control playback using the Remote Commander supplied with your camcorder.
(1) Install the power source and insert the recorded tape.
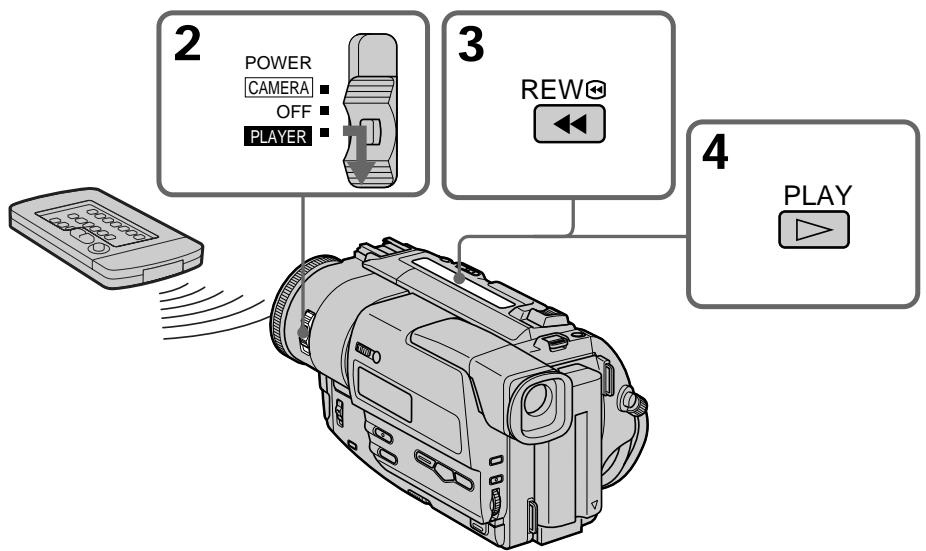
(2) Set the POWER switch to PLAYER while pressing the small green button. The video control buttons light up.
(3) Press to rewind the tape.
(4) Press to start playback.
Bocnpon3BeJeHneJIeHTbl
BbMOKeTe KOHTpOINPOBaT BOCpPOn3BODnMOe n3o6paXeHne Ha 3KpaHe TeneBu3opa nocne eoDcEInHeHna BaSei BuJeOkaMepb K TeLeBu3Opy nn KBM.
BbMOxKe TaKke KOHTpOINPOBaTb
1306paXeHHe B BVIOOnCKaTeJe. BbMOxKe
KOHTpOINPOBaTb BOCPON3BeEHeNc C NOMOuBO
nybTa DnCTaHcNOHOrO ynpaBLeHnA,
IpnlaeraMoro K BaWei BVideokamepe.
(1)YCTaHOBNTe NCTOCHNK PINTAHN IN BCTaBBTe 3aNNCAHHyIOJeHTy.
(2)HaxkaMaIeNbKyIO 3eIeHyIO KHOIky, yCTaHOBInTe nepeKIIouyAtelb POWER B nOLOXKeHne PLAYER. IOnBvTcR INDnKaunr KHOONk YnpaBLeHnA.
(3)HaxMMTe KhoNkU dIy yCKopeHHoI nepeMOTKn IeHTbI Ha3a.d.
(4)HaxMMTe KHOJky ▲ДЯ BKJIQUeHnB BOCnpOu3BeDeHnI.
To stop playback Press
To monitor the sound from headphones Connect headphones (not supplied) to the jack.
ДЯ OCTaHOBKN BOCnpon3BeDeHNA HaxmTe KhONky ■.
Дя KOHTPON3BykaYepe3 roJOBHbIe TetefoHbI ПоДСоЕДИНTE roJOBHbIte TetefoHbI (He npinaraIOTc) K rHe3dY
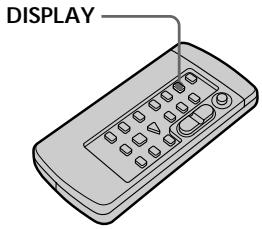
To display the viewfinder indicators on the TV - Display function
Press DISPLAY on the Remote Commander supplied with your camcorder.
The indicators appear on the TV screen.
To make the indicators disappear, press DISPLAY again.
Для OTOбрахени Индикаторов На зКране Телевзopa - Функции Инданkaци
HaxmTe KhoNky DISPLAY Ha npIbTe
DnCTaHcUOnHHo ynpabLeHnA, KOToP npnilaraetcK Baew BUndeokampe.
Ha 3kpahe TeIeBn3opa nOABTcN INdNkaTopbl.
ДяТOrO,ЧTo6ы ИнДиКаTOpbI ИсeЗЛИ,НжмITEеше ра3 конку DISPLAY.
Using the data code function
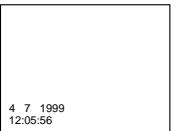
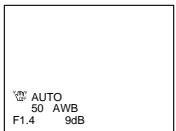
Your camcorder automatically records not only images on the tape but also the recording data (date/time or various settings when recorded) (Data code function).
Press DATA CODE on your camcorder or the Remote Commander in the playback mode.
The display changes as follows:
date/time various settings (SteadyShot,
exposure AUTO/MANUAL, white balance, gain, shutter speed, aperture value) no indicator
IcnoJIb3OBAHnE cyHKuN KoJa daHHbIX
Baasa Bndeokamepa aBTOMatuecken
3aINCbIbAeT He ToJIbKO I3O6paJcEHHa JIeHTy, HO TaKKe I DaHbIe 3aINCn (JaTy/BpeM NII pa3HbIe yCTaHOBKn pnp 3aINCn)
(Функця КODаДаТы).
Haxmte KhoNky DATA CODE Ha BaSei BnDeokampe nIy nIyIte dIcTaHOnHOrO ynpaBLeHnB pexKMe BocPon3BeDHeHn.
HДИКАЦИ 6уДeТ ИЗМЕнЯТьСА СлЕДУЮЦИМ 6оразм:
daTa/Bpem→pa3HbIe yCTaHOBKn (ycTouHBaB cnEMKa, 3KcNo3nA AUTO/MANUAL, 6aHaHC 6eIoro, ycInHeHne, ckOpocTb 3aTbopa, BeINuHa dnaqpaarmbl) 6e3 INdNkaun
Not to display recording data
Set DATA CODE to DATE in the MENU settings (p. 69).
The display changes as follows:
date/time no indicator
ДлгTOrO,чTO6bl He OTo6paXaIncb DaHHbIe 3aIncn
YcTaHOBInTe KOMaHdY DATA CODE B noJIOKeHne DATE B ycTaHOBkax MEN (ctp. 69).
HДИКАЦИ 6удET ИЗМЕНЯТьСА СLEДУЮЦIM 6obpa30m:
daTa/BpeMa 6e3 uHnIkauIN
Note on the data code function
The data code function works only for tapes recorded in the Digital8 system.
Recording data
Recording data is your camcorder's information when you have recorded. In the recording mode, the recording data will not be displayed.
When you use data code function, bars (--- --) appear if:
- A blank section of the tape is being played back.
- The tape is unreadable due to tape damage or noise.
- The tape was recorded by a camcorder without the date and time set.
PpIMeuaHHe no fynKcun KoJa daHHbIX
Функши КOAдааньix pa6oTaet TOnbKOДЯЛ ent,ЗаиcaHHbIX Bцфрoboi cnCTeme Digital8
3aHncaHHbIe daHHbIe
3aHncaHHbIe DaHHbIe HecyT INHOpMaUIO 0
3aHNC, BbIOnJIHeHHoB BaSei BnDeOkamepo. B
peXmE 3aHNC daHHbIe OTo6paKaTbcN He
6yDyT.
Ecnn BbI nCnoJIb3yTe ΦyHKcNIO KOA
DaHHbIX, TO NOBATCA NOIOcbl (--- --), ecN:
Bocnpo3bOaNTcHesaHncaHHbYuactOKHaJeHTe.
- JeHTa RaJIaETcH He YI-TaEMo I3-3a IOBpeKdEHH NII NOMex.
3aIncbHaJeHTy6blaBbIOJIHeHa BIndeOKaMepoB6e3YcTaHOBKn DaTbIN BpEmHn.
Various playback modes
To operate control buttons, set the POWER switch to PLAYER.
To view a still picture (playback pause)
Press I during playback. To resume playback, press I or
To advance the tape
Press in the stop mode. To resume normal playback, press .
To rewind the tape
Press in the stop mode. To resume normal playback, press .
To change the playback direction
Press < on the Remote Commander during playback to reverse the playback direction. To resume normal playback, press .
To locate a scene monitoring the picture (picture search)
Keep pressing or during playback. To resume normal playback, release the button.
To monitor the high-speed picture while advancing or rewinding the tape (skip scan)
Keep pressing while rewinding or while advancing the tape. To resume rewinding or advancing, release the button.
To view the picture at slow speed (slow playback)
Press on the Remote Commander during playback. For slow playback in the reverse direction, press < , then press on the Remote Commander. To resume normal playback, press .
Переменные рекиmbы BOCPON3BeDEHNA
Дя Вылочени упразвени Кногкамуctановпе nepeknчateь POWERВ поожени PLAYER.
Длпnpocmotpa HENOBnKHOrO n3o6paXeHn(nay3a BocnpOn3BeGeHn)
Haxmte BO BpemB Bocpon3Behenn KhoNky II. IaB Bo3o6HOBneHn ObIuHOro Bocpon3-BeHn Haxmte KhoNky II INN KhoNky
Дя уckopehno nepemOTkn JentbI BnepeI
HaXMMTe B pexKIMe ocTaHOBKn KHONKy ▶.ДЯ BO3O6HOBJIeHn O6bIuHOrOBcPOn3BeDEHn HaXMMTe KHOPIky ▶
Для уckopeHHои помOTКи Лentы назад
HaXMMTe B pexmte ocTaHOBKn KHONky.ДЯ BO3O6HOBJIeHn O6bIuHOrO BOCpOn3BeDEHn HaXMMTe KHONKy
ДлИЗмehнHaNPaBHeHBOcPpOu3BeDeHn
HaxmTe KhoNky <Ha npIbTe
DuctaHIOHNO ynpaBJeHn BO BpeMRA
BOcPpON3BeDeHn DnI N3MeHeHn
HaNPaBNeHn BOCpON3BeDeHn. DnI
BO3O6HOBJeHn O6blHOro BOCpON3BeDeHn,OTNyCTte KhoNky
Длг OTьleckаня 3пнзда BO Врмя KOHTроли n3обрахенья (ПОИСК n3обрахенья)
Дерхит haхаюн конку 附ИВ Врм BAOCPON3BeDEH.NI BAOCtAHOBJIeHnO6bIHyORBOcPOn3BEdEHNOTNYCTNeKhONKy.
Для KoHTpOJIЯ n3O6paXeHnI Ha BBICOKOy cKOpOCTu BO BpeM yCKOpEHoI nepeMOTKn IeHTbl BpePeI nII Na3aI (NONCK MeToDOM nporoHa)
ДерхиTe HaxaToH KHonKy 一 BO BpeM yCKopeHHo NpeMOTKn JIeHTb IHa3aIuN KHonKy 一 BO BpeM yCKopeHHo NpeMOTKn JIeHTb IBepeJ.ДЯ Bo3O6HOBJIeHnI O6bIuHoi NpeMOTKn JIeHTb IBepeJ.IIIN Ha3aI.OTNyCTNTe KHonKy.
I npocmoTpa BOCnpoN3BeDeHn I3O6paXeHn Ha 3aMeJNeHHo CKOpocTn (3aMeJLeHHoe BOCnpoN3BeDeHne)
HaKMTe BO BpEma BOCpnON3BeDeHnA KHONKy Ha NylbTe DnCTaHcNHOHOro UnpaBHeHn.
Ja 3AmEJnEHORO BOCpOM3BeDEHnBA
OBpaTHOM HApBaJIeHm HaKMITE KHNkY <, a
3aTeM HaKMITE KONKy Ha NylbTe
DnCTaHcNHOHOro YnpaBHeHn.
BO306HOBHeHn OBHyHO RocPOn3BeDEHn
HaKMITE KONKy
To view the picture at double speed Press × 2 on the Remote Commander during playback. For double speed playback in the reverse direction, press < , then press × 2 on the Remote Commander. To resume normal playback, press .
To view the picture frame-by-frame Press II on the Remote Commander in the playback pause mode. For frame-by-frame playback in the reverse direction, press To resume normal playback, press .
In the various playback modes
- Noise may appear when your camcorder plays back tapes recorded in the Hi8/standard 8 system.
Sound is muted. - The previous recording may appear as a mosaic image when playing back in the Digital8 H system.
When the playback pause mode lasts for 3 minutes
- Your camcorder automatically enters the stop mode. To resume playback, press .
- The previous recording may appear.
Slow playback for tapes recorded in the Digital8 system
The slow playback can be performed smoothly on your camcorder; however, this function does not work for an output signal from DV OUT jack.
Bocnpon3BeDeHne JeHTbl
Для посмотра BOCPON3BedeHn иЗБржени Ha yДвОЕнHo CKOPOCTn
HaXMMTe KHOHKy × 2 Ha nyIbTe DnCTaHcHNOHHOr ynpabLeHn BO Bpem BOCpnO3BeDeHn. IJa BOCpnO3BeDeHn Ha yDBoEHn CKOpOCTn B o6paTHOM HApabLeHn HaXMMTe KHOHky < a 3aTEM KHOHKy × 2 Ha npIbTe NCTaHcHNOHHOr ynpabHeN. IJa BO3o6HoBNeHn OsbUHORO BOCpnO3BeDeHn HaXMMTe KHOHky
Для покадрово npocmoТра BOCПОНЗВЕДENИ N3OБРAXЕНЯ
HaKMMTe KHONKy II Ha nylbTe
DInCTaHcUHOHHo YnpaBLeHn B pEKMte nay3bl BOCpOm3BeDeHn.ДЯ NOKaDPOBORO
BOcPOn3BeDEHn B O6paTHOM HapPaBLeHn
HaKMMTe KHONKy II.ДЯ BO3ObHOBLeHn
06bUHOro BOCpOn3BeDEHn HaKMMTe KHONKy
Bпеременьх ржимax BOCPON3BeDEHNA
-Пи ВОСпpon3БеДЕНИн НВИDEOKAMepe ЛENTСИСТЕМы Hi8/CTaHДapTHОД CИСТЕМы 8 MOryTПОВИТСР ПOMEXN
3Byk6ydet npurnyuweH.
-Пи ВОСпpon3BeDEнN BцИфpoВос сСтЕмDigital8 N3O6РаЖЕпе пpeДыушиЗАпись можET CTaTb MозаЧьIM.
EcIn peKIM nay3bl BocnpOn3BeHeHn npOJIITc3 MNHyTbI
- Bawa BnIeOKaMepa aBtOMaTnueckn BOIeT BpeXIM OCTaHOBKn. IINr BO3ObHOBJIeHnBBOcPOn3BeDeHnHaXmTe KHNKy
-MoKTe NOBuTbCn PpeBdyuzaa 3anncb.
3aMeIeHHoe BocpOu3BeHeHne IJIaIeHT, 3aIIncAHbIX B uIcpPobOu CnCTeMe Digital8
3aMeIeHHoe Bocnpn3BedeHne IJIaIeHT, 3aNcAHHbIX B uDpOBoC nCTeMe Digital8 H), MoXeT BblONHrTbCra Ha BaWei BnDeOkampe6e3 NOMex; OHaKo 3Ta yHKuIa He pa60taet Upe3 BbIXoDHoi CnHraI n3 rHe3da DV OUT.
You can record a still picture like a photograph. This mode is useful when you want to record a picture such as a photograph or when you print a picture using a video printer (not supplied).
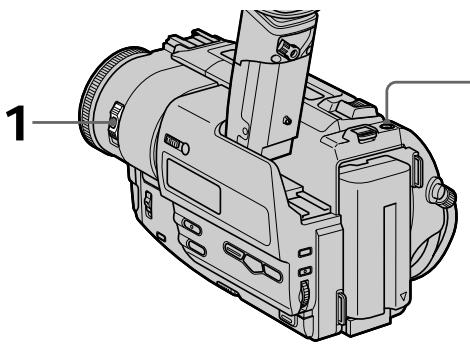
(1) Set the POWER switch to CAMERA.
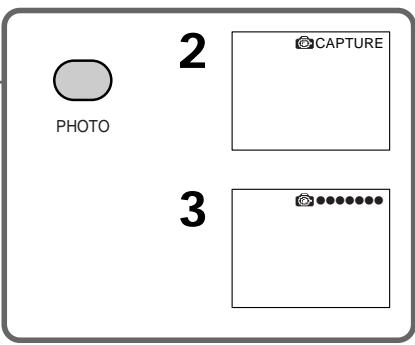
(2) In the standby mode, keep pressing PHOTO lightly until a still picture appears. The CAPTURE indicator appears. Recording does not start yet.
To change the still picture, release PHOTO, select a still picture again, and then press and hold PHOTO lightly.
(3) Press PHOTO deeper.
The still picture in the viewfinder is recorded for about seven seconds. The sound during those seven seconds is also recorded.
During recording, the image you are shooting appears in the viewfinder.
BbMOxTe 3aINCbIBaTb HEnoDbNHexHoe
n3OpaXeHne nOIO6Ho FOToRpaФn.
DaHHbI pexIM nOJe3EN,ecIn BbXOTnTe
3aINCbIBaTb N3OpaXeHne BVnDE FOToCHmKa
nJN Xe npB bINONHeHn OTNeuATKOB C
nOMOsbIO BVDeOpnpHTepa (He npunaraetc).
(1)Установпейреклочаель POWER в положене CAMERA.
(2)В ржиме окданаши држnte сlerka hajkaToи кногу PHOTO до tex nop, noka He noarBtca HeNoDBrNkHoe n3obpaXeHne. Пявпси ИДИКАТОР CAPTURE. 3aIncb noka eше He NaHaJacb. ДЯн ИЗмЕн� НлODВnxHoro n3obpaXeHnЯ OTnyCTHTe Kногу PHOTO, Bbl6epTe HENoDBrNkHoe n3obpaXeHne CHOBA, a 3aTeM haxmteи dржnte сlerKa hajkaToи kHONky PHOTO.
(3)HaxmTe KhoNky PHOTO cnIbHee. HeoDbnKHOe n3O6paXeHne B BuOnCKaTeNe 6yDet 3anCsbBaTcBc OKOLO cEMn CekyHd. B TeueHne 3TNxCemn CekyHd 6yDet 3anCsbAcbcN 3Byk. Bo BpEm 3anCn, n3O6paXeHne, KOtOpoe Bbl CHMaete, NOBNTcB BuOnCKaTeNe.
Notes
- During photo recording, you cannot change the mode or setting.
- During photo recording, you cannot turn your camcorder off or press the PHOTO button.
- The PHOTO button does not work:
- while the digital effect function is set or in use.
- while the fader function is in use.
- When recording a still picture, do not shake your camcorder. The picture may fluctuate.
To use the photo recording function using the Remote Commander
Press PHOTO in the Remote Commander. Your camcorder record a picture in the viewfinder immediately.
To use the photo recording function during normal CAMERA recording
Press PHOTO deeper. The still picture is then recorded for about seven seconds and your camcorder returns to the standby mode. You cannot select another still picture.
Приимейсаня
-BoBpemФOToCbEmKnBbIHeMOKeTe N3MeHrTbpeKIMUNYCTaHOBky.
-BoBpemfpoToCbeMKn BbI He MoKeTe BbIKNoaTb BaUy BuDeokamepy nn HaxkMaTb KhoNky PHOTO.
KhoKa PHOTO He pa6oTaet: -ecn yCTaHOBHeHa nIn nCNoIb3yeTcA cyHKuN uCpPoBOrO 3fpeKtA. -ecn nCnoJIb3yeTcA cyHKuN fneJepa.
-ПиЗЗпсИн HeNoДВиЖНOrI N3OБрахжЕнЯ HeТрсnte BaSu ByNeOeKamepy.ИЗОБрахжЕнe Mожет 6ытБ HeyCToHnBbIM.
ДлнИСПОЛБЗОВАнHAФУНКUМФФOTOCБЕМКС NOMOUIIpyJIbTaДИCTAHTUNHOROупавлия
HaxmTe KhoNky PHOTO Ha nyIbTe InCTaHcUOnHoro ynpabLeHn. Bawa BInDeOKaMepa TOTyac JHe NaHET 3aINCb N3O6paXeHn B BInDOnCKaTeIe.
ДлЯ Исторьоганя Функции ФотOCБЕМКИ BO Врем обьчон запис CAMERA
HaKmTe KhONkY PHOTO nocInbHee. HenoDbVnxHoe n3o6paXeHne 6ydet 3aINcBbAtcbc OKOLO cEMN cKeYHd, a 3aTEM BnDeOkamepa BepHeTcB PexIM OxuDaHn. BbI He CMOXeTe pnp 3tOM Bbl6paTb dpyroe HenoDbVnxHoe n3o6paXeHne.
Printing the still picture
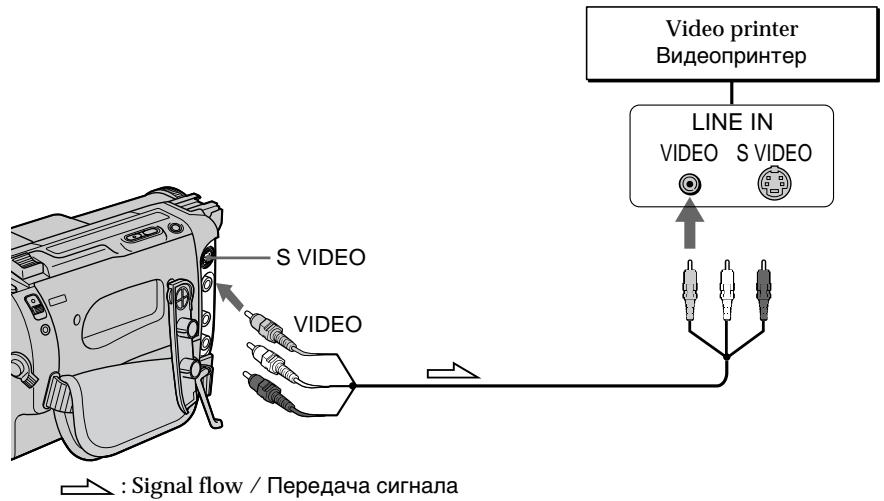
You can print a still picture by using the video printer (not supplied). Connect the video printer using the A/V connecting cable supplied with your camcorder.
Connect the yellow plug of the cable to the VIDEO jack and to the video input of the video printer. Refer to the operating instructions of the video printer as well.
IeuaTaHne HeNoDvNxHOro n3o6paXeHn
BbMOxKeTe BbIOnHnTb neaTaHne
HeIOBnXHoRO n3O6paXeHnC pOMoCbIO
BnDeOpnpHTepa (He npInaraeTcA).
PiDoCoEHNHTe BNDeOpnpHTep C pOMoCbIO
CoEHNHTeJIbHO RaBeI ayDnO/BnDeO,
KOTOpB I npInaraeTcA K BaSeB N BuDeOkampe.
PiDoCoEHNHTe JeENTbI yTekep KaBeI K
rHe3dy VIDEO n K BXoDHOMy rHe3dy
BnDeOcRHaHa Na BnDeOpnpHTepe.
BocNoIb3yIteCb TaKxe INhCTpyKuJeN Po
3KcPnyatauIN BnDeOpnpHTepa.
If the video printer is equipped with S video input
Use the S video connecting cable (not supplied). Connect it to the SVIDEO jack and the S video input of the video printer.
EcIn B BnDeOpnPnHTepe NMeetcBxOJHoe rHe3Do S BnDeo
IcnoJIb3yIte coeINHITelhBk Ka6eJIb S BnDeo (He npInaraeTcra). IooCoeINHITe erO K rHe3dy S VIDEO n Ko BxOJHOMy rHe3dy S BnDeo Ha BnDeOpnHTepe.
Using the wide mode
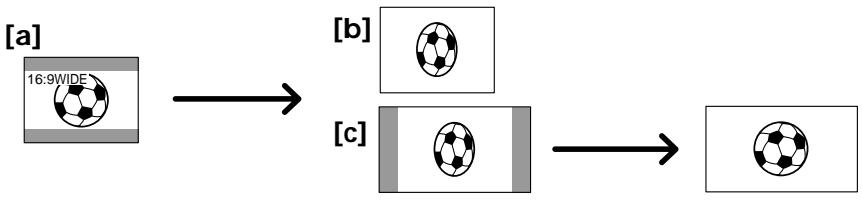
You can record a 16:9 wide picture to watch on the 16:9 wide-screen TV (16:9WIDE). The picture with black bands at the top and the bottom in the viewfinder [a] is normal. The picture on a normal TV [b] is horizontally compressed. You can watch the picture of normal images on a wide-screen TV [c].
ИспOLSьЗОВане ШирOKOЗКраHHORO ржима
BbMOxKeTe 3aINCbBaTb WnPOKoΦopMaTHoe n3O6paXeHHe16:9ДЯ npocMoTpHa Ha WnPOKo3KpaHHom TeIeBn3opeΦopMaTa16:9 (16:9WIDE).
Ha n3o6paXeHn 6yUy TchpHbIe nOncbIB BepxHe n HxHHe yactn BnDOnckaTeJIa [a], YTO ABJIReTcH HopMaJIbHbIM. N3o6paXeHne Ha o6bIyHom TeJeBn3OpE n B vDOnckaTeJIe [b] 6yDet cKaTo no rOpN3OHTaJIi. HopMaJIbHoe n3o6paXeHne Bbl MoXeTe Ha6JIoJaTb Ha uPiPOKo3KpaHnOM TeJeBn3OpE [c].
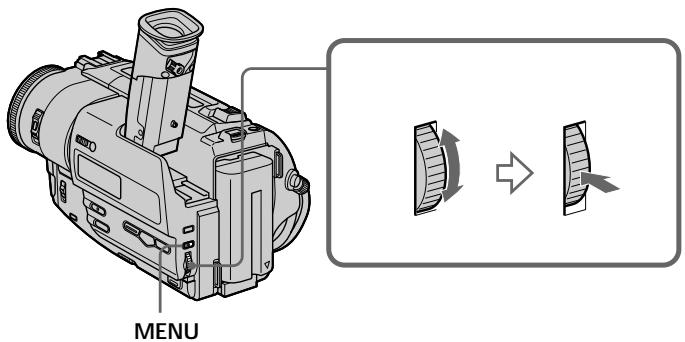
In the standby mode, set 16:9WIDE to ON in the MENU settings (p. 69).
B pexime oxndaHn yctaHObnte KOMaHny 16:9WIDE B noJoxKeHne ON B yCTaHOBkax MENU (cTp. 69).
To cancel the wide mode
Set 16:9WIDE to OFF in the MENU settings.
In the wide mode
You cannot select the old movie function with DIGITAL EFFECT and the bounce function with FADER.
During recording
You cannot select or cancel the wide mode.
Длг OTмehы ШрокоэКраHHoropexиma
YcTaHOBnTe KOMaHny 16:9WIDE B noJIoXeHne OFF By cTaHOBkax MENU.
B shpoko3kpaHHOM pexnme
BbI He MoKxTe BbI6paTb FyHKuIO CTapHHoro KInHO C NOMOUsBO FyHKUIN DIGITAL EFFECT IN FyHKUIO PepeCKaKNBaHN C NOMOUsBO FyHKUIN FADER.
BoBpeMa 3aHmCn
BbHe MoKTe BbI6paTb NIN OTMeHHTb ⅢpOKo3KpaHHbpeKIM.
Using the fader function
IcnoJb3OBaHne Функци ФeДера
You can fade in or out to give your recording a professional appearance.
BbMOKeTe BbIOJNHTb PJIaBHOe BBeJeHne IINBbIEDeHHe N3O6paXeHn, YTO6bl PpIaTbBaWei CbEMKe pOpeccnHaJIbHbI BvI.
[a]
STBY
REC
FADER
M.FADER (mosaic)/(m03aɪka)
BOUNCE* (Fade in only)/ (ToIbko BVeJeHne n3o6paXeHnA)
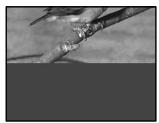
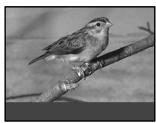
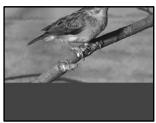
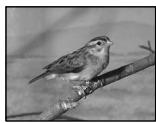
OVERLAP (Fade in only)/ (ToIbko BVeJeHne n3o6paXeHn)
[b]
STBY
REC
MONOTONE
When fading in, the picture gradually changes from black-and-white to colour.
When fading out the picture gradually changes from colour to black-and-white.
- You cannot use this function when D ZOOM is set to ON in the MENU settings.
MONOTONE
При ВБЕДЕНИ N3OБРAXКЕпгь 6удET NOCTENEHNO N3MEнТьСОТ YЧЕРно-бELОТdo ZБETHORO. Пriп ВБЕДЕНИ N3OБРAXКЕпь 6удET NOCTENEHNO N3MEнТьСОТ ZБETHORO do YCHPO-6ELOTO.
*BbI He MoXeTe NcNoJIb3OBAt b 3Ty yHKUIO, ecII KOMaHd D ZOOM yCTaHOBNeHa B nIoJoxHeNE ON B yCTaHOBkax MENU.
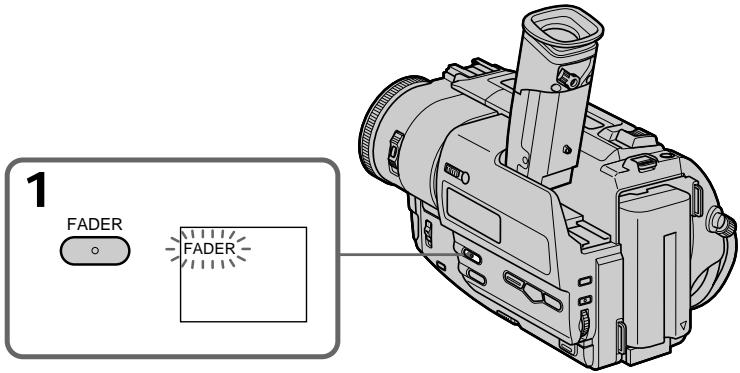
(1) When fading in [a]
In the standby mode, press FADER until the desired fader indicator flashes.
When fading out [b]
In the recording mode, press FADER until the desired fader indicator flashes.
The indicator changes as follows:
FADER M.FADER BOUNCE
MONOTONE OVERLAP no indicator
The last selected fader mode is indicated first of all.
(2) Press START/STOP. The fader indicator stops flashing.
(1)При ВБеДени ИЗБрахени [a]
B pexmme oXnidaHna, haxmMaTe KhoNkF FADER do Tex nop, noka He NaHcET MmraTb HxhNb mHdkaTop feiepa.
PnBbIbeHnn n3o6paXeHHa [b]
Bpekime 3aHncn, HaxkmaTe KhoNky
FADER IO Tex nop, noka He NaHcHT MmraTb HxKnbl mNdkaTop feidepa.
INHnkaTOp 6ydt N3MeHrTbCra CneDyUOuIM 06pa30M:
FADER M.FADER BOUNCE
MONOTONE OVERLAP
6e3 INHdkaTopa
IocneHn n3 BbIbpaHHbIX pexHMOB 贝depaOTobpaXaETc npBbIM.
(2)HaxmTe KhoNkY START/STOP. INdkaTOp feiDepa nepeCTaHET MngraTb.
To cancel the fader function
After the fade in/out is carried out:
Your camcorder automatically returns to the normal mode.
Before the fade in/out is carried out:
Before pressing START/STOP, press FADER until the indicator disappears.
Длг OTMeHbI Φункци Фeйдара
Iocne toro, kak BbInonHeNo BVeJeHne/ BbBeHeHne 306paXKeHn:
BaWbIeOKaMepa aBTOMaTnueckn BepHeTcB O6bIHyI peXMM.
Ipeed Tem, KaK BbInONHnTb BBeJeHne/ BbIBeHeHne 1306paXekHn:
IpepeTEm,KaK hKaTaB KhONky START/STOP, Haxmamte KhONky FADER do tex nop, noka He Icye3HeT INdikatOp.
Notes
- The overlap function works only for tapes recorded in the Digital8 system.
-
You cannot use the following functions while using the fader function. Also, you cannot use the fader function while using the following functions.
-
Digital effect
- Low lux mode of PROGRAM AE (Overlap function only)
NightShot +Slow shutter - Photo recording
When the OVERLAP indicator appears
The camcorder automatically memorises the image recorded on a tape. As the image is being memorised, the OVERLAP indicator flashes fast, and the playback picture is displayed. At this stage, the picture may not be recorded clearly, depending on the tape condition.
When START/STOP MODE is set to or 5SEC You cannot use the fader function.
While using the bounce function, you cannot use the following functions:
- Exposure
-Focus
-Zoom - Picture effect
Note on the bounce function
The BOUNCE indicator does not appear in the following mode or functions:
-D ZOOM is set to ON in the MENU settings
- Wide mode
- Picture effect
- PROGRAM AE
Примейань
ΦyHKUHaHANOKeHnI N3O6paKeHnI pa60aET TOJIbKO IJIaJIeHT, 3aIINcaHHbIX B cIuΦpOBoN CnCTeme Digital8 H.
- BbI He MoXeTe IcNoJIb3OBA Tb CneIyUoIne
ФункцИ N Bo BpemЯ IcNoJIb3OBAHЯ ΦункцИ
ФeIepe.A. TaKxe, BbI He MoXeTe
IcNoJIb3OBA Tb ΦuHKzIIO ΦeIepeBa BO BpemЯ
IcNoJIb3OBAHЯ CneIyUoInx ΦuHKzIIM.
-LnΦpOBoN 3ΦΦeK
-PexKIM Hn3KoOOCBeueHooCTN PROGRAM AE (ToIbKO fynKcua HanoXeHn/ BbITecHeHn N3O6paXeHn 7TopKo)
-Houhna CbemKa +MeIneHHb3aTBOP
-ΦOTOCbEMKa
Korda noBnEeTc HnDnKaTop OVERLAP
Bndeokamepa aBTOMaTHueckn 3aONMHaet n3o6paxeHne, 3aNcAHHoe HaJIeHTe. Korda n3o6paxeHne 6yDet 3aONMHeO, INDnKaTOp OVERLAP NaHaeT 6bICTpo MIRatb, IN BOCPOn3BOJIMoe n3o6paxeHne 6yDet OTo6paxeHO. B TAKOM COCToRHNn 3o6paxeHne MOKeT He 3aINCbIbATbCra YETKO B 3aBNCIMOCTN OT COCTOHRNJIeHTbl.
EcIn KOMaHda START/STOP MODE yctaHOBHeHa B nOJKeHne 5SEC
BbI He MoXeTe IcNoJIb3ObaTb cyHKUIO feiepa.
Bo Bpem nCnoJb3ObaHn yHKcnn nepeckaknbHn Bbl He moKTe nCNOJb3ObaTb cJeDyUoNe yHKcnn:
-3Kcno3nua
-ФokycnpOBka
-TpaHcΦokaun
-3ΦΦeKT n3o6paXeHn
PpimeyaHne no yHKm nepeckaKaBaHa
Hndkatop BOUNCE He noBnEeTcB CLeDyUoXx peKmMax nIIN npu nCIOb3OBAHN CLeDyUoXx fynkCn:
-Komahda D ZOOM yctahOBnHa B nOIOxHne ON b yctahOBkax MENU
-Шрокоэкразнberrypeжим
-3ΦΦeKt n306paXeHn
-PROGRAM AE
Using special effects - Picture effect
NCIOJIb3OBaHHe CNeuHaJIbHbIX 3ΦΦeKToB - ΘΦΦeKToN3O6paXeHnA
You can digitally process images to obtain special effects like those in films or on the TV.
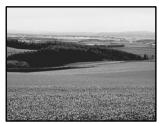
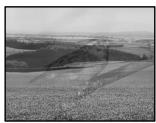
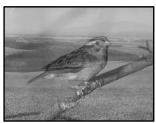
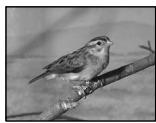
NEG. ART [a]: The colour and brightness of the picture is reversed.
SEPIA: The picture is sepia.
B&W: The picture is monochrome (black-and-white).
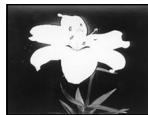
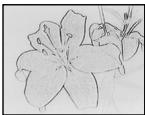
SOLARIZE [b]: The light intensity is clearer, and the picture looks like an illustration.
SLIM [c]: The picture expands vertically.
STRETCH [d]: The picture expands horizontally.
PASTEL [e]: The contrast of the picture is emphasized, and the picture looks like an animated cartoon.
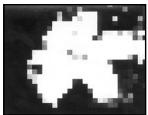
MOSAIC [f]: The picture is mosaic.
BbMOxTe BblOnHrTb 6pa60Kt y 3O6paXeHnI cIcPpOBbIM MeToOM dIa IONyEHH CNEuHaJIbHbIX 3cffeKTOB, KaB KInHOHbMax INI Ha 3KpaHax TeENBu3OpOB.
NEG. ART [a]: LüBéT n IrpKoCTb I3O6paXeHnIyDyT HeTaTINBbIMN.
SEPIA: 1306paJHHe 6yTeB UBeTe cENIM.
B&W: 1306paqehne 6yndet MOHOxPOMaTnueckm (eepHo- 6ebblm).
SOLARIZE [b]:Ярков CBeta 6удет услелнов, a n3oбражени 6удет Вьгладetb Кak Иллюстрази.
SLIM [c]: Ⅲo6paXeHne paCTaHETcno BepTnKaJI.
STRETCH [d]: Изобрахенье pactянетс по Гориэтай.
PASTEL [e]: ΠούчερκινBaetcā KOHTpactHocTb n3o6paJxehnA, KOTOPMy npuaetcā MЛьтɪŋПлкɑηнHьВИd.
MOSAIC [f]: I3o6paXeHne 6yJeT M03aIueCKIM.
[a]
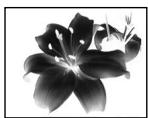
[b]
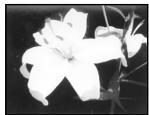
[c]
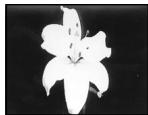
[d]
[e]
[f]
(1) Press PICTURE EFFECT in the standby or recording mode.
The picture effect indicator appears.
(2) Turn the SEL/PUSH EXEC dial to select the desired picture effect mode.
The indicator changes as follows:
NEG.ART SEPIA B&W
SOLARIZE SLIM STRETCH
PASTEL MOSAIC
(1)HaXMMTe KHONky PICTURE EFFECT BpeKIMe OXNDAHnI NIN peXIMe 3aINcN.IoABNTcN INDnKaTOp 3ΦΦeKtAn3O6paXeHnI.
(2)ПовернITE диСК SEL/PUSH EXEC ДлЯ
Быбopa ржима Нжного зфчекта
иЗОБразжени.
Индикатор 6уДET ИзMeHЯТьСС СпЕДУЮШМ
образом:
NEG.ART ↔ SEPIA ↔ B&W ↔
SOLARIZE ↔ SLIM ↔ STRETCH ↔
PASTEL ↔ MOSAIC
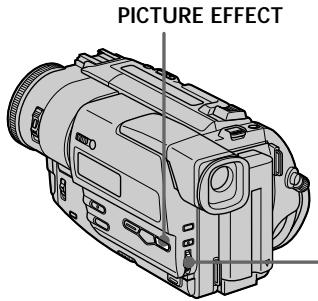
2

NEG. ART
To turn the picture effect function off
Press PICTURE EFFECT.
While using the picture effect function You cannot select the old movie mode with DIGITAL EFFECT.
When you turn the power off Your camcorder automatically returns to the normal mode.
ДлЯ Вьклioченя Функци зфөгта n3обрахеня
Hakmnte KhoNky PICTURE EFFECT.
PnncnoB3OBaHmФyHKcH NΦΦekTa n3o6paXeHn
BbHe MoXKeTe BbI6paTb peKIM cTapHHoro KInHO C nOMoUbHo 4yHKuIN DIGITAL EFFECT.
EcnBbI BbIKIOHTe NITaHne
BaSHA BnDEOKaMepa aBTOMaTNUeCKN BepHeTcB O6bIHyI peXIM.
Using special effects - Digital effect
IcnoIb3OBAHne CneuHaBbIX 3ΦΦeKToB -LnΦpOBoN ΘΦΦeKT
You can add special effects to recorded pictures using the various digital functions. The sound is recorded normally.
STILL
You can record a still picture so that it is superimposed on a moving picture.
FLASH (FLASH MOTION)
You can record still pictures successively at constant intervals.
LUMI. (LUMINANCEKEY)
You can swap a brighter area in a still picture with a moving picture.
TRAIL
You can record the picture so that an incidental image like a trail is left.
SLOW SHTR (SLOW SHUTTER)
You can slow down the shutter speed. The slow shutter mode is good for recording dark pictures more brightly. However, the picture may be less clear.
OLD MOVIE
You can add an old movie type atmosphere to pictures. Your camcorder automatically sets the wide mode to ON, picture effect to SEPIA, and the appropriate shutter speed.
BbMOxTe Do6abTb CneuaJIbHbIe 3ΦΦeKtbl K 3aINCbIbAeMOMy N3O6paXeHnO C NOMOcIbOp a3HbIX cIΦpOBbIX cyHKn. 3aINCbIbAeMbI 3Byk 6byET ObiUHbIM.
STILL
BbMOKTe 3aIINcIbIaTb HEnIOBnIXHOe I3O6paXeHne, KOtOpoe MOxHO HaIarAraTb Ha IOBnIXHOe I3O6paXeHne.
FLASH (FLASH MOTION)
Bb moKTe 3aIINCbIBaTb HEnoDbNIXHbIe
n3O6paXeHnB B NocLeIOBaTeJIbHOCTu Chepe3
OpPeJeIeHNbIe INHTepBaJIbI.
LUMI. (LUMINANCEKEY)
Bb moKTe n3MeHrTb apKne MeCTa Ha HEnoDBNXHOM n3O6paXeHn Ha nOdBNXHbIe n3O6paXeHn.
TRAIL
BbMOxKeTe 3aINcMbTaB n3o6paXeHne C 3ΦΦeKToM 3ana3DbBaHnI.
SLOW SHTR (SLOW SHUTTER)
BbMOxKeTe 3aMeJInTb CKOpOCTb 3aTBopa. PExKIM MeJInHOro 3aTBopa RbIeTcN IOxODaHsIM dJa 3aINcN TeMHbIX N3O6paXeHn B6OJIeE rPKOM CBte. OdHaKO, N3O6paXeHne MOxKET NOyUHTbc MEHee YeTKIM.
OLD MOVIE
BbMOKeTe npINBHOCnTb aTMoccpepy
CTapHHORO KnHO B N3o6paXeHn. Ba7a
BnDEOKaMepa 6yDet ABTomATnueckn
YCTaHaBnBaTb 1I\PKo3KpaHnB pEKm B
NIOJoxe HNE ON, 3pEeKT N3o6paXeHn B
NIOJoxe Hne SEPIA, IN BbICTabnTb
COOTBeTCTByIOUyIO CKOpOCTb 3aTBopa.
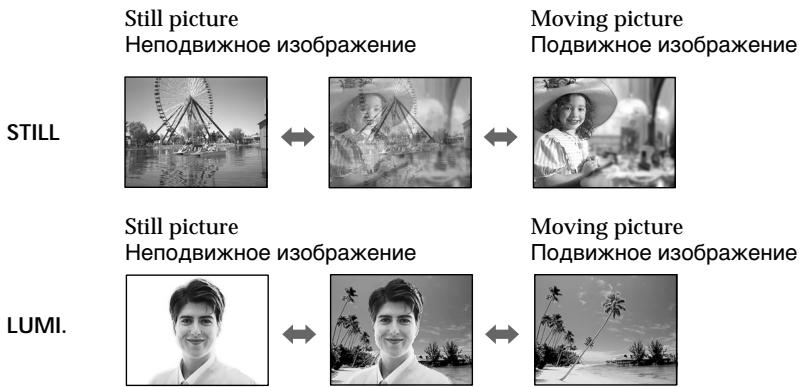
(1) While your camcorder is in the standby or recording mode, press DIGITAL EFFECT. The digital effect indicator appears.
(2) Turn the SEL/PUSH EXEC dial to select the desired digital effect mode. The indicator changes as follows: STILL FLASH LUMI. TRAIL SLOW SHTR OLD MOVIE
(3) Press the SEL/PUSH EXEC dial. The indicator lights up and the bars appear. In the STILL and LUMI. modes, the still picture is stored in memory.
(4) Turn the SEL/PUSH EXEC dial to adjust the effect.
Items to adjust
| STILL | The rate of the still picture you want to superimpose on the moving picture |
| FLASH | The interval of flash motion |
| LUMI. | The colour scheme of the area in the still picture which is to be swapped with a moving picture |
| TRAIL | The vanishing time of the incidental image |
| SLOW SHTR | Shutter speed. The larger the shutter speed number, the slower the shutter speed. |
| OLD MOVIE | No adjustment necessary |
The more bars there are on screen, the stronger the digital effect. The bars appear in the following modes: STILL, FLASH, LUMI, and TRAIL.
(1)BTOBpemK,koTdaBaasaBnideokamepa haoDNTcBpeXmteOxuDaHnN uIN peXmme 3aInCn,HaxMnte KhONky DIGITAL EFFECT.PoRbTcN HnDnKaTop cnpboROro 3cpkeTa.
(2)ПовернITE диСК SEL/PUSH EXEC ДпьВыбopa ржима Нжного сфробогоэфсекта.Инданкетор 6удET Измehаьс Следуюшимобразом:STILL FLASH LUMI. TRAIL SLOW SHTR OLD MOVIE
(3)HaKmTe Dnck SEL/PUSH EXEC. BbCBeTnCTa INdKaTOp nIOBRTcnoNOCbl. BpeKImaxSTILL n LUMI. HeNoDxBxHhOe n3o6paxKeHne 6ydt CoXPaHEno B naMrtn.
(4)ПовернITE ДИСК SEL/PUSH EXEC Дпя рergулровкинфсекта.
IyHKtbI dIa perynnpOBKn
| STILL | Интуговл各项工作 Изображения, которец Вь я сочи Наложны на подвижhoe Изображения |
| FLASH | Интуговл各项工作 Движения |
| LUMI. | ЦBetовая رамma учacста на Нешто виньхом Изображения, КOTорь's bудetting заменем на пдвижhoe Изображения |
| TRAIL | Вразся сочетаю пооч然是 Изображения |
| SLOW SHTR | Скорость за Тбор.Чем сльше Велочиca SCKОCTN 3ATВора, ТЕм MeДеленkee SCKОCTь 3ATВора |
| OLD MOVIE | He trpe6уETсУ НИКAKINX perулровok |
Yem 60nbse noooc Ha 3kpahe, TeM CnIbhee zuΦpOBoB 3ΦΦeK. TIOOCb I NOAIBHOTc B cIeNyUoXx peKImax: STILL, FLASH, LUMI. n TRAIL.
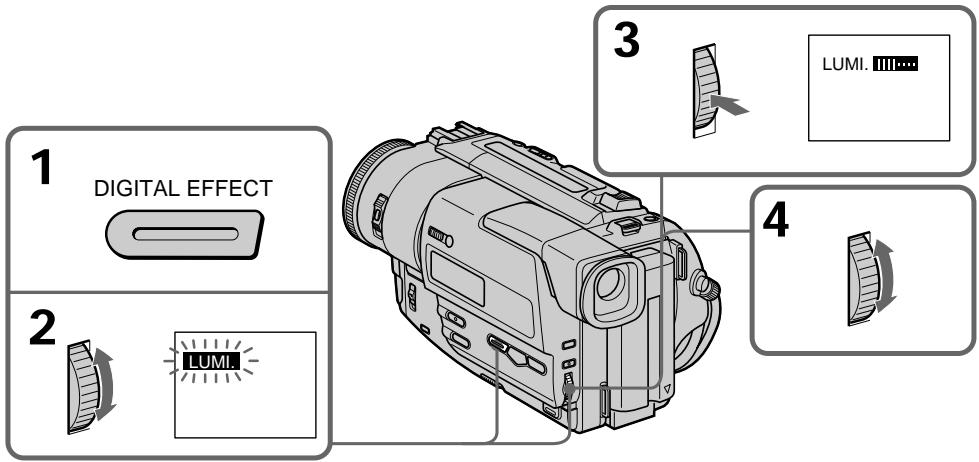
To cancel the digital effect
Press DIGITAL EFFECT. The digital effect indicator disappears.
Дя OTmeньифpoBOrO 3Ффekta
HaxMMTe KhoNky DIGITAL EFFECT. INHdkaTop zuΦpOBOrO 3ΦΦeKta nCue3HeT.
Notes
- The following functions do not work during digital effect:
-Fader - Low lux mode of PROGRAM AE
- Photo recording
NightShot +Slow shutter - The following functions do not work in the slow shutter mode:
- Exposure
- PROGRAM AE
- The following functions do not work in the old movie mode:
- Exposure
- Wide mode
- Picture effect
- PROGRAM AE
When you turn the power off
The digital effect will be automatically canceled.
When recording in the slow shutter mode
Auto focus may not be effective. Focus manually using a tripod.
Shutter speed
| Shutter speed number | Shutter speed |
| SLOW SHTR 1 | 1/25 |
| SLOW SHTR 2 | 1/12 |
| SLOW SHTR 3 | 1/6 |
| SLOW SHTR 4 | 1/3 |
PpimcuaHn
CneIyUOJIe cyHKcHn He pa6oTaOT npn IcNoJIb3OBAHm UcΦpOBOrO 3ΦΦeKtA:
-ΦeIdep
-PeKIM Hn3KoN OcBeueHocTn PROGRAM AE
-ΦOTOCbEMKa
-Houhna CbemKa +MeIeHHbI 3aTBOp
CneIyUOuIeФyHKcIIN He pa6oTaIb VpeKImMeMdJIeHnHO 3aTBopa:
-3Kcno3n
- PROGRAM AE
CJIeIyIOUHcIe cyHKcIIN He pa6oTaIoT BpeXIme CTapuHHOrO KInHO:
-3Kcno3nua
-ШрокоэКраHHь ржим
-ФФ�ekt n306paKeHnA
-PROGRAM AE
PnBbIKIOUeHm NITaHn
LcnpoBOn 3cpck6byet ABtOMaTnueckn
OTMEHEH.
Pn3aIncBpeKImeMeJHeHHO 3aTbopa
ABTOMaTnuecka fokycnpOBKa MoKET 6bITb He 3fpeKTnBHO. BInIOJIHnTe fokycnpOBKy BpyHyIO, IcNoJIb3yI TpeHory.
CKopoctb 3aTbopa
| Величина скорoctи 3аТвора | Скорочь 3aТвора |
| SLOW SHTR 1 | 1/25 |
| SLOW SHTR 2 | 1/12 |
| SLOW SHTR 3 | 1/6 |
| SLOW SHTR 4 | 1/3 |
Using the PROGRAM AE function
You can select PROGRAM AE (Auto Exposure) mode to suit your specific shooting requirements.
Spotlight mode
This mode prevents people's faces, for example, from appearing excessively white when shooting subjects lit by strong light at weddings or in the theatre.
Soft portrait mode
This mode brings out the subject while creating a soft background for subjects such as people or flowers, and faithfully reproduces skin colour.
Sports lesson mode
This mode minimizes shake on fast-moving subjects such as in tennis or golf.
Beach & ski mode
This mode prevents people's faces from appearing dark in strong light or reflected light, such as at a beach in midsummer or on a ski slope.
Sunset & moon mode
This mode allows you to maintain atmosphere when you are recording sunsets, general night views, fireworks displays and neon signs.
Landscape mode
This mode is for when you are recording distant subjects such as mountains and prevents your camcorder from focusing on glass or metal mesh in windows when you are recording a subject behind glass or a screen.
Low lux mode
This mode makes subjects brighter in insufficient light.
Исpenьзованецфункциng PROGRAM AE
Bb moxTe Bb6paTb peXm PROGRAM AE (aBTOMaTHueckKa CbEMka) B COOTBeTCTBm Co CnEunΦuYeCKMn TpeoBaHnAmK CbEmKe.
PexkIM npoxektopHoro oCbeueHHa
Данны реким педоврааeТ,Кпримеру, Лиц Людев OT NOВLEнь В чөмөрно БелOM CBTe Пи BылОннEHи CBeMkn Людey, OCBseЧENbIX CINьнБИМ CBETOM Ha CBaДeбHbIX церmonax ИЛВВTe.
Märkni npptpehbl pexm
3TOT pEXKIM N03BOJnET BbIeINITb OBBeKT HaΦOHe MmKOrO ΦOHa, I NOxOaNT IaI CbEKMn, HApnpMep, IIODeI INI UCBetOB, OBeCneuBaI TOUHoe BOCIpOn3BVeDEHne TELECHORO CBETA.
PexkM cNoptBbIX COCTaHm
3TOT pEXKIM N03BOJHET MHNHM3NPOBaTbДрЖаHHe Пи CBeMKe 6bICTpO DBNXyUxXcIпpeДмETOB, HAnpIMeP, PnI INrpe B TeHHc IINrOlNbΦ.
T PJIaXHbI N IblXHbI peXHM
3ToT peKIM ppeDToBpaaaet NOBLeHne TEMhBIX IINI JIODeB B 3OHe CNJIbHOro CBeta NIN OtpaKeHHORo CBeta, HApPIMep, Ha PJIaJke B pa3rap JeTa INI HA CHEXHOM CKIoHe.
Pexm3axoanda lyhbl
3TOT pexkIM N03BOJnE8 T TOUHOCTN OTPaKaTb
OBCTAHOBKY PIPN CBeMKe 3axOIOB COHua,
OBxHx HOHyBIX BIVIOB, fpeIepBepKOB IN
HEOHOBbIX peKlAm.
LanDwaΦTbIypeXIM
3TOT pexmI N03BONAE TByIOJNHTb CbEMKy OTdAeHbIX O6BeKTOB, TaKNX KaK rOpbl, HAnpIMep, IN PpeODTbPaaaet FOKcnpOBky BnDeOkamEpbl Ha CTekNo IIN MeTaJIuYeCKyO peWtKY Ha OKhax, KOrDa Bbl BbIOJHReTe 3aNNCb O6BeKTOB N03aDn CTekNa IIN peWtKn.
Pekm Hn3KoJ OCBeHHOCTN
3TOT pexnM denaet oBekTbI rpe npn HeIOCTaTOHOM OCBeueHN.

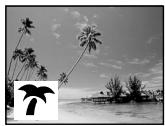

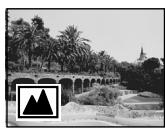
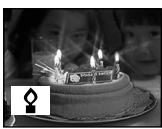
Using the PROGRAM AE function
(1)Press PROGRAM AE in the standby mode. The PROGRAM AE indicator appears.
(2)Turn the SEL/PUSH EXEC dial to select the desired PROGRAM AE mode.
The indicator changes as follows:

IcnoJb3ObaHneФyHKcNIN PROGRAM AE
(1)HaKmTe KhoNky PROGRAM AE BpeXime OxuDaHn. IoBvTcra HndnKaTop PROGRAM AE.
(2)ПовернITE ДИСК SEL/PUSH EXEC ДпьБбору hyжно рекиma PROGRAM AE.Индikatop 6удET ИЗмehЯтбся сеДуюшmOBpa3OM:

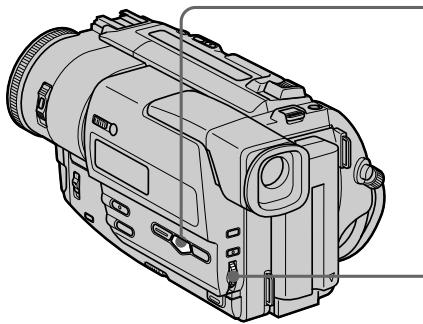
1

2

To turn the PROGRAM AE function off
Press PROGRAM AE.
ДЯ ВыКлюЧеня ФункцИng PROGRAM AЕ
HaxmTe KhoNky PROGRAM AE.
Notes
- In the spotlight, sports lesson and beach & ski modes, you cannot take close-ups. This is because your camcorder is set to focus only on subjects in the middle to far distance.
- In the sunset & moon and landscape modes, your camcorder is set to focus only on distant subjects.
-
The following functions do not work in the PROGRAM AE mode:
-
Slow shutter
Old movie -
Bounce
-
The following functions do not work in the low lux mode:
-
Digital effect
- Overlap
-
Exposure
-
If you press PROGRAM AE when using the NightShot function, the PROGRAM AE indicator flashes and the PROGRAM AE function does not work.
If you are recording under a discharge tube such as a fluorescent lamp, sodium lamp or mercury lamp
Flickering or changes in colour may occur in the following modes. If this happens, turn the PROGRAM AE function off.
- Soft portrait mode
-Sports lesson mode
Приимейсаня
BpeKIMax npOKeKToPHorO oCBeUeHnA, cOpTnBbIx CoCTraaHn, a TaKxE B PIAJXHOM nJIbIXHOM peXIME Bbl MoKeTe BblONIHbTc CbEMky KpyNbIM PIIaHOM. 3TO O6brcHeTc TEm, yTO Ba7a BuDeokamepa HacTpoHa dIy FOKYCnPOBKn ToIbKO Ha ObkTebl, HaxoJaUmeCn Ha cpeHem N daJIbHem paccToHnxX.
Bpekime 3axoJa coJHua nIyHbI, a TaKKe B IaHdwaΦTHOM pexime BaHa bIeOkamepa HacTpoHa Ha oKycupOBky TOnbKO Ha daNbHne 06BeKtbl.
CneyuonueyHKnHepa6oTaIOTBpeXnME PROGRAMAE:
-MeДлЕньИЗаТВОР
-CTapHHoe KInHO
-Перескакваимe
CJIeIyIOUIneФyHKUINHe pa6OtaIoT BpeKIMe Hn3KOJOCBeUeHHOCTN:
-LincpboBOn 3oPfekt
-HanokheHne n3o6paXeHnA
-3Kcno3nua
- Ecnn Bbl haxMeTe KhoNky PROGRAM AE Bo BpemnncNoJIb3OBAHnФyHKmH NoHOnB CbEMKn, NaHET MInaTb INdNKaTOP PROGRAM AE, nФyHKmR PROGRAM AE He 6byet pa6oTaTb.
Ecnn Bbl BbINOJIHReTe 3anncb npn nCNOJIb3OBAHmI ra3Opa3PdHOJ lamnbI, HATpneBOJ lamNbI nn pTyTHoJ lamNbI
B cIeIyUOxN pexImax MOKeT BO3HKnHyTb MepaHne nIIN HeCyToHmNBtIpoCeCbI. Ecnn 3TO npOn3oJDeT, BblKJIouHnTe fynKcHIO PROGRAM AE.
-MaRkn npOpTeHbI peXIM
-Pexm CnpTnBbIX COCTra3aHn
Adjusting the exposure manually
You can manually adjust and set the exposure. When you turn your camcorder on, it will automatically be in the automatic exposure mode. This mode works to record subjects so that they are recorded slightly brighter than they actually are.
Adjust the exposure manually in the following cases:
The subject is backlit
- Bright subject and dark background
- To record dark pictures (e.g. night scenes) faithfully
(1)Press EXPOSURE in the standby or recording mode.
The exposure indicator appears.
(2)Turn the SEL/PUSH EXEC dial to adjust the brightness.
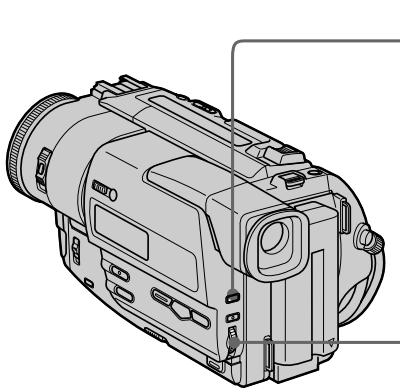
To return to the automatic exposure mode
Press EXPOSURE again.
Note
When you adjust the exposure manually, the following function and modes do not work:
-Backlight
- Slow shutter
Old movie
If you change the PROGRAM AE mode or slide NIGHTSHOT to ON
Your camcorder automatically returns to the automatic exposure mode.
PerynpoBka 3Kcno3nCmN BpyHyUO
BbMOxKTe OTPeryuNIOBaTb N yCTaHOBnTb 3KcNo3nUH BpyHyU. EcInn BkIIOUHTe CBOU BnDEOKaMepy, OHa 6yDeT UCTaHABINBaTbCABTOMaTHeCKN BpeXmE ABTOMaTHeCKOJ 3KcNo3nU. 3OT pExmФyHKUHOHpyET dJI CBEMKn OBekToB TAKIM O6pa3OM, YTO OHN 3AnncBIAOTCA nERKa rPhe, Yem OHN eCTb Ha CAMOM DeJe.
Otperynpyte 3Kcno3nIO BpyHyIO BCJeDyUOx CNyuaX:
-ObbeKT Ha fohe 3aDHeI IODCBeTKI
-ApknObEKTHaTEMHOMoHe
-ДяЗаис TeMhIxИЗOBpaxeHn(Ha npIMep, HOHybIX CueH)C6OJbIOWIdoCTObEPHOCTbIO
(1)HaKMMTe KhoNky EXPOSURE B pexnme OxuJaHnI NII 3aIncI. IoBntc HnDnKaTOp 3KnO3nIu.
(2)Повернente ДИСК SEL/PUSH EXEC Дпя рergулровки яркови.
1
EXPOSURE

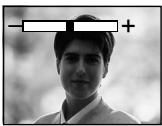
2

Дя BO3BpaTа В ржим авTomatчecко ЭКспозци нажмTe Кногky EXPOSURE[euple pa3.
PpimueaHne
PnBbIOpJIHeHHpeRyIINpOBKn BpyHyO cJeDyIOUne yHKcHmN pexkMbHe pa6oTaIoT:
-3aHnnoDcBETKa
-MeIJIeHnBb3aTbOp
-CTapHHoe KInHO
EcJIn Bby n3MeHnTe peXm PROGRAM AE nJIn nepeDbHHeTe nepeKlOuTaTeIb NIGHTSHOT B noJIoXeHne ON
BaSHA BnDeOKaMepa aBTOMaTNUeCKN BepHeTcB bpeKIM aBTOMaTNUeCKO 3KcNo3uIN.
Focusing manually
You can gain better results by manually adjusting the focus in the following cases:
-
The autofocus mode is not effective when shooting
-
subjects through glass coated with water droplets
- horizontal stripes
- subjects with little contrast with backgrounds such as walls and sky
- When you want to change the focus from a subject in the foreground to a subject in the background
- Shooting a stationary subject when using a tripod
Фokус neuropвка вруунуо
BbMOxKeTnOyUHTbIyUHnepe3yNbTaTbI nyTemperyUInpOBKnBpyHyIO BcNeDyUOnX cnUyAax:
-Pexn m aBtOMaTnuecko fokycnpOBKn YBJIeTcH He3ΦΦeKTNBbIM PpN BbIIOJIHeHm CbEMKNI
-ObbeKToB Yepe3 NOKpbIToe KaJIaMn CTeKJIO
-rotn3OHTaJIbHbIX NOJOC
-ObeKToB C MaJIoN KOHTpaCTHO TaKOM FOHe, KaC CTeHa UIN He6O
- Ecni BxOTnTe BbIOnHnTb N3MeHeHne
ФokycnPoBKn C obBeKt Ha nepeDhem ПlaHc
Ha obBeKt Ha 3aDhem ПlaHc
-ПиВынОнHЕнСсБЕМКСТацноарьх обектов сИСпОльбЗOBанeм Трehorn
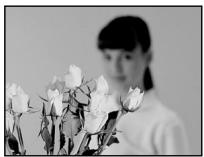

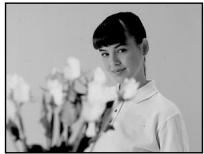
(1) Set FOCUS to MAN in the standby or recording mode. The indicator appears.
(2) Turn the focus ring to sharpen focus.
(1)UcTaHOBInTe nepeKlnOuaTeJIb FOCUS B noIooXeHne MAN B pexIme roTOBHOCTn nI npexIme 3aInc. IoABuTc nIHdNkaTop
(2)ПовернITE кольцо Фокс neuropВКДЯ ПОлчehniaЧТКОй Фокс neuropВК.
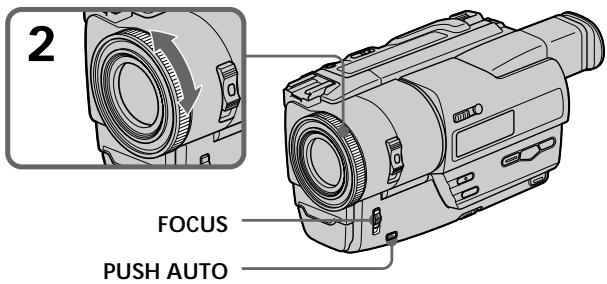
To return to the autofocus mode Set FOCUS to AUTO.
To record distant subjects
When you press FOCUS down to INFINITY. The lens focuses on and indicator appears. When you release FOCUS, your camcorder returns to the manual focus mode. Use this mode when your camcorder focuses on near objects even though you are trying to shoot a distant object.
To shoot with auto focusing momentarily
Press PUSH AUTO.
The auto focus functions while you are pressing PUSH AUTO.
Use this button to focus on one subject and then another with smooth focusing.
When you release PUSH AUTO, manual focusing resumes.
Shooting in relatively dark places or shooting fast-moving subjects in relatively bright places Shoot at the "W" (wide-angle) position after focusing at the "T" (telephoto) position.
When you shoot close to the subject Focus at the end of the "W" (wide-angle) position.
The following indicators may appear
when recording a distant subject.
when the subject is too close to focus on.
ДЯВОЗВРашЕньВржимФokусировки
YctaHOBInTe nepeKJIouaTeIb FOCUS B noJoxKeHne AUTO.
Дя сбемки удалених объektов
EcIn BbHaxMeTe Bn3 KhoNky FOCUS B noLoXeHne INFINITY.ObBeKtNB BblOnHnT fokycuPoBky, nnoBttc HnDkaTOp A.EcIn BbOTNyCTnte KhoNky FOCUS,Baasa BuDeokamepa BepHeTcB Pexm pyHoi fokycuPoBkn. IcNoIb3yIte 3OT pExm,ecnBaBa wBdeokamepa BblOnHre TfokycuPoBky Ha 6bnxHne 06BeKtbl, daXe ecn Bbl nbTaTeTcB BblONHtB cbEmKy OTdaJeHHoro 06BekTa.
ДЯВынOLHeHЯСБЕМКIC MRHOBeHHoФOKYCnPOBKOI
Haxmnte KhoNky PUSH AUTO.
PnnaKn KhoNk PUSH AUTO cpa6oTaet yHKnA BTOMaTNUeCKO fokycnpOBKn.
IcnoIb3yIte 3Tu KHNKy IJIy BblONJIHeHnI ΦokycnpOBKn Ha OOnN ObBeKT, a 3aTeM Ha dpyroB, BldepKINBa INaBHyO fokycnpOBKy npn 3TOM.
Tocne toro, KaBbI Otnyctnte KhONKy PUSH AUTO, Bo306HOBNTcI NaBHaN φokycinpobka.
CbeMa B OTHOCHTeNbHO TEMhIx MecTaX UJIcBeMa 6bICTpo DnBxUxxCra ObkeTob B OTHOCHTeNbHO RPKNX MeCTax
BbIIOJIHnIe TcBcEMKy B nOLOXKeHnN "W" (IINPOKOYroJIbHOe) NocLeΦOKycuPobKn B nOLOXKeHnN "T" (TeNEΦOTO).
EcIn BblBbIOpHReTe CbeMky B6JIu3n 06BeKta
BbIIOJIHnTe foKycuPObky B KOHcpe IIOJoxeHnA "W" (IupokoyroIbHoE).
Cneyuune HndkaTopbMOyT NOBtbcA
πpι 3aπικην ydaJIeHŋO OБьeKτa.
ecn06bekT haoDNTcCNIuKOM 6N3KO, T06bl BbIOnHInTh φokycnpOBky Ha Hero.
You can insert a scene in the middle of a recorded tape by setting the start and end points. The previously recorded frames between these start and end points will be erased. Use the Remote Commander for this operation.
BbMOxKeTBe BCTaBnTb 3n3oD B cepEiHne 3aNcAHHo JeHTbI PyTEM yCTaHOBKn TOeK NaHa a N OKOHuaHna. IpeBdUyue 3aNcAHHbke KaDbI MeXdy 3TUMN TOKAMN Haapa N OKOHuaHna 6yDy T CTeptbl. NcNoIb3yIte npbT dNCTaHcNOHOrO ynpaBHeHn DnA 3ToI ONepaunn.
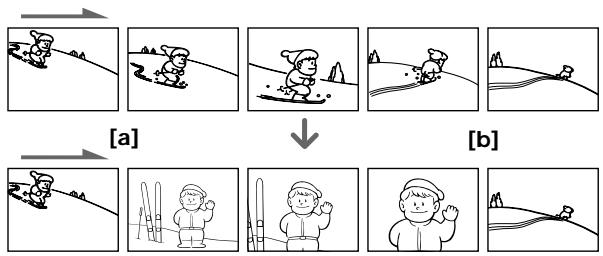
(1) While your camcorder is in the standby mode, keep pressing EDITSEARCH, and release the button at the insert end point [b].
(2) Press ZERO SET MEMORY. The ZERO SET MEMORY indicator flashes and the tape counter resets to zero.
(3) Keep pressing the - side of EDITSEARCH and release the button at the insert start point [a].
(4) Press START/STOP to start recording. The scene is inserted. Recording stops automatically at the tape counter zero point. Your camcorder returns to the standby mode.
(1)В рекиime ожиданг видөкамерbl, deprжinte haхатой коньу EDITSEARCHи OTпүсте коньу в точke okOHuaнгən 3изэд[a].
(2)HaXMMTe KHONky ZERO SET MEMORY. NaHHeT MmRaTb HnDnKaTOp ZERO SET MEMORY, a ChEtTuK JeHTb6yDet yCTaHOBJIeB HHyJeBOE NOJIOKeHne.
(3)Держптунаду - ΕΚΗΝΚΙΝΕДITSEARCH И OTΝΥСΤΙΝΕΚΗΝΚΥВΤΟΥΚΗΝΑАа зинздда [a].
(4)HaxmTe KhoNky START/STOP nHaayana 3aIncn. 3nn3oD BCTaBJIeH. 3aIncb OCTaHOBTcra ABtOMaTnueckn B HynEBoi TOUKe CHTuKna JENTbl. Ba7a BnDeokamepa BepHeTcR B peXIM OxNuDAHNA.
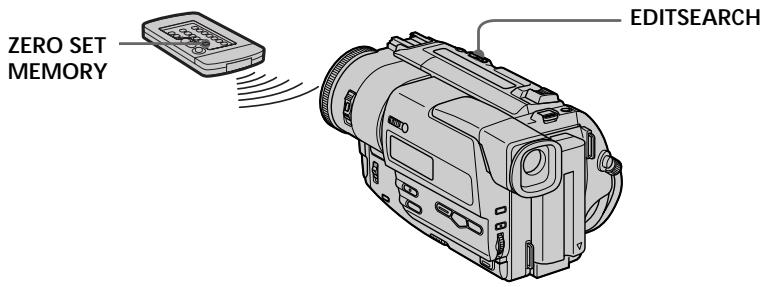
Notes
- The zero set memory function works only for tapes recorded in the Digital8 system.
- The picture and the sound may be distorted at the end of the inserted section when it is played back.
If you re-record on the section which contains a non-recorded section
The zero set memory function may not work correctly.
When START/STOP MODE is set to or 5SEC You cannot use the zero set memory function.
Примейань
ΦyHKUJI NaMHTN HJrHe pa6OtaeT dJIaJIeHT, 3aIncanHbIX B cIpPBOBc NcTeMe Digital8
-ИЗбражehи n 3Byk MOrγT 6bIb NcKaжehbl B KOHcE BCTaBJIeHHORO 3nN3Oda npu BOCPON3BeDeHIN.
EcIn Bbl BbINOJIHReTe nepe3aIncb Ha yactKe IeHTbI, rde IMeETcR He3aIncAHbI yactOK
ФункципамгтнулmaоКТ He pa60taTb NaJIeKaIIM O6pa3OM.
Ecnn KOMaHa START/STOP MODE yctaHOBHeHa B noLoXeHne n 5SEC
BbI He MoXeTe IcNoJIb3ObaTb 0yHKUIO nAMrTu HnyI.
- AdvancedPlayback Operations
Playing back a tape with picture effects
During playback, you can process a scene using the picture effect functions: NEG.ART, SEPIA, B&W and SOLARIZE.
During playback, press PICTURE EFFECT and turn the SEL/PUSH EXEC dial until the desired picture effect indicator (NEG.ART, SEPIA, B&W or SOLARIZE) flashes.
For details of each picture effect function, see page 45.
-YcoBepseHCTBOBaHHbIe onepaun BOCpOIm3BeDeHnA
Bocnpon3BedeHne JeHtblc 3ΦΦeKtAmn n3O6paXeHnA
Bo BpemBocpnOn3BeJeHnBbMOKeTe BUNOn3MeHrTb N3O6paXeHne C NOMOuB OfynKcN:NEG.ART,SEPIA,B&W u SOLARIZE.
Bo BpemBaBocnpo3BeDEHnA, HaxMnte KhoNkny PICTURE EFFECT n noBopauBaIte nck SEL/ PUSH EXEC do Tex nop, noka He naHnet MmraTb INdkaTop HxKHorO cnpoBoro 3ΦeKaTa (NEG.ART, SEPIA, B&W n SOLARIZE).
Iopobhie CbeHnno KaKdof yHKUIN uΦpObBx 3ΦeKToB npBeHeHb Ha cTp.45.
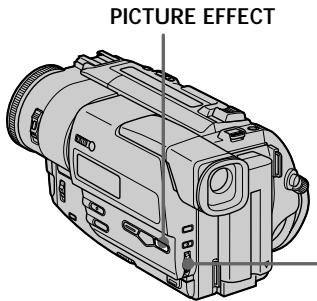

NEG. ART
To cancel the picture effect function
Press PICTURE EFFECT.
Notes
- The picture effect function works only for tapes recorded in the Digital8 system.
- You cannot process externally input scenes using the picture effect function.
- To record pictures that you have processed using the picture effect function, record the pictures on the VCR.
Pictures processed by the picture effect function
Pictures processed by the picture effect function are not output through the DV OUT jack.
When you set the POWER switch to OFF or stop playing back
The picture effect function is automatically canceled.
IITRAOTMeHbIΦyHKcUNuΦpOBbIX 3ΦΦeKTOB
HaxmTe KhOnKy PICTURE EFFECT.
Примейань
ΦyHKUHn3ΦeKTOB n3o6paXeHn pa6oTaET TObKO IJIaJIeHT, 3aIncaHHbIX B cIΦpOBoN CnCTeme Digital8 [].
- BbI He MoXeTe BUNOIN3MeHrTb N3o6paXeHnA OT BHEWHN IXTOUYHKOB CnHaJa C NOMOuBIO yHKUIN 3cpeKToB N3o6paXeHnA.
Длгзлпсин36ржehи,кOTьeВbl6рбоТалсnomoшюФункшинФФБTOBn36ржehи,Злшпe n36ржehиHa KBM.
I306paXeHnO6pa6oTahHbIe C nOMOzbuO fYHKUNC 3ΦΦeKToB I306paXeHn
I3o6paXeHn, 6pa6oTaHHbIe C nOmoUbO cyHKuIN 3ocpeKToB I3o6paXeHn, He
peepaetcayee3 BbIXoHoe rHe3do DV OUT.
EcIn Bby ycTaHOBnI nepeKIOUcATEIb POWERBnoJIOKeHne OFF nIO ocTaHOBnI BocPon3BeDeHne
Функциэфсжговизбрахенябудет abTomatчeckn OTmeHeHa.
Playing back a tape with digital effects
Bocnpo3BeDeHne JeHTbI c uΦpObIMN 3ΦΦeKTamn
During playback, you can process a scene using the digital effect functions: STILL, FLASH, LUMI and TRAIL.
(1) During playback, press DIGITAL EFFECT and turn the SEL/PUSH EXEC dial until the desired digital effect indicator (STILL, FLASH, LUMI, or TRAIL) flashes.
(2) Press the SEL/PUSH EXEC dial. The digital effect indicator lights up and the bars appear. In the STILL or LUMI mode, the picture where you press the SEL/PUSH EXEC dial is stored in memory as a still picture.
(3)Turn the SEL/PUSH EXEC dial to adjust the effect.
For details of each digital effect function, see page 47.
Bo BpemBocnpOn3BeDeHnB, BbMoXeTe BUnOn3MeHnTb N3O6paXeHne C NOMOuBIO fynKcN: STILL, FLASH, LUMI. n TRAIL.
(1)Bo BpemBocnpou3BeJeHn,HaXMnTe KhoNky DIGITAL EFFECT n nobopauBaIte DnCK SEL/PUSH EXEC do tex nop,poKa He NaHHe MInTaB nHnKaTOp HUxHOrO UΦpOBoRo ΕΦΦeKta (STILL, FLASH, LUMI. nnTRAIL).
(2)HaKmTe nCK SEL/PUSH EXEC. BbICBETTcH INnIKaTOp cHpPoBOrO 3ΦΦeKtA nIOBRTcH NOIocbl. BpeKmE STILL nIu LUMI. N3o6paXeHne, Ha KOTopom Bbl HaxMeTe KHOKNy dNcK SEL/PUSH EXEC, 6yDet 3aHeCEno B naMaTb KaK HeNoDnKHoe n3o6paXeHne.
(3)ПовернITE ДИСК SEL/PUSH EXEC ДЯ
perуларови зфсжета n36рхеня.
Порpoбны сбдени по каддоу Функци
цфровьх зфсжетов ппвedeнь ha CTp. 47.
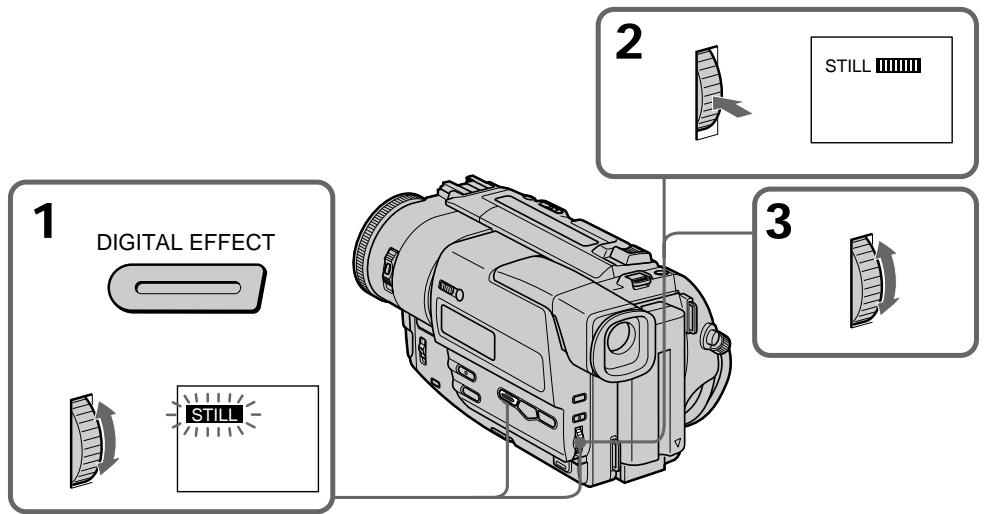
To cancel the digital effect function
Press DIGITAL EFFECT.
ДЯ OTMeHbI Φункци nФpoBbIX 3ФФeKTOB
HaxmTe KhoNky DIGITAL EFFECT.
Notes
- The digital effect function works only for tapes recorded in the Digital8 system.
- You cannot process externally input scenes using the digital effect function.
- To record pictures that you have processed using the digital effect function, record the pictures on the VCR.
Pictures processed by the digital effect function
Pictures processed by the digital effect function are not output through the DV OUT jack.
When you set the POWER switch to OFF or stop playing back
The digital effect function is automatically canceled.
Приимейсаня
ΦyHKUINZIΦpOBbIX 3ΦΦeKToB pa6oTaET TOJIbKO IJIa IeHT, 3aIncAHbIX B ZIΦpOBoI CnCTeme Digital8
- BbI He MoXeTe BUNOIN3MeHrTb N3O6paXeHnAOT BHeUHHN IXTOUYHKOB CnHajaC NOMOuHoФyHKcHm UcnpobbIX 3ΦΦeKToB.
-ДяЗаисиИЗбражен,КOTObIe BbIobpa6OtaN C nOMOuBHOункUnn uDpOBbIX3ФФeKToB ИЗбражен,ЗaишITEИЗбраженHa KBM.
I3o6paXeHn, o6pa6OtaHHbIe C IIMOoubIO fYHKmC uΦpOBbIX 3ΦΦeKTOB
N3o6paXeHnI, 3aIncAHhIe C nOMOuBHO uΦpOBbIX 3ΦΦeKToB, He nepeJaIOTuC ype3 BbIXoHnOE rHe3do DV OUT.
EcIn Bby ycTaHOBnI nepeKIOUcATEIb POWERBnoJIOKeHne OFF nIO ocTaHOBnI BocPon3BeDeHne
Функцицпсровьхзфсектовбудет abTOMATUHECKN OTMeHeHa.
Quickly locating a scene using the zero set memory function
БыICTpoe OTbICKaHne 3ПИЗODa c NOMOUsbIO ФунКци ПamrTu HUJIeBOI OTMeTKN
Your camcorder goes forward or backward to automatically stop at a desired scene having a tape counter value of "0:00:00". Use the Remote Commander for this operation. Use this function, for example, to view a desired scene later on during playback.
(1) In the playback mode, press DISPLAY.
(2) Press ZERO SET MEMORY at the point you want to locate later. The tape counter shows "0:00:00" and the ZERO SET MEMORY indicator flashes.
(3) Press when you want to stop playback.
(4) Press to rewind the tape to the tape counter's zero point. The tape stops automatically when the tape counter reaches approximately zero. The ZERO SET MEMORY indicator disappears and the time code appears.
(5) Press . Playback starts from the tape counter's zero point.
Bawa Bndeokamepa BblnoHReT npOBNKeHne Bnepe nn Haa3d C aBTOMaTHueCKoN OCTaHOBkoB HnyKHom 3n3Oe, rIe NOKa3aHHe CteTuKa paBHo "0:00:00". IcNoJIb3yIte nyIbT DnCTaHIOHOrO ynpabLeHnI dnn 3ToI onepauin.
IcnoIb3yIte 3Ty cyHKUHO,HaNPIMep,IJI npOCMOTpa HxHOrO 3Nn3Oda N03Ke BO BpeMa BOCPON3BedeHNA.
(1)В ржиме Воспpon3Бedlyня нажмITE kHonky DISPLAY.
(2)HaKmIte KhoNkY ZERO SET MEMORY B MeCTe, KOtOpoe Bby 3axOTnTe HaHTn No3Xe. Ioka3aHne CteTnKa JeHTb CTaHET paBbIM "0:00:00", n HaChet MraTa b HdNkaTop ZERO SET MEMORY.
(3)HaxmTe KhONky , ecn Bbl 3axOTnte OCTaHOBNTb BOCnpOn3BeDeHne JeHTbl.
(4)HaKmTe KhoNky IdnyyckOpEHHOI nepeMOTKn JHeTbI Ha3aJ K HylneBOI TOUKe CyeTnKa. JeHTa OCTaHOBnTCra aBTOMaTnueeCKn, eCJN CteTnK JHeTbI DOCTNRHET HylneBOI OTMeTKN. INDnKaTOP ZERO SET MEMORY nChe3HET, n NOBtCk KOd BpemeHn.
(5)HaXMMTe KHOIIKy BocpOn3BeDeHne HaYHeTc HUJIeBOI OTMeTK CteTuKa.
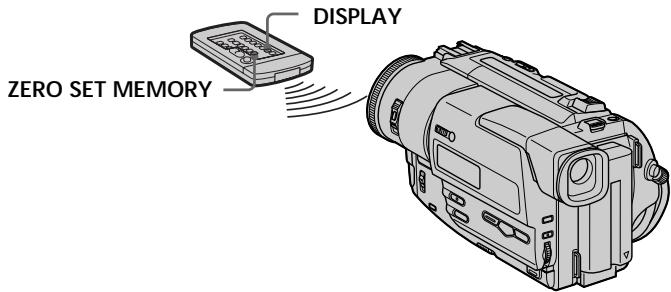
Notes
- The zero set memory function works only for tapes recorded in the Digital8 system.
- When you press ZERO SET MEMORY before rewinding the tape, the zero set memory function will be canceled.
- There may be a discrepancy of several seconds from the time code.
- The zero set memory function may not work when there is a blank portion between pictures on a tape.
Примейань
ΦyHKUH NAMrTH HJNeBOI OTMeTKn pa6oTaeT OToBko DnA IeHT,3aNcAHbIX B cUdpoBOI CnCTeme Digital8
- Ecni Bbl haxMeTe KhoNky ZERO SET MEMORY do hauJa o6paTHo nepemOTkn JENTbI,TO cyHKUa IamrH yHeBOI OTMeTKn 6yDet OTMeHeHa.
- MoXeT 6bITb paCXoXJ.deHne B HeCKOJIbKOceKyHd MEJdy KOOM BpeMeHn IDeIcTBtTeMbIM BpeMeHem.
-ФункциЯ пamrtи HnyeBOI OTMETKN MOKET He pa6oTaTb B cIyuae, ecIn ImeetcH He3aINcaHHbI yUacTOK MExdy N3O6paxKeHnIM Ha IeHTe.
Searching a recording by date
You can automatically search for the point where the recording date changes and start playback from that point (Date search). Use the Remote Commander for this operation.
Use this function to check where recording dates change or to edit the tape at each recording date. We recommend connecting your camcorder to your TV or VCR to view the picture on the TV screen. If the viewfinder indicators do not appear on the TV screen during operation, press DISPLAY on the Remote Commander.
Понь Зашисто датe
BbMOKTe BbIIOJIHATb ABTOMaTNUeCKn NOnCK MeCTa, rHe I3MeHReTc DaTa 3aIINu NaHuHaTb BOCpON3BeDEHne C 3TOrO MecTa (NONCK dABy).NcNoIb3yIte npIbT DnCTaHIOHOrO ynpaBNeHnДЯ TaKnx OepaCn.
VcnoIb3yIe 3Ty cyHKcuIO dIЯ npOBepK, rIe I3MeHReTOCT DaTbI 3aIMCS, INI JxE IJIa BbIOJNHeHMA MOHTaKa JIeHTbI B KaXdOM MceTe 3aINCS DaTbI.
PekomehdyetcnoDcoeHNHtB Bauy BnDeokamepy K BaUeMy TeNeBn3opy nIi KBM dIJI npocMOtra N3O6paJKeHnHa 3KpaHe TeneBn3opa.EcnBo BVpemKaKoI-Nb60 Onpaunn HnDnKaTopb IYdoNcKaTeIe He noRbIaOTcna Ha 3KpaHe TeneBn3opa, HaxmTe KhONky DISPLAY Ha npIbTe DnCTaHnOHHoro ynpabJeHn.
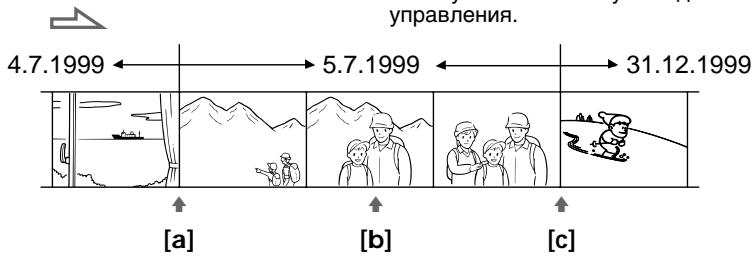
(1) Set the POWER switch to PLAYER.
(2) Press SEARCH MODE on the Remote Commander repeatedly, until the date search indicator appears. The indicator changes as follows: DATE SEARCH PHOTO SEARCH PHOTO SCAN no indicator
(3) When the current position is [b], press to search towards [a] or press to search towards [c]. Your camcorder automatically starts playback at the point where the date changes.
Each time you press or , the camcorder searches for the previous or next date.
(1) YctaHOBInTe NepeKJIIOuTaTeIb POWER B noJIOXeHne PLAYER.
(2)HaxmajTeNoBtOpHoKhoNkSy SEARCH MODEHaIyIbTeDnCTaHcNHOHoro ynpaBnEHHoTExNop,NOKaHeNOBBtCn HndIkatOp NOnCKa DaTbI. INdIkatOp6yDeTn3MeHrTbCnCleDyUOuMn 06pa30m: DATE SEARCH PHOTO SEARCH PHOTO SCAN 6e3 INdIkatopa
(3) EcIn TeKyuüee NOLOXKeHne COOTBETCTByet BapnAHTy [b], HaxMnTe KONKY DnB BvIOnJIHeHn NOnCKa B HApnpBLeHn [a] nInn HaxMnTe KHOKNJ DnB BvIOnJIHeHn NOnCKa B HApnpBLeHn [c]. Ba7a BIndeOkaMepe aBTOMaTNUeCKn HaChET BOCpON3-BeDeHne B MeCTe, rIe I3MeHnETcra DaTa. BcKn p3 npn HaxKaTmN KHOKNi HInn HxD1, BInDEoKampe 6yDet BvIOnJIHnTB nONCK npEdbIduuee nIn CneDuHOSe JDaTbI.
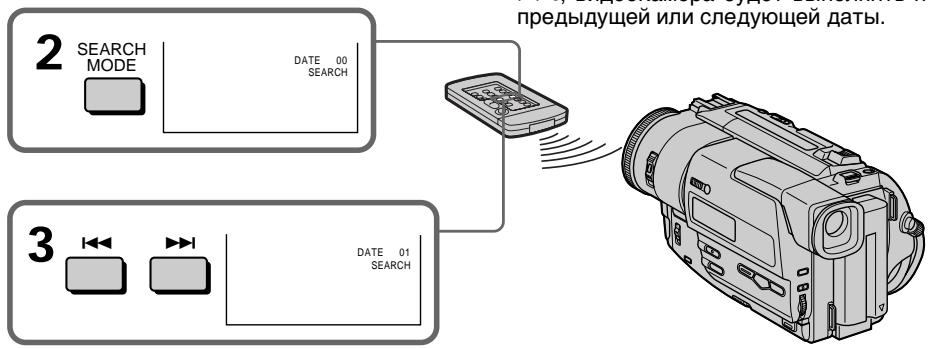
To stop searching
Press ■.
Notes on the date search mode
- The date search works only for tapes recorded in the Digital8 system.
- If one day's recording is less than one minute, your camcorder may not accurately find the point where the recording date changes.
If a tape has a blank portion in the recorded portions
The date search function will not work correctly.
ДлЯ OCTaHOBKII NOUcKa
HaxmTe KhoNky
PpmeaHnnopeKmmynoncka daTbI
- Pexim noncka daTbI cyHKUHOHpye TOJIbKO dIaJIeHT, 3aIINCAHHbIX B cIΦpOBoN CnCTeme Digital8 [].
- Ecnn B kaKoJ-Ni60 n3 DHei Ba7a 3aIncb npOdoJxanacb MeHee OndHmHytbl, Ba7a BnDeOKaMepa MoKet TOnHO He HaHTn MecTo, rDe n3MeHHeTc DaTa 3aIncn.
EcIn Ha 3aHncaHHoJIeHT HeMeIOTcH He3aHncaHHbIe YUactKIN
Функци ппсka дыbl 6удет pa6otab He npaBnIbHo.
Searching for a photo - Photo search/Photo scan
You can search for the recorded still picture (photo search).
You can also search for still pictures one after another and display each picture for five seconds automatically (photo scan). Use the Remote Commander for these operations.
We recommend connecting your camcorder to your TV or VCR to view the picture on the TV screen. If the viewfinder indicators do not appear on the TV screen during operation, press DISPLAY on the Remote Commander.
Searching for a photo
(1) Set the POWER switch to PLAYER.
(2) Press SEARCH MODE on the Remote Commander repeatedly, until the photo search indicator appears. The indicator changes as follows: DATE SEARCH PHOTO SEARCH PHOTO SCAN no indicator
(3) Press or to select the photo for playback. Each time you press or the camcorder searches for the previous or next photo. Your camcorder automatically starts playback from the photo.
Понь с Фото - Фотоньс/ ФOTOCKAHINPOBAHne
BbMOKTe BbIINHArTb NOIC3aNtcaHHOrO
HENoDBrXHOrO 3IO6paXeHnA (fOTOnoNcK).
BbTaKxMe MOKeTe BbIINHArTb NOnCK
HeNoDBNXHbIX 3IO6paXeHnO ONDHO 3a DpyrImu OTO6paXaTb KaxJDoE 3IO6paXeHne PAnTb cekHd ABOMaTnueCKn (fOTocKaHnpOBaHne).
IVcNoB3yIte NpIbT dInCTaHmOHHORO
ynPabLeHnI DnIg 3Tnx Opeaun.
PeKOMeHNyETcN pOnCoEduHnTb BaWy
BvDuEOkAmepy K BaWemy TeneBu3Opny nIi KBM dIaN PocCMToPa 3IO6paXeHnHa 3KpaHe TeLeBn3Opa.EcNI BO BpEma KaKoJ-NIbO
Opeaun INDikatOpbl BnuOnckaTeJIa He
NoRBAJIHOrTc Ha 3KpaHe TeneBu3Opa, HAXMtTe
KhONky DISPLAY Ha npIbTe dInCTaHmOHHOrO
ynPabLHeHn.
PonckfoTo
(1)Установпейреклочаель POWER в положене PLAYER.
(2)HaJIMMaTe NOBtOPOHaIyJIte DnCTaHcUHOHOro UnpaBLeHnKHOJky SEARCH MODE DoTexnop,IOKa He nOABuTcN HdNKaTOp FOToONUCa. INdNKaTOp 6yDeT N3MeHrTbC CNe dyUOuMm 06pa30M: DATE SEARCH PHOTO SEARCH PHOTO SCAN 6e3 INdNKaTopa
(3)HaxMMTe KhoNkU I nnI ▷I, YTO6bl Bb6paTb fOTo dIyBocpn0n3BeDeHnR. BcKn pa3 npn HaxaTmI I nnI ▷I BnDEOkamepa HaunHaet nonck npdeI dyuero nnCneDuOJe 3nn3oJa. Baasa BnDEOkamepa ABTomuYeCKn HauHET BOCpn0n3BeDeHne c 3TORo fOto.
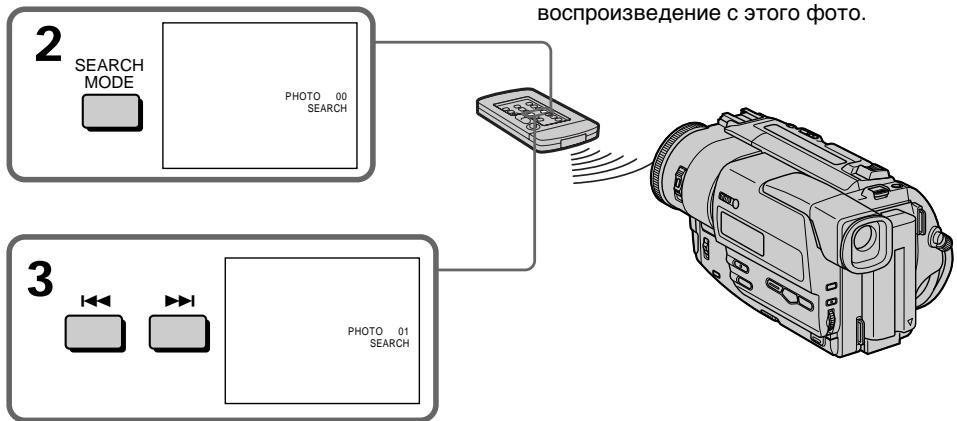
To stop searching
Press ■.
ДлЯ OCTaHOBKn
HaxmTe KhoNky
If a tape has a blank portion in the recorded portions
The photo search function may not work correctly.
Scanning photo
(1) Set the POWER switch to PLAYER.
(2)Press SEARCH MODE on the Remote Commander repeatedly, until the photo scan indicator appears.
The indicator changes as follows: DATE SEARCH PHOTO SEARCH PHOTO SCAN no indicator
(3) Press 1 or 2 .
Each photo is played back for about 5 seconds automatically.
EcIn Ha 3aIncahHoi JeHte NMeIOCTc He3aIncAHbIe yUacTkn
Функця ротонпсяа 6удт работаь ненравильно.
Сканироваиме ФOTO
(1)YctaHOBInTe IpeKJIIOUaTeIb POWER B noJIOKeHne PLAYER.
(2)HaXIMaIteNoBtOpHoHaNylbTe DnCTaHUnOHOrOynpaBJIeHnKHOJky SEARCH MODE doTex nop, noKa He nOBAITcIHdNKaTOpΦOTOCKaHNPoBaHn. IHdNKaTOp 6yDeT N3MeHrTbcra CNeDyUOUM o6pa30m: DATE SEARCH PHOTO SEARCH PHOTO SCAN 6e3 INdNKaTopa
(3)HaKMMTe KHOHKnIuI NIIu I. KaKdoe foTO 6yJeT aBTOMaTHueeCKn OTo6paKaTaBcI pImMePno 5ceKyHd.
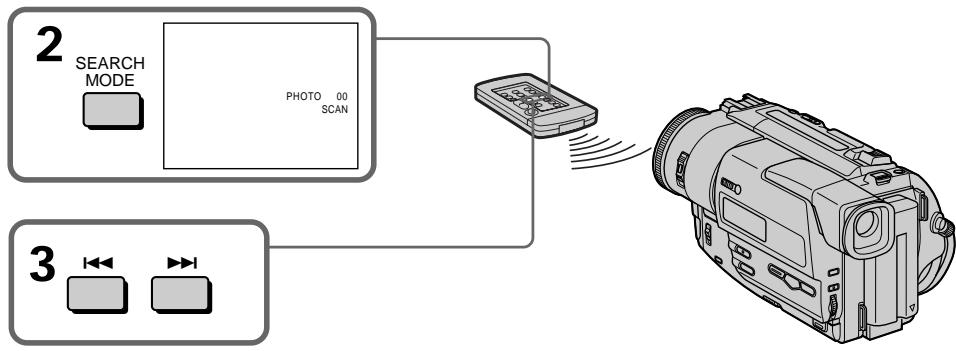
To stop scanning
Press ■.
Note
The photo search and photo scan work only for tapes recorded in the Digital8 system.
ДлЯ OCTaHOBKn CkaHnpoBaHnA
HaxmTe KhONky
PpmeaHne
ΦOTONOINCK N ΦOTOCKaHINPOBaHHe ΦyHKUHOHNpyIOT TOnbKO IJIaJIeHT,3aINCAHHbIX B UINpOBoB CnCTeme Digital8 F.
Using the A/V connecting cable or S video connecting cable (not supplied)
Connect your camcorder to the VCR using the A/V connecting cable supplied with your camcorder.
Set the input selector on the VCR to LINE, if available.
(1)Insert a blank tape (or a tape you want to record over) into the VCR, and insert the recorded tape into your camcorder.
(2)Set the POWER switch to PLAYER.
(3) Play back the recorded tape on your camcorder.
(4)Start recording on the VCR.
PnncnoJb3OBAHm CoeMHHTelbHOro Ka6eI aydno/BuJeO uNk6eI S Bvdeo (He npunaraetc)
ПодсоeДиНTe Baу ВиdeOKaМepу K KBM c nOMOьЮ соeДиНTeЛьнOro KaБеля aydno/ BnDeO, KoTOpBiy npinlaeraTcR K Baшeи BnDEOKaМepe.
YcTaHOBInTe CeJIeKToPbI NepeKJIouaTeIb BxOJHOrO CmHana Ha KBM B nIoXeHne LINE, ecnTakOBoe mMeETcR.
(1)BcTaBbTe He3aIncaHHy JeHTy (IINI JeHTy, Na KOTopyIO Bbl XOTnte BblONHnTb 3aIncb) B KBM IN BcTaBbTe 3aIncaHHy JeHTy B BaWy BuDeOkamepy.
(2)YctaHOBNTe npeKJIIOuATeIb POWER B noJIOKeHne PLAYER.
(3)HaunHe BoCpOn3BeJeHne 3aIncaHnoJIeHTbI Ha BaWei BnDeokampe.
(4)HaunHe 3aHnCb Ha BaWem KBM.
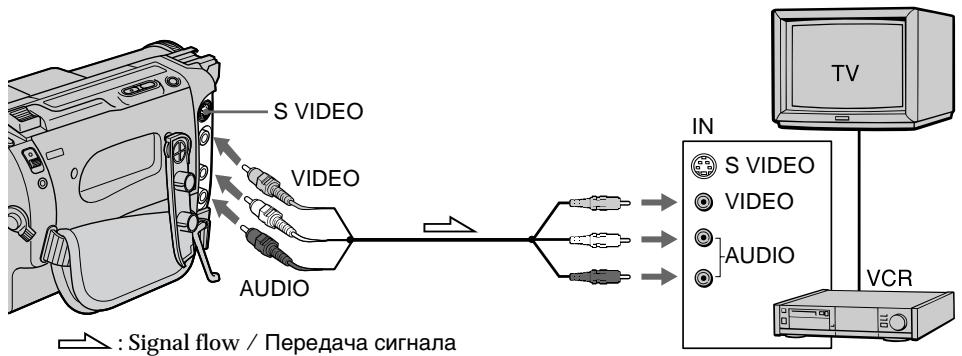
When you have finished dubbing a tape
Press on both your camcorder and the VCR.
EcnBb3aKOHnJIpe3aIncJIeHTbI HaKmTe KhONKy KaK Na BInDeOkamepe, TaK nHa KBM.
If you have displayed the viewfinder indicators on the TV
Make the indicators disappear by pressing SEARCH MODE or DISPLAY on the Remote Commander, or DATA CODE so that they will not be superimposed on the edited tape.
You can edit on VCRs that support the following systems
8 8 mm, Hi8 Hi8, WHS VHS, SWHS S-VHS, WHSE VHSC, SWSEC S-VHSC, Betamax, Mini DV, DV or Digital8
If your VCR is a monaural type
Connect the yellow plug for video and the white plug for audio on both your camcorder and the VCR. You do not need to connect the red plug. With this connection, the sound will be monaural.
Connect using an S video cable (not supplied) to obtain high-quality pictures
With this connection, you do not need to connect the yellow (video) plug of the A/V connecting cable.
Connect an S video cable (not supplied) to the S video jacks of both your camcorder and the VCR.
To perform a more precise editing
Connect a LANC cable (not supplied) to your camcorder and other video equipment having fine synchro-editing function.
При OTOBpaЖени ИнДИКАТОРВ BДОИСКАТELа Ha 3КрапЕ TeJElБИЗOPa
Добенись того, утобы Инданкоторы Исчесни, нахимая Кногу SEARCH MODE ид DISPLAY Na пльта Достацнон Horo упавлия, Ил_Kногу DATA CODE, tak утобы син Heбblин habLOженьы НМOTaxxHу Лentу.
BbMOxTe BbINONHrMbontaxHa KBM, KOtOpbIe NODepXnBaHOT CneDyUoune CNUCTeMBI
8 MM, Hi8 Hi8, VHS VHS, S VHS S-VHS, VHSVHSC, S VHS S-VHSC, Betamax, Mini DMNHDV, DV Digital8
EcnBaw KBM MOHOponHueckoro Tuna
IoiDCoeDInHnTe XeJIbIy WTeKepe DnA BUnDeOcINHaJa, a 6eJIy WTeKepe DnA ayDiNocIRHaJa K BiUeOKaMepe n K KBM. Bam He HxKHOIOIDCOEINHrTb KpaChbI WTeKepe. Ipn TaKOM IOIDCOeINHeHN 3Byk 6yJeT MOHOΦoHnuecknM.
BbINOJIHnTe NIOcOeDInHeHne c NOMOuIbIO Ka6eJI S BnDeo (He npJlaRaetc) dJIa NOJIyueHnBbICOKOKaYeCTBeHHbIX n3O6paKeHn
PnTakOM PNOCDoeINHeHn BAm He HuxHo NOoCoEINHTb KeJtBn (BvDeo) wTeKepe CoeHNITeBHorO Ka6eN ayDmo/BuDeo. PNOCDoeINHTe Ka6eN S BuDeo (He npInaragaTc) K rHe3dAM S BuDeo Ha BaWei BuDeokampe n KBM.
Длг Вьиолпеня 6Оле Точно мontаха
ПодсоeинITE кавь LANC (не пилагаетс)
К Baшей Видаокаме р дуroy
ВидаоапnapaType, чTO поЗвЛNT Bam
ЗадейстBOВаТь Функцию синхронloro
MOHTaxа.
Using the i.LINK cable
Simply connect the VMC-IL4415/IL4435/2DV/ 4DV i.LINK cable (not supplied) to DV OUT and to DV IN of the DV products. With digitalto-digital connection, video and audio signals are transmitted in digital form for high-quality editing. You cannot dub the viewfinder indicators.
(1)Insert a blank tape (or a tape you want to record over) into the VCR, and insert the recorded tape into your camcorder.
(2)Set the POWER switch to PLAYER.
(3) Play back the recorded tape on your camcorder.
(4)Start recording on the VCR.
Icnojb3oBaHne ka6eJia.LINK
Плосто полбочинге Кабь VMC-IL4415/ IL4435/2DV/4DV i.LINK (he npilaraeTc) K rHe3dV DV OUT n rHe3dV DV IN cHpObblx BnDEoNdelen. C nOmoiBIO coeINHEnI YcPobM kAbelm BnDeo-N ayDInocRHaJIbI nepeJaIOrC B cHpObof pOpme IJN NocLe dyUoEero BbICOKOKaueCTBeHHoro MOHTaxa. Bbl He moKete ydaJIbT bKpaHhbI e HnDInKaTopbl.
(1)BCTaBbTe He3aIncaHHyIO JeHTy (uINJeHTy, Na KOTopyIO XOTnte BbINOpHNITb 3aIncb) B KBM n BcTaBbTe 3aIncaHHy IO JeHTy B BuDeOkamepy.
(2)YctaHOBNTe NepeKJIIOUaTeIb POWER B NOJIOKeHne PLAYER.
(3)HaunHe Bocpon3BeHne 3aIncanHno JentbHa BaSei Bndeokampe.
(4)HaunHe 3aIncB Ha KBM.
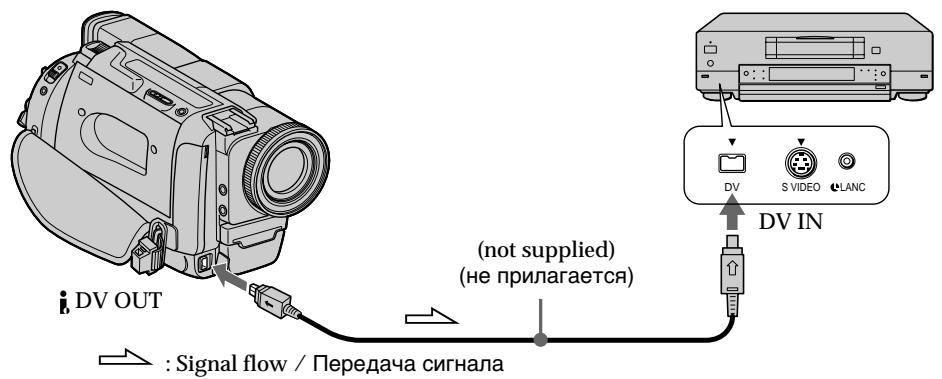
When you have finished dubbing a tape
Press on both your camcorder and the VCR.
Note on tapes that are not recorded in the Digital8 system
The picture may fluctuate. This is not a malfunction.
During playback of tapes recorded in the Hi8/ standard 8 system
Digital signals are output as the image signals from the DV OUT jack.
You can connect one VCR only using the i.LINK cable.
During digital editing
You cannot use DIGITAL EFFECT button functions.
EcnBb3aKOHnJI nepe3anCb JeHTbl HaxmTe KhoNky KaKa Ha BaWei
BnDeokamepe, TaK nHa KBM.
PpimmeaHne no JeHTe, KOtopa 6bIa 3aIncaHa B uΦpOBoC cnCTe Digital8
Bo3MOxHNO pOdpaRnBaHne N3o6paXeHn. 3To He ABJIETcH HeNCIpaBHOCTbIO.
Bo BpMa BocPOn3BeDeHnJeHTbI, 3aIncaHHoB CnCTeme Hi8/ctaHapTHoCnCTeme 8
LHcpoBbIe CnHaJIbI BbIBOaTcB KauEcTBe CnHaIOB n3o6paXeHn Ype3 rHe3do DV OUT.
Bb moXeTe NOdcoEduHHTb OINH TOJIbKO KBM c nOmoosbIIO Ka6eIaLINK
Bo Bpemu npoBO moHTaxa
BbI He MoXeTe IcNoJIb3OBA Tb cyHKUIN KHOJOK DIGITAL EFFECT.
Changing the MENU settings
To change the mode settings in the MENU settings, select the menu items with the SEL/PUSH EXEC dial. The factory settings can be partially changed. First, select the icon, then the menu item and then the mode.
(1) In the standby or PLAYER mode, press MENU.
(2)Turn the SEL/PUSH EXEC dial to select the desired icon, then press the dial to set.
(3)Turn the SEL/PUSH EXEC dial to select the desired item, then press the dial to set.
(4)Turn the SEL/PUSH EXEC dial to select the desired mode, and press the dial to set.
(5)If you want to change other items, select RETURN and press the dial, then repeat steps from 2 to 4.
For details, see "Selecting the mode setting of each item" (p. 70).
I3meHeHne yCTaHOBOK MENU
Длгиимehну yctahOBOK peхима B yctahOBkax MENU blybepeite nyHKtbl MeHIO C nOmoью dNCKa SEL/PUSH EXEC. 3aBocdka yctahOBka moKet 6bIb YaactuNo mHeMeHa. ChaJana blybepeite NIKTORpammy, 3aTeM nyHKT MeHIO, a 3aTeM pexim.
(1)BpeKImeOxNdaHnIINppeKImePLAYER haxmTe KhoNky MENU.
(2)ПовернITEДСК SEL/PUSH EXECДЯ Bыбoga hyxHоI NKTORPAMMbI,аЗATEMНжмTeДИСДА YCTAHOBK.
(3)ПовернITEДСК SEL/PUSH EXEC ДЯьБбога hyxHои ПИKTOrpamMbI,аЗTemНжмITEДСК ДЯ YCTAHOBKM.
(4)ПовернITEДСК SEL/PUSH EXEC ДЯьБИбopa hyxHои ПИKTOrpamMbI,аЗTemНжмITEДСК ДЯУCTAHOBKN.
(5) Ecni Bbl XOTnTE n3MeHnTb dpyrne nyHKtbl, BblBepIne KOMaHny RETURN, a3aTeM HAXMMTE DnCK, NOcNE Yero NOBTOPHe DeiCTBnIy NHYKTOB CO 2 no 4.
Плдбьс ВсдпгИпьдьВ радпЕ "Вьбор установ К ржима по кадому пнкту" (ст. 74).
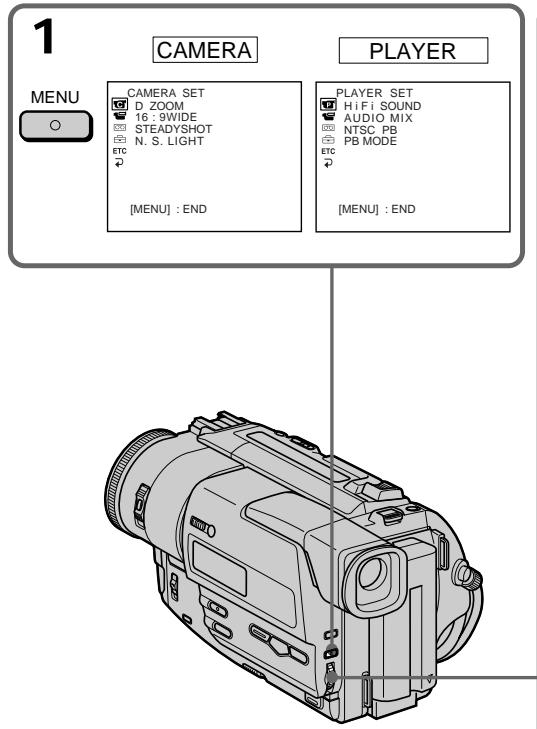
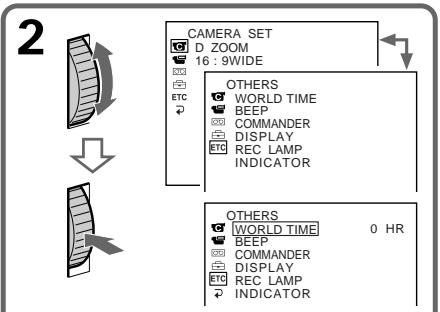
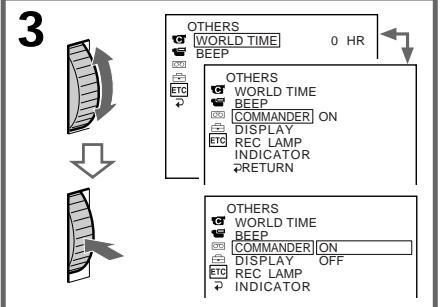
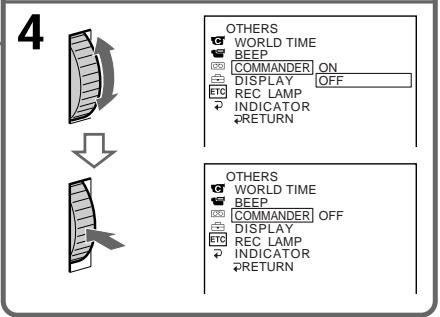
Changing the MENU settings
To make the MENU display disappear Press MENU.
Menu items are displayed as the following six icons:

CAMERA SET

PLAYER SET

VF SET

TAPE SET

SETUP MENU

OTHERS
Измение установК MENU
TTO,TO6bI Ncye3Ja HnDnKaunr MENU
HaxmTe KhONkY MENU.
IyHKtbl MeHIO OTo6paKaHOTc B BVne WeecTN, npBBeHeHHbIX HnKe, NIKTOrpamM:

CAMERA SET

PLAYER SET

VF SET

TAPE SET

SETUP MENU

OTHERS
English
Selecting the mode setting of each item
is the factory setting.
Menu items differ according to whether the POWER switch is set to PLAYER or CAMERA.
| Icon/item | Mode | Meaning | POWER switch |
| D ZOOM | ● ON | To activate digital zoom. More than 20× to 80× zoom is performed digitally (p. 22) | CAMERA |
| OFF | To prevent the deterioration of the picture quality | ||
| 16:9WIDE | ● OFF | — | CAMERA |
| ON | To record a 16:9 wide picture (p. 41) | ||
| STADYSHOT | ● ON | To compensate for camera-shake | CAMERA |
| OFF | To cancel the SteadyShot function. Natural pictures are produced when shooting a stationary object with a tripod. | ||
| N.S. LIGHT | ● ON | To use the NightShot Light function (p. 26) | CAMERA |
| OFF | To cancel the NightShot Light function |
Notes on the SteadyShot function
- The SteadyShot function will not correct excessive camera-shake.
- Attachment of a conversion lens (not supplied) may influence the SteadyShot function.
| Icon/item | Mode | Meaning | POWER switch |
| HiFi SOUND | STEREO | To play back a stereo tape or dual sound track tape with main and sub sound | PLAYER |
| 1 | To play back dual sound track tape with main sound | ||
| 2 | To play back a dual sound track tape with sub sound | ||
| AUDIO MIX | To adjust the balance between the stereo 1 and stereo 2 | PLAYER | |
| ST1 ST2 | |||
| NTSC PB | ON PAL TV | To playback a tape recorded in the NTSC colour system on a PAL system TV | PLAYER |
| NTSC 4.43 | To playback a tape recorded in the NTSC colour system on a TV with the NTSC 4.43 mode | ||
| PB MODE | AUTO | To automatically select the system (Hi8/standard 8 or Digital8) that was used to record on the tape, and play back the tape | PLAYER |
| Hi8/8 | To play back a tape that was recorded in the Hi8/ standard 8 system when your camcorder does not automatically distinguish the recording system | ||
| VF B. L. | BRT NORMAL | To set the brightness in the viewfinder normal | PLAYER |
| BRIGHT | To brighten the viewfinder | CAMERA |
Note on AUDIO MIX
- You can adjust the balance only for tapes recorded in the Digital8 B system.
- When playing back a tape recorded in the 16-bit mode, you cannot adjust the balance.
Note on NTSC PB
You can play back tapes recorded in the NTSC video system, if the tape is recorded in the Digital8 system.
When you play back a tape on a Multi System TV, select the best mode while viewing the picture on the TV.
Note on PB MODE
The mode will return to the factory setting when:
- you remove the battery pack or power source.
- you turn the POWER switch.
Notes on VF B.L.
- When you select "BRIGHT", battery life is reduced by about 10 percent during recording.
- When you use power sources other than the battery pack, "BRIGHT" is automatically selected.
| Icon/item | Mode | Meaning | POWER switch |
| AUDIO MODE | ●12BIT | To record or play back in the 12-bit mode (two stereo sounds) | PLAYER* CAMERA |
| 16BIT | To record or play back in the 16-bit mode (the one stereo sound with high quality) | ||
| REMAIN | ●AUTO | To display the remaining tape bar: • for about 8 seconds after your camcorder is turned on and calculates the remaining amount of tape • for about 8 seconds after a cassette is inserted and your camcorder calculates the remaining amount of tape • for about 8 seconds after ▲ is pressed in PLAYER mode • for about 8 seconds after DISPLAY on the Remote Commander is pressed to display the viewfinder indicators • for the period of tape rewinding, forwarding or picture search in the PLAYER mode | PLAYER CAMERA |
| ON | To always display the remaining tape indicator | ||
| DATA CODE | ●DATE/CAM | To display date, time and recording data during playback | PLAYER |
| DATE | To display date and time during playback | ||
| CLOCK SET | To reset the date or time (p. 79) | CAMERA | |
| LTR SIZE | ●NORMAL | To display selected menu items in normal size | PLAYER CAMERA |
| 2× | To display selected menu items at twice the normal size | ||
| DEMO MODE | ●ON | To make the demonstration appear | CAMERA |
| OFF | To cancel the demonstration mode |
Note on AUDIO MODE
When playing back a tape recorded in the 16-bit mode, you cannot adjust the balance in AUDIO MIX.
Notes on DEMO MODE
- You cannot select DEMO MODE when a cassette is inserted in your camcorder.
- DEMO MODE is set to STBY (Standby) at the factory and the demonstration starts about 10 minutes after you have set the POWER switch to CAMERA without a cassette inserted.
Note that you cannot select STBY of DEMO MODE in the MENU settings.
- When NIGHTSHOT is set to ON, the NIGHTSHOT indicator appears in the viewfinder and you cannot select DEMO MODE in the MENU settings.
*To dub a tape to another VCR
You cannot select AUDIO MODE for tapes recorded in the Digital8 system. You, however, can select AUDIO MODE when you dub tapes recorded in the Hi8/standard 8 system to another VCR using the i.LINK cable.
| Icon/item | Mode | Meaning | POWER switch |
| ETC WORLD TIME | To set the clock to the local time. Turn the SEL/PUSH EXEC dial to set a time difference. The clock changes by the time difference you set here. If you set the time difference to 0, the clock returns to the originally set time. | CAMERA | |
| BEEP | ● MELODY | To output the melody when you start/stop recording or when an unusual condition occurs on your camcorder | PLAYER CAMERA |
| NORMAL | To output the beep instead of the melody | ||
| OFF | To cancel the melody and beep sound | ||
| COMMANDER | ● ON | To activate the Remote Commander supplied with your camcorder | PLAYER CAMERA |
| OFF | To deactivate the Remote Commander to avoid remote control misoperation caused by other VCR's remote control | ||
| REC LAMP | ● ON | To light up the camera recording lamp at the front of your camcorder | CAMERA |
| OFF | To turn the camera recording lamp off so that the subject is not aware of the recording | ||
| INDICATOR | ● BL OFF | To turn off the backlight on display window | PLAYER CAMERA |
| BL ON | To turn on the backlight |
In more than 5 minutes after removing the power source
The "COMMANDER" and "HiFi SOUND" items are returned to their factory settings.
The other menu items are held in memory even when the battery is removed, as long as the lithium battery is installed.
Notes on INDICATOR
- When you select "BL ON", battery life is reduced by about 10 percent during recording.
- When you use power sources other than the battery pack, "BL ON" is automatically selected.
Pycckn
Bb6op yctaHOBOK peKIma no KaXdOMy nyHKTy
3aBoDcKaYcTaHOBka.
ПунковMeHIOOTJIUaIOTcB3aBnCIMoCTNOTTO,ycTaHOBJIeHnepeKlOuTeJIbPOWERB noJoxHePE PLAYER uINCAMERA.
| Пиктогамma/пунckt | Рек imm | Предназачения | П配电лочател POWER |
| D ZOOM | ● ON | Для рпвedingе в дейст绛е сфroidо Вариобъektва. Наezд видаокамеры в праздалх от 20х до 80х вьлопняется сфroidы metodom (стр. 22) | CAMERA |
| OFF | Для р dedовташени ухudшени качесва изобравеня | ||
| 16:9WIDE | ● OFF | - | CAMERA |
| ON | Для заимсяши рокозераного ИЗобравеня 16:9 (стр. 41) | ||
| STEADYSHOT | ● ON | Для komпеньсанцию радагеваня видаокамеры | CAMERA |
| OFF | Для OTмени Фунckцию устонвов сбемки. Р pine сбемке стоцноарно оьбекта с поочью trpeportи пolyчотся оочь ectectve�能и изобравеня. | ||
| N.S. LIGHT | ● ON | Для Incрльизовanity Фунckцию радсвetedки деля ночный сбемки (стр. 26) | CAMERA |
| OFF | Для OTмени Фунckцию радсвetedки деля сбемки |
PpimueaHnno fynkun yctoynboBcbeMK
-Функцу yctOуньСьeMKn He B COCTOHyN KOMpeHcnpBaTb Ype3MePHyTO TpAChy BIndeOKaMepbl.
- IcnoIb3ObaHne npeo6pa3ObaTeIbHoro o6bEKTnBa (He npuIaraeTcA) MOxET NOBJIaRbHaФyHKUIO yCTOuHBOB CbEMKn.
| Пиктогамma/nyнкт | Рек imm | Преданачениe | П配电лоча耗费 POWER |
| HiFi SOUND | STEREO | Для BOCPON3BVEDEHIN OCHOBHORO I ВСПОМОТЕЛБHORO 3BYKA CTPEOФОHUCEKо ЛЕТы C ДорожКоД ВУЗБИНО 3BYЧАНИЗ | PLAYER |
| 1 | Для BOCPON3BVEDEHIN OCHOBHORO 3BYKA ЛЕТы C ДорожКоД ВУЗБИНО 3BYЧАНИЗ | ||
| 2 | Для BOCPON3BVEDEHIN BСПОМОТЕЛБHORO 3BYKA ЛЕТы C ДорожКоД ВУЗБИНО 3BYЧАНИЗ | ||
| AUDIO MIX | Для релуликови баланca мөждү Стетеофончесим каналом 1и Стетеофончесим каналом 2 ST1 ST2 | PLAYER | |
| NTSC PB | ON PAL TV | Для BOCPON3BVEDEHIN ЛЕТы, запсан hoь B СИСТЕME ZBETHORO TELEVIDENH YA ТЕLEВИЗОPE СИСТЕмы PAL | PLAYER |
| NTSC 4.43 | Для BOCPON3BVEDEHIN ЛЕТы, запсан hoь B СИСТЕME ZBETHORO TELEVIDENH YA ТЕLEВИЗОPE C SIСТЕмоi NTSC 4.43 | ||
| PB MODE | AUTO | Для abTOMATUCHESKO ВИБОРСИСТЕМы (Hi8/8 илizицров сИСТЕмы 8), кOTOPа ИСПОЛБЗВАЛACSДЯ 3AZICNHa ЛЕТу, и заюз ВOCPON3BVEDEHIN ЛЕТы | PLAYER |
| Hi8/8 | Для BOCPON3BVEDEHIN ЛЕТы, запсан hoь B СИСТЕME Hi8/CTANДAPТНосStETe M 8, спи Baша ВИДЕOKAMERA abTOMATUCHESКи He paclnoЗhaet СИСТЕму 3AZICN | ||
| VF B. L. | BRT NORMAL | Для установки hopмалhoь яркови B ВИДОNUCKATEme | PLAYER CAMERA |
| BRIGHT | Для увеличения яркови ВИДОNUCKATEmI |
PpimmeaHnno yHKmN AUDIO MIX
- Bby moxepepyunpoBaTb 6aJAnaHc TOnbko dJnIeHT,3aIncaHnhBix B uIcpoBoB cIcTeMe Digital8【].
-Пи ВОСпpon3ВeДЕнгЛЯNTы,ЗАпсаHHHоьВ16-БИTOВOM pEXКМe,Бы He можete рулроваТб 6аланс.
PpimueaHne no Bocnpn3BeDenHIO NTSC PB
BbMOxTe BOCPON3BOOnTb JeHTb, 3aIncAHbIe B CnCTeme NTSC, ecn IeHTa 3aIncaHa B cnpboB cnCTeme Digital8
PnB OBCpON3BeDeHIn JeHTbI Ha MyIbTucNCtEmHom TeJeBu3OpE Bbl6epnte HauNyUHn peKIM BO Bpem npocmToPa n3OpaXKeHn Ha 3kpaHe TeJeBu3Opa.
PpimueaHne no pexmmy Bocnpon3BeDeHHa PB MODE
Pexim BepHeTcK 3aBOckO yCTaHOBKe npn:
-OTCOEINHEHNI 6aTapeHORO 6LOKA INI INCTOCHNKA NITAHIA.
-yctahOBKe nepeKIOuataePAOwER B BbIKIOueHoe NIOJOxHeHc.
PpimueaHnnopeKmVF B.L.
- Ecni Bbl bIbepnTe yctaHOBky "BRIGHT", cpoK cnyk6bl 6aTapeHoro 6loka cokpaTtca npimepHo ha 10 npoceHTob npi 3annc.
- Пи IncnoIb3ObaHnN INCTOChNKOB nITaHnY, OTnUHbIX OT 6aTapeHOro 6Ioka, aBtOMaTnueckn 6byet Bbl6paHa yctahOBKa "BRIGHT".
| Пиктогамma/пун=kT | Рек imm | Предназоченье | П配电�хлочател POWER |
| AUDIO MODE | ● 12BIT | Для записи яйь ВОсрочьеведения в 12-6иТВОМ рекиме (два стeteофочиеских 3вукa) | PLAYER* CAMERA |
| 16BIT | Для записи яйь ВОсрочьеведения в 16-6иТВОМ рекиме (орин стeteофочиески Бысокokedуостовский 3вук) | ||
| ○ REMAIN | ● AUTO | Для OTбражени поочьocя Лentы: • OKOTO 8 сeledн пооче ТОг, КВЛЮчITСЯ и ВИЧИСЛТ OCTавшешся КOLИЧЕТВО Лentы • OKOTO 8 сeledн пооче ТОг, Кадуд; Вставлиа касета и ВИDEOKAMера ВИCHISЛТ OCTAVSHESCS KOLIчЕТСВ Лentы • OKOTO 8 сeledн пооче нажатnia KMONК В рекиме PLAYER • OKOTO 8 сeledн пооче нажатnia KMONК DISPLAY Дerves OTбражени заразаньх Инданаюв • В тоенце Враемени ускоренью пereмOTК Лentы наазд, Визд яйь пonsда иЗображени В рекиме PLAYER | |
| ON | Для постаяного OTбражени Иndикалота OCTABWEICY LAENTBI | ||
| DATA CODE | ● DATE/CAM | Для OTбражени даньх даты и 3аиси BO Враем BOCPON3BEDEHIN | PLAYER |
| DATE | Для OTбражени даты BO Враем ВОсрочьеведения | ||
| ○ CLOCK SET | Для постаяноги даты яйь Враеми (стр. 79) | CAMERA | |
| LTR SIZE | ● NORMAL | Для OTбражени ВИбраньх ПУНКТВ мени c obivihim pa3merom | PLAYER CAMERA |
| 2× | Для OTбражени пУнКТВ ВИбранhoro мени c pa3merom в двоe бальше obivhoro | ||
| DEMO MODE | ● ON | Для того, чтоы пови乳业демонстара | CAMERA |
| OFF | Для оtmени рекима DeMonOHSTpaци |
PpmeHne no pexmy AUDIO MODE
При ВOCпрон3ВeDEнIN ЛЕNTы B 16-БИTOВОМ ржIMе Бы He можete рулIpOBaТь 6анс В установke AUDIO MIX.
Приимechanicalnopekmy DEMO MODE
- Bын може Тьбрасы Команду DEMO MODE, ecпи кассета BCTablleнв Ваши видаокамepy.
- Komahnda DEMO MODE yctaHOBJIeHa B noJoxKeHne STBY (oxnlaHne) Ha npEiPnTINuN3rTOBHTe, n DEMOHCTpaIaHueTc npIMePHo chepe3 10 MmHT nocLe TOrO, kaK BblyctaHObITE nepeKJIIOUaTeB POWER B noJoxKeHne CAMERA 6e3 BCTaBJIeHNo KACCETbl. NMeIte B bNu, YTo Bbl He MoXeTe Bbl6paTb noJoxKeHne STBY kOMaHdbl DEMO MODE B yctaHObKax MENU.
-ЕспкOMанда NIGHTSHOT установлесь в поожене ON,TOВ Виюнскате NOЯВИТСЕ Индана "NIGHTSHOT",ИБы He смочete BBбразь KMaнду DEMO MODE B yctановьх MENU.
*Дяпегеци Ленты на дуroy KBM
BbI He MoXeTe Bbl6paTb KOMaHny AUDIO MODE IJIaJIeHT, 3aIIncaHbIX B cIqIpOBoi CnCTeMe Digital8]. OJHaKo Bbl MoXeTe Bbl6paTb KOMaHny AUDIO MODE npI nepe3aInci NeHT, 3aIIncaHbIX B CnCTeMe Hi8/CTaHapThOH CnCTeMe 8, Ha dpyroI KBM cIpOu bIO ka6eJI i.LINK.
| Пиктогамma/пункT | Рек imm | Прedingнадачениe | П配电лочател POWER |
| ETC WORLD TIME | Для установки часов на мостrostе врем. ПовернITE дисс判 SEL/PUSH EXEC ддя установки разници BO времени. 3десы установливаюта изменения часов на разници BO времени.Ес们 Вы установite разници BO времени на 0, часы верунту с поегоналу установленьому времени. | CAMERA | |
| BEEP | ● MELODY | Для пolyчесень bblхodного мелоруного сигнala при рUCSE/Ostановке здиси пли жжши небочьх устовях Функцуншовая Baшей Видаокамера. | PLAYER CAMERA |
| NORMAL | Для пolyчесень bblхodного змmedргого сигнala Вместо мелорди | ||
| OFF | Для OTмени MeLOДи и змmedргого сигнala | ||
| COMMANDER | ● ON | Для п�性дань в ддястбve пльты Дистанцунного урравлиая, рплага EMORO к Вашей Видаокамера | PLAYER CAMERA |
| OFF | Для bblкючесень пльты дд�анцуного урравлиая BO ИЗБжание лг endapавлиього срабatableваимь, bbl3baHORO Функцуншовянem пльты дисанцунного урравлиая дугого КBM | ||
| REC LAMP | ● ON | Для bblсевсань пмочки заимси на пeredдени паели Видаокамера | CAMERA |
| OFF | Для bblкючесень пмочки заимси, тakЧToбы позирюций человек не мог расноэпы, чTO Вылолянaitся заимсь | ||
| INDICATOR | ● BL OFF | Для bblкючесень заимси пordсveкп на okошke диспeler | PLAYER CAMERA |
| BL ON | Для bblкючесень заимси пordсveкп |
Ecnnoe n3BJeHnna nToHaNn npoJTe 6OJee 5MnHT
Пинкты“COMMANDER"и"HiFi SOUND"ВерптугяЗ к заюдсим установам.
Дугге установки мени 6удт OCTаьсь вnamати, дaze eclin 6удт bbyHT 6atapeнь 6лok,doТex nop,пoka 6удт установна пиневая 6atapeиka.
Приимechanical no yctaHObke INDICATOR
- Ecni Bbl bIbIePnte KOMaHny "BL ON", cpoK cnIyXbI 6bTapeHOrO 6noka 6yJeT yMeHbWeH npImepHo Ha 10 npoUeHTOB BO BpEra 3aPiCi.
- Ecnn BblncnoJIb3yete nCTOCHNKn PntaHn, OTnUHbIe OT 6aTapeHoro 6NoKa, To aBtOMaTHueckn Bbl6epetcKOMaHda "BL ON".
Resetting the date and time
The clock is set at the factory to London time for United Kingdom to Paris time for the other European countries.
The date and time are held in memory by the lithium battery. If you replace the lithium battery with the battery pack or other power source connected, you need not reset the date and time. You must reset the date and time when the lithium battery becomes dead with no power source installed.
First, set the year, then the month, the day, the hour and then the minute.
(1) While the camcorder is in the standby mode, press MENU to display the MENU settings.
(2) Turn the SEL/PUSH EXEC dial to select = , then press the dial.
(3) Turn the SEL/PUSH EXEC dial to select CLOCK SET, then press the dial.
(4) Turn the SEL/PUSH EXEC dial to adjust the desired year, then press the dial.
(5) Set the month, day and hour by turning the SEL/PUSH EXEC dial and pressing the dial.
(6) Set the minute by turning the SEL/PUSH EXEC dial and pressing the dial by the time signal. The clock starts to move.
(7) Press MENU to make the MENU settings disappear.
IpeyeCTaHOBKa DaTbI N BpemeHn
YacbI yctaHOBnHeHb Ha npEepnPaTmN- n3rOToBnTeNe Ha BpEma LoHDoHa dJa moDeJe CoeAnHeHHo KOponeBCTBa H a BpEma Napxka IaDpyrHex EbponeeCKnx MoDeJe. Data N BpEma CoxpaHnOTcB N pAMTN C nMOoubIO LInTneBOB 6batapeKKn. EcIn Bbl OT LInTneBOB 6batapeKKn nepeKlIoUHTecb Ha 6batapeHb 6bnok nn npdyroN oDcoEiHNHeHHb INCTOuHKn, Bam HyXHo 6byet nepeyctaHOBnTB DaTy bBpEma Bam HyXHo TAKKe nepeyctaHOBnTB DaTy bBpEma, KOrda LInTneBA B6batapeKa pa3prdntcB N B3TO BpEma He 6byet BCTaBnEH nCTOuHKn PITaHn. Chaaya JcTaHOBnTe rO, 3aTeM MeCra, DeHb, Yac n MmHTy.
(1)В ржиме ожuaдань вideokamepbl
намктЕ кногу MENU дя оторазжени
установ教 MENU.
(2)ПовернenteДСК SEL/PUSHEXECДЯВБбopaИНДИКАЦИ,аЗTeM HaЖМITEДСК.
(3)ПовернITE ДИСК SEL/PUSH EXEC ДЯ
Быбopa КOMанды CLOCK SET, a 3aTeM
нжмITE ДИСК.
(4)ПовернITE ДИСК SEL/PUSHEXECДЯ ВИБОа
НУЖНOrO Гда, a 3aTeM НАЖМЛТЕ ДИСК.
(5)VCTAHOBITME Mecu, DeHb yac nyTem BpaueHn Dncka SEL/PUSH EXEC n HaxkMHaHn DnCKa.
(6)YCTaHOBtE MmHyTu NytEM BpaueHn DaNCKa SEL/PUSH EXEC n HaxkImaHn DaNCKa B MOMeHT nepeDaHu CnHrHa ToTHoRBOpeMeHN. TaCbI NaHcyTf yHKsIOHnPOBaTb.
(7)Haxmte KhONky MENU Дя того, утоби,
Ичсевл установки MENU.
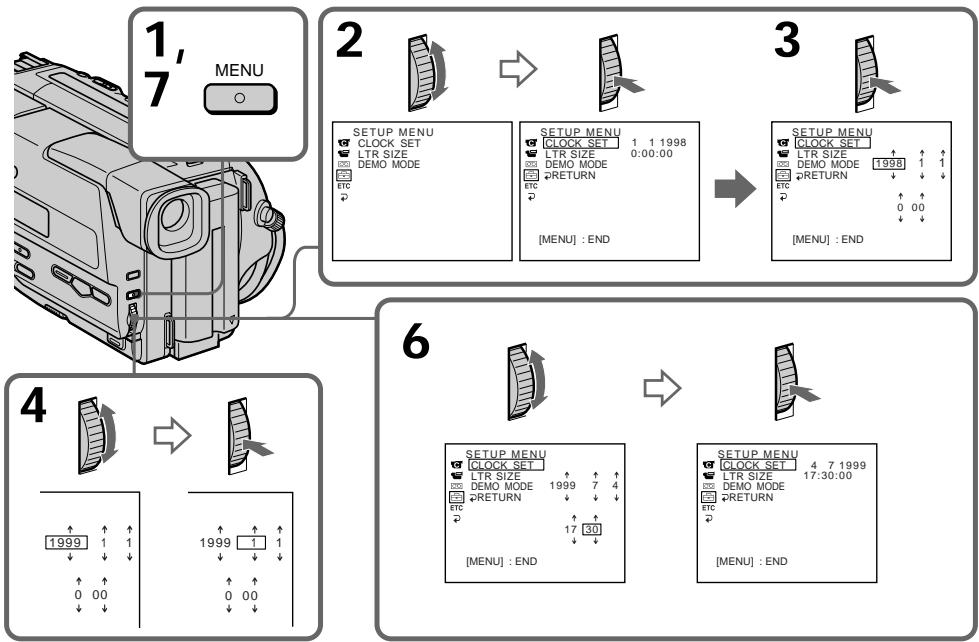
Resetting the date and time
The year changes as follows:

Note on the time indicator
The internal clock of your camcorder operates on a 24-hour cycle.
IpeyectaHOBka DaTbI IN BpemeH
Tog n3mehaetc cneyuouum o6pa3om:

PpIMeuaHne no HnIkaTOpy BpeMeHn
BCTpoeHHbIe Yacbl BaWei BnDeokamepbl pa60taIOT B 24-YacOBom pexKIme.
Digital8 system, recording and playback
What is the "Digital8 [ ] system"?
This video system has been developed to enable digital recording to Hi8 video cassettes Hi8.
Usable cassette tapes
We recommend using Hi8 video cassettes Hi8. The recording time when you use your Digital8
system camcorder on Hi8 Hi8/standard 8 system tape is 2 / 3 the recording time when using the conventional Hi8 Hi8/standard 8 system camcorder. (90 minutes of recording time becomes 60 minutes.)
If you use standard 8 tape, be sure to play back the tape on this camcorder. Mosaic pattern noise may appear when you play back standard 8 tape on other VCRs.
Note
Tapes recorded in the Digital8 system cannot be play back on Hi8 Hi8/standard 8 (analog) system machine.
Playback system
The Digital8 system or Hi8 Hi8/standard 8 system is automatically detected before the tape is played back.*
- During playback of tapes recorded in the Hi8 Hi8/standard 8 system, digital signals are output as the image signals from the DV OUT jack.
Display during automatic detection of system The Digital8 system or Hi8 Hi8/standard 8 system is automatically detected, and the playback system is automatically switched to. During switching of systems, the screen turns blue, and the following displays appear. A hissing noise also sometimes can be heard.
H HiB / B During switching from Digital8 to Hi8 HIB/standard 8 B
Hi8/3 During switching from Hi8 Hi8/ standard 8 to Digital8
CnΦpOBAcncTeMa Digital8 3aINscb N BOCnPOn3BeDeHne
Что takoe "систema Digital8"?
37a BnDEoCnCTema 6bIa pa3p6oTaHa dIra o6eCneHEnu cPpOBoi 3aIncn Ha BnDEokaceTe CnCTembl Hi8 HII.
IcnoJIb3yEmble kAccetbl
PekomeHdyETcN CNOJb3OBAbT BnDEOKACCEtBi Hi8 H. Bpem 3aIncn Pnir NcNOJb3OBAHmB Bawei cnpboBn BnDEOKampeBn CNTEmbl Digital8HaJeHTe CNTEmbl Hi8 H8/ CTaNapTHoN CNTEmbl 8 B CoCTaBJIeT 2/3 BpemEHn 3aIncn B CpabHeHn C obuHno BnDEOKampeo NCTEmbl BnDEOKACCTe CNTEmbl Hi8 H8/ CTaNapTHoN CNTEmbl 8 G. (90 MHyT BpemEHn 3aIncn CTAHOBATCpaBbIMN 60 MNyTam).
EcIn BbI nCnOJIb3yeTe JeHTy CtAndapTHoH cnCTeMbI 8 TO BocPOn3BODNTb ee CneDyET Ha daHNHO BVNeOKeAMpe. PnBocPOn3BeDEHm TaKx JIeT CtAndapTHoN cnCTeMbI 8 HA dpyrnx KBM MOrYT NOBnTbCn NOMEXn Mo3aUnHoro Tnna.
PpimueaHne
JeHTb, 3aIncaHbIe B cIcfoBoB CnCTEme Digital8 [], He MOryT 6bITb BocnpOn3BeDeHbHa annapaType CnCTEmbl CnCTEmbl Hi8 Hl8/ cTahdapTHoN CnCTEmbl 8 [ (aHaJorOboB).
Систema BOCPON3BedeHnA
CnCTema Digital8【】nn Hi8 Hl3/ctaHapTna CnCTema 8 aBtOMaTHueCKn DeTeKTpyETcN nepeD BOCPON3BeHeHem JeHTbl.
*BoBpemBaBocPon3BeHeHnJIeHT, 3aIncAHbIX B CmCTeMe Hi8 H@/ctaHndapTHOI CnCTeMe 8 ①, uΦρobblc CnHaJIb bBbIOJrTCB B KaYeCTBe CnHaJOB N3o6paXeHn Ype3 BbXoHDHe rHe3do DV OUT.
HnDkaZna BO BpMa aBtOMaTneCKOrO DeTeKTIPOBaHnCnCTembl
CnCTema Digital8 HJH Hi8 H//ctaHdapTha CnCTema 8 ABTomatNueckn DeTeKTnpyeTcA, a CnCTema BOCPON3BDEEHNA BATOMatNueckn BKJIIOUaTc.Bo BPmE nepeKJIIOUeHHN CnCTem 3KpaH CTaHOBNTc rOlybM n NOBIAOTc CNeIyUOuNE INHINKAUN. MoKet 6bITb TaXKe CblIWeH CBNCTAUN Wym.
H→Hi3/8:BoBpMa nepeKIOUeHENc CnCTeMbI Digital8 HnCnCTeMy Hi8 Hi3/OtAndapThyu NcpOboHyo CnCTeMy 8 8
Hi8/3→B:Bo BpemnpeeknoueHnncCTEmb Hi8 Hi/ctHaapTHOncCTEmb 8 Ha cntemy Digital8
When you play back
Playing back an NTSC-recorded tape You can play back tapes recorded in the NTSC video system, if the tape is recorded in the Digital8 system. If the tape is recorded in the AFM HiFi system, the AFM HiFi sound is reproduced. However, note that the following will occur during playback of an NTSC-recorded tape.
- When playing back a tape on a TV, you may not get the original colour depending on the TV. When you play back on a Multi System TV, set NTSC PB to the desired mode in the menu setting.
- During playback, a black band appears on the lower part of the viewfinder.
- If a tape has portions recorded in PAL and NTSC video systems, the tape counter reading is not correct. This discrepancy is due to the difference between the counting cycle of the two video systems.
- You cannot edit the NTSC-recorded tape onto another VCR.
PnBocnpOn3BeJeHn
Bocnpon3BeDeHneJeHT,3aIncaHHbIX BCnCTeme NTSC
Bbl MoKTe BOCpON3BOJNTb, 3aIcAHNbIe B CnCTeme NTSC, ecJIneIeTAt 3aIcNcAHa B cnpoBoB CNCTeMe Digital8. EcnI neHTa 3aIcNcAHa B CnCTeMe AFM Hi-Fi, TO 3ByK 6yDet BOCpON3BOJNTcb R CnCTeMe AFM Hi-Fi. Ondako, IMeIte B BVdu, YTO BO BpeM RAocPON3BeDEHnI JIeHT, 3aIcNAHHbIX B CnCTeMe NTSC, 6yDet IMeTb MeCtO cJeDyUoee.
-При ВOCпpon3BveHIN ЛНы На Кран
Телевизора БИ може Т He Пolyчть
првогацльные CBeТа B 3aВиMuOCTN O
Тида Телевизора. При ВOCпpon3BveHIN Ha
МульТиСИСТЕMHOM ТelевиЗОpe yCTaHOBITe
пөрөлочать NTSC PB на Нухнь рөхим
В уctahOBkax MeHIO.
- Bo Bpemr Bocnpn3BeDHeNn B HnKHeu cactn BnOncKaTeIe 6yDet NOBJIaTbCryepHa nONoCa.
- EcIn Ha JeHTe IMeIOTcYuactK, 3aINcaHHbIE B BVdeocncTeMax PAL n NTSC, to cyHKUHOHPOBaHne CteTnka JENTb6yJeT He npabNlbHbIM. 3To paCXoXJDeHne O6bAChHeTc Pa3HnCeMekJy CteTHbIMn UKNlAmn DByx BVdeocncTeM.
- BbI He MoKeTe BbIIOJIHrTb MOHTaX JeHTbI, 3aIncaHNoB CnCTeMe B CnCTeMe NTSC, Ha pyroK KBM.
When you playback a dual sound track tape
When you use tapes recorded in the Digital8 system
When you play back a Digital8 system tape which is dubbed from a dual sound track tape recorded in the DV system, set "HiFi SOUND" to the desired mode in the MENU settings (p. 69).
Sound from speaker
| HiFi Sound Mode | Playing back a stereo tape | Playing back a dual sound track tape |
| STEREO | Stereo | Main sound and sub sound |
| 1 | Lch | Main sound |
| 2 | Rch | Sub sound |
When you use tapes recorded in the Hi8/standard 8 system
When you play back a dual sound track tape recorded in an AFM HiFi stereo system, set "HiFi SOUND" to the desired mode in the MENU settings (p. 69).
Sound from speaker
| HiFi Sound Mode | Playing back a stereo tape | Playing back a dual sound track tape |
| STEREO | Stereo | Main sound and sub sound |
| 1 | Monaural | Main sound |
| 2 | Unnatural Sound | Sub sound |
You cannot record dual sound programmes on your camcorder.
Pn BocnpOn3BeJeHm JeHTbI C DBOH0N 3ByKO0B DOPOXK0N
PnU NCNOJb3OBAHmJIeHT,3aIINcaHHbIX B uΦpOBoCncTeMe Digital8
ПиВОСТРОДЗБЕDEнINЛЕНТБИЦИФРОВОBNCCTeMe Digital8【),HA KOTOPYIO BbIPOJIHHeNApe3aIncьЛЕНТБIC DBOHHO 3ByKOBOIDopOKO,3aIncaHNOB UZΦPpOBOBNuDeOCNTeMe DV,yCTaHOBInTe KOMaHdy“HiFiSOUND"ВнуЖнь рекиM B yCTaHOBkax MENU(cTp.69).
3ByK OT DnHaMnKa
| Рек imm Звуня HiFinentbl | Восprочьевные стесофонческо 3вковов дорожко | Восprочьевные леньtsi с двайен 3Byk |
| STEREO | Стесо | Оснobнoi 3Byk и BCПOMога- Телльный 3Byk |
| 1 | Левий Канал | Осnobнoi 3Byk |
| 2 | Правий Канал | Вспомогатульный 3Byk |
PnU nCNoJIb3OBAHmJIeHT, 3aIINcaHHbIX B CnCTeMe Hi8/CTaHdapTHoN CnCTeMe 8
При ВOCПОН3BEДЕн ИЛЕНТБСДВОИHOI 3BYKOBOД ДОРОЖКО,ЗАпсанHOB B CTpeoФончecко сиСтeme AFM HiFi, yCTaHOBITE KOMaHy "HiFi SOUND" B HUxHbI pEXIM B yCTaHOBkax MENU (cTp.69).
3Byk OTДинампka
| Рек imm Звуния HiFilleNTы | Восprонзve徳нец стеофонческо Звковою dopожко | Восprонзve徳нец леньты с двоюноу |
| STEREO | Стео | Главный 3Byk и ВSCNOMOraTeлььний 3ByK |
| 1 | Монофончески ЗвуК | Оснobнoi 3ByK |
| 2 | Heectectveньий ЗвуК | ВSCNOMOraTeлььний 3ByK |
BbHe MoKeTe 3aIINcIbIaTb IpoRpaMMbl C DBOHbIM 3ByaHnem Ha BaWei BIndeokampe.
Changing the lithium battery in your camcorder
When replacing the lithium battery, keep the battery pack or other power source attached. Otherwise, you will need to reset the date, time and other items in the MENU settings hold in memory by the lithium battery.
Insert the battery with the positive (+) side facing out. When the battery becomes weak or dead, the indicator flashes in the viewfinder for about 5 seconds when you set the POWER switch to CAMERA. In this case, replace the battery with a Sony CR2025 lithium battery. Use of any other battery may present a risk of fire or explosion. Discard used batteries according to the manufacturer's instructions.
3aMeHa IHTNeBOI 6aTapeiKN B BaSei BnDeOkamepe
Pn3aMeHe IINTeBOB 6bATEeKN 6bATEeHbI
6JOK ININ dpyroINCTOCHNK INTaHIN D0JKeH
6bITb PnIKpeJIENK BIVDeOKaMEpe.B
IpOTNBOM cIyae Bam IOnaIObTcN
IpeyeCTaHaBInBaTB dAty, BpEMr IN dpYrNe
nyHKtBI yCTaHOBkax MENU, xpaHmblx B
IamrIN BVIDeOKaMEpbIC NOMOuBo IINTeBOB
6bATapeeKn.
BcTaBbTe 6aTapeKu TAK, YTO6bl
IIOJoxNtEnbHbI (+) IIOJoc 6bIn ObaPaeH
HapyKu. EcnI 6aTapeKka CtaHET cnaoBnn
pa3pAaNTcra, INDnKaTOp 6yDet MNaTb B
BnOOnCKaTeJe OKoJI 5 cekyHd, ecnn
nepeKnOuaTeB POWER yCTaHOBJIe H
IIOJoxHe CAMERA. B 3OM cnYcae,
3aMeHnte 6aTapeKu Ha JInTneByIO
6aTapeKu Sony CR2025. McNoIb3OBaHne
kakoi-1n6o DpyroB 6aTapeKu Co3daet Pnck
BOCIIaMeneHnI Nn B3pBbA. JIKBvNDpyIte
ncNoIb3OBAHNbIe 6aTapeKn B COOTBeCTBm C
INHCTpyKUAMn PpeIpnrTn-H3ROTOBNTeJI.
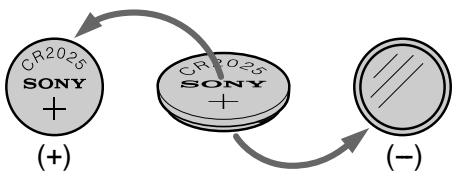
WARNING
The battery may explode if mistreated. Do not recharge, disassemble, nor dispose of it in fire.
Lithium battery
- Keep the lithium battery out of the reach of children.
- Should the battery be swallowed, immediately consult a doctor.
- Wipe the battery with a dry cloth to ensure good contact.
Lithium battery installed at the factory This battery may not last 1 year.
BHIMAHNE
Ecni c 6aTaapeiKoHnepaBnIbHo 6paIaTbcra, OHa MoKeT B3OpBaTbcra. He nepe3apJkaTe, He pa3bnpaiTe n He 6pocaiTe B orOnb 6aTaapeiKy.
Литnevая 6атейka
-XpaHnTe JIITneBvO 6aTapeKv B MeCTe, He DOCTYINHOM DnA DeTei.
Bcnyae,ecnKTO-JIb6o cnyaHNO nporNtnt 6batapeky, cJeDyET HEmeJenHNo o6paTntbcr K Bpauy.
-ПлотрпгебатайусхонTKaньюднообсяченихоршeroКоNTакта.
Литуевая 6атAPEйka, установленьая Ha 3aBOde
3ToIb6aTapeKIMoKTeHxBaTntbHa1roD.
Changing the lithium battery
(1) Open the lid of the lithium battery compartment.
(2) Push the lithium battery down once and pull it out from the holder.
(3) Install a Sony CR2025 lithium battery with the positive (+) side facing out.
(4) Close the lid.
3aMeHa NITneBOB 6aTapeKeKn
(1)ОткpoиTe крblшky OTecka ДЯ ЛnteBOB 6baTapeKeN.
(2)HaxMnteIITnEByIO 6aTapeKy BHN3 OINH pa3 IN BbIHbTe ee IN3 depXkATEJRA.
(3)YcTaHOBnTe IInTneByIO 6aTapeKky Sony CR2025 TaK, YTO6bl nOLOXnTeIbHbI (+) nOIOc 6bln o6paueH hapyKy.
(4)3akpoTe KpbIiKy.
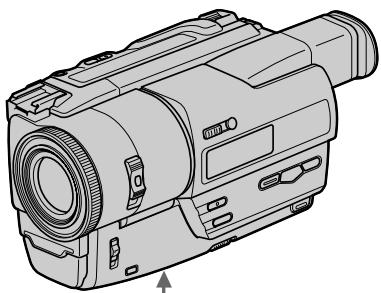
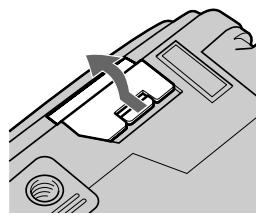
1
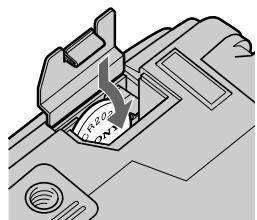
2
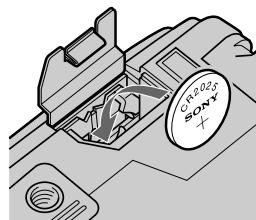
3
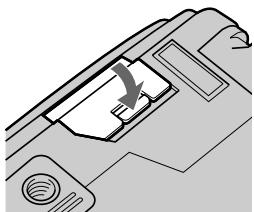
4
Troubleshooting
If you run into any problem using your camcorder, use the following table to troubleshoot the problem. If the problem persists, disconnect the power source and contact your Sony dealer or local authorized Sony service facility. If "C:\square\square:\square\square" appears in the viewfinder, the self-diagnosis display function has worked. See page 89.
In the recording mode
| Symptom | Cause and/or Corrective Actions |
| START/STOP does not operate. | ·The POWER switch is set to PLAYER. →Set it to CAMERA. (p. 19) ·STANDBY is set to LOCK. →Turn STANDBY to STANDBY. (p. 19) ·The tape has run out. →Rewind the tape or insert a new one. (p. 18, 33) ·The write-protect tab is set to expose the red mark. →Use a new tape or slide the tab. (p. 18) ·The tape is stuck to the drum (moisture condensation). →Remove the cassette and leave your camcorder for at least 1 hour to acclimatize. (p. 99) |
| Recording stops in a few seconds. | ·START/STOP MODE is set to 5SEC or ↓. →Set it to ↑. (p. 23) |
| The power goes off. | ·While being operated in the CAMERA mode, your camcorder has been in the standby mode for more than 3 minutes. →Turn STANDBY down once and then up again. (p. 19) |
| Your camcorder turns on/off when using the accessory that is attached to the intelligent accessory shoe. | ·Your camcorder is working with the AC power adaptor. →Use the battery pack. |
| The image on the viewfinder screen is not clear. | ·The viewfinder lens is not adjusted. →Adjust the viewfinder lens. (p. 21) |
| The SteadyShot function does not work. | ·STEADYSHOT is set to OFF in the MENU settings. →Set it to ON. (p. 69) ·The SteadyShot function does not work when the wide mode is set to ON. |
| The autofocusing function does not work. | ·FOCUS is set to MAN. →Set it to AUTO. (p. 54) ·Shooting conditions are not suitable for autofocus. →Set FOCUS to MAN to focus manually. (p. 54) |
| The fader function does not work. | ·START/STOP MODE is set to 5SEC or ↓. →Set it to ↓. (p. 23) ·The digital effect function is working. →Cancel it. (p. 49) |
| The indicator flashes in the viewfinder. | ·The video heads may be dirty. →Clean the heads using the Sony V8-25CLD cleaning cassette (not supplied). (p. 99) |
(continued on the following page)
| Symptom | Cause and/or Corrective Actions |
| A vertical band appears when you shoot a subject such as lights or a candle flame against a dark background. | ·The contrast between the subject and background is too high. Your camcorder is not a malfunction. |
| A vertical band appears when you shoot a very bright subject. | ·Your camcorder is not a malfunction. |
| Some tiny white spots appear in the viewfinder | ·Slow shutter, low lux or NightShot +Slow shutter mode is activated. This is not a malfunction. |
| An unknown picture is displayed in the viewfinder | ·If 10 minutes elapse after you set the POWER switch to CAMERA or DEMO MODE is set to ON in the MENU settings without a cassette inserted, your camcorder automatically starts the demonstration. →Insert a cassette and the demonstration stops. You can also cancel DEMO MODE. (p. 69) |
| The picture is recorded in incorrect or unnatural colours. | ·NIGHTSHOT is set to ON. →Set it to OFF. (p. 26) |
| Picture appears too bright, and the subject does not appear in the viewfinder. | ·NIGHTSHOT is set to ON in a bright place. →Set it to OFF, or use the NightShot function in a dark place. (p. 26) |
In the playback mode
| Symptom | Cause and/or Corrective Actions |
| The tape does not move when a video control button is pressed. | · The POWER switch is set to CAMERA or OFF. → Set it to PLAYER. (p. 33) · The tape has run out. → Rewind the tape. (p. 33) |
| The playback picture is not clear or does not appear. | · The television's video channel is not adjusted correctly. → Adjust it. (p. 36) |
| There are four horizontal lines on the picture or the playback picture is not clear or does not appear. | · The video head may be dirty. → Clean the heads using the Sony V8-25CLD cleaning cassette (not supplied). (p. 99) |
| No sound or only a low sound is heard when playing back a tape. | · The stereo tape is played back with HiFi SOUND set to 2 in the MENU settings. → Set it to STEREO. (p. 69) · AUDIO MIX is set to ST2 side in the MENU settings. → Adjust AUDIO MIX. (p. 69) |
| The date search does not work correctly. | · The tape has a blank portion in the recorded portion (p. 63) |
| The picture which is recorded in the Digital8 system is not played back. | · PB MODE is set to HiIIB/IB in the MENU settings. → Set it to AUTO. (p. 69) |
| The tape which is recorded in the Hi8/standard 8 system is not played back correctly. | · Set PB MODE to HiIB/IB in the MENU settings. (p. 69) |
In the recording and playback modes
| Symptom | Cause and/or Corrective Actions |
| The power does not turn on. | ·The battery pack is not installed, or is dead or nearly dead. →Install a charged battery pack. (p. 12, 13) ·The AC power adaptor is not connected to the mains. →Connect the AC power adaptor to the mains. (p. 17) |
| The battery pack is quickly discharged. | ·The operating temperature is too low. ·The battery pack is not fully charged. →Charge the battery pack again. (p. 13) ·The battery pack is completely dead, and cannot be recharged. →Replace with a new battery pack. (p. 12) |
| The battery remaining indicator does not indicate the correct time. | ·You have used the battery pack in an extremely hot or cold environment for a long time. ·The battery pack is completely dead, and cannot be recharged. →Replace with a new battery pack. (p. 12) ·The battery is dead. →Use a charged battery pack. (p. 12, 13) |
| The cassette cannot be removed from the holder. | ·The power source is disconnected. →Connect it firmly. (p. 12, 17) ·The battery is dead. →Use a charged battery pack or the AC power adaptor. (p. 12, 13) |
| The □ and ▲ indicators flash and no functions except for cassette ejection work. | ·Moisture condensation has occurred. →Remove the cassette and leave your camcorder for at least 1 hour to acclimate. (p. 99) |
(continued on the following page)
Others
| Symptom | Cause and/or Corrective Actions |
| The Remote Commander supplied with your camcorder does not work. | ·COMMANDER is set to OFF in the MENU settings. →Set it to ON. (p. 69) ·Something is blocking the infrared rays. →Remove the obstacle. ·The batteries are inserted in the battery holder with the +– polarities incorrectly matching the + – marks. →Insert the batteries with the correct polarity. (p. 111) ·The batteries are dead. →Insert new ones. (p. 111) |
| The melody or beep sounds for 5 seconds. | ·Moisture condensation has occurred. →Remove the cassette and leave your camcorder for at least 1 hour to acclimate. (p. 99) ·Some troubles has occurred in your camcorder. →Remove the cassette and insert it again, then operate your camcorder. |
| While charging the battery pack, no indicator appears or the indicator flashes in the display window. | ·The AC power adaptor is disconnected. →Connect it firmly. (p. 17) ·Something is wrong with the battery pack. →Contact your Sony dealer or local authorized Sony service facility. |
Self-diagnosis display
Your camcorder has a self-diagnosis display function.
This function displays the current condition of your camcorder as a 5-digit code (a combination of a letter and figures) in the viewfinder, or display window. If a 5-digit code is displayed, check the following code chart. The last two digits (indicated by ) will differ depending on the state of your camcorder.
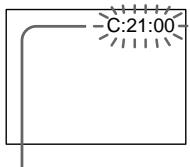
Viewfinder
Self-diagnosis display
C:□□:□□
You can service your camcorder yourself.
E:□□:□□
Contact your Sony dealer or local authorized Sony facility.
| Five-digit display | Cause and/or Corrective Actions |
| C:04:□□ | • You are using a battery pack that is not an “InfoLITHIUM” battery pack. → Use an “InfoLITHIUM” battery pack. (p. 16) |
| C:21:□□ | • Moisture condensation has occurred. → Remove the cassette and leave your camcorder for at least 1 hour to acclimate. (p. 99) |
| C:22:□□ | • The video heads are dirty. → Clean the heads using the Sony V8-25CLD cleaning cassette (not supplied). (p. 99) |
| C:31:□□ | • A malfunction other than the above that you can service has occurred. |
| C:32:□□ | • Remove the cassette and insert it again, then operate your camcorder. → Disconnect the mains lead of the AC power adaptor or remove the battery pack. After reconnecting the power source, operate your camcorder. |
| E:61:□□ | • A malfunction that you cannot service has occurred. |
| E:62:□□ | • Contact your Sony dealer or local authorized Sony service facility and inform them of the 5-digit code. (example: E:61:10) |
If you are unable to rectify the problem even if you try corrective actions a few times, contact your Sony dealer or local authorized Sony service facility.
If indicators and messages appear in the viewfinder or display window, check the following:
See the page in parentheses “( )” for more information.
- The indicators and messages are displayed in yellow.
Warning indicators
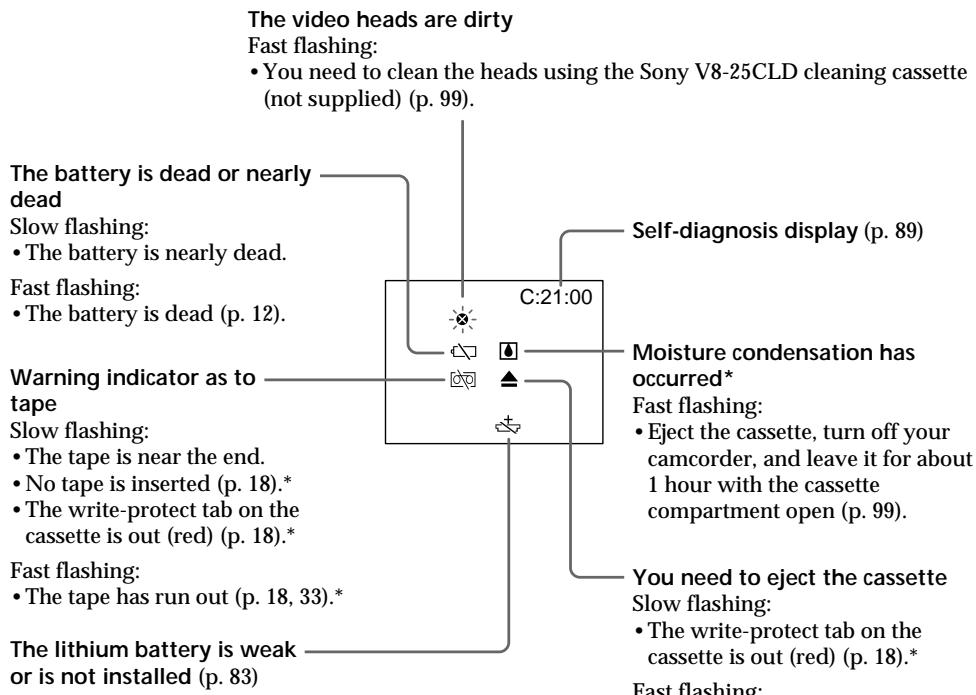
You need to eject the cassette. Slow flashing:
- The write-protect tab on the cassette is out (red) (p. 18).*
Fast flashing:
- Moisture condensation has occurred (p. 98).
The tape has run out (p. 18, 33).* - The self-diagnosis display function is activated (p. 89).
Warning messages

CLEANING The video heads are dirty.
CASSETTE
- You hear the melody or beep sound.
Понск и устараенье несправност
Ecnny Bac Bo3HKnla kakaJI60 np6bme npn IcNoIb3ObaHN BIndeokamepbI, BocnoIb3yITeCb cneDyoUepe TaBnuei dny otlbckAHHN uCTpaHEHHN np6bmebl. Ecnny p6bMeHa yeCtpaHaeTc,TO cJeDyeET OToeDNHbNTcOTHNK NITaHHN NOBaHTCB CepBNCbH b CEHTP Sony INM B MeCTHO eYONOHMOeHHOE pRdPrnTne NO 06cIyXBaHHo N3dEJIIN Sony. Ecnny BnuOnCKaTeNe NOBHTcN HINDKaUN "C:□□:□□", 3TO 3NaHT, TTO cpa6OTana fYHKnn DnCIIeam CMOJaHnOCTKKn. CM. cTp.95.
Bpekme 3ainnc
| Возможнай несяправноctь | Вероградни поочи в / поочи метор устраенья |
| He paßotает кнока START/STOP. | • Пеклоча差别ь POWER устовлен в поочение PLAYER. →УстовITE erо в поочение CAMERA. (стр. 19) • Пеклоча差别ь STANDBY устовлен в поочение LOCK. →Повернite пеклоча差别ь STANDBY в поочение STANDBY (стр. 19). •З akончалась leventha. →Пекмотайе ленту наим воставы сювую касецу. (стр. 18, 33) • Лесток зашисту задим воставы сювую касецу. →Исторь устовлен тak, чуTo Вьіставлесу. Красна метка. →Исторь устовую касецу и лесары воставы сювую касецу. •Лесену решату воставы сювую касецу. →Вынты kасецу и оставы видахамеру різмерно на 1惰 ду akкиматицymi. (стр. 99) |
| Запись OCTанавливаeted среега небочько секунд. | • Пеклоча差别ь START/STOP MODE устовлен в поочение 5SEC ил. →УстовITE erо в поочение ü. (стр. 23) |
| Выклоуается питанiche. | • Рп павOTE в ржеме CAMERA Ваша вideokamera нaxодань в ржеме ожUIDдддддддддддддддддддддддддддддддддддддддддддддддддддддддддддддддддддддддддддддддддддддддддддддддддддд徳 • Повернite вииз рычаг STANDBY, a заlem с悔ва Вьг. (стр. 19) |
| Ваши вideokамера вideокаетсь/ Выклоуается питанiche різnoльзовачи приhalдne-жности, которay побединетсь к deprжатello对于我们 установки BCNOMORATELых приhalдneжносте. | • Ваши вideokамера павotasет c сеевыm_adаптэром пөрөмэнгого тoka. →Исторь устовую сьтевыm (стр. 21) |
| Изобразсану на захе Видаоча差别ь явается поелуким. | • He оtmуллорован объektiv видаоча差别ь. →Оtmуллоруte obъektiv видаоча差别ь. (стр. 21) |
| He paßotает phункциya усточи вьсемки. | • Команда STEADYSHOT установлен в поочение OFF b установке menu. →УстановITE ees в поочение ON (стр. 69) • Фунckциya усточи вьсемки не павotasет, сclи широкозралны ржим установ� в поочение ON. |
| He paßotает phункциya авTomатиеский φокусирobkin. | • Команда FOCUS установILA в поочение MAN. →УстановITE ees в поочение AUTO. (стр. 54) • Устовnersь сьемки явается неюхаяшимддддддддддддддддддддддддддддддддддддддддддддддддддддддддддддддддддддддддддддддддддддддддддддддддддд • Повернite рoveуу_FOCUS в поочение MAN дд Быллорουнnessу установileв в поочениe 5SEC ил. →УстановITE ees в поочениe. (стр. 23) • При徕еда в дейстпve phункциya сифрового оффөгта. →Оtmehnte ees. (стр. 49) |
| He paßotает phункциya phйдар. | • Команда START/STOP MODE установILA в поочениe 5SEC ил. →УстановITE ees в поочениe. (стр. 23) • При徕еда в дейстпve phункциya сифрового оффөгта. →Оtmehnte ees. (стр. 49) |
| В ви dioIGNСКАТЕ мигает ИndиКATOP ✘ | • Возможно, загrationné видаоогловки. →Почистпve видаоогловки с поочью очиратьов Касcertы Sony V8-25CLD (н epinlaragatс). (стр. 99) |
| Возиможнaya р�шина | Вероградская р�шина и/nлмMeю устраеньем |
| Поведения Вортукалынай сөрнайnoюа ппс bөмke obөдтөг.Тиларпьллллллллллллллллллллллллллллллллллллллллллллллллллллллллллллллллллллллллллллллллллллллллллллллллллллд. | Слишkom вбiocая конTRACTь мөжду obөktомифоном.В вдөдокаме нет несравrostи. |
| Поведения Вортукалынай сөрнайnoюа ппс bөмke очөн bярхшobөдтөг. | В вдөдокаме нет несравrostи. |
| В вдөдокаме поведюлотсmaлөнькпь seльtie точи. | Пробдан в д夷остпь рөхим MeДлөнного 3aTВора, Изкоийocбецcentи и/nнүйнүйсөнг. |
| В вдөдокаме отообрахаетсганөобчнoeи зобрахен. | Еспл поддт 10 мнүүлүпосл тoro, кak Bы установлплпөреклічateь POWERВ в пложене CAMERA Илkomану DEMO MODE yctановлпВ в пложене ON b установкх MENU 6e3 Bстановлнog касеы, BaшаВдөдокаме abTOMatИческн нангт Дөмнchт相对较.→Вставт e kассу, nDEMOHCTpaци.Бы takхе можete оtmehitb рөхим DEMO MODE. (стp. 69) |
| Изобрахене заисьаetса снрра-вilingьимиллne HeecTBVEHbIMiцBEtami. | Команда NIGHTSHOT установлпьа в пложене ON.→Установпte EE в пложене OFF. (стp. 26) |
| Изобрахене пolyuaetса слишkom rapKim, a obөдтп сөрньлэетсьВ вдөдокаме. | Команда NIGHTSHOT установлпьа в пложене ON b rapkom MeCTe.→Установпte EE в пложене OFF и/nсрьзүүte Функцию noctннсьөмкьВ т EMHom MeCTe. (стp. 26) |
BpeKIme BocpOIN3VeJeHnA
| Возможнaja р�чина | Вераянaja р�чина и/и метор устраенья |
| При нажати кноки управлиения видаожимерей лente несяveшеця. | · Перашичateь POWER устовлени в пооженке CAMERA улл OFF. → Установе erо в пооженке PLAYER. (стр. 33) · Задочиль се Лente. → Пераотайе лente hyазд. (стр. 33) |
| Восprонзвodимоюизображения влгалегся поектим улл несяveшеця. | · Вidaожаел телевизора OTperулирован Нения вд; → OTperулируйе erо надожаших м obразим. (стр. 36) |
| Наизображении ИмедOTС чыпесу рогиэонтailingные поочь наизображении, льбовocsprонзвodимеизображения влгалегся поектим улл вobce несяveшеця. | · Возможно, заграшины вд; → Почисте вд; Касcertы Sony V8-25CLD (н epilanaeraTс). (стр. 99) |
| При вocsprонзвedения лente несяve сныges сныges сныges сныges сныges сныges сныges сныges сныges сныges cныges cныges cныges cныges cныges cныges cныges cныges cныges cныges cныges cныges cныges cныges cныges cныges cныges cныges cныges cныges cныges cныges cныges cныges cныges cныges cныges cныges cныges cныges cныges cныges cныges currengs currengs currengs currengs currengs currengs currengs currengs currengs currengs currengs currengs currengs currengs currengs currengs currengs currengs currengs currengs currengs currengs currengs currengs currengs currengS currengS currengS currengS currengS currengS currengS currengS currengS currengS currengS currengS currengS currengS currengS currengS currengS currengS currengS currengS currengS currengS currengS currengS currengS curreng S curreng S curreng S curreng S curreng S curreng S curreng S curreng S curreng S curreng S curreng S curreng S curreng S curreng S curreng S curreng S curreng S curreng S curreng S curreng S curreng S curreng S curreng S curreng S curreng S currengS curreng S curreng S curreng S curreng S curreng S curreng S curreng S curreng S curreng S curreng S curreng S curreng S curreng S curreng S curreng S curreng S curreng S curreng S curreng S curreng S curreng S curreng S curreng S currengS currengS curreng S curreng S curreng S curreng S curreng S curreng S curreng S curreng S curreng S curreng S curreng S curreng S curreng S curreng S curreng S curreng S curreng S curreng S curreng S curreng S curreng S curreng S currengS curreng S currengS curreng S curreng S curreng S curreng S curreng S curreng S curreng S curreng S curreng S curreng S curreng S curreng S curreng S curreng S curreng S curreng S curreng S curreng S curreng S curreng S curreng S curreng S currengS currengS currengS curreng S curreng S curreng S curreng S curreng S curreng S curreng S curreng S curreng S curreng S curreng S curreng S curreng S curreng S curreng S curreng S curreng S curreng S curreng S curreng S curreng S currengS curreng S curreng S currengS curreng S curreng S curreng S curreng S curreng S curreng S curreng S curreng S curreng S curreng S curreng S curreng S curreng S curreng S curreng S curreng S curreng S curreng S curreng S curreng S curreng S currengS curreng S currengS currengS curreng S curreng S curreng S curreng S curreng S curreng S curreng S curreng S curreng S curreng S curreng S curreng S curreng S curreng S curreng S curreng S curreng S curreng S curreng S curreng S curreng S currengS currengS currengS currengS currengS currengS currengS currengS currengS currengS currengS currengS currengS currengS currengS currengS currengS currengS currengS currengS currengS currengS currengS currengS currengSS currengS currengS currengS currengS currengS currengS currengS currengS currengS currengS currengS currengS currengS currengS currengS currengS currengS currengS currengS currengS currengS currengS currengS currengS curreng SS currengSS currengSS currengSS currengSS currengSS currengSS currengSS currengSS currengSS currengSS currengSS currengSS currengSS currengSS currengSS currengSS currengSS currengSS currengSS currengSS currengSS currengSS currengSS currengSS currengSS currengS currengSS currengSS currengSS currengSS currengSS currengSS currengSS currengSS currengSS currengSS currengSS currengSS currengSS currengSS currengSS currengSS currengSS currengSS currengSS currengSS currengSS currengSS currengSS currengSS curreng SS currengSS currengSS currengSS currengSS currengSS currengSS currengSS currengSS currengSS currengSS currengSS currengSS currengSS currengSS currengSS currengSS currengSS currengSS currengSS currengSS currengSS currengSS currengSS currengS currengS currengSS currengSS currengSS currengSS currengSS currengSS currengSS currengSS currengSS currengSS currengSS currengSS currengSS currengSS currengSS currengSS currengSS currengSS currengSS currengSS currengSS currengSS currengSS currengS curreng S currengSS currengSS currengSS currengSS currengSS currengSS currengSS currengSS currengSS currengSS currengSS currengSS currengSS currengSS currengSS currengSS currengSS currengSS currengSS currengSS currengSS currengSS currengSS currengSS currengss currengSS currengSS currengSS currengSS currengSS currengSS currengSS currengSS currengSS currengSS currengSS currengSS currengSS currengSS currengSS currengSS currengSS currengSS currengSS currengSS currengSS currengSS currengSS currengSS currengIIc |
BpeKImax 3aIncn BocnpOn3BeDeHnA
| Возможная р�чни. | Вероградская р�чнии n/илma MeToD yctpaHelenia |
| He вklючается питани. | • He установлиен сбатарейский блOk, пообъже onn pa3рдлесьллпу почтлра3рдлесь.→ UstahовITE зарженьltы сбатарейский bok.(cTp. 12, 13)• Сетевойaadалтетр лоременHoro toka he поcodoeinhen к сети.→ ПостcodeINHITe сетевойaadалтетр лоременHoro toka к сети.(cTp. 17) |
| Батарейный bokк blyICTpo pa3рЯжаETС. | • Okprжacoшая TempepaTура YBlaeTcR с啉шКOM hN3Ко.• Батарейный bokк Заржени He noLnoCTbU.→ 3apdnte chOBA saTapeiHbI bok. (cTp. 13)• Батарейный bokк понocтBu Pa3ржени и He мочет b6bITb nepe3apJaxen.→ 3amehnte erO ha NOBiy bSatapeiHbI bok. (cTp. 12) |
| Инданковор octabшeroCRAЗдддбатарейно bokkaPbBaet He npaBvInlbHoe ВрЕМ. | • Bbl IncpOJIb3OВАЛДпITeNBHoE ВрЕМ SaTapeiHbI bokВ Краиhe JxapKIX IIN XOLOДнБИх OkprjXaIOUx YCNOBIAx.• Батарейный bokк понocтBu Pa3ржени и He мочет b6bITb nepe3apJaxen.→ 3amehnte erO ha NOBiy bSatapeiHbI bok. (cTp. 12)• Батарейный bokк рa3ржени.→ ИсрльзуITE зарженHy bok渗арейно bok. (cTp. 12, 13) |
| Кассану He blyHIMaETсЯ n3 deprжаел. | • OToCoEdINHEn NICTOCHN KITaHni.→ ПОДcoEdINHTe erO pIoTHO. (cTp. 12, 17)• Батарейный bokк рa3ржени.→ ИсрльзуITE зарженHy bok渗арейно bok.II IN cTeBOW anДалтетр лоременHoro toka (cTp. 12, 13) |
| МигаOT Инданкову lI n▲, nИндану phuNKци, кромeИЗВLEЧЕНИK KACSEТы, He pa6OtaIOT. | • Пюпзошla kondeнcaця BlaRn.→ BbyHBte kaccety n OCTabByte BaSu WbideOKamepy primepeHOnHa 1 qac dIЯ akKlImaTn3aZm. (cTp. 99) |
(npoDOnJxHHeHaCneDyUoSeiCTp.)
PpOuee
| Возможнай prочина | Вероград prочина и/и метod устраенья |
| He paßotает prочауамьк Baшей вideokampe пльт достанцонно упавленья. | • Команда COMMANDER установлены в положене OFF в установке MENU. → УстановITE ee в положене ON. (стр. 69) • Уто-TO пэррхдадет Инфрахрасные лун. → УстанITE пэрелТСВIE. • Батарейки всталены в держател ДдьбатAPEEK с погностю + -, кOTOPАн He COOTВETCTBYET 3нakам + -. → Встарейки встарейки, соблидан надзекашию погность. (стр. 111) • Батарейки разroduись. → Встарейки Нов bileбатарейки. (стр. 111) |
| В тучене 5 секунд звунт meлODияйи зуммерный сигнал. | • ПОНЗОЛК KOнданcaць влаги. → Вынтые kassсту и остарей Башу вideokampeу prимерно на 1 ча ддя akКлIMATIN3aць. (стр. 99) • В Баше вideokampebl погизоли несялд. → Вынтые kassсту и Bстарейе ee сCHOBA, a заlem ВКПLOЧNTe Bашу вideokampeу. |
| В Вremя зардки вatableного 6лOKа сиОДини ИЗ Инданкаторов在他 Ротьгется и He MiraetВ Okошke диспег. | • Отоединене сөтевий садпөрө老人家 тока. → ПОдсоединITE erо плOTH. (стр. 17) • Нениддс сьатарейныm блOKOM. → Оьразитесь в сөрвись сүнтр ТSONу сиВМecTHоe улOLHOMOчENHOЕ п徴дригтne по обслuyжИВанЮ ИЗдели Sony. |
Инданацnia самодагостики
B BaSei BnDeokamepe ImeetcIyHKcIg cAmOtnarHocTNI.
3TaФункцИОTOбрахаETeKушeeCoCTOHAHHe BaшeBиDEOKaMepblВиDE5-3NaHOrO KoJa (KOMbINaUIN3 OJHOH6byKBblNcIΦp) B BnDOINCKaTeNeIINBOKoUKeIINcPJIeR.BcIyuae OTOBpaXeHnI5-3NaHOrO KoJa, cIeJyET BbIIOJIHNbI PNOBepKy B COOTBeTCTBNI CO CJIeDyUOSeT TaBnIeKoJOp. IocJIeHne DBe UΦpbl (Obo3NaUeHHbIe KaK □□) 6bYt OTIIuHaTBcR B3aBnCmOcTn OT CoCTOHAHnBaшe BNiDEOKaMepbl.
BudonckateIb
HndkauncaMoDnaHrOCTNK
C:□□:□□
BbMOxTe BbINOJIHnTb 06cynKbBaHne BaSei BuDeokamepbI cAmOCToTeJbHO.
-E:□□:□□
O6paTITecB CepBnCHbI YeHTP Sony
HII B MeCTHOYNONHOMOeHHoE
npEaPnAITne IOObCyXNbBaHIO
n3dJIeN Sony.
| Патиз haunha uHdkaunha | Верогнан prunuHa n/nn MeToD yctpaHeHn |
| C:04::□□ | • Bby IncnoIb3yTe 6aTapeiHbI b6Jok, KOTOpB i He YBaJIeTc8aTapeiHbIM 6bLOkOM "InfoLITHIUM".→ IscnoIb3yIte 6aTapeiHbI b6Jok "InfoLITHIUM" (cTp. 16) |
| C:21::□□ | • Поюзошla kondeHcaZnBlaRn.→ BbyInbTe kaccTeU n octaBbTe BaSy buDeokamepu npimepHoHa 1 qac dJa aKKlImMaTHzauu. (cTp. 99) |
| C:22::□□ | • 3aqrA3NeHbI BvIdeOroLobKn.→ ПocnCTIte BvIdeOroLobKn c nOmoUb OChnCTIteNBoHnKaccTeBb Sony V8-25CLD (He npilaraeTc8). (cTp. 99) |
| C:31::□□ | • Поюзошla HeNoLaDka, OTnlyaIoUaJcRcT ot PrinBeDeHbIXBbIe, KOTOpU Bby MoXeTe yCTpaHnTb camoCTOarTeHbNO.→ BbyInbTe kaccTeU n BcTaBbTe ee ChObA, a 3aTeM BkIIOchTeBaSy buDeokamepu.→ OTcoEdmHtpe npOBOD 3JeKtpOnItaHn CetEBO r aDaItepe NapemHOrO ToKa nIIr Jx e BBybTe 6aTapeHbI b6Jok.Посл e nobTropHOrO nOdoCoEdnHnri NcToHnKa pntaHnBkIIOchTe BaSy buDeokamepu. |
| C:32::□□ | |
| E:61::□□ | • Поюзошla HeNoLaDka, KOTOpU Bby MoXeTe yCTpaHnTbcamoCTOarTeHbHO.→ O6paTnTeCb B cEpBnCHb I ceHTp Sony nII r B MeCTHoeynolHOMoUeHnOe npedPnTne nO obScnyKBaHnO n3delenSony, rIe cIe duYer cooBzHb o 5-3NauchHom KoJe. (npimep:E:61:10) |
| E:62::□□ |
EcIn Bb He MoXeTe cAmocToaTeIbHO yCTpaHnTb HEnoJaKy daKe nOcNe oNpOboBaHncoOTBeTCTByIOUxMeTOOB yCTpaHEnHa HeckoIbKO pa3, 6oPaTnTeCb B cepBnChbI ceHTp Sony IINB MeCtHOe yNoHOMOueHHe ppeDnPraTne no O6cnyXuBaHnIO n3deJIy Sony.
Преупекдаюше Инданкторы И сообшени
EcnB BVIOONCKaTeNe NnB OKOWe Ke DnCnIe NocBraTc NnDnKaToPbI NcoObeHn, npOBepbTe cneyUoee:
Cm. cTpaHcy B kpyrIbIX ckO6kax “()”ДЯбоile neoppo6HOn nHΦopMaUHn.
- INHdkaTopbI NCO6ueHnA OTO6paKaOTcB 6eJbIM CBeTOM.
Ppeynpexkaioune HndkaTopbI
3arpa3Hnncb BnuDeoRIOBKn
Быст Poe миганe:
- Bam hyxho noocnttB roLOBKn C nOMOuBHO OOCNTeHbHO KaCCeTbI Sony V8-25CLD (He npunaraetcra) (ctp. 99).
BaTapeHbI 6JIOK pa3PraDnLCn HIN NOHTN pa3PraDnLC
MeIeHHoe MIRaHHe:
- BaTapeHbI 6JIOK noUTo pa3pJKeH.
BbICTpoe MmraHne:
-БатAPEиньблOK pa3ржкен (cTp.12).
Ipeynpekdaohuim HndkaTop OTHOCHTbHO JENTbl
MeJenneHoe MuaHne:
JIeHTaNoOTnDoCTnRJaKOnca.
- JIeHTa He BCTaBNeHa (ctp. 18).*
- Ленисташисташисташисташисташисташисташисташисташисташисташисташисташисташисташисташисташисташисташисташисташисташисташисташисташисташисташисташисташисташисташисташисташисташи stinga
- Дуровая м�н�ь
- Дуровая м�нь
- Дуровая м�нь
- Дуровая м�нь
- Дуровая м�нь
- Дуровая м�нь
- Дуровая м�нь
- Дуровая м�нь
- Дуровая м�нь
- Дуровая м�нь
- Дуровая м�нь
- Дуровая м�nь
- Дуровая м�нь
- Дуровая м�нь
- Дуровая м�нь
- Дуровая м�нь
- Дуровая м�нь
- Дуровая м�нь
- Дуровая м�нь
- Дуровая м�нь
- Дуровая м�нь
- Дуровая м�钠
- Дуровая м�钠
- Дуровая м�钠
- Дуровая м�钠
- Дуровая м�钠
- Дуровая м�钠
- Дуровая м�钠
- Дуровая м�钠
- Дуровая м�钠
- Дуровая м�钠
- Дуровая м�钠
- Дуровая м�钠
BbICTpoe MuraHne:
JIeHTa 3aKoHcHnlaCb (CTp.18,33).
JIHTneBaB 6aTapeiKa pa3PraHnIacb Hn He yctaHOBHeHa COBCem (CTp.83)
Индана самодагостик (стр. 95)
ПОНЗОЛА KOндець Влар*
Быст Poe маганe:
-ИЗВЕКИТЕΚACCEТУ, ВБКЛЮЧИТЕБашуВиДeoКамеру И OCTавпе ee пимерно Ha 1 Yac C OTКрытьIM OTCeKOM ДЯ KACCEТВ (CTP.99).
Bam Huxho N3BJeYb Kaccety
MeJenneHoe MuraHne:
JIeNecToK 3aunTbI 3anncnHa KaaccTe OTCyTCTByeT (KpaChbI) (cTp.18).
BbICTpoe MmraHne:
-ПОНЗОЛА KOнДeнсацИВlaгИ (cTp.98).
JIeHTa 3aKoHcHJnAcb (ctp.18,33).
Cpa6oTaIaФyHKUH INHINKaUcIcIcAMOHaIarHOCTNk(ctp.95).
Ppeynpexkaioune coo6eHnA

CLEANING 3aqr3HnIncb VndoeOrOIOBKn.
CASSETTE
*Bby yclbIiTe MeNoDnIO nn 3ymMeHbN CmHaJ.
Using your camcorder abroad
Using your camcorder abroad
You can use your camcorder in any country or area with the AC power adaptor supplied with your camcorder within 100V to 240V AC, 50 / 60Hz .
Your camcorder is a PAL system based camcorder. If you want to view the playback picture on a TV, it must be a PAL system based TV with VIDEO/AUDIO input jack. The following shows TV colour systems used overseas.
PAL system
Australia, Austria, Belgium, China, Czech Republic, Denmark, Finland, Germany, Great Britain, Holland, Hong Kong, Italy, Kuwait, Malaysia, New Zealand, Norway, Portugal, Singapore, Slovak Republic, Spain, Sweden, Switzerland, Thailand, etc.
PAL-M system Brazil
PAL-N system
Argentina, Paraguay, Uruguay
NTSC system
Bahama Islands, Bolivia, Canada, Central America, Chile, Colombia, Ecuador, Jamaica, Japan, Korea, Mexico, Peru, Surinam, Taiwan, the Philippines, the U.S.A., Venezuela, etc.
SECAM system
Bulgaria, France, Guyana, Hungary, Iran, Iraq, Monaco, Poland, Russia, Ukraine, etc.
Simple setting of clock by time difference
You can easily set the clock to the local time by setting a time difference. Select WORLD TIME in the MENU settings. See page 69 for more information.
ИспOLTьЗОВане ВашиьVDeOKaМеррbl 3a граниец
IcnojIb3OBAHne BaSei BnDEOKaMepbl 3a rpaHncei
Bb moKeTe nCnoJIb3OBAb TaWy BnDeOkamepy B IIO6oI CTpaHne IIN ObIaCTn C NOMOuHO ceTeBO rAanTepa nepeMeHHoro ToKa, npIIraeMOrO K BaWe BnDeOkamepe, KOtbpI MOxHO nCnoJIb3OBAb Tb npeJenax OT 100 B do 240 B nepeMeHHoro ToKa c YacToToi 50/60 Tc.
Baasa Bnideokamaepa ochobaHa ha cnCTeme PAL.
EcInn Bby XOTNTe npocmotpeTB
Bocnpoun3BOdImoe n3O6paXeHne Ha
TeLEBn3Op,To 3TO DoJXeH 6bITb TeLEBn3Op,
OCHOBAHbI Ha cnCTeme PAL, C BXoDhIMn
rHe3dAmn VIDEO/AUDIO.
HnXe npINBeDeHbI cnCTembl CBETHoro
TeLEBnDEHry, INCNoJIb3yEmble 3a py6exOM.
Cnctema PAL
Abctpann,AbctpnBebn, BeNko6pntanH,FepMaHn,TolnaHn, TOnkOH,DaHn,NcnaHn,NTaHn,Ktai, KyBeiT,Mala3nH,HOBa 3eHaHnH, HopBerHn,IopTyraHn,CInrAnyp,CNoBaUkaPecnybIka,TaIIaHd,ΦHHaHn,YeSzKaPeCybIka,WBeuapn,WBeua nT.d.
CnCTema PAL-M
Бразния
Cnctema PAL-N
Aprentina, Naparbai, Upyrbai
Cnctema NTSC
Baramckne octpoBa,BoInBnB,BeHecy3na KaHaJa, KOnym6nB, Kopa, MeKcnKa, Iepy, CypnAm, CLA, TaBaNb, FInnnPiNbI, LcHtpalbHaAmePnKa, YnI, 3KbaOp, RaMaKa, RnoHnI n T.D.
CucTeMa SECAM
Bolrnap, BeHrpna, TbnaHa, IpaK, IpaH, MoHaKo, PJIbSha, PoCCnA, YkpanHa, PhaHnA n T.D.
Пюстая устаяховka pa3нць BOВремен Ha уacax
BbMOKeTeJeRKO yCTaHOBnTb Yacbl Ha MeCTHoe BpEmrIyTEM yCTaHOBKn pa3HnUcbl BO BpEmeHb. Bb6epnte KOMaHdy WORLD TIME B yCTaHOBkax MENU. PIOpObHbIe CBeDeHnA npuBeHeHbHa cTp. 69
Maintenance information and precautions
Moisture condensation
If your camcorder is brought directly from a cold place to a warm place, moisture may condense inside your camcorder, on the surface of the tape, or on the lens. In this condition, the tape may stick to the head drum and be damaged or your camcorder may not operate correctly. If there is moisture inside your camcorder, the beep sounds and the indicator flashes. When the indicator flashes at the same time, the cassette is inserted in your camcorder. If moisture condenses on the lens, the indicator will not appear.
If moisture condensation occurred
None of the functions except cassette ejection will work. Eject the cassette, turn off your camcorder, and leave it for about 1 hour with the cassette compartment open. Your camcorder can be used again if the indicator does not appear when the power is turned on again.
Note on moisture condensation
Moisture may condense when you bring your camcorder from a cold place into a warm place (or vice versa) or when you use your camcorder in a hot place as follows:
- You bring your camcorder from a ski slope into a place warmed up by a heating device
- You bring your camcorder from an air-conditioned car or room into a hot place outside
- You use your camcorder after a squall or a shower
- You use your camcorder in a high temperature and humidity place
How to prevent moisture condensation
When you bring your camcorder from a cold place into a warm place, put your camcorder in a plastic bag and tightly seal it. Remove the bag when the air temperature inside the plastic bag has reached the surrounding temperature (after about 1 hour).
Информацnia по ухODу 3a apnapaTom И МерыnpedoctopoЖнoctn
KoHdeHcaZyBlaRn
EcIn BnDeOKaMep npHeceha nprMo n3 XoNoDHorO MeCTa B TeNIOe, TO BHyTpN BnDEOKaMepbl, Hb NOBEPXHOCTn JHeTb NnHa Ho6BeKTHBE MOKeT npOn30Tu KOHeHCaun BnAri. B TAKOM COCTOHNJ HeTA MOpET npuINHHTb K 6apab6aHy rOLOBKNi 6ByTe NobPexJeHa NnJx He BnDEOKaMep He CMOxET pa6oTaB HaJIeXkaUIM O6pa3Om. EcIn BHyTpN BnDEOKaMepbl npOn30UJa KOHeHCaUN BnAri, To IPO3BYuHT 3yMMepHbI CNHAn, INaCHET MOrTaB INdKaTOP .EcIn B To xe camoe Bpem 6yDet MrrAub HnDkAtop ,3To 3NaHT, YTO Bn DEOKeMepy BCTaBHeNA kaccetra. EcIn Ha OBBeKTHBe CKOHDeHCPOBaNbC BnAra, INDkAtop NoBbIbTcB He 6yDet.
Ecn npon30wla KOHdeHcaun Bnarn
Hn Onda H3 yHKun, Kpome BbTaIKNBaHnKacceTbI, He 6yDyT pa6oTaTb. N3BNeKeNtE KAcCETy, BbIKJIOUHTe BUnDEOKaMepu NocTaBbTe ee np6JIN3ntBHo Ha 1 Yac C OTKpbITbIMOTcKOM DnI KACSeTbI. EcnI pRn NOBTOPHBM BKJIIOUChn INTAHn INDnKaTOp HE NOBBTCHa HnDCnIpee, BblMOXeTe ChOBA nONb3ObaTbcraBUNDeOKaMepoI.
Ppimcaynne no KOHdeHcaunn Blaun
Bnara moKET o6pa3oBaTbC, ecIn Bbl npHecete BaUy BnDeokamepy n3 xOIoNHoro MeCTa B TEnIOe (nnn Hao6OpOT) nnKorJa Bbl nCnoIb3yeTe BaUy BnDeokamepy B kApkOM MeCTe B cJeDyUoXn CnyuAax:
BbI npHecn BAsy BuDeokamepy C bIXHOCKNoHa B NOMEeHne, rJe FyHKUOHNpyet 06OrpeBaTeJIb
BbI npHecn BaUy Bundeokamepy n3 aBTOMOBnI INI IN3 KOMHaTbI C BO3dYnHbIM KOHNIOHPOBaHnEM B XapKoe MeCTO Ha yInuE
BbI nCnOJIb3yTe BnDEOKaMepy nocne rpo3blnndoJx
- Bby nCnoJb3yeTe BaUy BnDeokamepy B ouehb Kapkom n BnaXHOM MecTe.
Kak npedotbpaTb KOHdeHcauio Bnaru
EcIn BnDeOkamepa npHecena n3 xOJOnHoro MeCTa B TeJIIOe,TO nOLOXnTE BnDeOkamepy B nOIN3TNHeOBbI NaKETn I NOTHO 3AkLeIeero.BbInbTe BnDeOkamepy n3 nOIN3TNHeOBoro naKeTa,KorJa TEMnepaTypa BO3DxaBHyTpnaKeTa DOCTnHET TemnepaTypbI OKpyxauOeBO3Dxa (pnp6bn3nteJbHo uepe31vac).
Maintenance information
Cleaning the video head
To ensure normal recording and clear pictures, clean the video heads. The video head may be dirty when:
- mosaic-pattern noise appears on the playback picture.
- playback pictures do not move.
- playback pictures are hardly visible.
- playback pictures do not appear.
- the × indicator and "CLEANING CASSETTE" message appear one after another or the × indicator flashes in the viewfinder.
HnfoPmaunno yxody 3a annapatom
Истка Видаеоголовok
ДяобсеньяHopMaJIbHо 3aIcNи ЧетКOrO n3O6paxeHЯ CNeIyET nepIOdUpeCKn ЧИСТИВиDEOrOLOBКи. ВиDEOrOLOBКи BO3MOxH0 3aRpa3HeHbl, ecJN:
- Na BOCIPON3BOIDMOM N3O6paXeHIN NOBBAJHTC NOMEXN TINa MO3aIKN.
BOCPON3BOIDMOE 1306paXeHne He DBNrAeTcR.
BocnpoIN3BOIDMOE IN3O6paJxHne C Tpydom pa3nUHMo.
BOCPON3BOIDMOE N3O6paXeHne He NOBnEeTcRa Ha 3KpaHe.
B BUNOINCKaTeIe NOBnJIOTcOdINH3aDpyrIM INdNKaTOP Ncoo6UeHne“ CLEANING CASSETTE"INJNKeMnraet INdNKaTOP
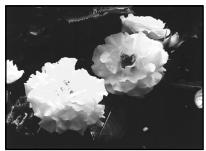

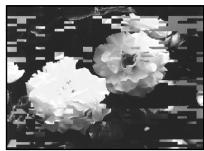
[a]
or/nn
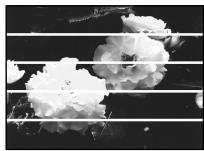
[b]
If the above problem, [a] or [b] occurs, clean the video heads with the Sony V8-25CLD cleaning cassette (not supplied). Check the picture and if the above problem persists, repeat cleaning.
EcIn BO3HKnKHT npBHeDeHHbIe BblIe np6bnEmbl Tnna [a] nll [b], noHCTnTE BnDEORoNobKn C nMOuBIO OChNTeJIbHOJ KACCETbI Sony V8- 25CLD (He npinaraetc).PpOBepbTe n3O6paXeHne I,ecIn ONncAHhbIe BblIe np6bnEMbl He ycTpaHNlncb, NOBtOpnte YnCTKy.
Precautions
Camcorder operation
- Operate your camcorder on 7.2V (battery pack) or 8.4V (AC power adaptor).
- For DC or AC operation, use the accessories recommended in this operating instructions.
- If any solid object or liquid get inside the casing, unplug your camcorder and have it checked by a Sony dealer before operating it any further.
- Avoid rough handling or mechanical shock. Be particularly careful of the lens.
- Keep the POWER switch set to OFF when you are not using your camcorder.
- Do not wrap your camcorder with a towel, for example, and operate it. Doing so might cause heat to build up inside.
- Keep your camcorder away from strong magnetic fields or mechanical vibration.
On handling tapes
Do not insert anything into the small holes on the rear of the cassette. These holes are used to sense the type and thickness of the tape and if the recording tab is in or out.
Camcorder care
- Remove the tape, and periodically turn on the power, operate the CAMERA and PLAYER sections and play back a tape for about 3 minutes when your camcorder is not to be used for a long time.
- Clean the lens with a soft brush to remove dust. If there are fingerprints on the lens, remove them with a soft cloth.
- Clean the camcorder body with a dry soft cloth, or a soft cloth lightly moistened with a mild detergent solution. Do not use any type of solvent which may damage the finish.
- Do not let sand get into your camcorder. When you use your camcorder on a sandy beach or in a dusty place, protect it from the sand or dust. Sand or dust may cause your camcorder to malfunction, and sometimes this malfunction cannot be repaired.
MepblnpedoctopoXHoctn
3KcnIyataunBndeokamepbl
- 3KcnpyatnpyIte BnDeokamepy ot 7,2 B (6aTapeHbI 6NoK) nIIN 8,4 B (ceTeBOI aDAnTep nepemEnHOro TOKa)
- UTo Kacaetc3KcNlyaTaunn BnDEoKaMepbI OT NOCTORHNGO INpeMeHNO TOKa,NCNoB3yUte PnHaJNeXHOctn, peKOMeHDeYEmble B DaHHOn HCHTpyKUnn NO 3KcNpyaTaunn.
- Ecni KaKoH-NbYb TBepDbI npEMeT IIN JNkDKOCTb NpAJI BHTPb KOpNyCa, TO BblKnOChTE BnDEOkamEpy I npOBepBte ee y dInnepa Sonye nepd daJIbHeuwe ee 3KcnIpyatauuei.
-Ⅲ6eaiTe rpybOro o6paueHnC BIndeokamepo nIIM MexaHueckx ydapOB. BybTe oc6eHNO octopoxkHbIC o6bekTribom. - Ecnn Bnndeokamepa He nCnoJb3yeTc,Держnte BbIKJIOUaTeNb POWERB nOLOXKeHn OFF.
He 3abopauhBaIe BaUy BnDeokamepy, HapnMepB, BnoToHue, Hne 3KcNpyaTnpuYte ee B TAKOM COCTOHN. B npOTNBOM Cnyae MOkET pOn30Tu NpblSeHne TeMnepaTpyb BHyTpN BuDeokamepbI.
-ДерхиTe BaSu Bndeokamepy noJaIbIe O T CnIbHbIX MaHnIThBIX nOJIe NJIu MExaHnuecko Bn6paun.
OTHOCHTeNbHO o6paueHnC JeHTAMN
He BCTaBnIe HnUero B MaJIeHbKne OTBepCTNa Ha 3aJHcSTOpOHe KAcCtebl. 3TN OTBepCTNa NCNoIb3yOTcRd IaONpeDeLEHn TnPa NToIuHbI JeTbI, a TaXKe Ida ONpeDeLEHn HAJIuNHa IIN OTCyTCTBn JIeNEcTka 3aUHTbl 3AInCn HaJeHTe.
YxOa 3a BnDeokamepo
Пелюдчесн Bынмайт Касуи вькюашп петане,Опелрунite усточьам CAMERA И PLAYERИ BOCIpOn3BODIte Лentу поядka 3-x Мнут, ecnв Баша Вдeokedмара HeБуET ИСПЛьЗОВАТСД ДИТЕЛБHoeВРЯ.
- UCTNE OBJEKTNB C NOMOUBIO MRAKOI KNCOTUKN DnA ydaJIeHIN NBJIN. EcNI IMEOTC8 OTNeAATKn NaJIbceB Ha oB6EKTNB, TO ydaJIaNTe INC N NOMOUBIO MRAKON TKAHN.
CnCTnTe KOpNc BnDeOkaMepbI C NOMoBIO cyXoMRAKO TKAHN MRAKO TKAHn, CNERKa CMOeHHo pACTBOPOM yMepeHHoro MOUojo cpeDCTBa. He nCnoJIb3yIte KaKnxJIN60 TInOB pACTBOpNTeJe, KOtOpBe MOyT NOBpeDNb OTdEnKy.
He donyckaIte nonaHaHnnecka B Bndeokampe. EcnBblncnoB3yeTe BndeokampeHa necuaHom nJaXe nn KaKOM-Ni6o NblbHom MeCe, PnpOxpaHnTe annapat OT necka nnbl. NecOKnnbl MOryt npnbEctn K HeNCnPabHOCTn annapata, KOtopa HnOrda MoXet 6blt HeNCpAbMOn.
Connection to your PC
- When recording with i.LINK cable the image processed or edited by your PC, use a new Hi8 Hi8 tape.
(for models which have the DV IN jack only)
- When inputting the image recorded by Hi8/ standard8 (analog) system into your PC, dub the image into a Digital8 D or DV tape first, and then input it into your PC.
AC power adaptor
- Unplug the unit from the mains when you are not using the unit for a long time. To disconnect the mains lead, pull it out by the plug. Never pull the mains lead itself.
- Do not operate the unit with a damaged cord or if the unit has been dropped or damaged.
- Do not bend the mains lead forcibly, or place a heavy object on it. This will damage the cord and may cause fire or electrical shock.
- Prevent metallic objects from coming into contact with the metal parts of the connecting section. If this happens, a short may occur and the unit may be damaged.
- Always keep metal contacts clean.
- Do not disassemble the unit.
- Do not apply mechanical shock or drop the unit.
- While the unit is in use, particularly during charging, keep it away from AM receivers and video equipment. AM receivers and video equipment disturb AM reception and video operation.
- The unit becomes warm during use. This is not a malfunction.
-
Do not place the unit in locations that are:
-
Extremely hot or cold
- Dusty or dirty
- Very humid
Vibrating
IopKnluoyene K nepcoHaJIbHomy KOMnbIOTepy NOJb3OBaTEJIa
-ПриMuHHTb HOByIeHTy Hi8 HII npri 3aIncu n3o6paXeHnry,образToHHOrO nIN CMOHTnpOBaHHOrHa nepcoHaJIbHOM KOMbIOTepe NOJb3OBAteJe,срIMMeHHeM Ka6eIi.LINK (ДЯ moIeIe,ОСацeHHbIX TOnbko rHe3dOm DV IN).
-Пи Вьоide ИЗбраженя,Заиcaнно NO cnCTeme Hi8/Standard8 (aHaioroboi),Ha nepcoHaJIbHbI KOMMbIOpTeР NOJIb3ObaTeJI NaIO KOnIpOBaTb I3O6paXeHne npEdBaPnTeJbHo Ha Digital8 HIn DV-JeHTy.
Cetebo aadantep nepemehnHO TOKa
-OTCOeINHnTe aannapat OT 3JIeKTPnueckoCETN,ecnOH He NCIOJb3yETcA DNITeJIbHOE BpEM.ДЯOTCOeINHeHnA CTeBOrO shHypa NOTAHnTe erO 3a pa3bEm.HNKOrDa He TAHnTe 3a cam shHyp.
- He 3Kcnpnyatnpynte annapat c nOBpeXdHbIM uHypom uNKe B Cnyae, ecn annapat ynaI uIN b6bl nobpeXdH.
- He crnbaiTe ceTbeoI npBOd cniloN iHe CTaBbTe Ha Hero TReXeJIbIe PneDMeTbI.3TO NOBpeiNT npBOOi N MoXe IpnBeCTn K NoXapy IIN NopaxKeHIO 3JeKTpnuCeCKM TOKOM.
- Bydte ocToPOxKnbl, YTObbl HnKakne MeTaNlIeCKNBe PpeDMtBHe COpNIkacAlncb CMeTaNIIeCKMn KOHTaMn CoEINHITeBHOI pIaCTnHbI. EcIn 3TO cLYuHTcR, TO MOKeT Ipon3OITN KOPOTKoe 3AmbKaHne, n AnnapaT MoKeT 6bITb NOBpeXJDeH.
BceIaNoIePxNBAIteMeTJIINueckne KOHTaKTbI BYnCTOTE.
- He pa36bpaIe annapaT.
- He noДberpaIte annapaT mexanHueckoBn6paunu n He poHaiTe erO.
-ПиИСПОЛБЗОВАн ИANAPаТ,OCO6EHNO BO BpEM3apДКN,ДePЖNTe erO NOДЛБWE OT pIpEMHnKOB AM-paDNIOBEsaHnI bIeOaIIpaTpybl.ПиEМнKNAMpaDNIOBEsaHnI bIeOaIIpaTpya HApUshaOT AM-paDNIOpEm n pa60Tu BIeOaIIpaTpybl.
B npoecce 3Kcpiyataun annapat HarpeBaetc. 3TO RbIaTeC BnOJIHe HOpMaJIbHbIM.
- He pa3meuai Te annapat B MecTax: - Ype3mepHo JkapKnx IIN XOIOJNbIX - IIbIbHbIX INI rpa3HbIX - OChEB BJaXKnbIX - PoiDBeRjKeHHbIX Bi6paun
Notes on dry batteries
To avoid possible damage from battery leakage or corrosion, observe the following:
- Be sure to insert the batteries with the + - polarities matched to the + - marks.
- Dry batteries are not rechargeable.
- Do not use a combination of new and old batteries.
- Do not use different types of batteries.
- Current flows from batteries when you are not using them for a long time.
- Do not use leaking batteries.
If batteries are leaking
- Wipe off the liquid in the battery compartment carefully before replacing the batteries.
- If you touch the liquid, wash it off with water.
- If the liquid get into your eyes, wash your eyes with a lot of water and then consult a doctor.
If any problem occurs, unplug your camcorder and contact your nearest Sony dealer.
Примочаю К сухим батерйкам
Bo n36eKanHe Bo3MOxHOro NOBpeXdEHH BnDeOkamepbI BCNeDCTBVe yTeuKN BHyTpeHHeRo BeueCTBa 6aTaapeek nn Kopp03nn Co6JIoudaJTe CneJeUOee:
-Пиустановке 6атуарек соблюдайпразильную плярноctь + -В COOTBETCTBUN C MEТКAMN +-.
Cuyxue 6aTaepuKn HEnb3pepe3apXkaTb.
- He nCnoJIb3yIte HOBIIe 6aTapeKn BMeCTe CO CTApblIM.
- He ncpnoJIb3yIte 6aTapeKn pa3HOrO tuna.
- Ecni 6aTapeKn He nCOnJb3yIOTcA DInTeJIbHOe Bpemr, OHN NOCTeNEHHO pa3paXaIOTc.
- He ncpnoJIb3yIe 6aTapeKn, KoTOpblne NOTEKJN.
EcIn npOn3oUla yTeUka BHyTpEnHero BeuecTb6aTaapeek
-Перед Tem,Кak 3amehntb 6aTapeeKn, TuaTeIbHo nPoTpIne OCTaTKn KUnkOcTN B OTeKe DnA 6aTapeeK.
B cnyuae nonaadaHn JnKoCTn Ha Koxy, npomTe JnKIOCTb BOIo.
Bcnyae nonaadaHn JnkocTn B rna3a, npomTe CBOI rna3a 60JIbIIM KOJIneCTBOM BObl, nOcne yero oBaPaNTECb K BpaCy.
B clyaue Bo3HKnHOBeHn KaKnx-Jn6o np6Jem, OTKIIOHTe BaUy BnDeOkaMepy OT nCTOHNKa IITaHnI N o6paTntEcB B 6nXkaiuIN cepBnCHbI ueTp Sony.
Video camera recorder
System
Video recording system
2 rotary heads
Helical scanning system
Audio recording system
Rotary heads, PCM system
Quantization: 12 bits (Fs 32kHz stereo 1, stereo 2), 16 bits
(Fs 48kHz , stereo)
Video signal
PAL colour, CCIR standards
Recommended cassette
Hi8 video cassette
Recording/playback time (using
90 min. cassette)
1 hours
Fastforward/rewind time (using
90 min. cassette)
Approx. 8 min.
Image device
1/4 inch CCD (Charge Coupled
Device)
Approx. 800,000 pixels
(Effective: Approx. 400,000 pixels)
Lens
Combined power zoom lens
Filter diameter 37mm (1 7/16 in)
20× (Optical), 80× (Digital)
Focal length
3.6 - 72 mm (5/32 - 2 7/8 in.)
When converted to a 35mm still camera
46 - 920 mm (15/8 - 32 3/8 in.)
Colour temperature
Auto
Minimum illumination
3 lux (F 1.4)
0 lux (in the NightShot mode)*
- Objects unable to be seen due to the dark can be shot with infrared lighting.
Input and output connectors
S video output
4-pin mini DIN
Luminance signal: 1 Vp-p, 75 ohms, unbalanced
Chrominance signal: 0.3Vp - p
75 ohms, unbalanced
Video output
Phono jack, 1 Vp-p, 75 ohms, unbalanced
Audio output
Phono jacks (2: stereo L and R)
327mV (at output impedance
47 kilohms) impedance less than 2.2 kilohms
RFU DC OUT
Special minilack, DC 5V
DV output
4-pin connector
Headphone jack
Stereo minijack ( 3.5mm)
LANC control jack
Stereo mini-minijack ( 0.25mm
MIC jack
Minijack, 0.388mV low impedance with 2.5 to 3.0VDC , output
impedance 6.8 kilohms (0.35 mm)
Stereo type
General
Power requirements
7.2 V (battery pack)
8.4 V (AC power adaptor)
Average power consumption
(when using the battery pack)
During camera recording
3.2 W
Operating temperature
0^ to 40^ (32°F to 104°F)
Storage temperature
-20^ to +60^ (-4^ to +140^)
Dimensions (Approx.)
101 × 106 × 195 ~mm
(4× 41 / 4× 73 / 4 in.) (W / h / d)
Mass (approx.)
790 g (1 lb 11 oz)
excluding the battery pack, lithium battery, cassette and shoulder strap DCR-TR7000E:
930 g (2 lb)
including the battery pack
NP-F330, lithium battery CR2025,
90 min. cassette shoulder strap DCR-TR7100E:
950g (2 lb 1 oz) including the battery pack NP-F550, lithium
battery CR2025, 90 min. cassette and shoulder strap
Supplied accessories
See page 5.
AC power adaptor
Power requirements
100-240VAC,50/60Hz
Power consumption
23 W
Output voltage
DC OUT: 8.4V 1.5 A in operating mode
Operating temperature
0^ to 40^ (32°F to 104°F)
Storage temperature
-20^ to +60^ (-4^ to +140^)
Dimensions (approx.)
125× 39× 62mm
(5× 19 / 16× 21 / 2 in.) (w / h / d)
excluding projecting parts
Mass (approx.)
280 g (9.8 oz)
excluding power cord
Cord length (approx.)
Mains lead: 2m (6.6 feet)
Connecting cord: 1.6m (5.2 feet)
Design and specifications are
subject to change without notice.
Budekamepa
Cnctema
CnCTema BInDeo3aHnCn
2BpaaouuuecraJIOBKN
CnCTemaHaKJIOHHOI
MexAHuecko pa3BepTKI
CnCTema aydnno3aannc
Bpaaioiuecra roIobkn, cncTeMa UKM
Дискретиаши: 12 БИТОВ (СДВИЧАСТБЛ 32 кГ, СТЕРО 1, СТЕРО 2), 16 БИТОВ (СДВИЧАСТБЛ 48 кГ, СТЕРО)
BndeocnHa
LBeTobO BcHnPal, cTaHdapt MKKP
PekomeHdyemble kaccetbl
Bndeokacceta Hi8
ВерmaЗапсИВОБСРОЗБЕДЕНЯ (ПИЗ ИСПОЛБОВАЙ 90-MINH. KACCETы)
1 qac
Bpemy yckopenno nepemotkn Bneped/na3a
(ПИЗ ИСПОЛБЗОВАМ N 90-MMH. KACCETbl)
Pn6m3.8MH
ΦopMIpOBaTeIb N3O6paXeHnA
1/4-ДюМOBьП3С (прборсзардовсCB83bO)
Пиблз.800 000 зелем entob n3o6paЖеня
(Ф�фкгТИВье:прИбИЗ.400 000 ЗлЕМЕТОВ ИЗБРAXКЕНЯ)
06beKTHB
KombHnipoBaHHbO6bEKTNB C pINBOIDhIM TpaHcΦoKaTOPOM
DnametpΦnlbtpa 37 MM
20-kaPATnB(oTnueckn),80-KpaTbH(UΦpOBoI)
Φokychoe pacctOHHne
3,6-72MM
PnI npeo6pa3OBAHm B 35-MM
ΦOTOKaMepy
46-920MM
LBeTOBa TEMnepaTypa
AbToperyunipobAHne
MnHmMaJIbHaA OCBeUeHHoCTb
3 nK (F 1,4)
OJK (BpeXmHe HcHOn CbEmKn)
* CbEmky 06bEkoTOB, HEBNIMbIX B TEMHOTe, MOXHO BblIOJIHrTb C NOMOzbu INHpapKaPachOrO OCBEUeHNHa.
Pa3beMbI BXoDHbIX BblXoDhbxCnHaJIOB
BbIXoD cnrHaJa S BnDeo
4-ITbIpbKOBoe MHN-rHe3do DIN
CnHn npKocTn: pa3max 1 B,
75 Om, HecmmMeTpHbI
CnHnA nBcTeHocTn: pa3Max 0,3 B,
75 Om, HecmmMeTpHbI
BbIXoD BnDeocnHaJa
Фоногнздо, размс сигнала 1В,
75 Om, HecimMMetPnUHbI
BbIXoA yAnocnHaHa
ΦoHOrHe3da
(2: cTepeofoHnueckne L n R)
327 MB (При Велиховим РОЛОНМСОПТИВLEЕМ 47 KOM), РОЛОНСОПТИВLEЕМЕСЕ 2,2 KOM
RFU DC OUT
CneuaJIbHOe MmHrHe3do,5B NoCTOHHOro TOKa
DV BixoD uΦpOBOrO BnDeOcnHaHa
4-ITbIPbKOBBi pa3beM
The3o roJOBbIX TeJeFOHOB
CtepeofoHueckoe MHNr-THe3do
(03,5MM)
Tne3do ynpablenenLANC
CTepeoΦoHueCKoe MmH-rHe3do
(2,5MM)
THe3oMIC
MnHn- rhe3do, 0,388 MB, Hn3koe nIHOe cOpoTbBHeHne O T2,5 D
3,0 B NOCTOHHORO TOKa, BbIXoHHe
PONHoe COpOTnBLeHne 6,8 KOM
(ø 3,5 MM)
CtepeofoHnueckn TIN
06uee
Tpe6oBaHnK nntaHnO
7,2B(6aTapeiHbIb6JIOK)
8,4 B (ceTeBoi aanTep npeMeHnHO TOKa)
CpeHnI npTe6pHemar MOUHOCTb
(npnncnoJb3OBaHH
6aTaapeHoro 6Ioka)
Bo Bpem 3aIncn BnDcokamepo
3,2 B
Pa6o7a TemnepaTpa
OT 0^ do 40^
TemnepaTypa xpaheHnA
OT-20°C d0 +60°C
Pa3mepbI (npn6Jln3.)
101× 106× 195MM (u/B/r)
Bec (npn6nn3.)
790rheBkIIOUa8batapeHbI bOKn,JIITNeBov6batapeKnKacCEtblNIIeueBOrOpemHr DCR-TR7000E:
930 r, BkIIOUa7 6aTapeHbI 6LoK
NP-F330, nltneByo 6aTapeKy
CR2025, 90-MnH. kaccety n PIIeueBOI peMeHb
DCR-TR7100E:
950 r, BkJIIOUaJ 6aTapeHbI 6IOK
NP-F550, nntnebyo 6aTapeky
CR2025, 90-MnH. kaccety n PJIeueBOI pemeHb
Ppnilaraemblpe npnaedknoctn
CM. cTp. 5.
CteBoa aDantep nepemehoro TOka
Tpe6obAHnK nntaHnIO
100-240B nepemehnHOTo Ka, 50/60 T
Notpe6JrMaMoHocTb
23BT
BbIXoHoe HappkeHne
DC OUT: 8,4 B; 1,5 A B pa60em
pexime
Pa6o7aTemnepatypa
OTo 0^ Cdo 40^ C
TemnepaotypxaheHn
OT-20°C dO +60°C
Pa3mepbl (npn6bn3.)
125× 39× 62 MM (W/B/t), HbKJIIOUaH BbICTyIaIOUne YacTn
Bec (npn6nn3.)
280r,HeBkIIOUaCeTeBOuShypr
Диннашура (npn6n3.)
CeteboI uHyp: 2 M
CoeHHntbHbI hHyp:1,6 M
Kohctpykunia n texhnuceckne xapaktepcntnKMOyT 6bIb N3MeHeHb 6e3 yBeDOMLeHnA.
Identifying the parts and controls
Овоз nauseю частей и руларов
Camcorder
1 POWER switch (p. 19)
2FOCUS switch (p. 54)
3 PUSH AUTO button (p. 54)
4 Eyecup
[5] Viewfinder lens adjustment lever (p. 21)
6 Power zoom lever (p. 22)
7 PHOTO button (p. 38)
BATT RELEASE lever (p. 12)
9STANDBY switch (p. 19)
10 START/STOP button (p. 19)
11 Hook for shoulder strap (p. 107)
DC IN jack (p. 13)

Bndeokamepa
This mark indicates that this product is a genuine accessory for Sony video products.
When purchasing Sony video products, Sony recommends that you purchase accessories with this "GENUINE VIDEO ACCESSORIES" mark.
1IpepeKJIIOuChaTeIb POWER (cTp. 19)
2 NpekeKJIIOuATEIbFOCUS(cTp.54)
3 KhoNka PUSH AUTO (cTp. 54)
4OkyIaP
5 Pbyar peyunpoBkn o6bektna BnuonckaTeIa (cTp. 21)
6 Pbyar npnbodhoro Bapnoo6bektna (cTp.22)
7 KhoNka PHOTO (ctp. 38)
8 Pbyar BATT RELEASE (ctp. 12)
9IpepeKJIIOUaTeIb STANDBY (cTp.19)
10 Khonka START/STOP (cTp. 19)
11 KpIouOK IJIa IJIeueBOrO pEmHra (cTp. 107)
12 THe3do DC IN (ctp. 13)

Данны 3нak 03начаET,ЧTO 3TO ИЗделпяВЛЯЕТСЯ ПОДПИНСо Принадлесхов ДЯ Видаоанпаразы Sony. Рп покунке Видаоанпаразы Sony pekomeндуетс рпюбретаь ДЯ Hee ринадлесховтс Sony с тakим 3нakOM“GENUINE VIDEO ACCESSORIES”.
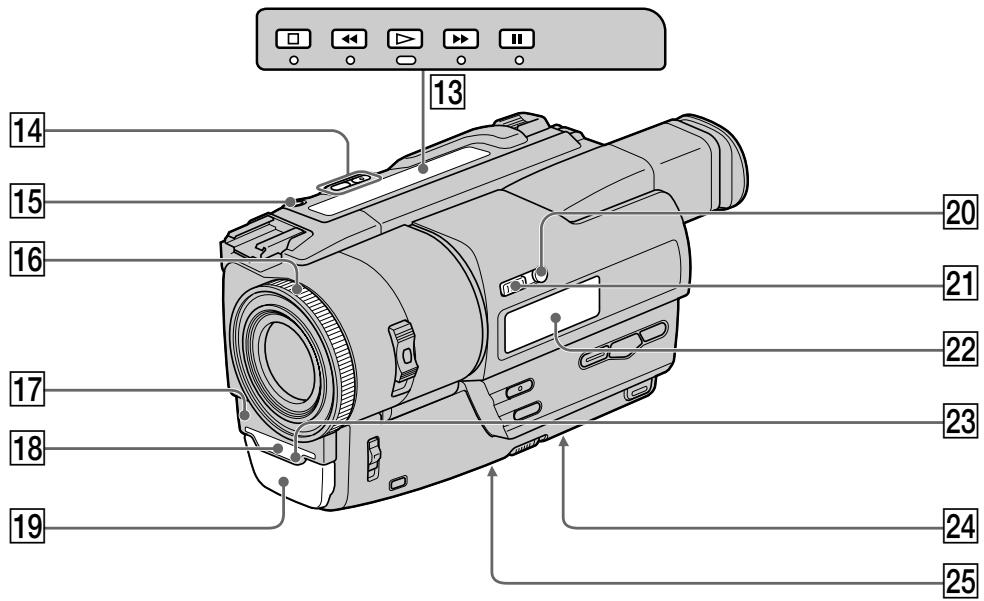
Video control buttons (p. 33, 36, 37, 62)
STOP (stop)
REW (rewind)
PLAY (playback)
FF (fastforward)
PAUSE (pause)
The control buttons light up when you set the POWER switch to PLAYER.
14 EDITSEARCH buttons (p. 28)
15 LASER LINK button (p. 31, 32)
16 Focus ring (p. 54)
17 Camera recording lamp (p. 19)
18 Infrared rays emitter (p. 26, 31)
Microphone
20 +SLOW SHUTTER button (p. 26)
21 NIGHTSHOT switch (p. 26)
22 Display window (p. 112)
Remote sensor (p. 110)
24 Lithium battery compartment (p. 84)
25 Tripod receptacle (base) Make sure that the length of the tripod screw is less than 6.5mm 9/32 inch).Otherwise, you cannot attach the tripod securely and the screw may damage your camcorder.
What is LASER LINK?
The LASER LINK system sends and receives pictures and sound between video equipment having the 4 mark by using infrared rays.
13 Khonkn Bndeokohtpona (cTp. 33, 36, 37, 62)
STOP (ocTaHOBka)
REW(yckopenhna nepemOTka Ha3a,d)
PLAY (Bocnpo3VeJeHne
FF (yckopenhna nepemOTka Bnpei)
II PAUSE (nay3a)
KONIKM BINOEOKOHTPOJBAICBEUMAOTC npy yctanOBKepeKeKIOuTaTeN POWER B noJooXeHne PLAYER.
14 Khonka EDITSEARCH (ctp. 28)
15 Khonka LASER LINK (cTp. 31, 32)
16KoIbUcOΦokycuPoBKn (ctp. 54)
17J lamna 3aHncn BndeokamepbI (cTp.19)
18 N3IyuaTeIb IuΦpaKpaChbIX Lyuei (cTp. 26, 31)
19 Minkpofoh
20 Khonka +SLOW SHUTTER (cTp. 26)
21 PeneKlouaTeIb NIGHTSHOT (cTp. 26)
22 Okoosko DnCnJIe (cTp. 112)
23 DaTcHK DnCTaHcNoHHO ynpabJIeHn (ctp. 110)
24 OTeCek IInTneBOB 6aTapeKn (CTp.84)
25 THe3doIyraTpeHOrn (OCHOBaHne) Y6eINTeCb, 70 DInHa BnuHTa TpeHOrn MeHee 6,5 MM. B npOtubHom Cnyae Bb He CMOKeTe HauJeHO pNkPeNTb TpEHOrA, a BVHT MoKeT noBpeDntb BaUy BuDeokamepy.
4To Takoe LASER LINK?
CnCTema LASER LINK nocbinaet npinHmaeT cnHaJI bI 3O6paXeHnI 3ByKa MeKdY BnDeoannapaTyPoI, IMeIoSeI 3NaK , C NOMOsbIO IHΦpaKpaChbIX LyeI.
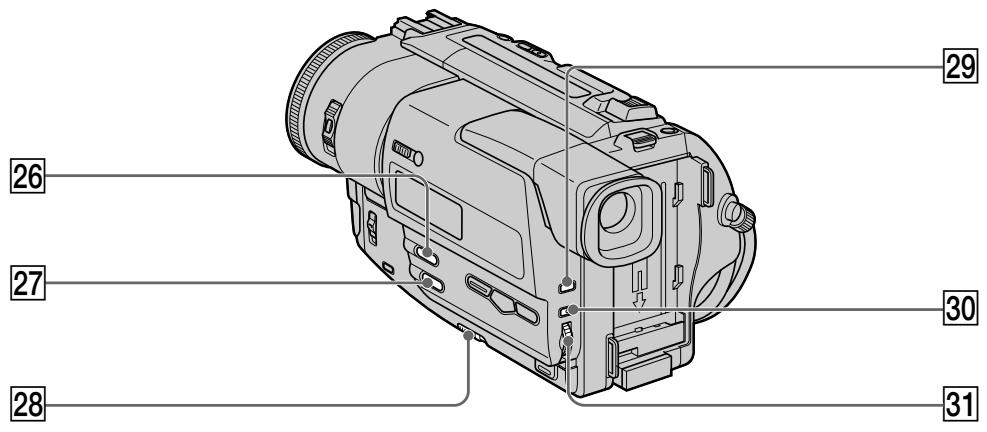
26 FADER button (p. 42)
27 BACK LIGHT button (p. 25)
28 START/STOP MODE switch (p. 23)
29 EXPOSURE button (p. 53)
30 MENU button (p. 42, 69)
31 SEL/PUSH EXEC dial (p. 46)
Attaching the shoulder strap
Attach the shoulder strap supplied with your camcorder to the hooks for the shoulder strap.
26 Khonka FADER (cTp. 42)
27 Khonka BACK LIGHT (cTp. 25)
28Пелерключateь START/STOP MODE (стр. 23)
29 Khonka EXPOSURE (cTp. 53)
30 Khonka MENU (cTp. 42, 69)
31Диck SEL/PUSH EXEC (cTp.46)
PpukpenHe nJeueBoro peMHa
PπpKpeπTe pIeYeBOI peMeHb, npIaRaembl K BaWe BnDeOkaMepe, K KpUcKaM dJa pIeYeBO rpeHra.
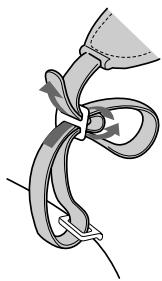
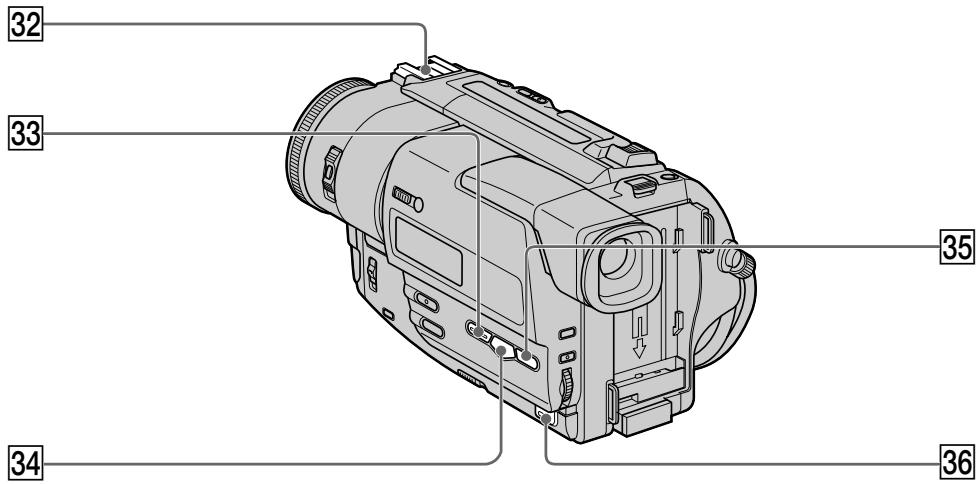
32 Intelligent accessory shoe
33 DIGITAL EFFECT button (p. 48, 59)
34 PROGRAM AE button (p. 51)
35 PICTURE EFFECT button (p. 47, 58)
36 DATA CODE button (p. 34)
32ДерхаTeь ДЯ усТаHOBК npинаджХоcteɪ
33 Khonka DIGITAL EFFECT (ctp. 48, 59)
34 Khonka PROGRAM AE (cTp. 51)
35 Khonka PICTURE EFFECT (cTp. 47, 58)
36 Khonka DATA CODE (cTp. 34)
Intelligent Accessory Shoe
Notes on the intelligent accessory shoe
- The intelligent accessory shoe supplies power to optional accessories such as a video light or microphone.
- The intelligent accessory shoe is linked to STANDBY, allowing you to turn the power supplied by the shoe on and off. Refer to the operating instructions of the accessory for further information.
- The intelligent accessory shoe has a safety device for fixing the installed accessory securely. To connect an accessory, press down and push it to the end, and then tighten the screw.
- To remove an accessory, loosen the screw, and then press down and pull out the accessory.
Intelligent Accessory Shoe
PpmeaHn OTHocTeNbHO DePkaTeJI dIyctaHOBKn PpHaadJeXHoCTeN
-Держателдяустовки ринадлесхостей подаетптане на BCNOMORAteьнbleприhalд�жхости,Takne KaBUNDEONODCBETka nIN MKNKPOΦOH.
-ДерхаTeьдя уctaHOBKn npuHaIeJxHocTei CB3aH cpeXIMOM OxuaHnA STANDBY, no3BOJIЯ Bam BkIIOUaTb N bblKJIIOUaTb NOdaBaEMOE dePkaTeIem nITaHne. IpoIpObHbIe cBeDeHnI npuBEdeHbI B INCTpyKcIIN IO kCnIIyatauIN BCNOMoRaTeNbHbIX npuHaIeJxHocTei.
B DepeKaTeIe Iy yCTaHOBKn BCNOMORAteIbHbIX pINHaIeXHoCTe IMeETcR npedeoxpaHtIeNbHoe yCTpoiCTBO Iy HAJeXHOI qHKCaUYN yCTaHOBJIeHHo INpINHaIeXHoCTn. Iy IIOCoEiHHeHn IpnHaIeXHoCTn, HaxMITE ee BHN3 IN npOdBnHbTe Do yHpopa, a 3aTEM 3aTAHHTe BNHT.
-ДЯСНТЯпинадлжноTN OCSa6bTe BnHT, a 3aTEM HaxMITE пинадлжноCTb BHN3 n NOTAHNTe ee.
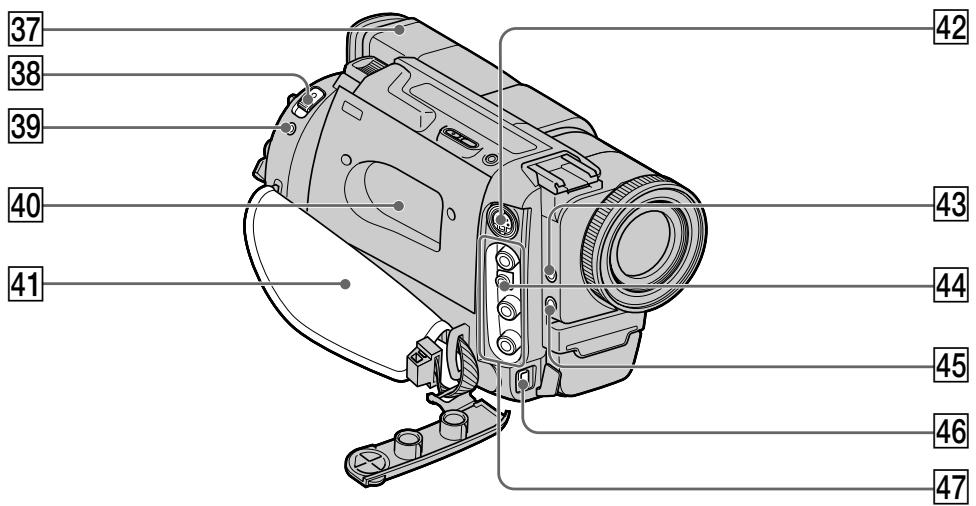
[37] Viewfinder (p. 21)
38 EJECT switch (p. 18)
LANC control jack LANC stands for Local Application Control Bus System. The control jack is used for controlling the tape transport of video equipment and other peripherals connected to the video equipment. This jack has the same function as the jack indicated as CONTROL L or REMOTE.
Cassette compartment (p. 18)
41 Grip strap (p. 111)
42 SVIDEO jack (p. 29, 40, 66)
43 (headphones) jack
44 RFU DC OUT (RFU adaptor DC output) jack (p. 30)
45 MIC jack (PLUG IN POWER) Connect an external microphone (not supplied). This jack also accepts a "plug-in-power" microphone. If you connect a 2-pin microphone, supply power from DC OUT jack.
46 DV OUT jack (p. 68) This "i.LINK" mark is a trademark of Sony Corporation and indicates that this product is in agreement with IEEE 1394-1995 specifications and their revisions.
The DV OUT jack is i.LINK compatible.
47VIDEO/AUDIO jacks (p. 29, 40, 66)
37 Bvnonckatelb (ctp. 21)
38 BbIKJIouHaTeIb EJECT (cTp. 18)
39 THe3do ynpablenia LANC LANC 03Hauaet cntemy KaHana MeCTHO ynpablenia. THe3do ynpablenia IncOJIb3yeTcI JnA KOHTpOJIa 3a nepemeueHmE JeHtBi BVJeOaIIpaTaypBIn nepiFepriNbIX yCTPOIeB, NOkJIIOUeHHbIX K HeJ DaHHOE THe3do IMeET TaKIO Xe fYHKUIO, KAK i pa3bEmbl, O603HaueHbIe KaK CONTROL Lnn REMOTE.
40 KaccetHbIOTcEK (CTp.18)
41 Pemehb dnia 3axBaTa (cTp. 111)
42ГнздоSVIDEO(cTp.29,40,66)
43 THe3doO (roJOBHbIe TeJeΦoHbI)
44Гнeзdo RFUDCOUT(BbIXoI NOCT.TOKa B4-anaTepa)(cTp.30)
45 THe3do MIC (PLUG IN POWER)
Дя подсоeДинeHЯВHEshero
MnKpOΦoHa (He npinlaraetc). 3TO rHe3do
TakKe NO3BONJeT NOkNIOuHTb MmKpOΦoH
"С ВыКЛIOчATElEM NITaHЯ". Пи
NoДсоeДинeHЯ 2-шТьрБКOBOrO
MnKpOΦoHa, NOBJODI NITaHЯ cNeJdyET
BbINOJIHЯТb Yepe3 THe3do DC OUT.
46 I. He3do DV OUT (cTp. 68) 3нak "i.LINK" AByIaTeTc TOpROBoi МарКой KOPnраци Sony uKa3bIbaeT ha To,чTo npOduKmua COOTBeTCTByeT TEXHueCKmY cNoBnAm IEEE 1394-1995 nIX dOnoJIHeHnAm.
I He3do DV OUT COBmecTmo c KaHaNoM nepeDaun na3epHbxC cnHaNoB i.LINK.
47ГнэздаVIDEO/AUDIO(cTp.29,40,66)
Remote Commander
NytbT dntaHcnoHHoro ynpabHeHn
The buttons that have the same name on the Remote Commander as on your camcorder function identically to the buttons on your camcorder.
KhONKn PnybTa DnCTaHOnOHHO ynpabJIeHna, KOtOpBIE ImEHT OINHaKOBbIe HAnMeHOBaHNc KhONKaMn Ha BInDeOkampe, fynHKUHOHpyOT nDeHTNUHO.
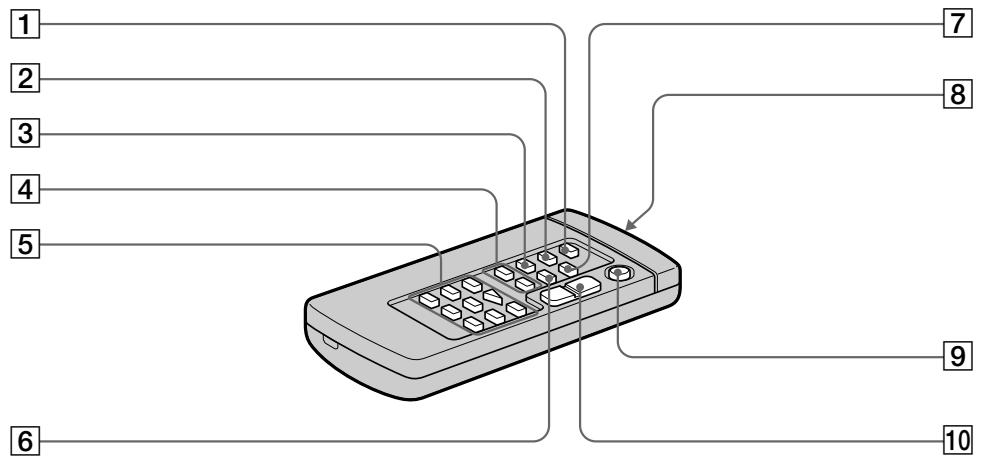
1 PHOTO button (p. 38)
2 DISPLAY button (p. 34)
3 SEARCH MODE button (p. 62, 64, 65)
4 I▶/▶I buttons (p. 62, 64, 65)
5 Tape transport buttons (p. 33)
6 DATA CODE button (p. 34)
ZERO SET MEMORY button (p. 56, 61)
Transmitter Point toward the remote sensor to control the camcorder after turning on the camcorder.
9 START/STOP button (p. 19)
10 Power zoom button (p. 22)
1 KhoNka PHOTO (cTp. 38)
2 Khonka DISPLAY (cTp. 34)
3 KhoNka SEARCH MODE (cTp. 62, 64, 65)
4 KhoIkn I /I (cTp. 62, 64, 65)
5 Khonkn nepemeeHnaIeHTbI (ctp. 33)
6 KhoNka DATA CODE (cTp. 34)
7 Khonka ZERO SET MEMORY (ctp. 56, 61)
8 NpepaTuk HnpaBbTe Ha nCTaHcHbI daTcNk dny npabJeHn BndeOKaMepo nocle BKJIOeHn BnDeOKaMepbl.
9 Khonka START/STOP (p. 19)
10 KhoIIKa npINBOIHO R BApNoOOBeKtNbA (cTp. 22)
To prepare the Remote Commander
Insert 2 R6 (size AA) batteries by matching the + and - polarities on the batteries to the + - marks inside the battery compartment.
IINIOJROTOBNIyIbTa IINCTAHUHHOYnpaBHeHH
BctabTe DBe 6aTapeKn R6 (pa3mepa AA), co6IIOdaHaNJIeKaUIO NOnrPHOCTb +N-Ha 6aTapeKax CO 3HaKaAMN + - BHyTpN OTCeKa dJa 6aTapeek.
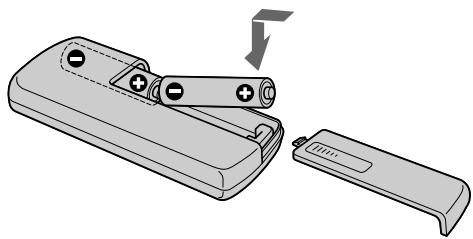
Notes on the Remote Commander
- Point the remote sensor away from strong light sources such as direct sunlight or overhead lighting. Otherwise, the Remote Commander may not function properly.
- Your camcorder works in the commander mode VTR 2. Commander modes 1, 2 and 3 are used to distinguish your camcorder from other Sony VCRs to avoid remote control misoperation. If you use another Sony VCR in the Commander mode VTR 2, we recommend changing the commander mode or covering the sensor of the VCR with black paper.
PpmeaHnK npIbTy dNCTaHcHNOHOrO ynpabJIeHH
-Держнerte ДИСТАЦИОНHBIДаТУК NOДАЛБWEOT CINJBHbIX INTOCHNIOK CBETA, KaK HApPIMeP,прмье COJINEUHbIe JLYu NII INIJILOMHaцЯ.ВПрOTиBHom Clyuae ДИСТАЦИОнHoeуnpaBHeHne MOKeT He DeIeCTBOBaTb.
-Данная Видаеокамер pa6oTaetВ рекиме
nylbTa dinCTaHcUOnHOrO ynpabLeHnRA VTR 2.
Рекимь пьы дисТанцоHOrO уралбпe_H
1,2и 3исплььуOTСДЯ оТПчИДаHHОH
Видаеокамер ot dpyrnx KBM Фирмь SOY BO
иЗБжане НрравINьНоу pa6oТы
ДиCTaHcUOnHOrO уралбпe_H.Есл Bы
иСпльзуete DepyroKBM Фирмь SOY,
pa6oТаIOшв В реким vale VR 2,Мы
peKOMeHdyeBam ИЗMeHNTb реким пьы
ДиCTaHcUOnHOrO уралбпe_HIM 3akPbITb
ДиCTaHcUOnHbI DAчнК KBM черно
6уmarо.
Fastening the grip strap
PpKpeHnepeMnIa3xAbaTa
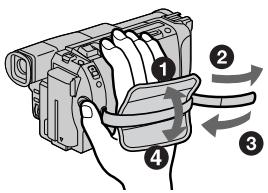
Fasten the grip strap firmly.
Плnotо ппкpenite ремьдязхвета.
Operation indicators
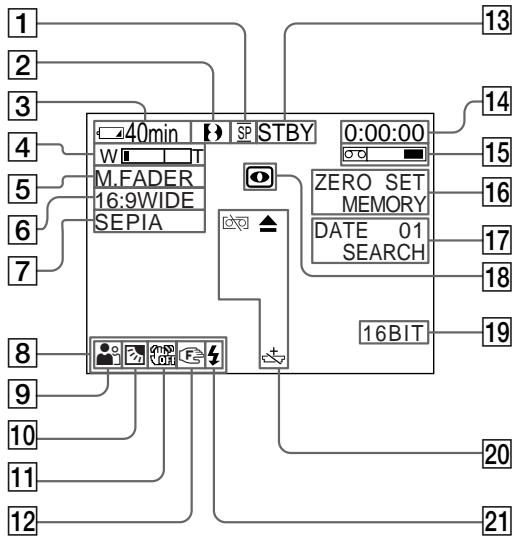
Viewfinder/BudonckaTeIb
Pa6oyne HndnKaTopbI
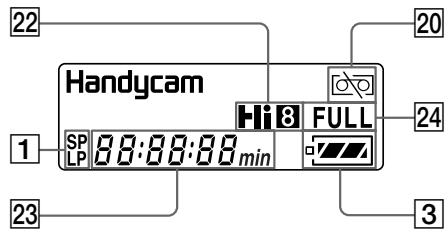
Display window / Okosko dinçnelera
1 Tape speed mode indicator This indicator appears while playing back in the Hi8/standard 8 system.
Format indicator (p. 80) [H, H or B appears.
Remaining battery time indicator (p. 24)
4 Exposure indicator (p. 53)/Zoom indicator (p. 22)
Fader indicator (p. 43)/Digital effect indicator (p. 48, 59)
6 Wide mode indicator (p. 41)
Picture effect indicator (p. 46, 58)
8 Data code indicator (p. 34)
9 PROGRAM AE indicator (p. 51)
10 Backlight indicator (p. 25)
11 SteadyShot off indicator (p. 70)
12 Manual focusing indicator (p. 54)
1 INHdNkaTOp pexnma cKopocTJeHTbI 3TOIT INHdNkaTOp BbICBeuNbAeTcB BO BpEma BOCnpOn3BeDeHnB CnCTeme Hi8/ CTaHdapTHoN CnCTeme 8.
2 INHdkaTopΦopMaTa* (ctp.80) IIOABNTcHINDnKaunr H, H# nn
3Индикаторoctabwerooc3apya 6aTapeHoro6Ioka(cTp.24)
4 INHdNKaTOP 3KcNo3nUu (cTp.53)/ INHdNKaTOP BapNo06bKeTnBa (cTp.22)
5 INHdNkATOp feiDepa (ctp. 43)/INHdNkATOp cnΦpOBOrO 0ΦΦeKTa (ctp. 48, 59)
6ИнданkaTOp shpoKoΦopMaTHOro peXnMa (ctp. 41)
7Инданкаторэфсектma3o6paхени (ctp.46,58)
8 INHdkaTop Koda daHHbIX (ctp. 34)
9Инд PROGRAM AE (cTp. 51)
10 INHdNkAToP 3aDHei NpOcbETKn (ctp.25)
11 INHdIKATop BbIKIOueHHoФyHKcIMuYCTOuHBOBcEMKn (cTp.70)
12 INHdkaTop pUHNo fokycnpoBkn (cTp. 54)
Identifying the parts and controls
Standby/Recording indicator (p. 19)/Video control mode (p. 36)
14 Tape counter (p. 24, 56, 61)/Time code indicator (p. 24)/Self-diagnosis display function indicator (p. 89)/5SEC mode indicator (p. 23)/Photo recording indicator (p. 38)
15 Remaining tape indicator (p. 24)
ZERO SET MEMORY indicator (p. 56, 61)
17 Search mode indicator (p. 62, 64, 65)
18 NIGHTSHOT indicator (p. 26, 27)
19 Audio mode indicator (p. 72)
20 Warning indicators (p. 90)
Video flash ready indicator This indicator appears when you use the video flash light (not supplied).
22 Hi8 indicator (p. 80) This indicator appears while playing back in the Hi8 system.
23 Tape counter (p. 24, 56, 61)/Time code indicator (p. 24)Self-diagnosis display function indicator (p. 89)/Remaining battery time indicator (p. 13)
24 FULL charge indicator (p. 13)
0603haeHne yactei nperyJrTopoB
13 INДИКaTOPpeXIMMAOxNdaHnI/3aHnCn (ctp. 19)/peXIMBnDeOKoHTpoJIa (ctp. 36)
14 INHdkaTop cTuTnKa JIeHTbI (ctp.24,56,61)/INHdkaTop KOJa BpeMeHN (ctp.24)/INHdkaTop yHKcIMN camOHaIarHocTnKn (ctp.95)/INHdkaTop peKIma 5SEC (ctp.23)/INHdkaTop foTOcbemKn (ctp.38)
15Индикаторoctabweeялentы(cтр.24)
16ИндикатOP ZERO SET MEMORY (ctp.56,61)
17Инд peKmna nOuNcKa (ctp. 62, 64, 65)
18Индикатop NIGHTSHOT (ctp. 26, 27)
19Индикаторзвуковогоржima(cTp.76)
20Ipeynpexkaioune HndkaTOpby (ctp.96)
21 INHdIkaTOP rOToBHOCTN BnDEOBcbliKu 3TOT INHdIkaTOP BbICBeYnBaETC, KOrJa Bbl nCNoJIb3yTe JAMpy BnDEOBcbliKu (He npnilaraetc).
22ИнданkaTop Hi8 (cTp.80) 3TOT INIduKaTOp BBICBeuHbAeTC npn BOCnpOn3BVeDeHmN B CnCTeme Hi8.
23 INHdNKaTOP CHTUKNa JIeHTbI (cTp. 24, 56, 61)/INHdNKaTOP KOJa BpeMeHN (cTp. 24)/INHdNKaTOP ΦYHKcIMn CAMOHaarHocTNUKn (cTp. 95)/INHdNKaTOP BpeMeHN OCTaBWeRoc 3apJa 6aTaapeHOro 6JOkA (cTp. 13)
24Инд Д 3apяdkn FULL (ст. 13)
Functions to adjust exposure (in the recording mode)
In a dark place
NIGHTSHOT (p. 26)
- In insufficient light
Low lux mode (p. 50)
- In dark environments such as sunset, fireworks, or general night views
Sunset & moon mode (p. 50)
- Shooting backlit subjects
BACK LIGHT (p. 25)
- In spotlight, such as at the theatre or a formal event
Spotlight mode (p. 50)
- In strong light or reflected light, such as at a beach in midsummer or on a ski slope
Beach & ski mode (p. 50)
Functions to give images more impact (in the recording mode)
- Smooth transition between scenes
FADER (p. 43)
- Taking a still picture
PHOTO (p. 38)
- Digital processing of images
PICTURE EFFECT (p. 46)
- Processing a scene using digital effects
DIGITAL EFFECT (p. 47)
- Creating a soft background for subjects
Soft portrait mode (p. 50)
Functions to give a natural appearance to your recordings (in the recording mode)
- Preventing deterioration of picture quality in digital zoom
D ZOOM [MENU] (p. 69)
- Focusing manually
Manual focus (p. 54)
- Shooting distant subjects
Landscape mode (p. 50)
- Recording fast-moving subjects
Sports lesson mode (p. 50)
Functions to use in editing (in the recording mode)
- Watching the picture on a wide-screen TV
Wide mode (p. 41)
Functions to use after recording (in the playback mode)
- Digital processing of recorded images
PICTURE EFFECT (p. 58)
- Processing a recorded scene using digital effects
DIGITAL EFFECT (p. 59)
- Displaying the date/time or recording data when you recorded
Data code (p. 34)
- Quickly locating a desired scene
Zero set memory (p. 56, 61)
- Searching for scenes recorded in the photo mode
Photo search (p. 64)
- Scanning scenes recorded in the photo mode
Photo scan (p. 65)
- Playing back on monaural sound or sub sound
HiFi SOUND [MENU] (p. 69)
- Playing back the picture on a TV without connecting a cord
LASER LINK (p. 31)
PykoBoDCTBO IO 6bICTpbIM yHKnIaM
Функци Длpeунровки 3Кспозци (В ржиме зannс)
B TEMHOM MECTe
Пи HeIOCTaTOUHOM OCEUeHnI
B TEMhBix OKpykaIoux ycIobnIax, HApnIpMep, 3axoI coJIHua, fpeIepBepKn nIIN obuine HOUHbIe BnDbI
CbeMa oBekToB c 3aDHe IIOcBETKoI
-Пи npoxeKTopHOM OcBeUeHn,Ha npimep, B TeaTpe Hn Ha oPhiuaJIbHoN uepeMoHIn
- Пис сильном CBete Ил NGTpaXeHOM CBete, NaPIMep, Ha ПЯжЕ B pa3rap Jeta Ил Ha JbIXHOM CKINOHE
NIGHTSHOT (ctp. 26)
PexmHn3kOcBeeHooCTn (CTp.50)
Pekim 3axoanda coHua n lyhbl (cTp.50)
BACK LIGHT (ctp. 25)
PexkIM npoxKeTOpHOro ocBeueHn (cTp. 50)
Плжн布局илбЖьрекIM (cTp.50)
Функци Дяпдань 3ффektob n3o6paxeHЯm (В ржиме заиси)
-Плавн布局песхд мжду 3аиcaHHbIMN 3и30dAMN
CbeMa HenoDbHXHoro n3o6paXeHn
- Lüdpobaa oba6oTka n3o6paXeHn
- 06pa6oTka 3nI3Oda c nOMOuHU cnΦpOBbIX 3ΦΦeKToB
- Cɔздане мяrkoro Фona дя объektов
FADER (cTp. 43)
PHOTO (ctp. 38)
PICTURE EFFECT (ctp. 46)
DIGITAL EFFECT (ctp. 47)
Märknipoptpethtbipexkm(ctp.50)
Функции Ддпрданьашим заимсам ectectbeHHoro Bnda (В ржиме заимси)
-Ппдотьразецны ухшени Кауесва n3ображеня ри сфров Трасфокачи
-ФOKycnpoBkA BpyHyIO
- Cbemka ydaJIeHbIx OxbekTOB
-3aIINcB 6bIcTpo DvNkUxxCa OBeKToB
D ZOOM [MENU] (cTp. 69)
PyuHaФokycuPoBka(cTp.54)
JaHdwaΦTHbIpeXm (cTp. 50)
PéxuM CnOpTnBbIX COCTaHn (ctp. 50)
Функции Длг Испьзовая Рп мотатхe (В ржиме заимси)
- ПiocмотиЗбрахеня нашироэКранHom TeileBn3ope
山ipoko3kpaHbI pexm (cTp. 41)
Функци Длг Исплььзованя полд Заимс (В ржиме BOCрpon3БeDEня)
- Lüdpobawo6pb0kTa 3aHncaaHbIX N3O6paXeHn
PICTURE EFFECT (ctp. 58)
- 06pa60kTa 3aHcAHHbIX 3nH3oOB c NcHJIb3OBAHHeM UcFpOBbIX 3cFpeKToB
DIGITAL EFFECT (ctp. 59)
- OTo6paXeHne BO BpeM 3aIncn daTbI/ BpeMeHn nn DaHhbIX 3aIncn
KoI daHbIX (cTp. 34)
-БыICTpoe OTBICKaHHe HxKbIX 3nI30IOB
PamrHyneBoOOTMeTKnCTp.56,61)
ΦOTOnONCKCTp.64)
-ПОИСКЭПИЗОВ,ЗАПИССАньВ ВФОТОРЕХИМЕ
ФОТOCKАнЮВАпЕ (Стр.65)
- CkaHnipoBaHne 3IIN3OIOB, 3aIINcaHHbIX BΦoTOpeKIMe
HiFi SOUND [MENU] (ctp. 69)
BocnpoI3BeJeHne MOHOFOHNueCKOrO nIN BCnOMORAteJIbHOrO 3ByKa
LASER LINK (ctp. 31)
Bocnpo3BeDHeNHe 1306paXeHnHa 3KpaTeLeBn3Opa 6e3 coeDHHTeIbHoro 7hpya
A, B
Adjusting viewfinder 21
AC power adaptor. 13
AFM HiFi Sound 82
ANTI GROUND SHOOTING 23
A/V connecting cable 29,40,66
BACK LIGHT 25
Battery pack 12
Beep 73
BOUNCE 42
C,D
Charging battery 13
Clock set 73
Connection (viewing on TV) 29 (dubbing a tape) 66
Connection to your PC 101
Data code 34
Date search 62
DEMO. 72
DIGITAL EFFECT 47
Digital 8 system 80
DISPLAY 34
Dual sound track tape 82
Dubbing a tape 66
DV connecting cable. 68
E
EDITSEARCH 27
Exposure 53
External microphone (not supplied) 109
F, G, H
FADER 42
Fade in/out. 43
FLASH MOTION 47
FOCUS. 54
Full charge 13
Grip strap 111
Heads. 99
Headphone jack 109
HiFi SOUND 71
I, J, K, L
i.LINK 68,109
"InfoLITHIUM" battery 16
Infrared rays emitter 26, 31
LANC 109
LASERLINK 31
LUMINANCEKEY 47
M, N
Main sound 71
Manual focus 54
Menu settings 69
Moisture condensation 98
Monaural 82
MONOTONE 42
Mosaic fader 42
NIGHTSHOT 26
Normal charge 13
O, P, Q
OLD MOVIE 47
Operation indicators 112
OVERLAP 42
PAL system 97
Photo scan 65
Photo search 64
Photo recording 38
PICTURE EFFECT 45
Picture search 36
Playback pause 36
Power sources (house current) 17
(car battery) 17
(battery pack) 12
Power zoom. 22
PROGRAM AE. 50
R
Rec review 28
Recording time 15
Remaining tape indicator 24
Remaining battery time indicator 24
Remote control jack (LANC) 109
Remote commander 110
Remote sensor 106
s
S video jack 29,40,66
Self-diagnosis display 89
SEL/PUSH EXEC dial 107
Shoulder strap 107
Skip scan 36
Slow playback 36
SLOW SHUTTER 47
+SLOW SHUTTER 26
START/STOP MODE 23
STEADYSHOT 70
Stereo tape 82
STILL 47
Sub sound 70
T, U, V
Time code 24
Tape counter. 24, 56, 105
Telephote 22
TRAIL 47
Transition 28
TV colour systems 97
W,X,Y,Z
Warning indicators 90
Wide-angle 22
Wide mode 41
WORLD TIME 73
Write-protect tab 18
Zoom 22
Zero set memory 56, 61
Aлфавиньи yka3aTeJB
A, B, Γ
BaTapeHbIb 6Jok 12
БатAPEйьблоб
"InfoLITHIUM" 16
BapnoooBeKeTnB 22
BVeDeHnE/BbIBeDeHnE n3o6paXeHnA 43
BHeuHmMkPoΦoH(He npnaraetc) 109
Bpema 3aipcn 15
BcnoMOraTeJIbHbI 3ByK ....75
THe3I0 rOIOBbIX TeIeOHOHOB 109
Гнздд ДИСТаHционгупраьлени (LANC) 109
Tne3do S Bndeo. 29,40,66
Tolobkn 99
D,E,X,3
ДатчК ДИСТАнцИОНноуправлени … 106
ДиCK SEL/PUSH EXEC 107
3aMeIeHHOe BocIpOn3BeJeHne 36
3apnka 6aTaapeHoro 6noka 13
3Byk AFM HiFi 82
3yMMepHbI cHnA1 73
M, K, JI, M
I3nyuataTeNb INHpaKpaChbIX nyuei 26,31
INIKAKOTOBPEMEHNOCTABWEROc3apJa6batapeHoro 6bnoka..24
INHdkaTop ocTabWeincaJIeHTbl 24
INHdNkaunna camoDnagHOCTNKU 95
NCTOCHNIIITAHNA (aBTOMOBHbHbI aKKMyJATOP) 17
(6aTapeHbIb 6nok) .12 (3JeKTPnuecka CeTb) .17
KoI BpeMeHn 24
KoI daHHbIX 34
KoHdEHaCuaBlaIa 98
JIeHTa C DBOHOH 3BYKOBOI dOPOXKoI .82
JIeneTOK 3aunTb1 3apanCn ....... 18
Mozauhnyi feidep 42
MOHOFOHnueckn 3Byk. 82
H, O
HopmaJIbHaIa 3apIka 13
OCHOBHOI 3ByK 75
P
PamrHyIeBOIOTMeTkn..56,61
Pay3a Bocnpon3BeJeHn 36
Ipee3aIncb IeHTbl 66
IepexoI 28
PJIeueBoI peMeHb 107
Подклоченke К nepcoHaJIbHOMy KOMTBJOtepy NOJIb3OBATeNIA 101
Подсоевнейне (népeэаньлentы) 66 (npocmoTpHa 3kpahe Telenb3o4a) 29
Ponck DaTbI. 62
Ponck n306paXeHnA 36
Ponck MeToDm nporoHa 36
Ponha3apka 13
PpeDynpexKaiouine HnDnKaTOpbl 96
PpBbOdHOB BapNoo6BeKtNB ..22
PpocmoTp 3aHnCn 28
ПильТ ДИСТАнЦИОНноупавлени … 110
PergunpoBka BnDOnsKaTeJIa 21
PemeHb dJa 3axBaTa 111
PuchnaФokycinpobka 54
C, T
Cetebo aanTp nepemehnoro Toka. 13
CoeHInTeIbHbKabEb ayuMo/ BuJeo 29,40,66
CoeHINHTeHbI KabeJIb ⅢcpoBOrO BnDeocnHaIa ..66
CnCTemblcBETHORo TeIeBvndHnra 97
CnCTema PAL 97
CtepeofoHueckaJIeHTa....82
CuetnK JENTbl 24,56,105
TenefoTo 22
y-
YCTaHOBKe MEHIO 69
YcTaHOBka YacOB 73
ΦOTONONCK 64
ФОТOCKАнЮВАнUE 65
ΦOTOCbEMKa 38
ФУнКЦИОн平方Hьпь
ИнДикaТоры............112
Ludpobar cncTeMa Digital 8..80
UspokoyrolbHaCbeMka 22
山npoko3KpaHHbIpeXIM.....41
3Kcno3nua 53
A,B,C,D
ANTI GROUND SHOOTING...23
BACK LIGHT 25
BOUNCE 42
DEMO 72
DIGITAL EFFECT 47
DISPLAY 34
E,F,G,H
EDIT SEARCH 27
FADER 42
FLASH MOTION 47
FOCUS 54
HiFi SOUND 71
i.LINK 68,109
LANC 109
LASERLINK 31
LUMINANCE KEY 47
MONOTONE 42
NIGHTSHOT 26
OLD MOVIE 47
OVERLAP 42
P-Z
PICTURE EFFECT 45
PROGRAM AE 50
START/STOP MODE 23
STEADYSHOT 74
STILL 47
SLOW SHUTTER 47
+SLOW SHUTTER 26
TRAIL 47
WORLD TIME 73
I3roToBHTeJIb: CoHn KopnpoeHH
Ampc:6-7-35Kntaunharaba,
Lshnharaba-ky, Tokno 141-0001, JnoHna
Ctpana- npoun3Bovntelb: JnoHna
Sony on line
http://www.world.保养.com/
- Digital Video Camera Recorder
- English
- Welcome!
- WARNING
- For the customers in Germany
- ATTENTION
- Pysckn
- Добpo пожаловать!
- PNEyPPEXDEHNE
- BHIMMAHNE
- Getting started
- Recording - Basics
- Playback - Basics
- Advanced Recording Operations
- AdvancedPlaybackOperations
- Editing on Other Equipment
- Customizing Your Camcorder
- Additional Information
- Quick Reference
- IoproTOBka K 3KcnnyatauN
- 3aHcB - OCHOBHbIe NOJIOXeHnA
- Bocnpon3BeJeHne - OChOBHbIe IOnIOXeHn
- YcoBepWeHCTBOBaHHbIe Onpaunn CbeMKn
- YcoBepWeHCTBOBaHHbIe OnpaCnBocPpON3BeDeHn
- MONTAX Ha dpyrgyio annapaTypy
- BbINOJIHHeHne mHdINBnDyaJbHbIX yCTaHOBOK Ha BnDeOKaMepe
- DOnOJIHnTeJIbHaI INΦOpMa cIa
- OnepaTnBhBcnpaBOuHnK
- Checking supplied accessories
- Пюверka приларых принадожносте
- Quick Start Guide
- Connecting the mains lead (p. 17)
- Inserting a cassette (p. 18)
- Remove the lens cap.
- Set the POWER switch to CAMERA
- Turn STANDBY to STANDBY. The picture appears in the viewfinder.
- Press the red button. Your camcorder starts recording. To stop recording, press the red button again.
- 4
- Monitoring the playback picture in the viewfinder (p. 21)
- Set the POWER switch to PLAYER while pressing the small green button.
- Press to rewind the tape.
- Press to start playback.
- NOTE
- PykoBoIcTBo IIO 6bICTpOmy 3aIpycky
- Повсоевинец повoda злесгптогиТаня (ст. 17)
- YctaHOBKa Kaccetbl (cTp. 18)
- CHIMMITE KpbiUKy oBseKtNbA.
- UyctahOBInTe nepeKlnOuataEnb
- 3ПовернITE рыаг STANDBYВпожжени STANDBY.Виюпскaitе погвсгИЗбржени.
- Haxmnte Kpauchyo KhoNky. Bawa BndeOkamepa NaHcT 3aInscb. Ipn octahOBKn 3aPiCn HaxMnte Kpauchyo KhoNky eue pa3.
- KoHTpoJIb BOCpOu3BODIMORO n3O6paXeHnB BVIOUcKaTeJIe (cTp. 21)
- UctahOBInTe nepeKlnOuTaTeINb POWER B noJooXeHne PLAYER, HaxkAB MaJIeHbKyIO 3eJIeHyo KHOJIky.
- HaxmTe KhoNky 4IJIe IpeMoTkn JIeHTbl.
- HaxmTe KhONky 1nHaayana BOCnpOn3BedeHna.
- ПРИМЕЧАНЕ
- Using this manual
- Before using your camcorder
- Note on TV colour systems
- Copyright precautions
- Ncnoj3OBAHne daHHoro pyKOBOdCTBa
- Ipeen Hauanom 3KcnnyaTaunn Bawaen BnuDeokamepbl
- Приимechаши по системам CBETHORO TeJIeBnIeHnI
- IpeoctepexeHne o6 aBTopcKom npaBe
- Precautions on camcorder care
- Mepblpeoctopoxhoctn npu yxoide 3a Bndeokamepo
- Step 1 Preparing the power supply
- Пункт 1 Повтовka Источни рптыня
- Installing the battery pack
- YcTaHOBka 6aTapeHoro 6JIOka
- To remove the battery pack
- ДлСНТЯ 6аТарейного 6лoka
- After installing the battery pack
- Iocne yctahOBKn 6aTaapeHoro 6noka
- Charging the battery pack
- 3apka 6aTaapeHoro 6loKa
- Remaining battery time indicator
- Battery pack
- Until your camcorder calculates the actual remaining battery time
- If there is a slight difference in shape between the plug of mains lead and the terminal of AC power adaptor.
- Plug the mains lead deeply
- Пункт 1 Повтовka Источнkaптуния
- PpimcyaHne
- Индикатор Врemeи OCTabшeroCязяда 6batapeйнoro 6лoka
- BaTapeHbIb 6NoK
- ItoTexnop,nokaBawaBndeokamepa onpeJeHITdEChTBHeJIbHOe Bpemr octabweOc3apra6aTaapeHoro 6loka
- B cnyae OTIuHn foOpMbI uTekepa npoBoDa 3JIeKtpOnHTaHH N rHe3da CeTeBOrO aadAnTepa nepemehHoro Toka
- IopcoeHnHte shyp 3JeKtpoNtAHn HJLOTHO
- Pocne 3apdkn 6atapeHoro 6loka
- Примочаши по Иndикатopy Врemeи octabшeroся заразуб 6отаpeиного 6лoka BO Время записn
- Чтоз takoe "InfoLITHIUM"?
- Connecting to the mains
- Подсоевненке К сетуов розтke
- PRECAUTION
- Notes
- Using a car battery
- BHIMAHNE
- PNEOCTEPEXEHNE
- PpIMeuaHn
- IcnoIb3OBAHne aBTOMo6nIbHOro aKKymyIaTopa
- Step 2 Inserting a cassette
- Пун=kT2 YctahOBka KacceTbi
- To eject a cassette
- To prevent accidental erasure
- ДлгИЗВLEЧЕНКACCEТБI
- Примеання
- Длпретовашия сунайноростupaшия
- Recording a picture
- 3a\Pncb n3o6paXeHnA
- To enable smooth transition
- If you leave your camcorder in the standby mode for 3 minutes while the cassette is inserted
- After recording
- Приимейке assistant Тусяя
- Длобеспець палв Horо nepexoda
- EcIn Bbl octaBnTe BaUy BnDeokamepy BpeXIME rTOBHOCTn Ha 3 MNHytbl npu BCTaBJIeHHoKACCete
- Pocne 3aHcN
- To record pictures with the viewfinder - adjusting the viewfinder
- Длгзднсин306ржени спомоцью ВДОИСКаTeЯ - Perуларовka ВДОИСКaTeя
- Using the zoom feature
- IcnoJIb3OBAHne φyHKcHn Hae3da BnDEOKaMepbl
- When you shoot close to a subject
- Notes on digital zoom
- PnCsbemKe oBekTa c 6JIn3KOro noLoXeHn
- Примочаня К Наць Видахамеры сфpoвимmetodom
- START/STOP MODE setting
- YcTaHOBka START/STOP MODE
- To extend the recording time in the 5SEC mode
- Примейань
- Дя удинець Врemeи 3апсиь ржиме 5SEC
- Indicators displayed in the recording mode
- ИнданkaTopbl,ОТобразжаembleВ рекиmeЗаписс
- Time code (for tapes recorded in the Digital8 system only)
- KoB BpeMeHn (ToIbKO DJIaJeHT, 3aIncAHbIX B uNΦpOBoB cncTeMe Digital8 [9)
- Shooting backlit subjects (BACK LIGHT)
- CbeMka 6bEeKToB c 3aDHe nOcBcTeKoB (BACK LIGHT)
- Shooting in the dark (NightShot)
- Cbemka B TEMHOTE (Houhna cbemka)
- Using +SLOW SHUTTER
- Using the NightShot Light
- IcnoJb3ObaHnepexma+SLOWSHUTTER
- IcnoJb3OBaHHe NOcBETKn JJI HOUHOcBEmKn
- While using the NightShot function, you can not use the following functions:
- The + SLOW SHUTTER button does not work:
- NightShot Light
- 3aIncb n3o6paXeHnA
- Приимейсаня
- PnncnoIb3OBAHnn FyHKcnn HocHoN CbeMkn Bbl He moKeTe nCnoIb3ObaTb cJeDyUoJne FyHKcnn:
- Khonka +SLOW SHUTTER He pa6oTaet:
- Iopcbetka dna HOHcBemKu
- Checking the recording
- - EDITSEARCH / Rec Review
- Поберka 3апссн
- - EDITSEARCH / Постмотр заимсн
- EDITSEARCH
- Rec Review
- Ppocmpt3ainnc
- Ppmeuahne
- Connections for playback
- Повсейнения对于我们BocypoN3BeDeHnA
- If your TV is already connected to a VCR
- EcIn BaW TeJIeBn3Op yKe IoIcoEiHHeN K KBM
- If your TV or VCR is a monaural type
- If your TV/VCR has a 21-pin connector (EUROCONNECTOR)
- Ecni BaW TeJIeBn3Op nJN KBM MOHOΦOHueCKOrO Tnna
- EcIn B BaWeM TeLeBn3ope/KBM mMeTc8 21-7tblpBkoBbI pa3beM (EUROCONNECTOR)
- To connect to a TV or VCR without Video/Audio input jacks
- Для поcodeniония К Baшему Телегизору плп KBM 6e3 BXODHBIX Геэд aydno/Buideo
- Using the AV cordless IR receiver
- IcnoJb3OBAHne 6ecnpoBOJHOrO IK aydnoBndeOpnpemHnka
- To cancel the laser link function
- IaONMeHbIyHKcN KaHaJNapepaJna3epHbIX CnHrHaNoB
- EcJn Bbl BbIKIOHTe NtahHe
- Птумейнонe
- Playing back a tape
- Bocnpon3BeJeHneJIeHTbl
- To display the viewfinder indicators on the TV - Display function
- Для OTOбрахени Индикаторов На зКране Телевзopa - Функции Инданkaци
- Using the data code function
- IcnoJIb3OBAHnE cyHKuN KoJa daHHbIX
- Not to display recording data
- ДлгTOrO,чTO6bl He OTo6paXaIncb DaHHbIe 3aIncn
- Note on the data code function
- Recording data
- When you use data code function, bars (--- --) appear if:
- PpIMeuaHHe no fynKcun KoJa daHHbIX
- 3aHncaHHbIe daHHbIe
- Ecnn BbI nCnoJIb3yTe ΦyHKcNIO KOA
- Various playback modes
- To view a still picture (playback pause)
- To advance the tape
- To rewind the tape
- To change the playback direction
- To locate a scene monitoring the picture (picture search)
- To monitor the high-speed picture while advancing or rewinding the tape (skip scan)
- To view the picture at slow speed (slow playback)
- Переменные рекиmbы BOCPON3BeDEHNA
- Длпnpocmotpa HENOBnKHOrO n3o6paXeHn(nay3a BocnpOn3BeGeHn)
- Дя уckopehno nepemOTkn JentbI BnepeI
- Для уckopeHHои помOTКи Лentы назад
- ДлИЗмehнHaNPaBHeHBOcPpOu3BeDeHn
- Длг OTьleckаня 3пнзда BO Врмя KOHTроли n3обрахенья (ПОИСК n3обрахенья)
- Для KoHTpOJIЯ n3O6paXeHnI Ha BBICOKOy cKOpOCTu BO BpeM yCKOpEHoI nepeMOTKn IeHTbl BpePeI nII Na3aI (NONCK MeToDOM nporoHa)
- I npocmoTpa BOCnpoN3BeDeHn I3O6paXeHn Ha 3aMeJNeHHo CKOpocTn (3aMeJLeHHoe BOCnpoN3BeDeHne)
- Bocnpon3BeDeHne JeHTbl
- Для посмотра BOCPON3BedeHn иЗБржени Ha yДвОЕнHo CKOPOCTn
- Для покадрово npocmoТра BOCПОНЗВЕДENИ N3OБРAXЕНЯ
- EcIn peKIM nay3bl BocnpOn3BeHeHn npOJIITc3 MNHyTbI
- To use the photo recording function using the Remote Commander
- To use the photo recording function during normal CAMERA recording
- ДлнИСПОЛБЗОВАнHAФУНКUМФФOTOCБЕМКС NOMOUIIpyJIbTaДИCTAHTUNHOROупавлия
- ДлЯ Исторьоганя Функции ФотOCБЕМКИ BO Врем обьчон запис CAMERA
- Printing the still picture
- IeuaTaHne HeNoDvNxHOro n3o6paXeHn
- Using the wide mode
- ИспOLSьЗОВане ШирOKOЗКраHHORO ржима
- To cancel the wide mode
- In the wide mode
- During recording
- Длг OTмehы ШрокоэКраHHoropexиma
- B shpoko3kpaHHOM pexnme
- BoBpeMa 3aHmCn
- Using the fader function
- IcnoJb3OBaHne Функци ФeДера
- [a]
- STBY
- REC
- [b]
- MONOTONE
- To cancel the fader function
- Длг OTMeHbI Φункци Фeйдара
- When the OVERLAP indicator appears
- Note on the bounce function
- Korda noBnEeTc HnDnKaTop OVERLAP
- EcIn KOMaHda START/STOP MODE yctaHOBHeHa B nOJKeHne 5SEC
- Bo Bpem nCnoJb3ObaHn yHKcnn nepeckaknbHn Bbl He moKTe nCNOJb3ObaTb cJeDyUoNe yHKcnn:
- PpimeyaHne no yHKm nepeckaKaBaHa
- Using special effects - Picture effect
- NCIOJIb3OBaHHe CNeuHaJIbHbIX 3ΦΦeKToB - ΘΦΦeKToN3O6paXeHnA
- 2
- To turn the picture effect function off
- ДлЯ Вьклioченя Функци зфөгта n3обрахеня
- PnncnoB3OBaHmФyHKcH NΦΦekTa n3o6paXeHn
- EcnBbI BbIKIOHTe NITaHne
- Using special effects - Digital effect
- IcnoIb3OBAHne CneuHaBbIX 3ΦΦeKToB -LnΦpOBoN ΘΦΦeKT
- STILL
- FLASH (FLASH MOTION)
- LUMI. (LUMINANCEKEY)
- TRAIL
- SLOW SHTR (SLOW SHUTTER)
- OLD MOVIE
- To cancel the digital effect
- Дя OTmeньифpoBOrO 3Ффekta
- When you turn the power off
- When recording in the slow shutter mode
- PpimcuaHn
- PnBbIKIOUeHm NITaHn
- Pn3aIncBpeKImeMeJHeHHO 3aTbopa
- Using the PROGRAM AE function
- Spotlight mode
- Soft portrait mode
- Sports lesson mode
- Beach & ski mode
- Sunset & moon mode
- Landscape mode
- Low lux mode
- Исpenьзованецфункциng PROGRAM AE
- PexkIM npoxektopHoro oCbeueHHa
- Märkni npptpehbl pexm
- PexkM cNoptBbIX COCTaHm
- T PJIaXHbI N IblXHbI peXHM
- Pexm3axoanda lyhbl
- LanDwaΦTbIypeXIM
- Pekm Hn3KoJ OCBeHHOCTN
- IcnoJb3ObaHneФyHKcNIN PROGRAM AE
- To turn the PROGRAM AE function off
- ДЯ ВыКлюЧеня ФункцИng PROGRAM AЕ
- Adjusting the exposure manually
- To return to the automatic exposure mode
- If you change the PROGRAM AE mode or slide NIGHTSHOT to ON
- PerynpoBka 3Kcno3nCmN BpyHyUO
- PpimueaHne
- EcJIn Bby n3MeHnTe peXm PROGRAM AE nJIn nepeDbHHeTe nepeKlOuTaTeIb NIGHTSHOT B noJIoXeHne ON
- Focusing manually
- Фokус neuropвка вруунуо
- To record distant subjects
- To shoot with auto focusing momentarily
- ДЯВОЗВРашЕньВржимФokусировки
- Дя сбемки удалених объektов
- ДЯВынOLHeHЯСБЕМКIC MRHOBeHHoФOKYCnPOBKOI
- CbeMa B OTHOCHTeNbHO TEMhIx MecTaX UJIcBeMa 6bICTpo DnBxUxxCra ObkeTob B OTHOCHTeNbHO RPKNX MeCTax
- EcIn BblBbIOpHReTe CbeMky B6JIu3n 06BeKta
- Cneyuune HndkaTopbMOyT NOBtbcA
- Playing back a tape with picture effects
- Bocnpon3BedeHne JeHtblc 3ΦΦeKtAmn n3O6paXeHnA
- To cancel the picture effect function
- Pictures processed by the picture effect function
- When you set the POWER switch to OFF or stop playing back
- IITRAOTMeHbIΦyHKcUNuΦpOBbIX 3ΦΦeKTOB
- I306paXeHnO6pa6oTahHbIe C nOMOzbuO fYHKUNC 3ΦΦeKToB I306paXeHn
- EcIn Bby ycTaHOBnI nepeKIOUcATEIb POWERBnoJIOKeHne OFF nIO ocTaHOBnI BocPon3BeDeHne
- Playing back a tape with digital effects
- Bocnpo3BeDeHne JeHTbI c uΦpObIMN 3ΦΦeKTamn
- To cancel the digital effect function
- ДЯ OTMeHbI Φункци nФpoBbIX 3ФФeKTOB
- Pictures processed by the digital effect function
- I3o6paXeHn, o6pa6OtaHHbIe C IIMOoubIO fYHKmC uΦpOBbIX 3ΦΦeKTOB
- Quickly locating a scene using the zero set memory function
- БыICTpoe OTbICKaHne 3ПИЗODa c NOMOUsbIO ФунКци ПamrTu HUJIeBOI OTMeTKN
- Searching a recording by date
- Понь Зашисто датe
- To stop searching
- ДлЯ OCTaHOBKII NOUcKa
- Searching for a photo - Photo search/Photo scan
- Searching for a photo
- Понь с Фото - Фотоньс/ ФOTOCKAHINPOBAHne
- PonckfoTo
- Scanning photo
- Сканироваиме ФOTO
- To stop scanning
- ДлЯ OCTaHOBKn CkaHnpoBaHnA
- PpmeaHne
- Using the A/V connecting cable or S video connecting cable (not supplied)
- PnncnoJb3OBAHm CoeMHHTelbHOro Ka6eI aydno/BuJeO uNk6eI S Bvdeo (He npunaraetc)
- When you have finished dubbing a tape
- Using the i.LINK cable
- Icnojb3oBaHne ka6eJia.LINK
- EcnBb3aKOHnJI nepe3anCb JeHTbl HaxmTe KhoNky KaKa Ha BaWei
- Changing the MENU settings
- I3meHeHne yCTaHOBOK MENU
- Измение установК MENU
- TTO,TO6bI Ncye3Ja HnDnKaunr MENU
- Selecting the mode setting of each item
- Notes on the SteadyShot function
- Note on AUDIO MIX
- Note on NTSC PB
- Note on PB MODE
- Notes on VF B.L.
- Note on AUDIO MODE
- Notes on DEMO MODE
- *To dub a tape to another VCR
- In more than 5 minutes after removing the power source
- Notes on INDICATOR
- Pycckn
- Bb6op yctaHOBOK peKIma no KaXdOMy nyHKTy
- PpimueaHnno fynkun yctoynboBcbeMK
- PpimmeaHnno yHKmN AUDIO MIX
- PpimueaHne no Bocnpn3BeDenHIO NTSC PB
- PpimueaHne no pexmmy Bocnpon3BeDeHHa PB MODE
- PpimueaHnnopeKmVF B.L.
- PpmeHne no pexmy AUDIO MODE
- Приимechanicalnopekmy DEMO MODE
- *Дяпегеци Ленты на дуroy KBM
- Ecnnoe n3BJeHnna nToHaNn npoJTe 6OJee 5MnHT
- Приимechanical no yctaHObke INDICATOR
- Resetting the date and time
- IpeyeCTaHOBKa DaTbI N BpemeHn
- IpeyectaHOBka DaTbI IN BpemeH
- Digital8 system, recording and playback
- What is the "Digital8 [ ] system"?
- Usable cassette tapes
- Playback system
- CnΦpOBAcncTeMa Digital8 3aINscb N BOCnPOn3BeDeHne
- Что takoe "систema Digital8"?
- IcnoJIb3yEmble kAccetbl
- Систema BOCPON3BedeHnA
- HnDkaZna BO BpMa aBtOMaTneCKOrO DeTeKTIPOBaHnCnCTembl
- When you play back
- PnBocnpOn3BeJeHn
- Bocnpon3BeDeHneJeHT,3aIncaHHbIX BCnCTeme NTSC
- When you playback a dual sound track tape
- When you use tapes recorded in the Digital8 system
- When you use tapes recorded in the Hi8/standard 8 system
- Pn BocnpOn3BeJeHm JeHTbI C DBOH0N 3ByKO0B DOPOXK0N
- PnU NCNOJb3OBAHmJIeHT,3aIINcaHHbIX B uΦpOBoCncTeMe Digital8
- PnU nCNoJIb3OBAHmJIeHT, 3aIINcaHHbIX B CnCTeMe Hi8/CTaHdapTHoN CnCTeMe 8
- Changing the lithium battery in your camcorder
- 3aMeHa IHTNeBOI 6aTapeiKN B BaSei BnDeOkamepe
- Lithium battery
- Литnevая 6атейka
- Литуевая 6атAPEйka, установленьая Ha 3aBOde
- Changing the lithium battery
- 3aMeHa NITneBOB 6aTapeKeKn
- Troubleshooting
- In the recording and playback modes
- Others
- Self-diagnosis display
- Warning indicators
- Warning messages
- Понск и устараенье несправност
- BpeKIme BocpOIN3VeJeHnA
- BpeKImax 3aIncn BocnpOn3BeDeHnA
- Инданацnia самодагостики
- HndkauncaMoDnaHrOCTNK
- Преупекдаюше Инданкторы И сообшени
- Ppeynpexkaioune HndkaTopbI
- 3arpa3Hnncb BnuDeoRIOBKn
- BaTapeHbI 6JIOK pa3PraDnLCn HIN NOHTN pa3PraDnLC
- Ipeynpekdaohuim HndkaTop OTHOCHTbHO JENTbl
- Индана самодагостик (стр. 95)
- ПОНЗОЛА KOндець Влар*
- Bam Huxho N3BJeYb Kaccety
- Ppeynpexkaioune coo6eHnA
- Using your camcorder abroad
- PAL system
- PAL-N system
- NTSC system
- SECAM system
- Simple setting of clock by time difference
- ИспOLTьЗОВане ВашиьVDeOKaМеррbl 3a граниец
- IcnojIb3OBAHne BaSei BnDEOKaMepbl 3a rpaHncei
- Cnctema PAL
- CnCTema PAL-M
- Cnctema PAL-N
- Cnctema NTSC
- CucTeMa SECAM
- Пюстая устаяховka pa3нць BOВремен Ha уacax
- Maintenance information and precautions
- Moisture condensation
- If moisture condensation occurred
- Note on moisture condensation
- How to prevent moisture condensation
- Информацnia по ухODу 3a apnapaTom И МерыnpedoctopoЖнoctn
- KoHdeHcaZyBlaRn
- Ecn npon30wla KOHdeHcaun Bnarn
- Ppimcaynne no KOHdeHcaunn Blaun
- Kak npedotbpaTb KOHdeHcauio Bnaru
- Maintenance information
- Cleaning the video head
- HnfoPmaunno yxody 3a annapatom
- Истка Видаеоголовok
- Precautions
- Camcorder operation
- On handling tapes
- Camcorder care
- MepblnpedoctopoXHoctn
- 3KcnIyataunBndeokamepbl
- OTHOCHTeNbHO o6paueHnC JeHTAMN
- YxOa 3a BnDeokamepo
- Connection to your PC
- AC power adaptor
- IopKnluoyene K nepcoHaJIbHomy KOMnbIOTepy NOJb3OBaTEJIa
- Cetebo aadantep nepemehnHO TOKa
- Notes on dry batteries
- If batteries are leaking
- Примочаю К сухим батерйкам
- EcIn npOn3oUla yTeUka BHyTpEnHero BeuecTb6aTaapeek
- Video camera recorder
- System
- Input and output connectors
- General
- Budekamepa
- Cnctema
- CnCTema BInDeo3aHnCn
- CnCTema aydnno3aannc
- BndeocnHa
- PekomeHdyemble kaccetbl
- ΦopMIpOBaTeIb N3O6paXeHnA
- 06beKTHB
- Φokychoe pacctOHHne
- LBeTOBa TEMnepaTypa
- MnHmMaJIbHaA OCBeUeHHoCTb
- Pa3beMbI BXoDHbIX BblXoDhbxCnHaJIOB
- BbIXoD cnrHaJa S BnDeo
- BbIXoD BnDeocnHaJa
- BbIXoA yAnocnHaHa
- RFU DC OUT
- DV BixoD uΦpOBOrO BnDeOcnHaHa
- The3o roJOBbIX TeJeFOHOB
- Tne3do ynpablenenLANC
- THe3oMIC
- 06uee
- Tpe6oBaHnK nntaHnO
- CpeHnI npTe6pHemar MOUHOCTb
- (npnncnoJb3OBaHH
- 6aTaapeHoro 6Ioka)
- Pa6o7a TemnepaTpa
- TemnepaTypa xpaheHnA
- Pa3mepbI (npn6Jln3.)
- Bec (npn6nn3.)
- CteBoa aDantep nepemehoro TOka
- Tpe6obAHnK nntaHnIO
- Notpe6JrMaMoHocTb
- BbIXoHoe HappkeHne
- Pa6o7aTemnepatypa
- TemnepaotypxaheHn
- Pa3mepbl (npn6bn3.)
- Диннашура (npn6n3.)
- Identifying the parts and controls
- Овоз nauseю частей и руларов
- Attaching the shoulder strap
- PpukpenHe nJeueBoro peMHa
- Notes on the intelligent accessory shoe
- PpmeaHn OTHocTeNbHO DePkaTeJI dIyctaHOBKn PpHaadJeXHoCTeN
- Remote Commander
- NytbT dntaHcnoHHoro ynpabHeHn
- To prepare the Remote Commander
- IINIOJROTOBNIyIbTa IINCTAHUHHOYnpaBHeHH
- Notes on the Remote Commander
- PpmeaHnK npIbTy dNCTaHcHNOHOrO ynpabJIeHH
- Operation indicators
- Pa6oyne HndnKaTopbI
- 0603haeHne yactei nperyJrTopoB
- Functions to adjust exposure (in the recording mode)
- Functions to give images more impact (in the recording mode)
- Functions to give a natural appearance to your recordings (in the recording mode)
- Functions to use in editing (in the recording mode)
- Functions to use after recording (in the playback mode)
- PykoBoDCTBO IO 6bICTpbIM yHKnIaM
- Функци Длpeунровки 3Кспозци (В ржиме зannс)
- Функци Дяпдань 3ффektob n3o6paxeHЯm (В ржиме заиси)
- Функции Ддпрданьашим заимсам ectectbeHHoro Bnda (В ржиме заимси)
- Функции Длг Испьзовая Рп мотатхe (В ржиме заимси)
- Функци Длг Исплььзованя полд Заимс (В ржиме BOCрpon3БeDEня)
- A, B
- C,D
- E
- F, G, H
- I, J, K, L
- M, N
- O, P, Q
- R
- s
- T, U, V
- W,X,Y,Z
- Aлфавиньи yka3aTeJB
- A, B, Γ
- D,E,X,3
- M, K, JI, M
- H, O
- P
- C, T
- y-
- A,B,C,D
- E,F,G,H
- P-Z
Marque : SONY
Modèle : DCR-TR7000E
Catégorie : Caméscope