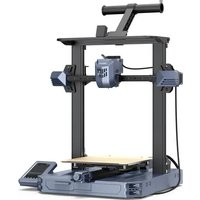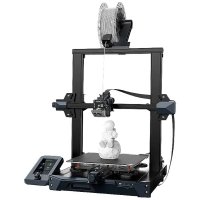
1001020340 - Imprimante CREALITY - Notice d'utilisation et mode d'emploi gratuit
Retrouvez gratuitement la notice de l'appareil 1001020340 CREALITY au format PDF.


| Type de produit | Imprimante 3D |
| Technologie d'impression | FDM (Fused Deposition Modeling) |
| Volume d'impression | 300 x 300 x 400 mm |
| Résolution d'impression | 0,1 à 0,4 mm |
| Vitesse d'impression | Jusqu'à 180 mm/s |
| Matériaux compatibles | PLA, ABS, PETG, TPU, etc. |
| Alimentation électrique | AC 100-240V, 50/60Hz |
| Dimensions approximatives | 600 x 600 x 700 mm |
| Poids | Environ 20 kg |
| Connectivité | USB, carte SD |
| Fonctions principales | Impression 3D, préchauffage, reprise d'impression |
| Entretien et nettoyage | Nettoyage régulier de la buse et du plateau, vérification des courroies |
| Pièces détachées et réparabilité | Pièces disponibles, documentation de réparation fournie |
| Sécurité | Arrêt automatique, protection contre la surchauffe |
| Informations générales | Garantie de 1 an, support technique disponible |
FOIRE AUX QUESTIONS - 1001020340 CREALITY
Questions des utilisateurs sur 1001020340 CREALITY
0 question sur cet appareil. Repondez a celles que vous connaissez ou posez la votre.
Poser une nouvelle question sur cet appareil
Téléchargez la notice de votre Imprimante au format PDF gratuitement ! Retrouvez votre notice 1001020340 - CREALITY et reprennez votre appareil électronique en main. Sur cette page sont publiés tous les documents nécessaires à l'utilisation de votre appareil 1001020340 de la marque CREALITY.
MODE D'EMPLOI 1001020340 CREALITY
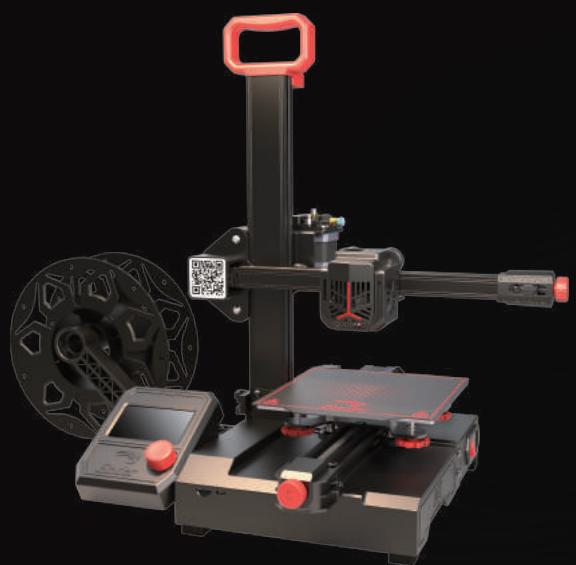
Ender-2 Pro
Ender-2 Pro
3D Printer User Manual
3D打印机用户使用手册
Dear Consumers,
Thank you for choosing our products. For the best experience, please read the instructions before operating the printer. Our teams will always be ready to provide you the best services. Please contact us via the phone number or e-mail address provided at the end when you encounter any problem with the printer.
For a better experience in using our products, you can also learn how to use the printer in the following ways:
View the accompanied instructions and videos in the storage card.
Visit our official website www.creality.com to find relevant software/hardware information, contact details, operation maintenance instructions.
尊敬的用户:
感谢您选择创想三维的产品。为了您使用方便,请在使用之前仔细阅读本说明书,并严格按照说明书的指示进行操作。
创想三维团队时刻准备为您提供优质的服务。在使用过程中无论遇到什么问题,请按照说明书结尾所提供的电话、邮箱与我们进行联系。
为了您能够更好地体验我们的产品,您还可以从以下方式获取设备操作知识:
您可以在存储卡内找到相关使用说明及视频。
您还可以登陆创想三维官网(www.cxsw3d.com)寻找相关软硬件、联系方式、设备操作、设备保养等信息。
Firmware Upgrade
Please login the official website https://www.creality.com/download, switch the language and select the relevant printer and model and download the required firmware.
固件升级
请您登录官网https://www.cxsw3d.com,点击首页 服务支持 下载所需固件,安装完成后即可使用。
NOTES 使用须知
1 Do not use the printer any way other than described herein in order to avoid personal injury or property damage.
Do not place the printer near any heat source or flammable or explosive objects. We suggest placing it in a cool and dustless environment.
Do not expose the printer to violent vibration or any unstable environment, as this may cause poor print quality.
4 Please use recommended resin to in case damage of machine.
Do not use any other power cable except the one supplied. Always use a grounded three-prong power outlet.
6 Do not disassemble the printer while operating the printer, so as not to affect printing.
Do not wear cotton gloves when operating the printer. Such cloths may become tangled in the printers moving parts leading to burns, possible bodily injury, or printer damage.
When cleaning debris from the printer hotend, always use the provided tools. Do not touch the nozzle directly when heated. This can cause personal injury.
9 Clean the body of the printer with dry cloth to remove dust and bonded printing materials.
Children under 10 years old should not use the printer without supervision.
Don't manually move the nozzle or printing platform quickly under the power-on state; otherwise, malfunction may be caused, leading to failure of operation.
Users should comply with the laws and regulations of the corresponding countries and regions where the equipment is located (used), abide by professional ethics, pay attention to safety obligations, and strictly prohibit the use of our products or equipment for any illegal purposes. Creality will not be responsible for any violators' legal liability under any circumstance.
请勿尝试任何使用说明中没有描述的方法来使用本机,避免造成意外的人身伤害和财产损失;
请勿将本机放置在易燃易爆物中或高热源附近,请将本机放置在阴凉、少尘的环境内;
请勿将打印机放置在振动较大或者其他不稳定的环境内,机器晃动会影响打印机打印质量;
建议使用厂家推荐耗材,以免造成机器损坏;
⑤ 请勿在安装过程中使用其他产品电源线代替,请使用本机附带的电源线,电源插头需接插在带有地线的三孔插座;
请勿在打印机工作时拆卸打印机,以免影响打印;
请勿在操作打印机时戴棉手套,以防可动部件对人身造成卷入挤压和切割伤害;
在打印完毕后及时利用喷头的余温借助工具将喷头上的耗材清理干净,清理时请勿直接用手触摸喷头,以防出现烫伤;
用干布对打印机做机身清洁,拭去灰尘和粘结的打印材料;
10 年龄在10岁以下的儿童,请勿在没有人员监督的情况下使用本机,以免造成人身伤害;
11 请勿在开机状态下手动快速移动喷头或打印平台,否则设备有可能会出现故障,无法正常工作;
使用者应遵守设备所在地(使用地)相应国家、地区法律法规,恪守职业道德,注意安全义务,严禁将我司的产品或设备使用在任何非法用途上。如有违反者所应承担的相关法律责任我司概不负责。
Contents目录
Introduction 设备简介 01-01
Equipment Parameters 设备参数 02-02
Package Content 零件清单· 03-03
Assemble XZ-axis Kit 组装XZ轴组件 04-04
Fix XZ-axis Kit 固定XZ轴组件 05-05
Install the Rack 安装料架组件· 06-06
Assemble Handle 组装把手 07-07
Cable Connection 设备连线 08-09
Install Display Screen 安装显示屏 10-10
Solution for V-wheel Jamming V轮卡顿解决方案 11-11
Bed Leveling 调平平台 ..... 12-13
Preheating 预热 14-16
Load Filament 装料 17-17
Start Printing 开始打印 18-19
Circuit Wiring电路接线 20-20
Trouble-shooting 故障检修 21-22
FDM 3D PRINT FILAMENTS 3D打印耗材 23-26
1. Introduction 设备简介
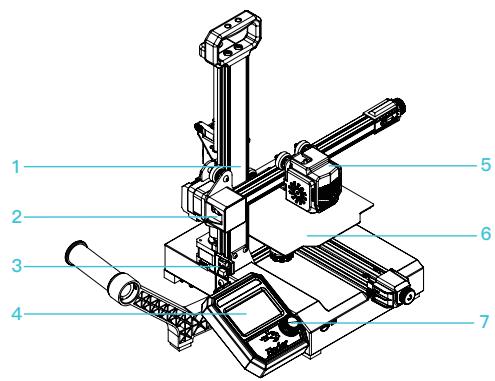
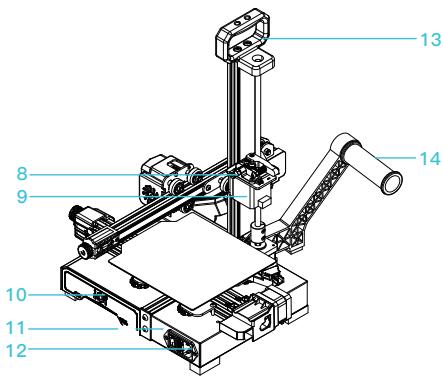
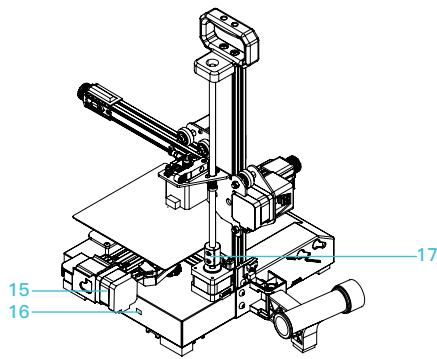
1 XZ-axis kit XZ轴组件
2 X-axis limit switch X轴限位开关
3 Z-axis limit switch Z轴限位开关
4 Screen 显示屏
5 Nozzle kit 喷头套件
6 Print platform打印平台
7 Knob 旋钮
8 Extruder 挤出机
9 E-axis motor
E轴电机
10 Tool box 收纳盒
11 Power电源
12 Power outlet 电源插座
13 Handle 把手
14 Material rack and material tube 料架及料管
15 Y-axis motor Y轴电机
16 Toggle switch 拨动开关
17 Coupling 联轴器
2. Equipment Parameters 设备参数
| Basic Parameters 基本参数 | |
| Model | 型号 | Ender-2 Pro |
| Printing Size | 成型尺寸 | 165*165*180mm |
| Molding Tech | 成型技术 | FDM |
| Nozzle Number | 喷头数量 | 1 |
| Slice Thickness | 切片层厚 | 0.1mm-0.4mm |
| Nozzle Diameter | 喷嘴直径 | Standard 0.4mm | 标配0.4mm |
| Precision | 打印精度 | ±0.1mm |
| Filament | 打印材料 | PLA/TPU/Wood | 木材 |
| File Format | 切片支持格式 | STL/OBJ/AMF |
| Working Mode | 打印方式 | USB or storage card |USB或存储卡脱机 |
| Slice Software | 可兼容切片软件 | Cura/Repetier-Host/Simplify3D |
| Rated Voltage | 额定电压 | 115/230V.ac 50/60Hz |
| Rated Power | 额定功率 | 150W |
| Bed Temp | 热床最高温度 | ≤80°C |
| Nozzle Temp | 喷嘴最高温度 | ≤260°C |
| Resume Print | 断电续打 | Yes | 支持 |
| Filament Detector | 断料检测 | No | 不支持 |
| Auto Leveing | 自动调平 | No | 不支持 |
| Language Selection | 语言切换 | English | 中文 |
| Operating System | 电脑操作系统 | WIN/XP/MAC/Linux/Vista |
| Printing Speed | 打印速度 | 30-100mm/s |
3. Package Content 零件清单
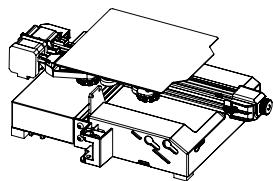
1 Printer base | 底座组件 x 1
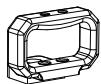
2 Handle | 把手 x 1
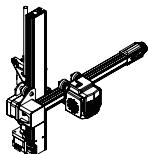
5 XZ-axis kit | XZ轴组件 x 1
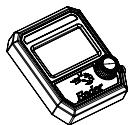
3 Screen kit | 显示屏组件 x 1
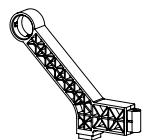
6 Material rack | 料架 x 1

4 Powercord|电源线 × 1
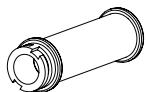
7 Material tube | 料管 x 1

Tool list 工具包清单

Filament x 1耗材


M4x16 hexagon socket x 2 button head screws M4x16内六角平圆头螺丝

10 M5x45 cylinder-head x 2 combination screw with washer M5×45圆柱头带垫组合螺丝
11 M5x40 hexagon x 1
socket button head screws
M5x40内六角平圆头螺丝

M5x14 hexagon x 2
socket button
head screws
M5x14内六角平圆头螺丝

13 Storage card & x 1 card reader 存储卡和读卡器
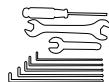
14 Wrenches and x 1 screwdrivers 扳手和螺丝刀
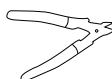
15 Diagonal pliers x 1 剪钳

16 Needle x 1通针

17 Quick connect × 2
buckles
快接卡扣

18 Nozzle x 1 喷嘴


19 Small pneumatic x 2 joint 小气动接头
Large pneumatic x1 joint 大气动接头
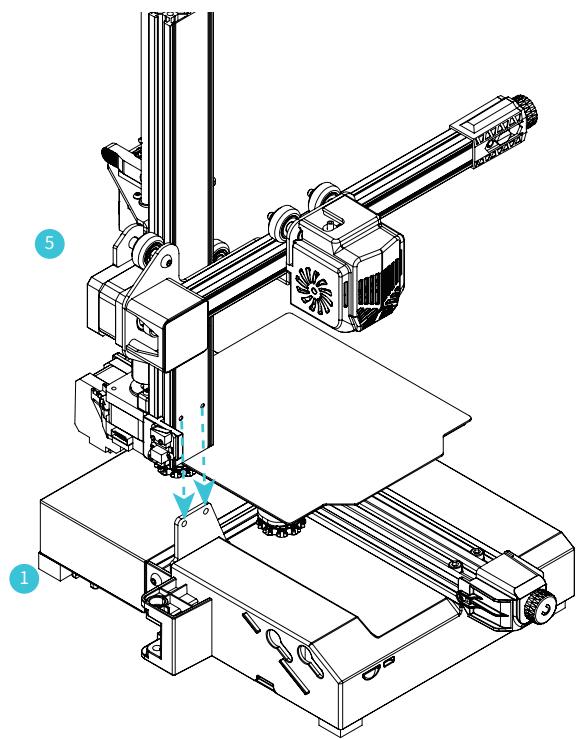
4.Assemble XZ-axis Kit 组装XZ轴组件
XZ-axis kit are vertically installed on the base. (As shown in the figure) | XZ轴组件垂直安装在底座组件。(如图所示)
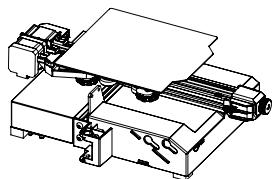
1 Printer base | 底座组件 × 1
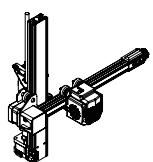
5 XZ-axis kit | XZ轴组件 x 1
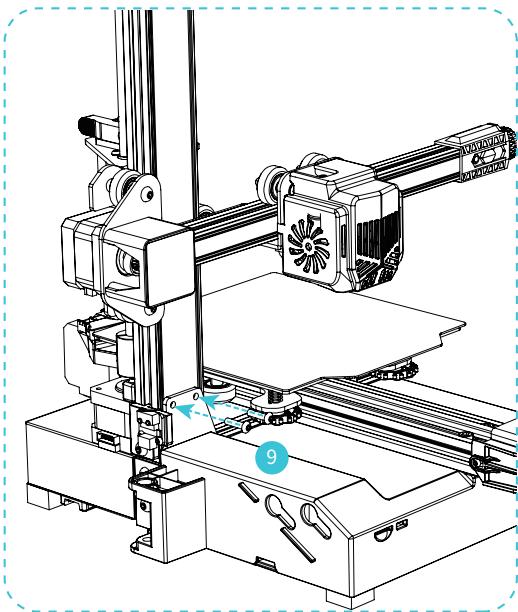
5. Fix XZ-axis Kit 固定XZ轴组件
A.Screw up two M4x16 hexagonal socket button head cap screws from the front. | 将两颗M4x16内六角平圆头螺丝从正面扭紧固定。
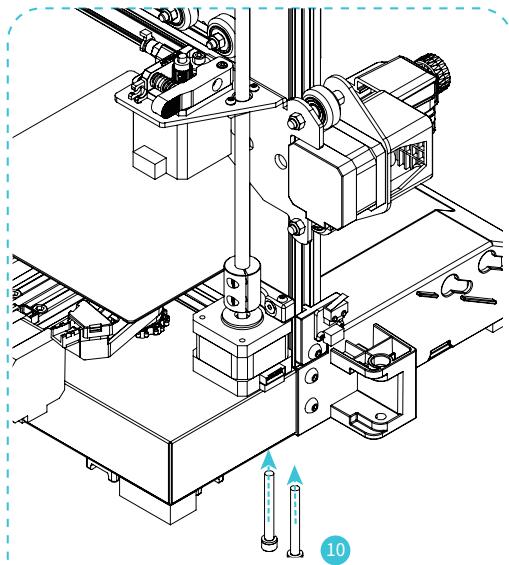
B.Tighten and secure it with two M5x45 cylinder-head combination screws with washer from the bottom. | 再用两颗M5x45圆柱头带垫组合螺丝从底部扭紧固定。


M4x16 hexagon socket x 2 button head screws M4x16内六角平圆头螺丝


M5×45 cylinder-head ×2 combination screw with washer M5×45圆柱头带垫组合螺丝
6.Install the Rack 安装料架组件
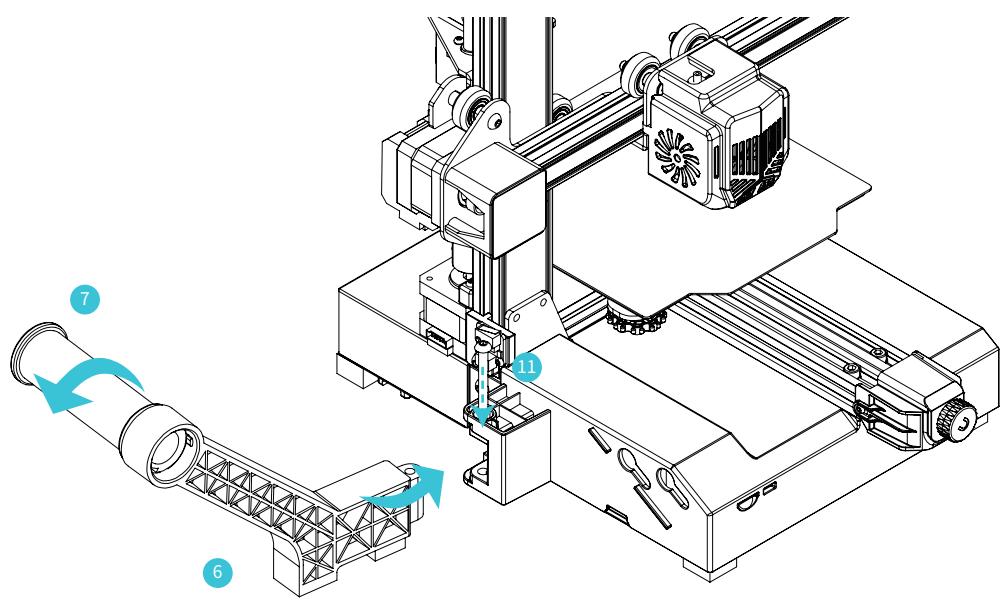
Fix the threaded end of the material tube on the rack, then align the screw hole of the rack with the position of the base, and finally fix it with one M5x40 hexagonal socket button head cap screw. (As shown in the figure)
将料管带螺纹的一端固定在料架上,再把料架的螺孔对准底座组件的位置,最后用一颗M5x40内六角平圆头螺丝扭紧固定。(如图所示)
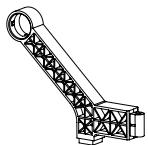
6 Rack | 料架 x1
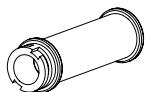
7 Spool | 料管 x1

M5x40 hexagon x 1
socket button head screws
M5x40内六角平圆头螺丝
7. Assemble Handle 组装把手
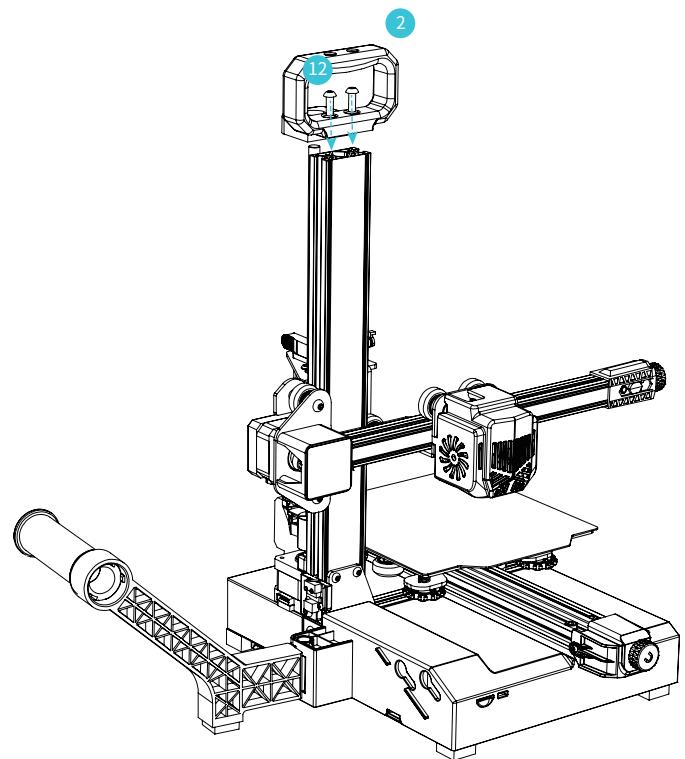
A. Overlap the bottom of the handle with the top surface of the profile. | 将把手的底面与型材上表面定位重合。
B. Fix it with two M5x14 hexagonal socket button head cap screws. | 再用2颗M5x14内六角平圆头螺丝扭紧固定。

2
Handle x1 把手

M5x14 hexagon x2
socket button
head screws
M5x14内六角平圆头螺丝
8. Cable Connection 设备接线
A.Connect X,E,Z-axis motor wires according to the yellow label on the 6-pin (5 wires) port. | 按照6-pin(5根线)端口上黄色标签提示连接X、E、Z轴步进电机。
B.ConnectX,Z-axis limit switch wires according to the yellow label on the 3-pin (2wires) port. | 按照3-pin(2根线)端口上黄色标签提示连接X、Z轴限位开关。
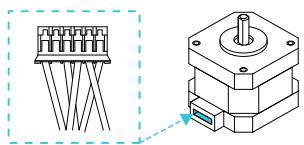
X、E、Z-axis motor port
X、E、Z轴电机接口
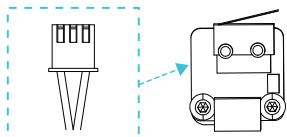
X、Z-axis limit switch
X、Z轴限位开关
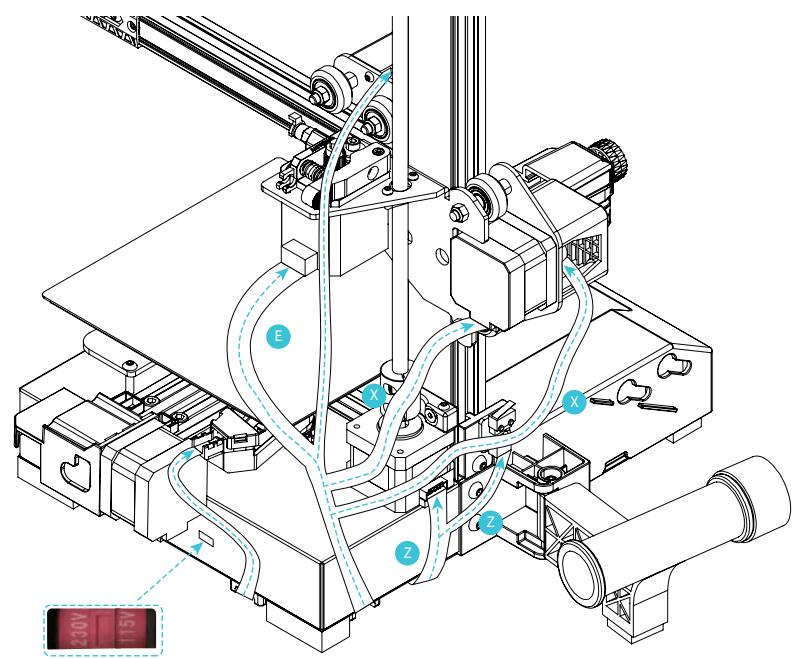
9. Cable Connection 设备接线
AAlign the flat cable socker with the slot at the back of display, and then insert it. | 排线的卡扣与显示屏里面的卡扣吻合,再插入。
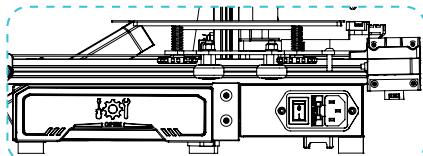
B.Plug in the power cord. | 插入电源线。


Power cord
电源线 × 1
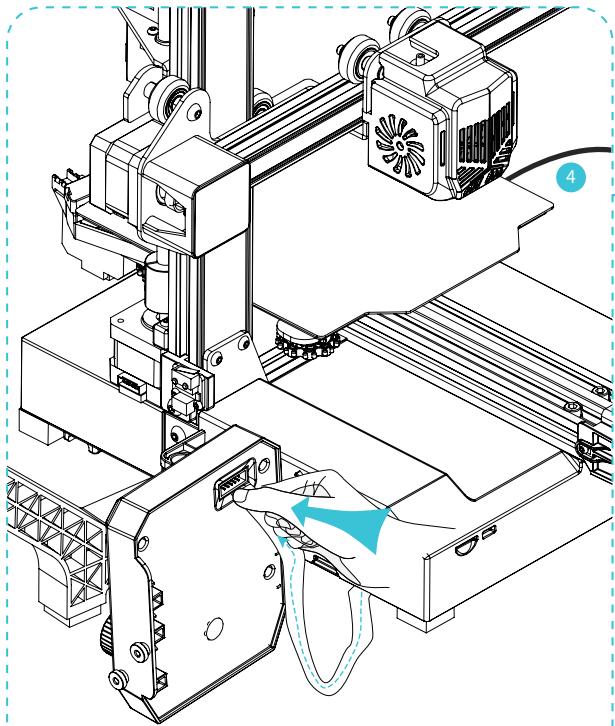
#
Caution
- Select the correct input voltage to match your local mains (115/230V)
- Damage can occur if voltage is set incorrectly.
- Connect the power cord and turn the power switch to 1 to turn it on.
选择正确的输入电压以匹配您的本地电源。 (115/230V)
如果电压设置不正确,可能会造成损坏。
连接电源线并将电源开关拨至1档即可开机
Do not connect or disconnect the cables when the machine is powered on. 当机器通电时,请勿连接或断开连接线。
10. Install Display Screen 安装显示屏
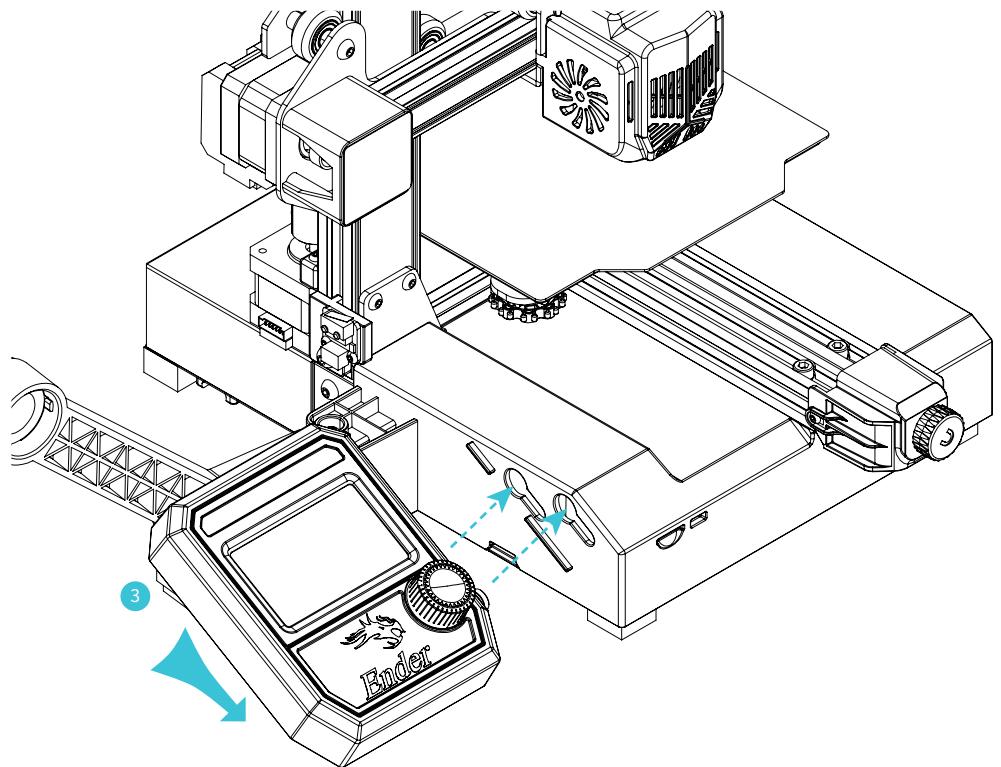
Align the two posts on the right side of the display screen with the slots of the base, and move them down to fix. (As shown in the figure)将显示屏组件右侧处的两个卡柱对准底部组件的卡槽往下移动加以固定。(如图所示)
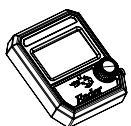
3 Screen kit | 显示屏组件 x1
11. Solution for V-wheel Jamming V轮卡顿解决方案
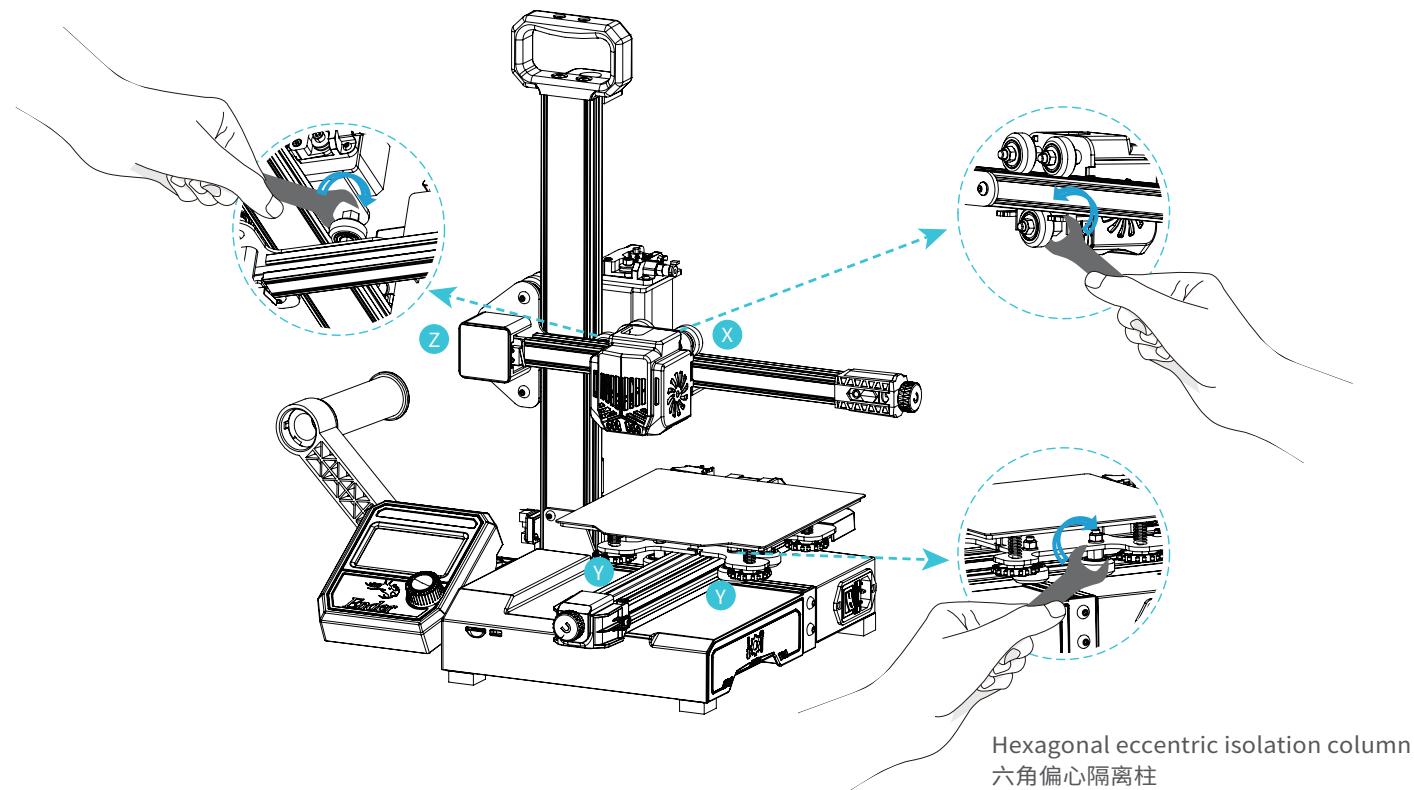
X/Y/Z axis V-wheel adjustment: After the machine is assembled gently dial the wheel to check whether it is idling or stuck. If this phenomenon occurs, use an open-end wrench to adjust the hexagonal eccentric isolation column to make it rotate smoothly.
X/Y/Z轴滑轮调节:机器组装完成后,用手轻拨滑轮,检查其是否有空转和卡顿,如有此现象请使用开口扳手调节六角偏心隔离柱,使其转动运动顺畅。
12. Bed Leveling 调平平台
Motion Auto Home Disable Steppers (Release the motor). | 运动 自动回到原点 关闭步进电机(释放电机)
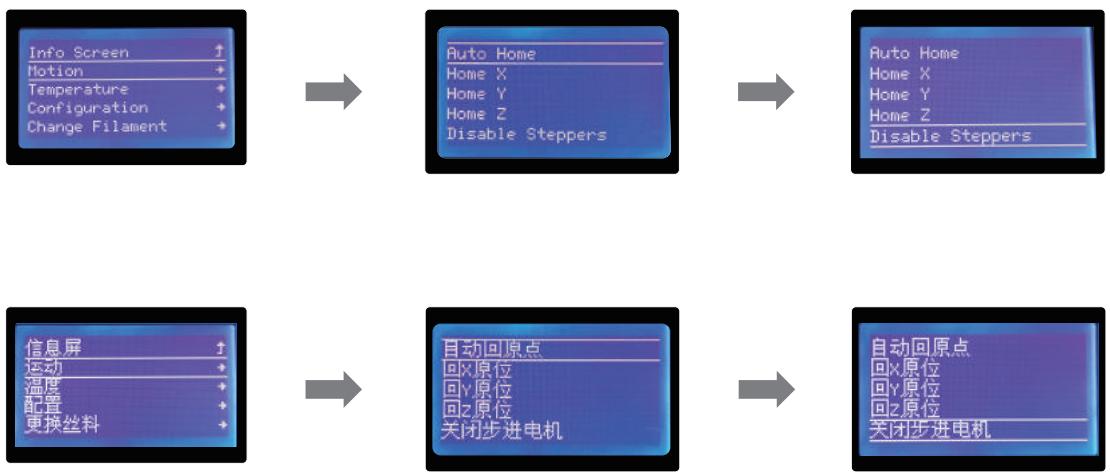
13. Bed Leveling 调平平台
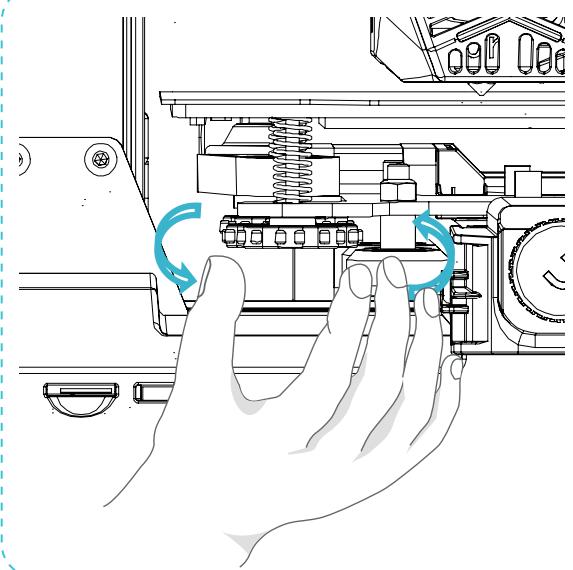
Move the nozzle the front/left leveling screw and adjust the platform height by turning the knob underneath (The thickness of a piece of A4 paper).
Use a piece of A4 paper (standard printer paper) to assist with the adjustment, making sure that the nozzle lightly scratches the paper.
Complete the adjustment of the screw on all 4 corners. Repeat above steps 1-2 times if necessary. Keep adjusting until there is slight resistance on the A4 paper from the nozzle.
移动喷嘴至螺丝上方附近。拧动螺丝,调节打印平台喷嘴使二者处于刚好贴合状态,间距约为0.1mm(一张A4纸的厚度)。
我们可以利用一张A4纸辅助调平,使喷嘴刚好能在A4纸上产生划痕。依次完成四个边角上调平螺丝的调节。不断调整直到在拉动A4纸时能感受到来自喷嘴的轻微阻力。

| The nozzle is too far away from the platform, so the consumables can not adhere to the platform. 喷嘴离平台太远,耗材无法粘附在平台上。 | ||
| Filament are extruded evenly, just sticking on the platform. 耗材挤出均匀,刚好贴在平台上。 | ||
| The nozzle is too close to the platform, and the filament are not extruded enough, even scraping the platform. 喷嘴离平台太近,耗材挤出不足,甚至刮坏平台。 |
14. Preheating 预热

Method 1

方法1
15. Preheating 预热
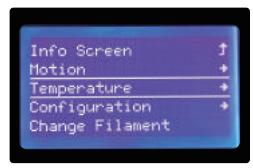
Method 2

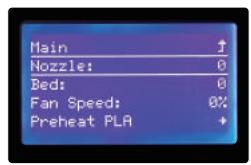

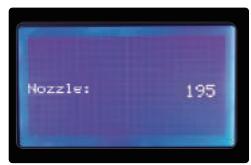
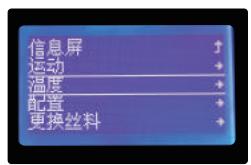
方法2

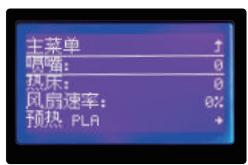

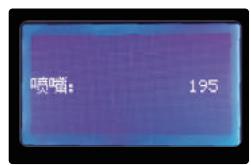
16. Preheating 预热
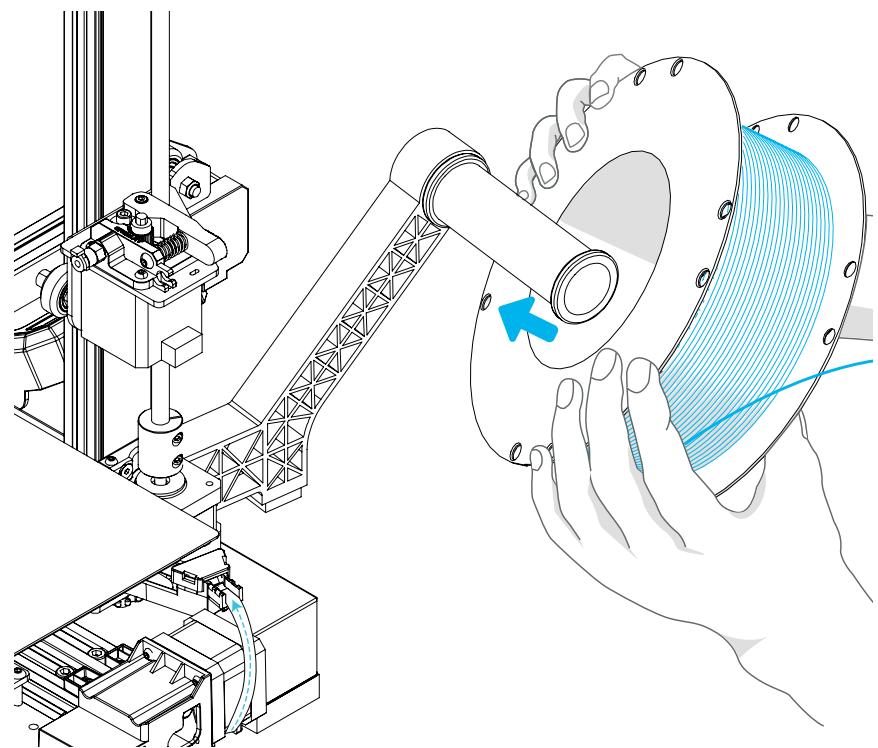
When you wait for the temperature to rise, hang the filament over the filament holder. | 当您等待温度上升时,把耗材挂在料架上。
#
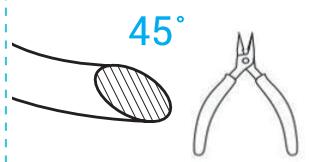
For smoother printing, the end of the filament should be cut as shown above.
为了顺利完成打印,耗材的末端位置应如图所示。
17. Load Filament 装料
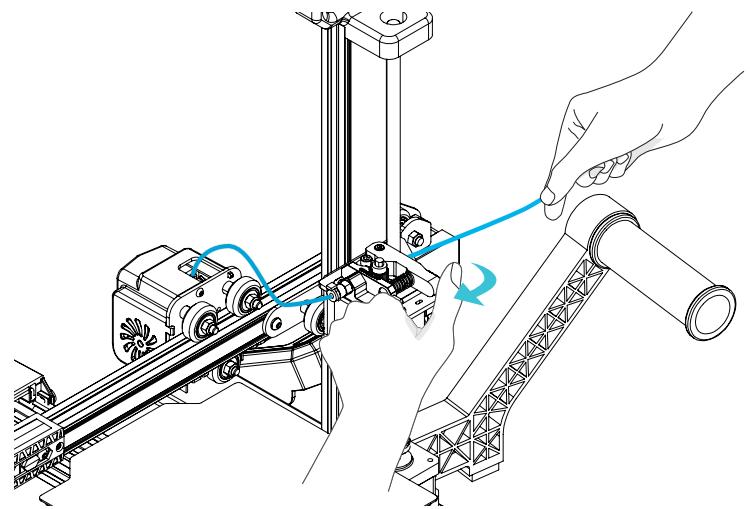
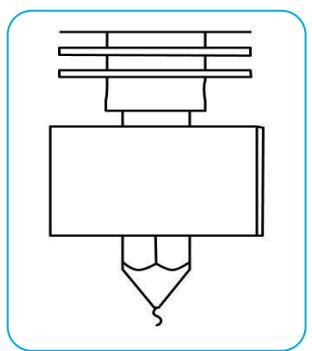
When target temperature is reached, hold the extruding clamp by hand and insert filament into the small hole of the extruder until the nozzle position. When filaments flow out of the nozzle, meaning that the filaments have been loaded.
当温度达到目标温度时,用手捏住挤出来,将耗材插入挤出机小孔直至喷嘴位置,看到喷嘴处有耗材流出即表示耗材已经装载完成。

Tips: How to Replace the Filament?
- Cutting filament near the Extruder and slowly feed new filament until they are fed into the new filament.
2, Withdrawing the filament quickly and feeding the new faliment after nozzle preheated and filament pushed a little forward.
提示:如何更换耗材?
方法一、在靠近挤出机处将耗材剪断,将新耗材缓缓送入,直到耗材被送入导料管为止。
方法二、预热喷嘴后,将耗材往前推进一下后,迅速抽出耗材,将新耗材送入。
18. Start Printing 开始打印
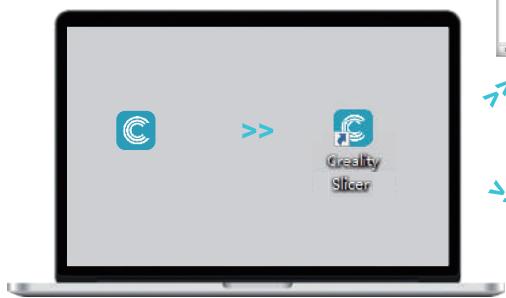
1.Double click to install the .| 双击安装Creatility Slicer
2.Double click to open the Creality Slicer. | 2.双击打开Creality Slicer
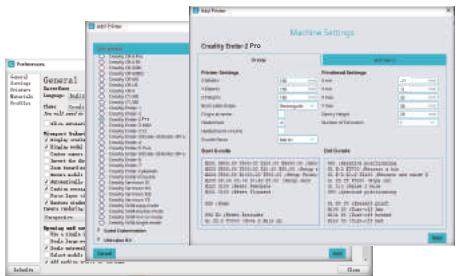
- Select language Next Select your machine Next Finish.


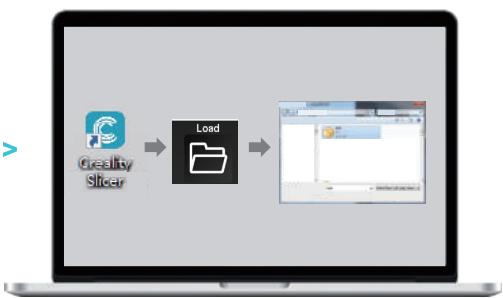
4.Open the software Load Select the file Wait for slicing to finish 打开创想三维切片软件 Load(读取文件) 选择文件
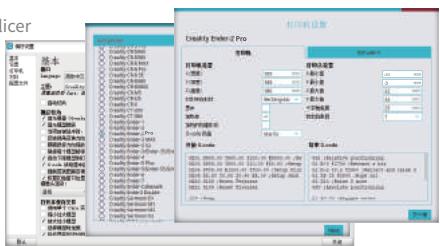
3.依次选择语言 Next 选择对应
机型 Next Finish, 完成设置
19. Start Printing 开始打印
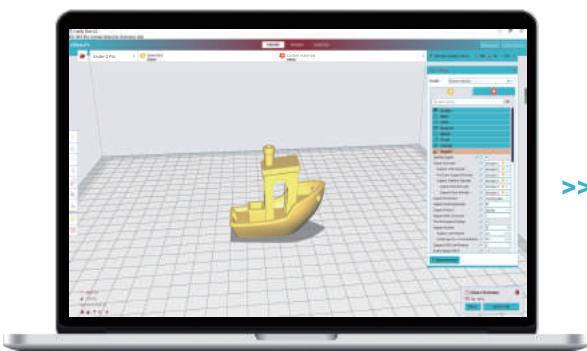
5. Generate G-code, and save the gcode file to storage card. 生成G代码 保存到存储卡

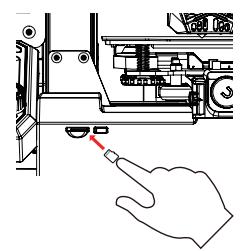


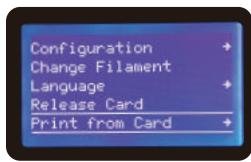
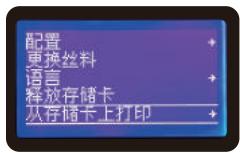
6.Insert the storage card press the knob Print from Card Choose the file to be printed.
插入存储卡 按下按钮 存储卡上打印 要打印的文件

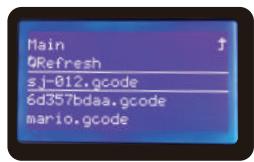


6d357bdaa.gcode
mario.gcode
!
File names must be Latin letters or numbers, not Chinese characters or other special symbols.
文件名需为拉丁字母或数字,不能为汉字或其他特殊符号。
#
Please don't insert or remove the storage card during printing.
警告:在打印过程中,禁止插拔存储卡。

Notes: For details on the software instructions, please refer to the slicing software manual in the storage card.
温馨提示:软件使用说明详情,请见存储卡内切片软件使用手册!
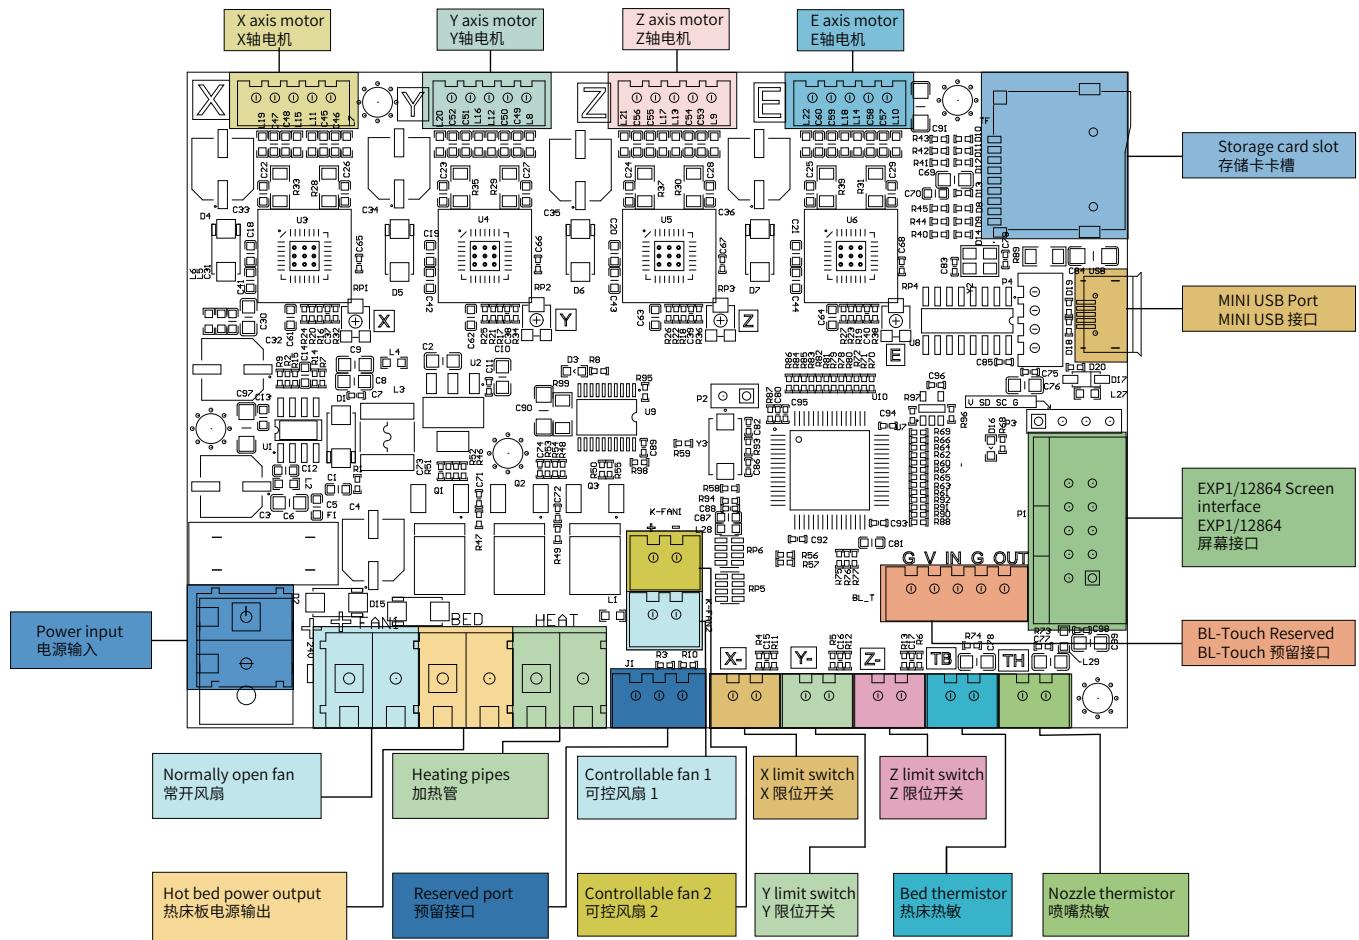
20. Circuit Wiring 电路接线
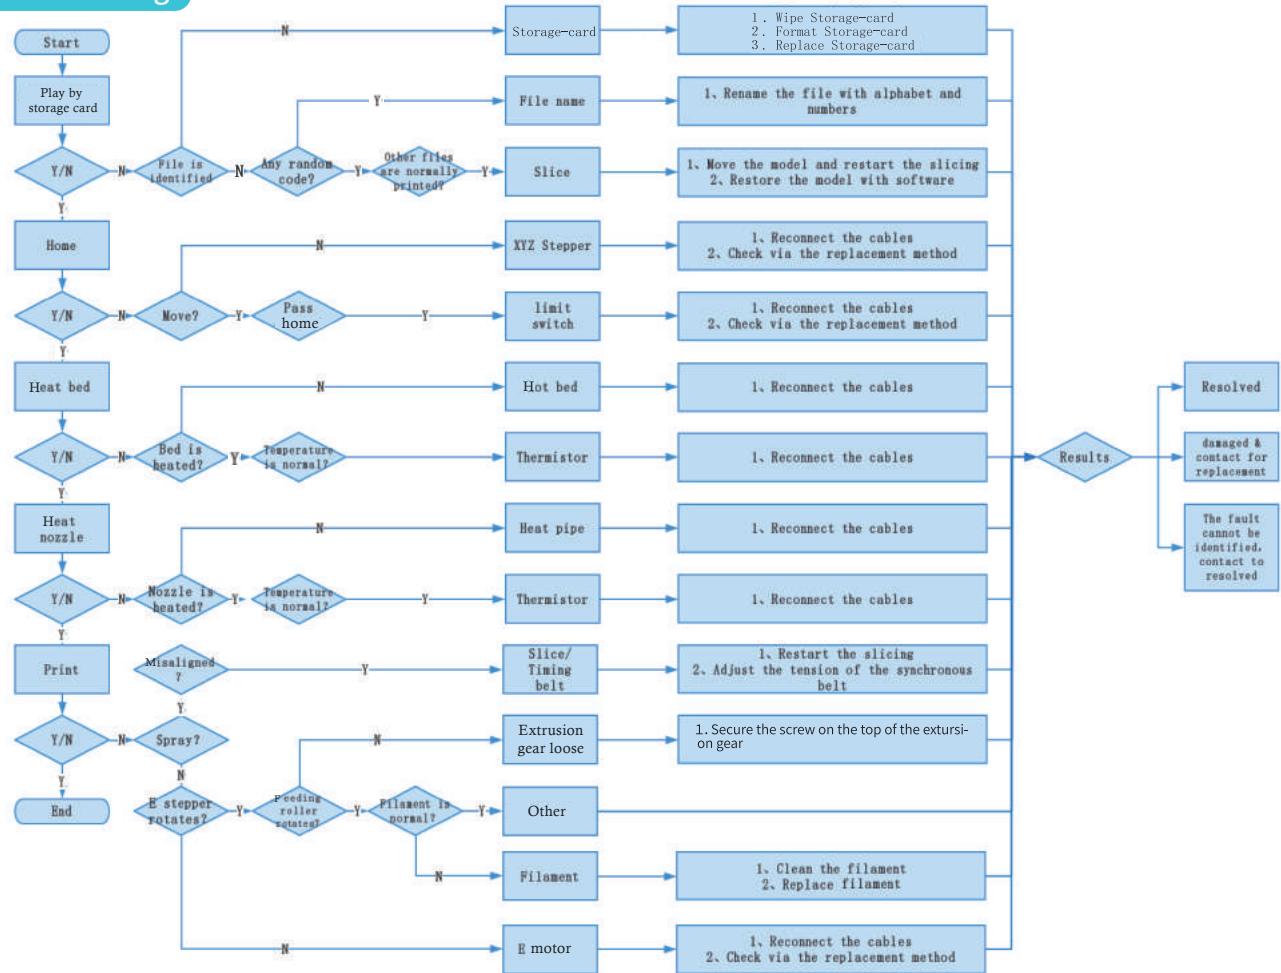
21. Trouble-shooting
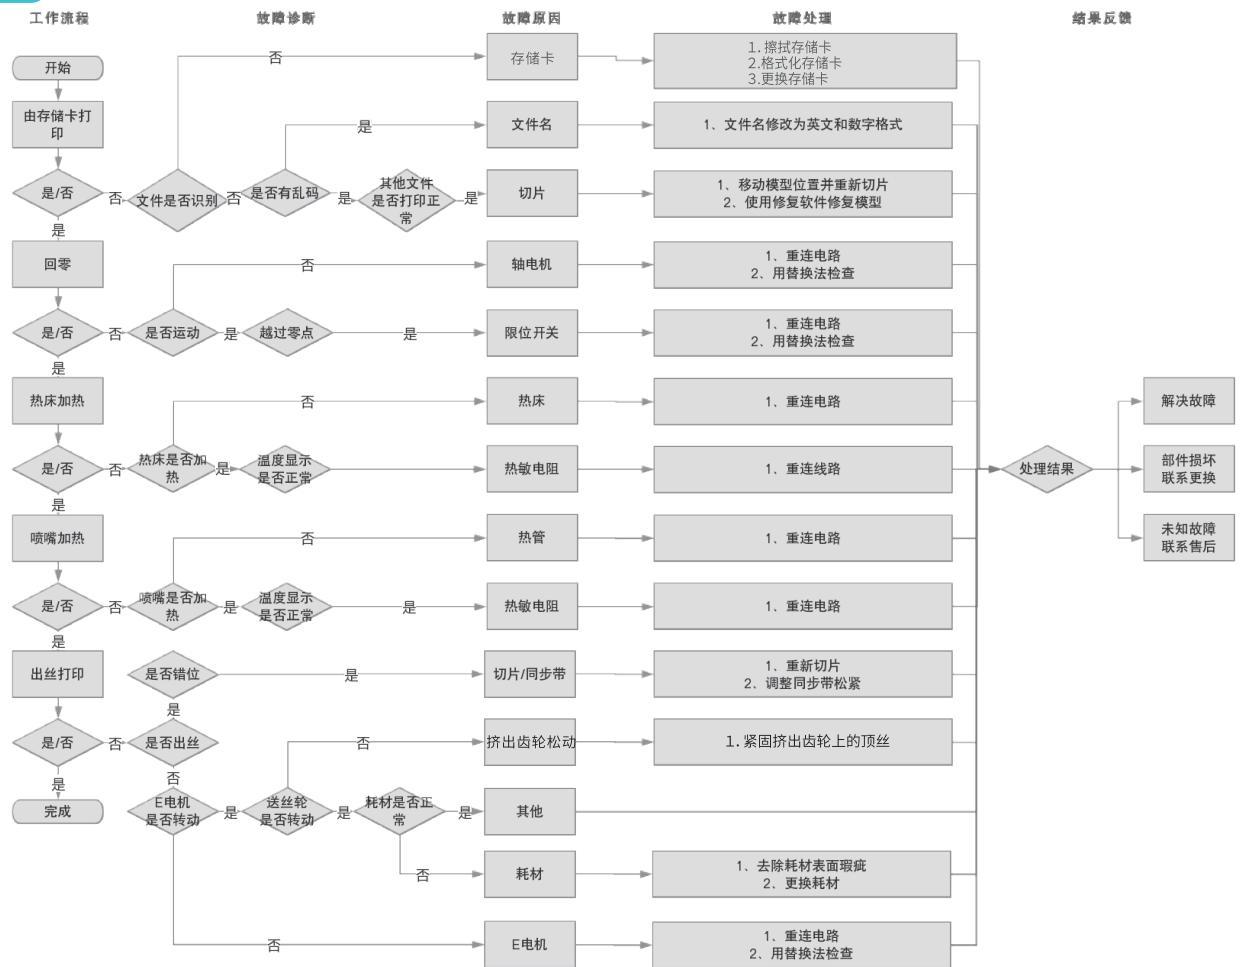
22. 故障检修
FDM 3D PRINTING FILAMENTS

HP-PLA
Upgraded environmentally friendly formula, matte effect, high toughness, and fine printing. The raw materials are imported from the United States, besides, there are rich colors for customers to choose.

CR-PLA CR-PETG
CR-ABS CR-TPU
Targeting at mid-end users, CR series is with transparent tray plus black-white color box design. Its slight tolerance in wire diameter contributes to stable printing quality. CR series meets your demands of daily design and prototype making.

EN-PLA EN-PETG
EN-ABS EN-TPU
Ender series is widely applied to general FDM printer design, which meet customers' needs of daily design and different prototyping needs.

HC-PLA HC-PETG
HC-ABS HC-TPU
HC series is cost-efficient. It's widely applicable to general FDM printer product designs on the market to meet your daily design and different prototyping needs.
24. Filaments Parameter Information
| Material | Print Temp (°C) | Bed Temp (°C) | Difficulty | Flexibility | Shrinkage | Ductility | Applicable Models | |
| PLA Series | HP-PLA | 190-220 | 50-60 | ● | ●● | ● | ●●● | Suitable for 99% FDM models |
| HP-PLAx3 | 190-220 | 50-60 | ● | ●● | ● | ●●● | Suitable for 99% FDM models | |
| CR-PLA | 190-220 | 50-60 | ● | ●● | ● | ●●● | Suitable for 99% FDM models | |
| HC/EN-PLA | 190-220 | 50-60 | ● | ●● | ● | ●● | Suitable for 99% FDM models | |
| ABS | 220-260 | 90-110 | ●●●● | ●● | ●●● | ●●●● | Hot bed is needed, and Creality printer enclosure is recommended for DIY machine | |
| PETG | 230-250 | 60-100 | ●●● | ●● | ●● | ●●● | Hot bed is needed, and Creality printer enclosure is recommended for DIY machine | |
| TPU | 210-240 | 50 | ●● | ●●●●●● | ● | ●●●●● | Direct extrusion models | |
| Silk | 190-220 | 50-60 | ● | ●● | ● | ●● | Suitable for 99% FDM models | |
| Nylon | 230-260 | 80-90 | ●●●●●● | ●●● | ●●●●● | ●●●●● | Hot bed is needed, and Creality printer enclosure is recommended for DIY machine | |
| Carbon (Ordinary type) | 190-220 | 50-60 | ● | ● | ● | ●● | Suitable for 99% FDM models | |
| PDS Advertising word filament-PLA | 190-220 | 50-60 | ● | ●● | ● | ●● | Creality K5、K8、T5 | |
| Low temperature filament-PCL | 60-100 | - | ● | ●●● | ● | ●●●●● | Low temperature 3D printing pen | |
3D打印耗材

HP-PLA
升级环保配方,哑光效果,韧性高,打印细腻,原料源自美国,有丰富的颜色可选。

CR-PLA CR-PETG CR-ABS CR-TPU
定位中高端用户,透明盘+黑白彩盒设计,线径公差小,打印性能稳定。可以满足您日常的设计和原型制作需求。具有出色的机械性能和打印质量。
Ender 系列
EN-PLA EN-PETG EN-ABS EN-TPU
广泛适用市面上通用型FDM打印机,并可以按照您的需求量身定制,可以满足您日常的设计和不同的原型制作需求,让想象插上翅膀。
HC 系列
HC-PLA HC-PETG HC-ABS HC-TPU
高性价比款,广泛适用市面上通用型FDM打印机,并可以按照您的需求量身定制,可以满足您日常的设计和不同的原型制作需求。
26.线材种类参数信息
| 材质 | 打印温度(℃) | 热床温度(℃) | 打印难度 | 柔软度 | 收缩率 | 韧性 | 适用机型 | |
| PLA系列 | HP-PLA | 190-220 | 50-60 | ● | ●● | ● | ●●● | 适配99%FDM机型 |
| HP-PLAx3 | 190-220 | 50-60 | ● | ●● | ● | ●●● | 适配99%FDM机型 | |
| CR-PLA | 190-220 | 50-60 | ● | ●● | ● | ●●● | 适配99%FDM机型 | |
| HC/EN-PLA | 190-220 | 50-60 | ● | ●● | ● | ●● | 适配99%FDM机型 | |
| ABS | 220-260 | 90-110 | ●●●● | ●● | ●●● | ●●● | 需要热床, DIY机推荐使用Creality保温罩 | |
| PETG | 230-250 | 60-100 | ●●● | ●● | ●● | ●●● | 需要热床, DIY机推荐使用Creality保温罩 | |
| TPU | 210-240 | 50 | ●● | ●●●●● | ● | ●●●● | 近端挤出机型 | |
| Silk | 190-220 | 50-60 | ● | ●● | ● | ●● | 适配99%FDM机型 | |
| Nylon | 230-260 | 80-90 | ●●●●● | ●●● | ●●●● | ●●●● | 需要热床, DIY机推荐使用Creality保温罩 | |
| Carbon(普通型) | 190-220 | 50-60 | ● | ● | ● | ●● | 适配99%FDM机型 | |
| 广告字耗材-PLA | 190-220 | 50-60 | ● | ●● | ● | ●● | Creality K5、K8、T5 | |
| 低温打印笔耗材-PCL | 60-100 | - | ● | ●●● | ● | ●●●● | 低温打印笔 | |
Due to the differences between different machine models, the physical objects and the final images can differ. The final explanation rights shall be reserved by Shenzhen Creality 3D Technology Co., Ltd.
因每款机型不同,实物与图可能有所差异,请以实物为准,最终解释权归深圳市创想三维科技股份有限公司所有。

Scan To Learn More
扫码了解更多
SHENZHEN CREALITY 3D TECHNOLOGY CO., LTD.
Add:18F, JinXiuHongDu Building, Meilong Blvd., Longhua Dist.,
Shenzhen, China 518131
Official Website: www.creality.com
Tel: +86 755-8523 4565
E-mail: info@creality.com cs@creality.com
深圳市创想三维科技股份有限公司
深圳市龙华区民治街道新牛社区梅龙大道锦绣鸿都大厦18F
公司网站:www.cxsw3d.com
服务热线:4006133882 0755-85234565