ANTIVIR EXCHANGE - Antivirus AVIRA - Notice d'utilisation et mode d'emploi gratuit
Retrouvez gratuitement la notice de l'appareil ANTIVIR EXCHANGE AVIRA au format PDF.


| Type de produit | Logiciel antivirus pour serveurs Exchange |
|---|---|
| Caractéristiques techniques principales | Protection en temps réel, analyse des e-mails, filtrage des spams, mise à jour automatique des signatures de virus |
| Compatibilités | Compatible avec Microsoft Exchange Server 2010, 2013, 2016, 2019 |
| Fonctions principales | Détection et suppression de virus, protection contre les malwares, gestion des menaces par e-mail |
| Alimentation électrique | Non applicable (logiciel) |
| Dimensions approximatives | Non applicable (logiciel) |
| Poids | Non applicable (logiciel) |
| Entretien et nettoyage | Mises à jour régulières recommandées, scans programmés pour maintenir la sécurité |
| Pièces détachées et réparabilité | Non applicable (logiciel) |
| Sécurité | Chiffrement des données, protection contre les ransomwares, conformité avec les normes de sécurité |
| Informations générales utiles | Essai gratuit disponible, support technique inclus, licence annuelle requise |
FOIRE AUX QUESTIONS - ANTIVIR EXCHANGE AVIRA
Questions des utilisateurs sur ANTIVIR EXCHANGE AVIRA
0 question sur cet appareil. Repondez a celles que vous connaissez ou posez la votre.
Poser une nouvelle question sur cet appareil
Téléchargez la notice de votre Antivirus au format PDF gratuitement ! Retrouvez votre notice ANTIVIR EXCHANGE - AVIRA et reprennez votre appareil électronique en main. Sur cette page sont publiés tous les documents nécessaires à l'utilisation de votre appareil ANTIVIR EXCHANGE de la marque AVIRA.
MODE D'EMPLOI ANTIVIR EXCHANGE AVIRA
www.avira.com


User Manual
Avira AntiVir
Exchange Server 2000/2003
Table of Contents
1 About this Manual. 1
1.1 Introduction 1
1.2 The Structure of the Manual 1
1.3 Symbols and emphases 2
2 Avira AntiVir for Exchange - Product Overview. 3
2.1 AntiVir 3
2.2 AntiVir Wall 4
2.3 AntiVir Wall 4
3 Getting Started. 5
3.1 Installation on an Exchange Server 5
3.2 Starting the AntiVir Exchange Management Console 5
3.3 Configuration in the AntiVir Exchange Management Console ..6
3.3.1 Required Basic Configuration Steps 6
3.3.2 Required Policy Configuration Steps 6
3.3.3 Recommended Basic Configuration Steps 7
3.3.4 Virus Scanning in Exchange Databases 7
3.4 Observing Data in AntiVir Monitor 7
4 Installation 9
4.1 System Requirements 9
4.2 Installation of Virus Scanners 9
4.3 Execution 10
4.3.1 Installation of Avira AntiVir Exchange on an Exchange Server10
4.4 Installation in Cluster 12
4.5 Uninstallation of Avira AntiVir Exchange for Exchange 12
4.6 Insert Licence File 13
5 General 15
5.1 The Architecture of Avira AntiVir Exchange 15
5.1.1 AntiVir Exchange Management Console 15
5.1.2 The AntiVir Server 16
5.1.3 The Grabber 16
5.1.4 The AntiVir Service = Enterprise Message Handler (EMH)..... 16
5.1.5 Avira AntiVir Exchange Configuration Settings 19
5.2 Message Processing Sequence 20
5.3 User Interface 20
5.3.1 The Toolbar 21
5.3.2 The Icons 21
5.4 Configuration in the Avira AntiVir Exchange Management Console 23
5.5 Basic Configuration 23
5.5.1 Configuration Reports 23
5.5.2 Import Configuration 24
5.5.3 AntiVir Server Settings 24
5.5.4 Individual Server Settings 27
5.5.5 Address Lists 30
5.5.6 Create Notification Templates 36
5.5.7 Folder settings 43
5.5.8 Utility Settings 47
5.6 Policy Configuration 47
5.6.1 Job Types 47
5.6.2Actions 49
5.6.3 Job Processing Sequence 49
5.7 AntiVir Monitor 50
5.7.1 Quarantines 51
5.7.2 AntiVir Reports 57
6 AntiVir 59
6.1 Overview 59
6.2 Virus Scanning 60
6.2.1 Scanning in the Information Store 61
6.2.2 AntiVir powered by Avira 62
6.2.3 Enabling Virus Scanning - Example 63
6.3 Virus Scan in the Information Store - Sample Job 69
6.3.1 General Settings 70
6.3.2 Scheduling 70
6.3.3 Defining Actions 71
6.3.4 Job Details 73
6.3.5 Server Status 73
6.4 File Restrictions for Attachments 74
6.4.1 By Type 74
6.4.2 By Message Size 75
6.4.3 By Type and/or Attachment Size 75
6.4.4 Configuring Fingerprints 75
6.4.5 Denying File Attachments by Type - Example 81
6.4.6 Limiting Message Size - Example 84
6.4.7 Denying Attachment Types and Size - Example 87
7 AntiVir Wall. 93
7.1 Overview 93
7.2 Address Filtering 94
7.2.1 Blocking Senders and/or Recipients - Example 95
7.3 Content Filtering With Dictionaries 97
7.3.1 Setting up Dictionaries 98
7.3.2 Checking and Denying Text Contents - Example 100
7.4 Spam Filtering With the AntiVir Wall Spam Filtering Job ... 104
7.4.1 Definite No-Spam Criteria 106
7.4.2 Definite Spam Criteria 108
7.4.3 Practical Tips 108
7.4.4 Spam Filtering - Example 109
7.4.5 Advanced Spam Filtering 117
7.4.6 Manual Spam Filtering Configuration 121
7.5 Spam Filtering With the DCC Spam Filtering Job 122
7.5.1 What is DCC? 122
7.5.2 DCC Settings 123
7.5.3 Spam Filtering with DCC - Example 125
7.6 Blocking Images 126
7.6.1 Blocking Offensive Images - Example 126
7.7 Limiting the Number of Recipients 129
7.7.1 Limiting Number of Recipients - Example 129
8 Service 133
8.1 Support 133
8.2 Online shop 133
8.3 Service hotline 133
9 Appendix 135
9.1 Glossary 135
1 About this Manual
In this section you will get an overview of the structure and content of this manual.
After a short introduction you will get information on the following topics:
The Structure of the Manual
- "Symbols and emphases"
1.1 Introduction
We have enclosed in this manual all the information you need about AntiVir Exchange Server 2000/2003 and we shall guide you step by step through the configuration and operations of this software.
The Appendix contains a comprehensive Glossary, explaining the basic terms used in the manual.
For further information and assistance, please refer to our Website, to the Hotline of our Technical Support and to our regular Newsletter ("Service").
Your Avira Team
1.2 The Structure of the Manual
| Chapter | Contents |
| “About this Manual” | The structure of the manual, symbols and emphasis. |
| “Avira AntiVir for Exchange - Product Overview” | Overview of the software features and system requirements. |
| “Getting Started” | Starting and stopping the software, program interface, technical background, notes ini. |
| “Installation” | Instructions about installing the AntiVir Exchange Server 2000/2003 on your system, system requirements. |
| “General” | Description of the software architecture, user interface, configuration of the AntiVir Exchange Management Console and the AntiVir monitors. |
| “AntiVir” | Virus scanning, file-and size restrictions in emails and databases. |
| “AntiVir Wall” | Checking and blocking contents using textual analysis, checking senders and recipients, avoiding mailflood, limiting the number of recipients. |
| “Service” | Avira GmbH Support and Service. |
| “Appendix” | Glossary, explaining terms and abbreviation |
1.3 Symbols and emphases
The following symbols appear in this manual:
| Symbol | Explanation |
| ! | The info symbol is used to indicate special points that must be observed for trouble-free use of your system. |
| ! | The warning symbol means Attention. Be careful! It indicates important passages in the text that must be observed in order to avoid any loss of data, damage to your system or any other unpleasant occurrences. Read these passages with particular care and attention. |
| i | Here, we give you support on particular problems, we provide tips and tricks or alternative solutions and special points. |
The following emphases are used:
| Emphasis | Explanation |
| C:\AntiVirData | File names and file paths |
| Choose component, select all | Elements of the software interface such as menu items, window titles, buttons in the dialogue windows |
| http://www.avira.de | URLs |
| “Symbols and emphases” | Cross-references within the documents |
2 Avira AntiVir for Exchange - Product Overview
E-mail Lifecycle Management (ELM) is a set of strategies and methods for processing, storing, and managing e-mail, from creation to deletion, in accordance with business processes and statutory regulations. E-mail Lifecycle Management ensures effective business processes in every company. The Avira AntiVir Exchange from Avira GmbH is the leading software package for E-mail Lifecycle Management and is the ideal solution for implementing secure and efficient business processes. With Avira AntiVir Exchange, e-mails pass through all the necessary processes on a single platform, from encryption and virus protection, anti-spamming and content-filtering, to classification and long-term archiving.
E-mail can be controlled and automatically processed throughout its entire lifecycle based on specific rules. Third-party archiving systems can be seamlessly incorporated into Avira AntiVir Exchange and used for audit-proof e-mail archiving.
Consisting of a range of modules that can be used either individually or in combination with each other, Avira AntiVir Exchange represents a highly scalable, customizable solution. Using a common security concept, the modules interact directly with each other to yield an outstanding level of performance and almost unparalleled security. User-definable notification texts for senders, recipients and administrators provide transparency. All modules are managed centrally through a standardized user interface from Notes clients and browsers. Common logs, statistics and fault reports cut down on administration costs.
2.1 AntiVir
AntiVir provides comprehensive protection of your Microsoft Exchange environment from e-mail attacks, viruses and harmful content. Scanning all messages and databases on the server, it reliably removes all viruses and other potentially harmful attachments and places them in quarantine.
- Recursive virus scanning of all messages and attachments in real-time, both event- and time-controlled
- Information Store scanning on every server
- Scans do not affect replication times
- Powerful built-in virus scanner
- Support for automatic virus pattern updates
- Scanning of e-mail message bodies and attachments
- File type identification attachments using unique, tamperproof file fingerprints or by file extension; detection and blocking of manipulated files
- Definition of file restrictions through combination of filename, file extension and file size
- Application of file restrictions on archives, for example zip or rar
- Creation and use of user-defined file patterns to ensure exchange of current information (for example price lists or terms and conditions)
Automatic detection of new mailboxes - Virus scanning of encrypted messages in combination with Crypt
2.2 AntiVir Wall
Sexual and racist mail, an increasing volume of unsolicited advertising, and ever new methods of attack by hackers, make it necessary to protect company systems and employees from these problems. AntiVir Wall provides protection from misuse and uncontrolled use of e-mail and databases. This module provides comprehensive protection from spam and junk mail and prevents the sending of confidential information.
- Checking for forbidden, undesired or confidential content according to the corporate policies
- Blocking of e-mail from specific senders (known spam sources, mailing lists, etc.) and to specific recipients (for example competitors)
- Analysis of images for undesirable contents (for example pornography) with the Xblock function
- Use of current spam patterns for fast detection of new spammer tricks
- User-specific, management of whitelist and blacklists on the server for effective blocking of unwanted mail
- Specification of sender/recipient channels for regulating dedicated e-mail communications
- User-editable exclusion lists for addresses and content in subject and message body
- Flexible notification about blocked messages (direct or time-controlled) to administration or mail recipient or sender
- User-specific access to quarantined messages
- Central quarantine management, especially efficient in enterprise and multi-server environments
2.3 AntiVir Wall
The automatic organization and context-based storage of contents, the establishment of flexible delivery and distribution mechanisms and the automated indexing for die e-mail archiving are examples of the content-sensitive operations that can be implemented with AntiVir Wall.
- Classification into company-specific e-mail categories
Automatic classification of messages in one or more categories - Response management through defined classifications, for example for customer support: automatic mail forwarding to qualified operators
- Document protection, for example scanning outbound mail and attachments for relevant information.
3 Getting Started
3.1 Installation on an Exchange Server
To install Avira AntiVir Exchange, double-click the file antivirus_exchange(server_2k_de.exe
in the installation package.
Follow the Installation instructions. Unless you specify a different installation directory, Avira AntiVir Exchange is installed in the default directory, i.e.:
C:\Programme\H+BEDV\AntiVirExchange\ (German)
C:\Program Files\H+BEDV\AntiVirExchange\ (English)

Disable any real-time or on-access scan functions of your scan engines for the .AntiVirExchange\AntiVirData directory.
For further information on installing the software, see "Installation" on page 9.
3.2 Starting the AntiVir Exchange Management Console
Avira AntiVir Exchange is a server product which is configured through the AntiVir Exchange Management Console. The service must be running for the product to work, also refer to "The AntiVir Service = Enterprise Message Handler (EMH)" on page 16. To start the Console, select Start Programs Avira GmbH
AntiVir Exchange AntiVir Exchange Management Console.
Before the AntiVir Exchange Management Console exits, you are prompted to save any changes.

Pending changes are indicated by an asterisk (^*) next to the top node. You can save your configuration while you are working in Avira AntiVir Exchange by clicking the button. The configuration settings are saved in the Config-Data.xml file located in the H+BEDV\AntiVirExchange\Config.
3.3 Configuration in the AntiVir Exchange Management Console
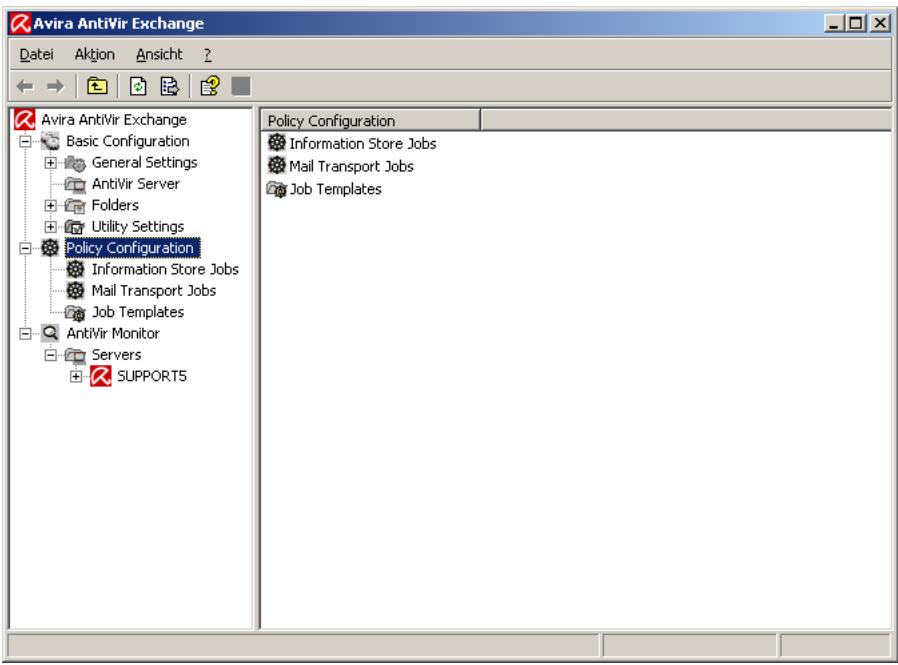
Following the installation, use the AntiVir Exchange Management Console to make the following settings.
3.3.1 Required Basic Configuration Steps
Basic Configuration is used to define the valid servers, e-mail addresses, shared templates and utility settings.
- Under Basic Configuration General Settings in the E-mail addresses tab check the entries for the AntiVir Exchange Administrators and the internal domains. Refer to "AntiVir Server Settings" on page 24.
3.3.2 Required Policy Configuration Steps
Use the Policy Configuration to define and enable selected jobs according to the company's policies.
- Under Sample jobs, find the template you wish to use.
- To create a new job, select the template and drag it to the Mail Transport Jobs folder. Give the job a name and edit its properties. Then, under Properties, enable the job (Active).
- Make sure that the jobs are performed in the correct order (see "Job Processing Sequence" on page 49).
- Save your changes, also refer to "Starting the AntiVir Exchange Management Console" on page 5.
For further information on setting up jobs and company policies, refer to "Policy Configuration" on page 47.
3.3.3 Recommended Basic Configuration Steps
In the Basic Configuration, it is recommended to define individual settings for address lists, templates, etc. However, this is not necessary for simply testing the system.
- Configure the Address lists (for selections in job rules) under General Settings.
- Where required, change the standard templates under General Settings.
- Under Utility Settings, configure any accessories required, e.g. dictionaries and DCC servers (for AntiVir Wall), fingerprints.
For further information on Basic Configuration please refer to "Basic Configuration" on page 23. Module-specific settings are described in the corresponding sections:
"AntiVir" on page 59,
"AntiVir Wall" on page 93.
For information on further customizing options, refer to "Configuration in the Avira AntiVir Exchange Management Console" on page 23.
3.3.4 Virus Scanning in Exchange Databases
Under Information Store Jobs, you can enter appropriate settings for each AntiVir server separately. It is not possible to create Informations Store jobs. A new Information Store job is automatically provided whenever a new server is specified. If the server is removed, the Information Store job will also be deleted. For further details on Information Store jobs, please refer to "Scanning in the Information Store" on page 61.
3.4 Observing Data in AntiVir Monitor
After having saved your settings, use the AntiVir Monitor to monitor the operation of Avira AntiVir Exchange. With the AntiVir Monitor, you can view current data in real-time and manage, for example, the Quarantines of the configured AntiVir servers. For details refer to Section "AntiVir Monitor" on page 50.
4 Installation
4.1 System Requirements
To install Avira AntiVir Exchange, your system must meet the following requirements:
- CD-ROM drive or network access
- RAM: Domino recommendation plus additional 64 MB
- Hard disk: at least 400 MB for installation
- Microsoft .NET Framework 1.1
-
Operating systems:
-
Windows 2000 Server from Service Pack 4
- Windows 2000 Advanced Server from Service Pack 4
- Windows Server 2003
- SBS 2003
Exchange Server:
- MS Domino Server 2000 from Service Pack 4
- MS Domino Server 2000 Enterprise Edition from Service Pack 4
-
MS Domino Server 2003 SP2
-
User Rights
-
User logged on to Active Directory with Administration rights for the Active Directory

Disable any real-time or on-access scan functions of your scan engines for the .AntiVirExchange\AntiVirData directory.
4.2 Installation of Virus Scanners
The Avira AntiVir scan engine can optionally be installed together with Avira AntiVir. The AntiVir scan engine is fully preconfigured and ready for immediate use. A virus scanning job that uses AntiVir is supplied and needs only to be enabled.
Avira AntiVir Exchange also supports virus scanners from other manufacturers. However, these virus scanners are not supplied with Avira AntiVir Exchange. To use a scan engine other than AntiVir, you must install it on your server before using Avira AntiVir Exchange.

Disable any real-time or on-access scan functions of your scan engines for the .AntiVirExchange\AntiVirData directory.
4.3 Execution
4.3.1 Installation of Avira AntiVir Exchange on an Exchange Server
From the installation package, call (double-click) the file setup_AntiVir_
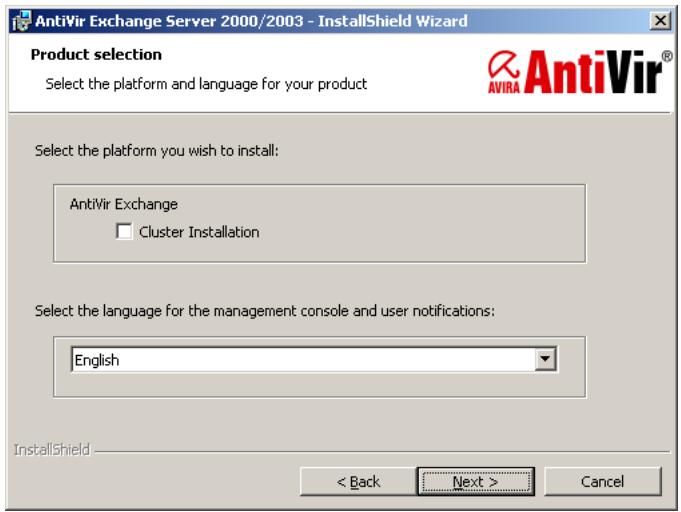
- First select the Setup language. Then select the desired product version and language. The selected product language applies to the user interface and for the notifications sent to the users by Avira AntiVir Exchange.
- In the window displayed next, accept the License Agreement and click Next to continue.
- In the next dialogue, select the features to be installed. This selection includes all server components and the AntiVir Exchange Management Console:
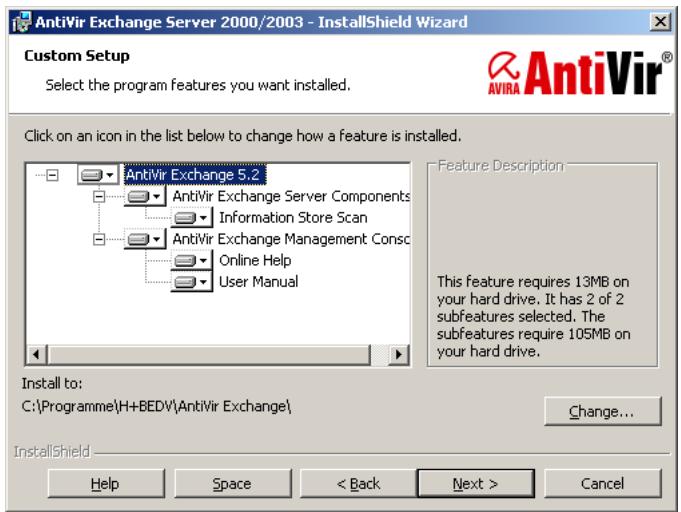
In case another Information Store Scan application1 is already run on the server, the feature will be disabled. If you wish to use Avira AntiVir Exchange Information Store Scan, the other application has to be uninstalled first.
- Click Next.
In case you have defined two or more virtual servers, you will now be prompted for the active virtual server on which Avira AntiVir Exchange is to be registered:
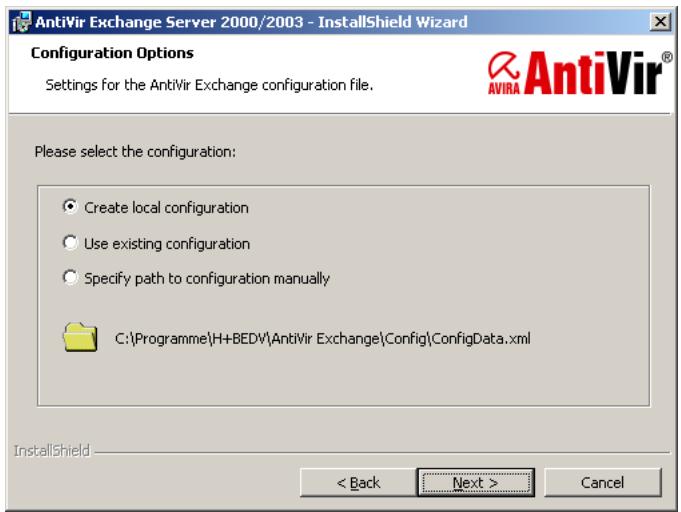
- In the next screen, you have to specify the path of the configuration file:
-
If you do not operate Avira AntiVir Exchange on several servers and want to work with a central configuration file for administration purposes1, confirm the default setting and click Next.
-
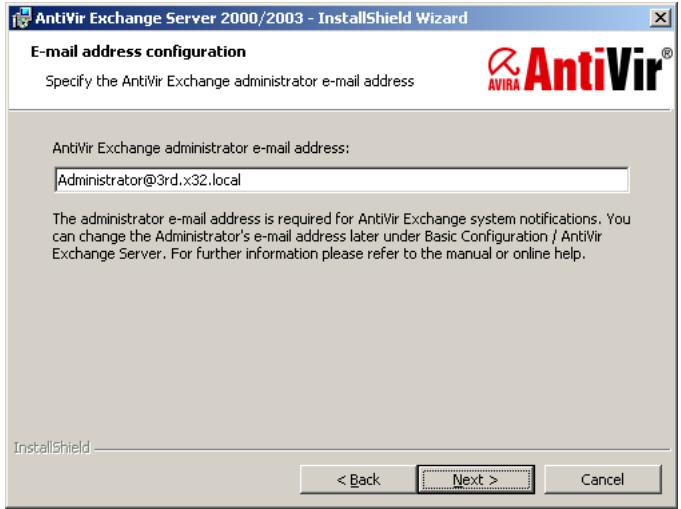
In the next dialog, specify the Administrator's e-mail address:
-
See also "Installation in Cluster" on page 12
-
A summary of your settings is now displayed:
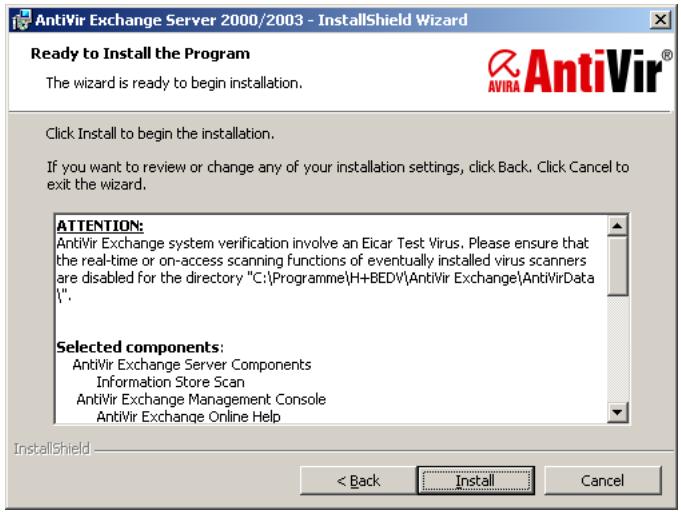
- Now disable the on-access scanners for the . . .\AntiVirData directory, unless you have already done so.
- Check your configuration settings.
These settings will be added as standard entries to the configuration of the AntiVir server. For details refer to “AntiVir Server Settings” on page 24.
- Follow the instructions on screen and click Install. AntiVir is installed to the following directory:
< LW> : \
When you click Finish in the final dialog, Avira AntiVir Exchange is fully installed.
If you are interested in a solution for multi-server environments please contact: support@avira.com.
4.4 Installation in Cluster
If you are interested in a solution for cluster please contact: support@avira.com.
4.5 Uninstallation of Avira AntiVir Exchange for Exchange
Click Start and select
- Settings Control Panel Software.
- Select the Avira AntiVir Exchange Server 2000/2003.
- Click Change to call the Setup.
- In the Welcome window, click Next.
- In the selection dialogue, click Remove program.
- Click Next and confirm with Remove.
The Setup then uninstalls Avira AntiVir Exchange without removing your configuration and the Quarantine data. A decision concerning this data can be taken separately after completing the uninstallation:
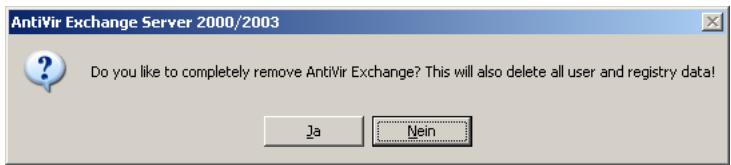
Click No if you want to keep your configuration and Quarantine data and Yes if all Avira AntiVir Exchange components are to be deleted.
4.6 Insert Licence File
Copy the licence file into the directory C:\Program Files\H+BEDV\Anti-Vir Exchange\Licence.
Restart the service AntiVir for Exchange to actually activate the licence.
5 General
5.1 The Architecture of Avira AntiVir Exchange
Avira AntiVir for Exchange consists of three main components:
- AntiVir Exchange Management Console
- AntiVir Server
- AntiVir Exchange Configuration (Also refer to "Configuration in the Avira AntiVir Exchange Management Console" on page 23).
5.1.1 AntiVir Exchange Management Console
The AntiVir Exchange Management Console is the "cockpit" from where Avira AntiVir Exchange is configured and administered. It is a so-called "Snap-In" for the MMC. The AntiVir Exchange Management Console can be used to administer individual Exchange server with AntiVir Exchange installed as well as entire "AntiVir server farm". This simplifies daily administration tasks, in particular in a multi-server environment. With the AntiVir Exchange Management Console, the Administrator has access to all configuration information needed and the AntiVir Monitor (Quarantine) of the AntiVir servers.
Two different access methods are used for configuring the system and for accessing the quarantine.
- Standard Windows file access
Windows file access is used for accessing the AntiVir Exchange configuration file, for example for changing the security settings. The AntiVir Exchange configuration file can be available locally or accessible through a Universal Naming Convention (UNC) path.
- SOAP and SSL
The AntiVir Monitor (see "AntiVir Monitor" on page 50) is accessed through SOAP and SSL using a permanently assigned communication port.
The AntiVir Exchange Management Console supports two operating modes.
- Local Administration
Here, AntiVir Exchange Management Console is run directly on the Exchange server on which all components of AntiVir Exchange are installed. This mode is suited for smaller systems and for managing the server locally.
- Remote Administration
In this case, the AntiVir Exchange Management Console is not installed on the Exchange server, but on a client.
The AntiVir Exchange Management Console can run under the following client operating systems:
- Windows 2000 Professional
- Windows 2003
- Windows XP Professional
Remote administration is suited for central administration in multi-server environments, with the AntiVir Exchange Management Console accessing one or more Exchange servers to configure and administer AntiVir Exchange.
5.1.2 The AntiVir Server
All of the functions and processes of the AntiVir Exchange which run exclusively on the Exchange Server are referred to as AntiVir Server. The AntiVir Server can be installed in simple environments as well as in front-end/back-end environments. It is divided into different sections.
5.1.3 The Grabber
The Grabber is a process ensuring that all messages, schedule queries, etc. sent, received or routed by the Exchange server are grabbed. The SMTP protocol is used for transporting e-mail, schedule queries, etc. The entire e-mail traffic is channeled through the SMTP Advanced Queue (a part of the SMTP protocol), regardless of whether the mail is internal (between mailboxes on the same server or mailbox store), inbound or outbound.
All messages must go through the Advanced Queue.
The Grabber is "latched in" to this Advanced Queue. As a registered event sink, it monitors the mail traffic and routes all relevant information to the AntiVir Exchange Service – the second component of Server. Each message is held there until the AntiVir Server has finished processing it.

Internal Exchange information, for instance replication messages, are recognized as such by the Grabber and left in the Exchange system unchanged.
5.1.4 The AntiVir Service = Enterprise Message Handler (EMH)
As Windows service, the AntiVir Exchange service is started on a permanent basis and uses all information provided by the Grabber. From then on, the subsequent processing through AntiVir Exchange is entirely monitored and controlled by the AntiVir Exchange service. If the AntiVir Exchange service is stopped, the AntiVir Exchange security functions are switched off. The AntiVir Exchange service has access to all information required, including, for instance:
the configured AntiVir jobs,
the installed AntiVir Exchange license,
the Active Directory,
the AntiVir Quarantine
Using this information, it scans messages for viruses, identifies and quarantines spam and adds legal liability disclaimers.
After processing is complete, the AntiVir Exchange service returns the e-mails to the Exchange server.
5.1.4.1 AntiVir Quarantine
Virus-infected or other undesirable messages can optionally be stopped on the server to prevent them reaching their intended recipients. These messages are instead placed in the AntiVir Quarantine. Several default quarantines are set up on each AntiVir server during installation. The administrator can set up additional quarantines.
AntiVir quarantines consist of
a quarantine directory on the Exchange server
(..AntiVirData\Quarantine\Default-Quarantine),
the messages copied into the quarantine,
- a quarantine database (LocIdxDB.mdb).
For each e-mail quarantined e-mail, Avira AntiVir Exchange automatically creates an entry in the Quarantine database, a Microsoft Access file.
The following information is stored in that database:
- Message Subject line
- Date and time
- Message sender
- Message recipient
- Short description of the applicable restriction
- Message size
- Name of the AntiVir job that quarantined the message
- Name of the Exchange server
- Name of the mail file
- Processing history
When you view an AntiVir Quarantine using the AntiVir Exchange Management Console, the information from the Quarantine database is shown first. When you open a Quarantine entry, further information is read from the message file.
For communicating with the Quarantine, AntiVir uses SOAP (Simple Object Access Protocol) and SSL (Secure Socket Layer). This applies both to local access directly on the server and to access from remote Windows workstations. By default, port 8008 is used for communications. You can change this port in the AntiVir Exchange Management Console (AntiVir Servers node), but you must then also make this change in all other AntiVir Exchange Management Consoles that access the server. All stations must use the same port. SSL is used to encrypt the SOAP communications channel. The required components are included with the package.
Only authorized persons have access to the AntiVir quarantines via the network.
The user privileges are set through the properties of the file access.acl
(....\H+BEDV\AntiVirExchange\AppData). These privileges are checked by the AntiVir Exchange service. If not logged on to the server, you must authenticate yourself when calling the Quarantine for the first time. The authentication information is temporarily stored so that subsequent calls (in particular of other quarantines) use the same login information. If that fails, a user name and password input dialog appears.
For successful access, the following conditions must be fulfilled:
- The AntiVir Exchange service is running.
- The communication port (default: 8008) is available.
- The station's name can be resolved and accessed through TCP/IP.
- The user has the required Windows user rights.
5.1.4.2 Active Directory / LDIF
Avira AntiVir Exchange does not make any changes or additions to the Active Directory. However, Avira AntiVir Exchange does read various information from the Active Directory.
When started, the AntiVir Exchange service determines the available Global Catalog server, which is used, for example, for resolving addresses in distribution lists during e-mail processing.
The AntiVir Exchange Management Console uses the Active Directory to select sender/recipient conditions.
If an Active Directory is not available – for example because the corresponding ports are not open – an LDAP file can be used. This can, for example, be created through an LDAP export from an Active Directory, an Exchange 5.5 user directory or a Notes Name and Address Book (NAB).
5.1.4.3 Compressed Files and Archives: The Avira AntiVir Exchange Unpacker
Files are often compressed (zipped) before being sent by e-mail. To allow compressed files to be scanned for viruses, Avira AntiVir Exchange unpacks the files before running the scan. An unpacker is automatically installed with Avira AntiVir Exchange.
The unpacker supports the following archive formats:
- ACE
CAB
ZIP - Selfextracting ZIP
ARJ - Selfextracting ARJ
TAR
GZIP - TGZ (Tape archive)
- UUE (Executable compressed ASCII archive)
LZH (LHARC)
RAR
- Selfextracting RAR
- Java Archive (.jar)
BZIP2

Archives can themselves contain further archives. These recursively compressed files are by default decompressed to a nesting depth of five levels. All archives exceeding this nesting depth are moved to the badmail folder (see "Badmail" on page 56).
The standard upper limit for an e-mail including unpacked files is 500 MB. Such a limit is particularly important to handle so-called "ZIP of Death" attacks.
You can change the recursion depth and the space restriction on the console under AntiVir Servers Properties General tab.
5.1.5 Avira AntiVir Exchange Configuration Settings
All information required to run Avira AntiVir Exchange is saved in the Avira AntiVir Exchange configuration file, an XML file named ConfigData.xml.
The structure of the ConfigData.xml file is similar to that of a database: various entries exist for each configuration area. Since all configuration settings are stored in a single file, the configuration can be easily distributed and backed up. If you have a problem with the configuration, you can simply send the ConfigData.xml file to the Avira Support team for assistance.
The configuration settings are needed by both the AntiVir server and the AntiVir Exchange Management Console. The AntiVir server needs it, for example, for information on the AntiVir jobs to be carried out. To make changes to the configuration with the console, the console must be able to access the ConfigData.xml file. The configuration file can be placed both in a local directory and on a shared network path. The Avira AntiVir Exchange configuration used by the AntiVir Exchange Management Console and the AntiVir server is specified through an entry in the Registry. The path to the configuration file can be entered in the format C:.... or as UNC path (\Servername\Share\Config-
Data.xml). If the specified Avira AntiVir Exchange configuration file is not available, Avira AntiVir Exchange uses the "last known good" configuration, which is logged in the Windows events log. The last known good configuration is saved locally for each server and is updated whenever the Avira AntiVir Exchange configuration is changed and access from the Avira AntiVir Exchange configuration file to the last know good configuration is possible.

To open a non-standard configuration with the Console, you must specify the file with a special parameter. Run Avira.msc file with the parameter config and the desired configuration file. For example:
"C:\Programme\Avira GmbH\AntiVir Exchange\Avira.msc" config "C:\OtherDirectory\Directory\ConfigData.xml"
You can also specify a UNC path here.
For detailed instructions for customizing the Avira AntiVir Exchange configuration, refer to "Configuration in the Avira AntiVir Exchange Management Console" on page 23.
5.2 Message Processing Sequence
The sequence is as follows:
- An e-mail message arrives at the mail server.
- The e-mail is intercepted from the SMTP Advanced Queue by the Grabber.
- The Enterprise Message Handler (EMH) [= AntiVir Exchange Service] fetches the mail for processing.
- According to the configuration settings, the EMH checks whether or not the e-mail is to be processed by Avira AntiVir Exchange.
- Messages to be processed are dealt with as specified in the configuration settings (jobs by priority).
- When processing is complete, the EMH releases the e-mail and, if applicable, modifies the e-mail as configured.
5.3 User Interface
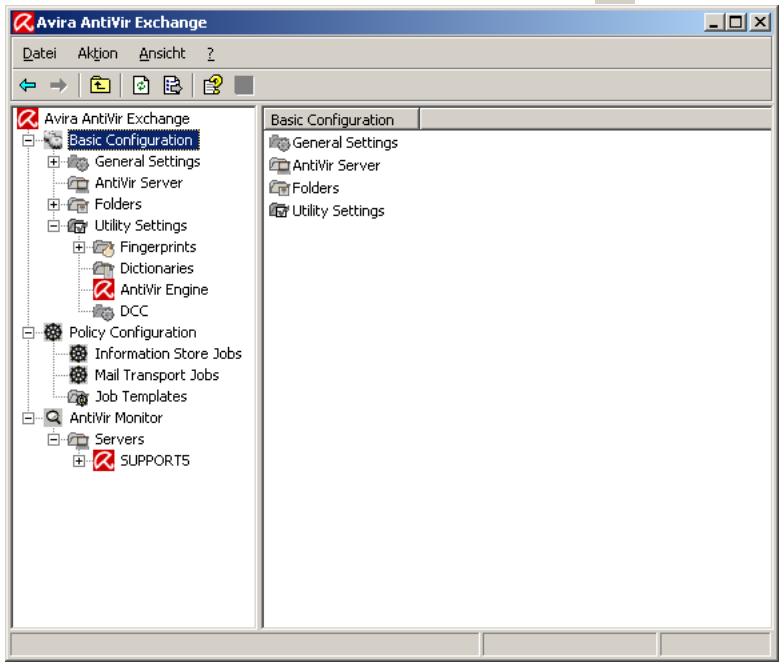
After you have opened Avira AntiVir Exchange, select Basic Configuration, Policy Configuration or AntiVir Monitor in the left column. The right window then shows the corresponding subfolder. To view the online help, click on the toolbar or select Help in the Action menu
5.3.1 The Toolbar
Previous
Next
Up one level
Properties of the selected item
Update view
Export list
Help
Save
Move up one position
Move down one position
Enable job
Disable job
New item
Set filter in quarantine/badmail
Disable filter in quarantine/bad
5.3.2 The Icons
AntiVir Exchange Management Start console and logo.
Basic Configuration for general settings for all modules
Node for Global settings.
The address list folder.
An individual AntiVir address list (orange collar). Included by
default in Avira AntiVir Exchange, cannot be edited.
An individual user-defined address list (yellow collar). Created by
the user and configurable under Properties.
The Notification Templates folder, which contains the individual
templates notification for each job type and recipient.
An individual notification template; configurable under Proper
ties.

A list of all AntiVir servers, in which you can add, remove and configure servers. The common server properties are defined under General Settings AntiVir Servers Settings. konfiguriert. Alternatively, right-click AntiVir Servers Properties. This includes the default e-mail addresses and the internal domain(s).

General AntiVir Servers settings under the node General Settings in the right window section.

Folder Settings and Utility Settings. Folder Settings contains the quarantines, while Utility Settings contains all add-ons, such as virus scanners.

The Quarantine folder structure, which contains all quarantine folders.

An individual quarantine folder; configurable under Properties. The Fingerprints folder.

A logically linked fingerprint group.

An individual fingerprint; configurable under Properties.

The folder for the dictionaries used for content filtering.

An individual dictionary; configurable under Properties.

DCC Folder

A single DCC configuration.

Policy Configuration for configuring individual jobs according to the company policy.

Folder for sample jobs; contains sample jobs for each job type.

An AntiVir with different job types, configurable under Properties.

An AntiVir with different job types, configurable under Properties.

The AntiVir Monitor for viewing all quarantine folders on each available server. The quarantine folders contain the copies of original messages including attachments.

The Quarantine folders with original messages for viewing, including detailed information for each message.

A single quarantined item.

An invalid quarantined item.


A resent quarantined item.

Information Store quarantine item.

Time and weekday of quarantine maintenance.

Folder for reports supplied with AntiVir.

Individual AntiVir report.
5.4 Configuration in the Avira AntiVir Exchange Management Console
The AntiVir Exchange Management Console window consists of three sections:
Basic Configuration
The Basic Configuration is used for general settings and the essential basic settings of the modules.
Policy Configuration
The Policy Configuration is used to implement the company policies by way of jobs.
- AntiVir Monitor
The AntiVir Monitor allows to view the Quarantine areas on each available server as well as detailed information on the mails quarantined there.
5.5 Basic Configuration
In the Basic Configuration, you can make
the general settings, such as:
- Adress lists,
- Notification Templates
- all Folders (such as the Quarantines)
and Utilities:
- dictionaries and the DCC server for content checking,
- Fingerrpints for blocking attachments,
- the virus scanners and
- unpackers
5.5.1 Configuration Reports
The configuration reports provide an overview of the current configuration:
- Right-click on Basic Configuration.
- Click All Aufgaben Show configuration reports ...
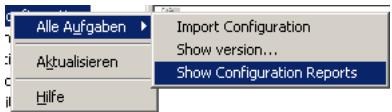
- A list of all configuration reports is displayed:
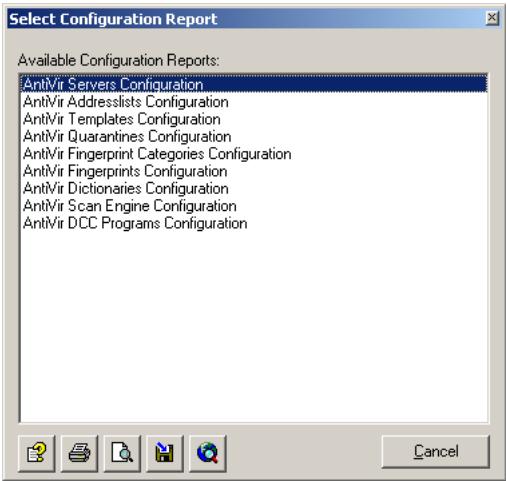
Click on the desired report and then on Display report: . The report is opened as HTML file in the browser. Click Preview Report for a preview of the printed report.
Click Save Report to save the selected report as HTML file.
5.5.2 Import Configuration
To update any of the above elements and items, such as dictionaries and fingerprints, with a new version, select Basic Configuration All Tasks Import Configuration and select the XML file provided by Avira GmbH

This function updates only individual jobs, not the complete configuration (ConfigData.xml).

Before you update a Basic Configuration object, make a backup copy of the existing object. The new version replaces the old one, overwriting any user-defined settings.
5.5.3 AntiVir Server Settings
The AntiVir Server Settings option is used to configure the standard settings for all AntiVir servers1. Additionally, each server can be configured individually; for details refer to "Individual Server Settings" on page 27.
Select Basic Configuration General Settings, in the right window section click on AntiVir Server Settings and select Properties from the context menu (right-click) or open the Properties with a double-click. As an alternative, in the left window section under Basic Configuration, right-click on AntiVir Servers to open the Properties.
- For background information refer to "The AntiVir Server" on page 16.
5.5.3.1 Packed Files and AntiVir Monitor
The settings on the General tab set the maximum size of unpacked files on the hard disk1 and the maximum recursion depth on archives2. Whenever an e-mail exceeds one of these values, it is moved to the Bad Mail area.

Be sure to use a correct setting for the communication port for AntiVir Monitor. Otherwise, communication with the servers will be impossible.
Usually, 8008 is used (also entered as standard port during installation). The values specified here apply to all servers.
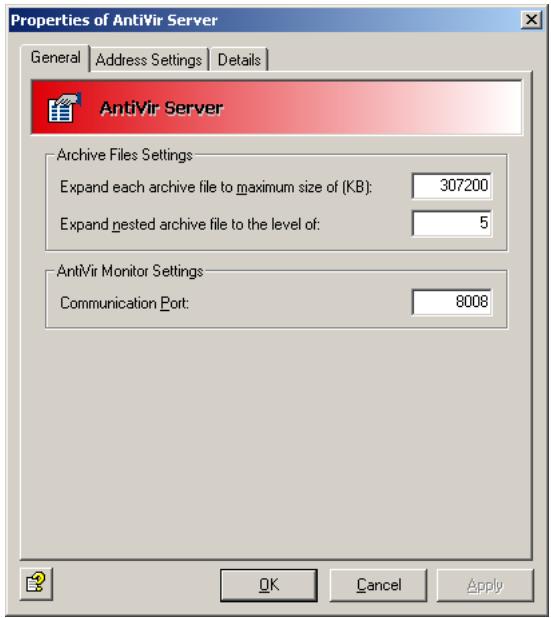
In this context, also read the description on allocating rights and security settings under "AntiVir Monitor" on page 50.
5.5.3.2 Definition of e-mail addresses and internal domains
Avira AntiVir Exchange requires a number of basic settings concerning the mail domain of the e-mails processed. During installation, the e-mail address of the AntiVir Administrator specified is used for the following Avira AntiVir Exchange basic settings:
- Also refer to ZIP of Death in the "Glossary" on page 135
- Also refer to "Compressed Files and Archives: The Avira AntiVir Exchange Unpacker" on page 18
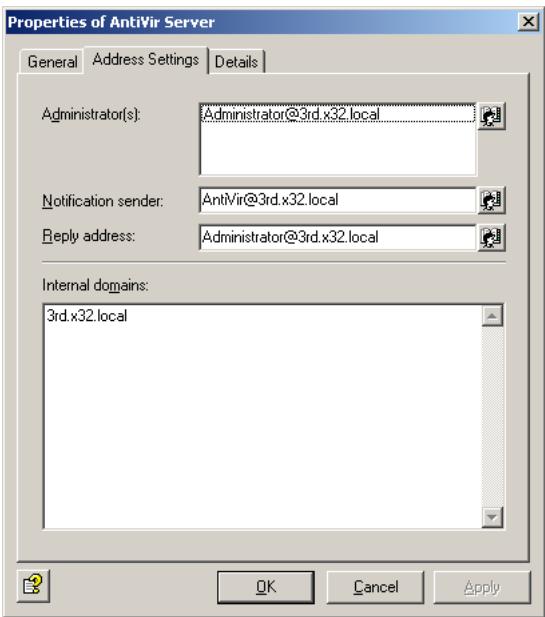
- Administrator(s): The AntiVir administrator addresses entered in this field will receive important status notifications on the Avira AntiVir Exchange installation as well as the configured Administrator notifications. As default, the installation enters the administrator address prompted for.
- Notification sender: The sender shown in the Avira AntiVir Exchange notifications. As default, the installation enters Avira AntiVir Exchange with the mail domain of the administrator address prompted for.
- Reply-to address: The recipient stored in the Avira AntiVir Exchange notifications of replies to these notifications. As default, the installation enters the administrator address prompted for.
- Internal domains: The mail domains entered in this field are considered as internal mail domains, all others as external mail domains. This setting is used to enable the Avira AntiVir Exchange rule engine to identify incoming and outgoing through the sender and recipient addresses. For instance, a spam filter job will only apply to incoming mails, while a trailer is not to be added to an incoming mail.
Multiple domains are separated by Carriage Return. Subdomains are automatically included, when the main domain is preceded by a " wildcard, e.g..domain.com. As default, the installation enters the mail domain of the administrator address prompted for.
These entries apply to all Avira AntiVir Exchange servers. The settings can be changed at any time in the same window.
5.5.4 Individual Server Settings
Select Basic Configuration, in the left window section click Antivir Servers and double-click the required server to select it. To define a new server, right-click AntiVir Servers New AntiVir Server. Right-click Properties.
5.5.4.1 General Server Settings
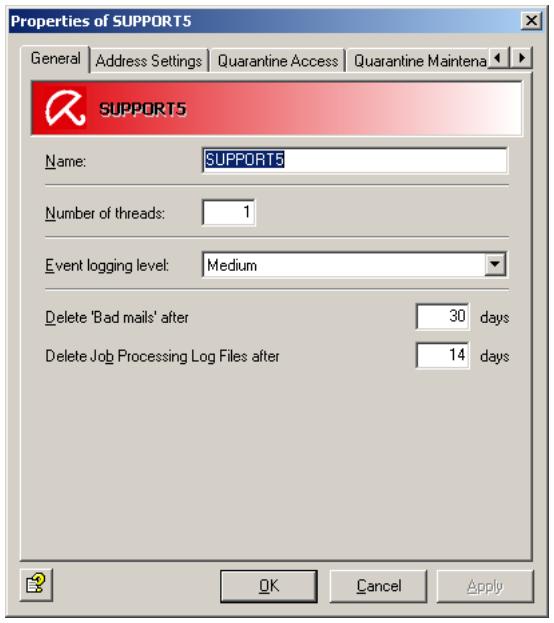
- Enter the name of the Exchange server. During the installation, the current Exchange server is automatically entered as the internal domain.
- Set the maximum number of e-mails processed simultaneously by Avira AntiVir Exchange in the field Number of Threads. A reasonable maximum depends on the capacity and performance of your server.
- Select the logging level for the event log. You can view this log with the Event Viewer (Windows Event Log). The options range from None to Maximum
- Set the number of days the mails are to remain in the Bad Mail Quarantine. When this period expires, the mails are automatically deleted.
- Set the number of days after which a job processing log in the Log folder is to be deleted. Refer to "Write processing log" on page 64.

To be able to access a newly created server in the Monitor, refresh the view in the Monitor (right-click on AntiVir Monitor Refresh or click on the refresh symbol in the tool bar).
5.5.4.2 Defining Global E-Mail Addresses for a Single Server
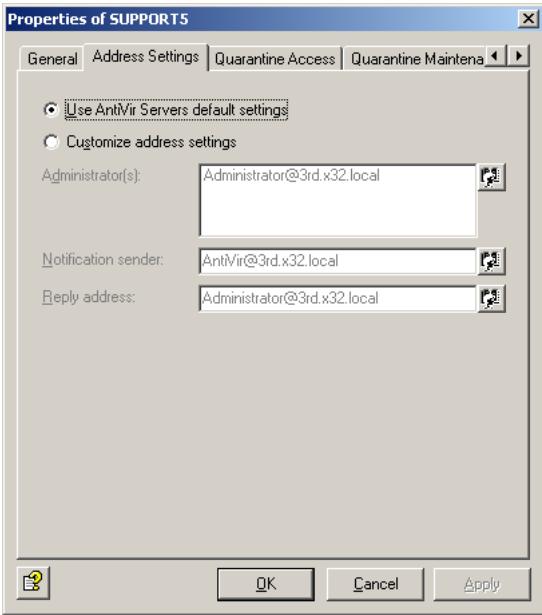
The user-defined and default installation settings in the Properties for all AntiVir servers are copied to each individual server. These are the default setting for AntiVir servers. To specify different settings for a specific server, select Customize address settings and enter the new addresses in the appropriate fields.
5.5.4.3 User-specific Quarantine Access
With Avira AntiVir Exchange, users can access their quarantined messages themselves. For each quarantine, you can specify individual access rules for messages and users. This function is especially useful for spam filtering, i.e. for the spam quarantines. It also helps to reduce the administrator's workload by allowing users to forward quarantined messages to their inboxes. For each server you can specify whether and how users can access their quarantined mail. The user receives a summary report on quarantined mails, clicks on the corresponding action for the selected mail and, by doing so, sends a request. These actions are configured individually for each quarantine and include Request (delivery to the recipient of the summary notification), Release (delivery to all recipients) and/or Remove (mail marked for deletion in the quarantine). The user gets access through a mail request or a HTTP request. Click the Quarantine access tab:
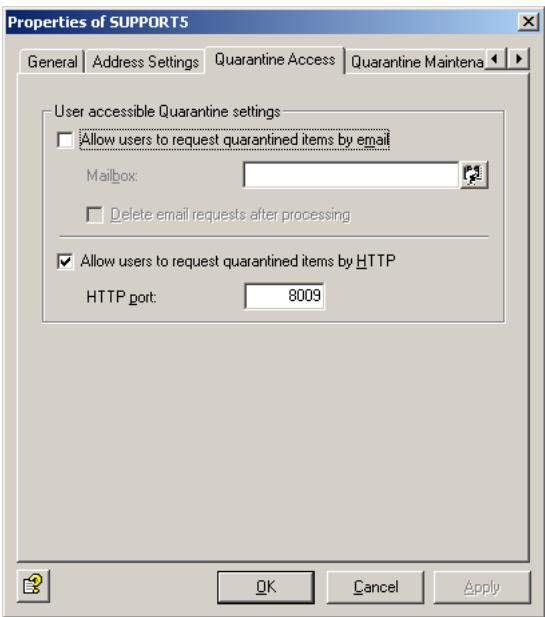
Allow users to request quarantined items per mail: Quarantine queries are started by a mail request. This message is generated automatically when the user clicks the action link for a quarantined message in the summary report1 and is sent to the e-mail address entered in the Mailbox field on this tab. A precondition is that the e-mail address exists and that the mail is sent through the server on which Avira AntiVir Exchange (and the queried quarantines) are installed. We recommend that you set up the mailbox on the same server. The message content is read out, thereby triggering the action requested by the user. Avira AntiVir Exchange recognizes request messages by
- the e-mail address (specified in the Mailbox field),
- the keyword for a user request in the message.
Finally the request message is placed in the specified mailbox. To delete request messages once they have been processed, check the Delete request mails after processing option.
Allow users to request quarantined items per HTTP: Quarantine queries are started by an HTTP request. When the user clicks the required action, the default Web browser opens. The user is notified that the inquiry is being processed. The precondition for this inquiry is a free port. The default port is 8009.

The browser always displays the same feedback message (OK_Response.html in the AntiVirExchange\AppData directory). If the requested message no longer exists (for example because it has been deleted from the quarantine), the user is not notified.
For further information on configuring user-specific quarantine access, refer to "Configuring the Quarantine" on page 43.
- Also refer to "Defining Quarantine Summary Reports" on page 44
5.5.4.4 Quarantine Maintenance
Use this tab to specify the time at which the quarantine on the servers is to be purged. This deletes all messages marked for deletion to make space for newer messages. The default setting is each Saturday at 3:00 a.m. If you wish to modify the time and/or the purge period, click Edit und enter the selected time.


If necessary, you can also purge quarantines manually. To do so, open the quarantine in the AntiVir Monitor and right-click All Tasks Purge Quarantine.
5.5.4.5 Viewing list of all jobs
In the tab AntiVir Jobs you will get a list of all the jobs, which are defined on this server.

If you want to edit a job on the server, open the job properties. Refer to "Policy Configuration" on page 47
5.5.5 Address Lists
5.5.5.1 Creating, Editing and Deleting Custom Address Lists
In the Basic Configuration General Settings under Address lists, you can create your own address lists to be selected for individual jobs. The available addresses are taken from the Active Directory.
To create an address list, perform the following steps:
- Click Address lists.
- Right-click and select New Address list from the context menu.
- Enter a meaningful name for the address list.
- Click the Select addresses icon:
- In the window that opens, select the addresses to be added and click Add:
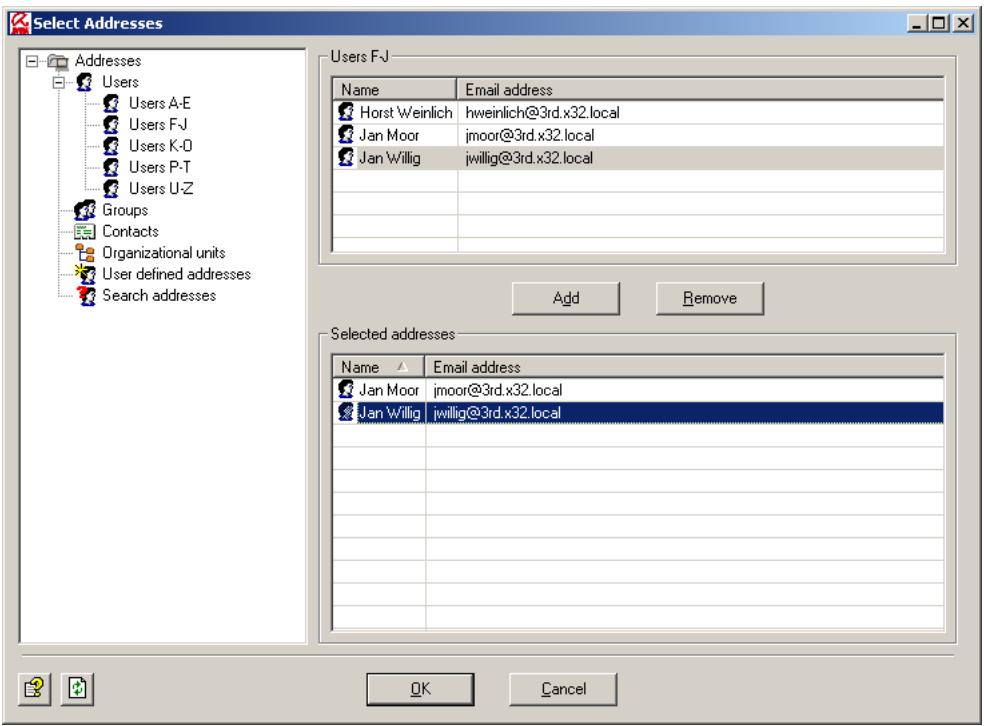
To add your own addresses to the address list, enter them in the input field. You can use the wildcards * (asterisk) and ? (question mark). it is also possible to enter formally invalid e-mail addresses such as info@domain. Press the Enter key before each new entry to place it on a new line.
To search for an entry in a large list of custom addresses, click the symbol. This text search function is also available for dictionaries. For further information on searching and replacing, see "Searching for Text in Dictionaries" on page 99.
To remove an entry from the list, select it and click Remove.
6. Click OK.
- Your address list should now look like this:
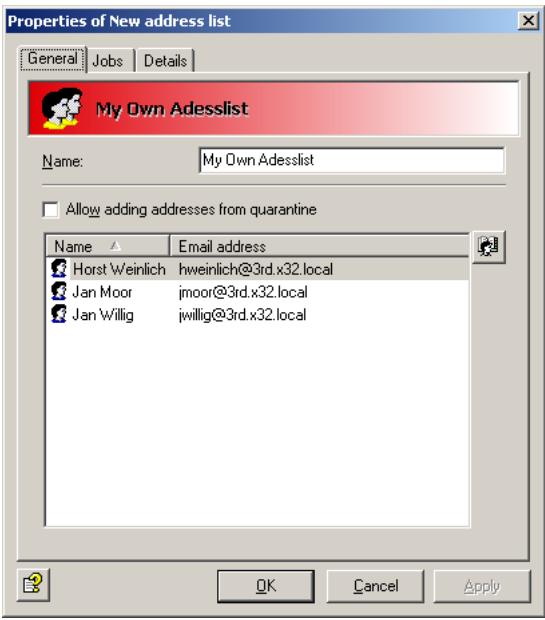
Allow adding addresses from quarantine: Use this option to specify whether or not addresses from quarantined messages can be directly added to this address list. When checked, you can add the quarantined mail's sender address to various address lists with the Add button in the AntiVir Monitor.
By default the following address lists are enabled for direct access:
- Anti-Spam: Blacklist
- Anti-Spam:Newsletter Blacklist
- Anti-Spam:Newsletter Whitelist
- Anti-Spam: Whitelist
8. Click OK again.
To edit or delete your address list, select Address lists. To delete the address list, right-click it and select Delete from the context menu.
5.5.5.2 Using and Handling Addresses Within a Job
In each job, the Addresses tab allows to set the users for whom a job is valid. Most of the current application cases can be set with options available:
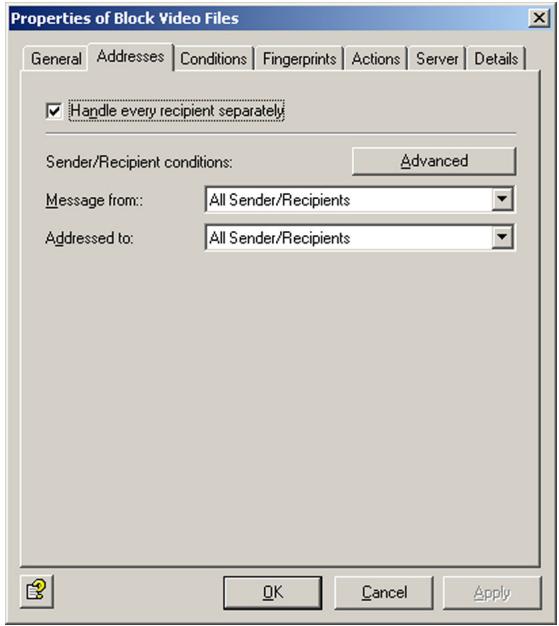
Set whether the job is to be valid for all users or restricted to internal or external users. This selection is available for senders and recipients.
Both conditions in the Message from and Addressed to fields must come true for an action to be triggered (logical AND!).
Handle every recipient separately (Split): If a message is addressed to several recipients and one or more of these are entered in an address filtering job, the message is split into two e-mails: one for the recipients specified in the address filtering job and one for the remaining recipients. Only the message with the specified recipients is processed by the job. The message is not split if no address filtering was defined for the recipients! Note that splitting messages affects the performance of your server.
Example: scanning for viruses
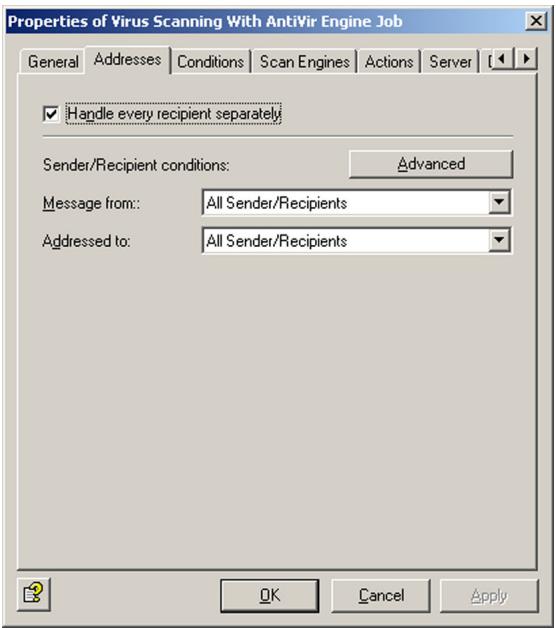
Corporate policy: You want to scan all messages for viruses. In this case it is not enough to scan messages from external domains only: you also have to make sure that no infected mail leaves the company. The specified actions (scanning for viruses, if necessary cleaning the file and sending a copy to quarantine), must therefore be performed regardless of the sender and recipient address.
Implementation: The action is executed for Message from:
These are the address settings for the job:
The Advanced window of the Addresses tab provides options for an easy implementation of more complex corporate policies1. Click on the Advanced button:
Click the Basic button to return to the standard selection.
Example job for blocking file attachments
Company policy: Let us assume you want to block messages with attached video files from Internet domains unless they are addressed to Marketing or Management.
- Run this job when a message arrives from checks the sender, as well as the exception Except where addressed from.
- And where addressed to checks the recipient, as well as the exception Except where addressed to.
Implementation: The address settings in the job should look as follows: The specified job action (i.e. blocking files with video attachments) is performed for the
- Also refer to "Policy Configuration" on page 47
Under Except where addressed to, enter the Marketing and Management addresses. If you have not already entered these as a group in the Active Directory, you can enter them individually. All video attachments from external senders to internal recipient will now be blocked unless the recipient is a member of the Marketing department or a corporate manager. These are the address settings for the job:
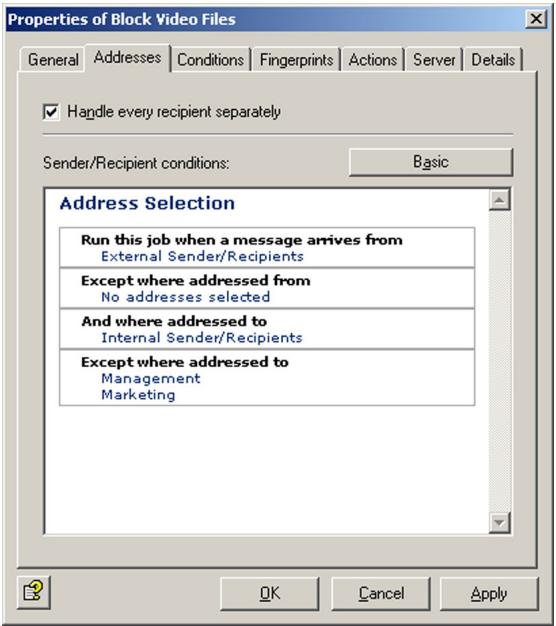

All specified conditions in the senders are and recipients are fields must be fulfilled for an action to be initiated (logical AND). If several addresses are entered within the same condition (e.g. senders are), only one has to apply to trigger the action. The exceptions (except where addressed from/to ...) have no effect on the initiation of this action and are only taken into account in addition to the specified conditions. Messages to or from these addresses are forwarded without further processing.
To specify the addresses for a specific condition, click Internal Senders/Recipients, No addresses selected or a corresponding entry in the exceptions. This opens the Address Selection dialog:
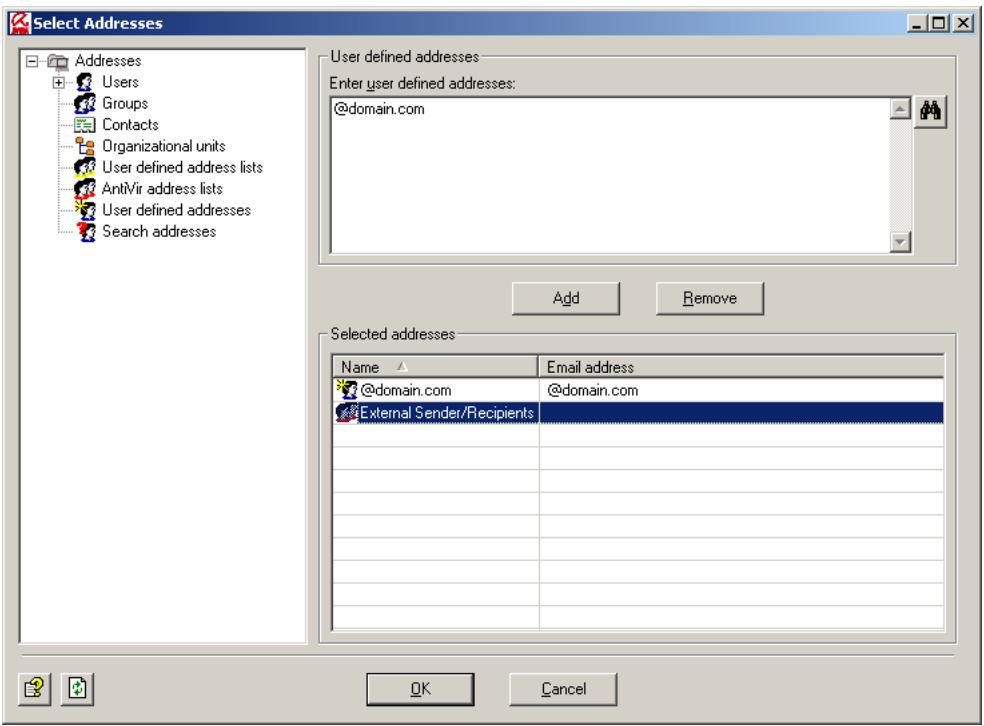
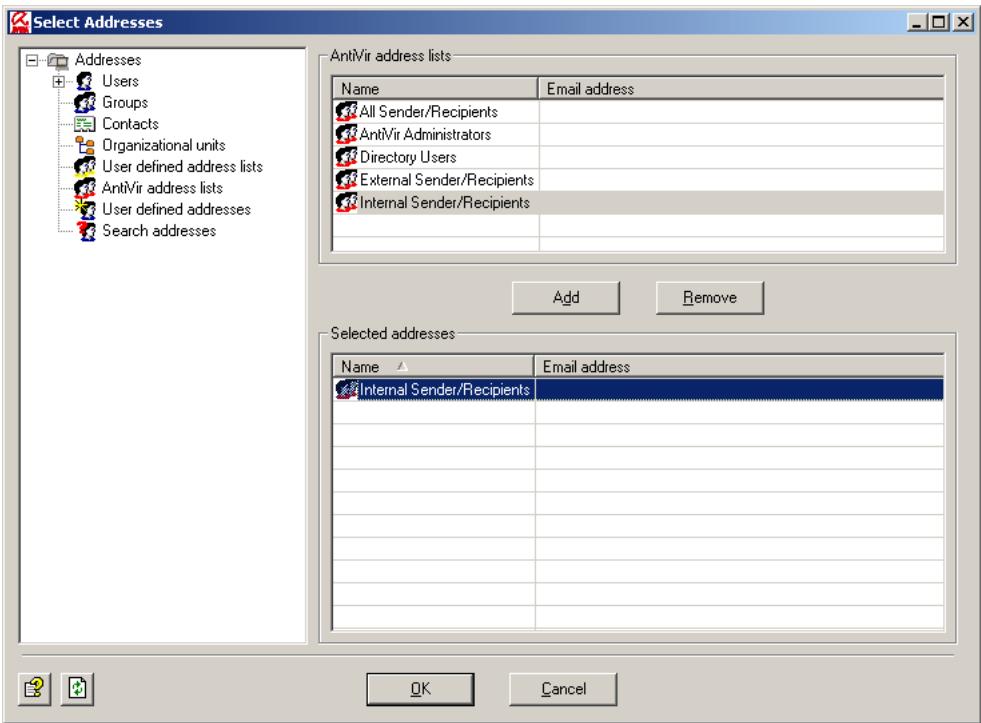
You can also use the AntiVir address lists:
The AntiVir address lists are permanent lists, generated from the global AntiVir Server settings that are prompted for and entered during installation or which you have configured manually. Also refer to "AntiVir Server Settings" on page 24.
5.5.6 Create Notification Templates
In each job, under Actions, you can specify the persons to be notified when Avira AntiVir Exchange has intercepted a denied message. You can create new jobs using templates: simply select the appropriate template for the job type. For further information on the individual job types, see "Policy Configuration" on page 47.
The notification templates for the individual jobs (content filtering, virus scanning, etc.) are created under Basic Configuration.
You can find standard notification templates for each module under Basic Configuration General Settings Templates.
- Click Templates and select the template type.
- In the right pane, right-click the template you want to use and select Properties.
- Enter the subject.
- For the notification body text, click the Notification Body tab and then Edit. To add layout to your text with HTML, use the Formatting toolbar. To enter HTML tags directly, open the source code with the button.
- The Jobs tab lists the jobs that use the notification template.
- Click OK.
For further information on the template type Quarantine summary report, refer to "Defining Quarantine Summary Reports" on page 44.
5.5.6.1 List of Notification Variables
In the message body and Subject line, you can enter the following variables, which you can also insert directly with the button [v]:
| Category, Variable-Type | Variable | Description |
| General | ||
| General: Sender | [VAR]From[/VAR] | Sender of the message that triggered the action |
| General: Subject | [VAR]Subject[/VAR] | Subject line of the message that triggered the action |
| General: Date and Time | [VAR]Date[/VAR] | Date and time at which the job that started the action was run |
| General: Date | [VAR]DateOnly[/VAR] | Date on which the job that started the action was run |
| General: Recipi- ent(s) | [VAR]Recipients[/VAR] | Recipient of the message that triggered the action |
| General: Job Name | [VAR]Jobname[/VAR] | Name of the job that started an action |
| General: Non-appli-cable recipient | [VAR]UnrestrictedRecipi-ents[/VAR] | Recipients of the message that triggered the action who were not defined in the (inbound) address condi-tions |
| General: Quarantine folder | [VAR]Quarantine[/VAR] | The quarantine in which a message was placed |
| General: ID of a quarantine e-mail | [VAR]QuarantineDocRef [/VAR] | Unique identifier of the quarantined mail |
| General: Server | [VAR]Server[/VAR] | Server through which the affected message was sent; here: the name entered in the configuration settings |
| General: Server (Network name) | [VAR]ServerFQDN[/VAR] | Server through which the affected message was sent; here: the server's network name (fully qualified domain name) |
| General: Time | [VAR]TimeOnly[/VAR] | Time at which the job that started the action was run |
| General: Avira Anti-Vir Exchange Report | [VAR]ToolReport[/VAR] | Summary of the scan results |
| General: Avira Anti-Vir Exchange Report (Details) | [VAR]ToolReportDetails [/VAR] | Result of the scans with all details |
| General: Applicable recipient | [VAR]RestrictedRecipients [/VAR] | Recipients of the message that triggered the action who were defined in the (inbound) address condi-tions. |
| AntiVir | ||
| AntiVir: Attachment size | [VAR]AttachmentSize [/VAR] | Size of the denied/infected attachment |
| AntiVir: Attachment type | [VAR]FingerprintName [/VAR] | Name of the denied file type |
| AntiVir: Finger-print category | [VAR]Fingerprintcate-gory[/VAR] | Category of the denied file type |
| AntiVir: e-mail size | [VAR]MessageSize[/VAR] | Size of the whole message |
| AntiVir: Attach- ment Name | [VAR]AttachmentName [/VAR] | Names of the denied/infec- ted attachments |
| AntiVir: e-mail size limit | [VAR]SetSizeLimit[/VAR] | Maximum message size spe- cified in the job |
| AntiVir: Virus name | [VAR]Virusname[/VAR] | Names of the found viruses |
| AntiVir: Virus scan- ner | [VAR]VirusScanner[/VAR] | Names of the scan engines that have found the virus |
Information Store Scan
| IS-Scan: Database | [VAR]VSAPI_Database[/VAR] | Name of the Information Store in which the message was located at the time of the virus scan |
| IS-Scan: Databases URL | [VAR]VSAPI_Url[/VAR] | URL of the Information Store, in which the message was located at the time of the virus scan |
| IS-Scan: Error description | [VAR]VSAPI_ErrorText[/VAR] | Further description in the event of an error through the Information Store job |
| IS-Scan: Submit time | [VAR]VSAPI_SubmitTime[/VAR] | Date and time at which message was sent |
| IS-Scan: MessageUrl URL | [VAR]VSAPI_Message[/VAR] | Information Store URL of the message at the time of the virus scan |
| IS-Scan: Folder | [VAR]VSAPI Folder[/VAR] | Name of the Information Store folder in which the message was located at the time of the virus scan |
| IS-Scan: Mailbox | [VAR]VSAPI_Mailbox[/VAR] | Name of the mailbox in which the message was located at the time of the virus scan |
| IS-Scan: Server | [VAR]VSAPIServer[/VAR] | Name of the server on which the virus scan was performed through the Information Store scan |
| IS-Scan: Virus scanner | [VAR]viruscatterer[/VAR] | Names of the scan engine that has found the virus |
| Category, Variable-Type | Variable | Description |
| IS-Scan: Virus name | [VAR]virusname[/VAR] | Names of the found viruses |
| IS-Scan: Delivery time | [VAR]VSAPI_DeliveryTime [/VAR] | Date and time at which message was delivered |
| AntiVir Wall | ||
| Content filtering | ||
| AntiVir Wall: Con- tent analysis details | [VAR]DeniedContent- TabHTML[/VAR] | Detailed information about the found words/sentences |
| AntiVir Wall: Mail part | [VAR]DeniedMailParts [/VAR] | Attachments message body texts causing the action |
| AntiVir Wall: Rest- stricted dictionaries | [VAR]DeniedWordlists [/VAR] | Dictionaries triggering action because value/thres- hold value was reached |
| AntiVir Wall: Rest- stricted words | [VAR]DeniedWord[/VAR] | Word triggering action because value/threshold value was reached |
| Spam filtering | ||
| AntiVir Wall: DCC result | [VAR]DCCString[/VAR] | Return value of the DCC server after the message has been analyzed by the server |
| AntiVir Wall: Spam analysis details | [VAR]SpamReportHTML [/VAR] | Detailed information about each spam criterion |
| AntiVir Wall: Spam- probability | [VAR]SpamValue[/VAR] | Calculated spam probability value (from 0 to 100). This value is compared with the individually defined threse- hold values in the advanced spam filtering job. |
Category, Variable-Type
AntiVir Wall: Spam level
[VAR]SpamLevel[/VAR]
Description
AntiVir Wall adds a spam level in the form of a star rating in the header of each scanned message (for example X-SPAM-TAG: * indicates a spam probability between 0 and 10, X-SPAM-TAG: *** a probability between 20 and 30). You can define a rule that looks for this string in the Outlook message header and applies actions to message with more than a certain number of asterisks. For further information on creating rules in Outlook, see the Outlook help.
Address filtering
AntiVir Wall: Number of recipients
[VAR]NumberRecipient [/VAR]
Number of recipients to which the message is addressed
AntiVir Wall: Recipient number limit
[VAR]SetRecipientLimit [/VAR]
The maximum number of recipients defined in the job
AntiVir Wall: Restricted sender
[VAR]DeniedSender [/VAR]
Name of the sender that started an action
AntiVir Wall: Restricted recipient
[VAR]DeniedRecipient [/VAR]
Name of the recipient that started an action
Summary report
Summary: Sender
[VAR]From[/VAR]
Sender of the summary report
Summary: Reply to
[VAR]ReplyTo[/VAR]
Address to which replies to the summary report are to be sent (NotificationReplyTo)
Summary: Subject
[VAR]Subject[/VAR]
Subject of the summary report
Summary: Current summary report date
[VAR]Nowdate[/VAR]
Date on which the current summary report was generated
| Category, Variable-Type | Variable | Description |
| Summary: Last summary report date | [VAR]Lastdate[/VAR] | Date on which the previous summary report was generated |
| Summary: Current summary report date and time | [VAR]Now[/VAR] | Date and time at which the current summary report was generated |
| Summary: Last summary report date and time | [VAR]Last[/VAR] | Date and time at which the previous summary report was generated |
| Summary: Recipi- ents | [VAR]RcptTo[/VAR] | Recipients of the summary report |
| Summary: Fully qualified domain name | [VAR]FQDN[/VAR] | Full domain name of the server on which the quaran- tine for which a notificati- ons to be generated is located |
| Summary: Quaran- tine e-mail list | [VAR]HtmlList[/VAR] | Complete list of all quaran- tined items for a recipient with HTML formatting (compulsory field in the quarantine summary report) |
| Summary: HTTP Port | [VAR]HTTPPort[/VAR] | Port of the HTTP server |
| Summary: HTTP Server | [VAR]HTTPServer[/VAR] | HTTP server through which HTTP user requests are sent |
| Summary: Quaran- tine | [VAR]Displayname[/VAR] | Name of the quarantine from which the message list was generated |
| Summary: Server | [VAR]Server[/VAR] | Short name server on which the quarantine for which a notifications to be genera- ted is located |
| Summary: Current summary report time | [VAR]Nowtime[/VAR] | Time at which the current summary report was generated |
| Summary: Last summary report time | [VAR]Lasttime[/VAR] | Time at which the previous summary report was generated |
Category, Variable-Type
X-Block
X-Block: Name of the image with offensive contents
X-Block: Result of the of the image with offensive contents
Whitelist
Whitelist: WhiteList entries
Whitelist: Fully qualified domain name
Whitelist: HTTP port
Whitelist: HTTP server
Whitelist: Display name
Whitelist: Recipients
Whitelist: Reply To
Whitelist: Sender
Whitelist: Server
Whitelist: Size
Whitelist: Subject
Variable
[VAR]XblockAttachment [/VAR]
[VAR]XblockResult[/VAR]
[VAR]HtmlList[/VAR]
[VAR]FQDN[/VAR]
[VAR]HTTPPort[/VAR]
[VAR]HTTPServer[/VAR]
[VAR]Displayname[/VAR]
[VAR]RcptTo[/VAR]
[VAR]ReplyTo[/VAR]
[VAR]From[/VAR]
[VAR]Server[/VAR]
[VAR] CollectedSize[/VAR]
[VAR]Subject[/VAR]
Description
If several images were found, the one with the highest value is specified.
If several images were found, the one with the highest value is specified.
Complete list of all entries for a recipient with HTML formatting (compulsory field in the whitelist summary report)
Full domain name of the server on which the whitelist for which a notifications to be generated is located
Port of the HTTP server
HTTP server through which HTTP user requests are sent
Name of the whitelist from which the message list was generated
Recipients of the summary report
Address to which replies to the whitelist summary report are to be sent (NotificationReplyTo)
Sender of the summary report
Short name server on which the whitelist for which a notifications to be generated is located
Size of the whole whitelist
Subject of the summary report
| Category, Variable-Type | Variable | Description |
| Whitelist: Summary part | [VAR]SummaryPart[/VAR] | In case more than 3,000 new addresses are to be entered in a whitelist, the user receives several white-list reports. The variable returns the number of the summary report ("1" for the first 3000 entries, "2" for the next 3000 etc.). |
| Whitelist: Send whitelist by web | [VAR]link::HTTP_SendWh itelist[/VAR] | Whitelist request and notification occurs through HTTP |
| Whitelist: Send whitelist by mail | [VAR]link::MAIL_SendWh itelist[/VAR] | Whitelist request and notification occurs through e-mail |
| Whitelist: Clear whitelist by web | [VAR]link::HTTP_ClearW hitelis[/VAR] | Delete the whitelist through HTTP |
| Whitelist: Clear whitelist by mail | [VAR]link::MAIL_ClearWh itelist[/VAR] | Delete the whitelist through e-mail |

Note that the tokens [/VAR] and [/VAR] are case-sensitive and must always be written in capital letters.
5.5.7 Folder settings
5.5.7.1 Configuring the Quarantine
The quarantine is a directory in which all messages are placed that meet the criteria you have defined for the Copy to quarantine action. When Avira AntiVir Exchange is installed, a folder called Quarantine is created in the data directory, which contains initially some default quarantines and later all other new quaranti-nes. Select Basic Configuration Folder Settings Quarantine to config- gure the existing quarantines and set up new ones.
- Click Quarantines: in the right window section, all available quarantines are shown.
- Right-click an existing quarantine in the right pane and select Properties.
- Under Name, enter a description for the Quarantine. The Quarantine's Folder Name remains the same. This option is only available when you create a new quarantine.
- Unter the Summary Reports tab, you can now configure a summary notification for the selected Quarantine.

In case you allow the users to access and modify whitelist, select under Temp-late Quarantine Summary Report with Whitelist Support.
To create a new Quarantine:
- Right-click Quarantine and New Quarantine.
- The Folder Name is taken from the description. Only the characters A - Z and 0 - 9 are used, all others are converted into underscores.
- The proposed Folder Name can be overwritten.

Enter the folder name only, not an absolute path!
- When you have saved the configuration, these quarantines are automatically created by the EMH and displayed in the AntiVir Monitor (after having refreshed the View)1.

The size of a quarantine is limited to 2 GB! Observe the deletion interval. By default, all entries older than 30 days are automatically deleted.
5.5.7.2 Defining Quarantine Summary Reports
Quarantine Summary Reports provide information on the messages quarantined by Avira AntiVir Exchange, the Whitelist Summary Reports on the new entries in the user whitelist.
Summary reports can be sent to various recipients or recipient groups and contain a list of various quarantined messages. The listed messages, the actions the user can take when receiving a summary report and the additional information contained therein are defined separately for each summary report.
Summary reports consist of two parts:
- the template, which contains variables and defines the form of the notification.
To edit the summary report template, select Basis Settings Templates Quarantine Summaries. The variables used here apply only to the summary report and its form. Configure the summary report template as described under "Create Notification Templates" on page 36.
- Fields define the messages and the fields of each message to be listed in the summary.
The content of the summary report, i.e. the list of quarantined messages, is defined by variable Summary: Quarantine e-mail list ([VAR]HTMLList [/VAR]), which must be set for every summary report. The entries contained in the list is specified under Folder Settings Quarantine Properties Summary Reports Add Summary fields.
You can configure the list content but not its form or representation.
Example: Variable Summary: Sender under Templates indicates the sender of the summary report (the same sender as for all Avira AntiVir Exchange notifications; it is defined under AntiVir Server Settings). The Sender checkbox in the Fields tab for a quarantine specifies that the sender of the quarantined message will be shown in the list.
1. Furthermore on Quarantines in "Quarantines" on page 51
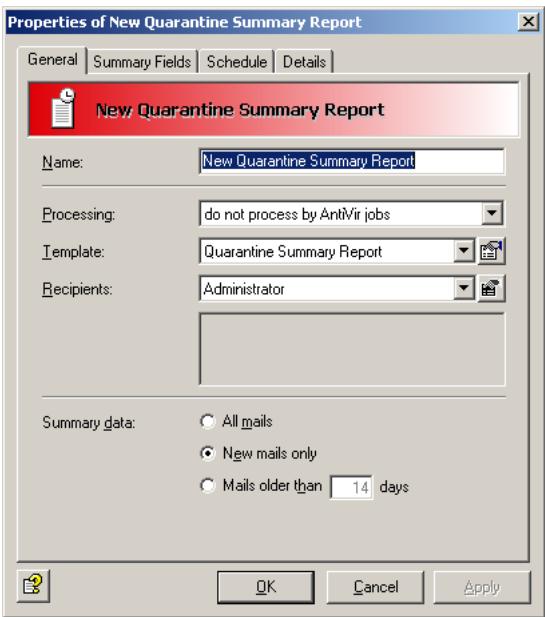
- In the Recipients field, select All Recipients. The recipients of the quarantined messages will receive the summary report. Select Userdefined recipients when you want to limit the group of recipients of a summary report. The selected recipients or groups are listed in the field under the Recipients field.
- As Template you can use a summary report that you have created yourself under General Settings Templates Quarantine-Summary Report. By default, Avira AntiVir Exchange contains only the Quarantine summary report template.
- For the summary data (report's content) select New mails only. The summary report will then list only those messages that have been quarantined since the last summary report.
- Processing: do not process by AntiVir jobs means that messages resent or released on the user's request are not checked by enabled AntiVir jobs, but are delivered to the recipient without further processing. Also refer to the next tab, Fields.
- In the Fields tab, select the message fields to be listed in the quarantined messages summary report. If, for example, you check Subject here, the subject of the quarantined messages are listed in the summary report. A default selection is already checked by default.
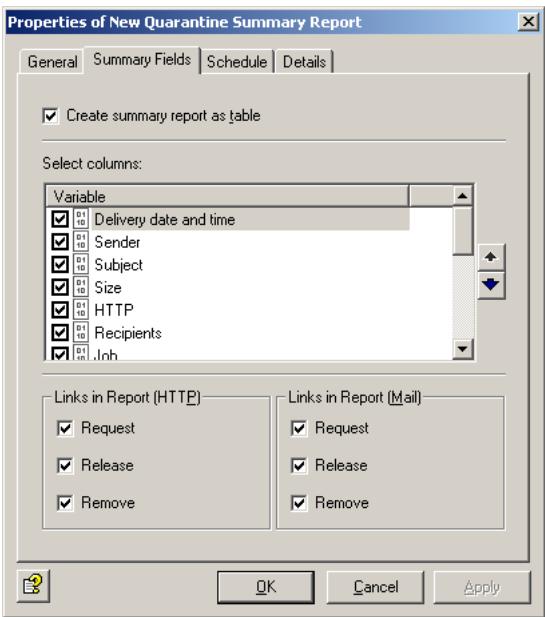
Users can click the links in the summary report to perform actions on the selected messages. Select one of the actions to be performed:
Request: The quarantined message is forwarded to the recipient of the summary report.
Release: The message is forwarded to all original recipients.
Remove: The quarantined message is marked for deletion.

All options checked the Fields tab will appear as a link in the summary report list.
- Click the Schedule tab and then Add. A Schedule dialog opens in which you can specify the time at which summary reports will be generated. In this case, a summary report is sent to the recipient of the spam mail daily at midnight (00:00 hours).

You can create several different summary reports with differing content for a single quarantine. For each report, the messages are compiled separately from the quarantine, even if the reports are scheduled for the same time.

A list of all quarantines is available under Folder Settings Quarantine. The Summary report column shows the quarantines for which a summary notification has been configured (yes/no).
5.5.8 Utility Settings
5.5.8.1 Fingerprints
AntiVir uses Fingerprints to identify file types. A comprehensive, categorized range of fingerprints is included with Avira AntiVir Exchange. Normally, you do not have to make any changes to these initially. For further information on configuring fingerprints, see "Configuring Fingerprints" on page 75.
5.5.8.2 Dictionaries
Here, you can create dictionaries of text strings that you want AntiVir Wall content and spam filtering to block. We have already created a few dictionary categories that you can customize to your requirements. For details about setting up dictionaries see "Setting up Dictionaries" on page 98.
5.5.8.3 DCC
AntiVir Wall uses DCC technology for spam detection. It recognizes bulk mail using checksums that are counted by DCC servers. You can define the global DCC settings under Basic Configuration. For further information about junk mail filtering with DCC, see "Spam Filtering With the DCC Spam Filtering Job" on page 122.
5.6 Policy Configuration
Under Policy Configuration, define your AntiVir jobs based on your company's own policies.
Using a range of conditions (or filters), you can specify the messages that will be intercepted, the actions to be performed and scheduled, and the priority of each job (i.e. the order in which jobs are run). All conditions can be configured within the jobs. Together, the AntiVir jobs form your company's policy.
5.6.1 Job Types
There are 10 different job types, which you can find under Policy Configuration Mail Transport Jobs right click New:
| Job Type | Function |
| AntiVir Virus Scanning | Scans messages for viruses. |
| AntiVir Attachment Filtr-ring | Checks messages for denied file attachments The various file formats are identified with finger-prints. |
| AntiVir Attachment/Size Filtering | Checks messages for denied file attachments and for file size, and denies files larger than the speci-fied size. |
| AntiVir E-Mail Size Filtr-ring | Checks messages for size and denies files that are larger than the allowed maximum size (per message size). |
| AntiVir Wall E-Mail Address Filtering | Checks messages for address restrictions. |
| AntiVir Wall Content Filtering | Checks messages and attachments for restricted text content. |
| AntiVir Wall Spam Filtr-ring | Checks messages for spam using a range of criteria. |
| AntiVir Wall DCC Spam Filtering | Checks messages for spam using a DCC server. Use this job only for testing. DCC analysis is included in the AntiVir Wall Spam Filtering Job as combined criterion and has only to be enabled. |
| AntiVir Wall Recipient Limit Filtering | Checks messages for a maximum permissible number of recipients per message (the recipient in the To field of each message are counted). |
| AntiVir Wall Xblock Image Filtering | Checks messages for offensive images. |
For each job type, you can define individual conditions, all of which must apply for the specified action to be executed. Address filtering can be performed by all job types. You can, for example, create a job that quarantines and deletes all messages (without forwarding them to their recipient) that were sent from the domains @gmx.net and @@hotmail.com, are larger than 500 KB and belong to the fingerprint category Sound. This would be a AntiVir Attachment/Size Filtering Job.
AntiVir is delivered with a number of standard jobs, which can be adapted to your requirements. Of course, you can also create your own jobs. Preconfigured jobs are available under Policy Configuration Sample Jobs. With the mouse, drag the desired job to Mail Transport Jobs. There is no limit to the number of jobs you can create. The order in which the jobs will be processed is shown in the job list in Mail Transport Jobs. For additional information, refer to "Job Processing Sequence" on page 49.
A job can be enabled or disabled. To prevent a job being run, you can simply disable it: you do not have to permanently delete it from your configuration.
For each job, on the Actions tab, you can specify the actions to be executed when a message meets the defined criteria or is virus-infected.
5.6.2 Actions
In addition to the job-specific actions, you can use the following standard actions.
| Copy to Quarantine | A copy of the message is placed in the specified quarantine folder, where it can be viewed any time. |
| Delete e-mail | The infected/denied message is permanently deleted from the server. If selected, a copy is first placed in quarantine. |
| Delete attachment | The infected attachments are permanently deleted from the server. |
| Add a subject extension | A configurable supplement is added to the Subject line to indicate that the message has been processed. |
| Send notifications to | Notifications can be sent to the following groups and individuals: ● Administrators ● Sender ● Recipients ● Other persons |
| Run external Program | Runs an external program. |
| Add X-header field | A field is added to the message header, which can be filled with a value from one of the variables. |
| Mail umleiten | The e-mail is resent to the defined recipients. As an option: the message can also be sent to the actual recipient. |
5.6.3 Job Processing Sequence
The order in which jobs are processed is shown in the job list under Policy Configuration Mail Transport Jobs. New jobs are added at the end of the list and can be moved to the desired position with the arrows in the icon bar or via the context menu (All Tasks Move up/Move down).
Meaningful order:
If you need to decrypt e-mails with AntiVir Crypt, the import and decryption jobs should be the first ones executed, as the mails cannot be further processed otherwise. Without decryption, a virus scan job should be placed at the first position in order to make sure that any mails quarantined (by another job) and possibly delivered from there are virus-free.
Mails that could be resent include the mails processed by jobs with blocking functions for specific fingerprints or anti-spam jobs (with summary reports sent to the users, see "Defining Quarantine Summary Reports" on page 44. For instance, if a mail is quarantined by an anti-spam job, it will be labeled Spam in the Quarantine, but it cannot be excluded that it is virus-infected if no virus scan job has been run previously.
We recommend to assign a high position to jobs with simple blocking functions, e.g. for very large mails or unknown archives, in order to exclude the mails affected from further processing and avoid unnecessary server loads. For instance, assign a high position to a AntiVir Wall Recipient Limit job, so that mails addressed to too many recipients are discarded before other jobs are run and possibly change the list of recipients, thus falsifying the Recipient Limit job result.
5.7 AntiVir Monitor
The AntiVir Monitor is used to observe all AntiVir servers, quarantines and badmail folders. In addition, it provides access to statistical evaluations. The AntiVir Monitor lists all servers configured under Basic Configuration AntiVir Servers. AntiVir Monitor accesses the servers via the network using SOAP/ SSL encryption. To enable access to a server, first enter the server under Basic Configuration AntiVir Servers and then refresh the AntiVir Monitor view. For details on how to add a server, please refer to "Individual Server Settings" on page 27. Also make sure your Quarantine has been set up according to the instructions under "Configuring the Quarantine" on page 43.
You can view detailed information on the Avira AntiVir Exchange version, configuration, etc. for each server: In AntiVir Monitor, right-click the desired server and select Properties.
The AntiVir Monitor requires a logon as authorized user. If you are not logged on to the server locally, a logon dialog will prompt you for a user name and password to access the corresponding domain.
The AntiVir Monitor access rights are set in the properties of the access.acl file in the folder ...\Avira GmbH\AntiVirExchange\AppData.Select the Security tab and give the desired users at least write access.
The login dialog for another server appears only if your current user name does not have a sufficient access rights for the second server. It is possible to log on to several servers at the same time using different user names and thus to access every AntiVir Monitor on each server.
During the AntiVir installation, the access rights are assigned according to the rights to the corresponding drive, i.e. the administrator will usually have access automatically.
To observe data in the AntiVir Monitor:
- Click on the desired server.
- Invalidate yourself with a user name and a password with sufficient rights to access the AntiVir data on the server's file system.
- Click the area you wish to view, e.g. Standard Quarantine or Badmail. All available mails will be displayed (up to a maximum of 10,000).
- Filter the mails using the Filter Options icon
- Double-click on a mail to open it.
- Resend bei Bedarf erneut.
5.7.1 Quarantines
If you have enabled the Copy to quarantine action in a job, all affected messages are copied into a quarantine1 and the AntiVir Monitor displays all information available on individual mails.
Click on a quarantine to view a list of mails. If you right-click on a mail, the following options are available:
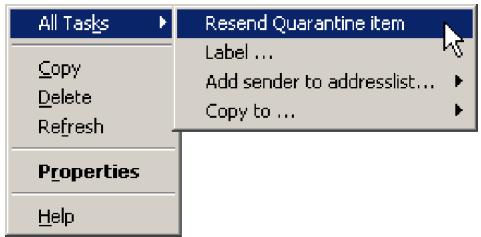
Copying mails is also possible via drag & drop. With the mouse, simply drag the selected mail into another quarantine.
Within a quarantine, you can filter messages according to numerous selection criteria. To do so, right-click Vew Fitrer or click on the icon . The following dialog appears:
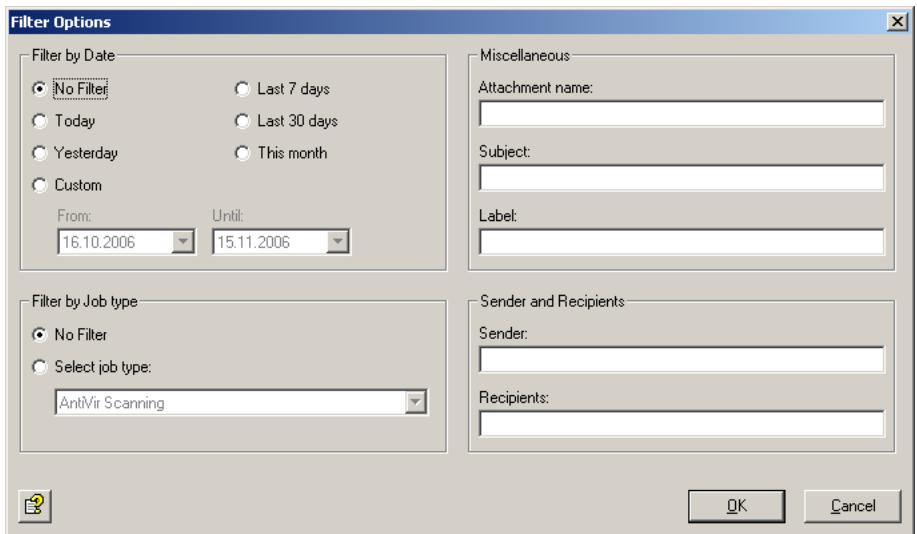
- Refer to "Configuring the Quarantine" on page 43

You can reset the options in one of three ways:
- Under Filter options, select No Filter.
- Right-click View Show all objects.
- Click in the toolbar.
The AntiVir Monitor view displays a maximum of 10,000 e-mails at a time (the most recent ones). To view older e-mails, select appropriate filter options to restrict the e-mails displayed.
5.7.1.1 Example of a Quarantined Message
To view this information, double-click the quarantined message or right-click and select Properties.
The Message tab contains a summary of the important information:
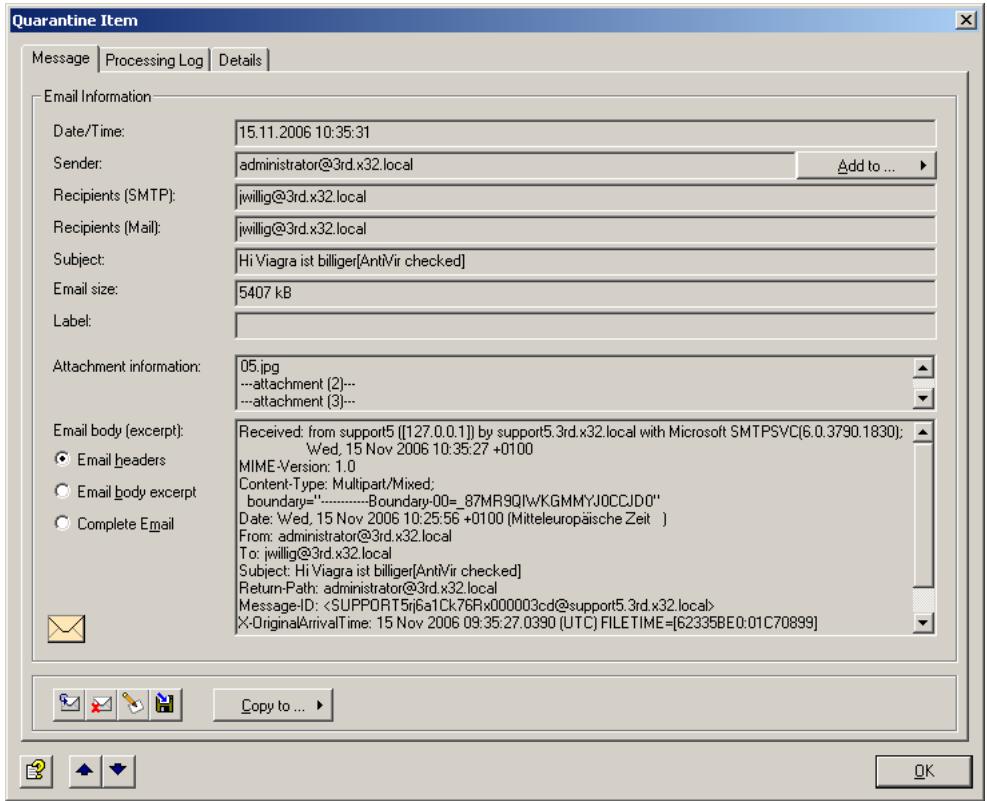
Icons used on these tabs:


Send message from quarantine
Delete message in quarantine
Create,edit or delete message label
Next message in quarantine/badmail
Previous message in quarantine/badmail
To add the message sender to an address list, click the Add button. The address lists shown with this button are defined separately for each address list. For further information, see "Address Lists" on page 30. When you add the sender's address to the address list, a message appears:
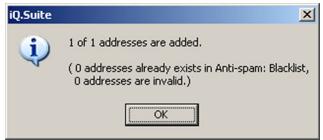
To copy the message to another quarantine on this server, click Copy.
The Processing Log tab shows the name of the job that has quarantined the message, the job type, the server, the reason for quarantining the message as well as other processing details:
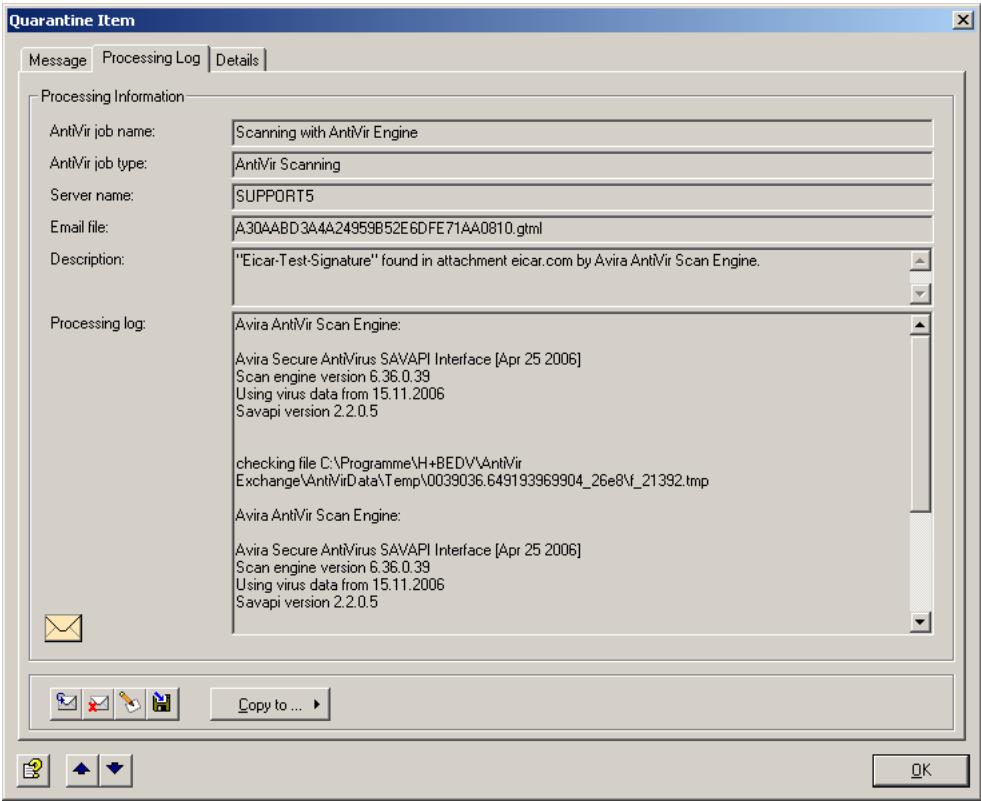
The Resent Log tab displays details on the resend process:
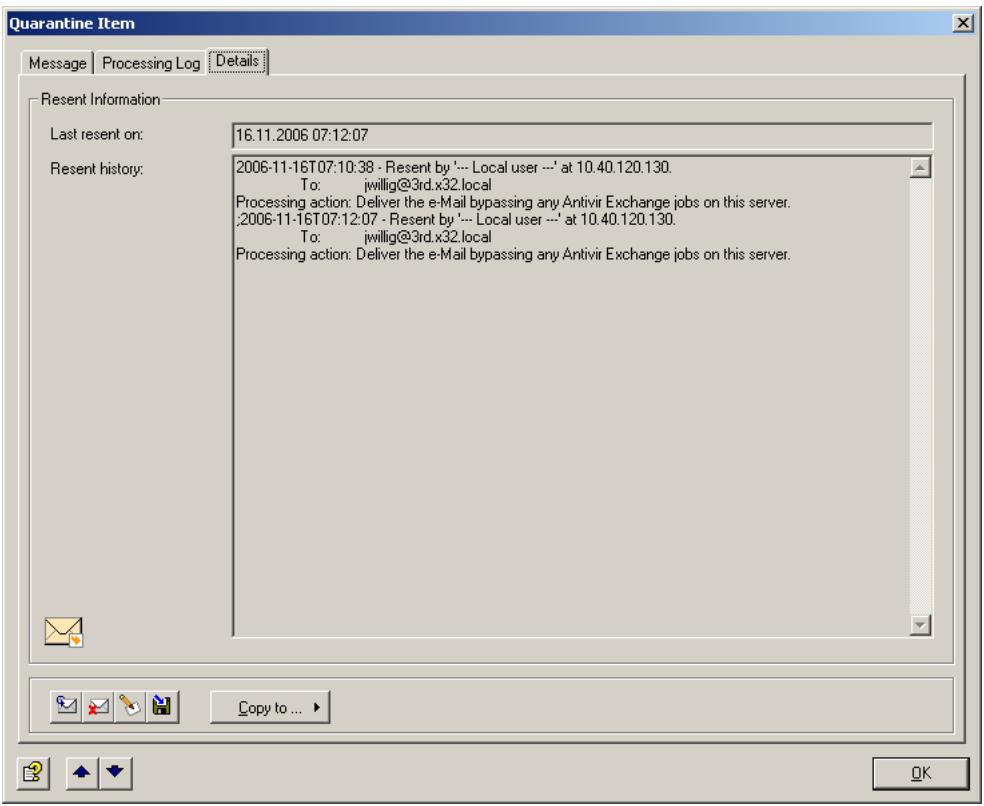
5.7.1.2 Example of a Mail in the Information Store Quarantine
To view this information, double-click the message in the Information Store quarantine or right-click and select Properties.
The Item tab contains a summary of the important information:
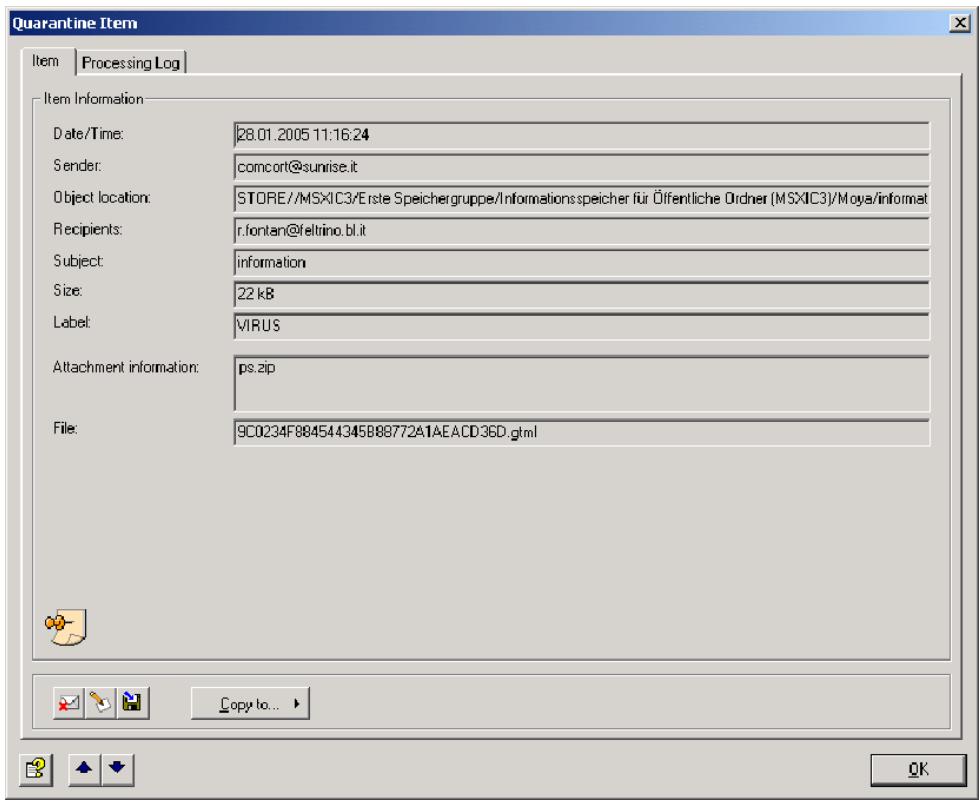
Icons used on these tabs:

Delete item in quarantine

Create, edit or delete item label

Save item in the file system

Next item in quarantine

Previous item in quarantine
To copy the item to another quarantine on this server, click Copy.
The Processing tab shows the name of the job that has quarantined the item, the job type, the server, the reason for quarantining the item as well as other processing details:
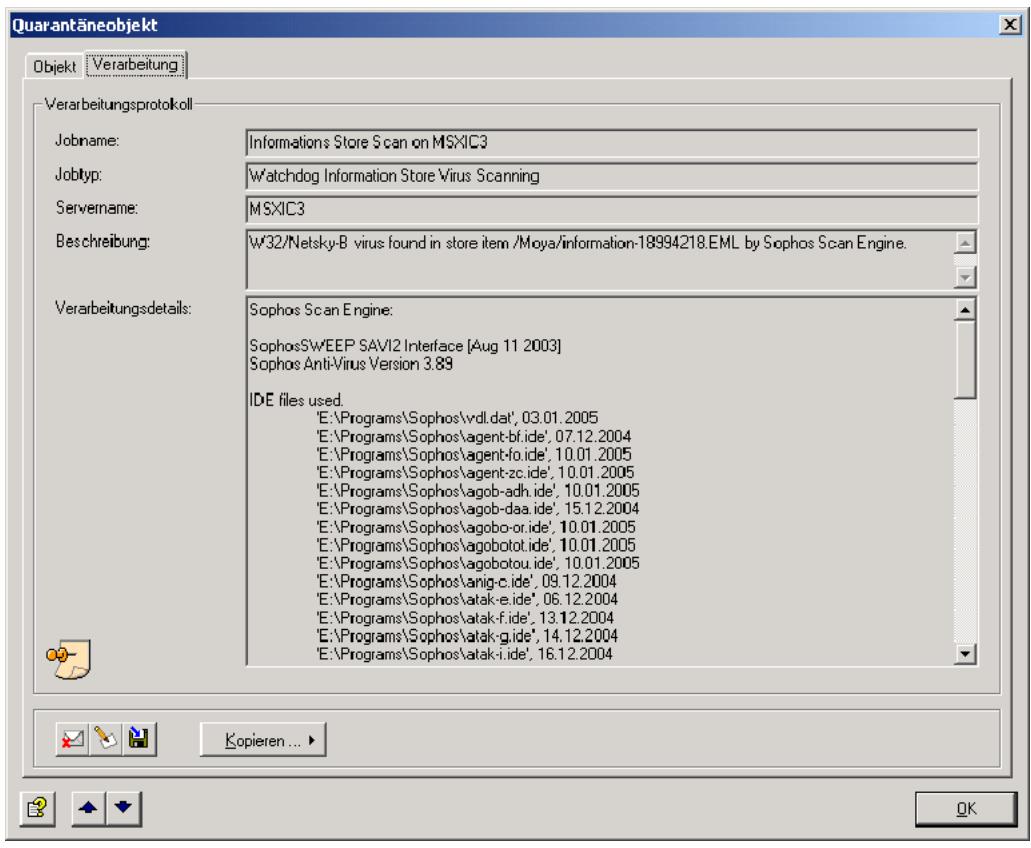
5.7.1.3 Sending From Quarantine
If you want to send a quarantined message to its original recipient or another user, you can resend it directly from the quarantine without having it rechecked by AntiVir job:
- In the AntiVir Monitor, open a list of quarantined messages.
- Right-click the desired message.
- Now select All Tasks Resend Quarantine item

As an alternative, you can send the message directly from the Properties dialog by clicking the icon.
4. The following dialog appears:
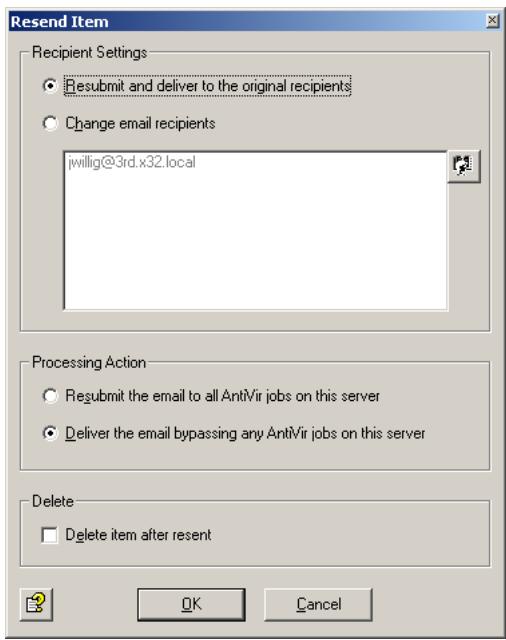

No address lists are available to select an address for resending from quarantine.
If you do not want any jobs to process the message, select the Deliver the e-mail bypassing any AntiVir jobs on this server option. When you forward a message from quarantine, it is likely to be urgent even though it contains restricted words or attachments, so you probably want this to be your default setting.

This is a global setting. If you have enabled jobs that are to scan mail resent from quarantine, set this option to Resubmit the e-mail to all AntiVir jobs on this server. Otherwise, the Check e-mails resent from quarantine job setting does not apply and all messages are forwarded without further checking.

The instruction Resubmit the e-mail to all AntiVir jobs applies also to those jobs for which the option Quarantined e-mails: Check e-mails resent from quarantine has been enabled. Even if you want to reprocess quarantined mail, all jobs for which Ignore e-mails resent from quarantine is selected will be excluded from processing.
5.7.1.4 Badmail
Messages that cannot be processed by AntiVir jobs – such as messages with unknown formats – are referred to as badmail. Because Avira AntiVir Exchange cannot read these messages, little is known about badmail. This mail may therefore also contain undetected viruses.
There is only one badmail folder on each server, and you can not create further badmail folders. Otherwise, the same functions and options apply to badmail as for quarantined mail.
5.7.2 AntiVir Reports
With Avira AntiVir Exchange's Reporting and Statistics functions, you can retrieve detailed information on e-mail processing. Eight predefined reports and one advanced statistics report are available. The advanced statistics report can be defined individually. The reports can be accessed through the AntiVir Monitor. The reports list the policy violations detected (e.g. viruses, undesired file attachments) both graphically and in list form. Specific reports are available for the most current issues. In addition, information on AntiVir quarantines is also shown. Reports can be created for freely selectable periods. They can be printed and exported with a wide range of options for further processing.
Report data is temporarily stored during processing and written to the evaluation database at half-hour intervals, i.e. processed e-mails do not immediately in the reports.
Click AntiVir Reports and double-click the required report in the right pane to open it. In the window that now appears, enter the desired timespan for the report. Click to export the analysis in one of several formats for importing into another application.
6 AntiVir
6.1 Overview
AntiVir checks messages for viruses, for the type and size of its attachments and for the total message size.
In that context, a distinction is made between scanning on the transport level (inbound/outbound messages) and scanning in the MS Exchange database (public and private Information Store).
Job types
- Virus scanning in inbound and outbound messages
Job: AntiVir Virus Scanning
- Virus scanning in MS Exchange databases
(on access & proactive/background)
Job: Information Store scan
- Blocking specific file types in attachments
Job: AntiVir Attachment Filtering
- Limiting message size
Job: AntiVir E-mail Size Filtering
- Limiting attachment type and/or size
Job: AntiVir Attachment/Size Filtering
Create a separate job for each restriction type. The job types cannot be changed later on.
The diagram below illustrates the working principle:
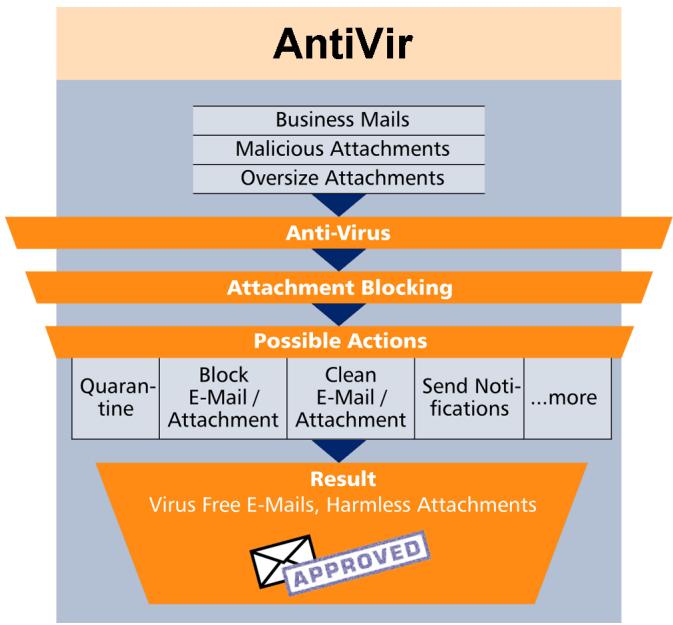
6.2 Virus Scanning
One or more third-party scan engines are used for virus scanning. With the exception of AntiVir powered by Avira, you must install these virus scanners yourself on the Exchange server so that AntiVir can use them.
You must therefore also configure the scan engines for AntiVir. Open the Basic Configuration -> Utility Settings and enter your scan engines under Scan Engines. This menu item is the interface between your scan engine(s) and AntiVir. AntiVir usupports scan engines from the following manufacturers:
Avira
Sophos
- Norman
Trend Micro
- Symantec
McAfee
F-Secure
Command Software
The AntiVir Virus Scanning job starts the selected scan engines as defined in the configured conditions. The conditions determine the messages for which a job will be performed. If you have selected several scan engines, the mails are checked by all of them, cleaned if they are infected. If configured, further actions are performed as previously defined:
The example below illustrates the working principle of a virus scanning job. The job checks, for instance, an e-mail with the result "virus found". It triggers a virus alarm and initiates a series of actions specified under Actions. You can, for instance, specify the following:
- If a virus is found, clean the original mail and deliver it to the recipient.
- If the mail could not be cleaned, a copy of it is placed in your selected quarantine folder and the original is deleted without being forwarded.
- Notifications with the relevant information from the scan engine and the AntiVir job are then sent to the administrator, sender and recipient.
The following actions are possible:
- Scan for Viruses
- Clean infected message
- Add a subject extension
- Copy the entire message into quarantine
- Remove infected attachments from the message
- Delete the affected message without delivering it
- Run an external application
- Notify the administrator
- Notify the sender
- Notify the recipient
- Notify any other, user-definable persons
- Add X-header field
- Redirect mail
6.2.1 Scanning in the Information Store
In addition to virus scanning at transport level, AntiVir Exchange is also able to scan data in the public or private MS Exchange Information Store.
There are three basic types of Information Store scanning:
On-demand scan
When a client tries to open a mail, a comparison is performed to ensure that text body and attachment have been checked by the current virus signature file. If they have not, the message is scanned before being forwarded to the client. On-demand scanning is the most commonly used task for Information Store scanning.
Proactive scan
The proactive scan catches new messages before these are accessed by a client through an on-demand scan. Used in addition to on-demand scanning, it can help to speed up client access.
- Background scan
A background scan checks all elements of the Information Store. It can be activated separately for the public and private Information Stores and scans all elements that were not yet scanned with the current scanner signature file.
In addition to a scheduled execution, the background scan is run whenever the database is loaded (for example when a server is started).
The Information Store scan is a global function that applies to the entire server, so that only one AntiVir Information Store scan job exists on each server (as opposed to any number of AntiVir virus scanning jobs).
If a virus is found in a mail, various actions tailored to the Information Store scan can be performed:
- Blocking an object
Object blocking denies access to the entire message object. Current Microsoft mail clients generate a message when the user tries to open a blocked message, while other and older clients may respond differently. The blocked message can always be deleted, however.
Replacing
You can replace infected elements with an information text. The infected element is then deleted.
- Do not mark infected
In exceptional cases, you may decide that an infected element is not to be flagged infected. Subsequent virus scans will then find the virus again. This action is intended for testing only, as it provides no protection for users and the system.

Virus scanning in the MS Exchange Information Store is performed by the Microsoft Virus Scanning API version 2.0/2.5. For further information, visit http://support.microsoft.com/kb/285667/DE/.

Messages blocked by the Information Store scan may result in error messages during Information Store backups.

Exiting or uninstalling Avira AntiVir Exchange and terminating the Information Store scan jobs releases any elements that were blocked due to virus infection as well as disabling the Information Store's active virus protection.
6.2.2 AntiVir powered by Avira
The AntiVir Engine is found automatically and is enabled by default.
Default parameters:
/decomp (decompress PKLite and LZExe archives)
/verbosescan (scan complete file)
Additional parameters: /paranoid (interpret warning from heuristic analysis as virus)
If you are using a proxy server, change the savapi.ini file for online updates of the virus patterns:
- Stop the SAVAPI service.
- Go to folder AntiVirExchange\Engine.
-
Open the savapi.ini file with Notepad and add the following parameters:
-
Use proxy server for updates If this value is enabled (1), the engine tries to download the updates through the specified proxy. By default, no proxy server is used. Example: ProxyEnabled=0 (= disabled).
-
Proxy server address Here, you can enter the full name or IP address of the proxy server used for the update. This value is used only when "ProxyEnabled" is set to "1". Example: ProxyUrl=proxy.mydomain.com
- Proxy port address The port specified here is used for updates through the proxy server. This value is used only when "ProxyEnabled" is set to "1". Enter the proxy server's port number here. Example: ProxyPort=3128
-
User name for proxy server (proxy authentication)
Enter the user name here under which the update service logs on to the proxy server. This value is used only when "ProxyEnabled" is set to "1". Example: ProxyUserName=hmaier -
Password for proxy server (proxy authentication)
Enter the password for the proxy server login user name here. This value is used only when "ProxyEnabled" is set to "1".
Example: ProxyPassword=password
- Search interval for new updates
This value specifies the number of minutes after which the update service searches for new versions on the server entered under Update URL. The default value is 120 minutes (2 hours). An automatic update of the engine and virus signatures is automatically performed immediately after the first action (virus scan). If this value is zero, automatic updating is disabled.
Example: UpdateInterval = 120
6.2.3 Enabling Virus Scanning - Example
Under Policy Configuration Mail Transport Jobs, you will find the Virus Scanning With AntiVir Engine. Double-click this job to open it.
6.2.3.1 General Settings
Under the General tab, enter your own name for the job. You can identify a disabled job by the red cross in the lower corner of the job symbol. Set the job to Enabled. Once you have saved your settings with OK and closed the job, the job is enabled and the red cross disappears.
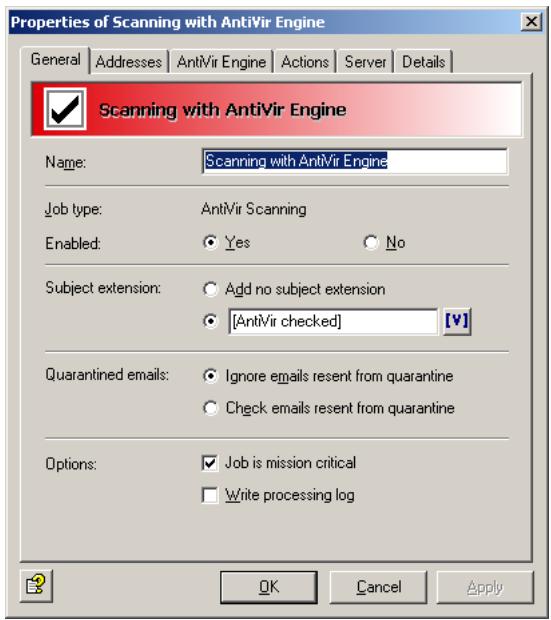
By default, the Subject Extension is pre-set to AntiVir checked. This text is added to the subject of each mail checked by the job.
This job is also applied to messages resent from quarantine. The Processing action for sending from quarantine applies to all jobs and has priority. If, therefore, you resend a message with the Deliver the e-mail bypassing any AntiVir
jobs on this server option, it is not processed by any job. You should therefore set the Processing action to Resubmit the e-mail to all AntiVir jobs on this server.
For further information on sending quarantined mail, refer to "Icons used on these tabs:" on page 55.
This job is mission-critical
If a job is Mission-critical, any errors – such as a missing virus scanner – result in the processed message being placed in the badmail area. Enable this option for critical jobs such as virus scanning.

Until the fault is rectified, all affected e-mails, both inbound and outbound, are placed in the badmail area!
A job is not Mission Critical when any processing errors are to be ignored for the corresponding mail, in which case it is passed to the next job for further processing. All processing errors are recorded in the Windows Event Log. If the same processing error occurs five times in succession, the job is disabled and automatically restarted after 15 minutes. Do not enable this option for company-critical jobs such as adding an individual signature with AntiVir Trailer (deselect checkbox).
The default settings for almost all jobs are not Mission Critical. All the jobs which can be classified as company-critical jobs, should be determined in the company policy.
Write processing log
The Processing Log provides information on how e-mails were processed by the job. Enable this function if you need some sort of evidence (e.g. that mails were encrypted) or if you wish to test the job.
With this option enabled, information on whether and how the job has processed the mail is written into a text file for each mail. This log text file is stored in the Avira AntiVir Exchange installation directory in the Log folder. Logging is defined for each job, but the text file contains the information for all jobs for which Write processing log is enabled. A separate text file is created for each day.
Name of the text file:
Audit_all_
Individual pieces of information on the e-mail processed are separated by semicolon and therefore be evaluated manually or automatically:
- Date and time when the mail was processed
- Job ID
- Job name
- Message ID
- SMTP sender
- SMTP recipient
7. AntiVir filtering result
a) Restricted - E-mail matches the restrictions defined
b) Unrestricted - E-mail does not match the restrictions defined
Recipient groups are resolved, with a separate line written for each recipient.
6.2.3.2 Setting up Address Conditions
Under the Addresses tab, specify the senders or recipients to which this job is to apply. You can select addresses from existing lists or from your own. For details on how to make the best use of address lists and details, see description under "Address Lists" on page 30.
6.2.3.3 Setting up Content Conditions
Under the Conditions tab you can set the requirements as to which mails or documents a job is to be run for.

The content conditions and the address conditions set in the Adresses tab must simultaneously come true for a job to be run (logical AND).
6.2.3.4 Defining Actions
Under the Actions tab, specify the actions to be taken when the job finds a virus-infected message.
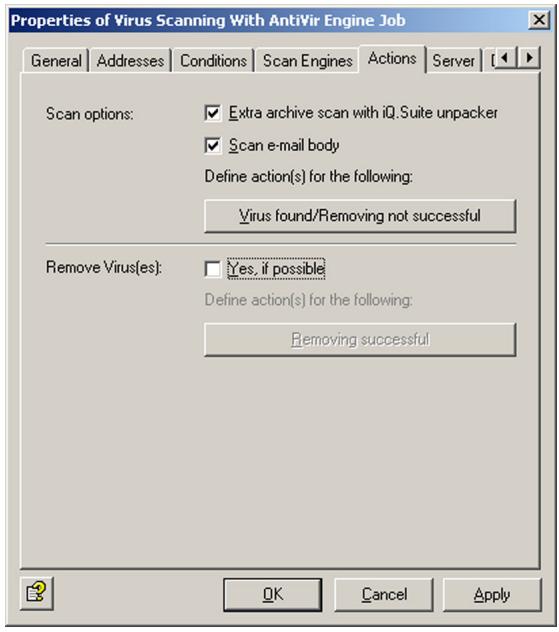
This job scans messages for viruses but does not attempt to clean infected messages and attachments. Though all virus scanners are capable of cleaning infected objects, it is advisable to quarantine infected attachments immediately, as, in practice, viruses are usually received in spam and rarely from infected, known communication partners.
Extra archive scan with AntiVir Exchange unpacker: If you are using a virus scanner that does not have an integrated unpacker, enable this option. AntiVir Exchange's built-in unpacker will then extract the compressed files before passing them to the virus scanner.
After you have defined what is to be checked, specify two different actions:
- One to be performed in case a virus was found and the file could not be cleaned,
- and another in case the file was cleaned successfully (if you have selected this option).
In the first case, the following actions are available:
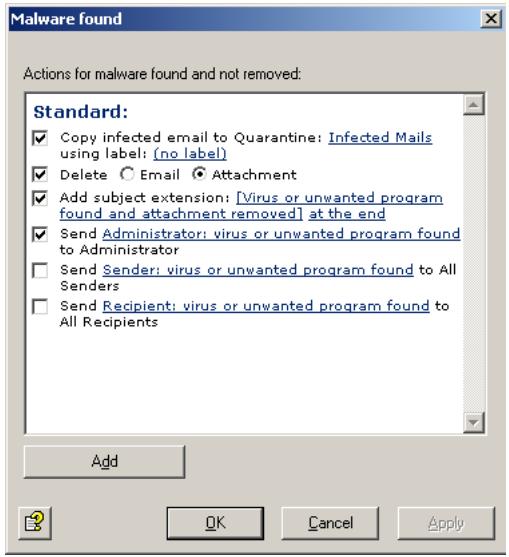
In this example, a copy of the message is placed in quarantine and the infected attachments are deleted. The message is delivered to its recipient only if the message body is virus-free and the attachment could be deleted. A notification on the virus is sent to the administrator. You can select this notification from the list menu of available notification templates, which you can format using the HTML toolbar or by entering appropriate HTML code yourself.

Check whether the infected mails addressed to your company are often also spam. If they are, it is best to delete the entire message and not just the attachment. This saves filtering of the remaining message text.

If you have selected the Scan options: Scan e-mail body option and a virus is found in the text body, the entire message including any attachments is deleted if you have selected the Delete and don't deliver the restricted attachment(s) option (attachments are not delivered without text body). The affected message section is usually deleted separately. If only the attachment was infected, only the attachment is deleted.
To define further actions, click Add:
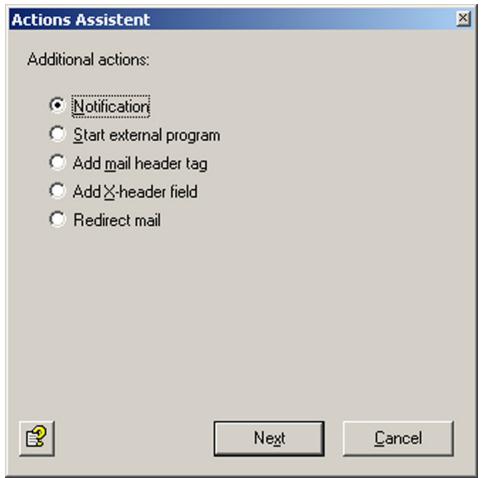

Note about Redirect mail: When you redirect a TNEF message to an external address, the recipient will get a blank message that may contain an attached file called winmail.dat. Exchange uses the TNEF format when an Outlook user (not Outlook Express!) sends a message within an Exchange organization. This format is not used for Internet communications or by other mail programs.
Select Notification for a notification to a user-defined recipient or Start external program to perform different actions and click Next:
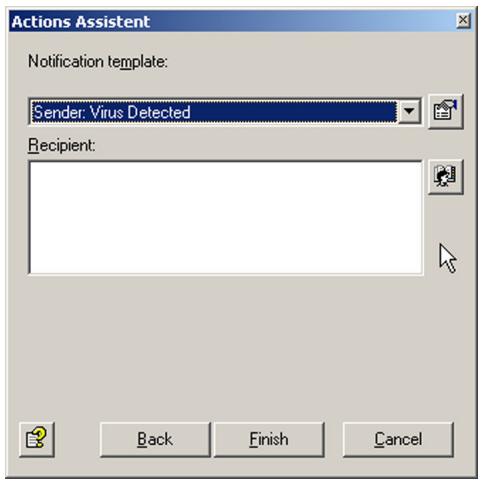
To select additional recipients or enter your own addresses, click the address book icon. When you have entered a recipient, click Finish.
For starting an external application, enter its name and path, any optional parameters and a timeout:
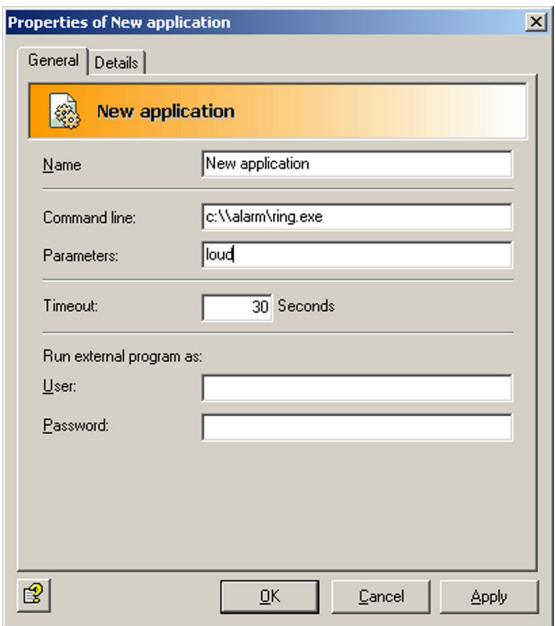
In the second case – the virus was removed – the following actions are available:
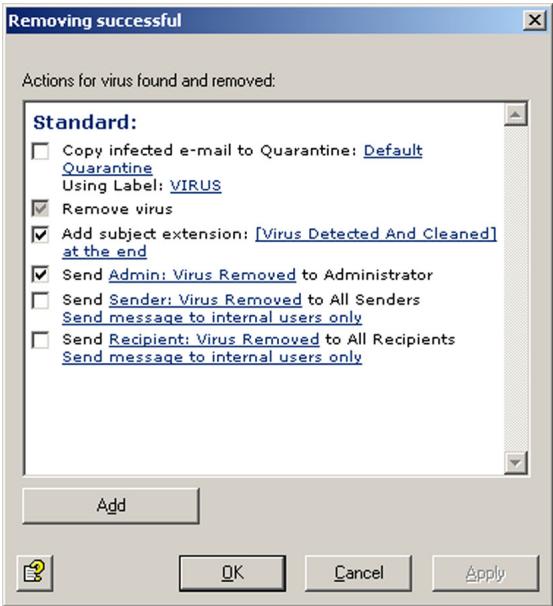
In this example, the message is delivered, the Subject text is appended, and a notification is sent to the administrator for tracking purposes.
6.2.3.5 Selecting Servers
Under the Server tab, select the server or servers on which the job is to be enabled.
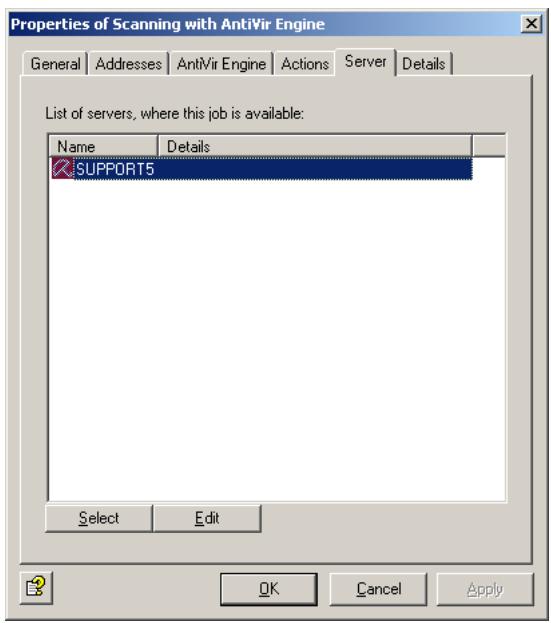
Click Select. A dialog similar to the one for selecting scan engines appears.

If a server is not listed, it may not be correctly configured. For further information on configuring AntiVir servers, refer to "Individual Server Settings" on page 27.
6.2.3.6 Entering Job Details
Under the Details tab, you can add a job description:
Save the configuration of the AntiVir Exchange Management Console each time you have modified the settings. Click on the button. The configuration is saved in the ConfigData.xml file located in the Avira GmbH\AntiVirExchange\Config folder. Pending changes are indicated by an asterisk (*) next to the top node
6.3 Virus Scan in the Information Store - Sample Job
Under Policy Configuration in the Information Store jobs area, you will find an Information Store scan job for each server. Double-click this job to open it.

When you enable or disable the Information Store scan job, it takes up to two minutes for the Exchange Store to register the change.
6.3.1 General Settings
Under the General tab you can enable on-demand scanning for both the private and the public Information Store.
In addition to on-demand scanning, you can also enable proactive and background scanning. For further information, refer to "Scanning in the Information Store" on page 61.
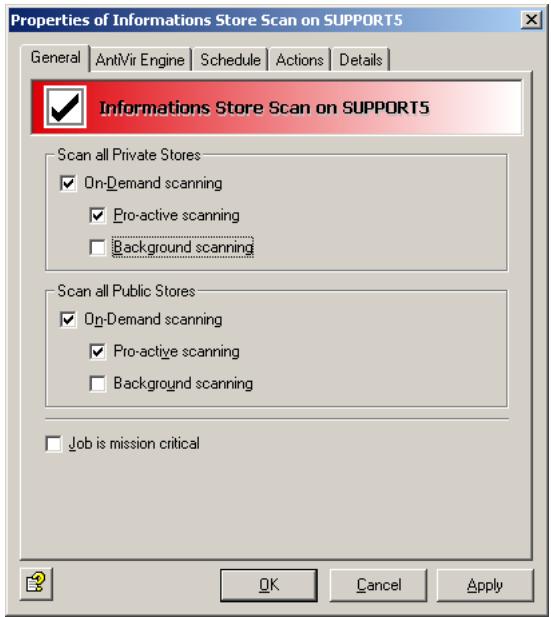
For details on the Mission Critical option, refer to This job is mission-critical
6.3.2 Scheduling
Use the Schedule tab to define a schedule for restarting the scan. When scanning is restarted, all elements in the Information Store are checked one more time. This applies to all three scan modes. If you have enabled background scanning, this scan may take a long time and use a lot of processor capacity. It is therefore advisable to restart scanning during periods of low system usage and following pattern file updates.
To create a schedule entry click Add. Then select a start time and the days on which restarting is to be performed. Confirm with OK.
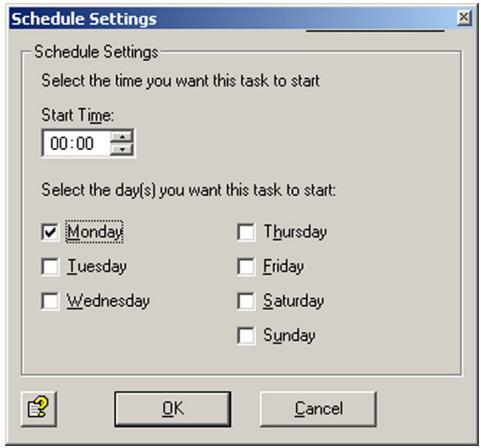
6.3.3 Defining Actions
Under the Actions tab, specify the actions to be taken if the job finds an infected mail.
Extra archive scan with AntiVir Exchange unpacker: If you are using a virus scanner that does not have an integrated unpacker, enable this option. AntiVir Exchange's built-in unpacker will then extract the compressed files before passing them to the virus scanner.
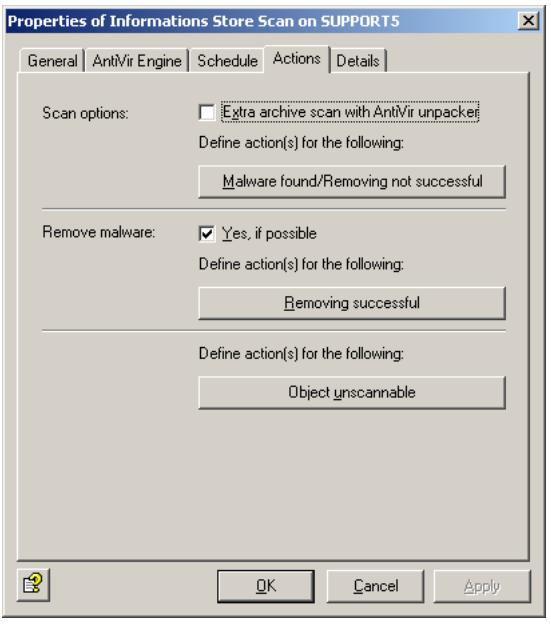
Three different actions are possible:
- Virus found/Removing not successful: Specifies the actions if virus was found and the file could not be cleaned.
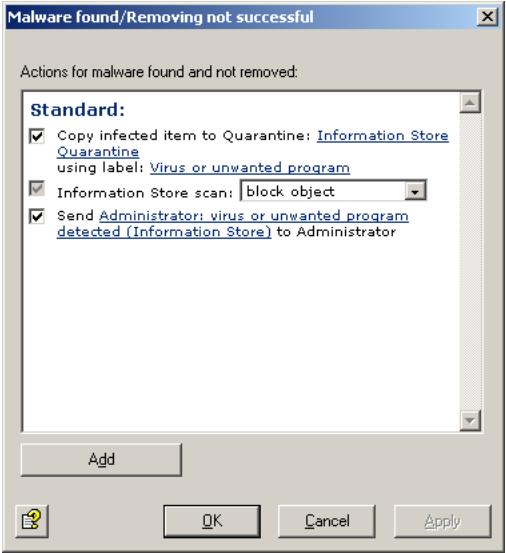
a) Specify whether a copy of the object is to be quarantined and labeled. A separate default quarantine is available for the Information Store.
b) With the second option, the object can be blocked, replaced or ignored. Also refer to "Scanning in the Information Store" on page 61.
c) The final option defines whether a notification is sent to the administrator(s).
d) Use the Add button to define further actions, for instance sending notifications to other users or starting an external application.
- Removing successful: Specifies the actions to be taken if the file was cleaned successfully.
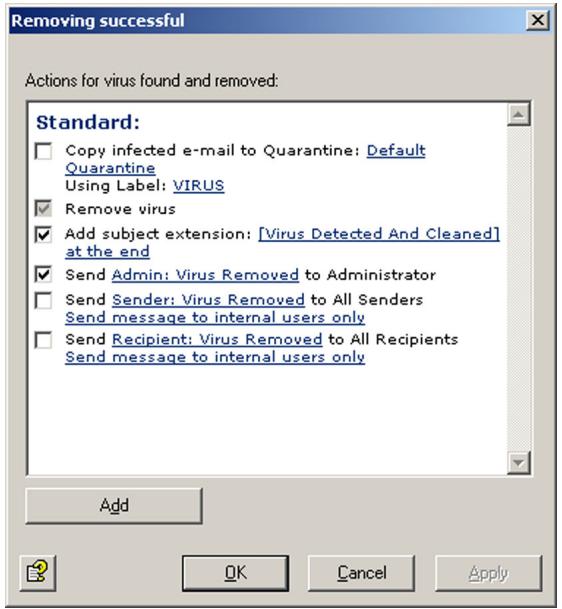
The following actions are available:
a) Use the first option to specify whether a copy of the object is to be quarantined and labeled. The copy is created before cleaning so that the object is quarantined in its original state.
b) In addition you can define whether a notification is sent to the administrator(s).
- Object unscannable: This option allows to control the behavior of AntiVir Exchange when it finds encrypted objects, which cannot be opened for scanning.

Two options are available. In the Information Store scan field, select one of two settings:
a) Treat as error
The object will be rescanned with the next scan. If previous scans have not treated the object as uninfected, access is denied.
b) Treat as uninfected
The object is treated as if it were virus-free. It is not rescanned before virus scanning is restarted.
You can also notify the administrator and add further actions ny clicking on the Add button.
6.3.4 Job Details
For details on entering the job details, refer to "Entering Job Details" on page 69 durchgeführt.
6.3.5 Server Status
Under AntiVir Monitor Server
The General tab shows the following:
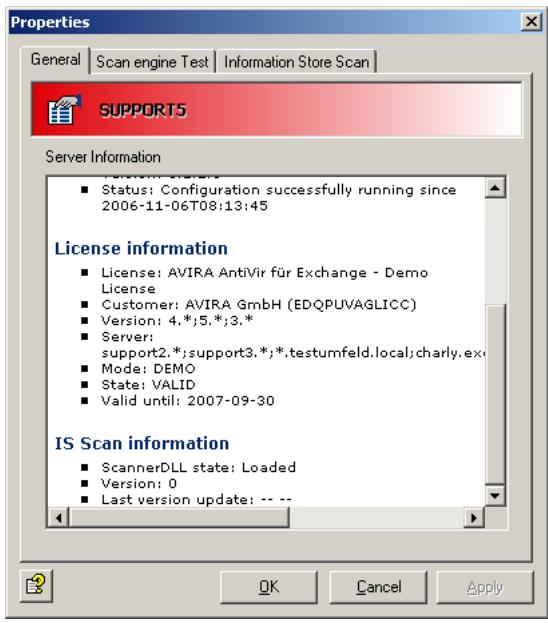
- Whether the scanner DLL for the Information Store scan is loaded. When the DLL indicates Loaded, the Information Store scan is enabled.
- The Information Store scan version. This number is incremented with every restart.
- The date of the last version update and the time and date of the last restart.
Under the Information Store Scan tab, you can restart background scanning:
When scanning is restarted, all elements in the Information Store are checked one more time. This applies to all three scan modes. If you have enabled background scanning, this scan may take a long time and use a lot of processor capacity. It is therefore advisable to restart scanning during periods of low system usage and following pattern file updates.
6.4 File Restrictions for Attachments
Files can be restricted according to their type and size: you can deny specific file types and you can specify maximum message and attachment sizes. Both the size and the type of attachments can also be checked with a single job.
6.4.1 By Type
AntiVir must be able to identify files according to their type. This is done with file fingerprints1, which contain a binary file pattern (for example for .exe files) and/or the file extension (for example for .vbs files). The result of this scan is compared with the denied/allowed fingerprints under AntiVir Restrictions and blocked or delivered accordingly. For denied files, the job actions are then performed, for instance for a mail with a denied attachment:
- The denied attachment is copied to the quarantine folder.
- The message text is delivered to the recipient.
- Notifications are sent to the administrator and the sender.
An AntiVir Attachment Filtering job can perform the following actions:
- Add a subject extension
- Place the entire message into quarantine
- Remove affected attachments from the message
-
Delete the affected message without delivering it
-
refer to "Configuring Fingerprints" on page 75.
-
Run an external application
- Notify the administrator
- Notify the sender
- Notify the recipient
- Notify any other, user-definable persons
- Add X-header field
- Redirect mail
6.4.2 By Message Size
E-mails can be checked for and denied according to their total size. The e-mail size limit is specified under the E-mail Size tab.
An AntiVir E-Mail Size Filtering job can perform the following actions:
- Add a subject extension
- Place the entire message into quarantine
- Delete the affected message without delivering it
- Run an external application
- Notify the administrator
- Notify the sender
- Notify the recipient
- Notify any other, user-definable persons
- Add X-header field
- Redirect mail
6.4.3 By Type and/or Attachment Size
Attachments can be checked for size and messages delivered or denied accordingly. The maximum attachment size is specified on the Fingerprint/Size tab. This job can check and deny attachment types while at the same time filtering by attachment size.
AntiVir Attachment/Size Filtering jobs can perform the same actions as attachment filtering jobs.
6.4.4 Configuring Fingerprints
Fingerprints consist of a name pattern and/or a binary pattern.
- Filename pattern: used to define file types by filenames and file extensions (*.exe, etc.)
- Binary pattern: used to define file types using unique binary file information.
Malicious users can manipulate filenames by simply changing the extension to a different file type. To prevent file type filtering being fooled by this type of manipulation, you can use the binary pattern which uniquely identifies file formats. The binary pattern is therefore the most reliable method for identifying file types.
Filename patterns, however, can be used to quickly react to new virus attacks:
As soon as the extension of the file containing a virus is known (for example Nimda Virus = readme.exe), a virus infection can be prevented even before a virus pattern update is available from the publisher of your antivirus application. A new fingerprint with the filename pattern is simply created to identify the virus.
You can also block individual files:
If your company employs custom software that uses its own file formats, you can also create fingerprints for these files, which you can use, for example, to prevent files of this type being sent as e-mail attachments to recipients outside the company.
You can sort fingerprints and group them into logical categories. Fingerprint categories are listed alphabetically.
- Click under Basic Configuration Utility Settings and click Fingerprints to view all available categories in the right pane.
- Click a single category to open it. The individual fingerprints appear in the right pane.
- You can drag individual fingerprints from the right pane into a different category in the left pane.
- To view the Properties of a fingerprint in the right pane, double-click or right-click the fingerprint.

To copy fingerprints from the All Fingerprints category, drag them to the desired category. When you drag fingerprints from any of the other categories, they are moved! To copy from other categories, hold the Ctrl key while dragging. A plus symbol then appears in the cursor.

When you delete a fingerprint from any category with the Del key, it is permanently deleted and can not be restored. To remove a fingerprint from a category without permanently deleting it, right-click it and select Remove fingerprint(s) from this category. Make sure that the fingerprints you want to delete or remove are no longer used by an AntiVir job.
To create a new fingerprint category, click on Fingerprints in the left pane, right-click and select New Fingerprint Category. For a new fingerprint, right-click the category and select New Fingerprint.
The Jobs tab lists the jobs that use the fingerprint.
6.4.4.1 Creating Fingerprints with Name Patterns
If a file's binary pattern is not known, it can be identified quickly using a name pattern. When you open the General tab under Properties for a fingerprint (see "Configuring Fingerprints" on page 75), the following dialog appears (with a Microsoft fingerprint in the example below):
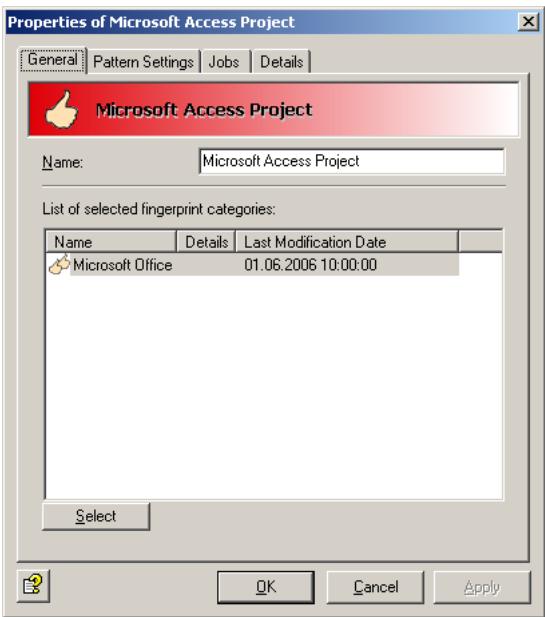
The fingerprint is called Microsoft Access Project and belongs to the Microsoft Office category, which is shown in the Categories pane.
Select the Pattern Settings tab.
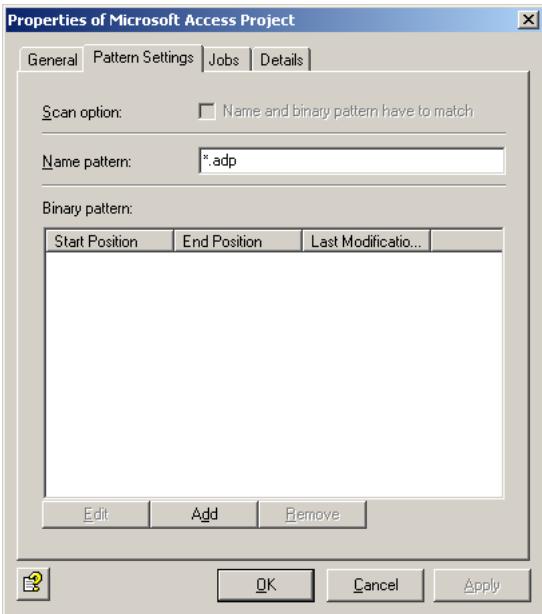
In the Name pattern field, enter the file extension for this name pattern.
You can define several filename patterns for each fingerprint. Multiple entries must be separated with a semicolon (·) .
You can use the “*” wildcard for multiple characters, for instance to define a fingerprint with the filename pattern“.vbs”. You can also specify complete filenames in this field. If you enter, for instance, “Att01.cdf” here, the created fingerprint, when specified in a job, denies all files with that name.

If you have selected the Check Binary and Name Pattern option, both the filename pattern (file extension) and the binary pattern of the checked file must correspond with the data in the fingerprint properties. Make sure that you have specified this information. If you have not selected this option, but both patterns have been specified in the fingerprint properties, only one of the patterns must match to identify the file format. For further information on entering name and binary patterns, refer to "Selecting Fingerprints" on page 83.
6.4.4.2 Creating Binary Patterns for Fingerprints
Description
Binary patterns contain the following information:
- Start position
End position -
Hexadezimalen values
-
Start position: The position within a file from which a pattern search is performed.
The following values are possible:
"1" Start at the first byte of the file
"1", "2", ... Start at the first byte, second byte, etc. of the file
"-"1" ... Start at the last byte of the file
"-" 6" ... Start at the sixth byte from the end of the file
- End position: The position within a file up to which the pattern search is performed.
The following values are possible:
"-" Search to the end of the file
"1", "2", ... Search up to byte 1, byte 2, etc. of the file end
"-11" ... Search to the eleventh byte from the end of the file
- Hexadezimale values: The pattern to be searched for between the start and end positions.
Fingerprints can consist of several binary patterns.
Go to the fingerprint Properties (see "Configuring Fingerprints" on page 75) and select the Pattern Settings tab. Click Add.
Enter the start position, the end position and the hexadecimal search value.
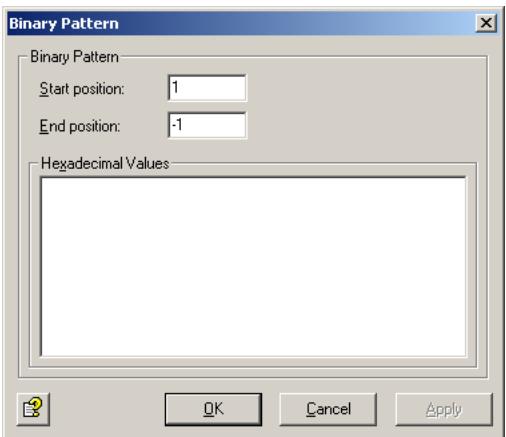
The start position is the point in the file from which the specified binary pattern will be searched for. The position of the first byte in the file, i.e. the beginning of the file, is offset 1. The second byte then has an offset of 2, etc. The end position is the offset up to which the pattern is searched for.
If the number in one or both of these fields is prefixed with a minus sign (“-”) , the bytes are counted in reverse. The entry -1, for example, is the last byte of the file. -2 would then be the last but one byte, etc. The file size is irrelevant for this purpose. A start position of 1 and an end position of -1 means that the entire file will be searched for the specified pattern. You can also enter two negative values for example -6 as start position and -1 as end position. The search is then performed from the last byte to the sixth from last byte, regardless of the byte size of the file. A positive start position and a negative end position are always possible, for example 11 as start position (the eleventh byte) and -10 as end position (the tenth byte from the end). You can not enter a negative start position and a positive end position.
Example: Windows/OS2 Bitmap Files (.bmp)
When you open the pattern settings for a bitmap file, the following dialog appears:
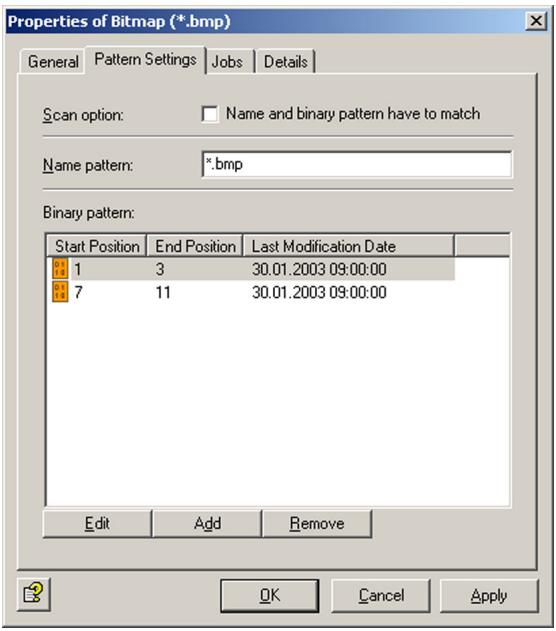
For details on the Check Binary and Name Pattern option, refer to "Configuring Fingerprints" on page 75.
Now click Edit to open the first entry. The following dialog appears:
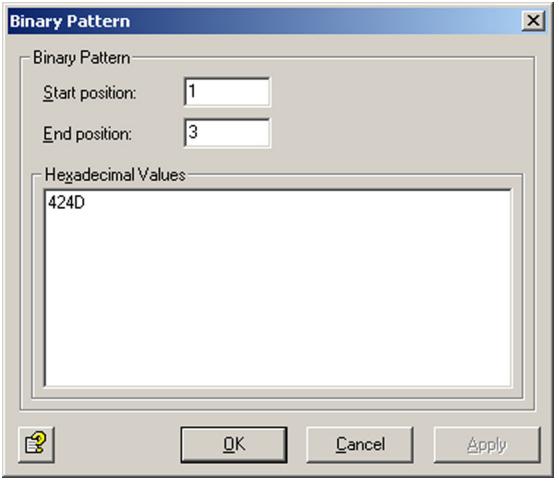
The start position is "1", the end position "3". This means that the file is searched for the binary pattern "42 4D" between the first and the third byte, i.e. between offset 1 and offset 3. The binary pattern is entered as a hexadecimal number in the lower field. The pattern in this example corresponds to the letters "BM". This is part of the ID of a Windows/OS2 bitmap file. This is still not a complete pattern.
To complete the binary pattern for a bitmap file, you must add one more entry, which looks like this:
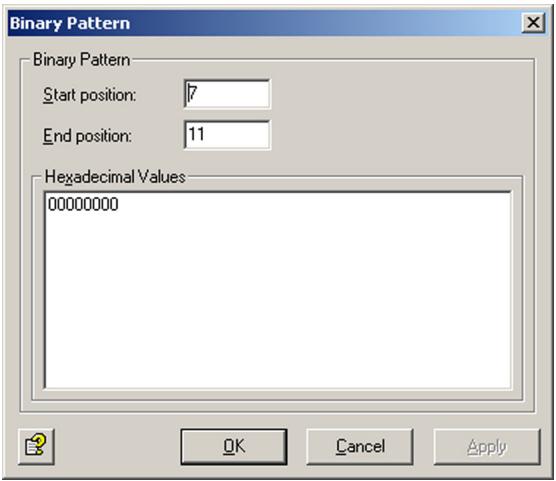
Here, a search is performed for the pattern "00000000" between offsets 7 and 11.
Only when both binary patterns have been found in a file, does the file match the pattern and can be identified as a bitmap. For each additional search pattern, click Add.
If you want to identify fingerprint binary patterns that are not included in the supplied list of file patterns, please contact the publisher of the software to which the file type applies, e.g. Adobe for Acrobat (.pdf) files or contact our Support.
6.4.4.3 Further Fingerprint Examples
| Example of a simple fingerprint: ZIP file | ||
| Start | End | Hex value |
| 1 | 4 | 504B0304 |
| Example of a more complex fingerprint: Windows Meta File | ||
| Start | End | Hex value |
| 1 | 13 | 576F72642E446F63756D656E74 |
| 1 | -1 | 57006F007200640044006F00630075006D0065006E0074 |
| 1 | 10 | D0CF11E0A1B11AE10000 |
6.4.5 Denying File Attachments by Type - Example
Under Policy Configuration Sample Jobs, you will find various jobs for blocking different file formats.
- Block Archives, Except ZIP Files
Blocks all compressed formats except ZIP files
- Block Suspicious Attachments
Blocks known malicious attachments such as Nimda.
- Block Image Files
Blocks image formats
- Block Video Files
Blocks video formats
- Block Sound Files
Blocks sound formats
- Block Executable Files
Blocksexe,com,files,etc.
We will use the Block Video Files job as an example. Drag this job to the Mail Transport Jobs folder and open it there with a double-click.
6.4.5.1 General Settings
On the General tab, enter your own name for the job. You can identify a disabled job by the red cross in the lower corner of the job symbol. Set the job to Enabled. Once you have saved your settings with OK and closed the job, the job is enabled and the red cross disappears.
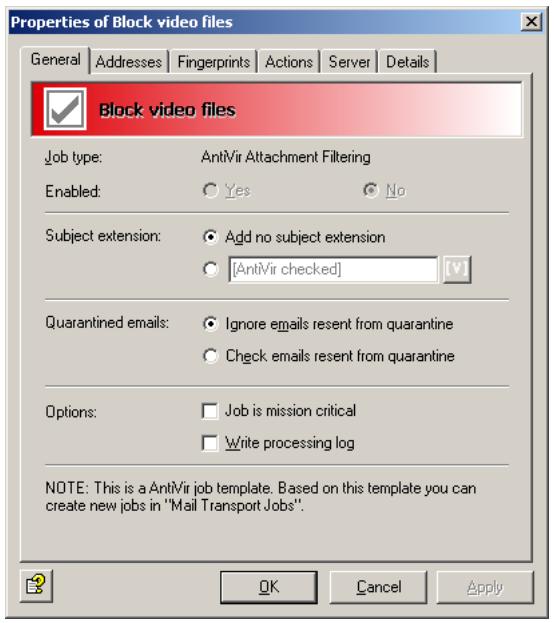
By default, the Subject Extension is pre-set to AntiVir checked. If enabled, this text is added to the subject of each mail checked by the job.
This job does not process mails that are being resent from Quarantine (AntiVir Monitor
For further information on sending quarantined mail, refer to "Icons used on these tabs:" on page 55. For details on the Mission Critical option, refer to This job is mission-critical. The Write processing log option is described under Write processing log.
6.4.5.2 Setting up Address Conditions
Under the Addresses tab, specify the senders or recipients to which this job is to apply. You can select addresses from existing lists or from your own. For details on how to make the best use of address lists and details, see description under "Address Lists" on page 30.
6.4.5.3 Setting up Content Conditions
Under the Conditions tab you can set the requirements as to which mails or documents a job is to be run for.

The content conditions and the address conditions set in the Adresses tab must simultaneously come true for a job to be run (logical AND).
6.4.5.4 Selecting Fingerprints
under the Fingerprints tab, select the denied fingerprints:
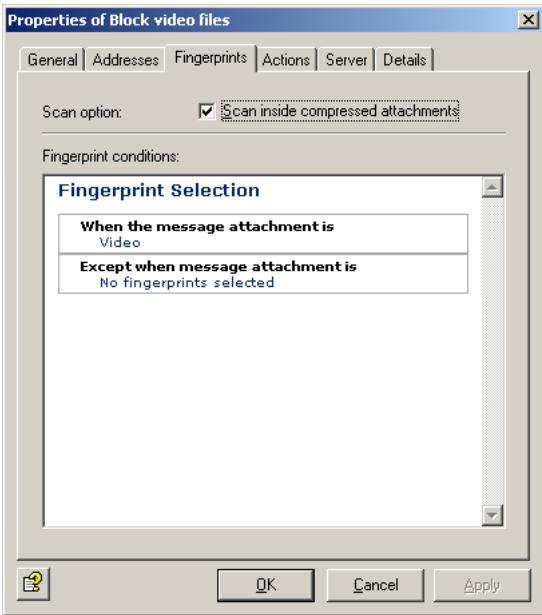
Scan inside compressed attachments means that the internal unpacker opens archives and checks the files it contains for the specified fingerprints. If this option is not selected, only the archive is checked and identified as compressed format.
Fingerprint conditions: Click Video or No fingerprints selected to select a fingerprint category or an individual fingerprint from the list. You get the following view:
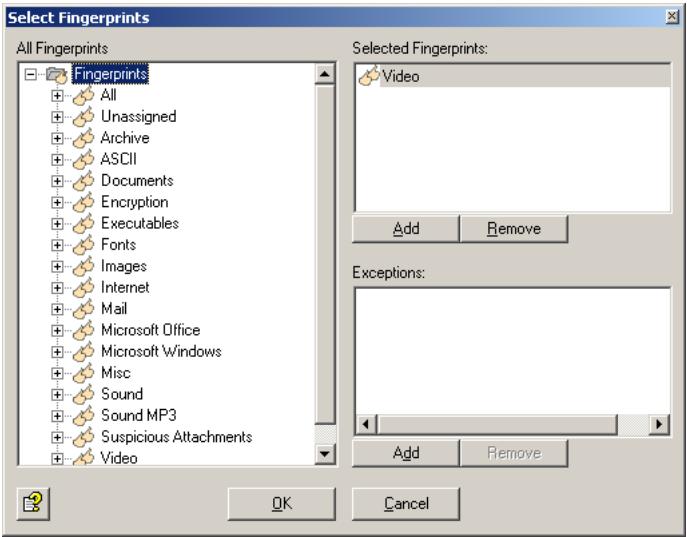
With the Add and Remove buttons, you can assign entire categories or individual fingerprints to the list of denied and/or allowed fingerprints. To do so, double-click the category in the left pane or click the + sign to open it.

You can enter a category such as "Video" under Denied Fingerprints and define one or more fingerprints from that category as exception under Allowed Fingerprints. To keep a clear overview, do not use the same job for too many categories.
For further information on fingerprints, refer to "Configuring Fingerprints" on page 75.
6.4.5.5 Defining Actions
Under the Actions tab, specify the actions to be taken when the job finds an attachment with a denied fingerprint.
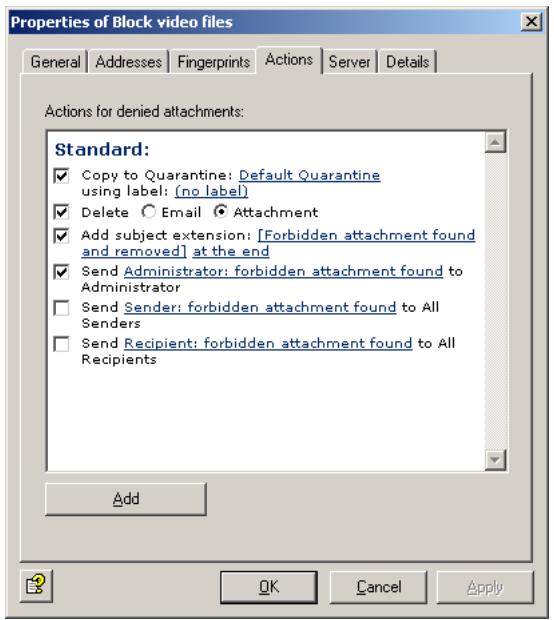
In this example, a copy of the message is placed in quarantine and the infected attachments are deleted. The message is delivered to its recipient, but the denied attachments are removed. A notification about the denied fingerprint is sent to the administrator. You can select this notification from the list menu of available notification templates, which you can format using the HTML toolbar or by entering appropriate HTML code yourself.
To define further actions, click the Add button. For a description of the procedure, refer to „AntiVir, Job example: “Defining Actions” on page 65".
6.4.5.6 Selecting servers/Job Details
For details on selecting servers and entering job details, refer to "Selecting Servers" on page 69 and "Entering Job Details" on page 69.
6.4.6 Limiting Message Size - Example
Under Policy Configuration Sample Jobs you will find the Block E-mails Larger 100 MB job.

The message size limit applies to the e-mail as a whole, including subject, text body, header and attachments.
Drag this job to the Mail Transport Jobs folder and open it there with a double-click.
6.4.6.1 General Settings
Under the General tab, you can enter your own name for the job. You can identify a disabled job by the red cross in the lower corner of the job symbol. Set the job to Enabled. Once you have saved your settings with OK and closed the job, the job is enabled and the red cross disappears.
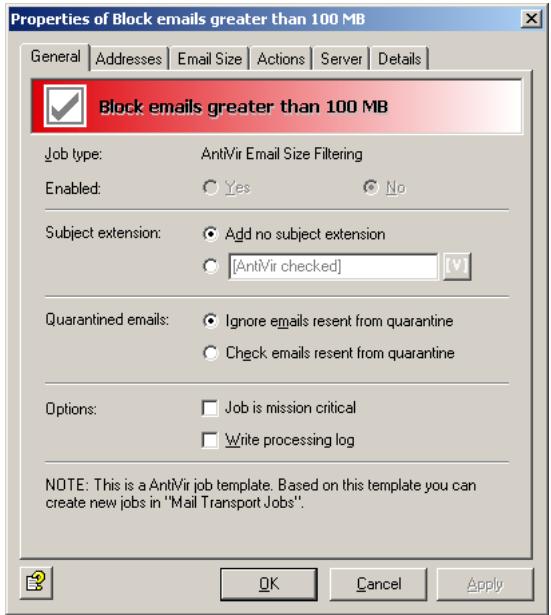
By default, the Subject Extension is pre-set to AntiVir checked. If enabled, this text is added to the subject of each mail checked by the job.
This job does not process mails that are being resent from Quarantine (AntiVir Monitor
For further information on sending quarantined mail, refer to "Icons used on these tabs:" on page 55. For details on the Mission Critical option, refer to This job is mission-critical. The Write processing log option is described under Write processing log.
6.4.6.2 Setting up Address Conditions
Under the Addresses tab, specify the senders or recipients to which this job is to apply. You can select addresses from existing lists or from your own. For details on how to make the best use of address lists and details, see description under "Address Lists" on page 30.
6.4.6.3 Setting up Content Conditions
Under the Conditions tab you can set the requirements as to which mails or documents a job is to be run for.

The content conditions and the address conditions set in the Adresses tab must simultaneously come true for a job to be run (logical AND).
6.4.6.4 Specifying Message Size
Under the E-Mail Size tab, enter the e-mail size limit in kilobytes:
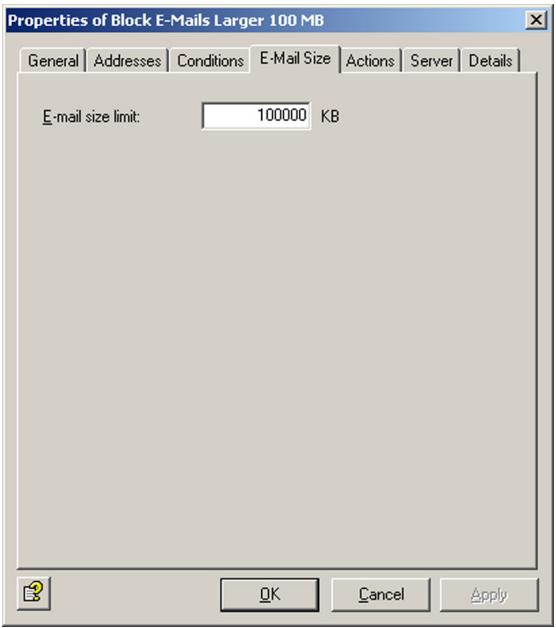
With the setting above, the maximum permissible size of each incoming and outgoing e-mail is 100,000 kilobytes.
6.4.6.5 Defining Actions
Under the Actions tab, specify the actions to be taken when the job finds an e-mail that exceeds the maximum size.
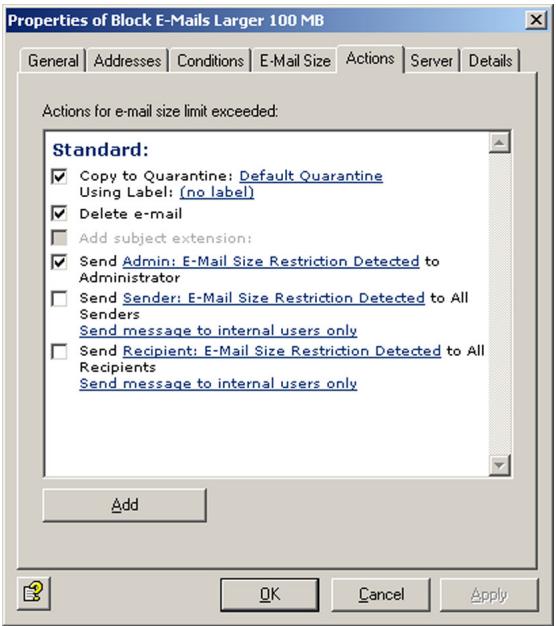
In this example, a copy of the message is placed in quarantine and the message is deleted without being delivered to its recipient. A notification about the excessive message size is sent to the administrator. You can select this notification from the list menu of available notification templates, which you can format using the HTML toolbar or by entering appropriate HTML code yourself.
To define further actions, click the Add button. For a description of the procedure, refer to „AntiVir, Job example: “Defining Actions” on page 65".
6.4.6.6 Selecting servers/Job Details
For details on selecting servers and entering job details, refer to "Selecting Servers" on page 69 and "Entering Job Details" on page 69.
Save the configuration of the AntiVir Exchange Management Console each time you have modified the settings. Click on the button. The configuration is saved in the ConfigData.xml file located in the Avira GmbH\AntiVirExchange\Config folder. Pending changes are indicated by an asterisk (*) next to the top node
6.4.7 Denying Attachment Types and Size - Example
Under Policy Configuration Sample Jobs you will find different jobs for blocking several file formats and corresponding file size.
- Block Office Files > 10 MB
Microsoft Office Files larger than 10 MB
- Block Sound Files > 5 MB
Sound Files larger than 5 MB
- Block Video Files > 5 MB
Video Files larger than 5 MB

Unlike message size checking, attachment format and size checking applies to attachments only; subject, text body and message header are not taken into account.
We will use the Block Office Files > 10 MB job as an example. Drag this job to the Mail Transport Jobs folder and open it there with a double-click.
6.4.7.1 General Settings
Under the General tab, enter your own name for the job. You can identify a disabled job by the red cross in the lower corner of the job symbol. Set the job to Enabled. Once you have saved your settings with OK and closed the job, the job is enabled and the red cross disappears.
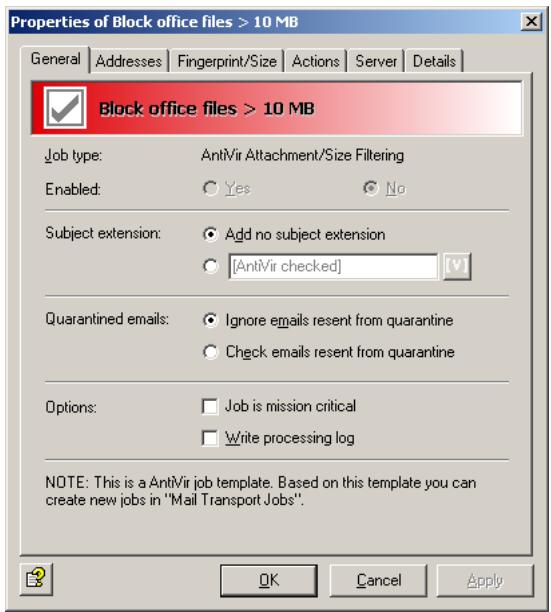
By default, the Subject Extension is pre-set to AntiVir checked. If enabled, this text is added to the subject of each mail checked by the job.
This job does not process mails that are being resent from Quarantine (AntiVir Monitor
For further information on sending quarantined mail, refer to "Icons used on these tabs:" on page 55. For details on the Mission Critical option, refer to This job is mission-critical. The Write processing log option is described under Write processing log.
6.4.7.2 Setting up Address Conditions
Under the Addresses tab, specify the senders or recipients to which this job is to apply. You can select addresses from existing lists or from your own. For details on how to make the best use of address lists and details, see description under "Address Lists" on page 30.
6.4.7.3 Setting up Content Conditions
Under the Conditions tab you can set the requirements as to which mails or documents a job is to be run for.

The content conditions and the address conditions set in the Adresses tab must simultaneously come true for a job to be run (logical AND).
6.4.7.4 Specifying Fingerprint and Size
Under the Fingerprint/Size tab, enter the maximum permissible e-mail size and the fingerprint format:
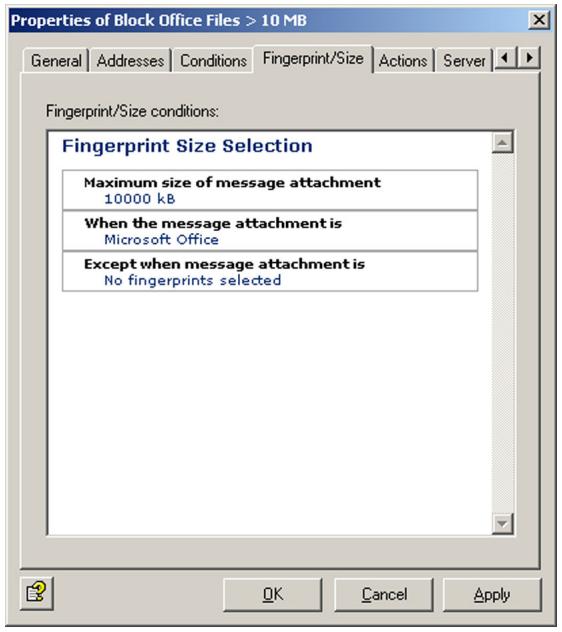

Unlike for simple fingerprint checking, the Scan inside compressed attachments option is not available here. To limit the size of compressed files, enter their formats in this job.
Fingerprint/size conditions: To specify the size in kilobytes, click 10000. To select a fingerprint category, an individual fingerprint or the maximum size from the list of fingerprints, click on Microsoft Office.
The following view is displayed:
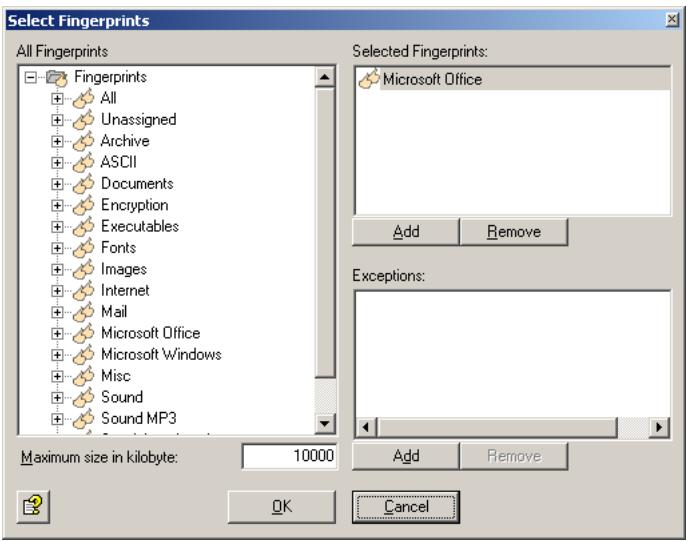
With the Add and Remove buttons, you can assign entire categories or individual fingerprints to the list of denied and/or allowed fingerprints. To do so, double-click the category in the left pane or click the + sign to open it.

You can enter a category such as "Microsoft Office" under Denied Fingerprints and define one or more fingerprints from that category as exception under Allowed Fingerprints. To keep a clear overview, do not use the same job for too many categories.
For further information on fingerprints and on entering name and binary patterns, refer to "Configuring Fingerprints" on page 75.
6.4.7.5 Defining Actions
Under the Actions tab, specify the actions to be taken when the job finds an e-mail that was denied by an attachment/size job.
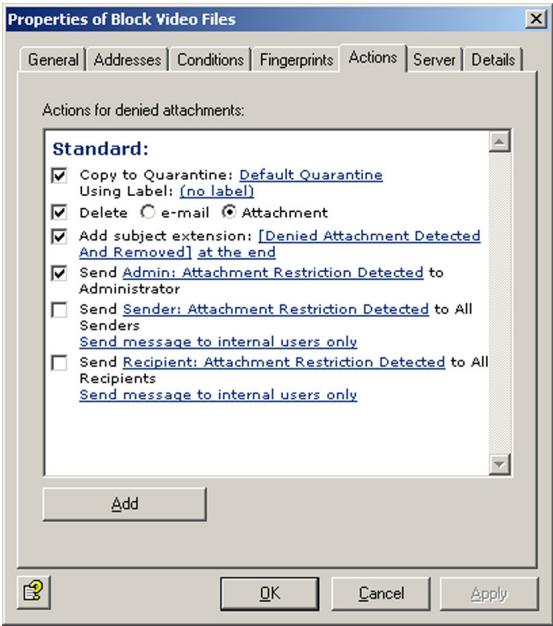
In this example, a copy of the message is placed in quarantine, the infected attachments are deleted, and the message is delivered without its attachment. A notification on the restriction is sent to the administrator. You can select this notification from the list menu of available notification templates, which you can format using the HTML toolbar or by entering appropriate HTML code yourself.
To define further actions, click the Add button. For a description of the procedure, refer to „AntiVir, Job example: “Defining Actions” on page 65".
6.4.7.6 Selecting servers/Job Details
For details on selecting servers and entering job details, refer to "Selecting Servers" on page 69 and "Entering Job Details" on page 69.
Save the configuration of the AntiVir Exchange Management Console each time you have modified the settings. Click on the button. The configuration is saved in the ConfigData.xml file located in the Avira GmbH\AntiVirExchange\Config folder. Pending changes are indicated by an asterisk (*) next to the top node.
7 AntiVir Wall
7.1 Overview
AntiVir Wall is used to filter e-mails or attachments according to their text content, check images for offensive contents, classify e-mails according to their content, limit the number of inbound or outbound e-mail addresses and to limit the number of recipients per e-mail.
Job types
- Filtering by e-mail address
Job: AntiVir Wall E-Mail Address Filtering - Filtering by message or attachment content
Job: AntiVir Wall Content Filtering - Spam filtering
Job: AntiVir Wall Spam Filtering - Spam filtering using DCC server
Job: AntiVir Wall DCC Spam Filtering - Checking for offensive images with Xblock
Job: AntiVir Wall Xblock Image Filtering - Restricting the number of recipients
Job: AntiVir Wall Recipient Limit Filtering

Create a separate job for each restriction type. The job types cannot be changed later on.
For details on setting up jobs, refer to the sample jobs, such as “Blocking Senders and/or Recipients – Example” on page 95. The diagram below illustrates the working principle:
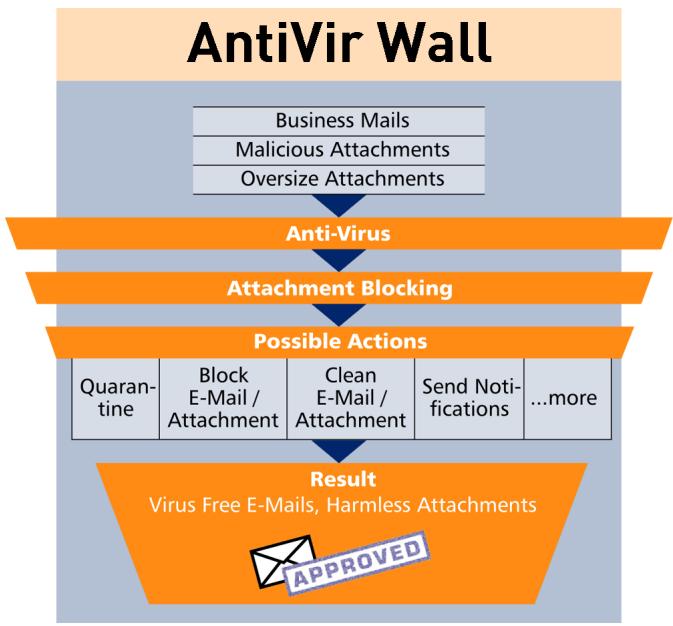
7.2 Address Filtering
Address filtering focuses on the senders and recipients of the e-mails. You can deny specific senders, so that no mail from these addresses is delivered to your users, and you can deny specific recipients, so that none of your employees (or only selected people) can send mail to them.
The following objects can be used for address filtering:
- Mail-Enabled Active Directory user
- Mail-Enabled Active Directory groups
- Mail-Enabled Active Directory contacts
- User-definable SMTP addresses including wildcards
- [INTERNAL] - domains defined as internal in Avira AntiVir Exchange
- [EXTERNAL] - all addresses that are not [INTERN]
- "Administrator" - the e-mail addresses defined as Administrator in Avira AntiVir Exchange.
Senders and recipients are defined by the corresponding e-mails fields. A sender can be either an employee of your company sending e-mail to someone outside or someone outside sending an e-mail to an employee of your company. You can define both senders and recipients as individuals or groups.
For address filtering, you can normally use the following wildcards:
- Asterisk (*)
The asterisk is the wildcard for one or more letters and numbers. It can be used several times within a word or expression.
- Question mark (?)
The question mark represents a single character. It can also be used several times within a word or expression.
Example: To specify a denied sender, you can enter something like “tom@.” as a disallowed sender instead of individual e-mail addresses. That means that all mail sent by any Tom with any extension (such as family name) and from any domain is denied. This includes your own employee Tom Jones, to whose mails the same restrictions will be applied. To specify a particular domain, you can enter “*@domain.com”. All senders or recipients from this domain are then denied. Be careful when you create an address filtering job for multiple servers that denies an entire domain. It is not always obvious which addresses are private and which business in nature. Keep in mind that smaller companies may have e-mail addresses for example under ISP domains, such as @demon.co.uk or @aol.com.
Address filtering is a simple means for filtering out e-mails sent from known spam addresses. The usual suspects can be intercepted at the server and deleted at once.

Because the processing condition is the same as the job restriction condition for address filtering, a subject extension – if defined – is added to passed e-mails even if the message does not meet the processing condition.
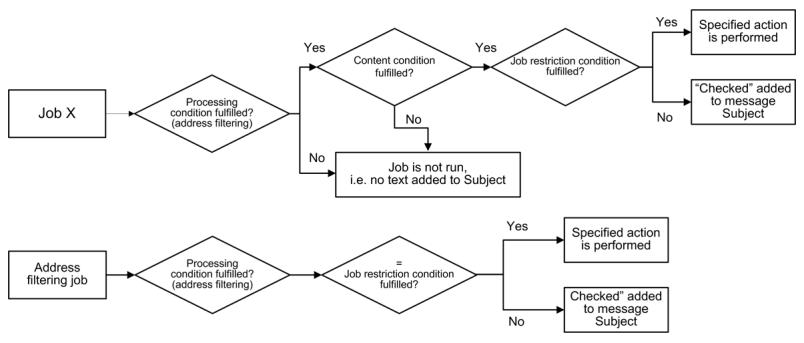
The following actions are possible:
- Add a subject extension
- Copy the entire message into quarantine
- Delete the affected e-mail without delivering it
- Run an external application
- Notify the administrator
- Notify the sender
- Notify the recipient
- Notify any other user-definable persons
- Add X-header field
- Redirect mail
7.2.1 Blocking Senders and/or Recipients - Example
Unter Policy Configuration Sample Jobs, you will find a configured address filtering job. Double-click the Block Specific Sender Addresses job to open it.
7.2.1.1 General Settings
Under the General tab, enter your own name for the job. You can identify a disabled job by the red cross in the lower corner of the job symbol. Set the job to Enabled. Once you have saved your settings with OK and closed the job, the job is enabled and the red cross disappears.
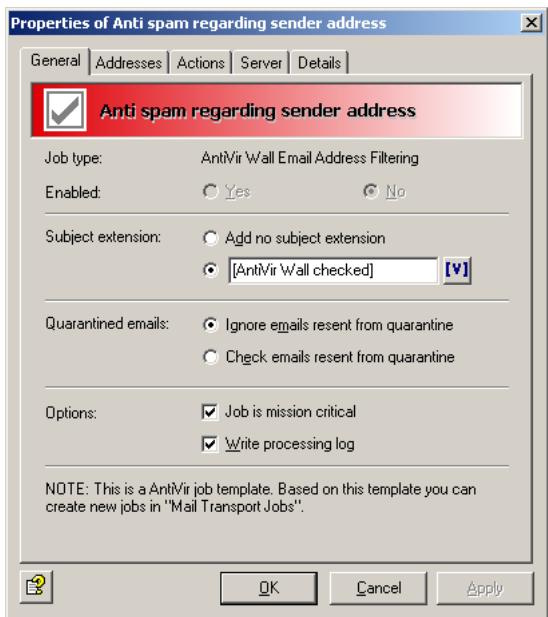
By default, the Subject Extension is pre-set to AntiVir Wall checked. If enabled, this text is added to the subject of each mail checked by the job.
This job does not process mails that are being resent from Quarantine (AntiVir Monitor
For further information on sending quarantined mail, refer to "Icons used on these tabs:" on page 55. For details on the Mission Critical option, refer to This job is mission-critical in the section AntiVir and to Write processing log for the description of the Write processing log option.
7.2.1.2 Setting up Address Conditions
Under the Addresses tab, specify the senders or recipients to which this job is to apply. You can select addresses from existing lists or from your own. For details on how to make the best use of address lists and details, see description under "Address Lists" on page 30.
7.2.1.3 Setting up Content Conditions
Under the Conditions tab you can set the requirements as to which mails or documents a job is to be run for.

The content conditions and the address conditions set in the Adresses tab must simultaneously come true for a job to be run (logical AND).
7.2.1.4 Defining actions
Under the Actions tab, specify the actions to be taken when the job finds an e-mail with denied senders.
In this example, a copy of the message is placed in quarantine and the message is deleted without being delivered to its recipient. A notification warning of the denied address is sent to the administrator. You can select this notification from the list menu of available notification templates, which you can format using the HTML toolbar or by entering appropriate HTML code yourself1.
1. Refer to "Create Notification Templates" on page 36
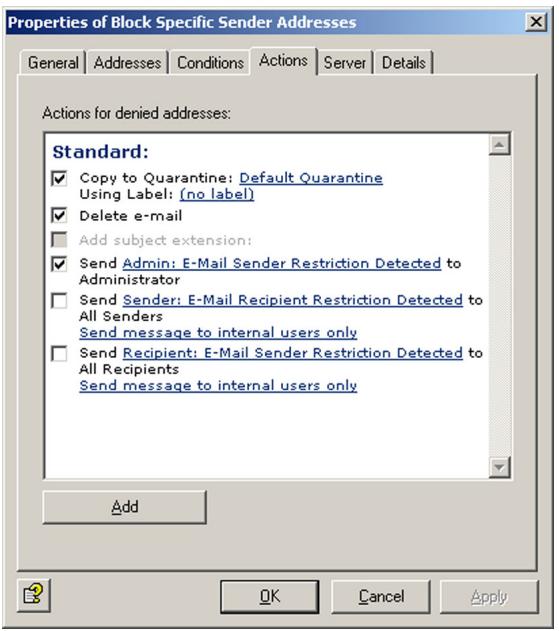
To define further actions, click the Add button. For a description of the procedure, refer to „AntiVir, Job example: “Defining Actions” on page 65".
7.2.1.5 Selecting servers/Job Details
For details on selecting servers and entering job details, refer to "Selecting Servers" on page 69 and "Entering Job Details" on page 69.
Save the configuration of the AntiVir Exchange Management Console each time you have modified the settings. Click on the button. The configuration is saved in the ConfigData.xml file located in the Avira GmbH\AntiVirExchange\Config folder. Pending changes are indicated by an asterisk (*) next to the top node.
7.3 Content Filtering With Dictionaries
AntiVir Wall uses predefined dictionaries to look for undesirable text content.
It can check the following message elements:
- Subject
- Message text
- Attachments
Content filtering can be limited to specific senders or recipients. You can specify, for example, that only external mail is scanned for pornography, racism, etc., while own-domain mail to external recipients can be checked for internal or confidential information. Messages are scanned and compared against the specified dictionaries. When a dictionary is enabled for a particular job, the words or sentences you have entered in that list are considered restricted as of a specific threshold value. The job also defines the character conversion. When the specified threshold is reached, the job starts the actions that you have previously defined under the Actions tab.
Example of the working principle of a content filtering job: The job checks an e-mail and finds restricted content. It triggers an alarm and initiates a series of actions that you have specified for the job under Actions. Let's assume that you have specified the following:
- The message is to be moved into the quarantine folder you have created and will not be delivered to the recipient.
- Notifications with the relevant information from the AntiVir Wall job are sent to the administrator, the sender and the recipient.
The actions available are the same as for address filtering.
7.3.1 Setting up Dictionaries
- Click Dictionaries.
- To open a dictionary, double-click it in the right pane.
- Under the General tab, enter a name for the dictionary.
- Give the dictionary a weighting from 1 to 200. The dictionary weighting applies to each word or phrase and determines the relationship to other dictionaries and to what extent the dictionary is taken into account in the job. For further information on weighting, refer to "Content Filtering With Dictionaries" on page 97 and "Checking and Denying Text Contents - Example" on page 100.
- Click the input field for the words and add words and phrases that you want to forbid. Each word and/or phrase must stand on its own line, separated with a paragraph mark (Enter key).
You can use the following wildcards in dictionaries:
- Asterisk (*)
The asterisk represents none or more characters within a word or phrase. Example: check will find “check” “checkpoint”, “intercheck” and “inter-checkpoint”. check* will find “check” and “checkpoint”, but not “inter-check” nor “intercheckpoint”. The asterisk must be placed at the beginning or end of a word or phrase.
- Plus symbol (+)
The plus symbol has the same function as the asterisk, but indicates that the search term is part of a word or phrase. Example: +check+ will find "checkpoint", "intercheck" and "intercheckpoint", but not "check" on its own. check+ finds only "checkpoint". The plus symbol must also be placed at the start or end of a word or phrase.

If you enter a word or phrase without wildcard, only that exact word/phrase will be found. For example, if you enter check, only the whole word "check" will be found.
- To sort the dictionary in ascending order, click , and to sort it in descending order, click .
To create a new dictionary, right-click Dictionaries and select New Dictionary wahlen.
The jobs tab lists the jobs that use an object.
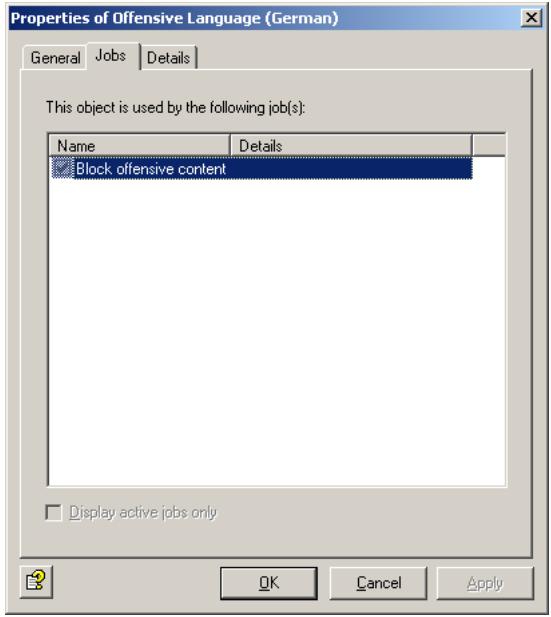

To use dictionaries in a job, select a Content Filtering job under Policy Configuration, enable the required dictionary and specify an overall threshold value (from 1 to 10,000). As soon as this threshold value is reached when all weightings (identified words/phrases) of the active dictionaries are added, the specified actions are performed. For further information, refer to "Checking and Denying Text Contents - Example" on page 100.
7.3.1.1 Searching for Text in Dictionaries
To search for and replace text in dictionaries, double-click the dictionary to open it and click :
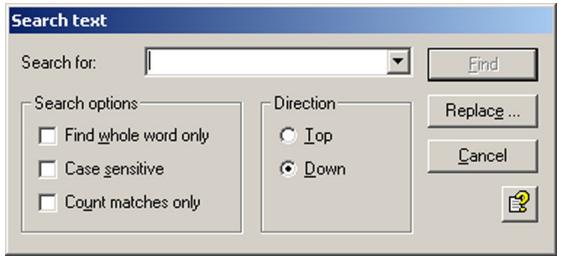
If you do not specify any additional options, the function looks for the entered character string everywhere, i.e. also within words and phrases.
Find whole word only:
You can separate words with any non-alphanumeric character including paragraph marks and manual line breaks.
- Case sensitive:
Makes the search case-sensitive.
- Count matches only:
Only the number of matches is displayed, not the matches themselves:
To replace a string with another, click Replace:
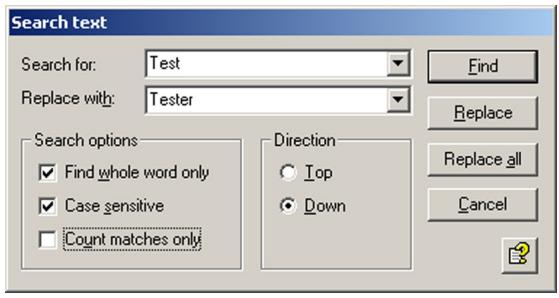
You can also use the text search and replace function for your own addresses. Also refer to "Address Lists" on page 30.
7.3.2 Checking and Denying Text Contents - Example
The Policy Configuration Sample Jobs contains various jobs for content filtering with dictionaries.
- Block Offensive Language
Search for obscene and pornographic language
- Block Script Commands
Search for script commands that could cause damage
- Block E-Mails With Resumes Or CVs
Search for terms common to resumés/CVs
- Block E-Mails from "Nigeria Connection"
Search for terms specific to "Nigeria" e-mails
We will use the Block Offensive Language job as an example. Drag this job to the Mail Transport Jobs folder and open it with a double-click.
7.3.2.1 General Settings
Under the General tab, enter your own name for the job. You can identify a disabled job by the red cross in the lower corner of the job symbol. Set the job to Enabled. Once you have saved your settings with OK and closed the job, the job is enabled and the red cross disappears.
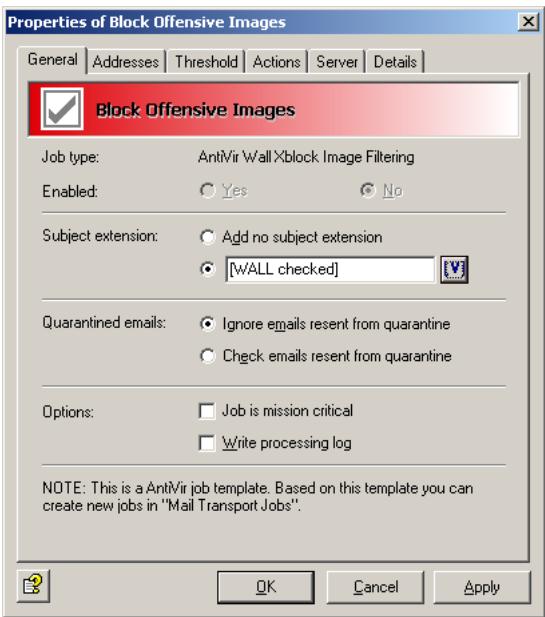
By default, the Subject Extension is pre-set to AntiVir Wall checked. If enabled, this text is added to the subject of each mail checked by the job.
This job does not process mails that are being resent from Quarantine (AntiVir Monitor
For further information on sending quarantined mail, refer to "Icons used on these tabs:" on page 55. For details on the Mission Critical option, refer to This job is mission-critical in the section AntiVir and to Write processing log for the description of the Write processing log option.
7.3.2.2 Setting up Address Conditions
Under the Addresses tab, specify the senders or recipients to which this job is to apply. You can select addresses from existing lists or from your own. For details on how to make the best use of address lists and details, see description under "Address Lists" on page 30.
7.3.2.3 Setting up Content Conditions
Under the Conditions tab you can set the requirements as to which mails or documents a job is to be run for.
The content conditions and the address conditions set in the Adresses tab must simultaneously come true for a job to be run (logical AND).
7.3.2.4 Selecting Dictionaries
Under the Content Restriction tab, specify the dictionaries to be used by this job.
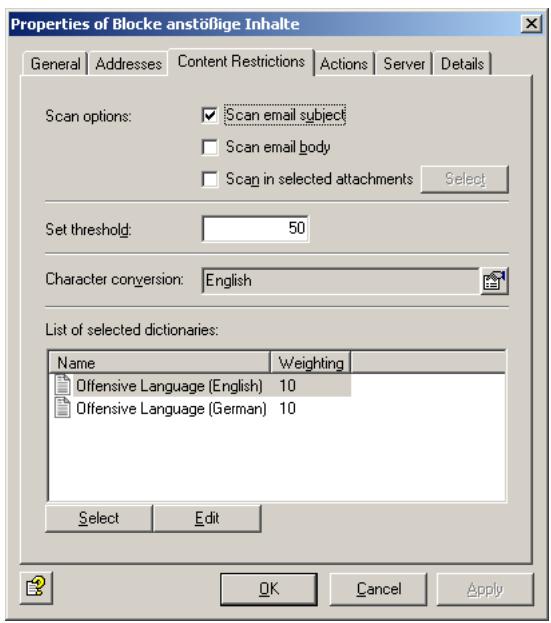
This job checks the subject line. The overall threshold value is set to 50. This means that when five words/phrases from the Offensive Language (English) or Offensive Language (German) dictionary have been found, the specified actions are performed.
The threshold is calculated as follows: Every word or phrase in the Offensive Language list has a weighting of 10. Here, the threshold is reached when at least five words from these lists are found in the message.
Calculation: Every word or phrase in the Offensive Language list has a weighting of 1. Each word or phrase from this list found is counted and multiplied with the weighting and finally compared to the threshold value.
In this case:
Let's assume that 5 words from the dictionary were found in the message. The sum of these words is multiplied with the weighting (10): 5 × 10 = 50 . This value is compared to the threshold value. Since this is also 50, the action is executed.
If only 4 words are found in the message, the total value is 40(4 × 10) , which is less than the threshold value, and no action is triggered.
Another example:
You are using two different dictionaries for checking the subject and the message body for denied content.
The overall threshold value for the job is set to 20 and the first dictionary (A) specified in the job has a weighting of 20. The second dictionary (B) specified in this job has a weighting of 1. This means that the specified actions are performed when one word or phrase from the dictionary A or 20 terms from the dictionary B are found.
The threshold is calculated as follows: Every word or phrase in the first word list A has a weighting of 20. If an e-mail contains only a single phrase from this list, the threshold value is reached and the action is performed.
Every word or phrase in the second word list B has a weighting of 1. Each word or phrase from this list found is counted and the sum of them multiplied with the weighting. The found value is then compared to the threshold value. If, therefore, 21 words from the dictionary B are found in the message, these are multiplied by the value (1): 21 × 1 = 21 . The sum is compared to the threshold value. Since this is 20, the action is executed.
To allow the software to correctly recognize words with language-specific special characters, click the button to the right of the Character Conversion field. The following dialog appears:
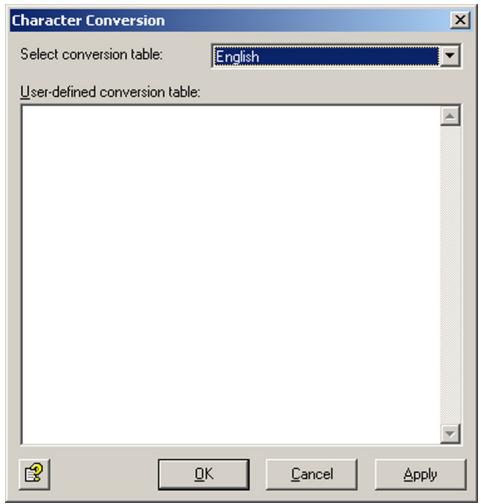
The list field contains the languages English and German as well as the User-defined conversion table. When you select German conversion, you can use umlauts (ö, ä, etc.) in your dictionaries, which will automatically be recognized. For special characters used in other languages, such as French accents, you need to define your own character conversion table.

To handle content in different languages, create the appropriate Dictionaries and define one job for each language. For languages such as French and Spanish, define your own character conversion table. For further information on creating your own schemes, please contact our Support.
7.3.2.5 Defining actions
Under the Actions tab, specify the actions to be taken when the job finds an e-mail with denied content.
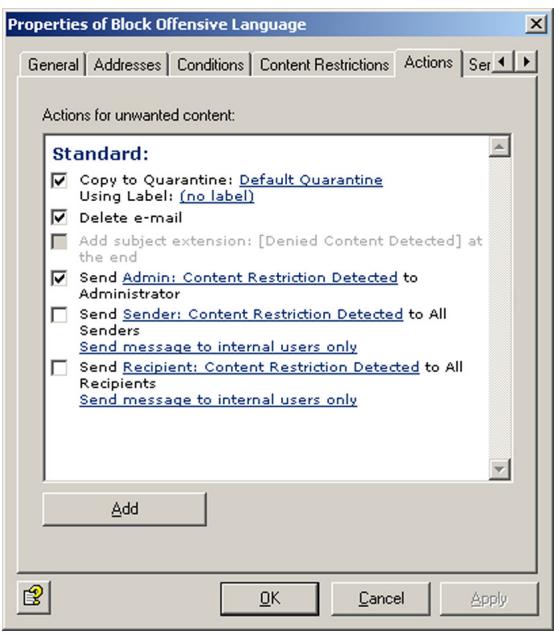
In this example, a copy of the message is placed in quarantine and the message is deleted without being delivered to its recipient. A notification that the corporate policy was breached is sent to the administrator. You can select this notification from the list menu of available notification templates, which you can format using the HTML toolbar or by entering appropriate HTML code yourself1.
To define further actions, click the Add button. For a description of the procedure, refer to „AntiVir, Job example: “Defining Actions” on page 65".
7.3.2.6 Selecting servers/Job Details
For details on selecting servers and entering job details, refer to "Selecting Servers" on page 69 and "Entering Job Details" on page 69.
7.4 Spam Filtering With the AntiVir Wall Spam Filtering Job
Spam Filtering scans e-mails for characteristics typical for spam. Unlike virus-infected mail, spam is not always clearly identifiable as such. Unsolicited mail can hold a wide variety of content and its originators use various methods to disguise it as "normal" mail to avoid its detection by spam filters. Any spam filtering job therefore has to take into account that e-mails may not be definitely identifiable as spam. The spam filtering job therefore works with a range of different criteria for identifying spam. These criteria are split into definite and combined criteria. Using the definite criteria, the job scans mail for unique spam characteristics and classifies them into spam and non-spam. It then uses the combined criteria to investigate the "gray zone" and determine a likelihood of the checked message
1. Refer to "Create Notification Templates" on page 36
being spam – its spam probability. The spam probability for the definite criteria is always 0% or 100% , while the probability for the combined criteria can range from 1 to 99.
You will find a configured AntiVir Wall Spam Filtering job under Policy Configuration. The job carries out a range of analyses and checks the following elements of each e-mail:
E-mail headers
- Subject
E-mail text
Like in normal content filtering, e-mails are checked for characteristic spam texts using dictionaries.
In the "gray zone", some of the characteristics typical for spam occur more frequently while others suggest that an e-mail may not be spam. On their own, combined criteria only pick up particular characteristics of an e-mail that suggest that it may be spam. The greater the number of characteristics that match the combined criteria, the greater the likelihood that the message is spam. The identified characteristics are combined (hence "combined criteria"), to obtain a value indicating the probability that the message is spam.
i
The defined job is configured so that a high spam probability – for example over 91% – can be achieved only when definite spam characteristics have been identified by several combined criteria.
The job distinguishes between up to four spam probability ranges. The boundaries between these ranges (i.e. the probability threshold values) are user-definable with sliders. For each range, you can specify actions to be taken for e-mails that fall into that range. For example, you can specify that
- definite "non-spam" with a Spam probability of 0% is delivered as normal;
- for mail with a spam probability between 10 and 50 % , the SCL field is processed in Exchange 2003, so that the e-mail is automatically moved to the recipient's junk mail folder or the e-mails are placed into the Anti-Spam:
Medium quarantine1, the recipients receive a summary report on the quarantined e-mails and can request their delivery if required;
- e-mails with a spam probability over 50% are deleted immediately.
The following actions can be taken:
- Add a subject extension
- Copy the entire message into quarantine
- Delete the affected message without delivering it
- Run an external application
- Notify the administrator
- Notify the sender
- Notify the recipient
- Notify any other user-definable persons
- Add X-header field
-
Redirect mail
-
Refer to auch "Write spam result in Exchange SCL field" on page 112
The individual thresholds are:
- Spam Probability: None. Default: 0.
- Spam Probability: Low. Default: 0 - 9.
- Spam Probability: Medium. Default: 10 - 49.
- Spam Probability: High. Default: 50 -100.
The Low, Medium and High ranges can be adjusted with sliders and linked to corresponding actions, which are then performed on all e-mails in that range. For spam probability None, you can specify a subject extension.
In addition to effective spam filtering, an anti-spam solution must prevent the incorrect classification of mail as spam (false positives) and use the available processing resources efficiently in productive use. Mail is therefore checked using the definite criteria before the combined criteria are applied, so that e-mails that can be definitively classified as spam or non-spam are not subjected to further analysis. The exclusion criteria prevent checking e-mails that can be definitely identified as non-spam, for example through their sender.

When a definite criterion applies, the spam probability is always 0% or 100% and therefore falls into the probability range None or High, for which the corresponding actions are performed.

Of course, these criteria do not affect the execution of the remaining enabled jobs, such as attachment checking by AntiVir. Thus, if you have enabled the definite "No spam" criterion E-mails with attachments and set the threshold value (Minimum number) to 2, this means only that the Spam Filtering job immediately places these e-mails into the None spam probability range and not that a AntiVir job will let those two attachments pass into your network unchecked.

Normally you do not have to adapt the combined criteria. If your spam detection rate is unsatisfactory, try optimizing the definite spam criteria (see below for exclusion criteria).
7.4.1 Definite No-Spam Criteria
You can define the following exclusion criteria in the job:
| Kriterium | Beschreibung |
| E-mails from these trusted senders (White-list) | Whitelist: addresses of all known senders that are always allowed and that are known not to send spam. This normally includes all regular communication partners as well as the domains of your customers and suppliers. Keeping this list up-to-date and comprehensive ensures that your system resources will not be burdened with unnecessary checking. |
| E-mails from Active Directory users | The addresses in the Active Directory are regarded as trusted. |
| E-mails from User Whitelist entries | The senders (address entries) included in the user whitelist are delivered without prior checking for spam. |
| E-mails containing attachments | E-mails with file attachments. Most unsolicited mail does not contain attachments. You can optio-nally enter a threshold value here. Example: Minimum number = 2 means that all messages with two or more file attachments are delivered without spam checking. |
| E-mails with minimum size of | Spam e-mails are generally small, and large e-mails are therefore unlikely to be spam. Here, you can enter a size above which message are no longer checked for spam. |
| E-mails in TNEF format | TNEF e-mails. This Exchange specific format has not yet been used by spammers. |
| E-mails encrypted and/or signed | Encrypted and/or signed e-mails. Spammers do not send encrypted or signed e-mail. |
| E-mails containing attachments | E-mails with file attachments. Most unsolicited mail does not contain attachments. You can optio-nally enter a threshold value here. Example: Minimum number = 2 means that all messages with two or more file attachments are delivered without spam checking. |
| Microsoft Exchange “No spam” SCL valueAlso refer to Write spam result in Exchange SCL field. | Spam confidence level (SCL), spam filter (intelli-gent message filter - IMF) from Exchange 2003. SCL accepts integers from -1 to 9. Exchange assigns -1 for e-mails from senders from the same Exchange organization. The AntiVir Wall Spam Filtering job treats this value as definite “no spam” criterion. |
7.4.2 Definite Spam Criteria
| Kriterium | Beschreibung |
| E-mails from the following senders (Blacklist) | Blacklist: All sender addresses known to be originators of spam. The default configuration contains a list of known addresses to which you can add further addresses. |
| E-mails with this character set | This function checks the charset field in the message header for the character sets in the specified list. Messages with a matching character set are immediately classified as spam. |
i
If you want e-mails deleted immediately only if they are definitely spam, set the spam probability for High to 100 and define an appropriate action. This ensures that only e-mails definitely identified as spam (i.e. using the blacklist or character set) fall into this range. If you set this range, for instance, to 91 to 100, e-mails with a high spam probability based on other criteria will also be placed into this category.
7.4.3 Practical Tips
Depending on your working environment, the job may sometimes classify normal and wanted mail as spam. If that happens, try the following configuration settings:
- If the affected e-mails all exceed the spam probability threshold by only a small amount, increase the threshold value to avoid false positives.
- If e-mails from a particular sender are regularly classified incorrectly as spam, add this sender to the Active Directory or the whitelist (under Definite Criteria Definite "No Spam" Criteria), so that these e-mails are not checked for spam.
- Try to identify terms and expressions typically used in the affected e-mails and enter them in the Business Words dictionary. These words will then be taken into account through the "No Spam" criterion Body business phrases so that e-mails containing them will receive a lower spam value.
- If the number of false positives is still unacceptably high after you have taken the above measures, try to identify which criteria have caused the incorrect classification. To do so, you can use the Cause Description in the quarantine or the Spam analysis details notification variable1. If the same criterion is always responsible, reduce its significance by reducing the relevance of this criterion by one level under Combined Criteria. This criterion then has a lower relevance in determining the spam probability of e-mail.
-
If you are sufficiently familiar with the characteristics of typical e-mails in your business environment (both spam and non-spam), you can also use the
-
refer to "List of Notification Variables" on page 36
Combined Criteria under Advanced Configuration to optimize each criterion for your environment. This is especially useful if you had to reduce the relevance of a criterion by a large amount or disable it altogether to prevent false positives. This can, however, result in a reduced effectiveness of the spam filter. For further information, refer to "Advanced Spam Filtering" on page 117.
7.4.4 Spam Filtering - Example
Under Policy Configuration Mail Transport Jobs, you will find a configured Spam Filtering job. Double-click the Advanced Spam Filtering job to open it. This job scans the e-mails for special spam features.
7.4.4.1 General Settings
Under the General tab, enter your own name for the job. You can identify a disabled job by the red cross in the lower corner of the job symbol. Set the job to Enabled. Once you have saved your settings with OK and closed the job, the job is enabled and the red cross disappears.
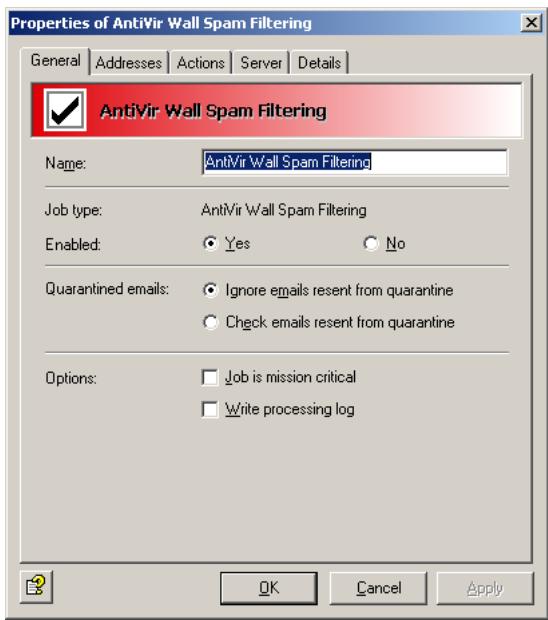
This job does not process mails that are being resent from Quarantine (AntiVir Monitor
For further information on sending quarantined mail, refer to "Icons used on these tabs:" on page 55. For details on the Mission Critical option, refer to This job is mission-critical in the section AntiVir and to Write processing log for the description of the Write processing log option.
In this job, the Subject extension field is located under the Actions tab.

7.4.4.2 Setting up Address Conditions
Under the Addresses tab, specify the senders or recipients to which this job is to apply. You can select addresses from existing lists or from your own. For details on how to make the best use of address lists and details, see description under "Address Lists" on page 30.
7.4.4.3 Defining actions
Under the Actions tab, specify the spam probabilities and the action to be taken on identified spam e-mails.
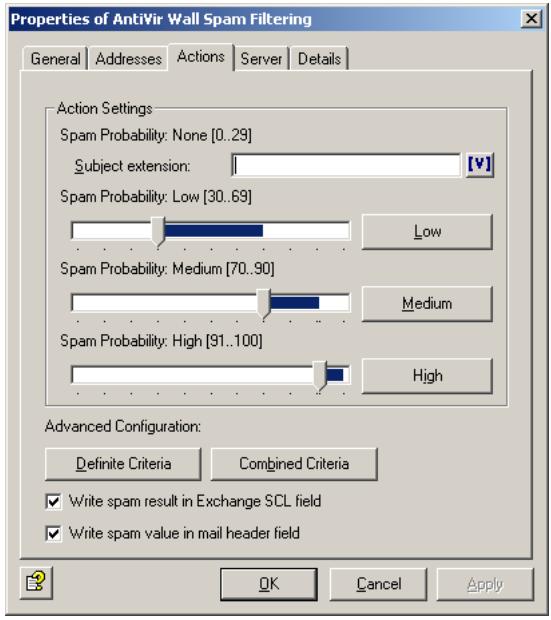
In this example, the following spam probabilities are specified:
- In the Spam Probability: None (value = 0) range, no actions are usually performed. The only possible action in this probability range is to add a subject extension, which you can define on this tab. You could, for example, enter "Checked for spam".
- In the Spam Probability: Low (set here from 0 to 9) range, the actions are defined on a separate tab. Click the Low button. The following dialog appears:
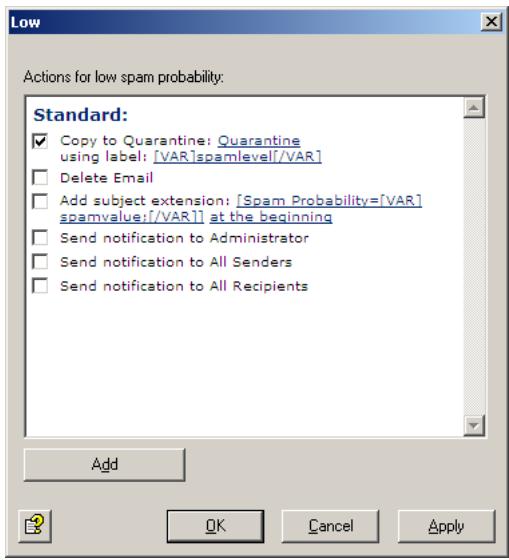
The only action defined in this example places a copy of the message into quarantine. The message is delivered to its recipient and is SpamLevel in the quarantine.
The spam probabilities are set to low values in this example. This means that e-mails are already placed in a low probability category if only minor spam criteria are fulfilled. Because the values set for Low include the possibility of None, the actions defined for Low are also performed for probability None. The actions defined here quarantine all e-mails.
To configure the actions for the Spam Probability: Medium range (set here from 10 to 49), click the Medium button. The following dialog appears:
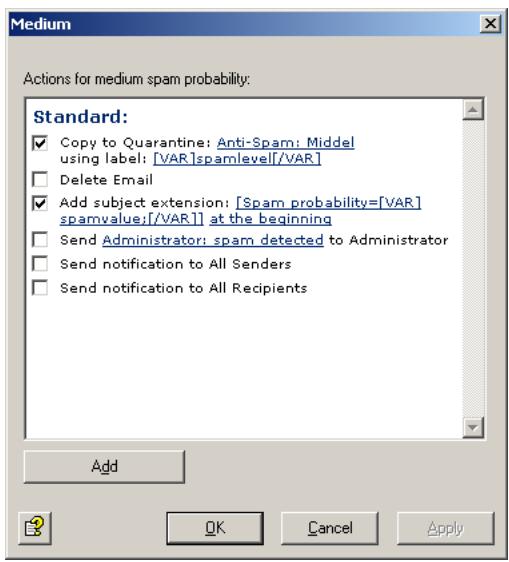
The actions defined here place a copy of the message into quarantine. The quarantined message is labeled [VAR]SpamLevel[/Var]. The original message is still delivered to its recipient. A further action is to add a subject extension to notify the recipient of the spam probability of this message (e.g. Spam probability = 31). The higher this value, the greater the likelihood that this is not a high-priority message. The Spam probability Medium is for those mails that may or may not be spam.
The low values of this setting mean that a medium spam probability is assumed if a few criteria suggesting a great spam likelihood or many criteria suggesting a small likelihood of spam were found. We recommend to store these e-mails in a separate quarantine (Anti-Spam: Medium) and to let the recipients decide what to do with them.
i
You can use summary reports to notify users of quarantined spam mails addressed to them. For further information, refer to "Defining Quarantine Summary Reports" on page 44. You can also use the Microsoft SCL value to forward the e-mails directly to the users' junk folder through the Exchange Store (see next section). If you have a Subject extension defined to display the spam probability value, users can set up their own Outlook message rules to deal with the mail.
Write spam result in Exchange SCL field
AS of Service Pack 1 for Exchange 2003 and Outlook 2003, Microsoft supplies a spam filter. This Intelligent Message Filter (IMF) determines a spam probability – the so-called Spam Confidence Level (SCL) – from -1 to 9. The higher the spam probability, the larger the SCL. An SCL of 0 means that the message is probably not spam -1 is used for unfiltered mail, for example internal mail from senders in the same Exchange organization. The Exchange SCL value trigger specified actions, such as automatically moving message to the user's Outlook junk mail folder. In the Exchange System Manager, you can centrally define what is to be done with e-mails with SCL values above a set threshold. You do not have to specify the action on the same system that assigns the SCL. Because the IMF assigns the e-mails' SCL value, actions can be defined only on the target system. For this, the e-mail gateway must also run Exchange 2003.
Even if you do not use the IMF, you can use this option to define the spam probability value for the spam filtering jobs as SCL result, so that they can use Exchange Store functionality for further processing. The spam probability values are internally converted to SCL values, which Outlook can use.

If you are using the summary report function, users are notified of all relevant spam e-mails (refer to “Defining Quarantine Summary Reports” on page 44). In that case you do not need to use Exchange Store forwarding to junk mail folders. For further information on the Exchange SCL field, visit http://www.microsoft.com/technet/prodtechnol/exchange/2003/library/imfdeploy.mspx
Write spam value in mail header field
The spam probability value (low, medium and high) is always written in the mail header. The result is converted to a string of asterisks (one asterisk meaning a value up to 10, two asterisks a value up to 20, three asterisks up to 30, etc.) to which an Outlook rule can be applied.
You can also specify the result separately for each Spam probability: In the Actions tab, select
Add -> Add X-header field. The result is then output as a numeric value instead of being converted to a string of asterisks.
- To configure the actions for the Spam Probability: High range (set here from 50 to 100), click the High button. The following dialog appears:
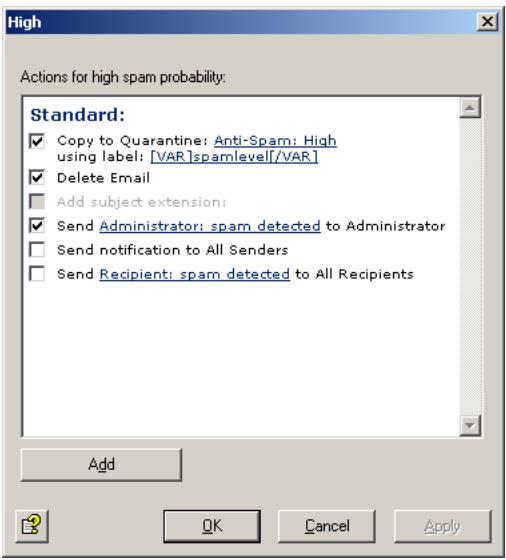
The Spam probability High is for those e-mails that are probably spam and should not be delivered. In this example, the original message is deleted immediately without being forwarded to its recipient. A copy of the message is placed in the quarantine. Because of today's large volume of junk mail, the administrator is not notified1.

Depending on your mail environment, you may want to set different threshold values for the Medium and High ranges. Before you do change the thresholds, though, observe whether the job yields good filtering results with these settings.
Your aims should be:
- to maximize the number of spam e-mails in the Anti-spam: High quarantine,
- to maximize the number of spam e-mails in the Anti-spam: Low quarantine,
- and therefore to minimize the volume of mail going into the Anti-spam: Medium quarantine.
On the Actions tab you can adjust the spam criteria. Click Definite Criteria. The following dialog appears:
- Refer to "Create Notification Templates" on page 36
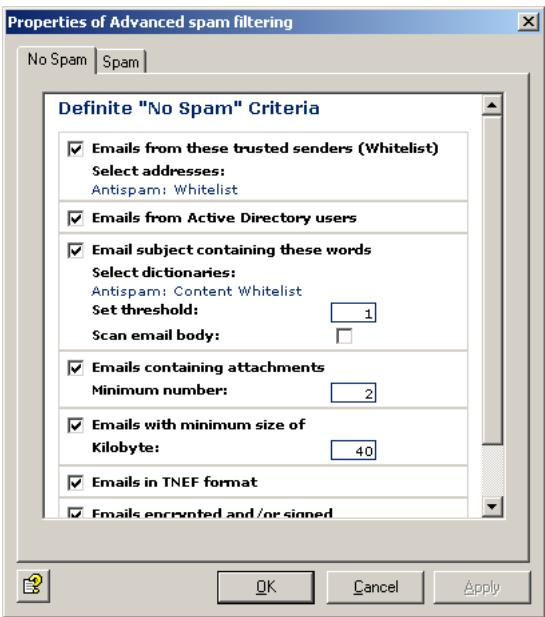
If you want to systematically allow e-mails from specific senders, click Anti-spam: Whitelist and Anti-Spam:Newsletter Whitelist in the criterion E-mails from these trusted senders (Whitelist). The address selection dialog appears:
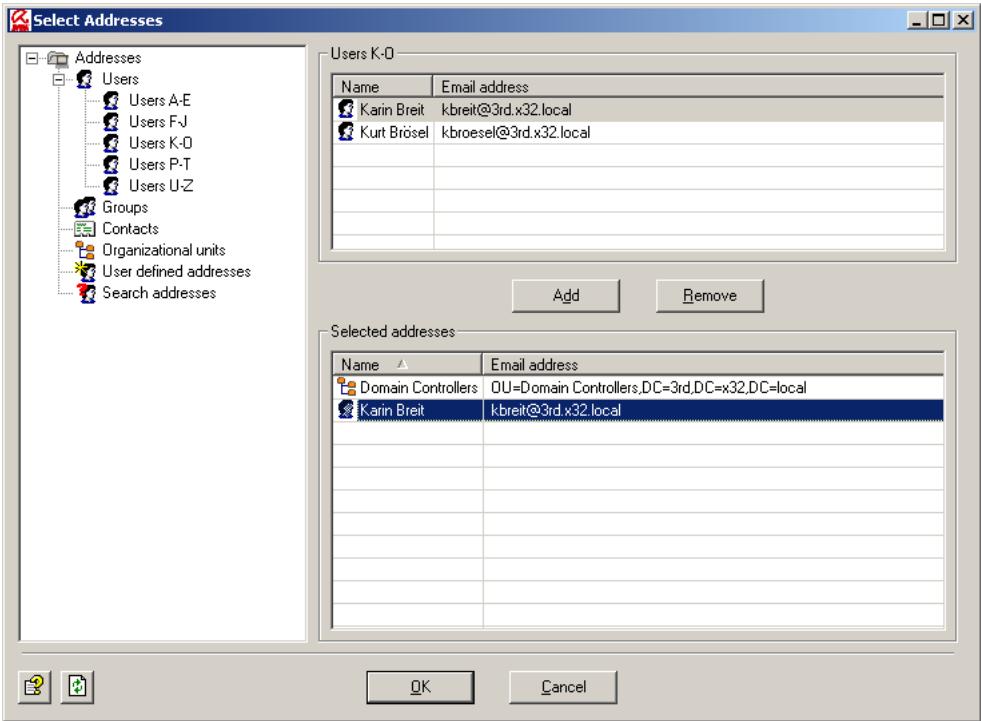
Select or enter the addresses that are to be always allowed as sender. You can use the asterisk () and question mark (?) as wildcards1. Alternatively, you can specify entire domains in the form .domain.com. After having entered all addresses, click OK.
In the Definite “No Spam” Criteria dialog, you can now customize the next criterion, Subject phrases. Click Anti-spam: Content Whitelist. The Dictionary Selection dialog appears:
- for wildcards in address checking refer to "Address Filtering" on page 94
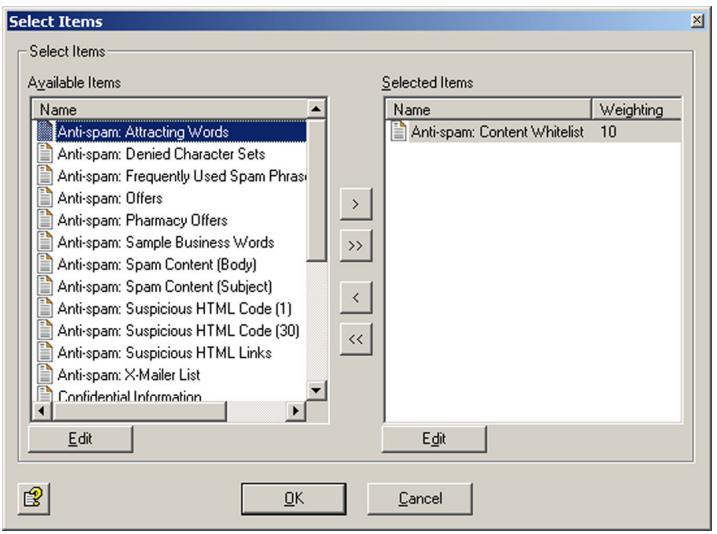
Use the and arrow keys to add and remove dictionaries in the list. The double arrows add or remove all existing dictionaries. In the right field, double-click Anti-spam: Content Whitelist or click the Edit button.
The following dialog appears:
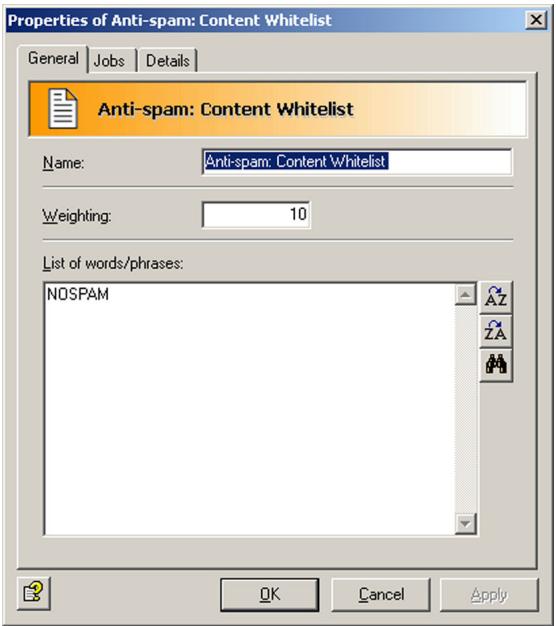
For further information on setting up dictionaries, refer to "Setting up Dictionaries" on page 98. For a detailed description of the remaining criteria, refer to "Definite No-Spam Criteria" on page 106.
When you have completed the dictionary and confirmed your input twice with OK, click the Spam tab:
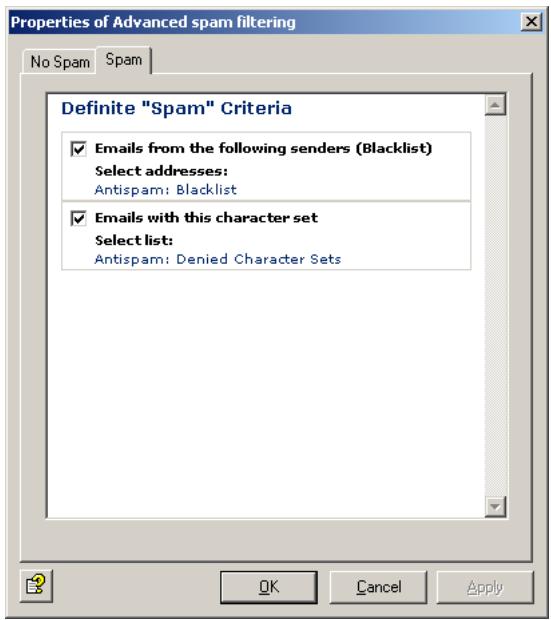
In the E-mails from the following senders (Blacklist) field, click Anti-spam: Blacklist and Anti-spam: Newsletter Blacklist. An address selection dialog again appears, in which you can enter e-mail addresses or domain names.
Make sure you keep both the whitelist and the blacklist up-to-date.
In addition, by selecting a particular character set, you can declare e-mails from specific regions as spam by default. Check E-Mails with this character set and click Anti-spam: Denied Character Sets. Each row contains the code for one character set. The allocation of countries to character sets is shown on the Details tab. If you have communication partners in any of the countries whose character sets are listed here, change the list as follows:
- Copy the Anti-spam: Denied Character Sets list under Dictionaries.
- Rename your list.
- Remove the character sets with the countries of your communication partners from the list.
- Save the list.
- Delete the Anti-spam: Denied Character Sets list in the job Advanced Spam Filtering and enter your own list under Definite 'Spam' Criteria E-mails with this character set.
This function checks only the "charset" e-mail header. Make sure that you have selected only character set list(s) for this option, and not any other dictionary.
7.4.4.4 Selecting servers/Job Details
For details on selecting servers and entering job details, refer to "Selecting Servers" on page 69 and "Entering Job Details" on page 69.
Save the configuration of the AntiVir Exchange Management Console each time you have modified the settings. Click on the button. The configuration is saved in the ConfigData.xml file located in the Avira GmbH\AntiVirExchange\Config folder. Pending changes are indicated by an asterisk (*) next to the top node
7.4.5 Advanced Spam Filtering
Use the Spam Filtering job to set definite and combined spam criteria. The definite criteria classify e-mails as spam or non-spam and label them "Spam Probability is 0% = None " or "Spam Probability is 100% = High ". The combined criteria are used only for e-mails that were not already classified with the definite criteria. For spam detection with combined criteria, several analysis mechanisms (criteria checks) are performed simultaneously and later cross-evaluated. Each criterion has a defined relevance to the overall result, which can be set from Low to Very high. You can also disable the criterion by deselecting the checkbox. An additional individual value can be assigned to most criteria for Minimum and Maximum. These two values apply, for example, to the dictionaries used by the criterion to check the e-mails. Below the minimum value, this criterion is not used in the overall weighting of e-mail. When the maximum score is reached or exceeded, this criterion considers the e-mail as spam.

This classification as spam only applies to this one criterion, whose maximum value was reached while analyzing an mail. As this analysis uses combined criteria, however, the other criteria can yield different results, overruling the criterion whose maximum value was reached. Also refer to the example below.
7.4.5.1 Combined Criteria - Example
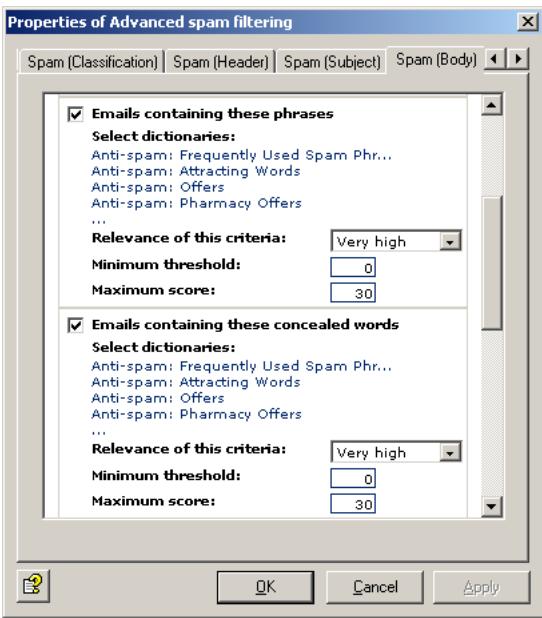
In the combined criterion Body phrases under the Spam (Body) tab, you are using the Anti-spam:Frequently Used Spam Phrases dictionary to check the e-mail bodies of all inbound e-mails for spam. This dictionary has a weighting value of 5. If a word or phrase from this dictionary is found in an e-mail, for instance "check it out", it receives a score of 5.
Now specify the number of occurrences required for this criterion to be taken into account in the overall score (Minimum threshold) as well as the maximum number of occurrences allowed (Maximum score). To do so, add up the value of the words to be found. If, for instance, you specify a value of 30 (as in our pre-configured job), six different words from this dictionary must be found in the message for the message to be classified as spam according to this criterion. If only three words are found, the message is not definitely spam according to this criterion, but the probability of it being spam is already quite high. If the dictionary had a threshold value of 10, three hits would be enough to classify the e-mail as spam.

Words that occur more than once in an e-mail are counted only once. If, for example, the phrase "check it out" occurs three times within the same e-mail, it would add only 5 to the score, not 15 (as in a normal AntiVir Wall Content Filtering job).
In addition, specify the Relevance of this criterion, which determines the extent to which the criterion is taken into consideration in the overall evaluation.
7.4.5.2 Combination of Values to Overall Spam Probability
The individual values of all combined criteria are weighted according to their defined relevance to establish a final evaluation. The job compares this overall value (the spam probability of the message) with the three threshold values and allocates the e-mail accordingly to one of the four spam probability ranges (None to High). When all combined criteria are taken into account, our sample e-mail with the three words from the dictionary may, therefore, still be classified as spam.
In this example, the e-mail in which six words from the dictionary were found, and which was consequently classified as spam according to this criterion, can still fall into spam probability category None or Low when the other criteria are considered.
The overall value is calculated from the relevance of the criteria, the minimum and maximum values and the individually set spam probability ranges.
You will find the individual combined criteria on four tabs under Advanced Configuration.
The following tables provide an overview of the combined criteria contained in the job.
7.4.5.3 Combined Classification Criteria
Here the results of other spam filtering products – which often use only a single junk filtering method – are included. Their combination with other criteria in the AntiVir Wall Spam Filtering job eliminates the disadvantages of these products.
| Criterion | Description |
| DCC analysis Also refer to “Spam Filtering With the DCC Spam Filtering Job” on page 122 | The results of the DCC analysis with the specified DCC server are used for determining the spam probability. The return value is a number or “many”. |
| Exchange SCL value Also refer to “Definite No-Slam Criteria” on page 106 and “Write spam result in Exchange SCL field” on page 112 | The Intelligent Message Filter (IMF) also determines a spam probability for each message. The so-called Spam Confidence Level (SCL) – from -1 to 9. The higher the spam probability, the larger the SCL. An SCL of 0 means that the message is probably not spam. For further information also refer to http://www.microsoft.com/technet/prodtechnol/exchange/2003/library/imfdeploy.mspx |
7.4.5.4 Combined Header Criteria
| Criterion | Description |
| Suspicious sender properties | Checks whether the message has a “From” header and whether this header is completed and corresponds with the sender in the SMTP protocol. |
| Suspicious recipient properties | Checks whether the message contains a “To” header, whether this header is completed and whether it or the “CC” header contains at least one of the SMTP recipients. |
| Digits in sender address(es) | Checks whether one of the sender addresses (SMTP or mail header) contains numbers. |
| Number of recipients per e-mail | Checks the number of recipients of an e-mail. |
| Known spam x-mailser | Checks whether the X-Mailer entry in the message is a known spam mail client. |
7.4.5.5 Combined Subject Criteria
| Criterion | Description |
| Missing subject | Checks whether the message has a subject field with content. |
| Recipient address in subject | Checks the part before the @ of any e-mail addresses in the subject to ascertain whether it is the address of a recipient. |
| Junk sequence in subject | Checks whether the message subject contains long strings of spaces or meaningless character strings. |
| Subject phrases | Checks whether the message subject contains words typically found in spam mail. |
| Subject concealed phrases | Checks whether the message subject contains any concealed words from the specified dictionaries. |
7.4.5.6 Combined Message Body Criteria
| Criterion | Description |
| Recipient address in body | Checks the part before the @ of any e-mail addresses in the message body to ascertain whether it is the address of a recipient. |
| Junk sequence in subject | Checks whether the message body contains long strings of spaces or meaningless character strings. |
| Body phrases | Checks whether the message body contains words typically found in spam mail. |
| Body concealed phrases | Checks whether the message body contains any concealed words from the specified dictionaries. |
| Suspicious HTML code | Checks whether the message body contains HTML constructs. |
| Suspicious HTML links | Checks whether the message body contains spam-mer links. |
| Many HTML Links | Checks whether the message body contains many HTML links in relation to the size of the text. |
7.4.6 Manual Spam Filtering Configuration
If you do not want to use the AntiVir Wall Spam Filtering job described above, you should set up the following sequence of actions in your job to ensure effective spam blocking:
- Filtering of known spam addresses.
- Spam filtering with DCC. Refer to Section "Spam Filtering With the DCC Spam Filtering Job" on page 122.
- Checking Subject line for text and obvious elements, such as dots or spaces. Also refer to the Spam Content (Subject) dictionary under Dictionaries in the Basic Configuration.
- Checking e-mail body texts for spam links (including redirections1 and click trackers2). Also refer to the Spam-Links (Body) dictionary under Dictionaries in the Basic Configuration.
- Checking e-mail bodies for spam text and typical features, such as HTML comments within an HTML message text. Also refer to the HTML Spam Detector dictionary under Dictionaries in the Basic Configuration.
To optimize filtering, be sure to set the most efficient Job Processing Sequence.
- Known common redirection services and typical redirection commands such as http://redirect.+ and similar using wildcards in the dictionary.
- Click trackers are websites which contain scripts that check every click for the spam link (who, when, from where, etc.) before redirecting the user to the linked page.
7.5 Spam Filtering With the DCC Spam Filtering Job
7.5.1 What is DCC?
DCC filtering uses the Distributed Checksum Clearinghouse (DCC) – a distributed system that maintains a database of mail reported by other DCC users. DCC is a worldwide anti-spam network of users and servers, which currently analyzes more than 150 million e-mails per day. For bulk mail distributions, checksums are generated, which programs – such as AntiVir – can use to determine whether incoming e-mails are junk.
The DCC does not itself identify e-mails as spam; it simply recognizes e-mails that were sent in bulk. The programs using DCC (including Avira AntiVir Exchange) generate a checksum for each inbound message, which they send to a server – the "clearing house". The server returns a value indicating the number of times this checksum has already been received and increments the count for this checksum. The DCC servers also exchange bulk mail data among themselves.
A key element of DCC is the use of "fuzzy checksums": Normally, checksum algorithms are designed so that the checksum changes if just a single bit of the checked object changes.
Because spammers often include random elements in their mail to prevent detection or personalize e-mails, DCC requires a different kind of fingerprint, which ignores certain elements of the message. The fuzzy checksums are generated in a way that ignore random and changing elements and therefore yields the same result for all e-mails with the same message.
The DCC checksum query takes place in real-time so that the most recent spam patterns are always used. It is therefore not necessary to download spam pattern updates to the local mail server.
DCC seamlessly integrates into the existing spam analysis of Avira AntiVir Exchange. Messages for which AntiVir receives a high bulk count is likely to be either spam or was sent from a popular mailing list. Because the DCC system can not distinguish between spam and list mailings, it should be used only in combination with whitelist's.
Because similar e-mails can also have identical checksums, business mail may erroneously be identified as bulk mail. A further disadvantage is that the first of a wave of spam mail is not yet identifiable as bulk mail, since the corresponding checksum counts will still be low. The more users report the checksums to the server, the greater the accuracy with which bulk mail can be identified.
Because of the above weaknesses, DCC analysis is included as combined criterion in the AntiVir Wall Advanced Spam Filtering job type and should – except for testing – not be used on its own.
To use DCC, you need a DCC Connector, which is already incorporated in Avira AntiVir Exchange and is automatically available for use after installation. It generates the checksums and interfaces with the DCC network to receive the network's checksum counts, which it passes on to the AntiVir job.
For further information on DCC and a list of available servers, visit: http://www.rhyolite.com/anti-spam/dcc/
7.5.2 DCC Settings
To change the default DCC settings:
- Click Basic Configuration Utility Settings DCC
- In the right window section, double-click the Default DCC Settings to select them. You get the following view:
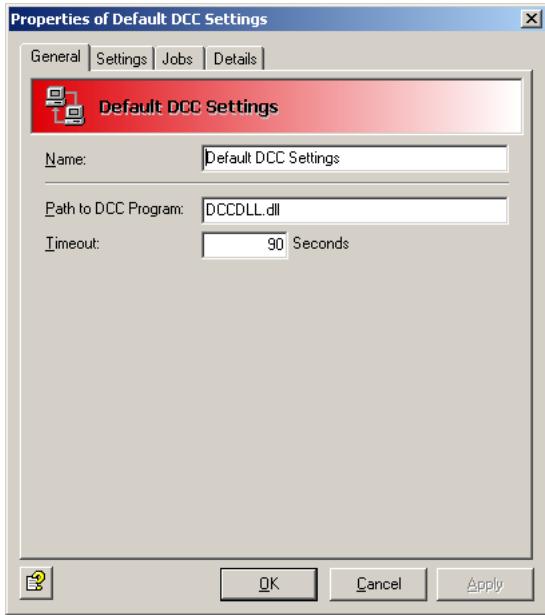
The path to the DLL is always the same. Do not change it!
-
Select the Settings tab. Here you can define the DCC server and its settings1.
-
Also refer to "What is DCC?" on page 122
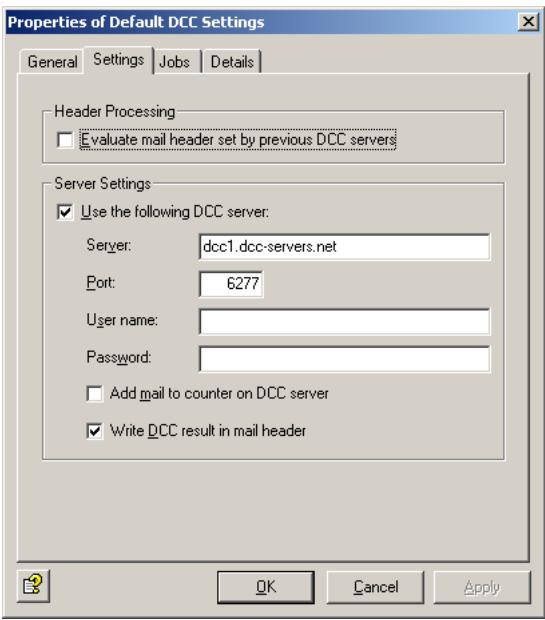
a) Query DCC server
Free DCC servers use the UDP protocol through the DCC server's IP port 6277 and generally do not need authentication. Enable port 6277 for UDP in your firewall.

Some DNS names – for example dcc1.dcc-servers.net – represent several servers with various IP addresses. Take this into account when you configure your firewall.
b) Evaluate mail header set by previous DCC servers
With this option selected, a checksum previously entered as X-header is queried instead of the DCC server. Set this option if the message on the SMTP gateway has already been checked by a DCC job. On subsequent mail servers, the X-header field can be checked. Also refer to the option under d).
c) Add mail to counter on DCC server
Here you can specify whether the DCC server should also count your inquiry. The job sends the message's checksums to the DCC server to increment the server's checksum count for future queries.
d) Write DCC result in mail header
A DCC server's response consists of a text of a standard format that Avira AntiVir Exchange adds to the analyzed message as X-header for subsequent analysis on other systems (also refer to option under b)).
- The Jobs tab lists all jobs in which DCC checking can be used.
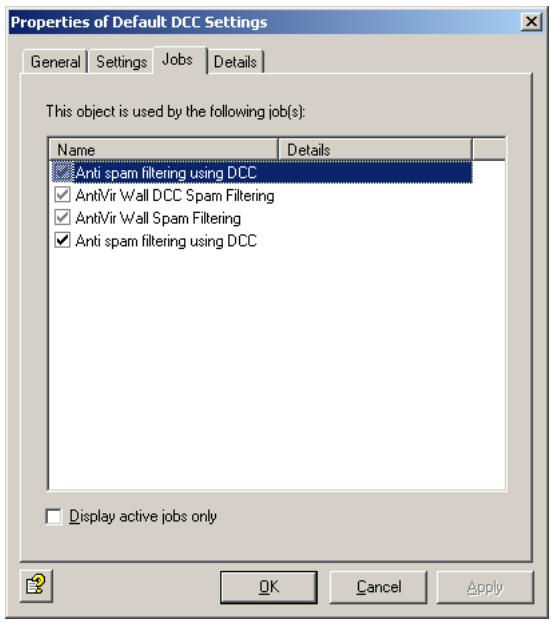
7.5.3 Spam Filtering with DCC - Example
To test the DCC server's function, use the AntiVir Wall DCC Spam Filtering job type. In productive use, it is advisable to enable DCC analysis in the Advanced Spam Filtering job. For details refer to "What is DCC?" on page 122 and "Combined Classification Criteria" on page 119.
- Select Policy Configuration Mail Transport Jobs.
- Right-click New and select AntiVir Wall DCC Spam Filtering.
- Under the General tab, enter a name and enable the job. For further information on the Quarantined e-mails option refer to "Icons used on these tabs:" on page 55. Deselect the option This job is mission-critical.
- Enter the address settings under Addresses. For further information, refer to "Address Lists" on page 30.
- Under DCC Options enter a Threshold value. When this value is exceeded, the job will classify the message as spam. The value is the checksum count returned by the DCC server. Example: Threshold = 100 means that the message will be classified as spam when the DCC server returns a value of 100 or above.
- Under Actions, specify that mail labeled DCC is quarantined and define an administrator notification to help you monitor the results.
- For details on selecting servers and entering job details, refer to “Selecting Servers” on page 69 and “Entering Job Details” on page 69.
- Click OK. The job is now enabled.
7.6 Blocking Images
This job type is used to block images with offensive or pornographic content. Supported formats include:
- JPEG
GIF
TIF - PNG
BMP
7.6.1 Blocking Offensive Images - Example
Under Policy Configuration Sample Jobs, you will find the Block unwanted images job. Drag this job to the Mail Transport Jobs folder and open it there with a double-click.
7.6.1.1 General Settings
Under the General tab, enter your own name for the job. You can identify a disabled job by the red cross in the lower corner of the job symbol. Set the job to Enabled. Once you have saved your settings with OK and closed the job, the job is enabled and the red cross disappears.
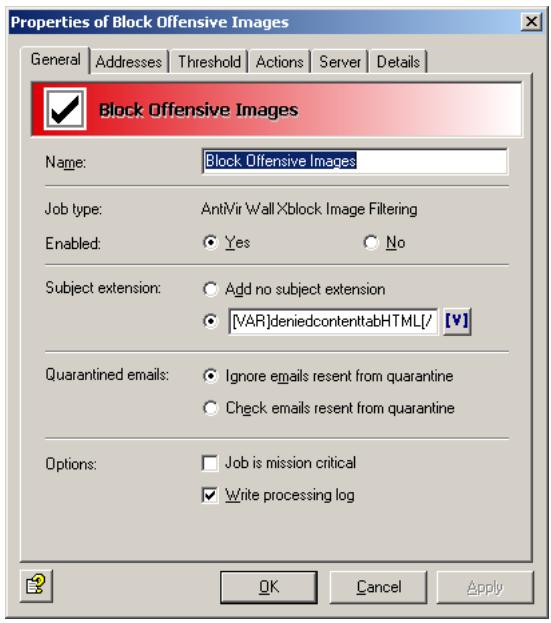
By default, the Subject Extension is pre-set to AntiVir Wall checked. If enabled, this text is added to the subject of each mail checked by the job.
This job does not process mails that are being resent from Quarantine (AntiVir Monitor
For further information on sending quarantined mail, refer to "Icons used on these tabs:" on page 55. For details on the Mission Critical option, refer to This job is mission-critical in the section AntiVir and to Write processing log for the description of the Write processing log option.
7.6.1.2 Setting up Address Conditions
Under the Addresses tab, specify the senders or recipients to which this job is to apply. You can select addresses from existing lists or from your own. For details on how to make the best use of address lists and details, see description under "Address Lists" on page 30.
7.6.1.3 Setting up Content Conditions
Under the Conditions tab you can set the requirements as to which mails or documents a job is to be run for.

The content conditions and the address conditions set in the Adresses tab must simultaneously come true for a job to be run (logical AND).
7.6.1.4 Setting threshold
Under the Threshold tab, set the threshold for triggering the actions defined. To do so, drag the slider with the mouse to the desired position.

Alternatively you can use the cursor keys (left/right) to increase/decrease the value in steps of 2. With the Shift key kept depressed at the same time, the value is increased/decreased in steps of 5.
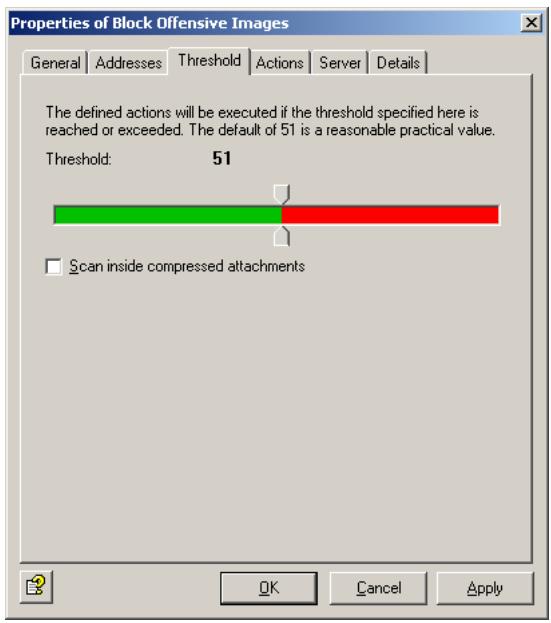
Whether or not an image is classified as offensive depends on the threshold set here. Possible values range from 0 to 100. Theoretically, "genuine" pornographic or hardcore images can reach a value of 100. In practice however, these values lie between 35 and 65.
More than 80% of all images reach values between 45 and 50. We therefore recommend to set the threshold to 51. This value will identify images with "a lot of naked skin" such as pin-ups. A threshold below 50 does not make sense, as these images are likely not to be pornographic. In this example, the action defined is triggered when the threshold of 51 is reached or exceeded. The overall result for the e-mail is the highest value of all images attached.
Mails with images that could not be classified (e.g. charts) are delivered to the recipient, unless they also contains images that could be classified and have reached the threshold.
Scan inside compressed attachments means that the internal unpacker extracts files from archives and checks them for unwanted images. If this option is disabled, only the archive is checked and identified as compressed format.
7.6.1.5 Defining actions
Under the Actions tab, define the actions to be executed when the job finds an e-mail with one or offensive images.
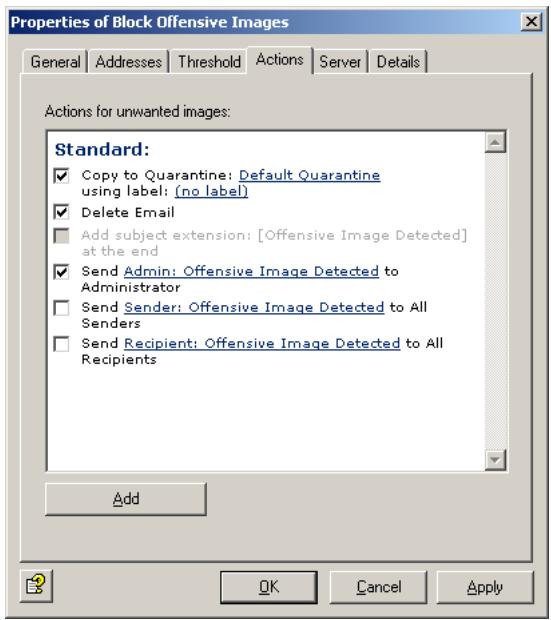
In this example, a copy of the message is placed in quarantine and the message is deleted without being delivered to its recipient. A notification warning of the denied address is sent to the administrator. You can select this notification from the list menu of available notification templates, which you can format using the HTML toolbar or by entering appropriate HTML code yourself.
If the job identifies more than one offensive image, the notification variables Xblock attachment and Xblock result will provide the name and the analysis result for the image with the highest score only.
To define further actions, click the Add button. For a description of the procedure, refer to „AntiVir, Job example: “Defining Actions” on page 65".
7.6.1.6 Selecting servers/Job Details
For details on selecting servers and entering job details, refer to "Selecting Servers" on page 69 and "Entering Job Details" on page 69.
Save the configuration of the AntiVir Exchange Management Console each time you have modified the settings. Click on the button. The configuration is saved in the ConfigData.xml file located in the Avira GmbH\AntiVirExchange\Config folder. Pending changes are indicated by an asterisk (*) next to the top node
7.7 Limiting the Number of Recipients
With this job type, you can limit the number of recipients for each e-mail. When this job is enabled, users cannot send bulk mail to all users in your company.
7.7.1 Limiting Number of Recipients - Example
Under Policy Configuration Sample Jobs you will find the Block E-Mails With More Than 50 Recipients job. Drag this job to the Mail Transport Jobs folder and open it there with a double-click.
7.7.1.1 General Settings
Under the General tab, enter your own name for the job. You can identify a disabled job by the red cross in the lower corner of the job symbol. Set the job to Enabled. Once you have saved your settings with OK and closed the job, the job is enabled and the red cross disappears.
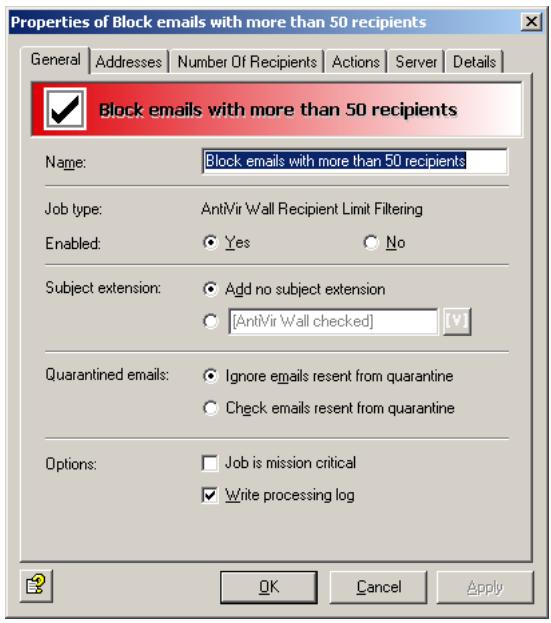
By default, the Subject Extension is pre-set to AntiVir Wall checked. If enabled, this text is added to the subject of each mail checked by the job.
This job does not process mails that are being resent from Quarantine (AntiVir Monitor
For further information on sending quarantined mail, refer to "Icons used on these tabs:" on page 55.
7.7.1.2 Setting up Address Conditions
Under the Addresses tab, specify the senders or recipients to which this job is to apply. You can select addresses from existing lists or from your own. For details on how to make the best use of address lists and details, see description under "Address Lists" on page 30.
7.7.1.3 Setting up Content Conditions
Under the Conditions tab you can set the requirements as to which mails or documents a job is to be run for.

The content conditions and the address conditions set in the Adresses tab must simultaneously come true for a job to be run (logical AND).
7.7.1.4 Specifying the Number of Recipients
Under the Recipient number limit tab, enter the maximum number of recipients per e-mail:
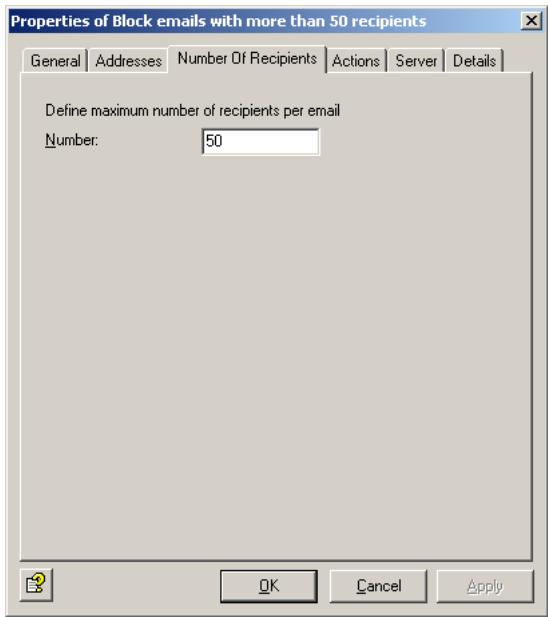
In this example, each incoming and outgoing e-mail can be addressed to no more than 50 recipients. As soon as an e-mail contains 51 recipients, the specified action is triggered.

If an e-mail is addressed to a group of recipients with a single address, the Exchange server must be able to resolve the list into its individual recipients to identify the actual number of recipients. Addresses that act as mailing lists are treated as single addresses if they are outside the scope of the Exchange server.
7.7.1.5 Defining actions
Under the Actions tab, specify the actions to be taken when the job finds a mail with too many recipients.
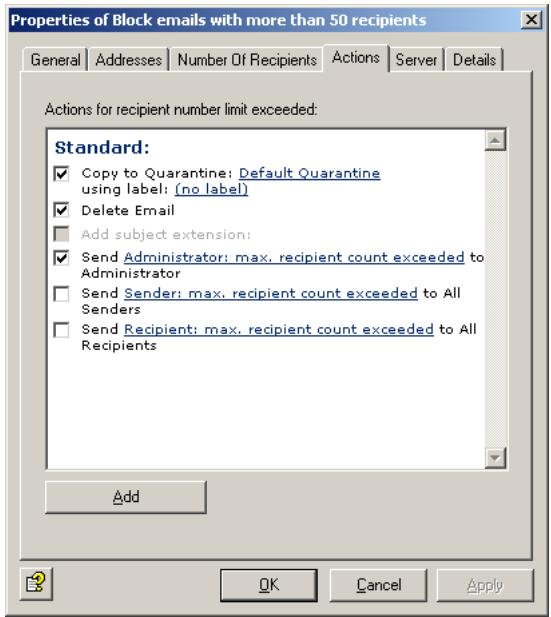
In this example, a copy of the message is placed in quarantine and the message is deleted without being delivered to its recipients. A notification about the number of recipients is sent to the administrator. You can select this notification from the list menu of available notification templates, which you can format using the HTML toolbar or by entering appropriate HTML code yourself.
To define further actions, click the Add button. For a description of the procedure, refer to „AntiVir, Job example: “Defining Actions” on page 65".
7.7.1.6 Selecting servers/Job Details
For details on selecting servers and entering job details, refer to "Selecting Servers" on page 69 and "Entering Job Details" on page 69.
Save the configuration of the AntiVir Exchange Management Console each time you have modified the settings. Click on the button. The configuration is saved in the ConfigData.xml file located in the Avira GmbH\AntiVirExchange\Config folder. Pending changes are indicated by an asterisk (*) next to the top node.
8 Service
8.1 Support
All relevant information concerning our comprehensive support service can be found on our website http://www.avira.com.
The experts answer your questions and help you with difficult technical problems.
Furthermore we recommend to purchase our AntiVir Classic Support (optionally), which enables you to contact our experts during office hours and to get advice from them.
The AntiVir Premium Support, which is also optionally available, offers all the features of the AntiVir Classic Support plus the possibility to reach competent experts outside of office hours in case of emergencies.
On demand a text message is sent to your mobile phone in case of virus alert.
Support via email can be obtained at http://www.avira.com.
8.2 Online shop
You want to purchase our products conveniently with the click of a button?
In the online shop of Avira GmbH, you can purchase, extend and enhance licenses quickly and securely under http://www.avira.de/en/onlineshop. The online shop guides you through the ordering menu step-by-step. Our multilingual Customer Care Center provides information onodering process, payment and delivery. Resellers can order on account.
8.3 Service hotline
Avira GmbH
Lindauer Strasse 21
D-88069 Tettnang
Germany
You can find further information about us and our products by visiting http://www.avira.com.
9 Appendix
9.1 Glossary
ACL (Access Control List)
List of entries in an object used for controlling access rights.
Active Directory
(AD). Directory of network objects (users, mailboxes, etc.) This is the directory service for Windows 2000 Server, which stores information about objects within the network and provides this information to authorized administrators and users. Active Directory allows network users to access all network resources to which they have access rights with a single login. Administrators are provided with an intuitive, hierarchical representation of the network and a single management location for all network objects.
Active Directory Connector (ADC)
A Windows 2000 service that uses Active Directory to replicate the Exchange 5.5 directory. This allows directories to be managed either with Active Directory or with the Exchange 5.5 directory service.
active/active clustering
Exchange 2000 runs on several servers at the same time. See also server.
API
Application Programming Interface - software user interface for calling program functions and exchanging data.
archive
See compression.
ASP
Application Service Provider. Single-source provider of IT services at an agreed price.
asymmetrical encryption
Public-private key encryption method, which uses two keys - a public key and a private key, which together form a pair. Each sender needs the public key of each recipient. Because the two keys are different, this method is called asymmetrical. The public key is published so that any recipient can choose to receive encrypted messages. The private key used to decrypt messages is known only to its owner.
authentication
A procedure to verify whether a person is entitled to access specific services. Authentication may, for example, use digital signatures. See also digital signature.
authenticity
Authenticity means that a document or certificate is what it purports to be. The term is also applied to electronic documents.
back office
General term for business areas responsible for processing business information and correspondence (for example secretary's office and order processing).
bitmap
A bitmap is an uncompressed, pixel-based image format for graphics and photos. Fax servers store received documents in the form of a pixel image. If an image file is split up into rows and columns, the result is a raster graphic. Each dot with its color information is saved as a bit sequence. Because it does not support compression, the bitmap file format (.BMP files) is not commonly used on the Internet. where the GIF and JPEG formats are more popular due to their small file size.
business-to-business
Electronic information exchange and trade between businesses.
business-to-customer
Electronic information exchange and trade between business and customers.
CA
Certification authority. See Certification Authority (CA).
certificate
Digital certificates are electronic documents linked to a public key. Certificates are digitally signed by a trustworthy authority (Certification Authority (CA)/trust center; see also PKI) that certifies that the key belongs to a specific person and has not been altered. The certification authority's digital signature is an integral part of the issued certificate. and allows anyone with access to this certification authority's public key to verify its authenticity. Using this method at multiple levels results in a Public Key Infrastructure (PKI). The advantage of such an infrastructure is that only the public key of the so-called root instance, i.e. the root certificate, will be required for complete verification, as the intermediate certificates are validated automatically. See also public key and private key.
Certification Authority (CA)
The Certification Authority is a trustworthy public authority that certifies cryptographic keys (see certificate). It is part of a PKI. The CA issues certificates and adds its digital signature to confirm the validity of the data they contain. This is usually the name of the key owner of the and any additional information to allow identification of the owner, the owner's public key, its validity period, and the name of the certification body. The degree of trust put in such a certificate depends on the operational procedures applied by the Certification Authority, i.e. the methods used to check the owner's identity. Once a certificate has been issued, the CA must provide a possibility to revoke the certificate and must provide revocation lists (CRLs) if any of the certificate data becomes invalid. This is in particular the case, when any of the owner's private keys have been compromised. See also public key and private key.
client
General term for a networked computer with application programs that access the services and resources provided by a server.
client/server systems
The server is a program that provides a service and a client is a program that uses this service. These services can both be installed on the same computer or be distributed across a network consisting of at least one central computer (the server), which makes its data, programs and any other connected devices available to one or more network stations (the clients).
compression
File size reduction to reduce network load and transfer times and/or save storage space. Multiple files can be compressed into a single archive. There are many compression formats, some of which are self-extracting. The most common ones are ZIP, TAR, ARJ, GZip, ARC and LZH. Which of these are used depends in part on the computer system: on UNIX systems, for example, GZip and TAR tend to be used, while ZIP and ARJ are the preferred choice for Windows systems (see also packer). Because viruses can easily hide in archives, content security tools must be able to perform recursive analyses on nested archives, i.e. decompress the files repeatedly to scan them in their original state.
console
A collection of administration tools in the MMC containing objects, such as snap-ins, extension snap-ins, monitoring controls, tasks, wizards and documentation used to manage the Windows 2000 system hardware, software and network components.
content security
The management and scanning of the content of digital correspondence. Content security products protect computer networks and users from dangerous content that is either deliberately or accidentally embedded in e-mails or Internet transmissions.
CRL
Certificate Revocation List – When information in a certificate becomes invalid during its lifetime, it must be revoked. Because certificates are digital documents, they can not be collected or destroyed. Revoked certificates are therefore registered in another document, the revocation list. A standard for revocation lists is defined in the X.509 protocol.
customizing
Adapting software solutions to customer-specific requirements.
data integrity
Defines the authenticity of data, i.e. whether unauthorized changes have been made to it either manually or automatically.
decompressor
Program for decompressing files and file archives. See also compression.
DHCP
Dynamic Host Configuration Protocol - server administration of IP addresses. Used for exchanging configuration information for a TCP/IP network between a
server and its client. DHCP is used, for example, for the dynamic allocation of IP addresses within a LAN.
digital signature
The electronic equivalent of a handwritten signature. It is used to verify the authenticity of electronic documents (i.e. its originator) as well as its integrity. This can be achieved with asymmetrical encryption, which uses private keys to generate information with which others can verify the integrity and authenticity of received mail using the associated public key.
DNS
Domain name service - assigns the domain names of computers on the Internet to their corresponding IP address.
domain
The domain is a part of an address which conforms to the conventions of the DNS. The domain levels in the address are each separated with a period, for example www.group-technologies.com. Domain names can contain letters and numbers. The only special character that can be used internationally without limitation is the dash. Names must be at least three characters long and contain at least one letter, since they could otherwise be mistaken for IP addresses.
Dynamic Link Library (DLL)
DLLs are Windows files which contain objects that are loaded dynamically, i.e. they are loaded into memory only when an application needs them. While this method reduces memory usage, its main purpose is to provide libraries of standard program objects that can be accessed by many different applications.
e-business
Electronic business - business processes using electronic means of communication. Includes all stages in the value-added chain that take place electronically, from simple word processing through e-mail communications to complex databases and global networking.
e-business enabling
Establishing the precondition for e-business.
e-business organization
Rule-based organization of inbound, outbound and internal information in e-business.
e-business security
Rule-based data protection and integrity management in e-business.
Electronic mail – communication medium with which information (text, speech, images, graphics, etc.) can be transmitted electronically.
e-mail account
Registered macro virus.
EMH (Enterprise Message Handler)
Interface between the Avira core technology and individual modules.
encryption
Making a message illegible to prevent it being read by unauthorized people. A range of different encryption methods can be used. See also PGP and S/MIME.
false positives
Inbound e-mail falsely classified as spam.
filter
See rule.
fingerprint
Unique feature of a file, by which it can be identified. Consists, for example, of the file's content or, if this is not possible, of a unique characteristic of the filename, such as its extension.Fingerprints are used to determine whether files should be blocked or passed by a mail filter. You can create your own file patterns, which AntiVir uses to identify the filetypes of attached files.
freeware
Free-of-charge software, usually available for download from the Internet or on sample CD-ROMs.
frontend/dashboard configuration
Separate server groups for handling protocols (policy, etc.) and data stores. The clients access front-end protocol servers, which sequentially establish connections to and query back-end database servers.
GIF
Graphics Interchange Format – standard Internet graphics format developed by CompuServe. Supports a color depth of 256 (8 bits per pixel) and compression of image data to reduce filesize, which results in shorter transfer times and relieves network load. In contrast to the JPEG format, GIF does not provide gradual color transitions. Interlaced GIF files – a variant of the GIF format – allow a low-resolution preview while the image is loaded. The GIF89a format supports transparency, one color being defined as alpha channel. This feature is useful for placing images on colored backgrounds on web pages. See also compression.
global settings
General settings that apply to the entire Avira AntiVir Exchange.
Grabber
Processing module for e-mails. The MailGrabber processes e-mails directly on the Domino server from which they are sent, calling the required function modules (such as iQ.Suite Watchdog) for each message.
groupware
Software that provides information and communication support for workgroups. It consists of integrated solutions for e-mail, a group calendar and scheduler, information exchange, electronic conferencing and document and work management functions.
hotline
Central telephone customer service.
HTML
Hypertext Markup Language – used for simple creation of hypertext documents for the Internet. HTML is based on SGML (Standard Generalized Markup Language), an ISO standard for the definition of structured data types. For a good description of HTML, see http://selfhtml.teamone.de/.
hyperlink
Hyperlinks, also called URLs (Uniform Resource Locators), are links to other documents or another location in the containing document, for example to web pages on the Internet.
IAB
Internet Activities Board – coordination body for Internet research activities; consisting of the IETF and the IRTF.
IETF
Internet Engineering Task Force - Standardization body for Internet standards.
implementation
Putting a design or concept into practice in the form of, for example, an executable program.
Information Store
Storage technology used in Exchange 2000 for storing user mailboxes and mail folders. There are two kinds of stores: mailbox stores and information stores for public folders.
Information Store for public folders
The part of the information store used for managing information in public folders. An information store for public folders consists of a Rich Text file with the extension .EDB and a system-specific streaming Internet content file with the extension .STM. See also MIME.
infrastructure
In the context of groupware, all hardware and software components, communication equipment and organizational measures required for operating a groupware.
Installable File System (IFS)
Storage technology for setting up archiving systems. Makes mailboxes and public folders available as conventional folders and files for Win32 standard processes such as Microsoft's Internet Explorer and the command prompt. See also Web storage system.
Integrated Collaborative Environment Software
See groupware.
Internet
Internet is the overall term for a worldwide information network (World Wide Web) and the associated technology, based on special standards, which give the Internet its independence from hardware and operating systems.
Internet Information Server (IIS)
A Microsoft Web server, IIS provides Internet functions, from the creation of web pages to the development of server-based web applications. IIS supports most Internet protocols such as NNTP, FTP and SMTP. Exchange 2000 extends the IIS functionality, using the server for message routing.
intranet
Corporate data and communication network for information exchange, based on Internet technology Internet. Used, for example, for shared access to databases, information pools and phone directories.
IP address
Unique Internet address. The Internet Protocol (IP) the protocol for the network layer of the Internet and is used by computers to address each other. The address is represented by sequence of numbers, for example 129.13.64.5.
IRTF
Internet Research Task Force - part of the IAB; supervises long-term development work of Internet technology.
ISO
International Standards Organization - Developers of the OSI model for communication networks.
ISP
Internet Service Provider - provides end clients with access to the Internet and related services. ISPs manage the Internet access points (points of presence).
ISP/ASP
See ISP and ASP
IT
Information technology - covers all technologies used for creating, storing, exchanging and using all forms of electronic information.
job
A job defines a sequence of actions that are performed when a particular event takes place or a particular rule applies. Jobs can be selectively disabled and enabled. Several jobs can be defined for each module, which are then processed according to their assigned priority for all modules.
JPEG
Also JPG. Joint Photographic (Experts) Group format. The standard Internet format for photographs and other images with a high level of detail or a high color resolution. Supports a color depth of 16 777216 (24 bits per pixel) and compression of image data to reduce filesize, which results in shorter transfer times and relieves network load. Higher compression ratios result in a reduced image qua
lity, but in practice this loss is can be kept at unnoticeable levels. Scanned photographs and images from digital cameras are often saved in JPEG format, and many fax servers also use this format.
junk mail
All forms of unwanted e-mail that were not requested by the recipient, such as invitations to view websites, images, chain letters, hoax virus warnings and advertising of the "make-money-faster" variety. Junk mails cost company resources and time for their recipient. See also spam.
knowledge management system
System with which a company collects, organizes, sorts and analyzes knowledge to support its aims.
LDAP
Lightweight Directory Access Protocol - An Internet protocol developed to promote the adoption of the X.500 directory standard after the original DAP (Directory Access Protocol) proved too complex for use with simple Internet clients. LDAP provides a standard for Internet-based communication with databases, enabling, for example, access to an online directory service to retrieve information such as e-mail addresses or certificates. Using gateways, it is not restricted to that specific directory service. The entries are packed as objects and structured in a hierarchical tree. They consist of attributes with types and values, with object classes defining which value types can be assigned to which attributes. Possible types include IA5 (ASCII) character strings, JPEG images, sound data, URLs and certificates.
LDIF
LDAP Data Interchange Format – used mainly on knowledge management system servers for exchanging address data. Being (ASCII) text-based, LDIF files can be conveniently edited with standard text editors. It is supported by many e-mail clients for importing and exporting address books (e.g. Outlook, Outlook Express, Netscape, The Bat!).
macro virus
virus that infects documents of the popular Microsoft Office applications (Word, Excel, Access and PowerPoint). MS Office applications can be controlled using the VBA programming language, which is embedded in Office documents in the form of macros. HTML documents created with Word can also contain macro viruses. Macro viruses can even spread across different operating systems, since MS Office – not the operating system – interprets and executes the macro.
mailflooding
Mail flooding is bulk sending of a large number of e-mails, usually from a single domain at intervals of a few seconds. These “attacks” overload the mail server handling the flood of messages, which severely affects its performance. These messages are usually unwanted mail sent with malicious intent. See also spam.
newsletter
Personal e-mail "In" and "Out" tray for a specific user on a mail server.
newsletter store
The part of the Information Store used for managing information in user mailboxes. Mailbox stores consist of a Rich Text Format (RTF) file (with extension .EDB) and a system-specific streaming Internet content file (with extension .STM).
messaging platform
Hardware or software platform for e-mail or electronic communications.
MIME
Multipurpose Internet Mail Extensions - Originally a method for encrypting non-text objects to allow their transmission using SMTP and e-mail. Today, this method is used universally for data transfers through the Internet. Providing the ability to define custom control codes for special characters – such as accents – and to attach all types of files extends the functionality of e-mail communications. The associated file extension is SMT. See also S/MIME.
MMC
Microsoft Management Console - administration environment containing administration tools and applications used to manage networks, computers, services, etc. The MMC lets you create, save and open collections of tools and applications.
MMC snap-in
Administrative functions component of an MMC. See snap-in.
module
A program unit with definable boundaries and action, which is embedded in an overall system as an independent, autonomous program component, such as secure AntiVir and AntiVir Wall.
mount
To connect to the file system (drive) of another computer system.
object
The basic unit of Active Directory. A defined and named set of attributes representing a real object or person, such as a user, a printer, a computer or an application.
OEM
Original equipment manufacturer - Company that buys other manufacturers' products or components and incorporates these in other products that it sells under its own name.
organization unit
An Active Directory container used for storing objects, such as user accounts, groups, computers, printers, applications, file sharing and other organization units. Organization units can be used for assigning and saving specific rights to object groups (for example users and printers). An organization unit can not contain objects from other domains. The organization unit is the smallest unit to which administration rights can be assigned or delegated.
Outlook Web Access
Outlook Web Access for Microsoft Exchange 2000 Server provides user access to e-mail, personal calendars, group scheduling, contacts and applications for cooperation via a web browser. Can be used by UNIX and Macintosh users, users without access to an Outlook 2000 client and for users connecting through the Internet. Provides platform-independent access for users stored on the server, for users with limited hardware resources, and for users without access to their own computers.
packer
Compression program. See compression.
passphrase
A long, but memorable, character sequence (e.g. short sentences with punctuation) used in place of a password for increased security.
password
A secret character sequence with which participants can authenticate themselves. Passwords are usually too short to guarantee security as they can often be guessed by trial and error.
PGP
Pretty Good Privacy – a program for encrypting and decrypting e-mails. Can also be used to electronically sign documents. Guarantees the recipient of such a document that the sender is the real author and the document was not sent or modified by another user. PGP is freeware and available from many shareware archives. In the context of e-mail, PGP is a standard just like S/MIMES/MIME. PGP is platform-independent.
PKI
Public Key Infrastructure. The biggest problem with using public key procedures is presented by the authenticity of public keys. The issue is how to guarantee that an existing key really comes from the desired communication partner. A PKI is a combination of hardware/software components, policies and various procedures. It is based mainly on certificates, which are keys of the communication partners that have been certified by a trustworthy authority through digital signatures.
platform
Software system, for example Lotus Notes, Microsoft Exchange, or an operating system, on which other applications or processes – such as the Avira GmbH products – can run.
policy
In the context of iQ.Suite, the overall configuration of all jobs within a company.
POP3
Post Office Protocol version 3 – a transfer protocol used for controlling the receipt of e-mail from a remote server on which messages are stored until their retrieval by the recipient. POP3 uses TCP/IP. Developed specifically for receiving e-mail it does not, unlike SMTP need a dedicated line.
private key
The private key is the part of a pair of keys that a user has to store at a safe place. It is used to decrypt information addressed to the owner of the private key and to generate digital signatures. Private keys are protected by a password or a passphrase. See also public key.
public folder hierarchy
The structure or hierarchy of public folders on a single Information Store for public folders.
public key
The public key is the part of a pair of keys that is made publicly accessible, e.g. on a trust center (knowledge management system) server. It is used to encrypt messages addressed to the owner of the public key and to check his digital signatures. A public key certified by a CA is termed certificate.
quarantine
An archive folder in which virus-infected and/or blocked files are stored and where they can be accessed by authorized persons.
replication
Synchronization of data between two identical databases on two different servers
reseller
Dealership which, in addition to the software itself, offers its own services to customers.
RFC 821
Request for Comments 821 – defines the SMTP protocol and is today the basis for transporting e-mails on the Internet. Developed 1982 together with RFC 822, which defines the e-mail message format. A range of RFC documents created by the IAB are available.
Rich Text Format (RTF)
A generic file format used for transferring formatted text between applications, also between different operating systems.
root certificate
The highest instance of a certificate. For further information, see certificate.
RSA
Commonly used encryption method named after its inventors – Rives, Shamir and Adleman. Used also with PGP. In RSA encryption, two large prime numbers are linked to form an even larger single prime number, which is then used for encryption. From a certain bit width (about 100 bit), not even the fastest supercomputers can crack this encryption. The required processing capacity is doubled with every additional bit.
rule
Restrict the number of e-mails or databases within the job that Avira AntiVir Exchange scans. The rules filter the messages and databases according to user-
defined policy, which allows operators to optimize the software to their corporate security concept.
rule-based
The execution of electronic processes or functions on the basis of particular rule defined by the system administrator.
S/MIME
Secure Multipurpose Internet Mail Extensions - a secure version of MIME, S/MIME is the industry standard for the encryption of e-mail e-mails sent between the same and different types of e-mail systems. S/MIME can use a range of signature and encryption algorithms. See also PGP.
scaleability
The adaptability of an IT system to user requirements regarding processing speed storage capacities and the number and type of connected workstations.
selection rules
Restrict the number of e-mails or databases that Avira AntiVir Exchange scans. The rules filter the mails and databases according to user-defined guidelines, which allows operators to optimally adapt the software to their corporate security concept.
server
Central system (hardware or applications; in general a universally accessible computer) which provides a particular service that can be used by the network stations (clients). See also client/server systems.
server-based
Programs that are installed on a server and are also executed there.
shareware
Software provided by its developer for a trial period. If the user decides to continue using the software, a registration fee must be paid to the author. The trial version of a shareware program may be restricted in its functionality. On payment of the registration fee, the user receives the full, unrestricted version.
SMTP
Simple Mail Transfer Protocol - protocol for sending and receiving e-mail. Based on RFC 821 and belonging to the TCP/IP family. SMTP messages consist of a head containing at least a sender and recipient ID, and the actual message. A e-mail program - the User Agent (UA) - forwards sent messages to the mail server - the Message Transfer Agent (MTA) in its own network. The MTA, in turn, forwards the message to other MTAs along the transmission path according to the "store and forward" principle until the message reaches its recipient. Because SMTP works with 7-bit ASCII, accented and extended characters can not be represented and no protection is provided against unauthorized access. ESMTP, in contrast, uses 8 bits for message transmission. Unlike the Post Office Protocol (policy), SMTP needs a dedicated line for receiving mail.
snap-in
Software representing the smallest unit of an MMC extension. Each snap-in represents one unit of management behavior. The System Manager is such an Exchange snap-in in MMC.
SOAP
Simple Object Access Protocol - an XML-based communications protocol that provides a common language for completing transactions. Allows platform-independent communication between applications through the Internet. With SOAP, goods orders can, for example, be placed without knowing the actual structure of the destination system.
spam
Unsolicited e-mails, which are generally sent to a large mailing list. Spam includes advertising mail. See also junk mail.
SSL
Secure Socket Layer - a method for sending data securely through a network. Developed by Netscape, SSL allows data to be encrypted for transmission (RSA encryption) to protect it from third-party access. Used, for example, for sending credit card information.
storage group
Group of Exchange Stores. A group of mailbox stores and information stores for public folders which share a collection of transaction log files. Exchange manages each Storage Group with a separate server process.
suite
A set of applications from a single vendor which are sold as a package, for example, E-business security.
supported applications
Commercially available programs and tools (such as WinZip, Sophos Virus Scanner, and PGP).
symmetrical encryption
In this case, messages are decrypted using the same key with which they were encrypted. This is called the symmetrical method as the keys are identical. This means that the key has to be accessible to both the sender and the recipient of the message. Keys are exchanged between recipient and sender using password-protected key files. The recipient of a message receives the password for the key file required to decrypt the message from the sender via an alternative route, i.e. on a "secure line".
system architecture
Structure of an IT system, consisting of hardware and software components.
system integrator
Provider who integrates hardware and software products from different manufacturers and its own components into integrated solutions.
TCP
Transmission Control Protocol – Next to IP (see IP address), the main protocol used on the Internet. provides applications with a connection-oriented, reliable duplex service in the form of a data stream.
TCP/IP
Combination of TCP and IP (abbreviation for Transmission Control Protocol/ Internet Protocol); originally developed for UNIX networks, it is today used as the main network protocol of the Internet. It splits data into convenient packages and sends them across the network using IP addresses to find the message destination. There, TCP reassembles the data packets again. TCP/IP also allows several Internet applications to be run using a single modem or ISDN line.
tools
Small programs and accessory software.
trust center
Trust centers are typically commercial service providers that issue, manage and provide public keys. They usually combine three functions: the actual certification authority (CA) certifies the information submitted; the registration authority (RA) is responsible for identifying the participants and issuing out the certificates; the directory service provides the information required for the creation and verification of certificates and signatures (e.g. timestamps or CRLs).
trusted domain
A domain that is trusted by another domain. Users in trusted domains can, for example, access the resources or receive user rights in a trusting domain.
trusting domain
A domain that regards another domain as trusted. This domain assigns rights to the trusted domain and allows users from this trusted domain to access its resources.
Universal Naming Convention (UNC)
A naming convention for files and other resources. The two backslashes at the beginning of a name indicate that the corresponding resource is located on a network station. The syntax for UNC names is \\server name\shared resource.
VBA
Visual Basic for Applications - programming language from Microsoft for controlling MS Office applications, such as Word, Access and Excel.
virus
Malicious program code that can be transmitted from one file or object to another. Viruses are defined by their ability to reproduce themselves. Viruses can infect other programs by copying themselves into another file or the boot sector of a disk drive.
virus scanner
Computer program for detecting viruses.
VPN
Virtual Private Network – a simulated private network that uses public networks (for example the Internet) to connect its nodes. Encryption is used to prevent unauthorized listening to communications across the VPN.
Web
InternetShort for World Wide Web and synonymous with Internet, whereby the focus is on its global presence.
Web storage system
Web-based information store which provides access to a wide variety of information, such as e-mail and multimedia files. The Web Store concept combines messaging, file access and Exchange database functions (e.g. multiple databases and transaction logging). Web Store is the technology embedded in the Exchange 2000 Information Store and provides a logical view of physical databases. See also Information Store and Installable File System (IFS).
Webconnect
Connection to the Internet.
wildcard
A character which represents another character or a character string. The most common wildcards are the question mark and the asterisk, which are used by the DOS command interpreter. The question mark (?) represents individual letters and numbers, while the asterisk (*) represents a string of one or more characters.
worm
A malicious self-executing, self-replicating program. Unlike viruses, worms do not need a container file (.com, .exe or Visual Basic within a document) to spread. They often take the form of a macro virus.
X.509
Standard for creating and coding certificates, CRLs and authentication services. X.509 is globally the most commonly used standard for certificate structures.
XML
Extensible Markup Language - meta-language for defining other markup languages (such as HTML).
ZIP of Death
A rather small 42 KB e-mail message containing an attachment of recursively packed ZIP files which, in themselves, are neither dangerous nor virus-infected. They do, however, contain over 1 million packed files that, once unpacked, add up to 49,000,000 Gigabytes. When processed by a virus scanner decompression tool, this inconspicuous e-mail initiates virtually endless loops, usually resulting in a system crash. This not only affects the virus scanners of client computers but also the mail servers which usually crash and paralyze the entire e-mail traffic within a few minutes.
www.avira.com


Avira GmbH
Lindauer Str. 21
D-88069 Tettnang
Telephone: +49 (0) 7542-5000
Fax: +49 (0) 7542-525 10
Email: info@avira.com
Internet: http://www.avira.com
All rights reserved. Subject to change.
© Avira GmbH