D3II - Support haut-parleur ECLIPSE - Notice d'utilisation et mode d'emploi gratuit
Retrouvez gratuitement la notice de l'appareil D3II ECLIPSE au format PDF.
| Type de produit | Support haut-parleur |
| Marque | ECLIPSE |
| Modèle | D3II |
| Compatibilité | Enceinte TD508 uniquement |
| Dimensions (environ) | Hauteur : 70 cm, Base : 30 x 30 cm |
| Poids (estimation) | 4,5 kg |
| Matériau | Acier (poteau et base), métal (fixations) |
| Couleur | Noir (typique) |
| Angle d’inclinaison | Réglable par vissage |
| Fonction principale | Maintenir l’enceinte à hauteur d’écoute avec réglage d’angle |
| Alimentation | Aucune (passif) |
| Montage | Nécessite assemblage avec clé Allen fournie |
| Entretien | Nettoyer avec un chiffon doux et une solution neutre. Ne pas utiliser de solvants. |
| Précautions de sécurité | Ne pas placer en hauteur, sur surface instable ou dans une zone de passage. Assembler à deux personnes. |
| Pièces fournies | Joint, poteau, plaque de base, boulons (hexagonal et tête ronde), clé Allen, patins (5) |
| Accessoires optionnels | Pointes M8 (non fournies) |
| Réparabilité | Réparable par remplacement de pièces standard |
| Utilisation prévue | Intérieur, sol plat et solide |
| Charge maximale | Conçue pour enceinte TD508 (poids approx. 5 kg) |
| Garantie | Non spécifiée, se référer au revendeur |
FOIRE AUX QUESTIONS - D3II ECLIPSE
Questions des utilisateurs sur D3II ECLIPSE
0 question sur cet appareil. Repondez a celles que vous connaissez ou posez la votre.
Poser une nouvelle question sur cet appareil
Téléchargez la notice de votre Support haut-parleur au format PDF gratuitement ! Retrouvez votre notice D3II - ECLIPSE et reprennez votre appareil électronique en main. Sur cette page sont publiés tous les documents nécessaires à l'utilisation de votre appareil D3II de la marque ECLIPSE.
MODE D'EMPLOI D3II ECLIPSE
SPEAKER STAND (for TD508 speaker only)
D3 II
SPEAKER STAND (for TD510 speaker only)
D6
OWNER'S MANUAL
Thank you for purchasing this high quality speaker stand. Please read this installation manual before assembling the stand, and be sure to use it properly. An accident or injury can result if the stand is incorrectly assembled or unspecified parts are used. After assembly, keep this manual where it can be consulted when necessary.

Contents
Before installation
Included Parts 2
Using this product safely and properly 3
Cautions before use 3
Installation
Removing the speakers 4
Assembling the speaker stand 5
7
Speaker angle adjustment 7
D3 components
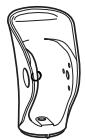
1 Joint

2 Post
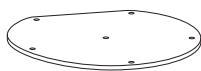
(3) Base plate

(4) Hexagonal bolt
X2

5
Pan-head bolt
X1
6
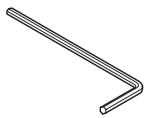
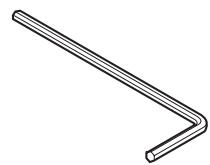
Allen key
X1

7
Spike hole seal
X5

(8)
Foot
X5
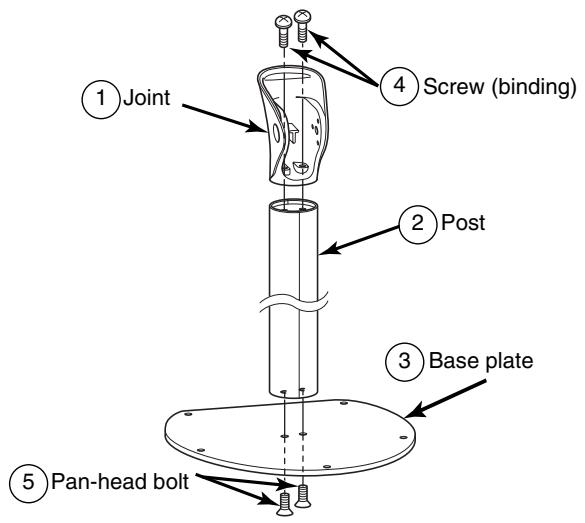
D6 components
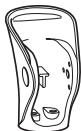
1
Joint
X1
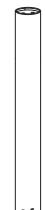
(2) Post
X1
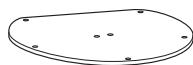
3
Base plate
X1

4
Screw (binding)
X2

5
Pan-head bolt
X2
6
Allen key
X1
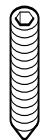
7
Spike (M8X25)
X5

8
Hexagonal nut
X5

9
Insulator
X5
The indicator symbols shown below are used in this manual and on the stand to ensure proper and safe use of the product, prevent injuries and avoid damage to surrounding items. Please become familiar
with these symbols and their associated information before proceeding to the assembly instructions of this manual.

Warning
This "Warning" sign indicates a situation in which incorrect handling may result in death or serious personal injury.

Caution
This "Caution" sign indicates a situation in which incorrect handling may result in personal injury or may result solely in damage to property.

Tip
This section contains information that can help to prevent problems and damage to the unit, and also contain other useful information.

Warning
- Do not place this stand on a tall object or high shelf. If the stand were to fall, it could cause an injury.

Caution
- This stand is meant for use with the TD508 speaker or TD510 speaker. Do not use the stand for other purposes. Improper use of the stand can result in an unstable condition with the potential to cause an injury by falling.
- Assemble the stand on a level surface. Placing the stand on an uneven surface can lead to overturning and result in an injury.
- Do not place the stand where people regularly move past it. Bumping into the stand can cause an injury.
-
Place the stand on a solid and level floor. Installing the stand in a location that is unstable can cause it to fall and result in an injury.
-
Do not drop or drag the stand when assembling or transporting it. Pushing over or dragging the stand can result in an injury or cause damage to the floor.
- Do not climb onto or hang from the stand. Be especially careful about children trying to do this. If the stand falls over it can cause an injury.
- The stand is heavy, so be sure 2 or more people cooperate in unpacking or moving it. Improper lifting can cause a back injury and dropping the stand can injure feet.
Cautions before use
- This is a stand for a speaker system. Avoid using the stand for other purposes.
- The stand is very heavy. Use caution when handling it.
- Be careful not to tip over the stand.
- Be careful that the speaker system does not fall from the stand.
- If the stand becomes dirty, clean it by lightly wiping with a soft cloth having a neutral cleaning solution on it. Do not use a substance like thinner or benzene.
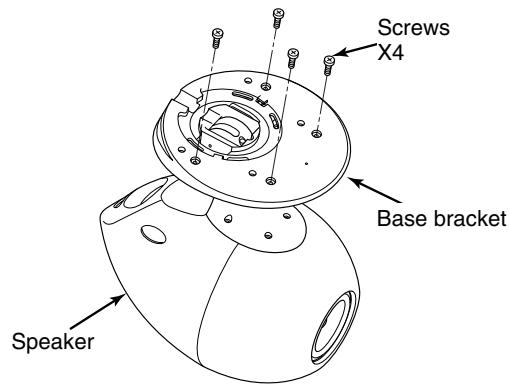
- Removing the speakers -
1 Remove the screws from the bottom of the speaker base bracket.
2 Remove the base cover.
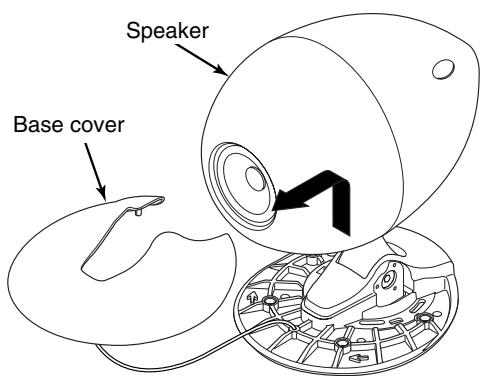
3 Remove the angle adjustment screw and the washer.
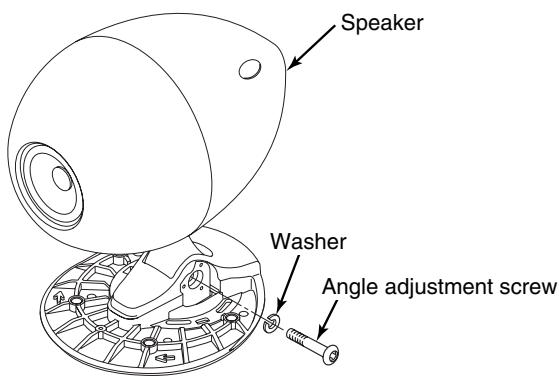
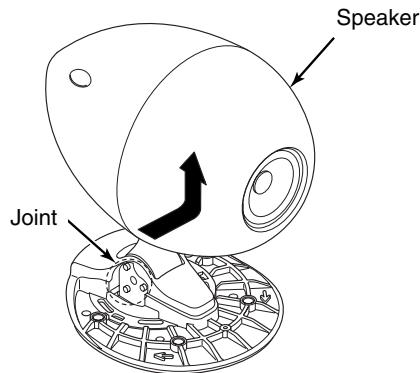
4 Slide the speaker to the right and then lift it up to remove it.

The speaker is heavy, so hold it with both hands when removing it.
1 Install the base plate and the post with the pan-head bolt.
2 Insert the Hexagonal bolt (speaker turn-prevention bolts) into the joint.
3 Assemble the joint and the post with the Hexagonal bolt.
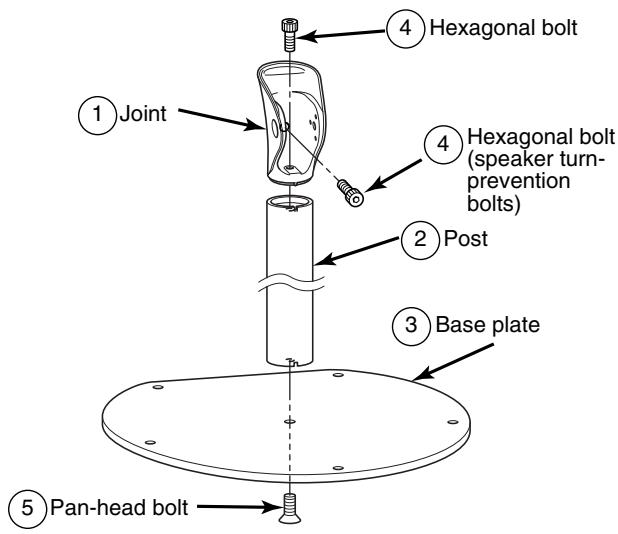

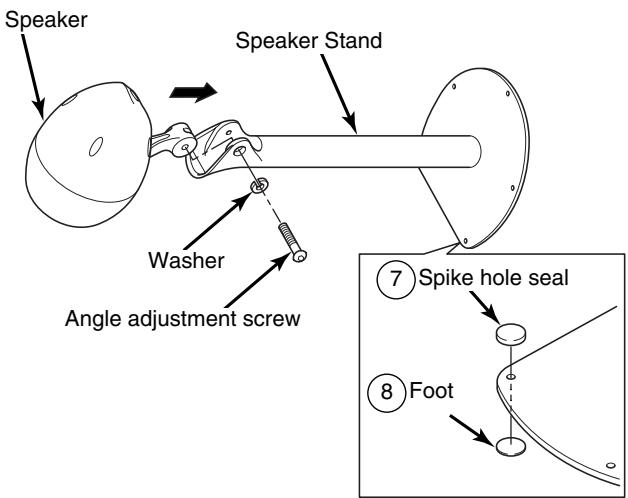
4 Install the spike hole seals and feet into the spike mounting holes in the base plate (5 places).
Commercially-available spikes (M8) can also be installed instead of the accessory spike hole seals and feet.
5 Commercially-available spikes (M8) can also be installed instead of the accessory spike hole seals and feet.
Caution
- The speaker is heavy, so lie it on the floor and place your hands around it when installing it.
- Lay a soft cloth or similar on the floor to prevent any damage to the speaker and the floor while working.
1 Install the base plate and the post with the pan-head bolt.
2 Assemble the joint and the post with the Screw (binding).
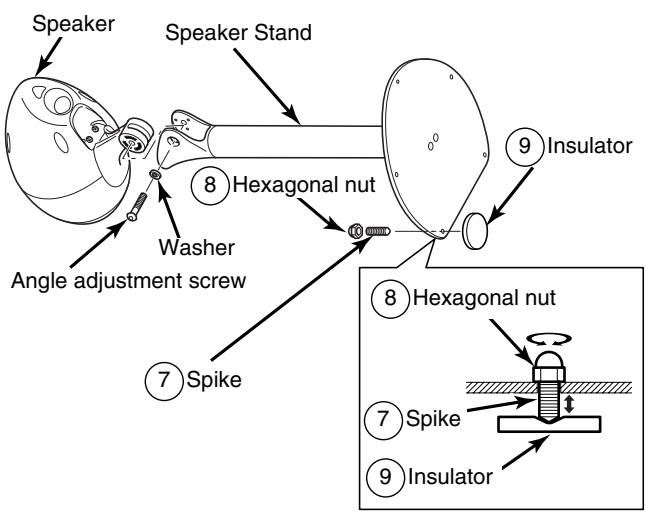
3 Place the insulator under the base plate, and then install the spikes and nuts to the base plate.
Tip
- Turn the spikes clockwise one at a time. Once the end of the spike feels as though it is touching the insulator, secure with the nut.
4 Insert the speaker into the joint, adjust it to the preferred angle, and then tighten the washer and angle adjustment screw to secure it in that position.
Caution
- The speaker is heavy, so lie it on the floor and place your hands around it when installing it.
- Lay a soft cloth or similar on the floor to prevent any damage to the speaker and the floor while working.

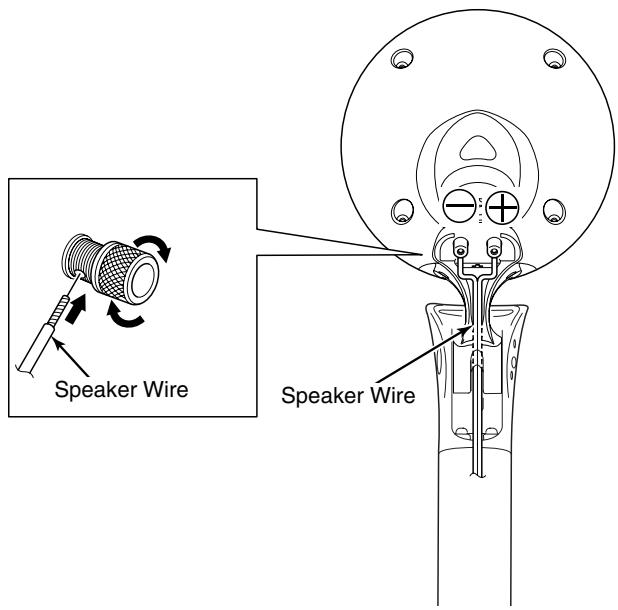
When connecting the speaker wire, connect it securely so that the end of the speaker wire does not touch any neighboring terminals.
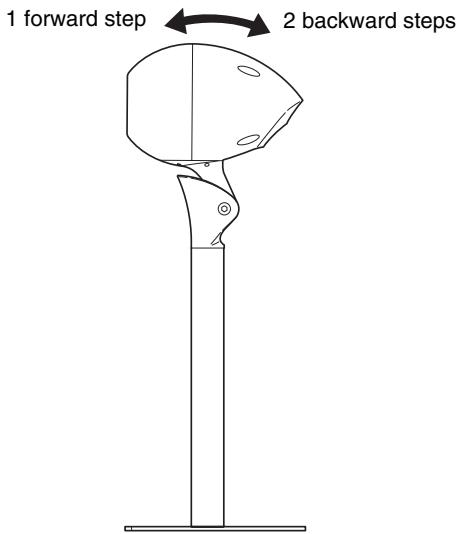
- Speaker angle adjustment -

Loosen the angle adjustment screw on the right side of the speaker.

Slide the speaker to the right slightly to disengage the tab of the joint.
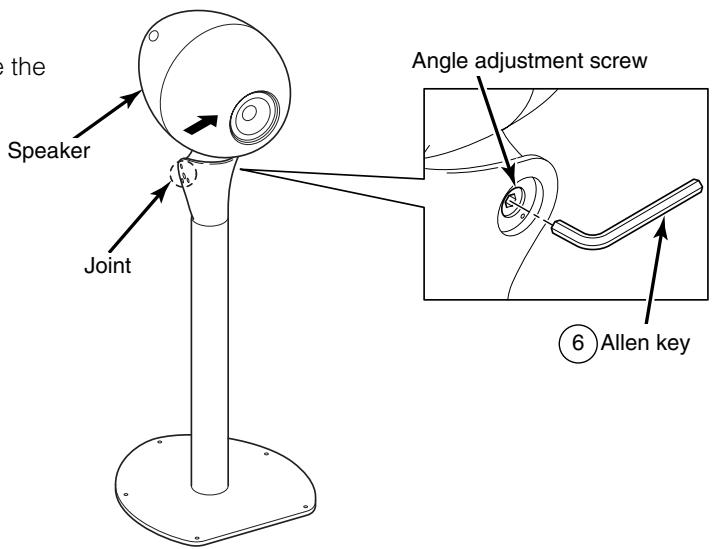

Adjust the speaker to the desired angle.

Securely tighten the angle adjustment screw.

Tip
- Hold the speaker securely while adjusting the angle.