
AC10 - Routeur sans fil ABIT - Notice d'utilisation et mode d'emploi gratuit
Retrouvez gratuitement la notice de l'appareil AC10 ABIT au format PDF.

| Type de produit | Routeur sans fil |
| Marque | ABIT |
| Modèle | AC10 |
| Modem intégré | V.90 & K56flex, fax Groupe III, correction d'erreurs V.42, compression V.42bis |
| Audio | 5.1 canaux Home Theatre avec codec AD1885, AC'97 2.1, S/N > 90 dB |
| Connectique | 1 x RJ-11 (ligne), 1 x RJ-11 (téléphone), 1 x G9 (6 haut-parleurs), 1 x MIC, 1 x Line In, headers internes CD/AUX |
| Interface bus | CNR (Communication and Networking Riser) |
| Systèmes d'exploitation supportés | Windows 95/98/ME, Windows NT 4.0, Windows 2000 |
| Processeur minimum requis | Pentium II 233 MHz, Celeron 266 MHz, AMD K6 233 MHz |
| Mémoire RAM minimale | 16 Mo (Win9x), 32 Mo (NT/2000) |
| Espace disque libre | 7 Mo |
| Alimentation | Via le bus CNR (non spécifié) |
| Dimensions | Carte CNR standard (non spécifié) |
| Poids | Environ 50 g |
| Contenu du carton | Carte AC10, CD de pilotes, câble G9 6 canaux, cordon téléphonique, manuel |
| Fonctions principales | Modem analogique V.90, fax, répondeur, haut-parleur mains-libres, audio 5.1 canaux, compatible vidéophone |
| Entretien et nettoyage | Débrancher avant nettoyage, utiliser un chiffon sec et non pelucheux |
| Sécurité | Conforme FCC, CE, CTR21 ; déconnecter l'alimentation avant installation |
| Pièces détachées et réparabilité | Contacter le revendeur pour le service RMA ; pas de pièces détachées disponibles |
| Informations générales | Notice d'utilisation fournie ; support technique via site web ABIT |
FOIRE AUX QUESTIONS - AC10 ABIT
Questions des utilisateurs sur AC10 ABIT
0 question sur cet appareil. Repondez a celles que vous connaissez ou posez la votre.
Poser une nouvelle question sur cet appareil
Téléchargez la notice de votre Routeur sans fil au format PDF gratuitement ! Retrouvez votre notice AC10 - ABIT et reprennez votre appareil électronique en main. Sur cette page sont publiés tous les documents nécessaires à l'utilisation de votre appareil AC10 de la marque ABIT.
MODE D'EMPLOI AC10 ABIT
Copyright and Warranty Notice
The information in this document is subject to change without notice and does not represent a commitment on part of the vendor, who assumes no liability or responsibility for any errors that may appear in this manual.
No warranty or representation, either expressed or implied, is made with respect to the quality, accuracy or fitness for any particular part of this document. In no event shall the manufacturer be liable for direct, indirect, special, incidental or consequential damages arising from any defect or error in this manual or product.
Product names appearing in this manual are for identification purpose only and trademarks and product names or brand names appearing in this document are the property of their respective owners.
This document contains materials protected under International Copyright Laws. All rights reserved. No part of this manual may be reproduced, transmitted or transcribed without the expressed written permission of the manufacturer and authors of this manual.
If you do not properly set the settings of this product, causing this product to malfunction or fail, we cannot guarantee any responsibility.
| As of December 31, | ||
| 2017 | 2016 | |
| (In thousands) | ||
| Amounts Payable and Commitments: | ||
| Amounts payable to NagraStar | 1,485,936 | 1,485,936 |
AC10 CNR Card User's Manual
Index
CHAPTER 1. INTRODUCTION 1-1
1-1. SPECIFICATIONS 1-1
1-2. WHAT'S IN THE BOX? (PACKAGE LIST) 1-4
CHAPTER 2. HARDWARE INSTALLATION.. 2-1
2-1. SYSTEM CONNECTION 2-1
2-2. CONNECTORS AND HEADERS 2-2
2-3. CARD INSTALLATION 2-3
2-4. CONNECTING MODEM TO TELEPHONE LINE 2-4
CHAPTER 3. DRIVER INSTALLATION 3-1
3-1. INSTALL MODEM DRIVER 3-1
3-2. DIAGNOSTICS FOR WINDOWS 9X 3-2
3-3. INSTALL 5.1 CHANNEL AUDIO DRIVER 3-3
CHAPTER 4. INTERVIDEO WINRIP™ SOFTWARE APPLICATION 4-1
4-1. WINRIP INSTALLATION 4-1
4-2. WINRIP CONFIGURATION 4-4
CHAPTER 5. INTERVIDEO WINDVD™ 2000 SOFTWARE APPLICATION 5-1
5-1. WINDVDTM 2000 INSTALLATION 5-1
5-2. REMOTE CONTROL KIT (OPTIONAL) 5-2
5-3. REMOTE CONTROLLER (OPTIONAL) 5-3
APPENDIX A. HOW TO GET TECHNICAL SUPPORT
Chapter 1. Introduction
The AC10 CNR (Communication and Networking Riser) card supports 5.1 channel Home Theatre speaker output and V.90 analog modem. It offers a cost-effective and a more flexible selection in communication and networking, allowing motherboard OEM manufacturers a new opportunity in the PC market.
The CNR card shares a PCI slot to distinguish its application from AMR. With the added functionality and the superior hardware-integration design, a system manufacturer has several motherboard acceleration options available, as well as expandability for future technologies.
1-1. Specifications
Modem
1. Chipset
SmarLink Si3014
2. Line Connection
PSTN, 2 wires
3. Data Modem
V.90 & K56flex
V.34 (33,600 bps - 2,400 bps)
V.32bis (14,400 bps - 4,800 bps)
V.32 (9,600 bps - 4,800 bps)
V.22bis (2,400 bps - 1,200 bps)
V.22 (1,200 bps)
V.23 (75/1,200-600 bps)
V.21 (300 bps)
Bell 212A (1,200 bps)
Bell 103 (300 bps)
4. Fax Modem
- Group III, Class 1
Class 1 fax error correction mode
V.17 (14,400/12,000 bps)
V.29 (9,600/7,200 bps)
V.27ter (4,800/2,400 bps)
V.21 (300 bps)
5. Error Correction
V.42, LAP-M & MNP 2-4
Data Compression
V.42bis & MNP 5
6. Answering Machine Option
- 8KHz PCM and IMA ADPCM
- Concurrent DTMF detection
Voice/Silence detection
7. Modem Communication Model
- Asynchronous
8. Speaker Phone Option
Full-duplex w/acoustic and line echo cancellation
- Microphone AGC and muting
- Software volume control
Music-on-hold
- Flash-hook
9. Video Phone Ready Modem
V.80 sync access mode interface
Transparent & framed sub-modes
- Voices call first Supports Intel Video Phone with ProShare technology
10. Adaptive Connection Support
V.8 auto mode negotiation
V.8 PRIME & V.8bis
Adaptive Rate Renegotiation
- Automatically adjusts speeds up and down to accommodate changing line conditions
11. Tone Detections
- Dial tone, second dial tone
Ring back, Busy
Data/fax answering tones
DTMF
12. PTT and Safety
FCC,CE,CTR21
13. DOS Box Comm. Applications Support (Available with TAM option)
- Distinguish among data, fax, voice
14. Modem Auto Dial & Auto Answer
YES
15. Modem Line Quality Monitoring
Receive Level Monitoring
16. Modem Programmable Volume Control
YES
17. Operating System Support
Windows 95/98/ME
- Windows NT 4.0
- Windows 2000
18. Modem Data Interface
- AC'97 compliant primary / secondary selection
19. Telephone Interface
PSTN Line through RJ-11
20. Minimum System Requirements
233MHz Pentium II Processor
266MHz Celeron Processor
233MHz AMD K6 3D now!
256K L2 Cache
- AC-Link V.2.1 Compatible Core Logic chipset
- Windows 95/98 with 16 MB RAM
- Windows NT 4.0/2000 with 32 MB RAM
- 7 MB free hard disk space
One CNR slot
5.1-Channel Audio
- Analog Device AD1885 Codec
Support 5.1 channel Home Theatre Speaker Output
AC'97 2.1-Compliant - Soft DVD provide Dolby Digital Decoding
- Bus Interface: CNR Bus
- Stereo Headphone amplifier
S/N Ratio Greater than 90 dB
Audio Converters: 16-bit Stereo Full-Duplex Codec - Games Compatibility: Compatible with all standard Windows games and most DOS games (in Real Mode DOS)
Full Duplex Variable Sample Rates from 7040Hz to 48kHz with 1 Hz Resolution - Audio Inputs/Outputs: Microphone input, Line input, Aux input on internal header, CD input on internal header, one G9 speaker output.
- Mono MIC input w/Built-in 20 dB Preamp
Power Management Support - Digital Audio Mixer Mode
- PHAT Stereo 3D Stereo Enhancement
-
Windows 95/98/ME, Windows NT 4.0, Windows 2000 operating system supported
-
Specifications and information contained in this manual are subject to change without notice.
1-2. What's In The Box? (Package List)
Check the following list. If there is any item damaged or missing, please contact your local dealer.
(1) AC10 CNR Card
(1) AC10 Installation and Utility Disc (CD-Title)
(1) G9 6-Channel Cable Red jack: To connect Front speakers White jack: To connect Rear speakers Black jack: To connect Center speaker/Subwoofer
(1) Telephone Cord
(1) This User's Manual
WinDVD Remote Controller Kit (Optional)
Chapter 2. Hardware Installation
2-1. System Connection
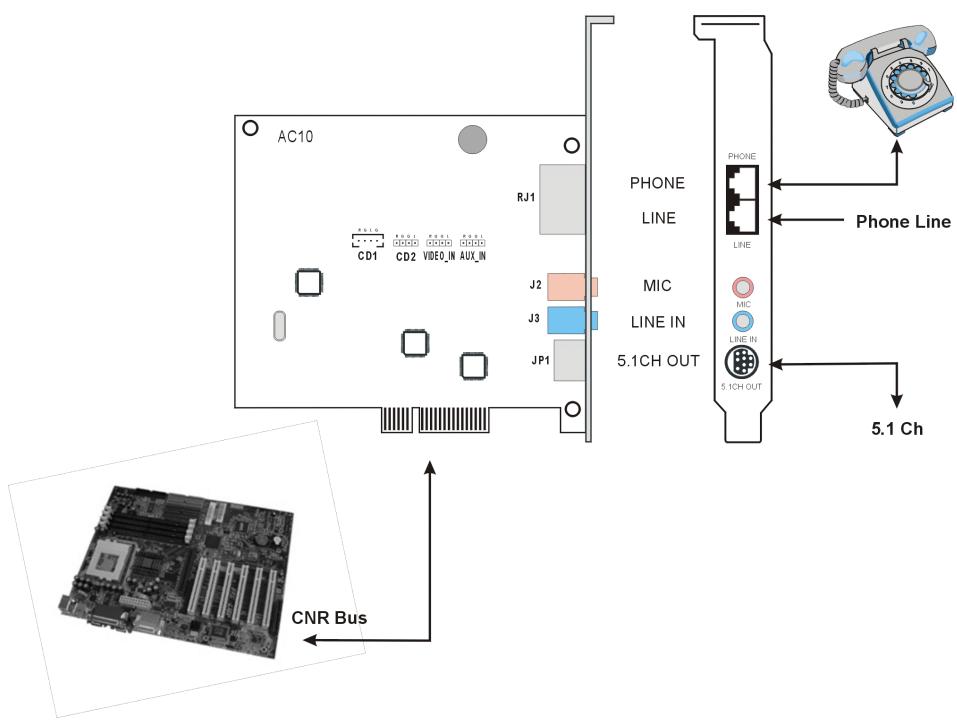
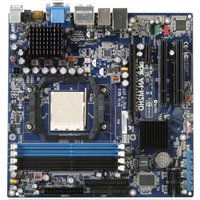
Figure 2-1. AC10 CNR card layout diagram.
2-2. Connectors and Headers
- PHONE (RJ1): Connect to a telephone set.
LINE (RJ1): Connect to telephone wall socket. - MIC (J2): Connect to an external microphone.
LINE IN (J3): Connect to an external audio source.
5.1CH OUT (JP1): Connect to a 6-speaker audio system (with G9 6-channel cable). - CD1, CD2,VIDEO_IN,AUX_IN: Connect to audio sources of internal CD-ROM or other audio sources.

Figure 2-2. Pin definition of CD1 ~ AUX_IN headers.
2-3. Card Installation
Step 1. Turn off the PC and all external peripherals connected to it (e.g. printer...etc.), and then remove the PC system cover.
Step 2. Locate the CNR expansion slot on the motherboard. The AC10 can only be plugged into the CNR slot. Remove the metal bracket corresponding to the CNR slot you have chosen. Save the screws.
Step 3. Align the AC10 connectors' side down to the CNR slot. Hold the card by its edges and insert the card into the slot without using excessive force or pressing any components on AC10. Make sure it is firmly and completely fixed into the CNR slot.

Figure 2-3. Install AC10 to CNR expansion slot.
Step 4. Secure AC10 to CNR slot. Align the notch in the mounting bracket of the CNR card with the screw hole in the rear panel of the computer case. Use the screw that had been removed from the metal bracket to secure the CNR card in place.
Step 5. Replace the system cover. It is ready to boot up your PC system.
Note
It is recommended to disconnect the power from the switching power supply before replacing this CNR card. Failing to do so may cause the system unable to detect this hardware after rebooting; you will have to flash the BIOS under this circumstance.
2-4. Connecting Modem to Telephone Line
Step 6. Plug one end of telephone cord supplied into the socket on the back of the modem marked "LINE".
Step 7. Insert the other end of the cord into the telephone wall socket.
Step 8. If you want to use your telephone set on the same line with modem, please connect your telephone cord into the socket on the back of the modem marked "PHONE".

Figure 2-4. Connect the LINE input from telephone wall socket, and then connect the PHONE output to your telephone set.
Chapter 3. Driver Installation
3-1. Install Modem Driver
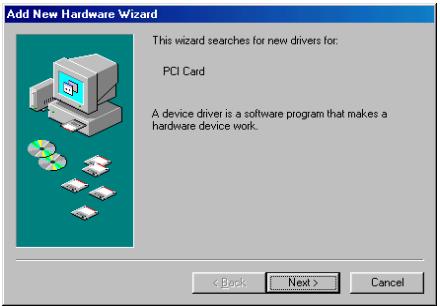
- When the message of "PCI Card" (or PCI Communication Device) appears, insert AC10 CD-Title, and then click "Next> to continue.
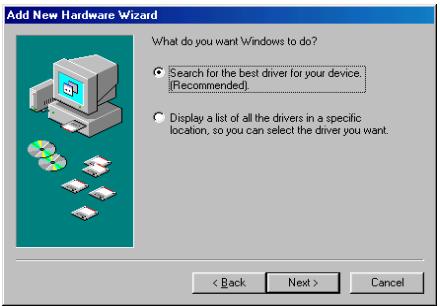
- Select "Search for the best driver ..." and click "Next" to continue.
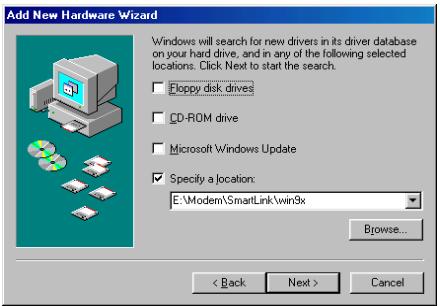
- Select "Specify a location:" and type "E:\Modem\SmartLink\Win9X" (E is the letter of CD-ROM drive) in the text box, or use "Browse..." to search the driver. Click "Next>" to continue.
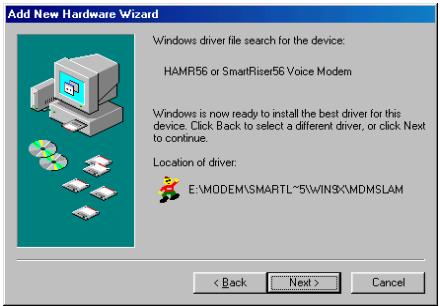
- Windows has found driver for "HAMR56 or SmartRiser56 Voice Modem", click "Next>" to continue.
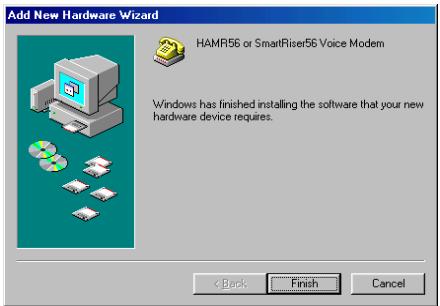
- Windows has finished installing software for this CNR card. Click "Finish" to restart the system.
3-2. Diagnostics for Windows 9x
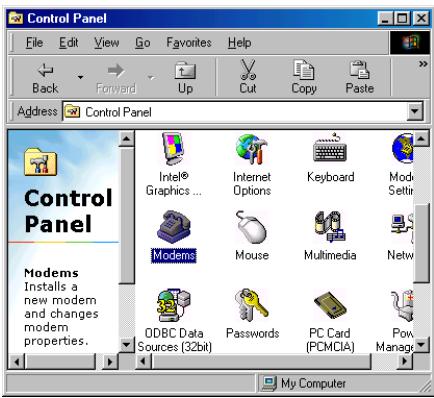
- Move the cursor to "Start Settings Control Panel", click "Control Panel". Then double-click on the "Modems" icon.
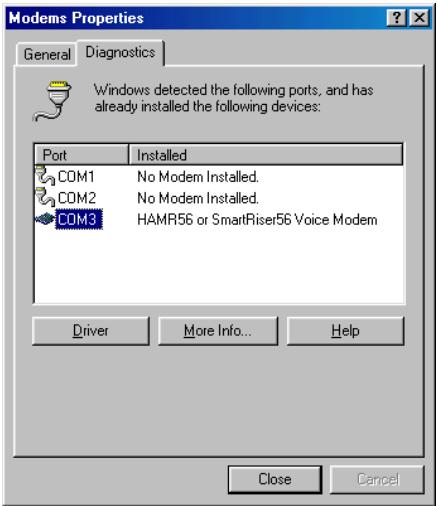
- Click on the "Diagnostics" tab. Select the "COM Port" that the modem is setting. Click on the "More Info..." button to start the test.
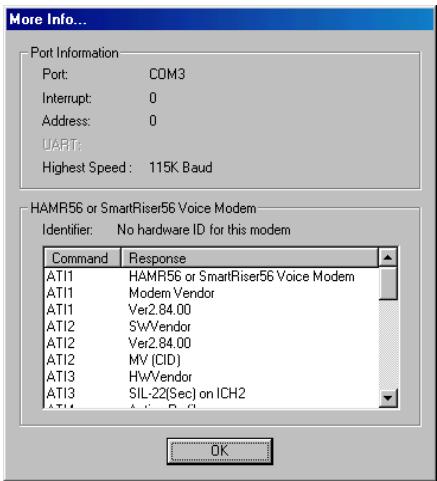
- If the modem is responding to AT commands and functioning correctly, it means the modem is working properly. Click "OK" to end the modem diagnostics.
3-3. Install 5.1 Channel Audio Driver
Insert the AC10 CD-Title into the CD-ROM drive, it should execute the program automatically. If not, execute the execution file at the main directory of this CD-Title. After it has been executed, enter the page of driver installation, the installation wizard appears:
Note
In order to obtain the effect of 5.1 Channel audio output, please install the latest version of DirectX first.
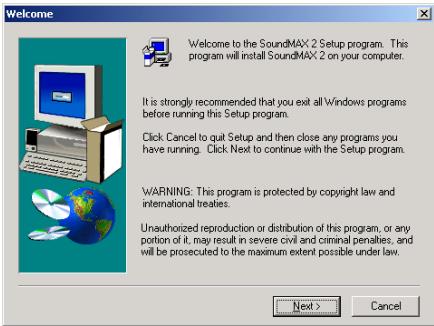
- The welcome screen appears. Click "Next>" to go on.
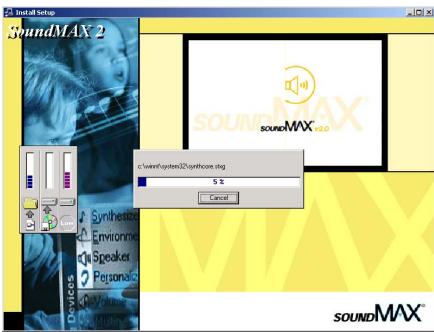
- Windows is installing the drivers for SoundMAX.
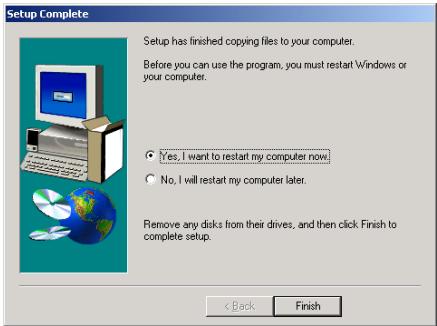
- Windows has finished installing the audio driver. Choose "Yes, I want to restart my computer now", and click "Finish".
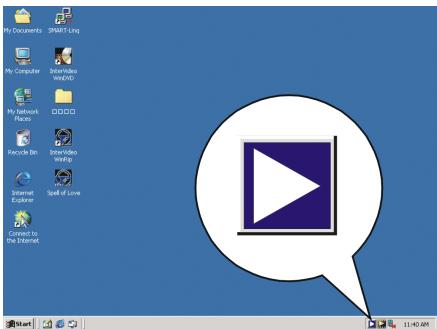
- After the system rebooted, there is a SoundMAX icon in the lower-right task bar.
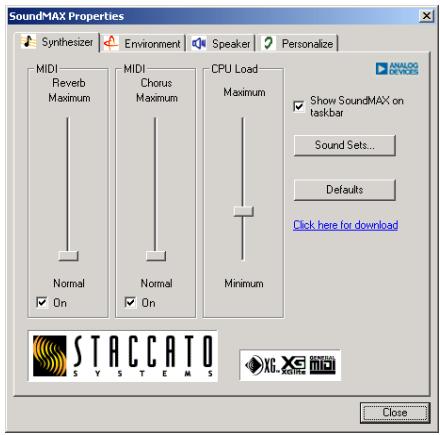
- Double-click on the SoundMAX icon in the task bar to call out SoundMAX properties to set up the sound effect.
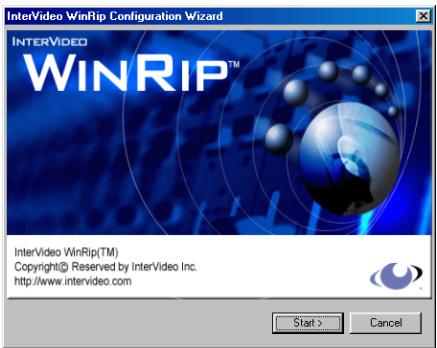
Chapter 4. InterVideo WinRip™ Software Application
WinRip is application software developed by InterVideo to provide you with a complete audio playback and recording environment for all currently available audio formats, including the MP3, MP2, WAVE, MIDI, and Audio CD formats for Abit's 5.1 channel playing device. WinRip enables you to swap and convert between these formats freely.
Insert the AC10 CD-Title into the CD-ROM drive, it should execute the program automatically. If not, execute the execution file at the main directory of this CD-Title. After it has been executed, enter the page of driver installation, the installation wizard appears:
4-1. WinRip Installation
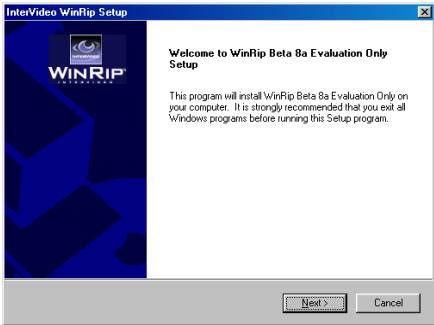
1. The welcome screen appears. Click "Next" to go on.
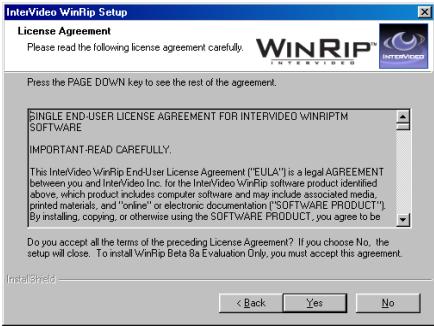
2. Please read the License Agreement and click "Yes" to go on.
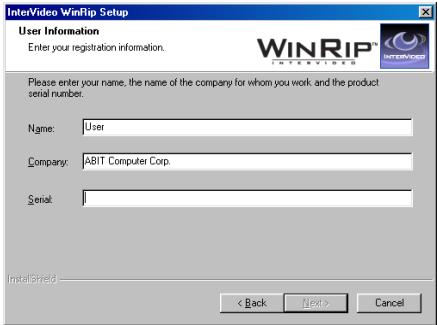
3. Type in your name, company name, and serial number of this software. Click "Next" to go on.
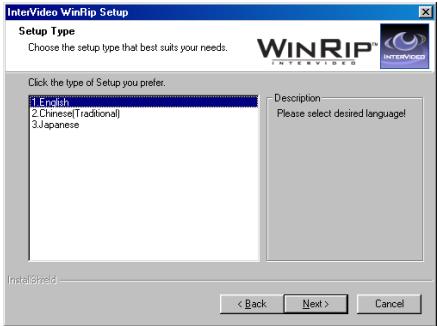
4. Select your desired setup language. Click "Next" to go on.
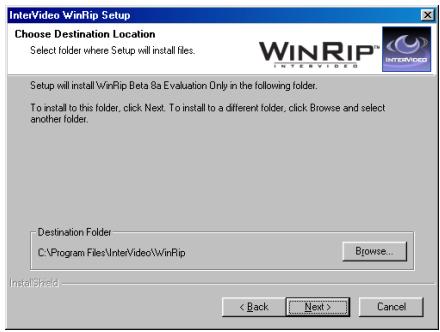
- Choose the destination location you want by entering the "Browse..." button, or you may click "Next" to go on.
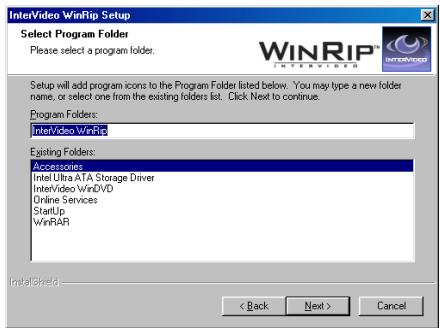
- Type the new folder name you want. Or you may click "Next" to go on.
- Click "Start" to go on.
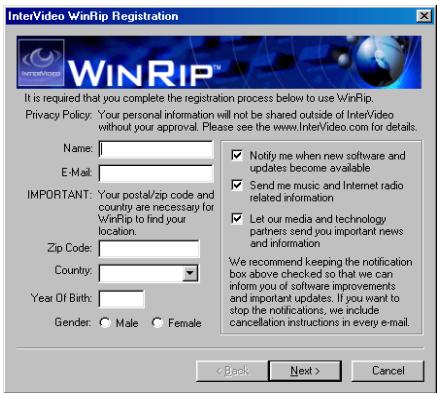
- Type in your registration information and click "Next" to go on. Or you may click "Cancel" to skip this step, finish the registration later, and jump directly to steps 13 to complete the installation.
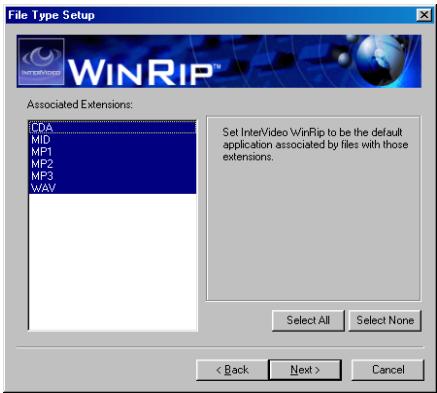
- Select the extensions names associated with WinRip, and click "Next" to go on.
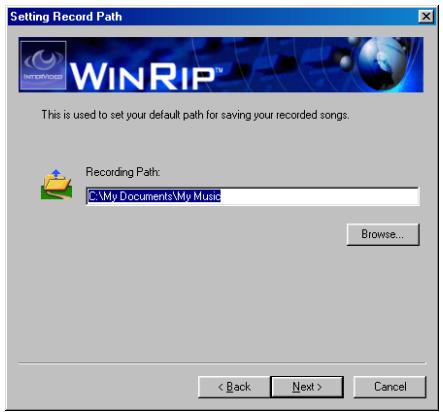
- Type in the recording path of your recorded songs, or you may click "Next" to go on with the default path.

- Check the type of recording. There are 128 (default), 160, 192, 224, 256, and 320 kbps options to select. Click "Next" to go on.
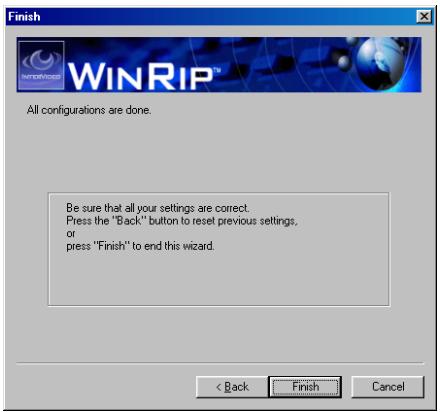
- Click "Finish" to end the installation.

- Windows has finished installing WinRip. Enable the check box if you want to view the Readme file, or click "Finish" to go on.
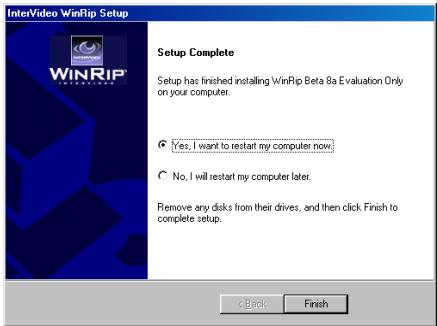
- Enable the check box of "Yes, I want to restart my computer now", and click "Finish" to complete the setup.
4-2. WinRip Configuration
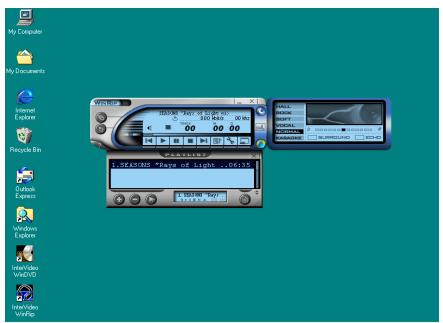
1. Double-click on the WipRip icon on the desktop.
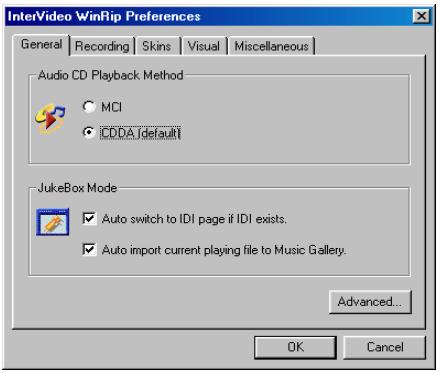
2. Click the "Advanced..." button to go on.
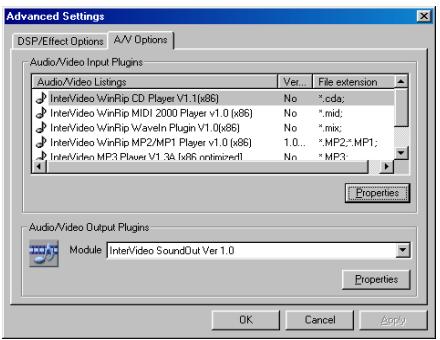
3. Select the A/V Options tab, and click the "Properties" button of Audio/Video Output Plugins to go on.
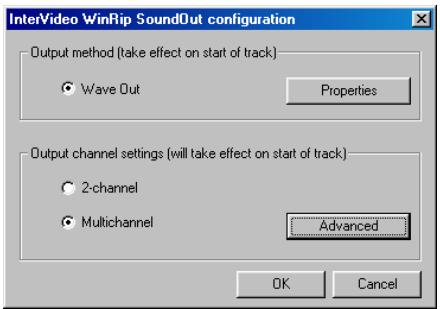
4. Enable the checkbox of the "Multichannel" and click the "Advance" button.
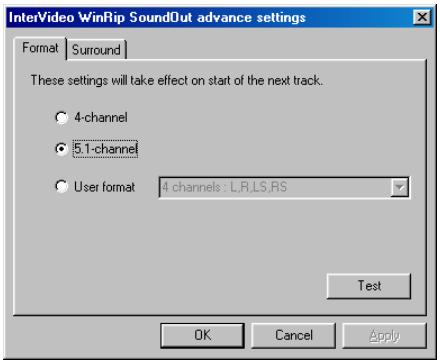
5. Choose 5.1-channel and click "OK" button.
You will have to click "OK" button for three more times in the next three steps, which are the same screen with step 4 to step 2.
The output channel settings will be taking effect immediately on the start of next track.
Chapter 5. InterVideo WinDVD™ 2000 Software Application
5-1. WinDVD™ 2000 Installation
Note
It is recommended to install the latest version of DirectX to obtain 5.1 channel audio output.
If you have a DVD-ROM, you can install this software for DVD player into your computer. Please insert the AC10 CD-Title into the CD/DVD-ROM drive. It should execute the program automatically. If not, you can go to the CD location and execute the execution file at the root directory of this CD-Title. After it has been executed you will see the screen below.
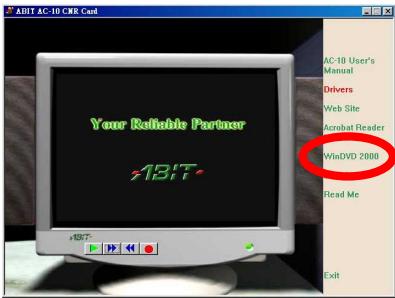
Move the cursor to "WinDVD 2000" and click on it. This will begin installing the InterVideo WinDVD software into your computer.
Note: Please follow the on-screen instruction for the rest of the installation procedure.
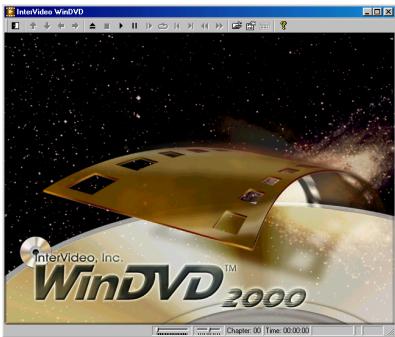
After finishing the installation, the wizard asks you to restart your computer. Restart it and go to "Start Program InterVideo WinDVD InterVideo WinDVD", or you may start it by double clicking the WinDVD icon on your desktop. Then you will see the screen as shown left.

You can also play DVD movies by using the DVD player control panel as shown left.
For more detailed information about how to operate it, you may refer to the Help File in the InterVideo WinDVD program group.
Note
The WinDVD2000 on Windows® 2000 operating system currently only provide stereo mode output. Please link to InterVideo (www.intervideo.com) for software update.
5-2. Remote Control Kit (Optional)
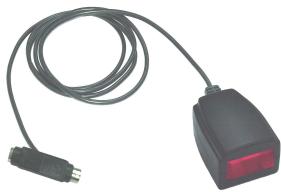
Remote Control Kit
Receiver Cable
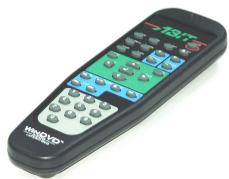
Remote Controller
This optional IR remote control kit replaces the keyboard and mouse when you are watching DVD/VCD movies with the WinDVD2000 software.
This remote control kit not only controls the WinDVD playback function but also used as a pointing device for Microsoft® PowerPoint™ presentation software.
The installation procedure:
Step 1. Remove the keyboard from the PS/2 port on your motherboard.
Step 2. Connect one end of the receiver cable to the PS/2 Keyboard port on your motherboard.
Step 3. Connect your PS/2 keyboard connector to the other end of the receiver cable.
Step 4. Place the IR receiver to the most convenient location facing towards you. Please avoid having any obstacle in between to block the IR transmission.
Note
This IR remote control kit only works with the version of WinDVD2000 software bundled together with ABIT's multimedia system.
5-3. Remote Controller (Optional)
- On/Off: Power On/Off
- Eject: Ejects the disk from the drive
- Screen: Select the size of viewing screen.
- Title: Opens a submenu showing you all of the titles available on the DVD disc currently being played and allows you to select a new title to play back.
- Subtitle: Displays the subtitle menu. If multiple language subtitles are available, use this menu to select your choice.
- Audio: Displays the audio track options. If multiple audio tracks or language are available, use this menu to select your choice.
- Mute: Mutes the sound on the disk currently playing
- Chap Menu: Shows the Chapter menu
- Angle: When available, select the angle to view from a list of optional angles.
Volume: Increase or decrease audio output - Brightness: Increase or decrease the brightness of the video output
- Menu: shows menu selections
- Up/Down/Right/Left: Use the directional buttons just as you would the mouse button or Tab key
- Enter/Play: Enter Plays the current title, restores play after a pause
- ESC: To escape from the Menu selection
- Fast Forward: Plays the disk in fast forward mode
- Stop: Stops the current playback
- Pause: Pauses the current playback
- Fast Backward: Plays the disk in fast reverse mode
- Previous Chapter: Jump to the previous chapter
- Next Chapter: Jump to the next chapter
- Chapter: Opens a submenu showing you the chapter currently being played. You can select another chapter from this menu.

- Numeric Keypad: The numeric keypad provides you with a method of selecting numbers. This is more likely to be used while playing a Video CD than a DVD disc. Any time that you enter a numeric value, click the corresponding key on the numeric keypad and then click the enter button to accept that number
Appendix A. How to Get Technical Support
(From our website) http://www.abit.com.tw
(In North America) http://www.abit-usa.com
(In Europe) http://www.ubit.nl
Thank you for choosing ABIT products. ABIT sells all our products through distributors, resellers and system integrators, we have no direct sales to end-users. Before sending email for tech support please check with your resellers or integrators if you need any services, they are the ones who sold you your system and they should know best as to what can be done, how they serve you is a good reference for future purchases.
We appreciate every customer and would like to provide the best service to you. Providing fast service to our customers is our top priority. However we receive many phone calls and a huge amount of email from all over the world. At the present time it is impossible for us to respond to every single inquiry. Therefore it is quite possible that if you send an email to us that you may not receive a response.
We have done many compatibility tests and reliability tests to make sure our products have the best quality and compatibility. In case you need service or technical support, please understand the constraint we have and always check with the reseller who sold the product to you first.
To expedite service, we recommend that you follow the procedures outlined below before contacting us. With your help, we can meet our commitment to provide the best service to the greatest number of ABIT customers:
- Check the Manual. It sounds simple but we have taken a lot of care in making a well-written and thorough manual. It is full of information that doesn't only pertain to motherboards. The CD-ROM included with your board will have the manual as well as drivers. If you don't have either one go to our Program Download Area of the Website or FTP server at:
http://www.ubit.com.tw/download/index.htm - Download latest BIOS, software or drivers. Please go to our Program Download area on our Website to check to see if you have the latest BIOS. They are developed over periods of time to fixes bugs or incompatibilities. Also please make sure you have the latest drivers from your peripheral cards makers!
-
Check the ABIT Technical Terms Guide and FAQ on our Website. We are trying to expand and make the FAQs more helpful and information rich. Let us know if you have any suggestions. For hot topics check out our HOT FAQ!
-
Internet Newsgroups. They are a great source of information and many people there can offer help. ABIT's Internet News group, alt.comp.perips.mainboard.abit, is an ideal forum for the public to exchange information and discuss experiences they have had with ABIT products. Many times you will see that your question has already been asked before. This is a public Internet news group and it is reserved for free discussions. Here is a list of some of the more popular ones:
alt.comp.perips.mainboard.abit
comp.sysibm.pc.hardware.chips
alt.comp.hardware.overclocking
alt.comp.hardware.homebuilt
alt.comp.hardware.pc-homebuilt
- Ask your reseller. Your ABIT authorized distributor should be able to provide the fastest solution to your technical problem. We sell our products through distributors who sell to resellers and stores. Your reseller should be very familiar with your system configuration and should be able to solve your problem much more efficiently than we could. After all, your reseller regards you as an important customer who may purchase more products and who can urge your friends to buy from him or her as well. They integrated and sold the system to you. They should know best what your system configuration is and your problem. They should have reasonable return or refund policies. How they serve you is also a good reference for your next purchase.
- Contacting ABIT. If you feel that you need to contact ABIT directly you can send email to the ABIT technical support department. First, please contact the support team for the branch office closest to you. They will be more familiar with local conditions and problems and will have better insight as to which resellers offer what products and services. Due to the huge number of emails coming in every day and other reasons, such as the time required for problem reproduction, we will not be able to reply to every email. Please understand that we are selling through distribution channels and don't have the resources to serve every end-user. However, we will try to do our best to help every customer. Please also remember that for many of our technical support team English is a second language, you will have a better chance of getting a helpful answer if your question can be understood in the first place. Be sure to use very, simple, concise language that clearly states the problem, avoid rambling or flowery language and always list your system components. Here is the contact information for our branch offices:
In North America and South America please contact:
ABIT Computer (USA) Corporation
46808 Lakeview Blvd.
Fremont, California 94538, U.S.A.
sales@abit-usa.com
technical@abit-usa.com
Tel: 1-510-623-0500
Fax: 1-510-623-1092
In the UK and Ireland:
ABIT Computer Corporation Ltd.
Unit 3, 24-26 Boulton Road
Stevenage, Herts SG1 4QX, UK
abituksales@compuserve.com
abituktech@compuserve.com
Tel: 44-1438-228888
Fax: 44-1438-226333
In Germany and Benelux (Belgium, Netherlands, Luxembourg) countries:
AMOR Computer B.V. (ABIT's European Office)
Van Coehoornstraat 7,
5916 PH Venlo, The Netherlands
sales@abit.nl
technical@abit.nl
Tel: 31-77-3204428
Fax: 31-77-3204420
All other territories not covered above please contact:
Taiwan Head Office
When contacting our headquarters please note we are located in Taiwan and we are 8+ GMT time. In addition, we have holidays that may be different from those in your country.
ABIT Computer Corporation
3F-7, No. 79, Sec. 1, Hsin Tai Wu Rd.
Hsi Chi, Taipei Hsien, Taiwan
sales@abit.com.tw
market@abit.com.tw
technical@abit.com.tw
Tel: 886-2-2698-1888
Fax: 886-2-2698-1811
- RMA Service. If your system has been working but it just stopped, but you have not installed any new software or hardware recently, it is likely that you have a defective component. Please contact the reseller from whom you bought the product. You should be able to get RMA service there.
- Reporting Compatibility Problems to ABIT. Because of tremendous number of email messages we receive every day, we are forced to give greater weight to certain types of messages than to others. For this reason, any compatibility problem that is reported to us, giving detailed system configuration information and error symptoms will receive the highest priority. For the other questions, we regret that we may not be able to reply directly. But your questions may be posted to the Internet news group in order that a larger number of users can have the benefit of the information. Please check the news group from time to time.
- Fill out the Technical Support Form: If you encounter any problems and need help from our technical staff, please take the time to fill out the Technical Support Form and send it to your dealer or our technical support mailbox. The mailbox address is: technical@abit.com.tw. We will try to solve your problem as soon as possible. You must provide specific information on your equipment. Also please describe in detail the problems you encountered. It's helpful and enables our technicians to analyze your problems more quickly. Information on items marked with an asterisk “*” on the Technical Support Form are required.

Technical Support Form
Company Name:
Phone Number:
Contact Person:
Fax Number:
E-mail Address:
| Product Name | * | Product Software and Driver Version | * |
| Motherboard Manufacturer, Model Name and Chipset type | |||
| Operating System Type | * | ||
| Hardware Name | Type | Specifications | |
| CPU Type and Speed | * | ||
| HDD IDE1 IDE2 | |||
| CD-ROM-Drive IDE1 IDE2 | |||
| System Memory Size (SDRAM) | |||
| Add-On CARD | |||
Problem Description:
Thank you, ABIT Computer Corporation http://www.abit.com.tw

- Copyright and Warranty Notice
- AC10 CNR Card User's Manual
- CHAPTER 1. INTRODUCTION 1-1
- CHAPTER 2. HARDWARE INSTALLATION.. 2-1
- CHAPTER 3. DRIVER INSTALLATION 3-1
- CHAPTER 4. INTERVIDEO WINRIP™ SOFTWARE APPLICATION 4-1
- CHAPTER 5. INTERVIDEO WINDVD™ 2000 SOFTWARE APPLICATION 5-1
- APPENDIX A. HOW TO GET TECHNICAL SUPPORT
- Chapter 1. Introduction
- 1-1. Specifications
- Modem
- Chipset
- Line Connection
- Data Modem
- Fax Modem
- Error Correction
- Answering Machine Option
- Modem Communication Model
- Speaker Phone Option
- Video Phone Ready Modem
- Adaptive Connection Support
- Tone Detections
- PTT and Safety
- DOS Box Comm. Applications Support (Available with TAM option)
- Modem Auto Dial & Auto Answer
- Modem Line Quality Monitoring
- Modem Programmable Volume Control
- Operating System Support
- Modem Data Interface
- Telephone Interface
- Minimum System Requirements
- 5.1-Channel Audio
- 1-2. What's In The Box? (Package List)
- Chapter 2. Hardware Installation
- 2-1. System Connection
- 2-2. Connectors and Headers
- 2-3. Card Installation
- Note
- 2-4. Connecting Modem to Telephone Line
- Chapter 3. Driver Installation
- 3-1. Install Modem Driver
- 3-2. Diagnostics for Windows 9x
- 3-3. Install 5.1 Channel Audio Driver
- Chapter 4. InterVideo WinRip™ Software Application
- 4-1. WinRip Installation
- 4-2. WinRip Configuration
- Chapter 5. InterVideo WinDVD™ 2000 Software Application
- 5-1. WinDVD™ 2000 Installation
- 5-2. Remote Control Kit (Optional)
- The installation procedure:
- 5-3. Remote Controller (Optional)
- Taiwan Head Office
- Technical Support Form
- Thank you, ABIT Computer Corporation http://www.abit.com.tw
Marque : ABIT
Modèle : AC10
Catégorie : Routeur sans fil