INSIGHT PORTABLE HARD DRIVE - Disque dur externe VERBATIM - Notice d'utilisation et mode d'emploi gratuit
Retrouvez gratuitement la notice de l'appareil INSIGHT PORTABLE HARD DRIVE VERBATIM au format PDF.


| Type de produit | Disque dur portable |
| Capacité de stockage | 1 To, 2 To |
| Interface de connexion | USB 3.2 Gen 1 |
| Dimensions approximatives | 112 x 82 x 20 mm |
| Poids | 200 g |
| Compatibilités | Windows, macOS, Linux |
| Alimentation électrique | Alimentation par USB |
| Fonctions principales | Stockage de données, sauvegarde, transfert de fichiers |
| Entretien et nettoyage | Essuyer avec un chiffon doux, éviter l'humidité |
| Pièces détachées et réparabilité | Non spécifié, produit non démontable |
| Sécurité des données | Chiffrement matériel (selon modèle) |
| Garantie | 2 ans |
FOIRE AUX QUESTIONS - INSIGHT PORTABLE HARD DRIVE VERBATIM
Questions des utilisateurs sur INSIGHT PORTABLE HARD DRIVE VERBATIM
0 question sur cet appareil. Repondez a celles que vous connaissez ou posez la votre.
Poser une nouvelle question sur cet appareil
Téléchargez la notice de votre Disque dur externe au format PDF gratuitement ! Retrouvez votre notice INSIGHT PORTABLE HARD DRIVE - VERBATIM et reprennez votre appareil électronique en main. Sur cette page sont publiés tous les documents nécessaires à l'utilisation de votre appareil INSIGHT PORTABLE HARD DRIVE de la marque VERBATIM.
MODE D'EMPLOI INSIGHT PORTABLE HARD DRIVE VERBATIM
InSight Portable Hard Drive
User Guide
English
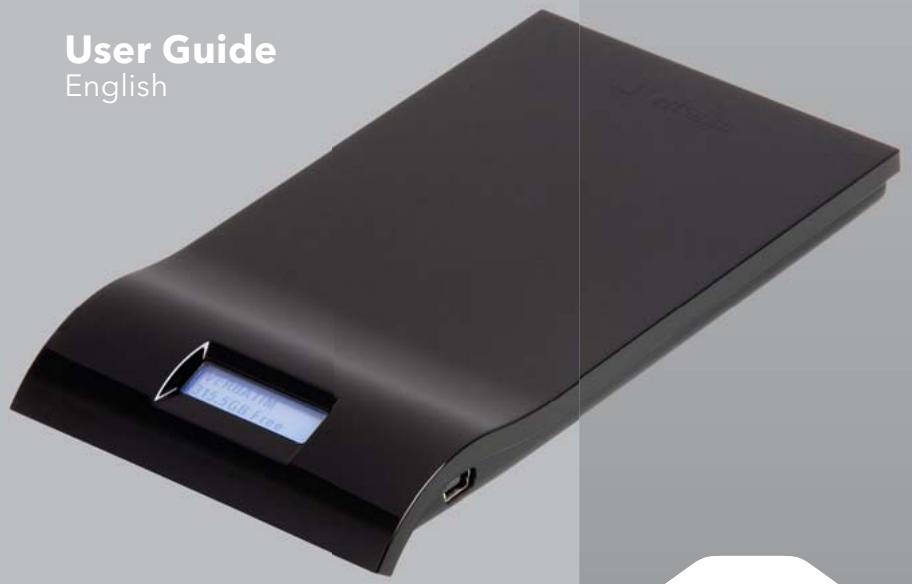
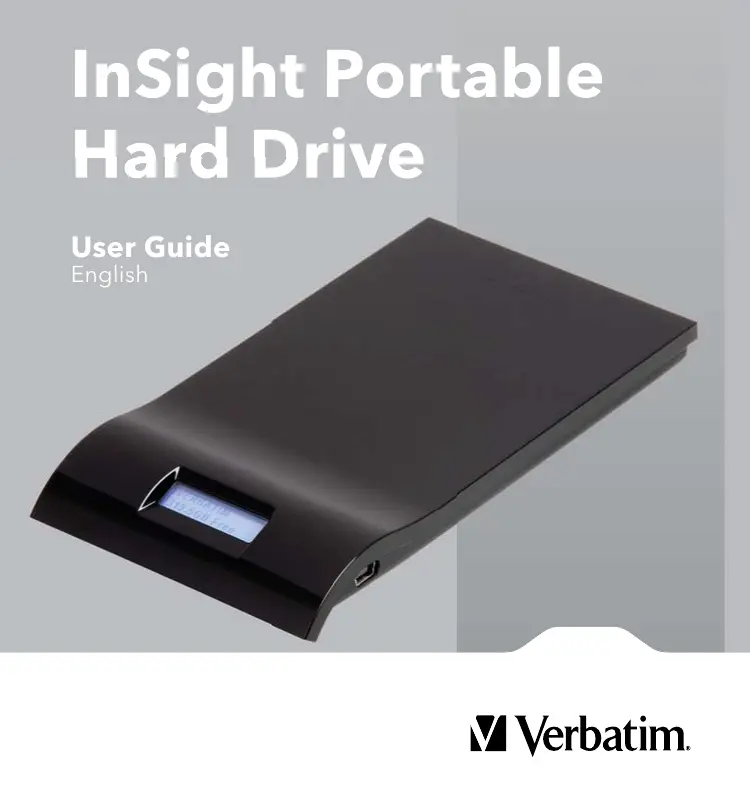
InSight is an innovative portable disk drive that allows you to view information about your drive even when it is not connected to a computer. Its unique cholesteric liquid crystal display (LCD) maintains its display image without any power source. You can carry InSight with you wherever you go and be able to read the information on its display.
Display Information
The display shows the drive's Volume Label on the top line and the remaining free space (in gigabytes) on the bottom line. When using Windows XP or Mac OS, the display information is updated each time you connect the drive to a computer and each time you do a safe removal of the drive (see below Disconnecting Your Portable Hard Drive). When using Windows Vista, the display is updated only when you connect the drive.
To change the Volume Label in Windows, right-click on the drive in My Computer and then select Rename. To change the Volume Label in Mac OS, highlight the drive on the desktop and then click on the drive name to edit. The new volume label will show on the display the next time the display is refreshed.
The number and types of characters that can be displayed depends on certain requirements of the Operating System, the drive format and of the display itself. The drive format requirements are summarized below.
- FAT32 Volume Label can contain up to 11 upper-case-only characters with the following character exclusions *?/|,;:+=[ ]<>"
- HFS+ Volume Label can not begin with a period and can contain up to 32 characters, excluding :
NTFS Volume Label can contain up to 32 characters with no exclusions.
Volume Label strings longer than the display size will be truncated. Any characters in the Volume Label string that are not in the display's supported character set will be displayed as *
About the Hard Drive
The hard drive comes pre-formatted in FAT32 format. This format allows for operation with either Windows or Mac OS.
If you want to format to NTFS please consult your Windows documentation and select an allocation unit size of 64K when formatting. Because calculating the amount of free space for large NTFS formatted drives can take considerable time (up to 3 minutes in some instances), there are special considerations for using the InSight display feature under NTFS:
- Upon connecting the drive, the display will show "scanning ..." and the blue LED will flash while the drive is busy calculating the remaining free space. This process must complete fully before the display will refresh and the drive will show up in My Computer.
- Upon safe removal, Windows may display the message indicating it is now safe to disconnect the drive, even while the drive itself is still busy calculating remaining free space. While the drive is still busy calculating, the display will show "scanning ..." and the blue LED will flash. Please wait for the flashing to cease and for the display to refresh.
- The display feature is not supported under NTFS with partition type "GUID Partition Table (GPT)".
- Longer calculation time is required for larger drive capacities.
- Shorter calculation time is required when using larger allocation unit sizes. For this reason we recommend selecting an allocation unit size of 64K when formatting to NTFS with this product.
If you plan to use your hard drive only with computers running Mac OS, you may reformat to HFS+. Consult your Mac OS documentation for how to format to HFS+. Please note these special considerations when using the display feature under HFS+
- Partition type "Master Boot Record" is supported for all HFS+ format types.
- Partition type "Apple Partition Manager" is supported only for Mac OS Extended and Mac OS Extended (Journaled) format types.
-
Partition type "GUID Partition Table" is not supported for HFS format types.
-
Whenever the partition/format type is not supported, the display will read "Unsupported Format".
Note: Capacity dependent on model. 1 MB = 1,000,000 bytes/1 GB = 1,000,000,000 bytes/1 TB = 1,000,000,000,000 bytes. Some capacity used for pre-loaded software, formatting and other functions, and thus is not available for data storage. As a result, and due to differing calculation methods, your operating systems may report as fewer megabytes/gigabytes/terabytes.
Activity LED
The blue LED located at the front of your drive will come on to indicate the power-on state. The LED will flash during data access.
Connecting To Your Computer
Installing your portable hard drive is extremely simple - just use the included mini-USB cable to connect your hard drive to any free USB port on your computer. On Windows computers, a new icon will appear in My Computer representing your hard drive. On Mac OS systems, your hard drive will appear on the desktop as a new disk.
Storing and Transferring Data
Once your drive is connected to a computer, it can be accessed and used like any other removable disk. You can drag files to your unit's icon to copy them, navigate to your unit in Open or Save dialog boxes, or delete files stored on your unit. For information on copying, opening, or deleting files, consult your computer's documentation.
nero BackItUp 4 Essentials software
Nero BackItUp 4 Essentials software is included on the hard drive. Double click the nero folder on the drive and then double click the setupx fi le to start installation. The nero installation window will appear. Follow up the set up wizard to install the software. Note: nero BackItUp Software is only compatible with Windows 2000 / XP / and Vista.
Disconnecting Your Portable Hard Drive
Your Verbatim portable hard drive is hot-pluggable; it can be connected and disconnected without restarting your computer. To disconnect your Verbatim hard drive at any time, simply perform the following steps. You can also disconnect your hard drive at any time while your computer is powered off.
Note: Please be careful to follow the correct procedure when disconnecting your unit. Your InSight display will update its disk information during the disconnection procedure. Simply unplugging the unit without first following the instructions below will cause the display to show incorrect information and may result in damage to your unit and/or loss of data.
For Windows Users:
- If you have files located on your drive open in any applications, close them.
- Click the Unplug or Eject Hardware button in the System Tray.
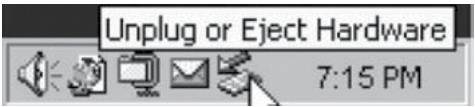
- Select your drive from the menu that appears.
- After a moment, Windows will display a message that your hardware can be safely removed.
For Mac OS Users:
- If you have files located on your drive open in any applications, close them.
- Locate the icon for your drive on the desktop, and drag it to the trash.
Note: Please wait for the display to refresh fully before unplugging the drive. If you unplug the drive too soon you will not get an updated display.
Depending on your computer's operating system, the following special notes may apply:
Note 1: For Windows. If you are using a USB 1.1 port on your Windows computer, the following cautionary note may appear on your display: Hi-Speed USB Device plugged into non-Hi-Speed USB hub. This does not indicate a problem because the drive is compatible with both USB 1.1 and USB 2.0 ports. Simply close the message and proceed. However, in this case the drive will operate only at USB 1.1 speeds.
Note 2: For Mac OS X 10.2, Mac OS X version 10.2 will not mount any single FAT32-formatted (MS-DOS) partition greater than 128GB. To work around this OS limitation, you may partition the drive into smaller FAT32 partitions, or you may reformat the drive to HFS+ format.
Technical Support
If you are experiencing difficulty installing or using your Verbatim product, please visit the main Verbatim Technical Support website at www.verbatim-europe.com. From this page you can access our library of user documentation, read answers to frequently asked questions, and download available software updates. Although most of our customers find this content sufficient to put them back on the right track, this page also lists ways in which you can contact the Verbatim Technical Support Team directly.
Europe: For technical support in Europe e-mail drivesupport@verbatim-europe.com or call 00 800 3883 2222 in the following countries: Austria, Belgium, Denmark, Finland, France, Germany, Hungary, Italy, Luxembourg, Monaco, Netherlands, Norway, Poland, Portugal, Republic of Ireland, Spain, Sweden, Switzerland and the United Kingdom. All other countries call +353 61 226586.
Limited Warranty Terms
Verbatim Limited warrants this product to be free from defects in material and workmanship for a period of 2 years from date of purchase. This warranty excludes batteries. If this product is found to be defective within the warranty period, it will be replaced at no cost to you. You may return it with your original cash register receipt to the place of purchase or contact Verbatim.
Product replacement is your sole remedy under this warranty, and this warranty does not apply to normal wear or to damage resulting from abnormal use, misuse, abuse, neglect or accident, or to any incompatibility or poor performance due to the specific computer software or hardware used. VERBATIM WILL NOT BE LIABLE FOR DATA LOSS OR ANY INCIDENTAL, CONSEQUENTIAL OR SPECIAL DAMAGES, HOWEVER CAUSED, FOR BREACH OF WARRANTYES OR OTHERWISE. This warranty gives you specific legal rights and you may also have other rights which vary from state to state or country to country.
Rights
Copyright © 2007 Verbatim Limited. No part of this document may be reproduced in any form or by any means, for any purpose, without the express written permission of Verbatim Corporation. All rights reserved. All other brands and product names referenced herein are property of their respective owners.
The Directive on Waste Electrical and Electronic Equipment (WEEE), which entered into force as European law on 13th February 2003, resulted in a major change in the treatment of electrical equipment at end-of-life.

The WEEE logo (shown at the left) on the product or on its box indicates that this product must not be disposed of or dumped with your other household waste. For more information about electronic and electrical waste equipment disposal, recovery, and collection points, please contact your local municipal household waste disposal service or shop from where you purchased the equipment.
FCC Compliance
This equipment has been tested and found to comply with the limits for a Class B digital device, pursuant to Part 15 of the FCC Rules. These limits are designed to provide reasonable protection against harmful interference in a residential installation. This equipment generates, uses and can radiate radio frequency energy and, if not installed and used in accordance with the instructions, may cause harmful interference to radio communications. However, there is no guarantee that interference will not occur in a particular installation. If this equipment does cause harmful interference to radio or television reception, which can be determined by turning the equipment off and on, the user is encouraged to try to correct the interference by one or more of the following measures:
Reorient or relocate the receiving antenna.
- Increase the separation between the equipment and receiver.
- Connect the equipment into an outlet on a circuit different from that to which the receiver is connected.
- Consult the dealer or an experienced radio/TV technician for help.
It is hereby declared that this product complied with the essential protection requirements of Council Directive 89/336/EEC and its amendments on the approximation of the laws of the Member States relating to electromagnetic compatibility.
This declaration applies to all specimens manufactured identical to the model submitted for testing/evaluation.
EN 55022:1998 +A1:2000+A2:2003
EN 61000-3-3:1995 + A1: 2001
EN 55024: 1998 + A1: 2001 + A2: 2003
IEC 61000-4-2: 1995 + A1: 1998 + A2: 2000
IEC 61000-4-3:2002 + A1:2002
IEC 61000-4-4: 1995 + A1: 2000 + A2: 2001
IEC 61000-4-5: 1995 + A1: 2000
IEC 61000-4-6: 1996 + A1: 2000
IEC 61000-4-8:1993 + A1:2000
IEC 61000-4-11: 1994 + A1: 2000
This product is in compliance with Directive 2002/95/EC of the European Parliament and of the Council of 27 January 2003, on the restriction of the use of certain hazardous substances in electrical and electronic equipment (RoHS) and its amendments.
THIS DEVICE COMPLIES WITH PART 15 OF THE FCC RULES. OPERATION IS SUBJECT TO THE FOLLOWING TWO CONDITIONS:
(1) THIS DEVICE MAY NOT CAUSE HARMFUL INTERFERENCE, AND
(2) THIS DEVICE MUST ACCEPT ANY INTERFERENCE RECEIVED, INCLUDING INTERFERENCE THAT MAY CAUSE UNDESIRED OPERATION.