KH 2254 CD CLOCK RADIO - Radio-réveil EBENCH - Notice d'utilisation et mode d'emploi gratuit
Retrouvez gratuitement la notice de l'appareil KH 2254 CD CLOCK RADIO EBENCH au format PDF.

| Type de produit | Radio-réveil avec lecteur CD |
| Marque | EBENCH |
| Modèle | KH 2254 CD CLOCK RADIO |
| Dimensions (L × l × H) | 18,1 × 23 × 9 cm |
| Poids | Environ 1200 g |
| Alimentation | 230-240 V~, 50 Hz |
| Consommation électrique | 9 W (fonctionnement), 2,8 W (veille) |
| Pile de secours | 9 V type 6LR61 (non fournie) |
| Plages de fréquences radio | FM 87,5-108 MHz, AM 530-1600 kHz |
| Fonctions principales | Radio FM/AM, lecteur CD, double alarme, mise en veille |
| Type d'alarme | Radio ou buzzer |
| Minuterie d'endormissement | 15, 30, 60, 90 minutes |
| Fonctions CD | Lecture, saut, répétition, aléatoire, programmation (20 pistes) |
| Affichage | Numérique avec indicateurs LED |
| Haut-parleur intégré | Oui |
| Antenne FM | Antenne télescopique |
| Protection | Classe II, laser classe 1 |
| Température de fonctionnement | +5°C à +40°C |
| Humidité | 5-90% (sans condensation) |
| Entretien | Nettoyer avec un chiffon sec ou légèrement humide ; compartiment CD avec un pinceau sec |
| Sécurité | Ne pas ouvrir le boîtier, risque de choc électrique, tenir hors de portée des enfants |
| Garantie | 3 ans |
| Importateur | KOMPERNASS GMBH, Allemagne |
FOIRE AUX QUESTIONS - KH 2254 CD CLOCK RADIO EBENCH
Questions des utilisateurs sur KH 2254 CD CLOCK RADIO EBENCH
0 question sur cet appareil. Repondez a celles que vous connaissez ou posez la votre.
Poser une nouvelle question sur cet appareil
Téléchargez la notice de votre Radio-réveil au format PDF gratuitement ! Retrouvez votre notice KH 2254 CD CLOCK RADIO - EBENCH et reprennez votre appareil électronique en main. Sur cette page sont publiés tous les documents nécessaires à l'utilisation de votre appareil KH 2254 CD CLOCK RADIO de la marque EBENCH.
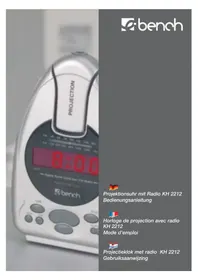
MODE D'EMPLOI KH 2254 CD CLOCK RADIO EBENCH
CD CLOCK RADIO

natural_image
Digital alarm clock resting on a desk with CD and DVD, no visible text or symbols on the device itself.GB CD CLOCK RADIO
IE
CY
Operating instructions
FI CD-KELLORADIO
Käyttöohje
Intended Usage 2
Technical data 2
Safety information 2
Information regarding the handling of batteries ....3
Operating Elements 4
Commissioning 5
Providing mains power 5
Battery Back-up System in Case of Power Failures 5
Setting the Time ....5
Radio operation 6
Use of the CD Player 6
Further Functions of the CD Player 6
SKIP/SEARCH 6
REPEAT: Repeat - Playback RANDOM: Random playback 6
PROGRAM: For preprogramming tracks in any order 7
Setting the Alarm Time and Alarm Type 7
Setting the alarm time 7
Switching the alarm OFF 8
Sleep timer 8
Cleaning 8
Disposal 8
Warranty and Service 9
Importer 9
Read these operating instructions carefully before using the appliance for the first time and preserve this booklet for future reference. Pass this booklet on to whoever might acquire the appliance at a future date.
Intended Usage
The intended uses for this appliance are the reception of FM / AM radio transmissions and as an alarm clock, using signal tones or the radio itself. This appliance is intended for use only in domestic settings. It is not suitable for use in commercial or industrial areas.
Technical data
This consumer electronics appliance, being in conformity with their fundamental requirements and directions, complies with the regulations of both the EMC Guidelines 2004/108/EG and the Guidelines for Low Voltage Appliances 2006/95/EG.
Mains voltage: 230 -240 V \~ / 50 Hz
Back-up power : 9 V Block battery Type 6LR61
(Batteries not included)
Power consumption : 9 W
Standby: 2,8 W
Protection class: II / ☐
CD player:
Frequency range (+/- 3dB) 100 Hz to 16 kHz
Laser: d = 760 nm Pmax = 0.4 mW
Radio frequency ranges:
Radio: FM (USW) : 87.5 - 108 MHZ
AM (MW) : 530 - 1600 KHz
Alarm functions : Radio, alarm signal
Operating temperature range: +5° - +40°C
Humidity: 5 – 90% (no condensation)
Dimensions
(L × B × H): 18.1 × 23 × 9 cm
Weight : approx. 1200 gr
Safety information
- This appliance is not intended for use by individuals (including children) with restricted physical, physiological or intellectual abilities or deficiencies in experience and/or knowledge unless they are supervised by a person responsible for their safety or receive from this person instruction in how the appliance is to be used.
- Children should be supervised in order to make sure that they do not play with the device.
- Keep batteries away from children. Children can put batteries into their mouths and swallow them. Should a battery ever be swallowed, you MUST call for medical assistance IMMEDIATELY.
⚠️ To avoid potentially fatal electric shocks:
- Connect the appliance only to correctly installed and properly earthed power sockets. Ensure that the rating of the local power supply tallies completely with the details given on the rating plate of the appliance.
- Ensure that the power cable never becomes wet or damp during operation. Lay the cable such that it does not get clamped or otherwise damaged.
- Arrange for defective power plugs and/or cables to be replaced at once by qualified technicians or our Customer Service Department.
- Arrange for Customer Services to repair or replace connecting cables and/or appliances that are not functioning properly or have been damaged.
- Only use the appliance in dry rooms.

NEVER submerse the appliance in water. Wipe it only with a slightly damp cloth.
- Ensure that liquids and miscellaneous objects are never able to penetrate into the device.
- Do not place water-filled receptacles (e.g. flower vases) on the appliance.
- Position the appliance close to an electrical wall-socket. Make sure that the wall socket is easily accessible
- To avoid the risks of tripping, do not use an extension cable. In the event of danger, the plug must be quickly and easily accessible.
- You may not open or repair the appliance casing yourself. Should you do so, appliance safety is no longer assured and the warranty becomes void.
Repairs are to be carried out exclusively by a specialist firm or the service centre.
⚠️ Notice regarding separation from mains-power
The ON/OFF button for this appliance does NOT completely separate it from the mains-power source. Additionally, the appliance consumes power when in standby-mode. To completely separate the appliance from mains power, the power plug MUST be removed from the wall socket.
⚠ Information regarding the handling of batteries
The appliance uses batteries for memory conservation. For the handling of batteries please observe the following:
⚠️ Risk of explosion!
Do not throw batteries into a fire. Do not recharge the batteries.
- Never open batteries, never solder or weld batteries.
The risk of explosions and injuries exists!
- Regularly check the condition of the batteries. Leaking batteries can cause damage to the appliance.
- If you do not intend to use the appliance for an extended period, remove the batteries.
- In the event of the batteries leaking acids, wear protective gloves.
- Clean the battery compartment and the battery contacts with a dry cloth.
⚠️ To avoid the risks of fire or injury:
- Do not place candles or other open fire sources on the appliance.
- Do not use the appliance near hot surfaces.
- Do not keep the device in places that are exposed to direct sunlight. If you do, it may overheat and become irreparably damaged.
- Place the instrument in a location with adequate ventilation to prevent heat build up.
- Never cover the ventilation openings!
- Avoid any additional heat build up, e.g. direct sunlight, heaters, other devices, etc.
- Keep children away from the connecting cable and the appliance. Children frequently underestimate the dangers of electrical appliances.
- Provide for a safe location for the appliance.
- Do not operate the appliance if it has sustained a fall or is damaged. Arrange for the appliance to be checked and/or repaired by qualified technicians.
- Keep batteries away from children. Children can put batteries into their mouths and swallow them. Should a battery be swallowed, seek medical attention IMMEDIATELY.
⚠ Thunderstorm warning!
Before a storm and/or a thunderstorm with a risk of lightning, please separate the appliance from the electrical power source!
⚠️ Notice regarding electrical power surges (EFT / electrical fast transient) and electrostatic discharges:
In a case of malfunction due to an electrical fast transient (power surge) and/or electrostatic discharge, the appliance must be returned to default settings in order to re-establish normal operation. Possibly the power supply must be separated and then reconnected.
Electro-magnetic fields
This appliance complies with the statutory limits for electro-magnetic compatibility! If you still have any doubts regarding its use in bedrooms:
It is completely safe to install the clock at a distance of half a meter away from the bed. From this distance the fields are not present even for electro sensitive people.
(i) Note:
Check the battery for power-outage protection annually, and replace it if necessary.
(i) Note:
This appliance is equipped with non-slip rubber feet. As furniture surfaces may be made of a variety of materials and are treated with many different types of cleaning agents, it cannot be completely ruled out that some substances contain ingredients which may corrode the rubber rests and soften them. If possible place an anti-slip material under the feet of the appliance.
⚠️ Danger - Laser Beams!
The appliance is fitted with a "Class 1 Laser".
• Never open the device.
- Never attempt to repair the device. There is invisible laser radiation inside the device.
- Avoid all direct optical contact with the laser beam, it could lead to serious eye injuries.
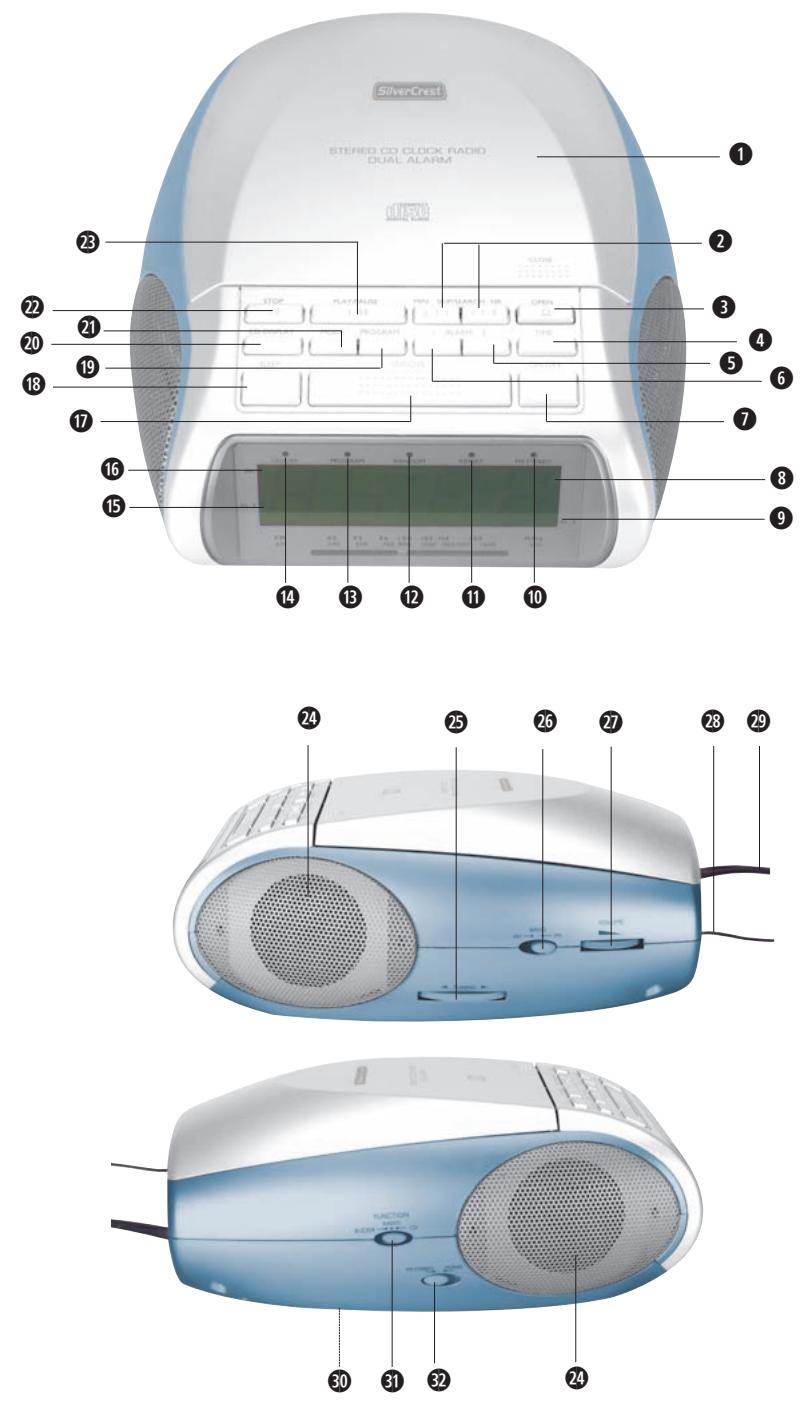
Operating Elements
① CD compartment
② Button SKIP/SEARCH MIN ◀ and SKIP/SEARCH HR ▶
Skip button and fast search within a title,
Time adjustment (minutes and hours)
③ Button OPEN
④ Button TIME: Time Adjustment
⑤ Button ALARM 2: Setting
6 Button ALARM 1: Setting
⑦ Button ON/OFF
8 Display
⑨ LED indicator for AL2
10 LED indicator for FM (VHF) Stereo
11 LED indicator for CD function REPEAT
12 LED indicator for CD function random replay RANDOM
13 LED indicator for CD function PROGRAM
14 ON/OFF LED indicator
(glows when appliance switched on)
15 LED indicator for AL1
16 LED indicator for PM
17 Button SNOOZE: Snooze mode
18 Button SLEEP: Sleep timer
19 Button PROGRAM: Preprogramming of CD titles
20 Button CD-DISPLAY
21 Button MODE
22 Button STOP: To switch off playback
23 Button PLAY/PAUSE: To start the CD playback or to briefly interrupt the CD playback
24 Loudspeaker
25 TUNING regulator: For selecting the radio station
26 Waveband selector switch AM/FM
27 Volume regulator
28 FM (VHF) Aerial
29 Power cable
30 Battery compartment (on the underside)
31 Function selector switch BUZZER - RADIO - CD
32 Switch FM STEREO/MONO
Unpack the appliance
Remove all packing material. Remove also the transportation lock from the CD compartment.

Attention!
Do not permit small children to play with the plastic packaging. There is a risk of suffocation!
Check the items supplied
Whilst unpacking, check to ensure that all of the following items are available:
- World Receiver
- Connector power pack
• Operating Instructions with Warranty Card
Providing mains power
This CD clock radio is operated with 230 - 240 Volt alternating current (AC), 50 Hz. It is additionally equipped with a back-up system for use in the event of a power failure, for which a 9 V block battery (not supplied) is required to be inserted.
- Connect the plug of the power pack with a wall power socket (AC).
- Insert the 9 V block battery into the battery compartment 30 on the underside of the appliance.

Take note:
The use of an alkaline battery is recommended. In order to ensure optimum functioning, the battery should be changed every 6 months. Batteries are not charged in the battery compartment!
Battery Back-up System in Case of Power Failures
The battery ensures that the clock continues to function in the event of a power failure. To prolong the life, however, the time is not shown in the display.
If a battery is not inserted, after a power failure
12:00 appears on the display. This means that you have to carry out the time and alarm settings again.
Setting the Time
For setting the time, the appliance must be switched off with the button ON/OFF ⑦.
Setting the time when switching on for the first time:
- Hold the button TIME ④ pressed down to switch between the 12h or 24h mode.

Take note:
In the display appears "12h" for the 12 hour mode resp. "24h" for the 24 hour mode. For the afternoon hours, an additional LED showing "PM" now appears at the top left of the display.
- The time blinks. Using the buttons SKIP/SEARCH MIN ◀ and SKIP/SEARCH HR ▶▶② programme in the desired time.
- When you re-press the button TIME ④ the programming is saved. The time display no longer flashes.
Setting the time at some later point:
- Hold the button TIME ④ pressed down to switch between the 12h or 24h mode.
- Press the button TIME ④. The time blinks. Using the buttons SKIP/SEARCH MIN ◀ and SKIP/SEARCH HR ▶▶ ② programme in the desired time.
- When you re-press the button TIME 4 the programming is saved. The time display no longer flashes.
Radio operation
- Slide the function selector switch 31 to the position RADIO.
- Slide the waveband selector switch ② to the position FM (VHF) or AM (MW).
- To optimise reception, extend the FM aerial ^28 to its full length. For the AM waveband, the appliance needs to be fine-tuned to achieve optimum reception.
- Switch the appliance on with the ON/OFF ⑦ button. The LED indicator ⑭ glows when the appliance is switched on.
- Set the desired volume level with the volume controller 27.
- Select the desired radio station using the TUNING-regulator ②5. Should a programme be transmitted in stereo and the appliance is set for stereo reception, the LED indicator FM STEREO ⑩ glows. For this, the switch FM STEREO/MONO ③2 must be positioned at FM STEREO.
- To switch off the radio, press the button ON/OFF ⑦. The ON/OFF LED indicator extinguishes.
Use of the CD Player
- Open the CD compartment ① by pressing the button OPEN ③ and then press the hole of the CD (with the labelling uppermost) lightly onto the cone in the CD compartment until it engages.
- Slide the function selector switch 27 into the CD position.
- After pressing the power button ON/OFF ⑦ the total number of titles on the CD is shown in the display ⑧. After a brief moment, the time is displayed again.
- To display the CD titles once again, press the button CD DISPLAY 20.
- Press the button PLAY/PAUSE 23 to start playback of the first title. In the Display 8 first appears 01, shortly thereafter the time is however displayed once again.
① Take note:
You can also use the button PLAY/PAUSE 23 to temporarily interrupt the playback of a title. Playback is continued by once again pressing the button PLAY/PAUSE 23.
- Set the desired volume level with the volume controller 27.
- The playback can be stopped by pressing button STOP 22.
Further Functions of the CD Player
/ SKIP/SEARCH
- Press the button SKIP/SEARCH HR ➕ to skip to the next title, or press the button SKIP/SEARCH HR ➕ several times to skip forward over several titles. Press SKIP/SEARCH MIN ➕ to go back to the start of a title, or press the button SKIP/SEARCH MIN ➕ several times to skip back over several titles. When SKIP/SEARCH MIN ➕ or SKIP/SEARCH HR ➕ are held down, particular points within a title can be quickly searched for and found.
REPEAT: Repeat - Playback RANDOM: Random playback
- Press the button MODE 21 once to repeat the playback of a particular title. The REPEAT indicator 11 blinks.
- Press the button MODE 21 once more to repeat playback of the whole CD. The REPEAT indicator 11 glows.
- Pressing once more on the button MODE 21 can erase this function. The REPEAT indicator 11 extinguishes.
- The RANDOM indicator 12 glows. The CD tracks are played in random order.
- Pressing once more on the button MODE 21 can erase this function. The RANDOM indicator 12 extinguishes.
PROGRAM: For preprogramming tracks in any order
- Insert the CD.
- Press the button ON/OFF ⑦. The total number of tracks appears briefly in the display ⑧.
- After pressing the button PROGRAM 19, the display shows p01. The programme indicator 13 blinks.
- Using the buttons SKIP/SEARCH MIN ◀ and SKIP/SEARCH HR ▶ select the desired titles. Then press the button PROGRAM ⑲ to save the title. Proceed as described above to program further tracks. A total of 20 tracks can be programmed.
- Press the button PLAY/PAUSE 23 to start playback. The LED indicator PROGRAM 13 glows.
- Press the button STOP 22 to stop playback.
If you wish to repeat the programming later:
- Press the button PROGRAM ⑲ again to activate the programming. The LED indicator PROGRAM ⑬ blinks.
- Press the button PLAY/PAUSE 19 to play back the programmed titles. The LED indicator PROGRAM 13 glows.
- To erase the programming, open the CD compartment ① or switch the appliance off and then back on.
Setting the Alarm Time and Alarm Type
With this appliance you can set two different wake-up times that can be used individually or simultaneously:
- AL 1 or AL 2
- AL 1 and AL 2
Setting the alarm time
Alarm (AL 1):
- Press the button ALARM 1 ⑥.
- Using the buttons SKIP/SEARCH MIN ◀ and SKIP/SEARCH HR ▶▶ ②, programme in the desired time.
The alarm time is stored as soon as you press the button ALARM 1 ⑥. The indicator for Alarm 1 appears in the display. - If you wish to check the alarm time, press once more on the button ALARM 1 6.
Alarm (AL 2):
Press the button ALARM 2 5 and carry out the same steps as described above. The indicator for Alarm 2 appears in the display.
- Now select the alarm mode by using the function selector switch 31 (RADIO, CD or BUZZER).
Alarm mode BUZZER
- Slide the function selector switch 31 to the position BUZZER.
Alarm mode Radio
- Carry out the steps 1 to 7 described under "Radio operation" to tune in to the radio station of your choice for the radio alarm.
Alarm mode CD Player
- Open the CD compartment ① in that you press the button OPEN ③, then insert a CD (with the labelling uppermost) into the CD compartment.
2.Slide the function selector switch 31 into the position CD.
① Take note:
The total playing time of the CD player in alarm mode is 60 minutes.
If no CD is inserted and alarm mode CD player is set, the alarm signal of the setting BUZ-ZER sounds automatically.
Switching the alarm OFF
The alarm period is programmed for 60 minutes.
- SNOOZE: Press the button SNOOZE ⑰ to switch the alarm off temporarily. The alarm will repeat itself again after roughly 6 minutes.
- ON/OFF: Press the button ON/OFF ⑦. The alarm is switched off, but will sound again after 24 hours.
- ALARM 1/ALARM 2: Press the button ALARM 1 ⑥/ALARM 2 ⑤ to switch the alarm off permanently.
Sleep timer
- Slide the function selector switch 31 to CD or RADIO.
- After you have pressed the button SLEEP 18, "90" appears in the display.
- Press the button SLEEP 18 again to set the desired sleep time (90, 60, 30 or 15 minutes). The sleep time countdown starts after a few seconds.
- To stop playback earlier, press the button ON/OFF ⑦.
① Take note:
If the playing time of the CD is shorter than the sleep time you have set, the music ends as soon as all the tracks on the CD have been played.
Cleaning
- Clean the housing of the appliance only with a slightly moist cloth and a mild detergent. Ensure that moisture cannot permeate into the appliance during cleaning!
- If necessary, clean the inside of the disc tray exclusively with a clean dry brush (i.e. a lens brush, obtainable from a photographic dealer). NEVER use moisture to clean the inside of the CD compartment!
Warning!
Moisture penetrating into the appliance creates the risk of electric shock! Additionally, the appliance could be irreparably damaged!
Disposal

Do not dispose of the appliance in your normal domestic waste. This product is subject to the European directive 2002/96/EG.
Dispose of the appliance through an approved disposal centre or at your community waste facility. Observe the currently applicable regulations. In case of doubt, please contact your waste disposal centre.
Disposal of batteries/accumulators
Used batteries/accumulators may not be disposed of in household waste. Every consumer is legally obligated to dispose of batteries at a collection site of his community / city district or at a retail store.
The purpose of this obligation is to ensure that batteries are disposed of in a non-polluting manner. Only dispose of batteries when they are fully discharged.

Dispose of the packaging materials in an environmentally responsible manner.
Warranty and Service
The warranty for this appliance is for 3 years from the date of purchase. Should you have grounds for complaint, despite our high quality standards, please contact our Service Hotline.
In the event that the processing of your complaint is not possible by telephone, you will receive
• a processing number (RMA number) as well as
- an address to which you can send your product for warranty processing.
In the event of a mail despatch, please enclose a copy of the purchase receipt (sales slip). The appliance must be securely packed and the RMA number clearly visible. Products sent in without an RMA number cannot be processed.
i Note:
The warranty provisions cover only material or factory defects.
The warranty is not valid;
- worn out parts
- for damages to breakable parts such as switches and batteries.
The appliance is intended for domestic use only, NOT for commercial purposes. If this product has been subjected to improper or inappropriate handling, abuse, or modifications not carried out by one of our authorised sales and service outlets, the warranty will be considered void.
Your statutory warranty claims are not restricted by this warranty.
Importer
KOMPERNASS GMBH
Burgstrasse 21
44867 BOCHUM, GERMANY
www.kompernass.com
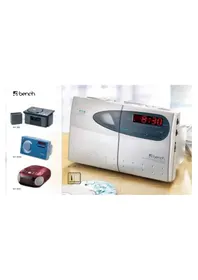
SilverCrest
CD Clock Radio
KH 2254
In order to obtain a cost free repair procedure, please get in touch with our Service Hotline. Make sure you have your receipt handy.
Sender, please write clearly:
Last name
First name
Street
Postcode/Place
Country
Telephone
Date/Signature
Description of fault:
Warranty
GB DES Ltd
Tel.: 0870/787-6177
Fax: 0870/787-6168
e-mail: support.uk@kompernass.com
IE Irish Connection
Tel: 00353 (0) 87 99 62 077
Fax: 00353 18398056
e-mail: support.ie@kompernass.com
www.mysilvercrest.de
Määräystenmukainen käyttö 14
Tekniset tiedot 14
Turvaohjeet 14
Käyttöelementit 16
Käyttöönotto 17
Sähkövirtaan liittäminen 17
Pariston silloitusjärjestelmä sähkökatkoksissa 17
Kellonajan asettaminen 17
Radiokäyttö 18
CD-soittimen käyttö 18
Muita CD-soittimen toimintoja 18
9 /: SKIP/SEARCH 18
REPEAT: jatkuva toisto RANDOM: saturnainen toisto .....18
PROGRAM: Kappaleitten esiohjelmoin-tiin halutussa järjestyksessä ....19
Herätysajan ja -tavan asettaminen 19
Herätysajan asettaminen 19
Hälytyksen asettaminen 20
Nukahtamisajastin 20
Puhdistus 20
Hävittäminen 20
Takuu ja huolto 21
Maahantuoja 21
Lue käyttöohje ennen ensimmäistä käyttökertaa huolellisesti läpi ja säilytä se myöhempää käyttöä varten.
Jos myyt laitteen, anna ohje myös seuraavalle omistajalle.
Määräystenmukainen käyttö
Tämä laite on tarkoitettu FM/AM -radioasemien vastaanottoon sekä herättämiseen merkkiäänen tai radion avulla. Tämä laite on tarkoitettu ainoastaan kotikäyttöön. Sitä ei ole tarkoitettu käytettäväksi kaupallisilla tai teollisilla alueilla.
Tekniset tiedot
Tämä laite vastaa EMC-direktiivin
2004/108/EY ja pienjännitelaitedirektiivin
2006/95/EY perustavia vaatimuksia.
Verkkojännite: 230-240 V \~ / 50 Hz
Kellonaikamuisti: 9 V:n paristo, tyyppi 6LR61
(ei sisälly toimitukseen)
Tehontarve: 9 W
Standby-tila: 2,8 wattia
Suojausluokka: II / ☐
CD-soitin:
Toistokäyrä (+/- 3dB) 100 Hz ... 16 kHz
Laser: d = 760 nm Pmax = 0,4 mW
Radion taajuusalueet:
Radio: FM (ULA): 87,5 - 108 MHZ
AM (KA): 530 - 1600 kHz
Herätystoiminnot: radio, merkkiääni
Käyttölämpötila-alue:+5 ... +40 °C
Kosteus: 5 ... 90 % (ei kondensaatiota)
Mitat
(P × L × K): 18,1 × 23 × 9 cm
Paino: n. 1200 g
Turvaohjeet
- Tätä laitetta ei ole tarkoitettu sellaisten henkilöiden (mukaan lukien lapset) käyttöön, joiden rajoitetut, fyysiset, aistilliset tai henkiset kyvyt tai kokemuksen ja/tai tiedon puute estävät käytön, lukuun ottamatta tilanteita, joissa heitä valvoo turvallisuudesta vastaava henkilö tai joissa he ovat saaneet tältä ohjeita laitteen käytöstä.
- Lapsia on valvottava ja on varmistettava, että he eivät leiki laitteella.
- Paristoja ei saa jättää lasten käsiin. Lapset saat- tavat pistää paristot suuhunsa ja niellä ne. Jos paristo on joutunut nieluun, on hakeuduttava välittömästi lääkärin hoitoon.
⚠️ Hengenvaarallisen sähköiskun välttämiseksi:
- Liitä laite ainoastaan määräysten mukaisesti asennettuun ja maadoitettuun pistorasiaan.
Verkkojännitteen on vastattava laitteen tyyppikilven tietoja. - Pidä huolta siitä, ettei virtajohto kastu konetta käytettäessä. Vedä virtajohto siten, ettei se tartu, puristu tai vaurioidu muulla tavalla.
- Anna vaurioitunut verkkopistoke tai virtajohto heti valtuutetun ammattihenkilöstön tai huoltopalvelun vaihdettavaksi vaarojen välttämiseksi.
- Jos johto tai laite eivät toimi moitteettomasti tai ovat vahingoittuneita, vie ne välittömästi valtuutettuun huoltoliikkeeseen korjattaviksi tai vaihdettaviksi.
- Käytä laitetta vain kuivissa tiloissa.

Älä koskaan upota laitetta veteen. Pyyhi laite ainoastaan kevyesti kosteutetulla liinalla.
- Huolehdi siitä, että laitteeseen ei koskaan pääse nesteitä tai vieraita esineitä.
- Älä aseta mitään vedellä täytettyä säiliötä (esim. kukkamaljakkoa) laitteen päälle.
-
Aseta laite verkkopistorasian läheisyyteen. Varmista, että verkkopistorasia on helposti käden ulottuvilla.
-
Älä käytä jatkojohtoa kompastumisvaaran välttämiseksi. Vaaratilanteessa tulee verkkopistokkeen olla nopeasti käsillä.
- Älä koskaan itse avaa laitteen koteloa tai yritä korjata sitä. Jos laitteen kotelo avataan itse, turvallisuus ei ole taattu ja takuu raukeaa. Korjauksia saa suorittaa ainoastaan ammattitaitoinen alan liike tai huoltoliike.

Ohje verkosta irrottamiseen
Laitteen ON/OFF-painike ei irrota laitetta kokonaan sähköverkosta. Lisäksi laite ottaa virtaa valmiustilassa. Irrota laite verkosta kokonaan vetämällä verkkopistoke verkkopistorasiasta.

Ohjeita paristojen käsittelyyn
Laite käyttää muistin suojaamiseksi paristoja.
Huomaa paristojen käsittelystä seuraavaa:

Räjähdysvaara!
Älä heitä paristoja tuleen. Älä lataa paristoja uudelleen.
- Älä koskaan avaa paristoja, älä koskaan juota tai hitsaa paristoja.
On olemassa räjähdyksen ja loukkaantumisen vaara! - Tarkasta paristot säännöllisesti. Vuotavat paristot saattavat vahingoittaa laitetta.
- Jos et käytä laitetta pidemmän aikaa, poista paristot.
- Käytä suojakäsineitä paristojen vuotaessa.
- Puhdista paristokotelo ja paristoliitännät kuivalla liinalla.

Palo- ja loukkaantumisvaarojen välttämiseksi:
- Älä aseta kynttilöitä tai muita avotulen lähteitä laitteen päälle.
- Älä aseta laitetta lämmönlähteiden lähelle.
- Älä sijoita laitetta paikkaan, jossa se altistuu suoralle auringonvalolle. Muutoin laite saattaa ylikuumentua ja vaurioitua käyttökelvottomaksi.
- Aseta laite niin, ettei sen ympäristö ylikuumene, ts. hyvin tuuletettuun paikkaan, jossa sen ympärillä on vapaata tilaa.
- Älä koskaan peitä ilmanottoaukkoja!
- Älä altista laitetta ylimääräiselle lämmölle, esim. suoralle auringonsäteilylle, lämmittimille tai muille laitteille.
- Pidä liitäntäjohto ja laite poissa lasten ulottuvilta. Lapset aliarvioivat usein sähkölaitteiden vaaran.
- Huolehdi siitä, että laite on turvallisessa kunnossa.
- Jos laite putoaa tai vahingoittuu, sitä ei saa ottaa käyttöön. Jätä laite pätevän ammattihenkilön tarkastettavaksi ja tarvittaessa korjattavaksi.
- Paristoja ei saa jättää lasten käsiin. Lapset saat- tavat pistää paristot suuhunsa ja niellä ne. Jos paristo on joutunut nieluun, hakeudu välittö- mästi lääkärin hoitoon.

Ukkosvaroitus!
Irrota laite sähköverkosta ennen myrskyä ja/tai ukkosta ja salamaniskun vaaraa!

Ohjeita syöksyjännitteiden (EFT / nopea sähköinen transientti) ja sähköstaattisten purkausten varalta:
Jos esiintyy nopeista sähköisistä transienteista (häiriöpurskeesta) tai sähköstaattisista purkauksista johtuva toimintahäiriö, tuote on nollattava normaalikäytön palauttamiseksi. Laite on mahdollisesti irrotettava virtalähteestä ja liitettävä siihen uudelleen.
⚠️ Sähkömagneettiset kentät
Tämä laite noudattaa sähkömagneettisen yhteensopivuuden lakisääteisiä raja-arvoja! Jos silti arveluttaa asettaa laitetta makuuhuoneeseen:
- Voit halutessasi varmuuden vuoksi pitää noin puolen metrin turvavälin laitteen ja vuoteen välillä. Viimeistään tällä etäisyydellä kenttä on sähkölle herkkienkin ihmisten kannalta olematon.
i Huomaa:
Tarkasta virtakatkossuojan paristo kerran vuodessa ja vaihda se tarvittaessa uuteen.
i Huomaa:
Tämä laite on varustettu liukumattomilla kumijalo-illa. Koska huonekalujen pinnat koostuvat erilaisista materiaaleista ja niitä hoidetaan erilaisilla aineilla, on mahdollista, että jotkut näistä materiaaleista sisältävät ainesosia, jotka vaurioittavat kumijalkoja ja pehmentävät niitä. Aseta tarvittaessa laitteen jalkojen alle liukumaton alusta.
⚠️ Vaara lasersäteilyä!
Laitteessa on "luokan 1 laser".
- Älä koskaan avaa laitetta.
- Älä yritä itse korjata laitetta. Laitteen sisällä on näkymätöntä lasersäteilyä.
- Älä altista itseäsi lasersäteelle, se saattaa johtaa silmävammoihin.
Käyttöelementit
1 CD-lokero
② Painikkeet SKIP/SEARCH MIN i ja SKIP/SEARCH HR ohituspainike ja pikahaku kappaleen sisällä, Kellonajan asettaminen (minuutit ja tunnit)
3 Painike OPEN
4 Painike TIME: aika-asetus
⑤ Painike ALARM 2: asetus
6 Painike ALARM 1: asetus
⑦ Painike ON/OFF
8 Näyttö
9 LED-näyttö AL2
10 LED-näyttö FM (ULA) stereo
11 LED-näyttö CD-toiminnolle REPEAT
12 LED-näyttö CD-toiminnolle satunnainen toisto RANDOM
13 LED-näyttö CD-toiminnolle PROGRAM
14 ON/OFF LED-näyttö
(palaa laitteen ollessa päällä)
15 LED-näyttö AL1
16 LED-näyttö PM
17 Painike SNOOZE: torkkutila
18 Painike SLEEP: nukahtamisajastin
19 Painike PROGRAM: CD-kappaleiden esiohjelmointi
20 Painike CD-DISPLAY
21 Painike MODE
22 Painike STOP: toiston sammuttaminen
23 Painike PLAY/PAUSE: CD-toiston aloittaminen tai CD-toiston lyhyt keskeyttäminen
24 Kaiutin
25 TUNING-säädin: radiokanavan säätämiseen
26 Taajuuden valintakytkin AM/FM
27 Äänenvoimakkuuden säädin
28 FM (ULA) -antenni
29 Virtajohto
30 Paristolokero (pohjassa)
31 Toiminnon valintakytkin BUZZER - RADIO - CD
32 Kytkin FM STEREO/MONO
Laitteen purkaminen pakkauksesta
Irrota kaikki pakkausmateriaalit. Poista myös kulje- tusvarmistus CD-lokerosta.

Huomio!
Älä anna pikkulasten leikkiä muoveilla. On olemassa tukehtumisvaara!
Tarkista toimituksen täydellisyys
Varmistu pakkausta purkaessasi, että seuraavat osat sisältyvät toimitukseen:
- CD-kelloradio
• Tämä käyttöohje ja takuukortti
Sähkövirtaan liittäminen
Tätä CD-radioherätyskelloa käytetään 230 - 240 voltin vaihtovirralla, 50 Hz:llä. Se on varustettu lisäksi virrankatkossiltauksella, jota varten laitteeseen tulee asettaa 9 V:n paristo (ei sisälly toimitukseen).
- Liitä virtajohdon pistoke verkkopistorasiaan (vaihtojännite).
- Aseta 9 V:n paristo laitteen pohjassa olevaan paristolokeroon 30.

Ohje:
Suosittelemme alkalipariston käyttöä. Ihanteellisen toiminnan takaamiseksi tulisi paristo vaihtaa 6 kuukauden välein. Akut eivät lataudu paris-tolokerossa!
Pariston silloitusjärjestelmä sähkökatkoksissa
Paristo huolehtii siitä, että kello käy edelleen virtakatkoksen aikana. Pariston käyttöiän säilyttämiseksi ei näytössä näytetä kellonaikaa.
Jos laitteeseen ei ole asetettu paristoa, näytössä näkyy sähkökatkoksen jälkeen 12:00. Tämä tarkoittaa, että kellonaika- ja hälytysasetukset tulee suorittaa uudelleen.
Kellonajan asettaminen
Kellonajan asettamista varten on laite sammutettava painikkeella ON/OFF ⑦.
Kellonajan asettaminen ensimmäisellä käyttöönottokerralla:
- Vaihda 12h-tai 24h-tilaan pitämällä painiketta TIME ④ painettuna.

Ohje:
Näytössä näkyy "12h" 12-tunnin näyttöä tai "24h" 24-tunnin näyttöä varten. Iltapäivän tunneissa palaa näytössä ylävasemmalla lisäksi LED "PM".
- Kellonaika vilkkuu. Aseta haluttu kellonaika painikkeilla SKIP/SEARCH MIN i ja SKIP/SEARCH HR i 2.
- Heti, kun painat painiketta TIME 4 uudelleen, asetus tallennetaan. Kellonaika lopettaa vilkkumisen.
Kellonajan asettaminen myöhemmin:
- Vaihda 12h-tai 24h-tilaan pitämällä painiketta TIME ④ painettuna.
- Paina painiketta TIME ④. Kellonaika vilkkuu. Aseta haluttu kellonaika painikkeilla SKIP/SEARCH MIN i ja SKIP/SEARCH HR i ②.
- Heti, kun painat painiketta TIME ④ uudelleen, asetus tallennetaan. Kellonaika lopettaa vilkkumisen.
Radiokäyttö
- Työnnä toiminnan valintakytkin 31 asentoon RADIO.
- Työnnä taajuuden valintakytkin 26 asentoon FM (ULA) tai AM (KA).
- Ihanteellisen vastaanoton saavuttamiseksi tulee FM-antenni 28 vetää täyteen mittaansa. AM-aaltoalueella laitetta tulee kääntää, kunnes vastaanotto on ihanteellisin.
- Kytke laite päälle painikkeella ON/OFF ⑦. LEDnäyttö ⑭ palaa laitteen ollessa kytkettynä päälle.
- Aseta haluttu äänenvoimakkuus äänenvoimakkuuden säätimellä 27.
- Aseta haluttu radiokanava TUNING-säätimen avulla. Jos radiolähetys lähetetään stereona ja laite on säädetty stereolle, LED-näyttö FM STEREO 10 syttyy palamaan. Tällöin kytkin FM STEREO/MONO 32 on asetettava asentoon FM STEREO.
- Radion sammuttamiseksi paina painiketta ON/OFF ⑦. ON/OFF LED-näyttö sammuu.
CD-soittimen käyttö
- Avaa CD-lokero ① painamalla painiketta OPEN ③ ja painamalla CD-levyn (etiketti ylöspäin) reikää kevyesti CD-lokerossa olevaan kiinnikkeeseen, kunnes levy lukittuu paikoilleen.
- Työnnä toiminnonvalintakytkin 31 asentoon CD.
- Painettuasi painiketta ON/OFF ⑦ näytetään näytössä ⑧ CD-kappaleiden yhteismäärä. Lyhyen ajan kuluttua näytetään jälleen kellonaikaa.
- Näytä CD-kappale uudelleen painamalla painiketta CD-NÄYTTÖ 20.
- Aloita ensimmäisen kappaleen toisto painamalla painiketta PLAY/PAUSE 23. Näyttöön 8 ilmestyy ensin 01, hieman sen jälkeen näytetään kuitenkin taas kellonaikaa.
① Ohje:
Käytä painiketta PLAY/PAUSE 23 myös keskeytääksesi kappaleen toiston lyhyeksi aikaa. Toistoa voidaan jatkaa painamalla uudelleen painiketta PLAY/PAUSE 23.
- Aseta haluttu äänenvoimakkuus äänenvoimakkuuden säätimellä 27.
- Toisto voidaan lopettaa painamalla painiketta STOP 22 voidaan toisto lopettaa.
Muita CD-soittimen toimintoja
/ SKIP/SEARCH
- Paina painiketta SKIP/SEARCH HR ▶siirtyäksesi seuraavaan kappaleeseen, tai paina painiketta SKIP/SEARCH HR ▶useampaan kertaan hypä-täksesi useamman kappaleen yli. Siirry kappaleen alkuun painamalla SKIP/SEARCH MIN ▶tai siirry useampia kappaleita taaksepäin painamalla painiketta SKIP/SEARCH MIN ▶useampaan kertaan. Jos SKIP/SEARCH MIN ▶tai SKIP/SEARCH HR ▶pidetään painettuna, voidaan kappa-leesta hakea nopeasti tiettyjä kohtia.
REPEAT: jatkuva toisto RANDOM: satunnainen toisto
- Toista tietyn kappaleen toistoa painamalla kerran painiketta MODE 21. REPEAT-näyttö 11 vilkkuu.
- Toista koko CD:n toisto painamalla vielä kerran painiketta MODE 21. REPEAT-näyttö 11 palaa.
- Painamalla painiketta MODE 21 uudelleen voidaan tämä toiminto poistaa. REPEAT-näyttö 11 sammu.
- RANDOM-näyttö 12 palaa. CD:n kappaleet soitetaan satunnaisessa järjestyksessä.
- Painamalla painiketta MODE 21 vielä kerran voidaan tämä toiminto poistaa. RANDOM-näyttö 12 sammuu.
PROGRAM: Kappaleitten esiohjelmoin- tiin halutussa järjestyksessä
- Aseta CD paikoilleen.
- Paina painiketta ON/OFF ⑦. Kappaleiden yhteismäärä näytetään lyhyesti näytössä ⑧.
- Painikkeen PROGRAM 19 painamisen jälkeen näytössä näkyy p01. Ohjelmanäyttö 13 vilkkuu.
- Valitse painikkeilla SKIP/SEARCH MIN ja SKIP/SEARCH HR ➤② haluamasi kappale. Tallenna kappale lopuksi painamalla painiketta PROGRAM 19. Toimi seuraavien kappaleiden kohdalla yllä kuvatulla tavalla. Voit ohjelmoida yhteensä 20 kappaletta.
- Aloita toisto painamalla painiketta PLAY/PAUSE 23. LED-näyttö PROGRAM 13 palaa.
- Lopeta toisto painamalla painiketta STOP 22.
Halutessasi toistaa ohjelmoinnin myöhemmin:
- Aktivoi ohjelmointi painamalla uudelleen painiketta PROGRAM ⑲. LED-näyttö PROGRAM ⑬ vilkkuu.
- Toista ohjelmoidut kappaleet painamalla painiketta PLAY/PAUSE 23. LED-näyttö PROGRAM 13 palaa.
- Poista ohjelmointi avaamalla CD-lokero ① tai sammuttamalla laite ja kytkemällä se sen jälkeen uudelleen päälle.
Herätysajan ja -tavan asettaminen
Tällä laitteella voit asettaa kaksi eri herätysaikaa, joita voidaan käyttää yksitellen tai yhtä aikaa:
- AL 1 tai AL 2
- AL 1 ja AL 2
Herätysajan asettaminen
Hälytys (AL 1):
• Paina painiketta ALARM 1 6.
- Aseta haluttu herätysaika painamalla painikkeita SKIP/SEARCH MIN i ja SKIP/SEARCH HR 2.
Herätysaika tallennetaan heti, kun painat painiketta ALARM 1 ⑥. Näytössä palaa hälytyksen 1 näyttö.
- Jos haluat poistaa hälytyksen, paina vielä kerran painiketta ALARM 1 6.
Hälytys (AL 2):
Paina painiketta ALARM 2 ⑤ ja suorita samat yllä kuvatut vaiheet. Näytössä palaa hälytyksen 2 näyttö.
- Valitse nyt herätystila toiminnan valintakytkimellä 31 (RADIO, CD tai BUZZER).
Hälytystila BUZZER (summeri)
- Työnnä toiminnan valintakytkin 31 asentoon BUZZER.
Hälytystila Radio
- Säädä haluamasi radioasema radiohälytystä varten suorittamalla kohdassa "Radiokäyttö" mainitut vaiheet 1 - 7.
Hälytystila CD-soitin
-
Avaa CD-lokero ① painamalla painiketta OPEN ③ ja aseta CD-levy (etiketti ylöspäin) CD-lokeroon.
-
Työnnä toiminnan valintakytkin 31 asentoon CD.
① Ohje:
CD-soittimen kokonaissoittoaika hälytystilassa on 60 minuuttia.
Jos laitteessa ei ole CD-levyä ja hälytystila CD-soitin on asetettu, kuuluu automaattisesti asetuksen BUZZER hälytyssignaali.
Hälytyksen asettaminen
Hälytysaika on ohjelmoitu 60 minuutiksi.
- SNOOZE: Kytke hälytys väliaikaisesti pois päältä painamalla painiketta SNOOZE 17. Noin 6 minuutin päästä kuuluu hälytys jälleen.
- ON/OFF: Paina painiketta ON/OFF ⑦. Hälytys mykistyy, mutta kuuluu uudelleen 24 tunnin kuluttua.
- ALARM 1/ALARM 2: Sammuta hälytys pysyvästi painamalla painiketta ALARM 1 ⑥/ALARM 2 ⑤.
Nukahtamisajastin
- Aseta toiminnan valintakytkin 31 asentoon CD tai RADIO.
- Kun olet painanut painiketta SLEEP 18, näyttöön ilmestyy "90".
- Paina uudelleen painiketta SLEEP 18 valitaksesi halutun nukahtamisajan (90, 60, 30 tai 15 minuuttia). Tämä alkaa muutaman sekunnin päästä.
- Lopeta toisto ennenaikaisesti painamalla painiketta ON/OFF 7.
i Ohje:
Mikäli CD:n soittoaika on lyhyempi kuin valitsemasi nukahtamisaika, musiikki loppuu heti, kun kaikki CD:n kappaleet on soitettu.
Puhdistus
- Käytä laitteiston ulkoiseen puhdistukseen ainoastaan kosteata liinaa ja mietoa pesuainetta. Varo, ettei puhdistuksen yhteydessä laitteeseen pääse kosteutta!
- Puhdista levylokeron sisäosat tarvittaessa ainoastaan puhtaalla, kuivalla siveltimellä (esim. objektiivisiveltimellä, saatavana valokuvausalan liikkeistä). Älä koskaan puhdista levylokeron sisäosia kostealla!
⚠️ Varoitus!
Mikäli laitteeseen joutuu kosteutta, on olemassa sähköiskun vaara! Lisäksi laite saattaa vaurioitua korjauskelvottomaan kuntoon!
Hävittäminen

Älä hävitä laitetta tavallisen talousjätteen mukana. Tämä tuote on eurooppalaisen direktiivin 2002/96/EY alainen.
Anna laite hyväksytyn jätehuoltoyrityksen tai kunnallisen jätelaitoksen hävitettäväksi.
Noudata voimassa olevia määräyksiä. Ota epävarmoissa tilanteissa yhteyttä jätelaitokseen.
Paristojen/akkujen hävittäminen
Paristoja/akkuja ei saa hävittää kotitalousjätteiden seassa. Laki velvoittaa jokaista kuluttajaa toimittamaan paristot ja akut asianmukaisiin keräyspisteisiin tai kauppaan.
Näin varmistetaan, että paristot/akut hävitetään ympäristöystävällisellä tavalla. Palauta paristot/akut ainoastaan lataus purettuna.

Hävitä kaikki pakkausmateriaalit ympäristöystävällisellä tavalla.
Takuu ja huolto
Laitteen takuu on 3 vuotta ostopäivästä. Jos sinulla on korkeista laatustandardeistamme huolimatta syytä valituksiin, ota yhteyttä palvelunumeroomme.
Mikäli vikaa ei voida korjata puhelimitse, saat
• käsittelynumeron (RMA-numeron) sekä
- osoitteen, johon voit lähettää tuotteesi takuuta varten.
Laita lähetyksen mukaan kopio ostotositteesta (kassakuitti). Laite tulee pakata kuljetuksen kestävästi ja RMA-numeron tulee olla selkeästi esillä. Ilman RMA-numeroa lähetettyjä tuotteita emme voi käsitellä.
i Huomaa:
Takuu koskee ainoastaan materiaali- ja valmistusvirheitä.
Takuu ei koske
- kuluvia osia
- herkkien osien, kuten kytkinten tai akkujen, vaurioita.
Tuote on tarkoitettu ainoastaan yksityiseen käyttöön. Tuotetta ei siten saa käyttää ammatillisiin tarkoituksiin.
Väärä tai asiaton käyttö, väkivallan käyttö ja muiden kuin valtuutetun huoltopisteen suorittamat korjaukset aiheuttavat takuun raukeamisen.
Tämä takuu ei rajoita lakimääräisiä takuuoikeuksia.
Maahantuoja
KOMPERNASS GMBH
BURGSTRASSE 21
44867 BOCHUM, SAKSA
www.kompernass.com
SilverCrest
CD-kelloradio
KH 2254
Ota yhteyttä asiakaspalvelunumeroomme maksuttoman korjauksen takaamiseksi. Pidä kassakuittisi kä- sillä soittaessasi.
Kirjoita lähettäjän tiedot selvästi:
Sukunimi
Etunimi
Katuosoite
Postinumero/-toimipaikka
Maa
Puhelin
Päiväys/allekirjoitus
Vian kuvaus:
FI Kompernass Service Suomi
Tel.: 02 822 28 87
Fax: 010 293 02 63
e-mail: support.fi@kompernass.com
www.mysilvercrest.de