
KH 2024 - Radio EBENCH - Notice d'utilisation et mode d'emploi gratuit
Retrouvez gratuitement la notice de l'appareil KH 2024 EBENCH au format PDF.
| Type de produit | Radio numérique mondiale |
| Marque | EBENCH |
| Modèle | KH 2024 |
| Alimentation | 4 piles AA LR6 1,5 V (non fournies) ou adaptateur secteur 6,0–7,5 V CC |
| Bandes de fréquences | FM 87,5–108,5 MHz / SW 5,85–15,6 MHz / MW 530–1656 kHz / LW 144–281 kHz |
| Présélections | 40 (10 par bande) |
| Affichage | Écran LCD interactif avec horloge, date, jour, heure mondiale |
| Alarmes | 2 alarmes indépendantes (sonnerie ou radio), répétition (snooze) 9 min |
| Minuterie sommeil | Jusqu’à 90 minutes |
| Antenne | Télescopique pour FM/SW ; ferrite interne pour MW/LW |
| Fonctions supplémentaires | Horloge mondiale (24 villes), calendrier 1950–2049, affichage du temps restant, verrouillage des touches, balayage des présélections |
| Entretien et nettoyage | Essuyer avec un chiffon doux et sec. Ne pas utiliser de produits abrasifs. Ne pas exposer à l’humidité. |
| Sécurité | Protéger de l’humidité. Ne pas utiliser de piles neuves et usagées ensemble. Respecter la polarité. |
FOIRE AUX QUESTIONS - KH 2024 EBENCH
Questions des utilisateurs sur KH 2024 EBENCH
0 question sur cet appareil. Repondez a celles que vous connaissez ou posez la votre.
Poser une nouvelle question sur cet appareil
Téléchargez la notice de votre Radio au format PDF gratuitement ! Retrouvez votre notice KH 2024 - EBENCH et reprennez votre appareil électronique en main. Sur cette page sont publiés tous les documents nécessaires à l'utilisation de votre appareil KH 2024 de la marque EBENCH.
MODE D'EMPLOI KH 2024 EBENCH
e-bench

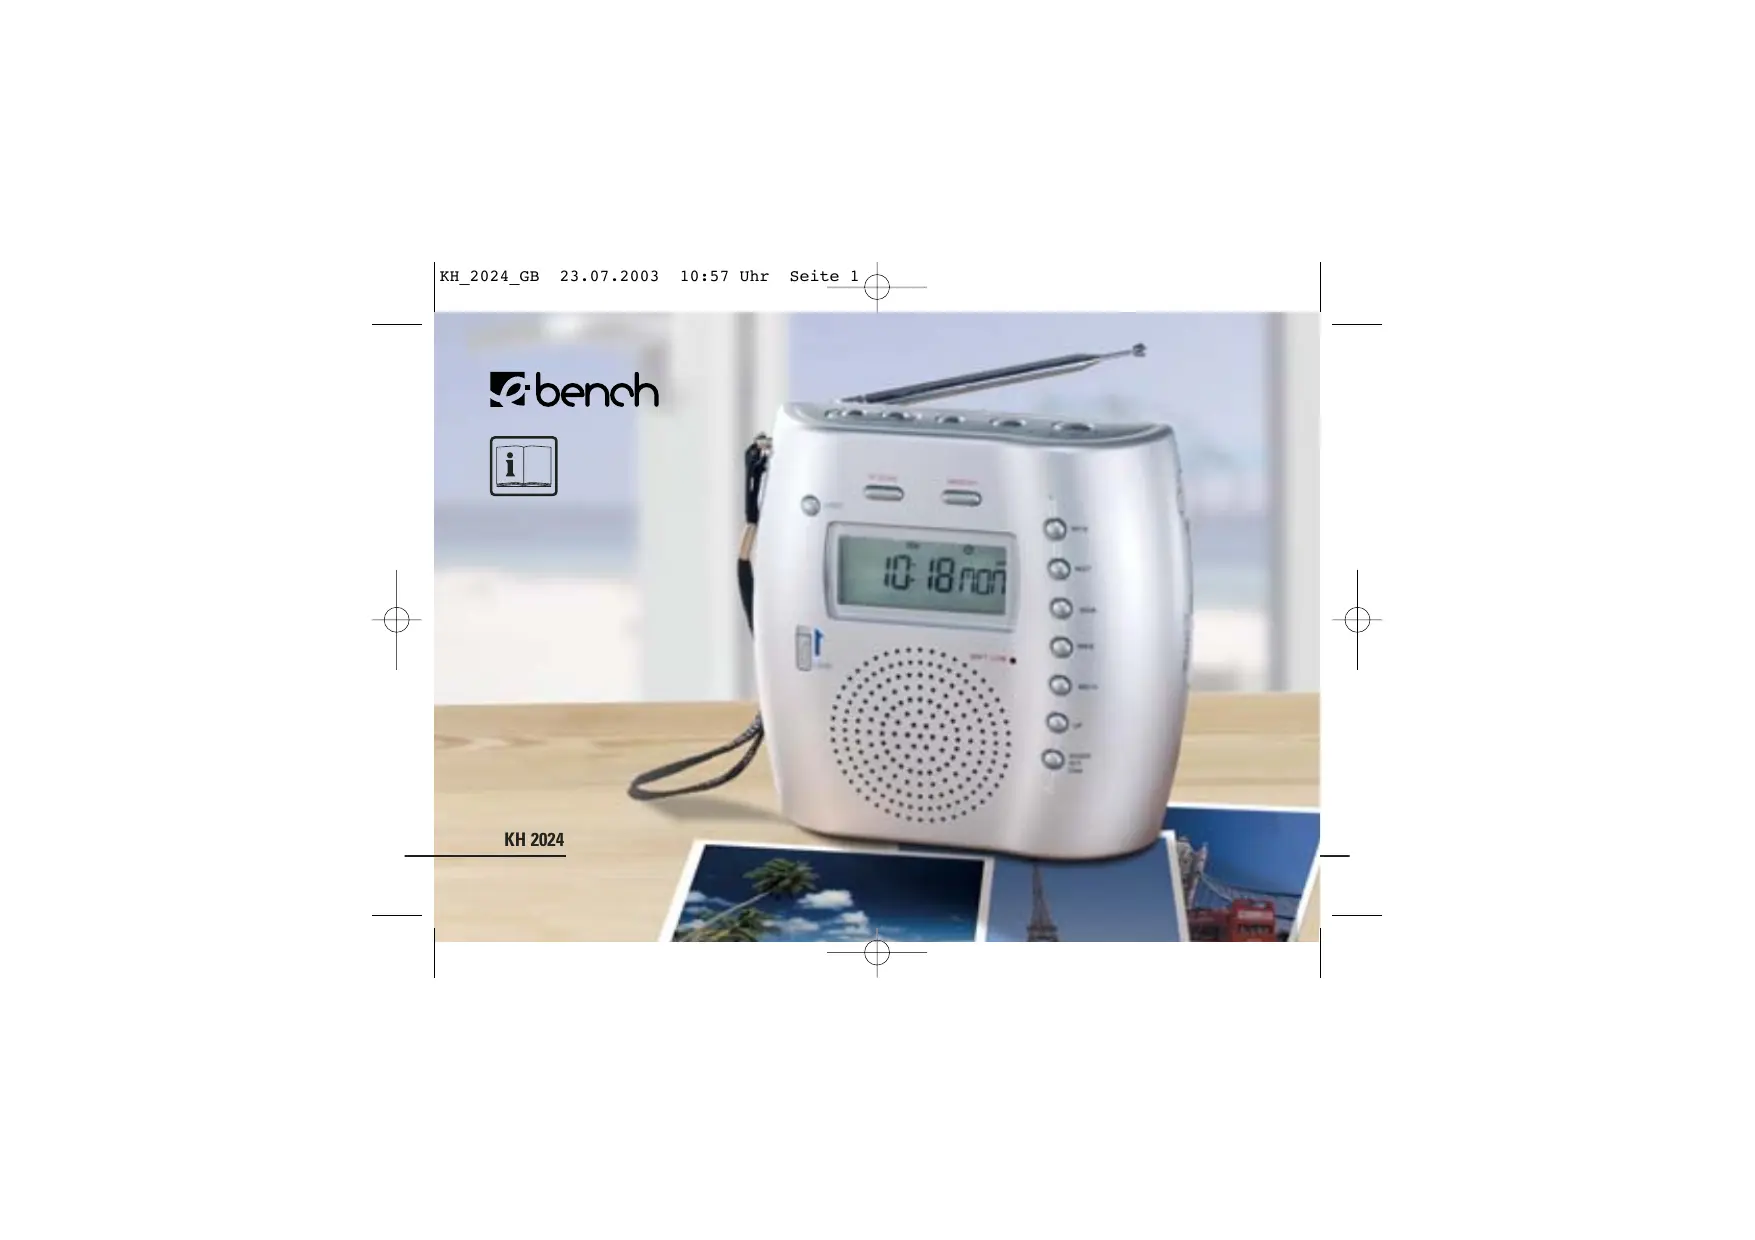
KH 2024

natural_image
Digital radio with digital display and antenna, placed on a wooden table with photo frames in the foreground (no visible text or symbols on device body)
Operating instructions
1. General description
– Electronic digital radio receiver
- Power supply: 6.0V DC (Direct Current) from batteries (4 x AA, LR6 1.5V, not supplied) or from an external adapter 6.0-7.5V AC
– Precision quartz operation
— User-friendly operation using interactive LCD display
— Current time and day of the week display
- 24 hour mode display
– Integrated calendar with automatic year switching from 1950 to 2049
– World time display for 24 cities (see accompanying list for codes)
– Remaining daylight display for local and world time, individually programmable.
- Programmable time, date and world time displays.
- Two independent alarm settings, e.g. for weekday and weekend alarm wake-up times
– Select between radio or tone alarms.
– Sleep Timer for up to 90 minutes.
– Radio with 40 preset memories (10 memory presets per band)
- Station search buttons, automatic or manual, forwards or backwards
- Memory search
- Weak battery display
- Button lock feature to prevent unintentional button actuation.
1.1 Features
① Telescopic aerial for FM and SW reception
② Button lock
③ Alarm /wake-up setting 1 button
④ Snooze / radio OFF button
⑤ Sleep Timer / radio OFF button
⑥ Alarm /wake-up setting 2 button
⑦ Station preset save button
⑧ Setting buttons »Up« / »Down«
⑨ »Mem. Scan«
⑩ Mode select button »Mode«
⑪ Station presets 1-10
⑫ Weak battery display
⑬ LCD display
⑭ Ext. AC connector
⑮ Ext. headphone connector
⑯ Carrying strap
⑰ Band selector FM/SW/MW/LW
⑱ Volume control
⑲ Stand
⑳ Illumination button
②1 Tuning short wave (SW)
Please read before you begin
Batteries:
This device requires 4 UM3/AA/LR6 1.5V batteries (not supplied). Install the batteries in the battery compartment as shown ("+" and "-"). Incorrect polarisation can damage the equipment. Never use combinations of new and used batteries.
If the device is disconnected from the mains, the stored data can be retained if the connection is restored within 30 seconds. If not, the stored data will be lost, and the stored information must be input again.
Weak battery display ⑫:
This display lights up if the batteries are discharged. The old batteries must be replaced with new ones as soon as possible.
Adapter:
Inserting an adapter into the adapter connector ^14 provides the device with a 6.0V supply. A suitable universal DC adapter (6.0-7.5V) intended for use on different equipment can be obtained from most electrical suppliers.
Warning: Even when using an external adapter, you should always have four UM3 batteries in the battery compartment as a back-up in case of mains power failure.
Protect the equipment from moisture. Never put it on a wet surface.
2. Operation
- When the device is switched on for the first time, the date and time are set as 1 January 2001, 0:00 hours.
- The two alarm presets are both set to 0:00 hours, daily wake-up, but are switched off.
• The radio is switched off. - Followed by a change to automatic operation.
2.1 Automatic operation (Brief description)
- By pressing the »MODE« button you can call up the various operating modes one after the other (with the radio switched on or off):
Setting the time – date – city for local / world time -
- With the radio switched off you can also select date and world time clock displays as alternatives to the local
time. For details see Section 2.13 'Alternative Displays'.
- In frequency display operation, the radio shows the frequency range and band of the station currently being received.
- Press »AL. 1« to set or check on alarm wake-up time 1.
- Press »AL. 2« to set or check on the alarm wake-up time 2.
- Press »SLEEP/RADIO ON« to activate the Sleep Timer manually and set the remaining time or just press ON once to turn on the radio
- Press »SNOOZE/RADIO OFF« to doze for a little while longer (Snooze alarm function), or press OFF to switch off the radio (see also Section 2.8).
- With the radio switched on, you can press the buttons with more than one preset the appropriate number of times to call up the saved setting (see also Section 2.9).
- With the radio switched on, press »SNOOZE/ RADIO OFF« to interrupt the set sleep time or alarm wake-up function.
- To store a station with the radio switched on, press »MEMORY« and then the desired station preset button ⑪ and finally »MEMORY« again in order to store the currently set station.
- With the radio switched on, press »MEM. SCAN« in order automatically to call up the stored station preset
one after the other.
- At one minute intervals, the actual time is checked with the alarm setting if this is activated. (for details see Section 2.8 "Activated alarm setting").
2.2 Setting the clock
- Press »MODE« ⑩ once if the device is in time display mode.
- Press »MODE« ⑩ twice if the device is in radio mode.
• The display shows 'CLOCK'. - The time display starts to flash and the day of the week disappears from the LCD.
- The seconds display continues to update every second.
- Press »UP« to increase the time setting by 1 minute. Keep the »UP« button pressed to change the time quickly in 10 minute increments.
- Press »DOWN« to decrease the time setting by 1 minute. Keep the »DOWN« button pressed to change the time quickly in 10 minute decrements.
- If within 15 seconds there has been no further setting made, then the current settings are activated/stored and the device goes once more into automatic operation.
2.3 Date entry
- Press »MODE« ⑩ twice if the device is in time display mode.
- Press »MODE« ⑩ three times if the device is in radio mode.
- If the device is already in "Setting the clock" mode as described in Section 2.2, you can enter "Date entry" mode by pressing the »MODE« ^10 button once.
- The existing set date DD.MM.YY (Day.Month.Year) flashes, then the LCD shows a steady display of 'DATE' as well as the day of the week.
- Press »UP« or »DOWN« in order to change the existing setting (by a day at a time). Keep the »UP« or »DOWN« button pressed to activate fast forward or fast backward adjustment (by 10 days at a time). The day of the week display is automatically activated as soon as the date display is steadily illuminated again.
- If within 15 seconds there has been no further setting made, then the current settings are activated and the device goes back into automatic operation.
2.4 Setting the local time
- Press »MODE« ⑩ three times if the device is in time display mode.
- Press »MODE« ⑩ four times if the device is in radio mode.
- If the device is already in "Date entry" mode as described in Section 2.3, you can enter "Setting the local time" mode by pressing the »MODE« ^10 button once.
- The preset local time starts to flash. 'LOCAL CITY' is displayed steadily.
- The hours, minutes and the day of the week displays are not displayed here and the display is empty.
- By pressing »UP« or »DOWN« you can select the time zone you require from the different codes. :
| Code | Time difference to CET | City |
| LON | 0:00 | London |
| MUN | + 1:00 | München |
| CAI | + 2:00 | Kairo |
| MOW | + 3:00 | Moskau |
| DXB | + 4:00 | Dubai |
| KHI | + 5:00 | Karachi |
| DAC | + 6:00 | Dhaka |
| BKK | + 7:00 | Bangkok |
| HKG | + 8:00 | Hong Kong |
| TYO | + 9:00 | Tokyo |
| SYD | +10:00 | Sydney |
| NOU | +11:00 | Nouméa |
| WLG | +12:00 | Wellington |
| --- | -11:00 | --- |
| HNL | -10:00 | Honolulu |
| ANC | - 9:00 | Anchorage |
| LAX | - 8:00 | Los Angeles |
| DEN | - 7:00 | Denver |
| CHI | - 6:00 | Chicago |
| NYC | - 5:00 | New York City |
| CCS | - 4:00 | Caracas |
| RIO | - 3:00 | Rio de Janeiro |
| -1H | - 2:00 | --- |
| -2H | - 1:00 | --- |
- The 'SUN' (sun symbol) display shows the remaining daylight. Press the SNOOZE/RADIO OFF button to activate the display.
- If within 15 seconds there has been no further setting
made, then the current settings are activated and the device goes back into automatic operation.
2.5 Checking the world time
- Press »MODE« ⑩ four times if the device is in time display mode.
- Press »MODE« ⑩ five times if the device is in radio mode.
- If the device is already in "Setting the local time" mode as described in Section 2.4, you can enter "Checking the world time" mode by pressing the »MODE« ^10 button once.
- The last time zone is displayed steadily in the hours and minutes part of the display, while on the right the code for the appropriate city starts to flash. The display shows "CITY" above steadily.
- You can select the required time zone by pressing the »UP« or »DOWN« buttons in accordance with the table in Section 2.4.
- Press »SNOOZE« to change the display. The display 'SUN' shows the remaining daylight.
- If »MODE« ⑩ is pressed once, or if no further setting
is made within 15 seconds, the device shows the frequency if the radio is on, or if not, the time again.
2.6 Sleep Timer
- Press »SLEEP/RADIO ON« ⑤ once to check the sleep timer current setting. If the Sleep Timer is not activated, then the display briefly shows "ON" (radio switched on).
- Press »SLEEP/RADIO ON« ⑤ once again to change the current setting. (in decrements of 10 minutes, from 90-10 minutes). The radio remains switched on and the selected band appears in the lower area of the LCD.
- Press »SLEEP/RADIO ON« ⑤ when the display reaches desired number of minutes/duration for the Sleep Timer (e.g. "10" for 10 minutes). "OFF" switches off the radio.
- If within 15 seconds there has been no further setting made, then the current settings for the Sleep Timer are activated and the device goes back into automatic operation.
2.7 Setting ALARM 1 and ALARM 2
- Press the »AL. 1« ③ or »AL. 2« ⑥ button once. 'AL 1' or 'AL 2' is displayed steadily in the alphanumeric
LCD display.
- The current setting HH.MM (hours:minutes) and the day of the week display start to flash.
- Use »UP« to adjust the setting in increments of 1 minute.
- Use »DOWN« to adjust the setting in decrements of 1 minute.
- Keep the »UP« or »DOWN« button pressed to change the time quickly in 10 minute increments or decrements.
- Press »SNOOZE« to change the alarm operation cycle between daily (all seven days of the week) and weekdays (Monday to Friday).
- Press the »AL. 1« ③ or »AL. 2« ⑥ button again to select either a music or tone wake-up alarm.
Wake-up type
Wake-up tone Radio Off
LCD display (on right in display)
Symbol 'BELL 1' Symbol 'MUSIC 1' Nothing displayed
Note: The alarm wake-up function is only activated if one of the two wake-up types (music or tone) is set.
- If within 15 seconds, there has been no further setting made then the current settings are activated and the
device goes back into automatic operation.
2.8 Alarm wake-up function
- When the actual time (clock) and the set alarm wake-up time are identical, the alarm wake-up function is switched on.
- When the alarm switches on, then the Sleep Timer, if in operation, is immediately ended.
- Alarm with wake-up tone, a) 4.5 kHz wake-up tone sounds b) Radio is silenced, even if it is switched on. c) The wake-up tone sounds for 10 minutes.
- Alarm with radio, a) The radio switches itself on (the last selected station) b) The radio plays for a maximum of 60 minutes
- By pressing the »SNOOZE/RADIO OFF« ④ button you can put off the alarm wake-up by 9 minutes (Snooze alarm function). The wake-up function is interrupted and resumed after 9 minutes.
- To stop the alarm wake-up, press the appropriate »AL.1« or »AL.2« button.
2.9 Selecting radio presets
• There are 10 presets for each radio band.
- Each button can have two presets. In order to call up the other preset, just press the button a second time.
- If the radio is switched on, press the station presets 1/6. The display shows 'MEM' steadily, the frequency of preset 1 appears steadily on the LCD and '1' appears steadily on the 'MEM' display.
- To select the required preset station, press the appropriate button 1/6, 2/7, 3/8, 4/9 or 5/10.
- The radio is silenced (MUTE) during the preset setting process. If the input of new preset data is interrupted for 1 second, then the preset selection is accepted, the radio changes to the corresponding frequency and the muted mode ends.
2.10 Storing radio stations
- Press »MEMORY« once to save the frequency of the radio station currently being received. The 'MEM' display starts to flash.
- The particular preset is determined by pressing once or twice on the appropriate preset station button.
The number of the selected preset is shown on the 'MEM display.
- Press »MEMORY« again to initiate the preset process. The 'MEM' display shows steadily.
- When the 'MEMORY' display is flashing you can use »UP«, »DOWN« or »MEM. SCAN« to search up and down through the presets. The 'MEMORY' display is no longer shown.
2.11 Station search manual /search process
- If the radio is on, press »UP« to increase the reception frequency manually (for step sizes, see frequency steps column in the table).
- Press »DOWN« in order to change the reception frequency downwards (by a step at a time).
- Keep pressing on to »UP« or »DOWN« button for an automatic search (search process) for the nearest receivable radio station.
- Table of frequency bands and steps for each band. :
| Band | Frequency range | Frequency steps |
| FM | 87.5 - 108.5 MHz | 50 kHz |
| SW | 5.85 -15.6 MHz | 5 kHz |
| MW | 530 -1656 kHz | 9 kHz |
| LW | 144 - 281 kHz | 1 kHz |
2.12 Tuning short wave (SW)
Set the slide switch to LX if the reception of the station is strong enough. Set the slide switch to RX to improve the reception of weak short wave stations.
2.13 Preset search (MEMORY SCAN)
- If the radio is on, press »MEM. SCAN« ⑨ once to go through the 10 preset stations.
- The search process starts at the next preset or MEM-1 if no particular preset has been selected.
- The search process is stopped after 5 seconds for each station.
- Press »SNOOZE /RADIO OFF« to terminate the preset search.
2.14 Display mode
- In time display mode (with the radio switched off), press »ALT. DISP.« once. The Time and day of the week displays are not shown, the current displays are made using 'CLOCK', 'DATE' and 'CITY'. By the appropriate number of presses you can select which display appears in addition to the time display. If the radio is switched off, the selected displays appear one after the other.
| Display | LCD display (right top in display) |
| Time display only | Steady 'CLOCK' display only |
| Time + date | Steady 'CLOCK' + 'DATE' display only |
| Local time and world time | Steady 'CLOCK' + 'CITY' display only |
| Local time +date +world time | Steady 'CLOCK' + 'DATE' + 'CITY' display only |
- Press »ALT. DISP.« to show all the selection options. If no further button is pressed for 3 seconds, the normal display is automatically activated.
- If the radio is switched on and in frequency display mode, only the frequency of the station being received is displayed irrespective of the display type selected in the display mode.
2.15 Button lock
- Move the switch for the button cut lock ② into the desired position:
$$ \begin{array}{l} \text { UNLOCK } = \text { button lock OFF } \ \text { LOCK } = \text { button lock activated } \ \end{array} $$
With the button lock on, the buttons have no effect.
2.16 Aerial
For improved reception in FM and SW bands, pull out and extend the telescopic aerial fully, turning it to get the best reception.
ML and LW use an internal ferrite antenna, so you only need to rotate the device to get the best reception.
2.17 Stand
The stand ⑲ on the back of the device can be folded out to provide the radio with a reliable stand.
3. Statement of conformity
We, Kompernaß Handelsgesellschaft mbH, Burgstr. 21, D-44867 Bochum, Germany, hereby declare that this product conforms with the following EC regulations:
EC low voltage regulations, Electromagnetic compatibility, Applicable harmonised standards.
Type/Description: Digital world radio receiver KH 2024
Bochum, 31.01.2003

Hans Kompernaß
- Managing Director -


- e-bench
- Operating instructions
- General description
- Features
- Please read before you begin
- Batteries:
- Weak battery display ⑫:
- Adapter:
- Operation
- Automatic operation (Brief description)
- Setting the clock
- Date entry
- Setting the local time
- Checking the world time
- Sleep Timer
- Setting ALARM 1 and ALARM 2
- Wake-up type
- LCD display (on right in display)
- Alarm wake-up function
- Selecting radio presets
- Storing radio stations
- Station search manual /search process
- Tuning short wave (SW)
- Preset search (MEMORY SCAN)
- Display mode
- Button lock
- Aerial
- Stand
- Statement of conformity
Marque : EBENCH
Modèle : KH 2024
Catégorie : Radio