
DYNAX 7D - Appareil photo reflex numérique MINOLTA - Notice d'utilisation et mode d'emploi gratuit
Retrouvez gratuitement la notice de l'appareil DYNAX 7D MINOLTA au format PDF.

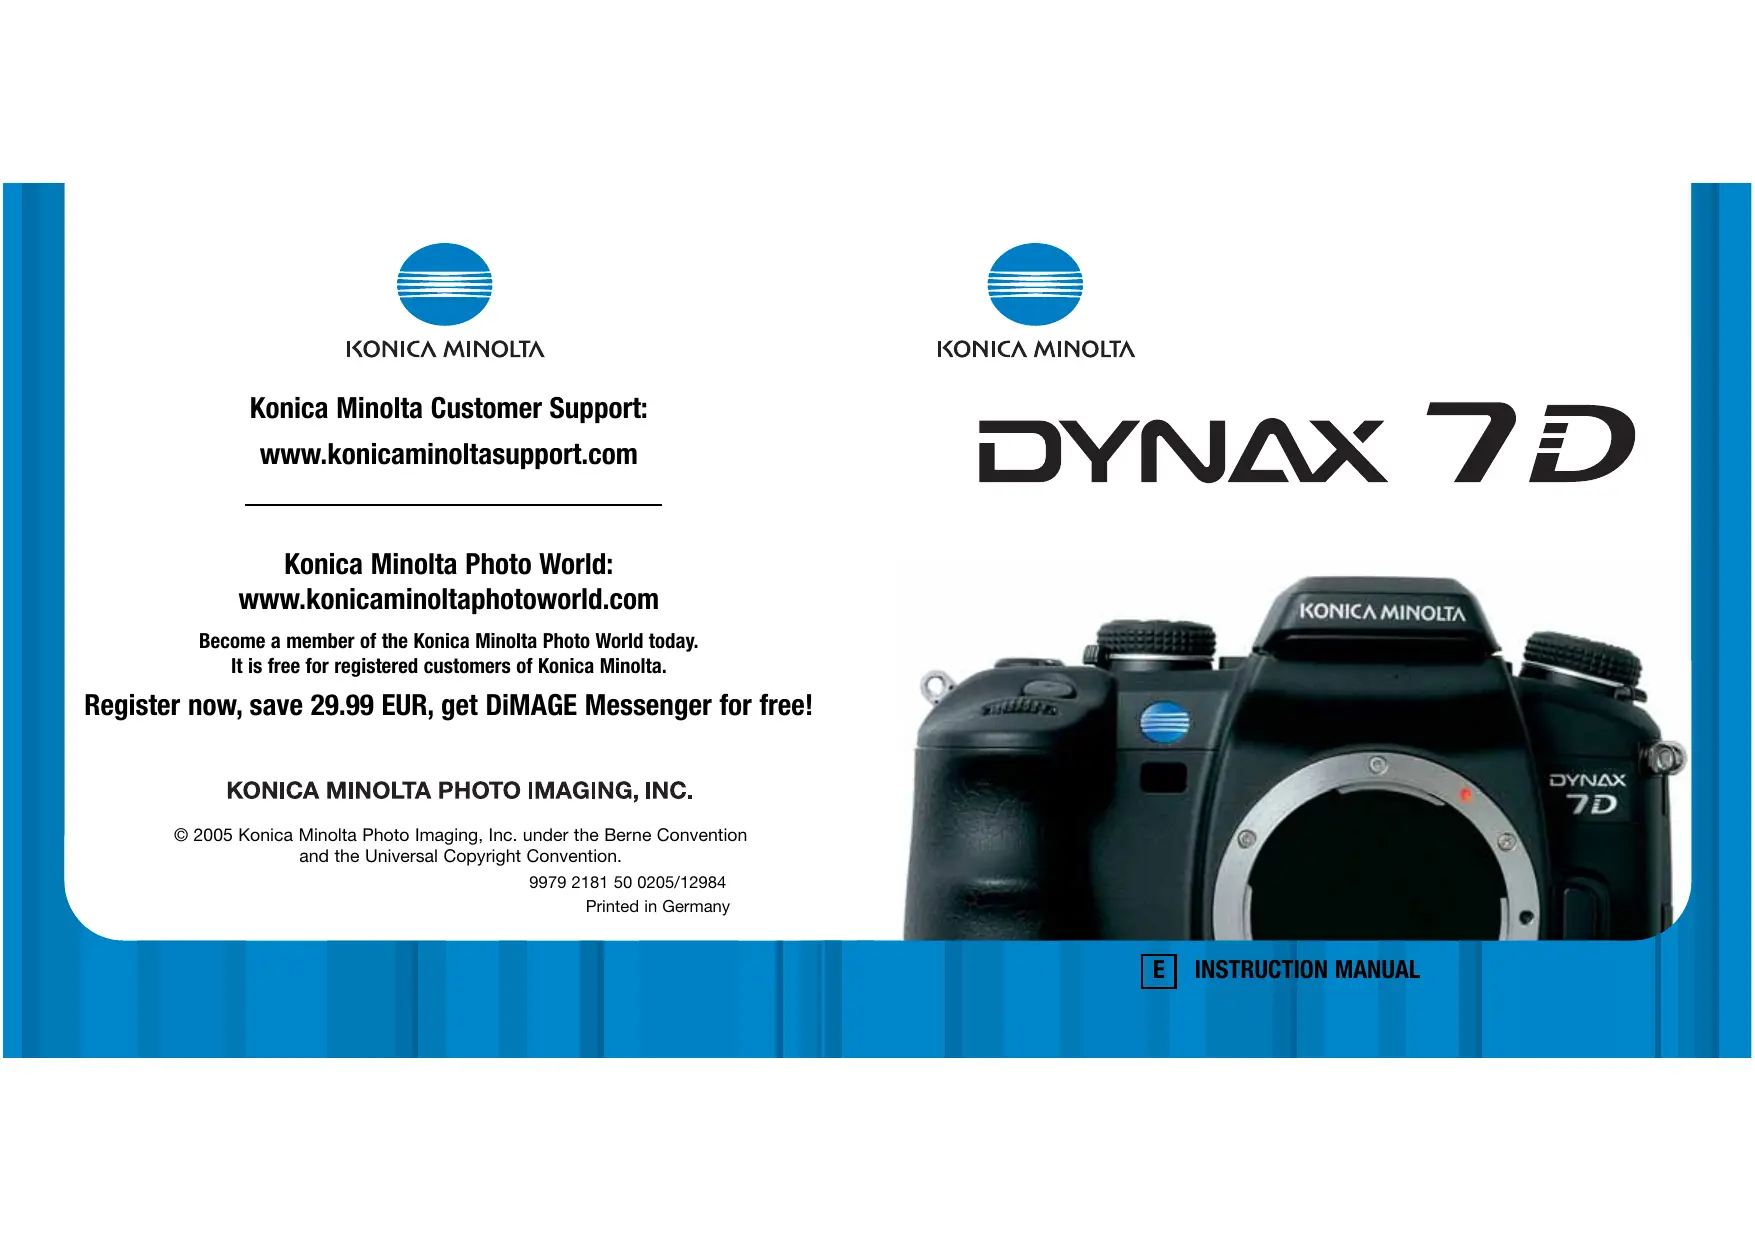

| Type de produit | Appareil photo reflex numérique |
| Marque | Konica Minolta |
| Modèle | Dynax 7D |
| Capteur | CCD 23,5 x 15,7 mm, 6,1 millions de pixels effectifs |
| Sensibilité ISO | Auto, 100, 200, 400, 800, 1600, 3200 |
| Viseur | Pentaprisme à hauteur d'œil, couverture 95 %, grossissement 0,9x |
| Écran LCD | 2,5 pouces TFT couleur |
| Obturateur | Électronique plan focal, 30 s à 1/4000 s |
| Synchro flash | 1/125 s (Anti-Shake activé) / 1/160 s (désactivé) |
| Modes d'exposition | Programme (P), priorité ouverture (A), priorité vitesse (S), manuel (M), plein auto |
| Mesure de lumière | Matrice 14 segments, pondérée centrale, spot |
| Autofocus | TTL détection de phase, 9 collimateurs |
| Stabilisation | Anti-Shake mécanique (capteur) |
| Flash intégré | NG 12 (ISO 100), couverture 24 mm |
| Support de stockage | CompactFlash Type I/II, Microdrive |
| Formats de fichier | JPEG, RAW |
| Alimentation | Batterie lithium-ion NP-400 (7,4 V, 1500 mAh) |
| Dimensions (L x H x P) | 150 x 106 x 77,5 mm |
| Poids | Environ 760 g (sans batterie ni carte) |
| Température d'utilisation | 0 °C à 40 °C |
| Connectivité | USB, sortie vidéo (NTSC/PAL), télécommande filaire |
| Accessoires inclus | Courroie, câbles USB et vidéo, logiciel DiMAGE Viewer, manuels |
FOIRE AUX QUESTIONS - DYNAX 7D MINOLTA
Questions des utilisateurs sur DYNAX 7D MINOLTA
0 question sur cet appareil. Repondez a celles que vous connaissez ou posez la votre.
Poser une nouvelle question sur cet appareil
Téléchargez la notice de votre Appareil photo reflex numérique au format PDF gratuitement ! Retrouvez votre notice DYNAX 7D - MINOLTA et reprennez votre appareil électronique en main. Sur cette page sont publiés tous les documents nécessaires à l'utilisation de votre appareil DYNAX 7D de la marque MINOLTA.
MODE D'EMPLOI DYNAX 7D MINOLTA

KONICA MINOLTA
Konica Minolta Customer Support:
www.konicaminoltasupport.com
Konica Minolta Photo World:
www.konicaminoltaphotoworld.com
Become a member of the Konica Minolta Photo World today. It is free for registered customers of Konica Minolta.
Register now, save 29.99 EUR, get DiMAGE Messenger for free!
KONICA MINOLTA PHOTO IMAGING, INC.
© 2005 Konica Minolta Photo Imaging, Inc. under the Berne Convention and the Universal Copyright Convention.
9979 2181 50 0205/12984
Printed in Germany

KONICA MINOLTA
DYNAX 7D
natural_image
Close-up of a black KONICA MINOLTA 7D DSLR camera with visible branding and control buttons (no additional text or symbols)BEFORE YOU BEGIN
Thank you for purchasing this Konica Minolta digital camera. Please take the time to read through this instruction manual so you can enjoy all the features of your new camera.
Check the packing list before using this product. If any items are missing, immediately contact your camera dealer.
Dynax digital camera
Lithium-ion battery NP-400
Lithium-ion battery charger BC-400
Wide Strap WS-4
Video Cable VC-500
USB Cable USB-2
LCD Monitor Protection Panel MPP-100
DiMAGE Viewer software CD-ROM
DiMAGE Instruction Manuals CD-ROM
Camera instruction manual
Pocket Reference Guide
Install Guide
Konica Minolta International Warranty Certificate
This product is designed to work with accessories manufactured and distributed by Konica Minolta. Using accessories or equipment not endorsed by Konica Minolta may result in unsatisfactory performance or damage to the product and its accessories.
Only use the battery specified in this manual that are manufactured and distributed by Konica Minolta. Beware of counterfeit batteries; the use of these batteries will damage the product and may cause fire.
This manual contains information on products and accessories available at the time of printing. To obtain compatibility information on products not contained in this manual, contact a Konica Minolta service facility.
While reasonable efforts have been made to assure the accuracy of this information, Konica Minolta assumes no liability or responsibility for any errors or omissions of this instruction manual.
Konica Minolta is a trademark of Konica Minolta Holdings, Inc. Dynax. and DiMAGE are trademarks of Konica Minolta Photo Imaging, Inc. Apple, Macintosh, and Mac OS are registered trademarks of Apple Computer Inc. Microsoft and Windows are registered trademarks of the Microsoft Corporation. The official name of Windows is Microsoft Windows Operating System. Microdrive is a trademark of Hitachi Global Storage Technologies. Adobe is a registered trademark of Adobe Systems Incorporated. All other brand and product names are trademarks or registered trademarks of their respective owners.
FOR PROPER AND SAFE USE
NP-400 LITHIUM-ION BATTERIES
This camera operates on a powerful lithium-ion battery. Misuse or abuse of the lithium-ion battery can cause damage or injury through fire, electric shock, or chemical leakage. Read and understand all warnings before using the battery.
DANGER
- Do not short, disassemble, damage, or modify the battery.
- Do not expose the battery to fire or high temperatures over 60^ (140°F).
- Do not expose the battery to water, or moisture. Water can corrode or damage the internal battery safety devices and cause the battery to overheat, ignite, rupture, or leak.
- Do not drop or subject the battery to strong impacts. Impacts can damage the internal battery safety devices and cause the battery to overheat, ignite, rupture, or leak.
- Do not store the battery near or in metallic products.
- Do not use the battery with any other products.
- Only use the specified charger. An inappropriate charger may cause damage or injury through fire or electric shock.
- Do not use a leaking battery. If fluid from the battery enters your eye, immediately rinse the eye with plenty of fresh water and contact a doctor. If fluid from the battery makes contact with your skin or clothing, wash the area thoroughly with water.
- Only use or charge the battery in an environment with ambient temperatures between 0° and 40°C (32° and 104°F). Only store the battery in an environment with ambient temperatures between -20° and 30°C (-4° and 86°F) and a humidity of 45% to 85% RH.
WARNING
- Tape over the lithium-ion battery contacts to avoid short-circuiting during disposal; always follow local regulations for battery disposal.
- If charging is not completed after the specified period elapses, unplug the charger and discontinue charging immediately.
GENERAL PRODUCT WARNINGS AND CAUTIONS
Read and understand the following warnings and cautions for safe use of the digital camera and its accessories.
WARNING
- Only use the battery specified in this manual.
- Only use the specified charger or AC adapter within the voltage range indicated on the unit. An inappropriate adapter or current may cause damage or injury through fire or electric shock.
- Only use the charger power cord in the sales region for which it was designed. An inappropriate current may cause damage or injury through fire or electric shock.
- Do not disassemble the camera or charger. Electric shock may cause injury if a high voltage circuit inside the product is touched.
- Immediately remove the battery or unplug the AC adapter and discontinue use if the camera is dropped or subjected to an impact in which the interior, especially the flash unit, is exposed. The flash has a high voltage circuit which may cause an electric shock resulting in injury. The continued use of a damaged product or part may cause injuries or fire.
- Keep the battery, memory card, or small parts that could be swallowed away from infants. Contact a doctor immediately if an object is swallowed.
- Store this product out of reach of children. Be careful when around children not to harm them with the product or parts.
- Do not fire the flash directly into the eyes. It may damage eyesight.
- Do not fire the flash at vehicle operators. It may cause a distraction or temporary blindness which may lead to an accident.
- Do not use the monitor while operating a vehicle or walking. It may result in injury or an accident.
-
Do not look at the sun or strong light sources through the viewfinder or lens. It may damage your eyesight or cause blindness.
-
Do not use these products in a humid environment, or operate them with wet hands. If liquid enters these products, immediately remove the battery or unplug the product, and discontinue use. The continued use of a product exposed to liquids may cause damage or injury through fire or electric shock.
- Do not use these products near inflammable gases or liquids such as gasoline, benzine, or paint thinner. Do not use inflammable products such as alcohol, benzine, or paint thinner to clean these products. The use of inflammable cleaners and solvents may cause an explosion or fire.
- When unplugging the AC adapter or charger, do not pull on the power cord. Hold the plug when removing it from an outlet.
- Do not damage, twist, modify, heat, or place heavy objects on the AC adapter or charger cord. A damaged cord may cause damage or injury through fire or electric shock.
- If these products emit a strange odor, heat, or smoke, discontinue use. Immediately remove the battery taking care not to burn yourself as the battery may become hot with use. The continued use of a damaged product or part may cause injuries or fire.
• Take the product to a Konica Minolta service facility when repairs are required. - Handling the cord on this product may expose you to lead, a chemical known to the State of California to cause cancer, and birth defects or other reproductive harm. Wash hands after handling.

CAUTION
- Do not point a photographic lens directly at the sun. If sunlight is focused on an inflammable surface, a fire may result. Replace the lens cap when the lens is not in use.
- Do not use or store these products in a hot or humid environment such as the glove compartment or trunk of a car. It may damage the camera, charger, and battery which may result in burns or injuries caused by heat, fire, explosion, or leaking battery fluid.
- If the battery is leaking, discontinue use of the product.
- The camera, charger, and battery temperature rises with extended periods of use. Care should be taken to avoid burns.
- Burns may result if the memory card or battery is removed immediately after extended periods of use. Turn the camera off and wait for it to cool.
- Do not fire the flash while it is in contact with people or objects. The flash unit discharges a large amount of energy which may cause burns.
- Do not apply pressure to the LCD monitor. A damaged monitor may cause injury, and the liquid from the monitor may cause inflammation. If liquid from the monitor makes contact with skin, wash the area with fresh water. If liquid from the monitor comes in contact with the eyes, immediately rinse the eyes with plenty of water and contact a doctor.
- When using the AC adapter and charger, insert the plug securely into the electrical outlet.
- Do not use electronic transformers or travel adapters with the charger. The use of these devices may cause a fire or damage the product.
- Do not use if the AC adapter or charger cord is damaged.
- Do not cover the AC adapter or charger. A fire may result.
- Do not obstruct access to the AC adapter or charger; this can hinder the unplugging of the units in emergencies.
- Unplug the AC adapter or charger when cleaning or not in use.
TABLE OF CONTENTS
Before you begin....3
For proper and safe use ....4
Names of parts ....14
Camera body....14
Recording mode display 16
Viewfinder 17
Getting up and running....18
Attaching the camera strap....18
Attaching a lens 19
Removing a lens....19
Diopter adjustment....20
Installing the monitor protection panel ....20
Charging the battery....21
Installing and changing the battery....22
Battery condition indicator....23
Auto power save 23
Inserting and changing a memory card 24
Turning on the camera 25
Setting the date and time....26
Basic recording 27
Setting the camera to record images automatically....27
Handling the camera....27
Basic recording display....27
Basic recording operation....28
Focus signals 29
Special focusing situations ....29
Focus lock....30
Camera-shake warning 30
Using the built-in flash 31
Anti-Shake system 32
Display button 33
Basic playback 34
Viewing images 34
Rotating images 35
Histogram display 35
Deleting single images ....36
Changing the playback display....37
Enlarged playback....38
Advanced recording....39
Exposure-mode dial 39
Program - P 40
Full -auto program....40
Program shift - PA/PS 41
Aperture priority - A....42
Shutter priority - S....43
Manual exposure - M 44
Bulb exposures....45
Attaching a remote cord (optional)....45
Exposure lock - AEL button 46
About slow sync....47
Exposure and flash compensation....48
Metering modes 50
Camera sensitivity - ISO 51
Focus-mode dial ....52
AF / MF button....53
Depth-of-field preview....53
Focus-area switch....54
Spot AF....54
Focus-area selection 55
Drive modes 56
Frames-remaining counter 56
Continuous-advance notes....57
Self-timer notes....57
Bracketing notes 58
Attaching the eyepiece cap....59
Optional viewfinder accessories ....59
White balance....60
Preset white balance....60
Custom white balance....61
Color temperature....62
Memory - storing camera settings....63
Recording menu....64
Navigating the recording menu....64
Image size and image quality....66
Color mode....68
About Adobe RGB 68
Digital Effects (FX) Control 69
Recording mode reset....70
Bracketing setup....70
Bracketing order....70
Flash modes....71
Wireless/Remote flash....72
Wireless/Remote camera and flash ranges 74
Flash control....75
Manual flash and power ratio....76
Instant playback....77
Noise reduction 77
Interval 78
A short guide to photography....80
Light sources and color....81
What is an Ev? 81
Playback menu 82
Navigating the playback menu....82
Frame-selection screen....83
Delete 84
Format 85
View folder....85
Lock 86
Index playback format....87
Slide Show 88
About DPOF 88
DPOF setup....89
Date imprint....90
Index print 90
Cancel print 90
Opening the custom & setup menus....91
Custom menu 92
AF / Shutter release priority setup 94
Focus-hold button setup....94
AF / MF button setup....94
AEL button setup....95
AF with shutter-release button....95
Auto AF setup 96
Control-dial setup....96
Control-dial (exposure compensation) setup....96
Control-dial lock....97
Exposure-compensation setup....97
AF illuminator....97
Shutter lock 97
AF area setup....98
Monitor display setup....98
Recording display setup 98
Anti-Shake viewfinder display setup....98
ISO button setup....99
Zone Matching 99
ISO menu setup ....100
M-SET button setup....100
Creating a menu shortcut....100
Custom menu reset....101
Setup menu 102
LCD brightness....104
Transfer mode 104
Video output....105
Viewing images on a television....105
Audio signals....106
Language....106
Date and time setup....107
File number memory 107
Folder name 108
Select folder....108
New folder....109
LCD backlight....109
Auto power save 109
Menu section memory....110
Delete confirmation....110
Clean CCD....110
Reset default ....112
Accessory notes....114
AC Adapter AC-11 (sold separately)....114
About the battery charger cord....114
Vertical Control Grip VC-7D (sold separately)....115
Focusing-screen compatibility ....115
Lens shadowing 115
Smooth focus....116
Focal-length conversion....116
CCD-plane indicator....117
Lens compatibility ....117
Attaching an accessory flash....117
Flash compatibility ....118
High-Speed Sync. (HSS)....118
Using the flash terminal....119
Data-transfer mode....120
System requirements ....120
Connecting the camera to a computer....121
Connecting to Windows 98/98 second edition....122
Automatic installation....122
Manual installation....123
Auto power save (Data-transfer mode)....125
Memory card folder organization....126
Disconnecting the camera from the computer ....128
Windows 98/98 second edition....128
Windows Me, 2000 Professional, and XP ....128
Macintosh....129
Changing the memory card (data-transfer mode) 130
Windows 98/98 second edition....130
Windows Me, 2000 Professional, and XP ....130
Macintosh....130
Removing the driver software - Windows....131
PictBridge....132
Notes on printing errors 133
Navigating the PictBridge menu ....134
Batch print....135
Index print....135
Paper size....136
Layout....136
Print quality....137
Data print....137
DPOF print....137
Troubleshooting....138
Care and storage 141
Camera care....141
Cleaning 141
Storage....141
Operating temperatures and conditions 142
Memory card care and handling 142
Batteries 142
LCD monitor care....143
Copyright....143
Before important events or journeys....143
Questions and service....143
Technical specifications....144
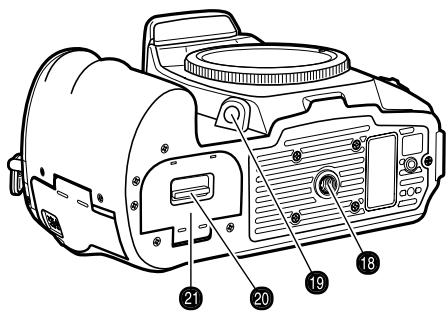
NAMES OF PARTS
CAMERA BODY
* This camera is a sophisticated optical instrument. Care should be taken to keep these surfaces clean. Please read the care and storage instructions in the back of this manual (p. 141).
- Front control dial
- Shutter-release button
- Exposure-mode dial (p. 39)
- Dial Lock Release
- Flash (p. 31)
- Exposure-compensation dial (p. 48)
- Flash-compensation dial (p. 48)
- Flash sync. terminal (p. 119)
- Strap eyelet (p. 18)
- DC terminal (p. 114)
- Remote-control terminal (p. 45)
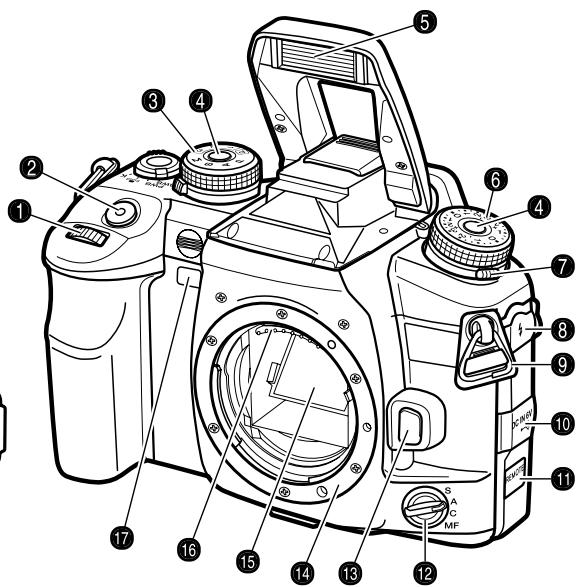
- Focus-mode dial (p. 52)
- Lens release (p. 19)
- Lens mount
- Mirror*
- Lens contacts*
- Self-timer lamp (p. 57)
- Tripod socket
- Depth-of-field preview button (p. 53)
- Battery-chamber release (p. 22)
-
Battery-chamber door (p. 22)
-
Main switch
- Eyepiece sensors*
- Viewfinder ^* (p. 17)
- Eyepiece cup (p. 59)
- Accessory shoe
- Diopter-adjustment dial (p. 20)
- Drive-mode dial (p. 56)
- AE lock button (p. 46)
- Metering-mode dial (p. 50)
- White-balance button (p. 60)
- White-balance dial (p. 60)
- AF/MF button (p. 53)
- Rear control dial
- USB port/Video-out terminal (p. 105, 121)
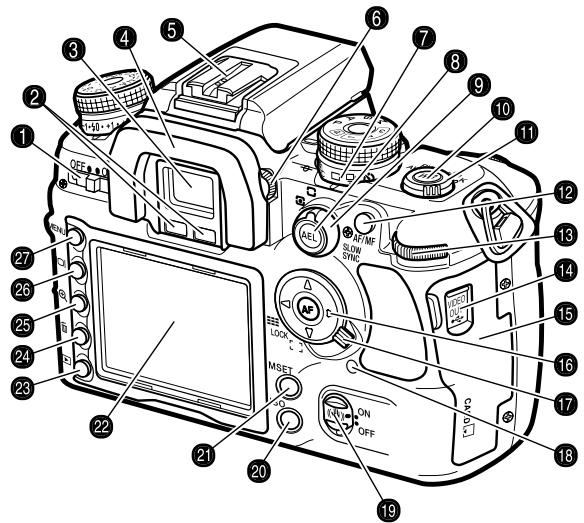
- Card-slot door (p. 24)
- Controller & Spot-AF button (p. 54)
- Focus-area switch (p. 54)
- Access lamp
- Anti-Shake switch (p. 32)
- Camera-sensitivity (ISO) button (p. 51)
- Memory set button (p. 63)
- LCD monitor* (p. 16, 34)
- Playback button (p. 34)
- Delete button (p. 36)
- Magnification button (p. 38)
- Display button (p. 33, 37)
- Menu button
RECORDING MODE DISPLAY
The recording display shows information on camera operation in panels. The information displayed varies with the functions set.
As the camera is rotated to a vertical position, the display automatically rotates to compensate for the camera position.
![1 P 125 F5.6 2 REAR -3·2·1·0·1·2·3+ 3 +2 COL+1 S-2 +2 Natural L 4 [ ] AF-A RP ISO 100 FINE 5 AEL AWB 0023](/content/2025/01/165690/images/56ea280683118688f108347d103ce04cda75220adbaa59c45e3cfe1a7f73c7db.jpg)
- Memory / exposure mode / exposure panel
- Flash panel
- Digital Effects panel
- Metering / AF area / AF mode / Release priority / Drive mode panel
- AE lock / battery condition panel
- Ev scale
- Color mode / camera-sensitivity panel
- Image size / quality panel
- White-balance panel
- Frame counter
![1 P 125 F5.6 -3..2..1..0..1..2..3+ REAR +2 COL+1 -2 +2 [ ] AFA RP □ AWB L FINE AEL Natural ISO 100 0023](/content/2025/01/165690/images/7a70b05a40d31011162f7912a117777f1ebf666c06a035386849aed179a82f68.jpg)
Camera Notes
The monitor-display setup and recording-display setup custom functions in section 3 of the custom menu control the monitor display (p. 92, 98).
VIEWFINDER
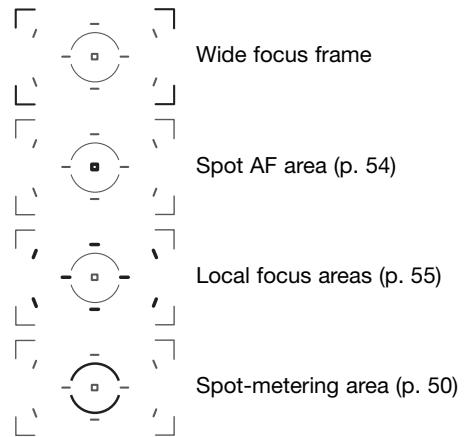
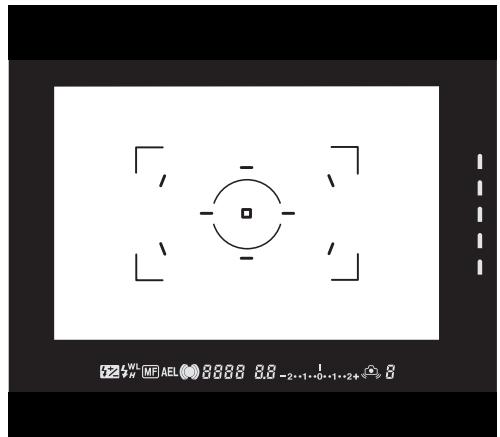
The spot AF area and local focus areas are illuminated briefly to indicate the point of focus when the focus is locked.

- Anti-Shake scale (p. 32)
- Flash-compensation indicator (p. 48)
- Flash signal (p. 31)
- High-speed sync. indicator (p. 118)
- Wireless/Remote flash indicator (p. 72)
- Manual focus indicator (p. 52)
- AE lock indicator (p. 46)
- Focus signal (p. 29)
- Shutter-speed display
- Aperture display
- Ev scale
- Camera-shake warning (p. 30)
- Frames-remaining counter (p. 56)
GETTING UP AND RUNNING
This section covers the preparation of the camera. This includes the changing of batteries, memory cards, and lenses as well as the use of external power supplies.
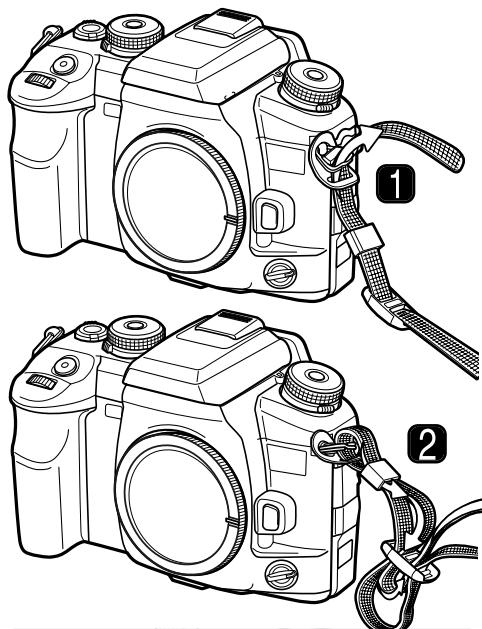
ATTACHING THE CAMERA STRAP
natural_image
Line drawing of a two-stage DSLR camera with attached strap and adjustment knobs (no text or symbols)Always keep the camera strap around your neck in the event that you drop the camera.
Pass the tip of the strap through the camera's strap eyelet from below (1). Attach the strap so the tip comes between the strap and the camera. The side of the strap with the remote-cord clip (p. 45) should be attached to the side of the camera with the remote-control terminal
Thread the tip of the strap through the holder ring and the inside of the buckle and pull to tighten (2). Leave some slack in the camera strap so the tip may be threaded through the buckle easily.
natural_image
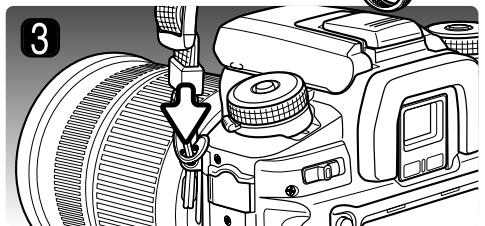
Close-up of a camera module with a tool inserted, showing lens and adjustment mechanism (no text or symbols)Push the holder ring toward the strap eyelet to secure the strap to the camera (3). Repeat with the other end of the camera strap.
ATTACHING A LENS
This camera uses interchangeable lenses. See page 117 for compatible lenses. Never touch the inside of the camera, especially the lens contacts and mirror. Take care not to let dust enter the body.
Remove the body cap from the camera and the rear cap from the lens.
Align the red mounting index on the lens and camera body. Carefully insert the lens into the mount, then turn it clockwise until it clicks into the locked position. Do not insert the lens at an angle. If it does not fit, check its orientation with the index marks. Never force the lens.
Camera Notes
Each time the camera is turned on, it automatically focuses the lens to the infinity position, even in manual focus. This operation is necessary to ensure proper exposures.
REMOVING A LENS
Press the lens release all the way in and turn the lens counter-clockwise until it stops. Carefully remove the lens.

Replace the caps on the lens and attach the body cap or another lens to the camera as soon as possible. Do not leave the interior of the camera exposed to dust or dirt. Check the body cap is clean and free from dust before mounting.

natural_image
Line drawing of a DSLR camera with no text or symbols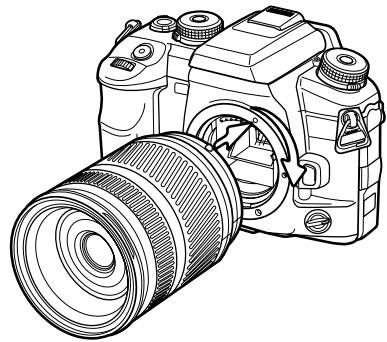
natural_image
Line drawing of a DSLR camera with lens and adjustment knobs (no text or symbols)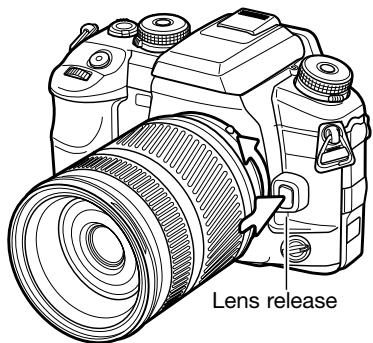
DIOPTER ADJUSTMENT
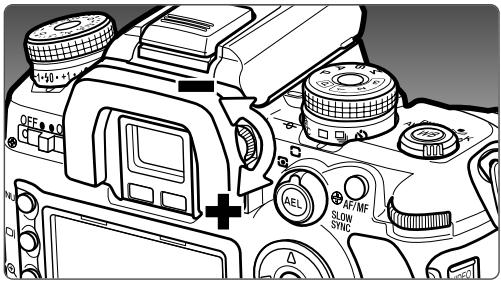
The EVF has a built-in diopter that can be adjusted between -3.0 to +1.0. While looking through the EVF, turn the diopter-adjustment dial until the viewfinder focus frame is sharp.
INSTALLING THE MONITOR PROTECTION PANEL
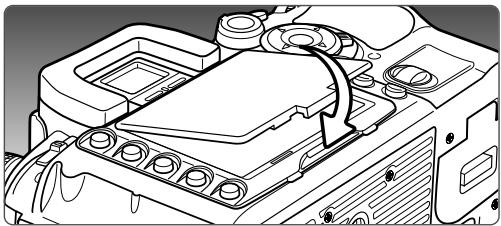
Install the monitor protection panel by placing the top of the panel at the top of the monitor frame on the camera and lower panel until it clicks into place at the bottom.
natural_image
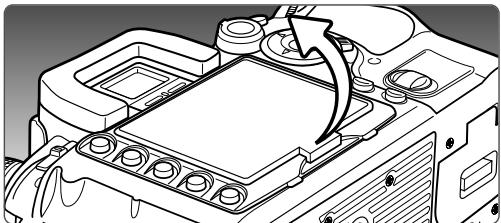
Technical line drawing of a mechanical assembly with no visible text or symbolsTo remove the panel, lift from the bottom.
natural_image
Technical line drawing of a mechanical component with an arrow indicating rotation or assembly (no text or symbols present)CHARGING THE BATTERY
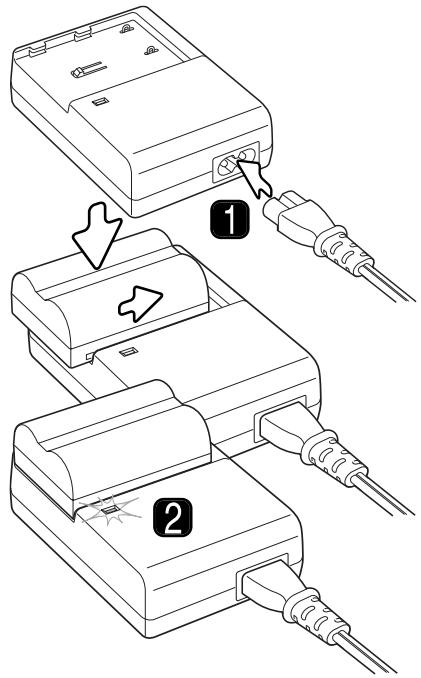
Before the camera can be used, the lithium-ion battery must be charged. Before charging the battery, read the safety warnings on page 4 of this manual. Only recharge the battery with the supplied battery charger. The battery should be recharged before each shooting session. See page 142 for battery care and storage.
Plug the power cord into the back of the charger unit (1). Plug the other end of the cord into a live household outlet. The included AC cord is designed for the current of the sales region. Only use the cord in the region it was purchased. For more on the AC cable, see page 114.
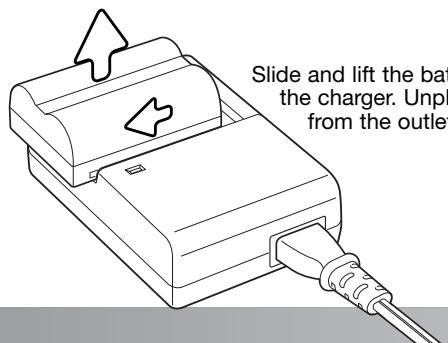
With the battery contacts toward the charger, align the channels on the bottom of the battery with the tabs on the charger unit. Slide the battery into the unit.
The indicator lamp (2) glows to show the battery is charging. The lamp goes out when the battery is charged. Charging time is approximately 150 minutes.
INSTALLING AND CHANGING THE BATTERY
This digital camera uses one NP-400 lithium-ion battery. Before using the battery, read the safety warnings on pages 4 of this manual. When replacing batteries, the camera should be off.
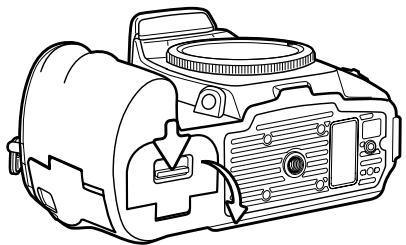
Open the battery-chamber door by sliding the battery-chamber release toward the back of the camera.
Insert the battery with the battery contacts first. Push the battery into the chamber until the battery latch clicks into place.
To remove a battery, slide the battery latch to the side of the battery chamber; the battery will spring out.
Close the battery-chamber door until it clicks shut.
natural_image
Line drawing of a DSLR camera with no visible text or symbols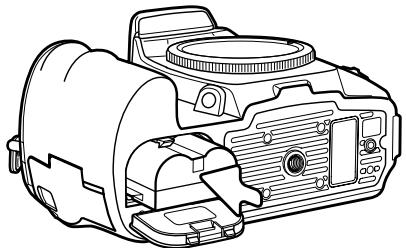
natural_image
Line drawing of a DSLR camera housing with internal components (no text or symbols)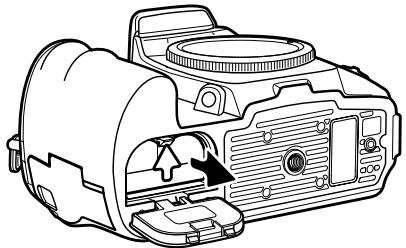
natural_image
Line drawing of a DSLR camera with internal components and a black arrow indicating a component (no text or symbols present)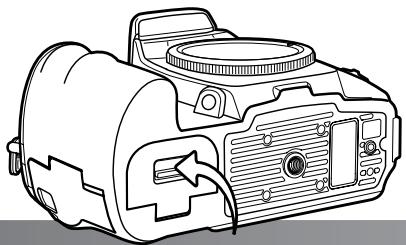
natural_image
Line drawing of a DSLR camera with no visible text or symbolsBATTERY CONDITION INDICATOR
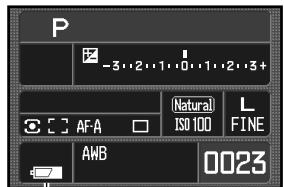
This camera is equipped with an automatic battery-condition indicator. When the camera is on, the indicator appears on the monitor. The indicator changes from white to red when battery power is low. If the monitor is blank, the battery may be exhausted.

Full-battery indicator - the battery is fully charged.
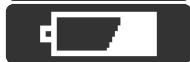
Low-battery indicator - battery power is low. Recharge the battery.

Low-battery warning - battery power is very low. Recharge the battery.
When power falls below the level of the low-battery warning, the battery exhausted message appears just before the camera shuts down. The camera will not function until the batteries are recharged.
AUTO POWER SAVE
To conserve battery power, the camera shuts down if an operation is not made within three minutes. To restore power, press the shutter-release button partway down. The length of the auto-power-save period can be changed in section 3 of the setup menu (p. 102).
The LCD monitor backlight turns off after five seconds. Press a camera button to restore the display. The length of this period can be changed in section 3 of the setup menu (p. 102).
System Accessories
This camera can be powered directly from a household electrical outlet with the optional AC Adapter AC-11. See page 114 on how to connect the adapter to the camera. Contact your local Konica Minolta dealer for more information.
INSERTING AND CHANGING A MEMORY CARD

Always turn off the camera and confirm the access lamp is not lit before inserting or removing a memory card, otherwise the card may be damaged, and data lost.
A memory card must be inserted for the camera to operate. If a card has not been inserted, “----” is displayed in the frame counter. Type I and II CompactFlash cards and Microdrives are compatible with this camera. For memory card care and handling, see page 142.
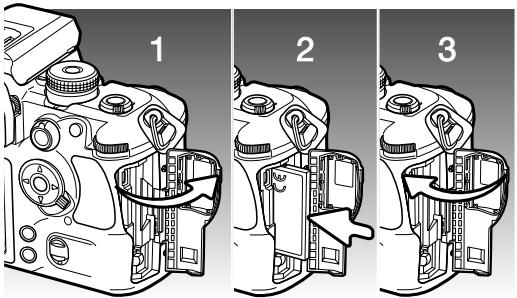
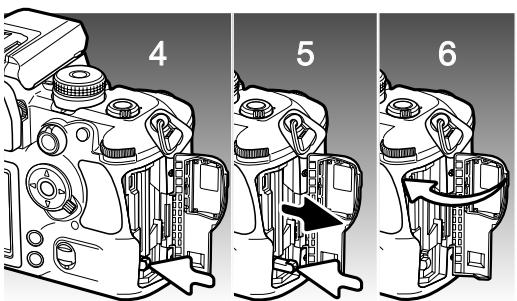
- Open the card-slot door in the direction indicated.
- Insert a memory card all the way into the card slot. Insert the card so the face is toward the front of the camera. Always push the card in straight. Never force the card. If the card does not fit, check that it is oriented correctly.
- Close the card-slot door.
- To eject a card, open the card-slot door, and press and release the card-eject lever to extend it.
- Press the card-eject lever to eject the card. The card can now be pulled out. Take care when removing the card as it becomes hot with use. The card-eject lever should remain inside the camera body. If it extends, push it into the camera.
- Insert a new memory card and close the card-slot door.
If the “Unable to use card, Format?” message appears, the card should be formatted with the camera. Use the right/left keys of the controller to highlight the yes button. Press the central button of the controller to format the card; this can take several minutes depending on the card. When a card is formatted, all the data on the card is permanently erased. Selecting “No” cancels the formatting operation; remove the card from the camera. A memory card used in another camera may have to be formatted before being used.
If the card-error message appears, press the central button of the controller to close the window; check the Konica Minolta web site for the latest compatibility information:
North America: http://www.konicaminolta.us/ Europe: http://www.konicaminoltasupport.com
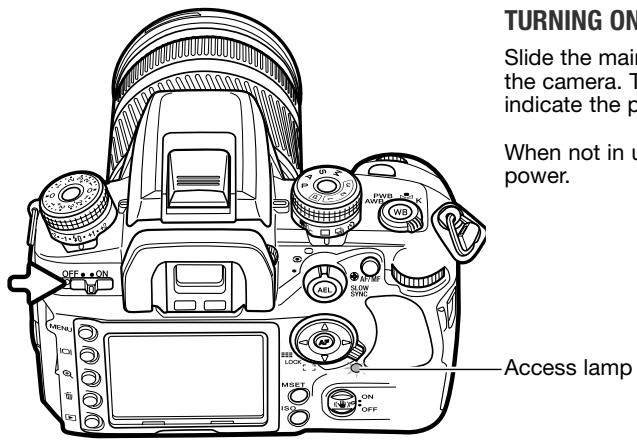
TURNING ON THE CAMERA
Slide the main switch to the on position to turn on the camera. The access lamp glows briefly to indicate the power is on.
When not in use, turn the camera off to conserve power.
SETTING THE DATE AND TIME
After initially inserting a memory card and battery, a message opens requesting that camera's clock and calendar be set. Images are recorded with the date and time of capture. Depending on the region, the menu language may also have to be set. To change the language, see the setup menu section on pages 102 and 107.
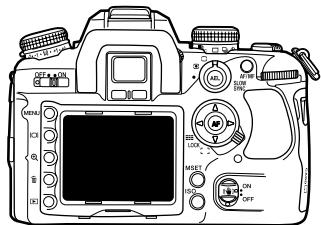
Turn on the camera.
Navigating the screen is simple. The up/down and left/right keys of the controller move the cursor and change settings. The central button of the controller sets adjustments.
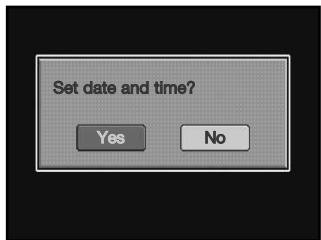
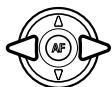
Use the left and right controller keys to select "Yes." "No" cancels the operation.

Press the central button of the controller to continue.
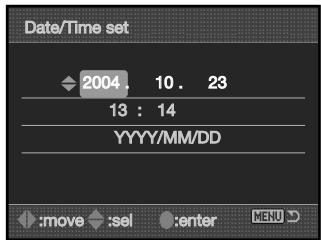
Date/Time setup screen
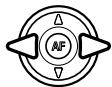
Use the left and right keys to select the item to be changed. The last item is the date format.

Use the up and down keys to adjust the item. The date format can be set among year/month/day. day/month/year, and month/day/year.

Press the central button to set the clock and calendar.
BASIC RECORDING
SETTING THE CAMERA TO RECORD IMAGES AUTOMATICALLY
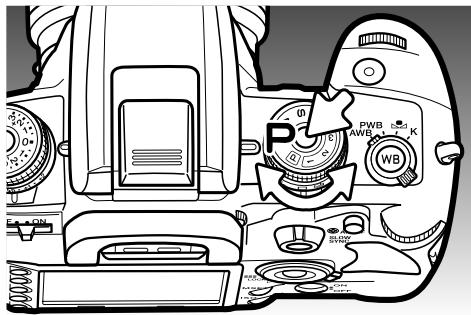
While pressing the Dial Lock Release, turn the exposure dial to the program (P) position. The camera controls the exposure system.
Full-auto program (circled P) acts like the program mode, except that the many of the recording functions are reset each time it is selected, see page 40 for more information.
HANDLING THE CAMERA
Grip the camera firmly with your right hand while supporting the body with the palm of your left hand. Keep your elbows at your side and your feet shoulder-width apart to hold the camera steadily. The use of a tripod or monopod is recommended when using the camera in low-light situations or when using telephoto lenses.
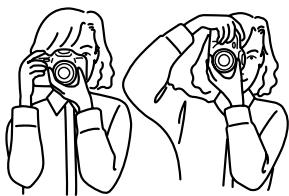
natural_image
Line drawing of two people holding cameras, no text or symbols presentBASIC RECORDING DISPLAY
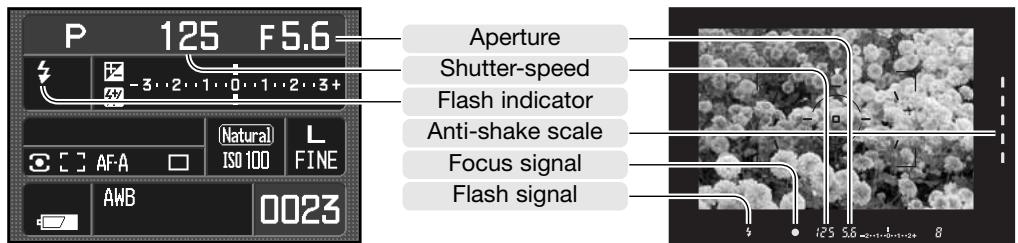
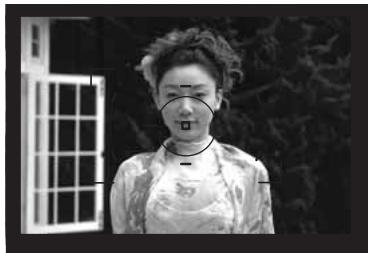
The viewfinder and monitor show the same indicators used in the basic recording operations.
natural_image
Black-and-white photo of a person wearing traditional attire, standing in front of a window (no visible text or symbols)BASIC RECORDING OPERATION
Place the subject within the focus frame. The subject must be within the focus range of the lens. If using a zoom lens, change the focal length to frame the subject.
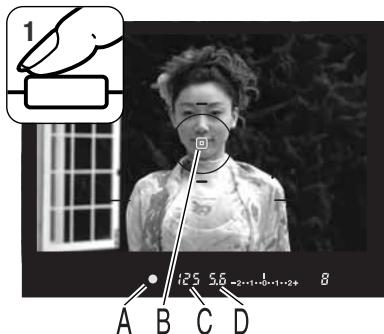
Press the shutter release button partway down to activate the autofocus and autoexposure systems (1). The viewfinder focus signal (A) confirms focus and the spot or local AF area (B) is illuminated briefly to indicate the point of focus. If the focus signal blinks, repeat the procedure.
The shutter speed (C) and aperture (D) used for the exposure are displayed in the viewfinder and on the monitor.
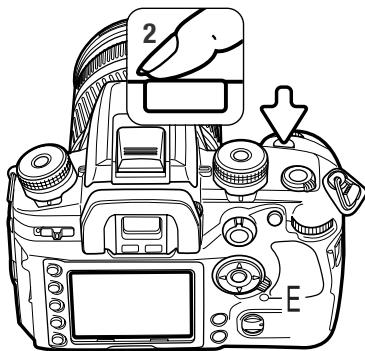
Press the shutter-release button all the way down (2) to take the picture. Press the shutter-release button gently so as not to the shake the camera during the exposure.
The recorded image is displayed while the image is being saved. Press the shutter-release button partway down to cancel the playback. For more on instant playback see page 77.
The access lamp (E) glows indicating the image data is being written to the memory card. Never remove a card while data is being transferred.
FOCUS SIGNALS
The viewfinder focus signal indicates the status of the autofocus system. Focusing time can be longer with macro or telephoto lenses, or in low light conditions.


Focus locked.

Focus is confirmed (Continuous AF - p. 52).

Indicator blinks - cannot focus. The shutter is locked.

Focusing (Continuous AF). The shutter is locked.
When the camera cannot focus, the subject may be too close or a special focusing situation may be preventing the system from focusing. Use focus lock with an object at the same distance as the main subject, focus the camera manually (p. 52), or raise the flash to use the AF illuminator (p. 97).
Autofocus priority and shutter-release priority can be specified in section 1 of the custom menu (p.94).
SPECIAL FOCUSING SITUATIONS
The camera may not be able to focus in certain situations. Use focus lock or manual focus.

natural_image
Four-panel cartoon illustration showing urban scenes: city skyline, landscape with trees, building, and cityscape (no text or symbols)The subject is composed of repeating vertical lines.
The subject in the focus frame is low in contrast.
Two subjects at different distances overlap in the focus frame.
The subject is near a very bright object or area.
FOCUS LOCK
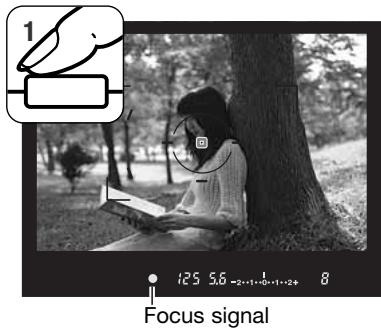
The focus-lock function is used when the subject is off-center and outside the focus frame. Focus lock may also be used when a special focusing situation prevents the camera from focusing on the subject.
Place the subject within the focus frame. Press and hold the shutter-release button partway down. The focus signals indicates that the focus is locked.
When the focus is set, an AF area is illuminated briefly to indicate the point of focus.
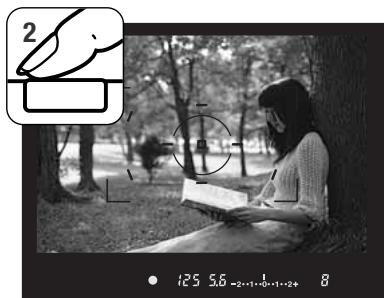
Without lifting your finger from the shutter-release button, recompose the subject within the viewfinder. Press the shutter-release button all the way down to take the picture.
CAMERA-SHAKE WARNING
If the shutter speed falls below the point where the camera can be hand held safely, the camera-shake warning indicator appears in the viewfinder. Camera shake is slight blurring caused by subtle hand motion and is more pronounced with telephoto lenses than wide angle. Although the warning appears, the shutter can still be released. If the warning appears, place the camera on a tripod or use the built-in flash.

15 2.8 -2…1…0…1…2+
Camera-shake warning
USING THE BUILT-IN FLASH
The built-in flash is designed to be used with lenses with focal lengths from 24mm or longer. When using lenses shorter than 24mm, the corners of the image are not be fully illuminated. The lens hood and certain lenses can cause shadowing, see page 115. The shutter will not release while the flash is charging.
natural_image
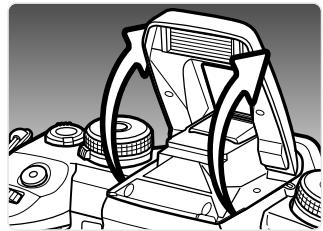
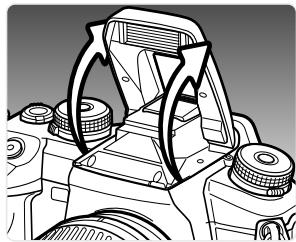
Technical line drawing of a mechanical device with no visible text or symbolsTo use the flash, simply pull up the unit by the tabs on each side. The flash position must be set manually, and once up, the flash unit always fire regardless of the amount of ambient light. The flash mode is changed with the recording menu (p. 71).
Push down the built-in flash when the camera is not in use. The flash is also used as an AF illuminator, see page 97.
The viewfinder flash signal indicates the status of the flash.


Signal steady - flash charged and ready to fire.

Signal blinking - flash output was sufficient for exposure.
If the flash signal does not blink after taking the picture, the subject was not within the flash range. The flash range depends on the aperture used for the exposure. The follow chart shows the range when camera sensitivity is set to ISO 100. See page 51 for the flash range with other camera sensitivity settings.
| Aperture | Flash range (ISO 100) |
| f/2.8 | 1.0m ~ 4.3m (3.3 ft. ~ 14.1 ft.) |
| f/3.5 | 1.0m ~ 3.4m (3.3 ft. ~ 11.1 ft.) |
| f/4.0 | 1.0m ~ 3.0m (3.3 ft. ~ 9.8 ft.) |
| f/5.6 | 1.0m ~ 2.1m (3.3 ft. ~ 6.9 ft.) |
Anti-shake switch Anti-shake scale
ANTI-SHAKE SYSTEM
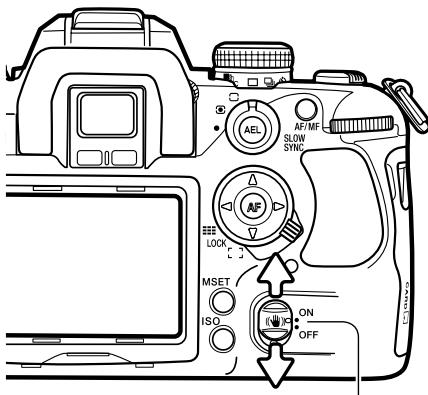
The Anti-Shake system minimizes the affect of camera shake, a slight blurring caused by subtle hand motion. Camera shake is more pronounced at long focal lengths than short ones. Anti-Shake is less effective with moving subjects or when the camera is panned, shutter speeds of 1/4 second or longer, and short object distances. Anti-shake is disabled with bulb exposures (p. 45).
When the system is active, the Anti-Shake scale in the viewfinder glows; the scale can be turned off in section 3 of the custom menu (p. 98). Anti-Shake can be turned off and on with the Anti-shake switch.
Frame the subject as described in the basic operation section. Press the shutter-release button partway down to focus and set the exposure.
natural_image
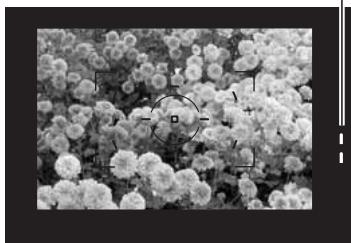
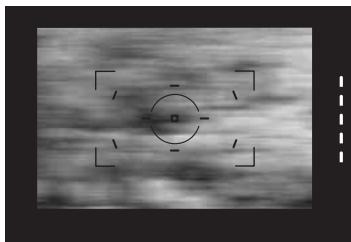
Microscopic view of a dense cluster of spherical particles with no visible text or symbolsThe Anti-Shake scale indicates the degree of stabilization. The more LEDs displayed, the more unstable the image. Confirm the image has stabilized with the scale and press the shutter-release button all the way down to take the picture.
Anti-shake cannot be used with some lenses, see page 117. Turn Anti-Shake off when the camera is mounted on a tripod. The metered exposure may change when turning this function on and off.
natural_image
Grayscale medical scan image with a central circular target and four corner markers (no text or symbols)DISPLAY BUTTON
Press the display button to switch the monitor display among full, basic, and off. For more on the full display, see page 16.
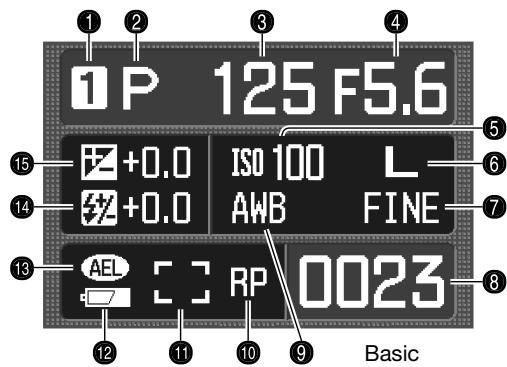
- Memory register (p. 63)
- Exposure mode (p. 39)
- Shutter speed display
- Aperture display
- Camera-sensitivity display (p. 51)
- Image-size display (p. 66)
- Image-quality display (p. 66)
- Frame counter (p. 67)
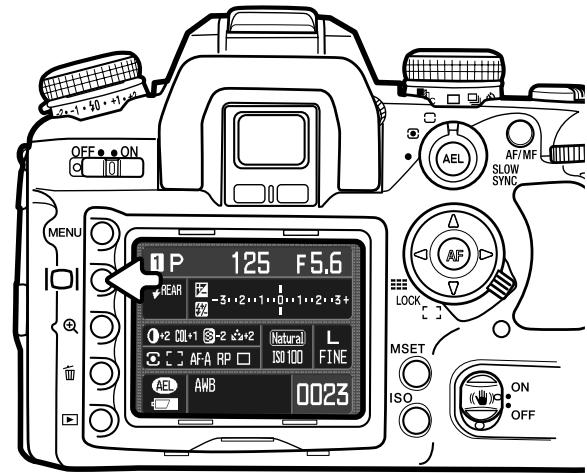
- White-balance display (p. 60)
- Release priority indicator (p. 94)
- AF area display (p. 55)
- Battery condition indicator (p. 23)
- AE lock indicator (p. 46)
- Flash-compensation display (p. 48)
- Exposure-compensation display (p. 48)
The full display uses a scale to show the degree of flash and exposure compensation as well as the metered exposure value in manual exposure. The basic display uses a numerical value.
Turning off the display conserves battery power.
BASIC PLAYBACK
Images can be viewed in the playback mode. This section covers the basic playback functions. The playback mode has additional menu functions, see page 82.
![VIEWING IMAGES Press the playback button to activate the playback mode. The left/right keys of the controller and both cont dials can be used to scr through the images. Time of recording 13:24 100-0135 Folder - file number (p. 126) Date of recording 2004.11.28 [0024/00930] Frame number / total number of images](/content/2025/01/165690/images/f51b8c38c579576773a3796aff19fc729b18de6079167ffb3d7d5a2734a33f41.jpg)
To return to the recording mode, press the playback button or the shutter-release button.
![L:3008x2000 FINE 13:24 100-0135 2004.11.26 [0024/0093]](/content/2025/01/165690/images/64e446f62831608563365ae768e21943f18e42d2062e7e957554ff80484dfbb8.jpg)
ROTATING IMAGES
Press the down key of the controller to rotate a displayed image 90^ left, 90^ right, or horizontally.
HISTOGRAM DISPLAY
![L:3008x2000 FINE 1/500 ±0.0 F3.5 ±0.0 P AWB ISO AUTO 100KM023-0135 [0024/0093] 2004.11.28](/content/2025/01/165690/images/d470384603514a0191c80e5d1ce4e6ea76051a5db963f4c6e95ed86bbd4200c4.jpg)

To view the histogram of the displayed image, press the up key. Press the down key to return to single-frame playback.
The dark area of the histogram shows the luminance distribution of the recorded image from black (left) to white (right). Each one of the 256 vertical lines indicates the relative proportion of that light value in the image. The histogram can be used to evaluate exposure and contrast, but displays no color information.
- Shutter speed
- Aperture
- Exposure mode (p. 39)
- Metering mode (p. 50)
- Date of recording
- Image size (p. 66)
- Image quality (p. 66)
- Exposure compensation (p. 48)
- Flash compensation (p. 48)
- White-balance mode (p. 60)
- Camera sensitivity (ISO) (p. 51)
- Folder name - file number (p. 126)
- Frame number / total number of images
Areas of the image approaching the shadow and highlight luminance limit are indicated in the image thumbnail. The portions of image whose levels are close to 0 and 255 flash.
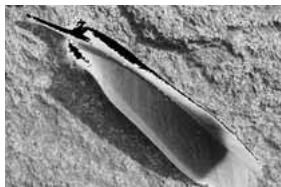
natural_image
Close-up of a dark, elongated object partially embedded in a textured surface (no visible text or symbols)Luminance limit display
DELETING SINGLE IMAGES

The displayed image can be deleted. Once deleted, an image cannot be recovered.

To delete a displayed image, press the delete button; a confirmation screen opens.
Use the left/right keys to highlight "Yes." "No" cancels the operation.
Press the controller to execute the command on the confirmation screen. The camera returns to playback mode.
![OFF • ON C 101 MENU IOI LOAD:3008x2000 FINE ⚠️ Delete this frame? Yes No 100-0135 2004.11.29 [0024/0065] MSET ISO](/content/2025/01/165690/images/ef04acac8915a2c67bda17ba1782aeb50a92571a3e75e02794646f523e1d2237.jpg)
Camera Notes
The camera can play back images on a television set. See page 105 on how to connect the camera to a TV with the supplied video cable.
CHANGING THE PLAYBACK DISPLAY
The display button controls the display format. Each time the button is pressed, the display cycles through to the next format: full display, image only, index playback. The index display can be changed in section 1 of the playback menu.
![L3:008x2000 FINE 13:24 100-0135 2004.11.28 [0024/0093]](/content/2025/01/165690/images/c85611fb496b5a3be17c79c75b95e198756b1935269355bfe7fb8326195b4573.jpg)
Full display
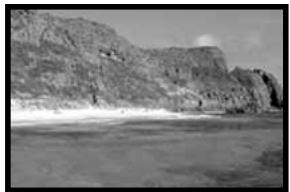
natural_image
Black-and-white landscape photo of a rocky cliffside with a sandy beach and clear sky (no text or symbols visible)Image only
Index playback
![OFF • ON AEL MENU 2004.11.28 [0024/0093] LOCK MSET ISO](/content/2025/01/165690/images/f4a88f584d27f7b2a2d7b6bd0416635bc89dd90faf79db2fa0f178b2d2c22da1.jpg)
In index playback, the four-way keys of the controller move the yellow border to the adjacent image. When the image is highlighted with the border, the date of recording, the lock and printing status, and the frame number of the image are displayed at the bottom of the screen. The highlighted image can be deleted using the delete button (p. 36).
When the display button is pressed again, the highlighted image is displayed in the single-frame playback mode. A four, nine, and sixteen image index can be displayed as well as a file browser. The index-playback format can be changed in section 1 of the playback menu (p. 82, 87).
ENLARGED PLAYBACK
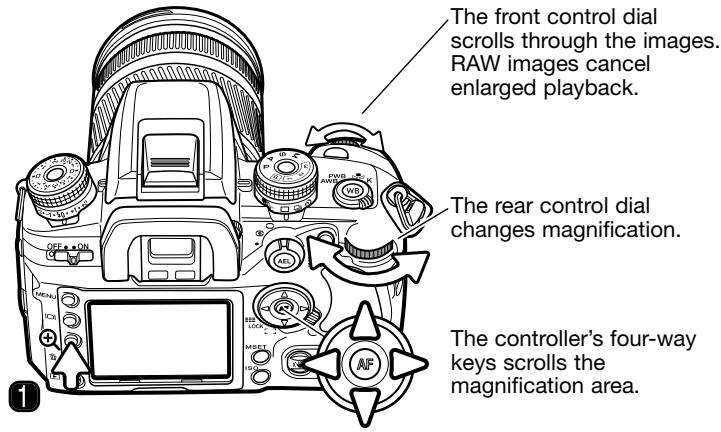
An image can be enlarged for closer examination. The maximum magnification depends on image size from 2.4X for small images to 4.7X for large images. RAW images cannot be enlarged.
Press the magnification button (1) to activate enlarged playback.
natural_image
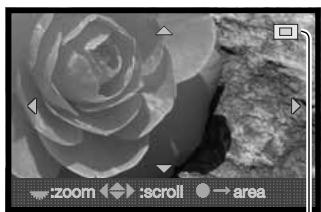
Black and white photo of a rose with blurred background (no text or symbols)The controller's four-way keys scrolls the magnified area. The locator (2) indicates the portion of the image displayed. The rear control dial changes the magnification.
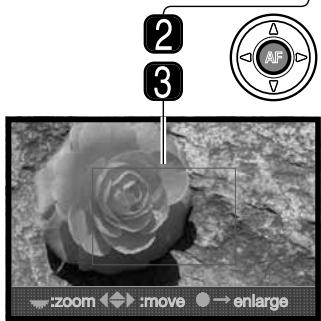
Press the central button of the controller to display the entire image area. Pressing the button a second time displays the magnified image.
The magnification area (3) shows the portion of the image enlarged. The controller's four-way keys scrolls the magnification area. The rear control dial changes the size of the area.
ADVANCED RECORDING
This section contains detailed information on the camera's recording functions and operation. Read the sections pertaining to your interest and need.
The monitor displays the active exposure mode.
EXPOSURE-MODE DIAL
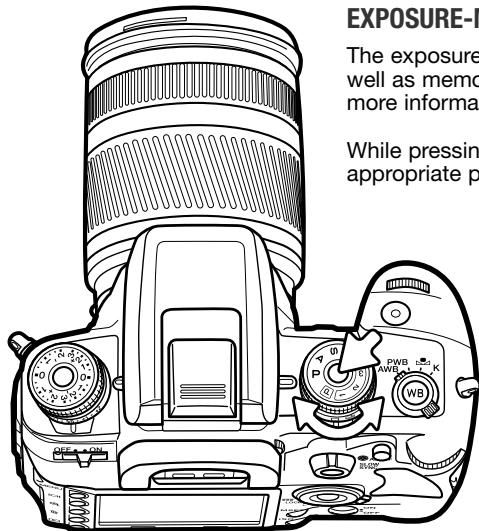
The exposure-mode dial is used to select the exposure modes as well as memorized camera settings. See the following sections for more information on the exposure modes.
While pressing the Dial Lock Release, turn the exposure dial to the appropriate position.
M Manual exposure (p. 44)
S Shutter priority (p. 43)
A Aperture priority (p. 42)
P Program exposure (p. 40)
P Full-auto program (p. 40)
1 Memory register 1 (p. 63)
2 Memory register 2 (p. 63)
3 Memory register 3 (p. 63)
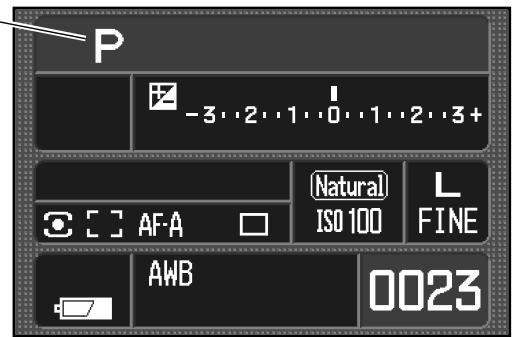
PROGRAM - P
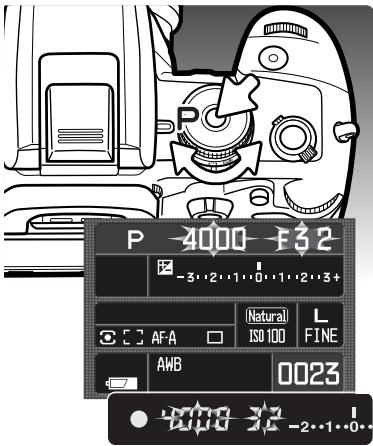
Program exposure is set with the exposure-mode dial (p. 39). Like full-auto program, program controls both the shutter speed and aperture required for each exposure. The operation is the same as described in the basic recording operation section on page 28. However, unlike full-auto program, functions set in this mode do not reset when the position of the exposure-mode dial is changed.
If the required exposure is beyond the shutter speed and aperture range, the shutter speed and aperture displays blink on the monitor and in the viewfinder.
In bright conditions, use a neutral density filter on the lens, set a lower camera sensitivity (ISO), or, if using artificial lights, reduce the intensity of the illumination. In dark conditions, use the built-in flash or increase the camera sensitivity (ISO).
FULL-AUTO PROGRAM
natural_image
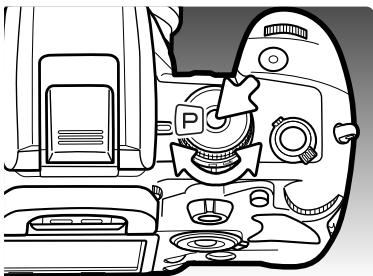
Interior view of a camera module showing the camera and dashboard (no text or symbols visible)Full-auto program is set with the exposure-mode dial. Use this exposure mode when wanting fully automatic operation.
Full-auto program operates the same way as the program exposure mode, except that when the exposure mode dial is turned to the full-auto program position, the dial and menu functions are reset to their default settings. Dial settings may not be actual; confirm camera settings with the monitor. Turning the camera off does not reset the camera.
Functions are reset to: fill-flash or red-eye reduction flash mode, 14-segment honeycomb-pattern metering, Auto AF focus mode, wide AF area, single-frame advance drive mode, flash and exposure compensation reset, ADI flash control, auto white balance, auto camera sensitivity (ISO), large-size images, fine image quality, Natural color mode, Digital Effects reset, 0.3Ev / 3 frame bracket setup, noise reduction.
PROGRAM SHIFT - Ps/PA
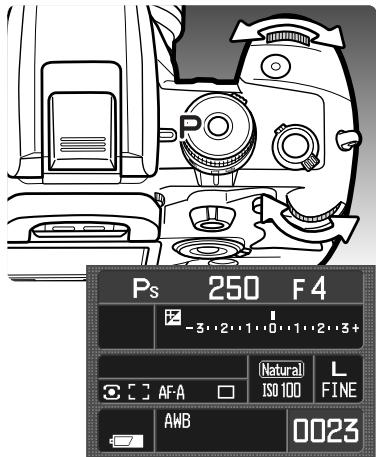
Program-shift function allows adjustment to the shutter-speed/aperture combination determined by the camera in both the program and full-auto program exposure modes. The built-in flash cannot be used with program shift. If the flash is raised, any changes made with program shift are canceled.
Press the shutter-release button partway down until the shutter speed and aperture are displayed.
Turn either the front or rear control dial to shift the shutter speed and aperture combination; each combination gives the equivalent exposure. The values are shifted depending on the position of the exposure-compensation dial, see camera notes below. The front dial changes the shutter speed (Ps) and the rear dial changes the aperture (PA). If the lighting changes, the shifted value remains fixed and the other changes for the exposure.
Camera Notes
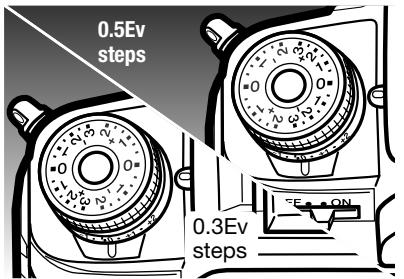
When adjusting the exposure in any of the exposure modes, the position of the exposure-compensation dial specifies the increment between 0.5Ev and 0.3Ev. For more on Ev see page 81.
When changing the position of the exposure-compensation dial, confirm it is set to the zero (0) position or it will affect the exposures. See page 48 for more on the exposure-compensation dial.
APERTURE PRIORITY - A
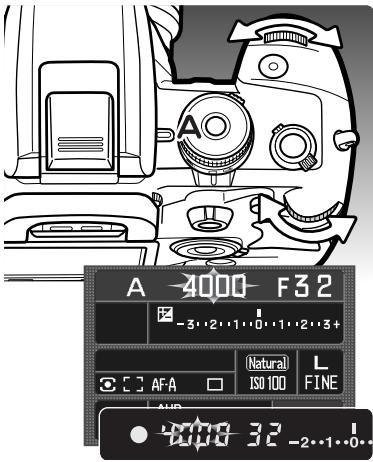
Aperture priority is set with the exposure-mode dial (p. 39). The photographer selects the aperture and the camera sets the appropriate shutter speed to ensure correct exposure.
Turn either control dial to adjust the aperture. The aperture value changes depending on the position of the exposure-compensation dial, see camera notes on page 41. The aperture range depends on the lens. The aperture value can be seen on the monitor and in the viewfinder.
Pressing the shutter-release button partway down displays the corresponding shutter speed. With the camera sensitivity (ISO) set to auto, the shutter speed may not change when the aperture is adjusted because the shutter speeds can change in fine steps. Press the shutter-release button all the way down to take the picture.
If the required exposure is beyond the shutter speed range, the shutter-speed display blinks. Adjust the aperture until the display is steady.
natural_image
Technical line drawing of a camera with lens and frame (no text or symbols)When using flash, the shutter speed cannot exceed the flash-sync speed. If the shutter-speed display blinks, adjust the aperture until the display is steady. Flash range is dependent on the aperture, see page 51.
Flash Sync. Speed
There is a limit to the maximum shutter speed when using the built-in flash. When Anti-Shake is on, the maximum shutter speed that can be used is 1/125s. With Anti-Shake off, the flash sync. speed is 1/160s. While a faster shutter speed cannot be used, there is no limit to the use of slower shutter speeds.
SHUTTER PRIORITY - S
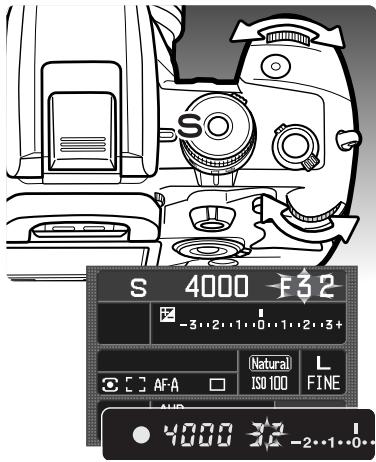
Shutter priority is set with the exposure-mode dial (p. 39). The photographer selects the shutter speed and the camera sets the appropriate aperture to ensure correct exposure.
Turn either control dial to adjust the shutter speed between 30 and 1/4000 second. The shutter speed changes depending on the position of the exposure-compensation dial, see camera notes on page 41. The shutter speed can be seen on the monitor and in the viewfinder.
Pressing the shutter-release button partway down displays the corresponding aperture. Press the shutter-release button all the way down to take the picture.
If the required exposure is beyond the aperture range, the aperture display blinks. Adjust the shutter speed until the display is steady.
When using flash, the shutter speed cannot exceed the flash-sync speed, see page 42. Flash range is dependent on the aperture, see page 51.
About Shutter Speeds
The shutter speed used for each exposure is displayed on the monitor and in the viewfinder. The following notation is used:

The reciprocal is used for shutter speeds from 1/4000 second to 1/3 second. 125 is 1/125 second.

For shutter speeds of a half a second or longer, a quote mark is used to denote whole seconds. 1"5 is one and a half seconds and 15" is fifteen seconds.
MANUAL EXPOSURE - M
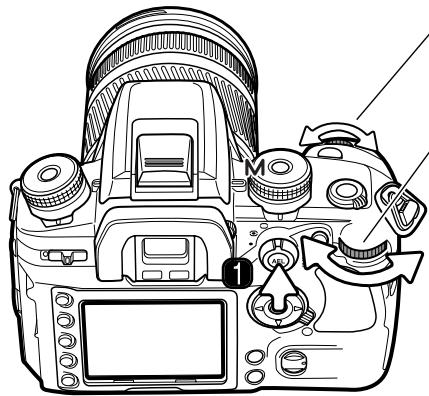
Manual exposure mode allows individual selection of shutter speeds and apertures. This mode overrides the exposure system giving the photographer total control over the final exposure. Bulb exposures can be made, see below. Manual exposure is set with the exposure-mode dial (p. 39).
natural_image
Line drawing of a DSLR camera with adjustment knobs and control buttons (no text or symbols)The front control dial changes the shutter speed.
The rear control dial changes the aperture.
Press and hold the AEL button (1) while turning the either control dial to shift the shutter speed and aperture without affecting the exposure.
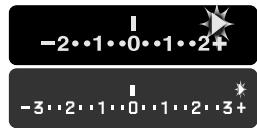
The Ev scale on the monitor and in the viewfinder indicates the difference between the set exposure and the exposure determined by the camera meter. Press the shutter-release button partway down to activate the meter. The increments on the scale depend on the exposure-compensation dial position. The examples below are based on a 0.5 Ev increment. For more on Ev, see page 81.
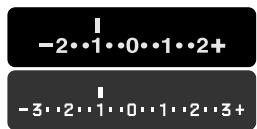
The set exposure is 1.0Ev less (−) than the exposure determined by the meter. The monitor scale is uses the manual metering (M.M.) indicator.
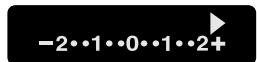
+2.5EV
The arrow indicates the set exposure is 0.5Ev more (+) or less (−) than the greatest value on the scale as determined by the meter.
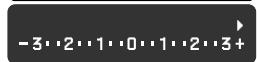
+3.5EV
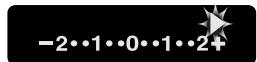
≥3.0EV
The blinking arrow indicates the set exposure is 1.0Ev or more greater (+) or less (−) than the greatest value on the scale as determined by the meter.
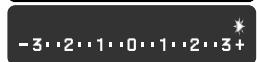
The shutter speed and aperture value change depending on the position of the exposure-compensation dial, see camera notes on page 41. The operation of the control dials in the manual exposure mode can be changed with the custom menu (p. 96). When using flash, the shutter speed cannot exceed the flash-sync speed, see page 42. Flash range is dependent on the aperture, see page 51.
Bulb exposures
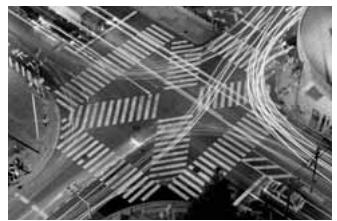
Bulb photographs can be taken in the manual-exposure mode (M). The use of a tripod, remote cord, and eyepiece cap (p. 59) is recommended. The camera's exposure system cannot be used to calculate bulb exposures. The use of a separate light meter is recommended. Anti-Shake is disabled.
natural_image
Aerial black-and-white photo of a complex highway interchange with multiple crosswalks and traffic lights (no visible text or symbols)Use the front control dial to decrease the shutter-speed until “BULB” is displayed.
Use the rear control dial to set the appropriate aperture required for the exposure.
To take the picture, press and hold the shutter-release button for the duration of the exposure. Releasing the shutter button ends the exposure.
The monitor is blank during the exposure and remains blank after the exposure for up to 30 seconds while noise-reduction processing is applied to the image.
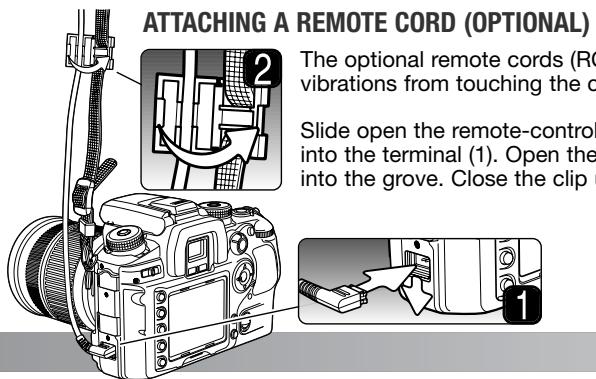
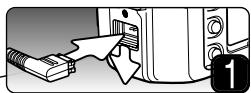
The optional remote cords (RC-1000S or RC-1000L) can be used to reduce vibrations from touching the camera during long exposures.
Slide open the remote-control terminal cover and insert the plug of the cord into the terminal (1). Open the remote-cord clip on the strap and push the cord into the grove. Close the clip until it clicks into place (2).
EXPOSURE LOCK - AEL BUTTON
The AE lock button locks the automatic exposure system without activating the AF system. This function allows the exposure to be set by a gray card or reference target outside the scene. When using flash in the P or A exposure modes, slow-shutter sync is active (p. 47). The operation of the AE lock button can be changed in section 1 of the custom menu (p. 95).
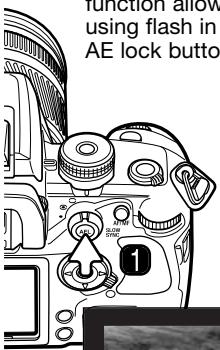
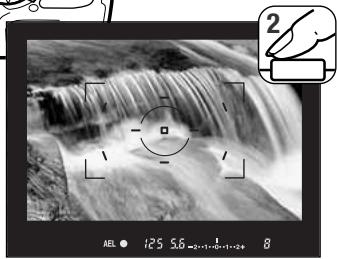
Frame the exposure target in the viewfinder depending on the metering mode in use (p. 50). Press and hold the AE lock button (1) to lock the exposure; the shutter speed and aperture are displayed and the AEL indicator is displayed in the viewfinder and on the monitor. Release the button to cancel the lock.
natural_image
Black-and-white photo of a waterfall with a magnified inset showing a hand holding a camera (no text or symbols on the image itself)While holding the AEL button, place the subject in the focus frame and press the shutter-release button partway down to focus (2). Press the shutter-release button down all the way to take the picture.
The exposure remains locked after the picture is taken if the AEL button is not released.
While the exposure is locked, the camera meter is still active. The viewfinder and monitor Ev scale shows the difference between the locked exposure and the current light level measured with the meter. Spot metering is used.

When the Ev scale indicates 0, the locked exposure shown in the shutter-speed and aperture displays is the same as the exposure determined by the spot-metering area.
The increments on the scale depend on the exposure-compensation dial position. See camera notes on page 41. The examples below are based on a 0.5 Ev increment.
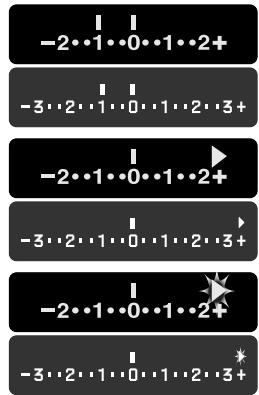
The metered area is 1.0Ev less (−) than the locked exposure.
+2.5EV
The arrow indicates the metered area is 0.5Ev more (+) or less (−) than the greatest value on the scale in comparison to the locked exposure.
+3.5EV
≥3.0EV
The blinking arrow indicates the metered area is 1.0Ev or more greater (+) or less (−) than the greatest value on the scale in comparison to the locked exposure.
ABOUT SLOW SYNC.
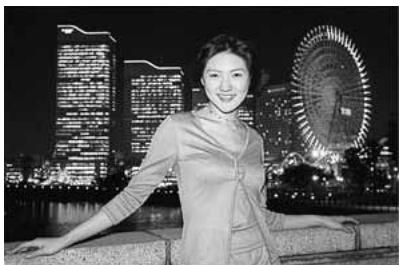
When using flash, pressing the AEL button activates the slow-sync. function in program, full-auto program, and aperture priority. Slow sync. balances the ambient light exposure with the flash exposure so the background is recorded with the subject.
When the AEL button is pressed and held, the ambient light exposure is determined and the flash exposure is based on the locked aperture setting. The use of a tripod is recommended with slow-sync. exposures.
natural_image
Black-and-white photo of a smiling woman posing at night with illuminated skyscrapers and a Ferris wheel in the background (no visible text or symbols)EXPOSURE AND FLASH COMPENSATION
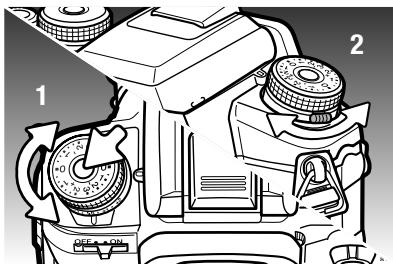
The ambient light and flash exposure can be adjusted before the image is captured to make the final picture lighter or darker.
To compensate the ambient exposure, press the Dial Lock Release and turn the exposure-compensation dial to the appropriate position (1). To adjust the flash exposure, turn the flash-compensation dial using the lever at the front of the camera (2).
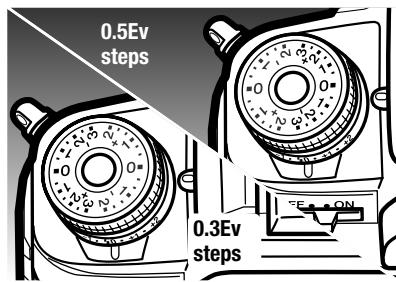
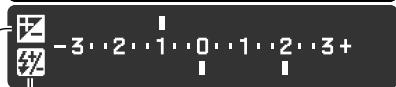
The exposure compensation dial has two scales. The orange scale adjusts the exposure up to ±2.0Ev in 0.3Ev steps. The silver scale allows the exposure to be adjusted up to ±3.0Ev in 0.5Ev steps.
The position of the dial also affects the exposure modes. See Camera Notes on page 41. When using 0.3Ev increments, the maximum and minimum lens apertures may not be displayed correctly.

When setting exposure or flash compensation, the change in Ev is shown on the monitor. Flash compensation is only displayed when the flash is raised. The viewfinder Ev scale only shows changes to exposure compensation; ±2.5E_v is shown with an arrow, ±3.0E_v is indicated with a blinking arrow. After the setting is made, the shutter-speed and aperture displays indicate the actual exposure.
Flash compensation - Exposure compensation

+2.5EV
+3.0EV
Camera Notes
Exposure compensation can be assigned to the control dials in section 2 of the custom menu (p. 96).
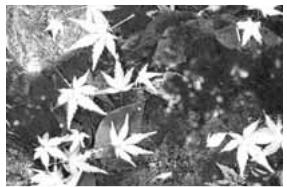
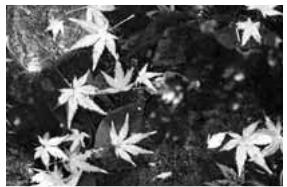
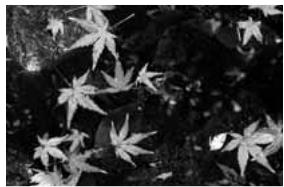
Sometimes the camera's exposure meter is deceived by high key or low key subjects. For example, a very bright scene, such as a snowy landscape or a white sandy beach, can appear too dark in the captured image. Before taking the picture, adjusting the exposure by +1 or +2 Ev results in an image with normal tonal values.
natural_image
Black and white photo of scattered maple leaves on a leafy background (no text or symbols)Calculated camera exposure
natural_image
Black and white photo of scattered maple leaves on a dark, textured surface (no text or symbols)-1.0Ev
natural_image
Black and white photo of scattered maple leaves on a dark background (no text or symbols)-2.0Ev
In the example above, the dark water caused the camera to overexpose the image making it bright and washed-out. By compensating the exposure, detail is brought out in the leaves, and the stones and water appear richer.
When using fill-flash to reduce harsh shadows caused by bright illumination or direct sunlight, flash compensation can change the ratio between the highlights and shadows. Fill flash affect the darkness of the shadows without affecting the area illuminated by the main light source. By decreasing the flash output with a negative Ev setting, the shadows receive less light and are darker, but subtle details in the shadows that would not appear without the flash are apparent. Increasing the flash output by using a positive Ev setting softens and nearly eliminate shadows.
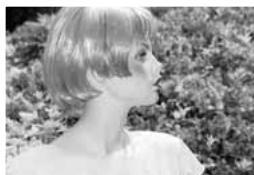
natural_image
Side profile of a person with short hair, wearing a white top, against a blurred floral background (no text or symbols visible)Positive compensation
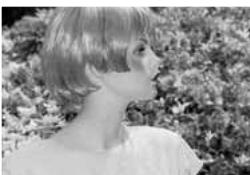
natural_image
Side profile of a person with short blonde hair wearing a white top, standing outdoors near foliage (no text or symbols visible)No compensation
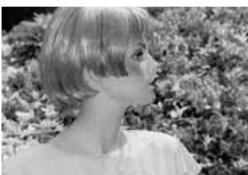
natural_image
Side profile of a person with short hair, wearing a white top, against a blurred floral background (no text or symbols visible)Negative compensation
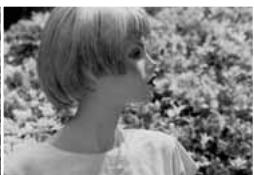
natural_image
Profile view of a person with short blonde hair wearing a white top, set against a blurred floral background (no text or symbols visible)No flash
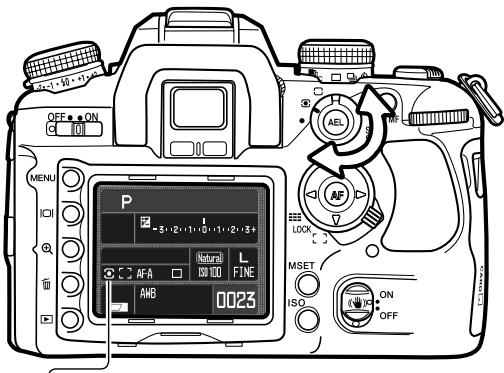
METERING MODES
The metering mode specifies the metering pattern.
Turn the metering-mode dial to the appropriate position to select the mode.

14-segment honeycomb-pattern metering - the camera's standard metering mode appropriate for most photographic situations. By combining information on the subject's distance and position from the autofocus system, this mode is less influenced by spot lighting or backlighting.

Center weighted - measures light values over the entire image area with emphasis given the central region.

Spot - uses a circular area within the image to calculate the exposure. Spot metering allows precise exposure measurements of a particular object without being influenced by extremely bright or dark areas within the scene.
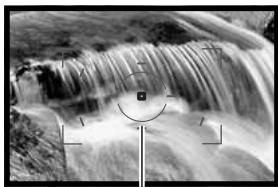
natural_image
Black and white photo of a waterfall cascading over rocks, with no visible text or symbolsSpot metering area
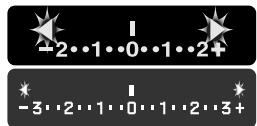
If the luminance levels of the scene are outside the metering range, the both arrows at each end of the Ev scale blink. In dark conditions, use the camera flash. Under bright light, use a neutral density filter on the lens to control the light levels.
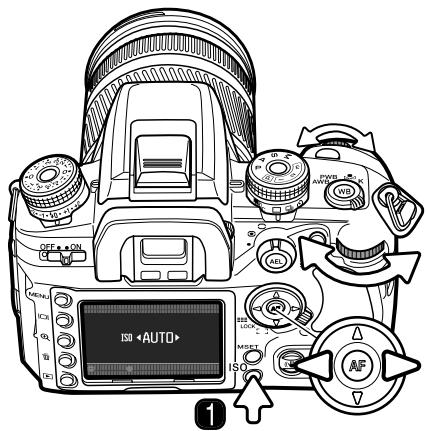
CAMERA SENSITIVITY - ISO
Seven settings can be selected for camera sensitivity: Auto, 100, 200, 400, 800, 1600, and 3200*. The numerical values are based on the film ISO equivalent: the higher the number, the more sensitive the film.
Press the ISO button (1) to open the setup screen.
The left/right keys of the controller and the control dials change the setting.
Press the central button of the controller or the shutter-release button to complete the operation.
The auto setting automatically adjusts the camera sensitivity to the light conditions between ISO 100 and 400. As the ISO value doubles, the camera sensitivity doubles; a change of one Ev. Like grain in silver-halide film that increases with speed, noise increases with sensitivity in digital imaging; an ISO setting of 100 has the least noise and 3200 has the most.
A change in ISO also affects the flash range. The flash range depends on the aperture used:
| ISO setting | f/2.8 | f/4.0 | f/5.6 |
| 100 | 1.0 ~ 4.3m / 3.3 ~ 14.1ft. | 1.0 ~ 3.0m / 3.3 ~ 9.8ft. | 1.0 ~ 2.1m / 3.3 ~ 6.7ft. |
| 200 | 1.0 ~ 6.0m / 3.3 ~ 20ft. | 1.0 ~ 4.3m / 3.3 ~ 14ft. | 1.0 ~ 3.0m / 3.3 ~ 9.8ft. |
| 400 / AUTO | 1.4 ~ 8.6m / 4.6 ~ 28ft. | 1.0 ~ 6.0m / 3.3 ~ 20ft. | 1.0 ~ 4.3m / 3.3 ~ 14ft. |
| 800 | 2.0 ~ 12m / 6.6 ~ 39ft. | 1.4 ~ 8.6m / 4.6 ~ 28ft. | 1.0 ~ 6.0m / 3.3 ~ 20ft. |
| 1600 | 2.8 ~ 17m / 9.2 ~ 56ft. | 2.0 ~ 12m / 6.6 ~ 39ft. | 1.4 ~ 8.6m / 4.6 ~ 28ft. |
| 3200* | 4.0 ~ 24m / 13 ~ 79ft. | 2.8 ~ 17m / 9.2 ~ 56ft. | 2.0 ~ 12m / 6.6 ~ 39ft. |
* Activated with the ISO-menu-setup option in section 4 of the custom menu (p. 100).
FOCUS-MODE DIAL
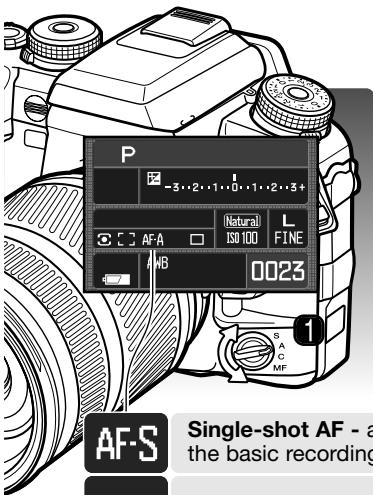
Single-shot AF (Autofocus), continuous AF, automatic AF, and manual focus is set with the focus-mode dial.
Turn the focus-mode dial (1) to the appropriate position to select the focus mode. The active focus mode is displayed on the monitor.
The AF system activates when the shutter-release button is pressed partway down. Focus is confirmed with the viewfinder focus signals, see page 29.
AF-S
Single-shot AF - a general purpose autofocusing mode. Its operation is described in the basic recording section. Focus lock is available (p. 30).
AF-A
Automatic AF - this AF mode automatically switches between single-shot AF and continuous AF depending on the subject's motion. This AF mode can be changed to Direct Manual Focus (DMF) in section 1 of the custom menu (p. 96).
AF-C
Continuous AF - used for photographing moving subjects. The camera continuously focuses on the subject even when the shutter-release button is pressed partway down. Spot and local AF areas illuminate as the subject moves through the wide focus frames to indicate the point of focus when the continuous AF is active. Focus lock is not available.
MF
Manual focus - the MF indicator is displayed in the viewfinder and on the monitor to indicate the focus mode. The focus signal appears when an object at the spot or local focus areas is in focus. All areas are active when using the wide-focus area and a specific area can be chosen with focus-area selection (p. 55).
MF
AF / MF BUTTON
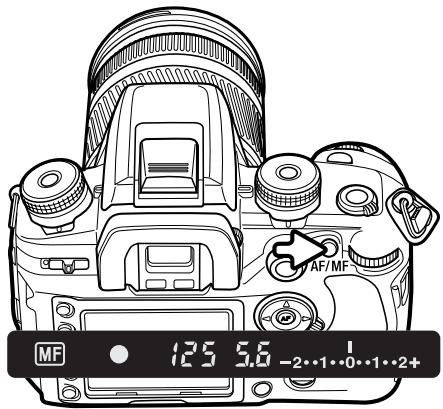
Press and hold the AM/MF button to switch between autofocus and manual focus. Release the button to return to the original focus mode. This cannot be used with xi and AF Power Zoom lenses, nor the STF 135mm f/2.8 [T/4.5] lens.
The focus mode used depends upon the position of the focus-mode dial. If set to manual focus, the focus mode switches to single-shot AF. If the focus-mode dial is set to one of the AF modes, manual focus is activated and the MF indicator is displayed in the viewfinder. The operation of the AM/MF button can be changed in section 1 of the custom menu (p. 94).
DEPTH-OF-FIELD PREVIEW
The aperture controls depth of field; the area in front of the camera that appears in focus. The smaller the aperture, the greater the depth of field. Depth-of-field preview sets the lens aperture to the setting used in the exposure so the affect of depth of field can be seen in the viewfinder.
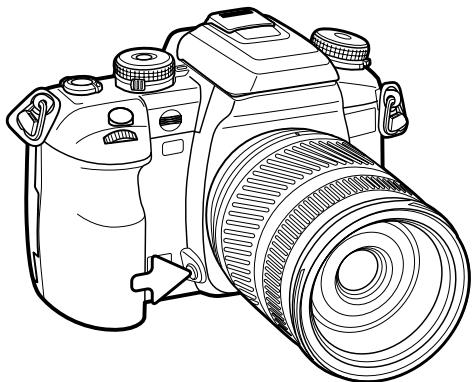
Press the shutter-release button partway down to lock the focus and exposure. Press the depth-of-field preview button to stop down the aperture.
natural_image
Line drawing of a DSLR camera with lens and adjustment knobs (no text or symbols)Camera Notes
Some Konica Minolta lenses are equipped with focus-hold buttons. Section 1 in the custom menu allows the focus-hold button to be used for depth-of-field preview (p. 94).
FOCUS-AREA SWITCH
The focus-area switch controls which AF areas are used. The switch has three positions:
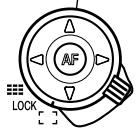
Wide focus area - to use the wide focus frames in the viewfinder to focus. See the basic operation section on page 28. Pressing and holding the four-way controller keys also activates and locks focus with the wide focus area. Spot AF can be used, see below. The AF illuminator is active (p. 97).
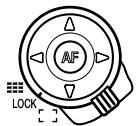
Focus-area lock - to fix the focus area used. The controller cannot be used to activate the AF system.
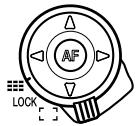
Focus-area selection - a specific AF area can be selected, see below. The AF illuminator is active (p. 97).
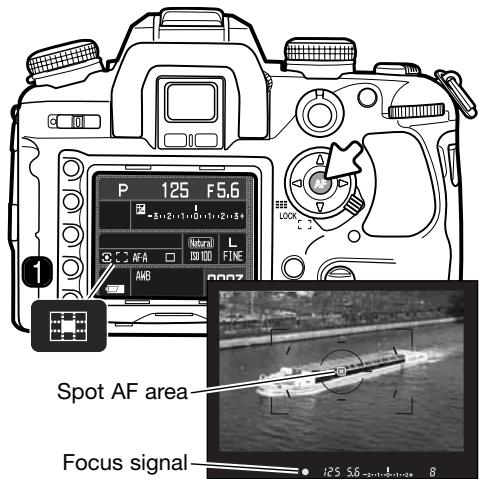
Spot AF
Spot AF can be used when using the wide focus area. With the spot AF area placed on the subject, press and hold the central button of the controller to focus. The viewfinder focus signal confirms focus and the spot AF indicator (1) is displayed on the monitor.
Compose the image in the viewfinder and press the shutter-release button all the way down to take the picture. Focus remains locked after the picture is taken until the central controller button is released.
Focus-area selection
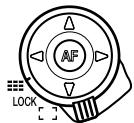
Slide the focus-area switch to the focus-area selection position.

Use the controller to select the AF area; the camera focuses each time an area is selected. The eight way keys select the local areas and the central button selects the spot AF area.
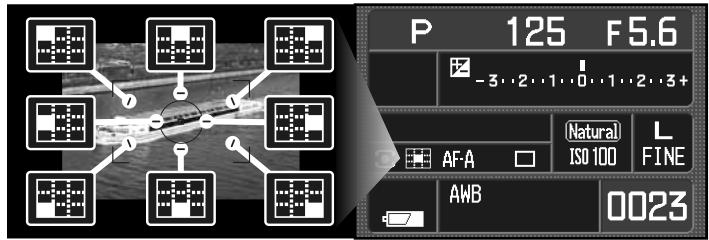
The active area is indicated on the monitor and is briefly illuminated in the viewfinder.
When the appropriate controller key pressed and held, focus is locked; the viewfinder focus signal confirms focus. Compose the image in the viewfinder and press the shutter-release button all the way down to take the picture. Focus remains locked after the picture is taken until the controller is released.
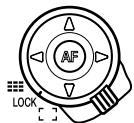
Sliding the focus-area switch to the lock position, fixes the selected area. Press the shutter-release button partway down to focus.
Camera Notes
Only the spot AF area can be used with the AF Reflex 500mm f/8 and AF Power Zoom 35-80mm f/4.0-5.6 lenses.
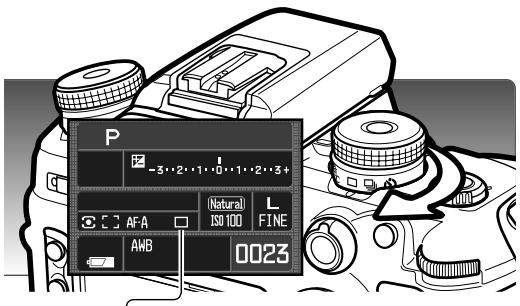
DRIVE MODES
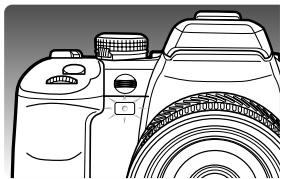
The drive modes control the rate and method images are captured. Indicators showing the selected drive mode appear on the monitor. The drive mode is set with the drive-mode dial. Simply turn the dial using the lever on the front to the appropriate position to select the mode.
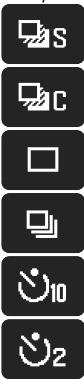
Single-frame advance bracketing - to take a series of images with differing exposure (p. 58). Each image of the series is captured one by one.
Continuous advance bracketing - to take a series of images with differing exposure (p.58). The series is advanced automatically.
Single-frame advance - to take a single image each time the shutter-release button is pressed (p. 28). Interval recording can be used (p. 78).
Continuous advance - to take a series of images when the shutter-release button is pressed and held (p. 57).
10 second self-timer - to delay the release of the shutter by 10 seconds. Used for self-portraits (p. 57).
2 second self-timer - to delay the release of the shutter by 2 seconds (p. 57).
FRAMES-REMAINING COUNTER
The frames-remaining counter indicate the approximate number of frames that can be stored in the camera buffer memory while recording. This number changes as images are captured and saved to the memory card.

Frames-remaining counter
CONTINUOUS-ADVANCE NOTES
Continuous-advance mode allows a series of images to be captured while holding down the shutter-release button. The maximum frame rate with continuous advance is 3 frames per second. The maximum number of frames that can be captured depend on the image size and quality settings. Approximately nine RAW and RAW & JPEG images can be captured, see the chart for other combinations. Numbers are approximate and depend the subject.
AF Zoom xi and Power Zoom lenses cannot be zoomed when taking pictures with continuous advance. The frame rate is affected by the flash as it must recharge between exposures. Focus and exposure are set between each frame with continuous AF and Auto AF.
| L | M | S | |
| Extra fine | 12 | 14 | 20 |
| Fine | 15 | 19 | 30 |
| Standard | 19 | 26 | 43 |
SELF-TIMER NOTES
With the camera on a tripod, compose the picture as described in the basic recording section (p.28). Press the shutter-release button partway down to lock the exposure and focus. Press the shutter-release button all the way down to begin the countdown. Because focus and exposure are determined when the shutter-release button is pressed, do not stand in front of the camera when taking a self-timer image. Always confirm the focus with the focus signals before beginning the countdown. Attach the eyepiece cap if a bright light source is behind the camera, see page 59.
With the ten-second self-timer, the self-timer lamp on the front of the camera and the audio signals indicate the countdown. The lamp glows steadily just before the shutter fires. To stop the
countdown, change the position of the drive-mode dial or flash (lift it or push it down), or turn the camera off. The audio signal can be turned off in section 1 of the setup menu (p. 102). The mirror raises just before the exposure.
With the two-second self-timer, no indication is given during the countdown. The mirror raises when the countdown starts.
natural_image
Line drawing of a camera with lens and top frame (no text or symbols)BRACKETING NOTES
Bracketing is a method of taking a series of images of a static subject in which each image has a slight variation in exposure. Exposure and flash brackets can be made.
Select continuous-advance bracketing or single-frame advance bracketing with the drive-mode dial (p. 56). Continuous-advance bracketing creates a successive series of images automatically when the shutter-release button is pressed and held. The shutter-release button must be pressed for each exposure when using single-frame advance bracketing.
The number of frames and the bracketing increment is displayed on the Ev scale on the monitor. This can be changed in section 2 of the recording mode menu (p. 64, 70). The bracketing order can also be set on the menu (p. 70).
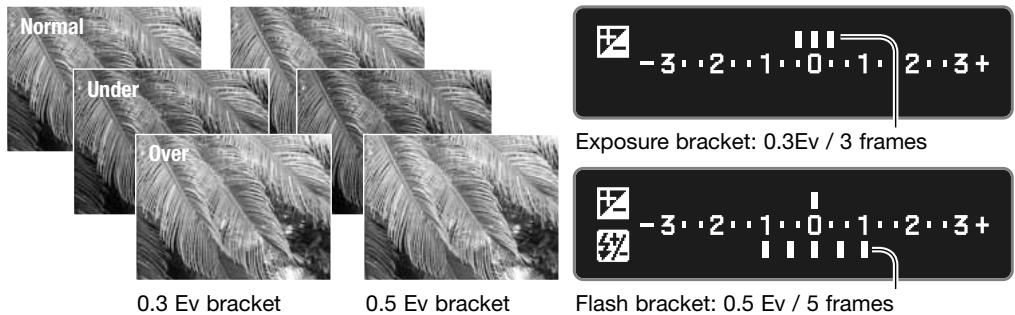
To make a flash bracket, raise the camera flash; the ambient exposure is not bracketed. The flash recharges between exposures. Exposure brackets are made when the flash is down.
Compose the picture as described in the basic recording section (p. 28). As the bracket is made, the index marks disappear from the Ev scale to show the remaining frames. When making a continuous-advance bracket, if the shutter button is release before the bracket is completed, the bracket resets. If using continuous AF or Auto AF with moving subjects (p. 52), the camera focuses between each exposure.
When exposure brackets are made in S exposure mode, the aperture controls the bracket. In A and M exposure modes, the shutter speed controls the bracket; in M mode, pressing the AEL button during the bracket changes the exposure control to the aperture. The camera uses both the aperture and shutter speed control the bracket in P and full-auto program mode.
ATTACHING THE EYEPIECE CAP
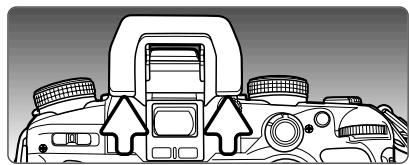
The supplied eyepiece cap prevents light from entering through the viewfinder and affecting the exposure meter or fogging the image when using the self-timer or during long exposures.
natural_image
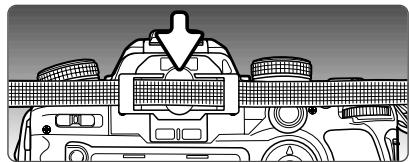
Diagram of a camera with labeled components and directional arrows indicating motion (no text or symbols present)Carefully slide the eyepiece cup from around the viewfinder frame by pushing on each side of the cup.
natural_image
Diagram of a vehicle's roof structure with a downward arrow indicating load or clearance (no text or symbols present)Slide the eyepiece cap over the viewfinder. The cap should be attached to the camera strap to prevent loss. Replace the eyepiece cup after the exposure.
OPTIONAL VIEWFINDER ACCESSORIES
The Angle Finder Vn and Magnifier Vn can be used with this camera. The Angle Finder makes using the camera at low angles easier. The Magnifier enlarges the center of the viewfinder image for critical focusing especially for macro photography.
Eyepiece Corrector 1000 series diopters can be used if the adjustable viewfinder diopter is not sufficient.
These accessories are mounted on the viewfinder frame as described above. For more information on these and other accessories, contact your Konica Minolta dealer.
![P -3..2..1..0..1..2..3+ 3 [ ] AFA □ Natural ISO 100 L FINE AWB 0023](/content/2025/01/165690/images/101a545e4c85c48502e988d2e6cf5d03db42369d953f4af65b7b7f85dc973729.jpg)
WHITE BALANCE
White balance is the camera's ability to make different types of lighting appear natural. The active white-balance mode is displayed in the white-balance panel on the monitor.
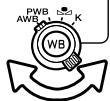
Turn the white-balance dial to the appropriate position.
AWB
Auto white balance - to automatically detect the type of light and adjust the white balance accordingly. When the built-in flash is used, the white balance is set for the color temperature of the flash. Simply set the white-balance dial to the AWB position.
PWB
Preset white balance - to set the white balance to a specific light source.

Custom white balance - to calibrate the camera to a specific lighting situation.

Color temperature - to set the white balance to a specific color temperature.
Preset White Balance
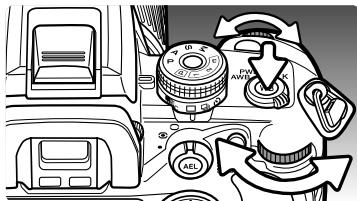
With the white balance dial in the PWB position, press the white-balance button to open the setting screen.
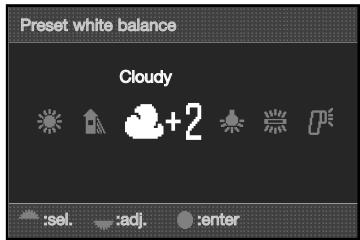
The front control dial and the left/right controller keys select the preset white-balance setting.
The rear control dial and the up/down controller keys adjust the white balance in seven levels: +3 to -3 (+4 to -2 for fluorescent). Except for fluorescent, the change of one unit is approximately equal to a 10 mired shift.
Press the central controller button to complete the operation. For information on light sources, see page 81.
Custom White Balance
Custom-white-balance function allows the camera to be calibrated to a specific lighting condition. Three setting can be stored in the camera.
With the white balance dial in the custom position, press the white-balance button to open the setting screen.
The control dials and the left/right controller keys select a previous custom setting stored on register 1, 2, or 3, or the set option to calibrate the camera.
Press the central controller button to apply a custom register setting or continue the calibration routine.
If the set option was selected, the red custom setup indicator is displayed on the monitor.
Fill the spot metering area with a white or neutral object; the object does not need to be in focus. Press the shutter-release button to calibrate the camera.
On the register-selection screen use the control dials or left/right keys of the controller to select the custom white-balance register in which to store the setting; any previous setting is replaced. Press the central button of the controller to complete the operation.
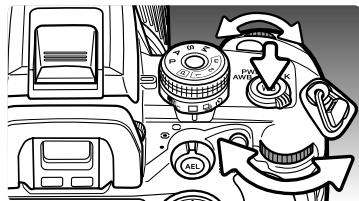
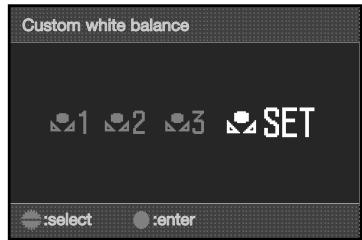
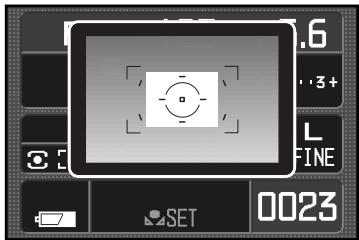
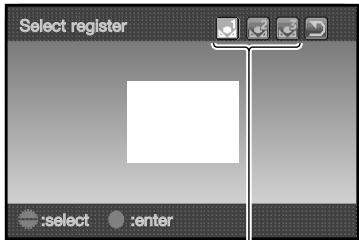
Custom registers
A calibration error may occur under extremely bright light sources, especially with flash units. If an error occurs, a message appears on the monitor and the white-balance indicator is yellow. Highlight the return button and press the center of the controller. Recalibrate using a gray card as a reference target to reduce the intensity of the illumination.
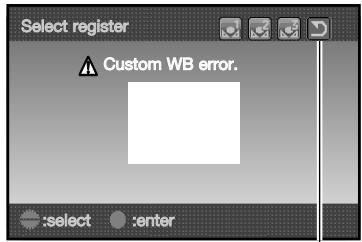
Return button
Color Temperature
White balance can be set to a known color temperature of a light source or set to the color temperature determined by a color meter.
With the white balance dial in the K position, press the white-balance button to open the setting screen.
The front control dial or the left/right controller keys adjust the color temperature in thousands of degrees. The rear control dial or the up/down controller keys adjust the color temperature in hundreds of degrees.
Press the central controller button to complete the operation. For information on light sources, see page 81.
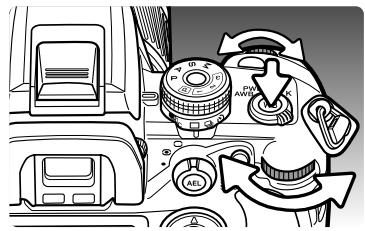
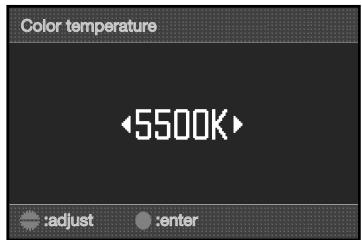
About Color Temperature
Color temperature refers to the color of the light emitted from a blackbody radiator at a specific temperature given in degrees Kelvin. This is an accurate way of measuring light from continuous-spectrum sources such as the sun and incandescent or tungsten light bulbs. However, color temperature can be inaccurate with discontinuous-spectrum sources such as fluorescent and mercury vapor.
MEMORY - STORING CAMERA SETTINGS
Three sets of camera settings can be saved. This saves time under frequently repeating conditions by eliminating the need to set the camera. Camera settings cannot be deleted from memory by turning the camera off. They are erased with the reset function in section 3 of the setup menu.
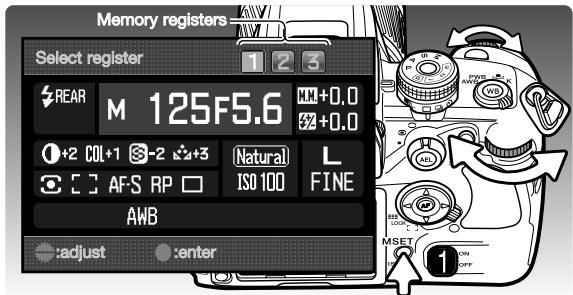
To save the current camera settings, press the M SET button (1); the setting appear on the registration screen.
Use the control dials or left/right keys of the controller to select the memory register in which to store the settings; any previous settings are replaced. Press the central controller button to complete the operation.
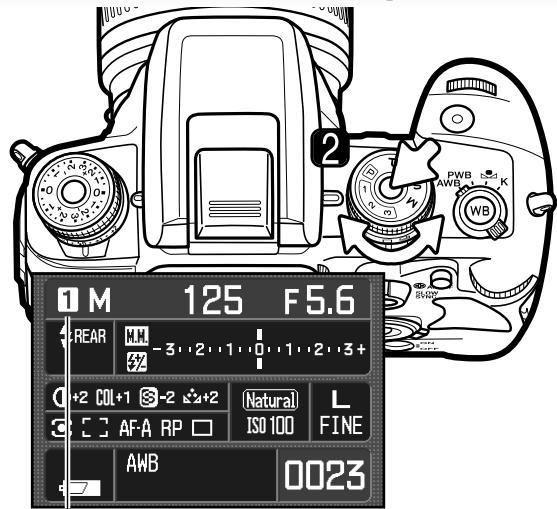
Camera settings are recalled with the exposure-mode dial.
Press the Dial Lock Release and turn the exposure mode dial to the appropriate memory register (2).
The camera settings are displayed on the monitor. The dial positions may not reflect the camera settings.
The M SET button can be used as a menu short cut. The shortcut function is set in section 4 of the custom menu.
Memory register
RECORDING MENU
In recording mode, press the menu button to open and close the menu. The four-way keys of the controller and the control dials move the cursor in the menu. Pressing the central button of the controller enters a setting.
NAVIGATING THE RECORDING MENU

Activate the recording menu with the menu button. Tab 1 at the top of the menu is highlighted.
Use the left/right keys of the controller to highlight the appropriate menu tab; the menus change as the tabs are highlighted.
When the required menu section is displayed, use the up/down key to scroll through the menu options. Highlight the option whose setting needs to be changed.

Press the right controller key to display the settings; the current setting is indicated by an arrow. To return to the menu options, press the left key.
Use the up/down key to highlight the new setting. If “Enter” is displayed, press the central button of the controller to open the next screen.

Press the central button of the controller to select the highlighted setting.
Once a setting has been selected, the cursor returns to the menu options and the new setting is displayed. Changes can continue to be made. To return to the recording mode, press the menu button.
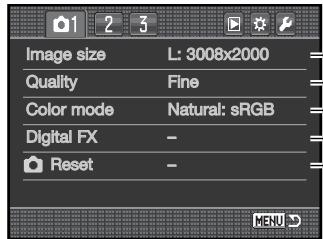
To set image resolution (p. 66).
To set file type and compression (p. 66).
-To select color mode and color space (p. 68).
-Contrast, sharpness, saturation, and hue controls (p. 69).
\~To reset the recording-mode functions (p. 70).
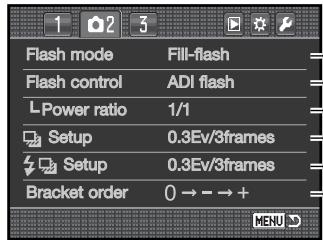
To set the flash mode of the built-in flash (p. 71).
To set automatic or manual flash control (p. 75).
-To set manual flash output (p. 76).
-To set exposure bracketing parameters (p. 70).
\~To set flash bracketing parameters (p. 70).
\~To set the order of the bracketing frames (p. 70).
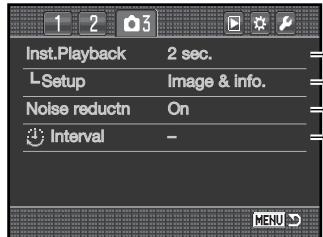
To play back images after they are recorded (p. 77).
To set the instant playback format (p. 77).
-To apply noise reduction to long exposures (p. 77).
-To set and start the interval recording mode (p. 78)
Camera Notes
The control dials can move the cursor in the menus. The front dial moves the cursor up and down. The rear dial moves it left and right.
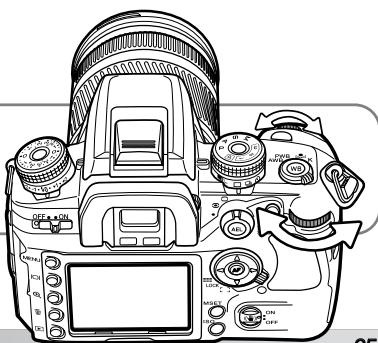
natural_image
Line drawing of a DSLR camera with control knobs and dials (no text or symbols)IMAGE SIZE AND IMAGE QUALITY
Image size and quality are set in section 1 of the recording menu (p. 64). Changes are displayed on the monitor.
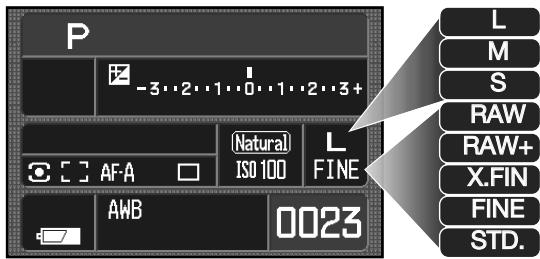
L: 3008 X 2000 (Large)
M: 2256 X 1496 (Medium)
S: 1504 X 1000 (Small)
RAW image
RAW & JPEG image
Extra fine: JPEG image
Fine: JPEG image
Standard: JPEG image
Image size affects the number of pixels in each image. The greater the image size, the larger the file size. Choose image size based on the final use of the image - smaller images are more suitable for web sites whereas larger sizes produce higher quality prints.
Image quality controls the file type and rate of compression. RAW is high-quality image file. The extra fine, fine, and standard settings produce JPEG files at various rates of compression. The higher the image quality, the lower the rate of compression and the larger the file sizes. If economical use of the memory card is important, use the standard mode. The RAW & JPEG option creates two image files at one time, a large RAW file and a fine quality JPEG file with an image size selected with the menu. The image files are saved with the same file name, but with different extensions (p. 126).
In the RAW image-quality mode, the image size is set to large and cannot be changed. The image size is not be displayed on the monitors. The enlarged playback and print functions cannot be used.
Unlike the other image-quality modes, RAW image data is unprocessed and requires image processing before it can be used. To process the RAW data, the DiMAGE Viewer or the optional DiMAGE Master software is required.
The number of images that can be stored on a memory card is determined by the size of the card and the file size of the images. One memory card can contain images of differing sizes and quality. The actual file size is determined by the scene; some subjects can be compressed further than others.
Approximate file sizes.
| L: 3008 x 2000 | M: 2256 X 1496 | S: 1504 X 1000 | |
| RAW | 8.6MB | - | - |
| Extra fine | 5.9MB | 3.3MB | 1.6MB |
| Fine | 3.0MB | 1.7MB | 850KB |
| Standard | 1.8MB | 1.0MB | 540KB |
| Approximate number of images that can be stored on a 256MB memory card. | |||
| RAW | 26 | - | - |
| Extra fine | 41 | 72 | 157 |
| Fine | 81 | 141 | 292 |
| Standard | 138 | 235 | 463 |
Camera Notes
The frame counter indicates the approximate number of images that can be stored on the memory card at the camera's image quality and size settings. If the settings are changed, the frame counter adjusts accordingly. Because the counter uses approximate file sizes, the actual image taken may not change the counter or may decrease it by more than one. When the frame counter displays zero, it indicates no more images at the image size and quality settings can be captured. Changing those settings may allow more images to be saved to the card.
![P -3..2..1..0..1..2..3+ 3 [ ] AF-A AWB Natural ISO 100 L FINE 0023](/content/2025/01/165690/images/6b181fd0ac6575f6c51f73c04e3017c5dbdc670e019bf47fc4986ea92ae15ee1.jpg)
Frame counter
DiMAGE Viewer Notes
When opening a RAW file with DiMAGE Viewer, the filter slider, as described in the instruction manual, does not appear on the RAW processing screen. The hue slider is available in its place.
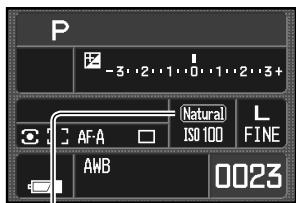
COLOR MODE
The color mode controls what the image looks like as well as the color space. The color mode is set in section 1 of the recording menu (p. 64).

Natural Color - reproduces the colors in the scene faithfully. Employs the sRGB color space.
Natural Plus - increases contrast and acutance. Employs the sRGB color space.
Embed Adobe RGB - like Natural Color, this color mode reproduces the colors in the scene faithfully, but uses the extended gamut of the Adobe RGB color space. The color space is embedded in the image data.
ABOUT ADOBE RGB
Adobe RGB has a larger color gamut than the more common sRGB. The size of the gamut limits the colors that can be reproduced; the larger the gamut, the more colors. If the image will be printed out with a high-quality printer, the use of the Adobe RGB color mode is recommended over the sRGB color modes of Natural and Natural Plus.
Color matching must be used when opening Adobe-RGB image files. When using the DiMAGE Viewer, the color matching function must be active and the color space set to Original Color Space (Adobe RGB) or Adobe RGB in the color preferences window, see the software manual. The DiMAGE Viewer included with the product or later versions is required to open RAW Adobe RGB images taken with this camera.
DIGITAL EFFECTS (FX) CONTROL
The Digital Effects Control can adjust image contrast, saturation, sharpness, and hue. These controls are accessed from section 1 of the recording menu (p. 64).
Highlight “Enter” in the Digital FX option in section 1 of the recording mode menu. Press the central button of the controller to open the Digital FX setup screen.
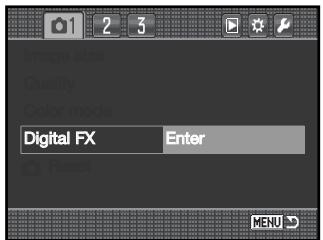
Use the up/down keys or front control dial to select the parameter to change.
Use the left/right keys or rear control dial to adjust the parameter.
Press the central button of the controller to complete the operation.
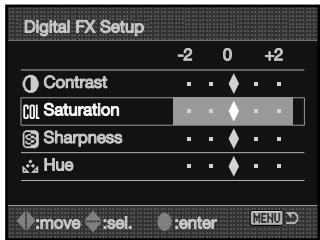
Adjustments can be made repeatedly and in combination. Adjustments remain in effect until manually reset. When set to any value other than zero, an indicator and value is displayed on the monitor as a warning.
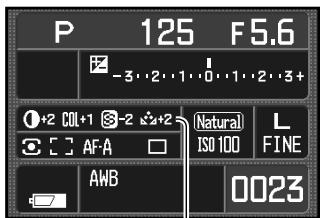
Digital Effects panel
RECORDING MODE RESET
The recording mode functions can be reset in section 1 of the recording menu (p. 64). When selected, a confirmation screen appears; choosing “Yes” resets the following functions and settings, “No” cancels the operation.
| Focus area selection | Spot AF area | p. 55 |
| Preset white balance | Daylight ±0 | p. 60 |
| Color temperature | 5500K | p. 60 |
| Digital Effects (FX) | All reset to ±0 | p. 69 |
| Flash mode | Fill flash or red-eye reduction1 | p. 71 |
| Flash control | ADI | p. 75 |
| Manual flash power ratio | 1/1 | p. 76 |
| Exposure bracketing setup | 0.3Ev / 3 frames | p. 70 |
| Flash bracketing setup | 0.3Ev / 3 frames | p. 70 |
- The flash mode is reset to whichever of the two modes was last set.
BRACKETING SETUP
The bracketing increment and the number of frames in a exposure and flash bracket is selected in section 2 of the recording menu (p. 64). The bracketing increment is in Ev (p. 81). For information on the bracketing drive mode, see page 58.
BRACKETING ORDER
The order in which the bracketing frames is captured selected in section 2 of the recording menu (p. 64). For information on the bracketing drive mode, see page 58.
$$ \Box \to - \to + $$
$$ - \rightarrow \square \rightarrow + $$
Normal - underexpose - overexpose*
Underexpose - normal - overexpose
* With a five frame bracket, the bracketing order is 0, -, +, -, +.
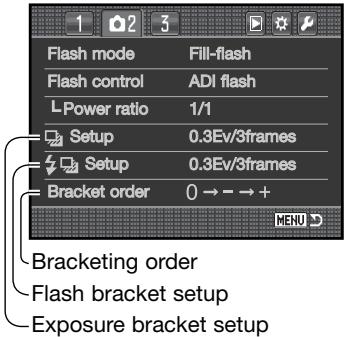
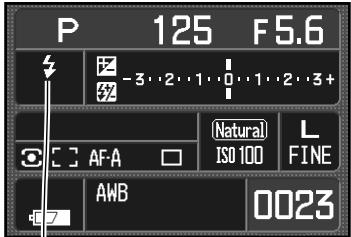
FLASH MODES
The flash mode can be changed in section 2 of the recording menu (p. 64). For the flash to fire, the built-in unit must be manually raised; lower the flash to prevent it from firing. The auto-white-balance setting gives priority to the flash's color temperature. If another type of white balance is used, priority is given to the active setting's color temperature.
[Non-Text]
Fill-flash - used as the main or supplementary light. In low-light conditions, the flash acts as the main source of illumination and overpowers the ambient light. Under strong sunlight or in backlit situations, the fill-flash can reduce harsh shadows.
![MINOLTA DYNAX 7D - [Non-Text] - 1](/content/2025/01/165690/images/ec6a2698c0cf041671444002d643738344c97a1d7eb0fc79c12dd567b02ff927.jpg)
natural_image
Side profile comparison of a person with short hair, labeled 'Fill-flash' (no other text or symbols)lightning bolt
Red-eye reduction - used when taking photographs of people or animals in low-light conditions. The red-eye effect is caused by light reflected from the retina of the eye. The camera fires several pre-flashes before the main flash burst to contract the pupils of the subject's eyes.
REAR
Rear flash sync - used with long exposures to make trailing lights or blurring appear to follow rather than proceed the subject. The effect is not apparent if the shutter speed is too fast and stops the subject's motion.
When the shutter is released, a pre-flash fires. This pre-flash is not for exposure, but for metering. The flash fires again just before the shutter closes.
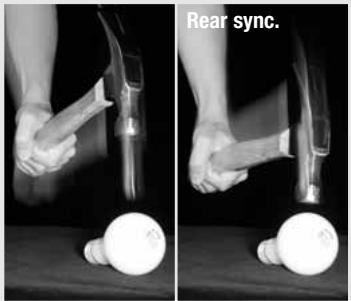
WL
Wireless / Remote flash - allows the camera to control an off-camera flash unit without the need of a cable. See page 72.
WIRELESS / REMOTE FLASH
natural_image
Black-and-white photo of a woman seated at a desk with a lamp and curtains in the background (no visible text or symbols)On-camera flash
Wireless/Remote flash
natural_image
Black-and-white photo of a woman seated at a table with arms crossed, next to a person in the background (no visible text or symbols)Wireless/Remote flash allows the camera to control an off-camera Program 5600HS(D) and 3600HS(D) flash unit without the need of a cable. Single or multiple flash units can be placed around the subject to create different lighting effects.
The camera's built-in flash fires to control the off-camera flash units rather than to illuminate the subject.
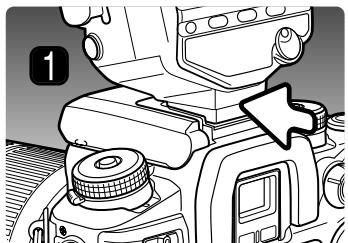
natural_image
Mechanical assembly diagram showing a cam or cam component with no visible text or symbols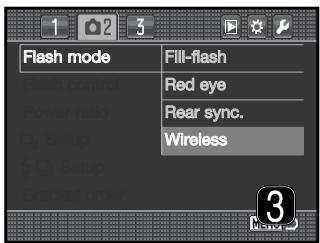
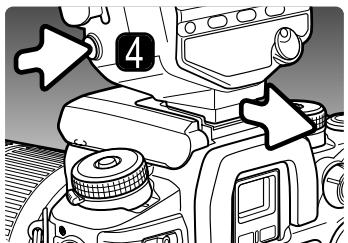
- Remove the accessory shoe cap (p. 117) and slide a Program 5600HS(D) or 3600HS(D) flash on the accessory shoe until the safety lock engages.
- Turn on the camera and flash unit.
- Set the camera to the wireless flash mode in section 2 of the recording menu (p. 64). This simultaneously set a the flash to the wireless mode and sets the camera to the flash's wireless channel.
- Press and hold the mounting-foot-release button to disengage the safety catch and remove the flash unit from the camera.
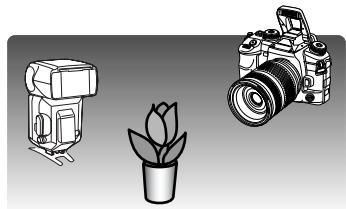
natural_image
Illustration of a camera, a small object resembling a flower, and a DSLR camera (no text or symbols)Raise the built-in flash on the camera and position the camera and flash around the subject. See the following page for operating ranges.
Make sure no objects come between the camera and flash unit. The flash units can be test fired by pressing the AEL button on the camera. AEL button setup in section 1 of the custom menu should be set to one of the hold options. If the flash does not fire, change the camera, flash, or subject position. The slow shutter sync is active in P and A exposure modes (p. 47).
When the 5600HS(D) and 3600HS(D) flash is charged, the AF illuminator on the front of the unit blinks. The viewfinder flash signal shows the status of the camera flash (p. 31). Take a picture as described in the basic recording section on page 28.
Wireless/Remote flash performs best under subdued light or interior lighting. Under bright light sources, the flash may not be able to detect the control signals from the camera's built-in flash.
When not using off-camera flash units, always turn off the wireless flash mode in section 1 of the recording menu, or inaccurate flash exposures will result. The 5600HS(D) and 3600HS(D) flash units can be reset simultaneously with the camera. Simply mount the flash unit in the accessory shoe and change the wireless flash mode setting on the menu to another flash mode.
High-speed sync. is available, see page 118. The Wireless/Remote Flash Controller is not compatible with this camera.
WIRELESS/REMOTE CAMERA AND FLASH RANGES
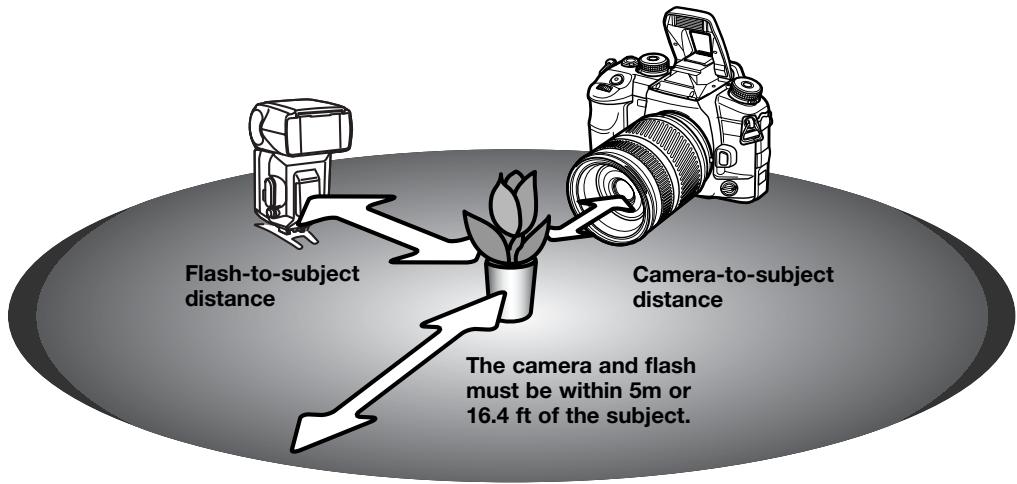
Specifications with Program flash 5600HS(D) at ISO 100
| Aperture | Camera-to-subject distance | Flash-to-subject distance^2 | ||
| Up to sync. speed^1 | 1/250 second | 1/1000 second | ||
| f/2.8 | 1.4 ~ 5m / 4.6 ~ 16.4ft | 1 ~ 5m / 3.3 ~ 16.4ft | 1 ~ 5m / 3.3 ~ 16.4ft | 1 ~ 2.5m / 3.3 ~ 8.2ft |
| f/4.0 | 1 ~ 5m / 3.3 ~ 16.4ft | 1 ~ 5m / 3.3 ~ 16.4ft | 1 ~ 3.5m / 3.3 ~ 11.5ft | 1 ~ 1.7m / 3.3 ~ 5.6ft |
| f/5.6 | 1 ~ 5m / 3.3 ~ 16.4ft | 1 ~ 5m / 3.3 ~ 16.4ft | 1 ~ 2.5m / 3.3 ~ 8.2ft | 1 ~ 1.2m / 3.3 ~ 3.9ft |
| Specifications with Program flash 3600HS(D) at ISO 100^1 | ||||
| f/2.8 | 1.4 ~ 5m / 4.6 ~ 16.4ft | 1 ~ 5m / 3.3 ~ 16.4ft | 1 ~ 4m / 3.3 ~ 13.1ft | 1 ~ 2m / 3.3 ~ 6.6ft |
| f/4.0 | 1 ~ 5m / 3.3 ~ 16.4ft | 1 ~ 5m / 3.3 ~ 16.4ft | 1 ~ 3m / 3.3 ~ 9.8ft | 1 ~ 1.5m / 3.3 ~ 4.9ft |
| f/5.6 | 1 ~ 5m / 3.3 ~ 16.4ft | 1 ~ 5m / 3.3 ~ 16.4ft | 1 ~ 2m / 3.3 ~ 6.6ft | - |
- The camera's flash sync. speed is 1/125 sec. with Anti-Shake on and 1/160 sec. with Anti-Shake off. Shutter speeds up to this limit can be used.
- Double the maximum distance when using the camera sensitivity at ISO 400. The maximum distance cannot exceed 5m or 16.4 ft.
FLASH CONTROL
ADI, pre-flash TTL, and manual flash control are available. Flash control is changed in section 2 of the recording menu (p. 64). The flash control used depends on the lens and flash combination.
ADI (Advanced Distance Integration) flash metering - combines distance information from D-series lenses with information from a pre-flash exposure. ADI metering is less influenced by subject reflectance.
| Flash mode | Fill-flash |
| Flash control | ADI flash |
| L Power ratio | 1/1 |
| Setup | 0.3Ev/3frames |
| Setup | 0.3Ev/3frames |
| Bracket order | 0 → → + |
The camera automatically switches from ADI metering to pre-flash
TTL when the autofocus system is prevented from focusing. When using the Macro Twin Flash 2400, Marco Ring flash 1200 or a wireless or off-camera flash unit, flash control is set to pre-flash TTL.
When using the Program Flash 2500(D), switch both the flash unit and camera to ADI metering.
Pre-flash TTL - calculates flash exposure with a pre-flash only. This mode must be used with close-up filters or filters that reduce the amount of light entering the camera such as neutral density filters. Pre-flash TTL must be used when a diffuser is attached to the built-in flash, the wide-angle adapter with the Program flash 3600HS(D), bounce flash with the Program Flash 2500(D), or an external flash unit.
Manual flash control - fires the flash at full power, 1/2, 1/4, 1/8, or 1/16 power. The power ratio is selected in section 2 of the recording menu (p. 64). See the following page for more on manual flash and power ratio. Because no pre-flash is used, it can be used to fire slave flash units. Manual flash cannot be used with wireless.
MANUAL FLASH AND POWER RATIO
The output of the flash can be specified when using manual flash control with power ratios.
Set the flash-control option in section 2 of the recording menu to manual. The power ratio, also in section 2, can then be selected. See page 64 for menu operation.
When the camera flash is raised, the power ratio is displayed on the monitor.
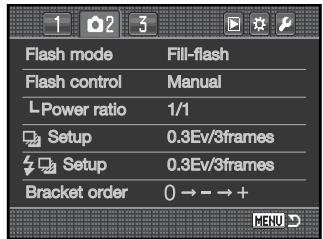
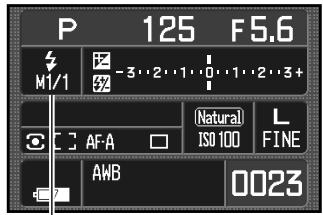
Power ratio
The chart lists approximate guide numbers for manual flash calculations. The following equations are useful in determining the guide number, aperture (f-number), or flash-to-subject distance required for exposures.
| Guide no. (for distance in meters / feet) | ||||||
| Power ratio | Camera sensitivity (ISO) | |||||
| 100 | 200 | 400 | 800 | 1600 | 3200 | |
| 1/1 (Full) | 12 / 39 | 17 / 56 | 24 / 79 | 34 / 112 | 48 / 157 | 68 / 223 |
| 1/2 | 8.5 / 29 | 12 / 39 | 17 / 56 | 24 / 79 | 34 / 112 | 48 / 157 |
| 1/4 | 6 / 20 | 8.5 / 29 | 12 / 39 | 17 / 56 | 24 / 79 | 34 / 112 |
| 1/8 | 4.2 / 14 | 6 / 20 | 8.5 / 29 | 12 / 39 | 17 / 56 | 24 / 79 |
| 1/16 | 3 / 10 | 4.2 / 14 | 6 / 20 | 8.5 / 29 | 12 / 39 | 17 / 56 |
Guide number = f-number X distance Distance = guide number / f-number f-number = guide number / distance
INSTANT PLAYBACK
After an image is captured, it can be displayed on the monitors for two, five, or ten seconds before being saved. When using continuous-advance bracketing, an index display is used. Instant playback is activated and the length of the playback period is set with the instant-playback option in section 3 of the recording menu (p. 64).
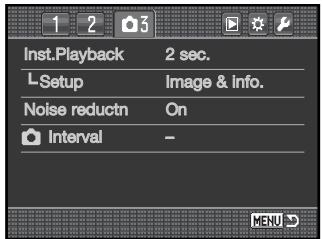
The setup option below instant playback specifies the display format:
natural_image
Black-and-white close-up of a dense cluster of small white flowers with rounded petals, no text or symbols visible.Image only
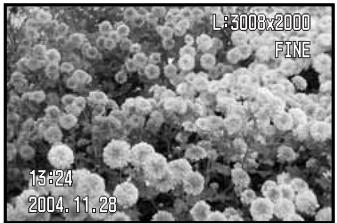
Image & information
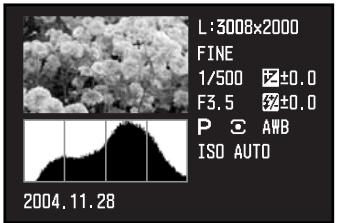
Image & histogram
After each image is captured, it is displayed as specified by the menu. Press the shutter-release button partway down to end the instant playback.
During the instant playback period, the captured images can be deleted using the delete button (p.36). When a continuous-advance bracketed series is captured, the entire series is erased. Single non-RAW images can be enlarged with the magnification button. The image is centered on the AF area used, see page 38 for information on enlarged playback.
NOISE REDUCTION
This function reduces the affect of dark noise with exposures of one second or longer. Processing is applied to each image after it is captured. The monitor remains blank during processing for a maximum of 30 seconds. This can be turned off in section 3 of the recording menu (p. 64). Noise reduction uses dark-frame subtraction. Noise reduction is not applied to a series of continuous-advance images
INTERVAL
The interval mode makes a series of still images over a period of time, similar to time-lapse photography.
Set the drive-mode dial to the single-frame advance position (p. 56) before opening the menu. Highlight “setup” in the interval option in section 3 on the recording menu and press the central button of the controller to open the setup screen.
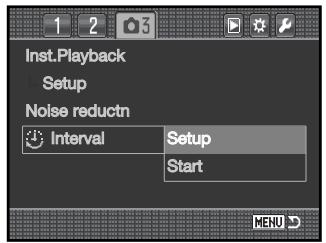
Use the up/down keys or front control dial to select the parameter to change.
Use the left/right keys or rear control dial to adjust the parameter.
Press the central button of the controller to complete the operation.


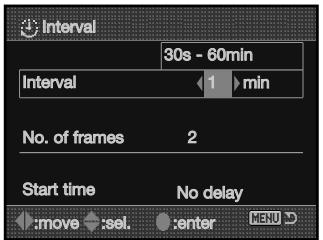
Confirm the recording menu settings, highlight the start option, and press the central button of the controller to put the camera in the interval recording mode.
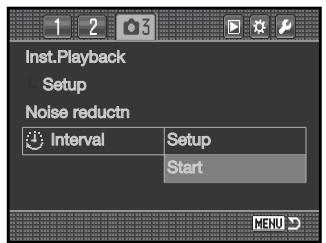
The interval indicator appears on the monitor.
After mounting the camera on a tripod, compose the image so that the subject area falls within the focus frames; the camera sets the focus, exposure, and white balance, and charges the flash just before each exposure.
Interval indicator
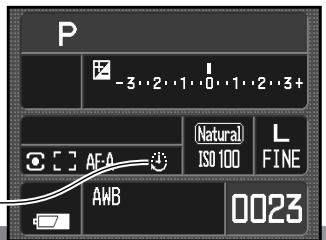
Confirm the memory card has enough storage capacity for the series by comparing the number of frames in the interval series with the number of recordable images displayed on the frame counter. Image size and quality settings can be changed to increase the number of pictures that can be saved on the memory card.
Continuous AF can be used. To override the automatic systems, use manual focus (p. 52), manual exposure (p. 44), and preset or custom white balance (p. 60).
Press the shutter-release button to begin the series. During the interval series, the monitor is turned off between exposures to conserve power. The access lamp glows when an image is being recorded.
The camera stops recording and resets to the first frame when the series is complete or when the memory card is full. The use of an AC adapter is recommended when recording with long intervals or a large number of frames. To cancel the interval series, turn off the camera or press the shutter-release button partway down.
A SHORT GUIDE TO PHOTOGRAPHY
Photography can be a rewarding pursuit. It is a broad and disciplined field that can take years to master. But the pleasure in making photographs and the joy of capturing a magical moment cannot be compared. The guide is an introduction to some basic photographic principles.
The lens aperture controls not only exposure, but also depth of field; the area between the closest object in focus and the furthest object in focus. The larger the aperture value, the greater the depth of field and the longer the shutter speed needed to make the exposure. The smaller the aperture value, the shallower the depth of field and the faster the shutter speed needed to make the exposure. Usually landscape photographs use a large depth of field (large aperture value) to keep the foreground and background in focus, and portraits use a shallow depth of field (small aperture value) to separate the subject from the background.
Depth of field also changes with focal length. The smaller the focal length, the greater the depth of field; the longer the focal length, the shallower the depth of field.
The shutter controls not only exposure, but also the ability to stop motion. Fast shutter speeds are used in sport photography to stop action. Slow shutter speeds can be used to show the flow of motion such as water cascading over a waterfall. The use of a tripod is recommended with slow shutter speeds.
For critical work, take a test photograph and view the result in playback (p. 34). The image can be deleted if not acceptable
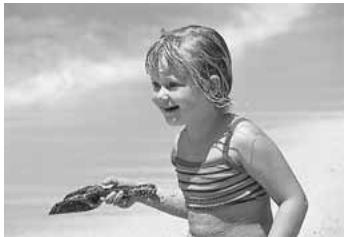
natural_image
Black-and-white photo of a smiling child holding a seafood on a beach (no text or symbols visible)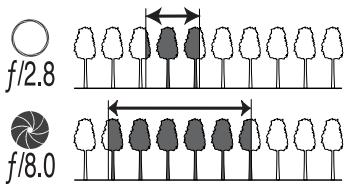
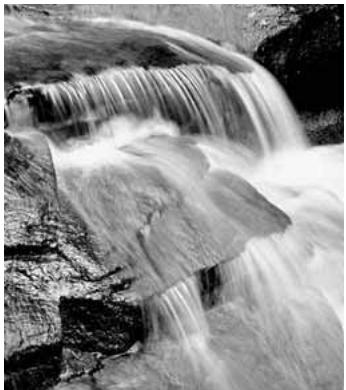
natural_image
Black-and-white photo of a cascading waterfall over rocky terrain (no text or symbols visible)LIGHT SOURCES AND COLOR
The human eye adapts itself extremely well under different conditions. The paper of this manual you are reading looks white regardless of the type of lighting. Photographic systems are much less flexible. As the light source changes, so does the overall color of a scene - fluorescent office ceiling lights create a green cast to pictures, regular household tungsten light bulbs make everything red. Like your eyes, the camera's white-balance controls adjust for different lighting to make natural looking pictures.
The most common source of light, our sun, changes color depending on the time of day and the atmospheric conditions. The sun is of course very warm near the horizon and very blue at noon. The daylight preset white-balance setting is for beautiful sunny days. When the weather is overcast, the color is cooler and the cloudy setting is appropriate. When the main light source is skylight, light from the blue sky rather than the direct light of the sun, the resulting color is very blue. The shade preset white-balance is designed for this condition.
Artificial lighting is more consistent but shows variations. Tungsten lamps become warmer as their wattage decreases. And fluorescent lamps come in classifications that define their color. The preset white balance settings can be adjusted with the rear control dial (p. 60) to match the change in these light sources.
Some artificial lighting have a discontinuous spectrum that create very unnatural color in a photograph. White balance cannot correct high-energy vapor lighting: sodium-vapor (yellow highway lights), or mercury vapor. For portraits under these lighting conditions, the flash can be used to overpower the ambient light. With landscapes containing these types of lights, set the white balance to the preset daylight setting.
WHAT IS AN EV?
Ev stands for exposure value. A change of one Ev adjusts the exposure calculated by the camera by a factor of two. An Ev and a “stop” are the same.
| +2.0 Ev | 4X as much light |
| +1.0 Ev | 2X as much light |
| ±0.0 Ev | Calculated exposure |
| -1.0 Ev | 1/2 as much light |
| -2.0 Ev | 1/4 as much light |
PLAYBACK MENU
In playback mode, press the menu button to open and close the menu. The four-way keys of the controller and the control dials move the cursor in the menu (p. 65). Pressing the central button of the controller enters a setting.
NAVIGATING THE PLAYBACK MENU
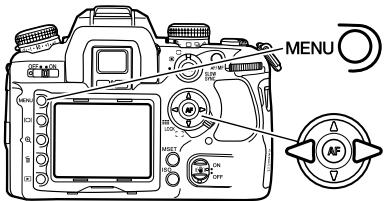
Activate the playback menu with the menu button. Tab 1 at the top of the menu is highlighted.
Use the left/right keys of the controller to highlight the appropriate menu tab; the menus change as the tabs are highlighted.
When the required menu section is displayed, use the up/down key to scroll through the menu options. Highlight the option whose setting needs to be changed.

Press the right controller key to display the settings; the current setting is indicated by an arrow. To return to the menu options, press the left key.
Use the up/down key to highlight the new setting. If “Enter” is displayed, press the central button of the controller to continue.

Press the central button of the controller to select the highlighted setting.
Once a setting has been selected, the cursor returns to the menu options and the new setting is displayed. Changes can continue to be made. To return to the playback mode, press the menu button.
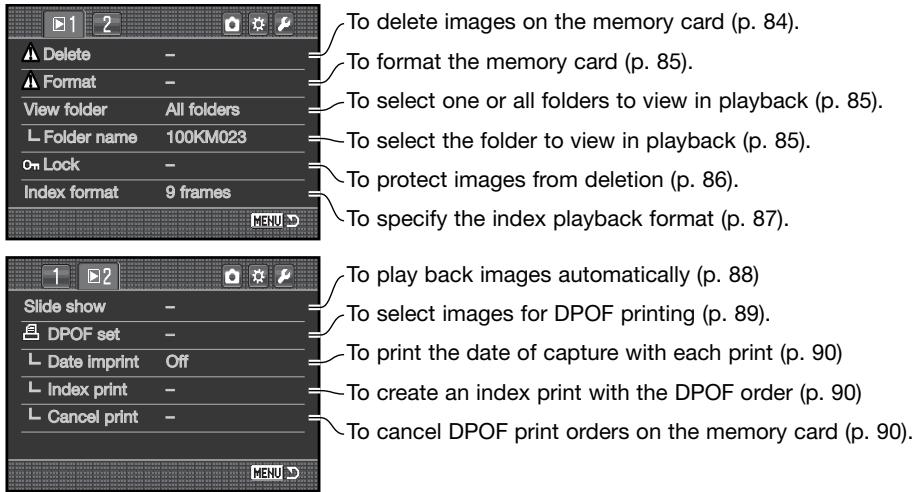
FRAME-SELECTION SCREEN
When a marked-frames setting is chosen on a menu, the frame-selection screen appears so multiple files can be selected. The index format of the screen can be changed in section 1 of the playback menu (p. 87).
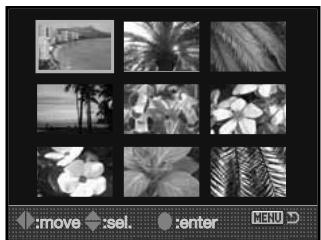
natural_image
Grid of grayscale photo thumbnails including beach, palm trees, flowers, and palm trees (no text or symbols)
The left/right keys of the controller move the yellow border to select the image.
The up key selects the frame; when selected, an indicator appears on the thumbnail. The down key deselects the image removing the indicator.

Press the central button of the controller to complete the operation. Pressing the menu button cancels the screen and any operation made.
DELETE

Deleting permanently erases the image. Once deleted, an image cannot be recovered. Care should be taken when using the delete function.
Single, multiple, or all images in a folder can be deleted with the playback menu. Before an image is deleted, a confirmation screen appears; choosing "Yes" executes the operation, "No" cancels it. Only the images in the view-folder option in section 1 of the playback menu (p. 82) can be viewed and deleted with the marked frames and all-in-folder options. Delete has three options:
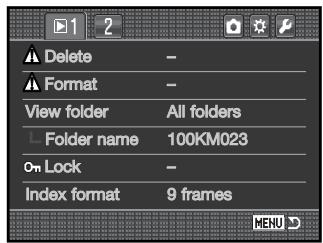
Marked frames - to delete multiple images. When this setting is chosen, the frame-selection screen is displayed. Use the left/right keys of the controller to highlight the first image to be deleted. Pressing the up key marks the thumbnail with the delete indicator. To deselect an image for deletion, highlight it with the yellow border and press the down key; the delete indicator disappears. Continue until all the images to be deleted are marked. Press the controller to continue (the confirmation screen appears), or press the menu button to cancel the operation and return to the playback menu. On the confirmation screen, highlighting and entering "Yes" deletes the marked images.
All in folder - to delete unlocked images in a single folder specified by the view-folder option.
All on card - all unlocked images on the card are deleted.
The delete function can only erase unlocked images. If an image is locked, it must be unlocked before it can be deleted.
FORMAT

When a memory card is formatted, all data on the card is erased.
The formatting function in section 1 of the playback menu is used to erase all data on a memory card. Before formatting a card, copy the data to a computer or storage device. Locking files will not protect them from being deleted when the card is formatted. Always format the memory card using the camera; never use a computer to format a card.
When the format option is selected and entered, a confirmation screen appears. Choosing "Yes" formats the card, choosing "No" cancels the operation. Never remove the card while it is being formatted. A screen appears to indicate the card has been formatted.
VIEW FOLDER
Only the images in the folders specified with the view-folder option in section 1 of the playback menu (p. 82) can be viewed or edited in playback. Two options are available:
All folders - to view and edit all images on the memory card.
Single folder - to view and edit images in a specific folder. The folder is selected in the folder-name option below the view-folder option.
For more on memory card organization, see page 126. Folders can be created and selected in section 2 of the setup menu (p. 108, 109).
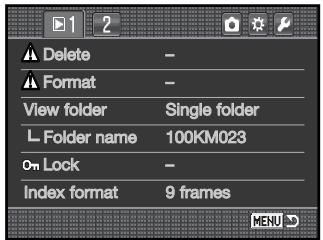
LOCK
Single, multiple, or all images on the memory card or in a folder specified with the view-folder option can be locked. A locked image cannot be deleted by either the playback menu functions or the delete button. Important images should be locked. Images are locked in section 1 of the playback menu (p. 82).
The lock has five options:
Marked frames - to lock or unlock multiple images. When this is chosen, the frame-selection screen (p. 83) is displayed. Use the left/right keys of the controller to highlight the image to be locked. Pressing the up key marks the thumbnail with the lock indicator. To unlock an image, highlight it with the yellow border and press the down key; the lock indicator disappears. Continue until all the images are marked. Press the controller to lock the marked frames, or press the menu button to cancel the operation and return to the playback menu.
All in folder - to lock images in a single folder specified by the view-folder option.
All on card - all images on the memory card are locked.
Unlock folder - to unlock images in a single folder specified by the view-folder option.
Unlock card - all images on the memory card are unlocked.
Locking an image protects it from a delete function. However, the formatting function erase all files on a memory card whether locked or not.
INDEX PLAYBACK FORMAT
The index-format option in section 1 of the playback menu can specify a four, nine, and sixteen image display for index playback (p. 37) and frame-selection screens (p. 83). A file browser can also be used in place of the index playback display mode; a 9-frame display is used for the selection screens.
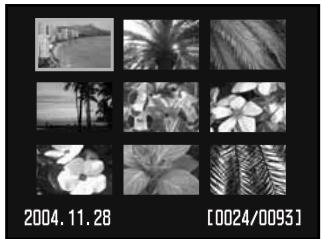
natural_image
Grid of black-and-white nature photos including beach, palm trees, tropical flowers, and a flower (no text or symbols)9-frame index
After selecting the file-browser option in the menu, press the display button in the playback mode to display the file browser.
The up/down keys of the controller switch between the folder tabs and images; a tab or images is highlighted.
The left/right keys of the controller select the folder tabs or images.

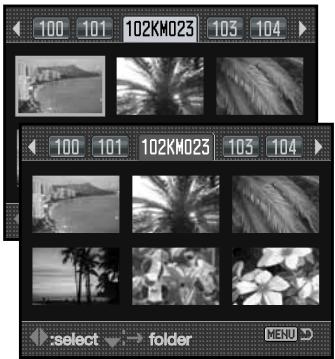
SLIDE SHOW
Section 2 of the playback menu starts the slide-show function. This function automatically displays images every five seconds on the card or in the folder specified with the view-folder option in section 1 of the menu.
Highlight “Enter” in the slide-show option in section 2 of the playback menu and press the center of the controller to begin the slide-show playback.
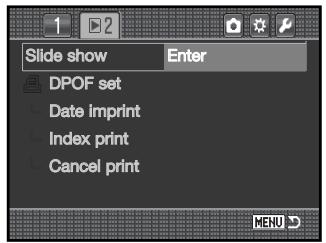
Press the central button of the controller to pause and restart the presentation.
Use the left/right keys of the controller to advance to the next image or return to the previous one.
To cancel the presentation, press the down key of the controller or the menu button.


![L:3008:2000 FINE 15:24 2004.11.23 100-0135 [0024/0095]](/content/2025/01/165690/images/2339ab90ef220a6a11a00feacdc42f7f61b2788c0329b46574cd75507dc2cf00.jpg)
ABOUT DPOF
This camera is supported by DPOF ^™ version 1.1. The DPOF (Digital Print Order Format) allows direct printing of still images from digital cameras. After the DPOF file is created, the memory card is simply taken to a photofinishing service or inserted into the memory -card slot of DPOF compatible printers.
When a DPOF file is created, a misc. folder is automatically made on the memory card to store it (p. 126). DPOF print files cannot be made for RAW images or images using the embedded Adobe RGB color mode (p. 68).
DPOF SETUP
The DPOF-set option is used to set an order for standard prints from digital images. Single, multiple, or all images on the memory card or in a folder specified with the view-folder option can be printed (p. 85).
DPOF setup has three options:
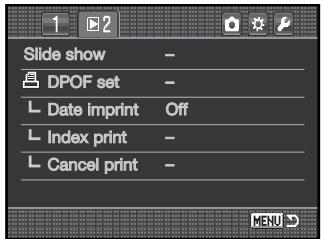
Marked frames - to choose a group of images to be printed or when the number of copies for each image varies. When selected, the frame-selection screen appears (p. 83). Use the left/right keys of the controller to highlight an image to be printed. Pressing the up key marks the image with the printer indicator. The number next to the indicator indicates the number of copies of that image will be printed. Pressing the up key increases the number of copies, pressing the down key decreases the number. A maximum of nine copies can be ordered. To deselect an image for printing, press the down key until the the number of copies reaches zero and the printer indicator disappears. Continue until all the images to be printed are marked. Press the controller to create the DPOF file, or press the menu button to cancel the operation and return to the playback menu.
All in folder - to select images in the folder specified by the view-folder option.
All on card - to select all images on the memory card for printing.
When the all-in-folder or all-on-card option is chosen, a screen appears requesting the number of copies of each image; a maximum of nine copies can be ordered. Use the up/down keys of the controller to set the number of copies. If the all-on-card option was used to create a print order, any additional images saved afterwards in the folder are not included in the order.
DPOF files created with another camera are deleted when a DPOF file is created.
DATE IMPRINT
To print the date of capture with each image with a compatible DPOF printer, turn the menu option on. To cancel date imprint, simply turn the option off. How the date is printed varies with the printer. Not all printers support this function.
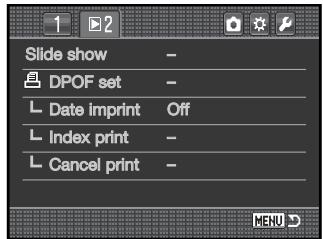
INDEX PRINT
To create an index print of all the images in the folder, set the option on. To cancel an index print, simply change the setting to off.
If an index-print order is created, any additional images saved afterwards in the folder are not included in the index print. The number of images printed per sheet differs between printers. The information printed with the thumbnails can vary.
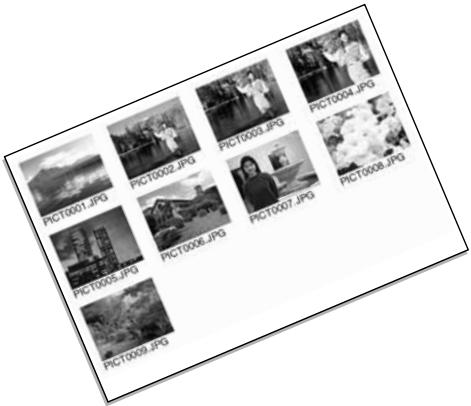
CANCEL PRINT
After the pictures have been printed, the DPOF file remains on the memory card and must be canceled manually. The cancel-print option in section 2 of the playback menu deletes the DPOF files. When the setting is selected, a confirmation screen appears; choosing and entering "Yes" executes the operation and cancels the print and index-print order. Two options are available:
All frames C - To cancel all printing files on the memory card.
All frames F - To cancel the printing file in the folder specified by the view-folder option.
OPENING THE CUSTOM & SETUP MENUS
The custom and setup menus can be accessed from both the recording and playback modes. The buttons in the top right corner of the menus are links to the other camera menus. See page 92 for information on the custom menu and page 102 for the setup menu.
Open the menu and use the left/right keys of the controller to highlight the custom or setup buttons.
Press the central button to display the menu. Repeat the procedure to return to the original or different menu or press the menu button to close the menu.

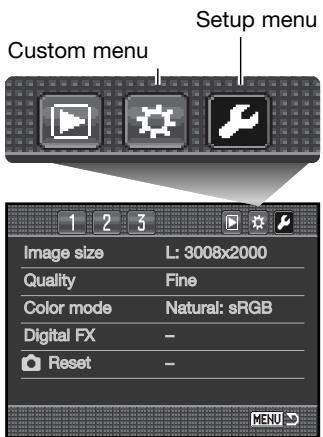
Camera Notes
The control dials can move the cursor in the menus. The front dial moves the cursor up and down. The rear dial moves it left and right.
The M-SET button setup option in section 4 of the custom menu allows a menu shortcuts to be made (p. 100). The menu-section memory option in section 3 of the setup menu memorizes the last menu section opened and returns to that section when the menu button is pressed (p. 110).
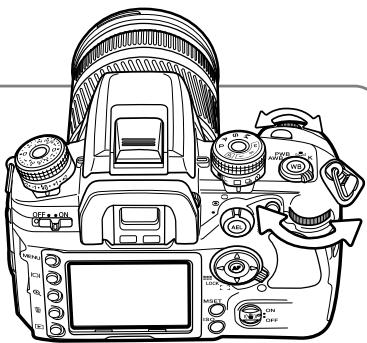
CUSTOM MENU
The custom menu controls operation preferences. See page 91 on how to open the custom menu.
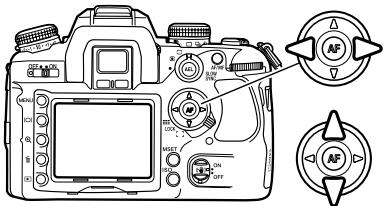
Use the left/right keys of the controller to highlight the appropriate menu tab; the menus change as the tabs are highlighted.
When the required menu section is displayed, use the up/down key to scroll through the menu options. Highlight the option whose setting needs to be changed.

Press the right controller key to display the settings; the current setting is indicated by an arrow. To return to the menu options, press the left key.
Use the up/down key to highlight the new setting. If “Enter” is displayed, press the central button of the controller to continue.

Press the central button of the controller to select the highlighted setting.
Once a setting has been selected, the cursor returns to the menu options and the new setting is displayed. Changes can continue to be made.
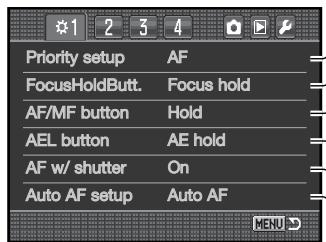
To set AF or shutter-release priority (p. 94).
To set the operation of a lens' focus-hold button (p. 94).
-To set the operation of the AF/MF button (p. 94).
-To set the operation of the AEL button (p. 95).
\~To set AF with the shutter-release button (p. 95).
To set the operation of the Auto AF focus mode(p. 96).
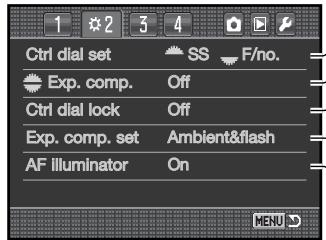
To specify exposure control with the control dials (p. 96).
To assign exposure comp. to the control dials (p. 96).
-To lock the control dials before AF and AE (p. 97).
-To specify flash output with exposure comp. (p. 97).
\~To turn the AF illuminator on and off (p. 97).
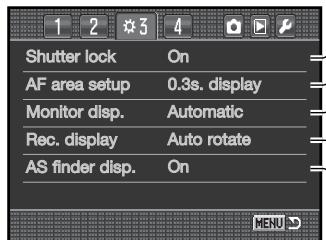
To lock the shutter when no lens is mounted (p. 97).
To control the viewfinder AF-area illumination (p. 98).
-To control how the monitor is turned on and off (p. 98).
-To set the recording display orientation (p. 98).
\~To turn the Anti-Shake scale on and off (p. 98).
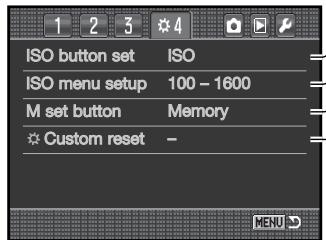
To switch between ISO and Zone Matching (p. 99).
To set the ISO range (p. 100).
-To select between memory and menu shortcut (p. 100).
-To reset the custom functions (p. 101).
AF/SHUTTER RELEASE PRIORITY SETUP
This custom function has two options:
AF - AF priority. The shutter will not release until the camera focuses.
Release - shutter-release priority. The shutter releases even if focus cannot be confirmed. The RP indicator is displayed on the monitor when this option is selected.
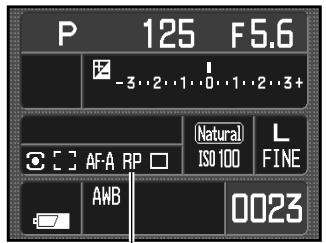
Release priority indicator
FOCUS-HOLD BUTTON SETUP
Some Konica Minolta lenses are equipped with a focus-hold button. The operation of this button can be specified in section 1 of the custom menu (p. 92). This custom function has two options:
Focus hold - pressing the focus-hold button on the lens locks the focus.
D.O.F. preview - pressing the focus-hold button previews the depth of field (p. 53). With non-D series lenses, this is active when the aperture and shutter speed are displayed.
AF/MF BUTTON SETUP
The operation of the AF/MF button (p. 53) can be specified in section 1 of the custom menu (p. 92). This custom function has two options:
Hold - press and hold the AF/MF button to switch between autofocus and manual focus. Releasing the button returns to the original focus mode.
Toggle - press and release the AF/MF button to switch between autofocus and manual focus. Press and release the button again returns to the original focus mode.
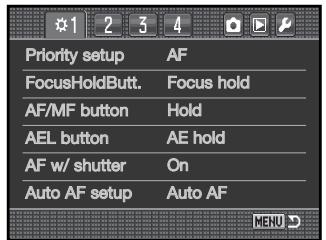
AEL BUTTON SETUP
The operation of the AEL button (p. 46) can be specified in section 1 of the custom menu (p. 92). This custom function has four options:
AE hold - press and hold the AEL button to lock the exposure, release the button to unlock it. The metering mode set with the metering-mode dial is used (p. 50).
AE toggle - press and release the AEL button to lock the exposure. The exposure remains locked even after the image is captured. Press and release the button again to unlock the exposure. The metering mode set with the metering-mode dial is used (p. 50).
Spot AE hold - the spot metering area is used regardless of the metering-mode selected with the dial (p. 50). Press and hold the AEL button to lock the exposure, release the button to unlock it.
Spot AE toggle - the spot metering area is used. Press and release the AEL button to lock the exposure. The exposure remains lock even after the image is captured. Press and release the button again to unlock the exposure.
AF WITH SHUTTER RELEASE BUTTON
The operation of the shutter-release button can be specified in section 1 of the custom menu (p.92). When on, AF is activated when the shutter-release button is pressed partway down. This is the basic operation described in this manual.
If this custom function is turned off, the AF system does not activate with the shutter-release button. The camera can be focused by pressing the controller. See page 54 for more information. The shutter can be released even if the camera has not focused.
AUTO AF SETUP
The operation of the Auto AF focus mode (p. 52) can be specified in section 1 of the custom menu (p. 92). This custom function has two options:
Auto AF - the AF system automatically switches between single-shot AF and continuous AF depending on the subject's motion.
DMF - Direct manual focus. After the AF system focuses, the manual focus indicator (MF) appears in the viewfinder. The focus can then be adjusted manually by the photographer.
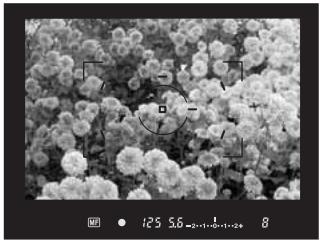
natural_image
Microscopic view of clustered spherical particles with measurement annotations (no readable text or symbols)CONTROL-DIAL SETUP
The operation of the control dials in the full-auto program, program, and manual exposure modes (p. 39) can be specified in section 2 of the custom menu (p. 92). This custom function has two options:
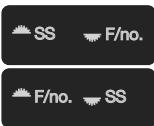
The front control dial adjusts the shutter speed. The rear control dial adjusts the aperture.
The front control dial adjusts the aperture. The rear control dial adjusts the shutter speed.
CONTROL-DIAL (EXPOSURE COMPENSATION) SETUP
Exposure compensation can be assigned to the front or rear control dial in section 2 of the custom menu (p. 92). In the recording mode, simply turn the selected control dial to adjust exposure compensation. The increment depends on the exposure-compensation dial position. For more on exposure compensation, see page 97.
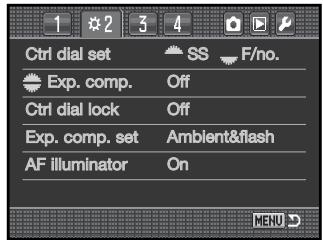
CONTROL-DIAL LOCK
Control-dial lock is set in section 2 of the custom menu (p. 92). When the control-dial lock is active, the exposure can be changed only when the AF system or exposure system have been activated with one of the camera controls. When the lock is off, the control dials are able to change the exposure at any time.
EXPOSURE COMPENSATION SETUP
Exposure compensation setup is set in section 2 of the custom menu (p. 92). This custom function has two options:
Ambient & flash - when using exposure compensation with the flash, both the ambient and flash exposure controls can be adjusted.
Ambient only - the flash exposure is fixed and only the ambient exposure controls (shutter speed, aperture, and camera sensitivity) adjust the exposure.
AF ILLUMINATOR
The built-in flash is used as an AF Illuminator. When the scene is too dark for the camera to focus, raise the built-in flash. It fires a few short bursts to provide light for the camera to focus. When an accessory flash is attached, the flash unit is used as the AF illuminator. The AF illuminator can be turned on and off in section 2 of the custom menu (p. 92).
The range of the AF Illuminator is approximately 1 to 5 m (3.3 to 16.4 ft.). It does not fire when using the continuous AF focus mode. The AF illuminator may not operate with focal lengths of 300mm or longer or with the 3x-1x Macro Zoom.
SHUTTER LOCK
The shutter lock prevents the shutter opening and exposing the CCD to dust when no lens is mounted on the camera. Turn the shutter lock off when attaching the camera to a telescope or microscope. The shutter lock is turned on and off in section 3 of the custom menu (p. 92).
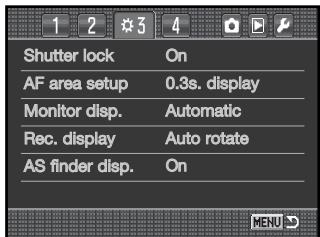
AF AREA SETUP
The spot focus or local AF areas are illuminated when the camera focuses. The illumination period is selected in section 3 of the custom menu (p. 92) between 0.3 seconds and 0.6 seconds. AF area illuminator activation with the shutter-release button can also be turned off.
AF area illuminator-
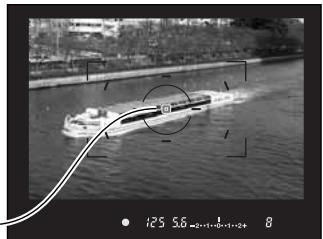
natural_image
Black-and-white photo of a submarine on water with a curved trajectory line overlay (no visible text or symbols)MONITOR DISPLAY SETUP
Automatic and manual monitor display is selected in section 3 of the custom menu (p. 92). The automatic option employs the viewfinder eye sensors to turn the monitor off when using the viewfinder. The manual option requires the monitor to be turned off using the display button (p. 33).
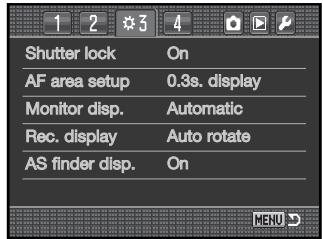
RECORDING DISPLAY SETUP
The auto-rotate and horizontal display is selected in section 3 of the custom menu (p. 92). The auto-rotate option automatically changes the recording display as the camera orientation is moved between horizontal and vertical positions. The horizontal option fixes the display to the horizontal position.
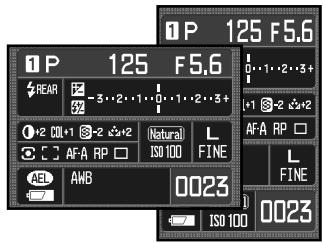
ANTI-SHAKE VIEWFINDER DISPLAY SETUP
The Anti-Shake scale can be turned on and off in section 3 of the custom menu (p. 92).
Anti-Shake scale
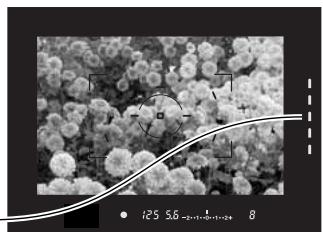
natural_image
Microscopic view of spherical particles with a fitted curve overlay (no text or symbols)ISO BUTTON SETUP
The function selected with the ISO button (p. 51) can be switched between camera sensitivity (ISO) and Zone Matching in section 4 of the custom menu (p. 92). For more on Zone Matching, see below.
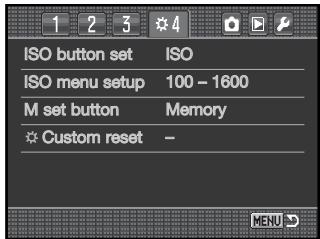
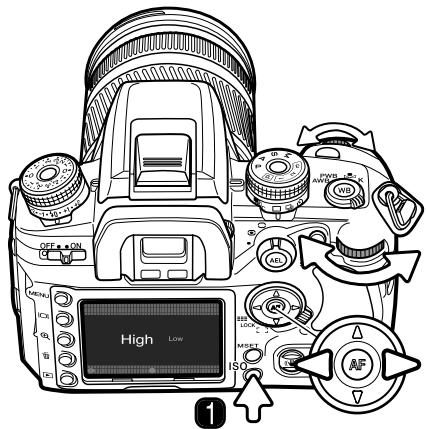
ZONE MATCHING
Zone Matching is used for recording high-key or low-key scenes. Zone Matching is activated in section 4 of the custom menu.
To set Zone Matching, press the ISO button (1) to open the setup screen.
The left/right keys of the controller and the control dials change between high (key) and low (key).
Press the central button of the controller or the shutter-release button to complete the operation.
When selected, an indicator is displayed on the monitor. The camera sensitivity is fixed at ISO 250 for high and ISO 100 for low. The color mode is fixed at Natural. Contrast cannot be changed with the Digital Effect Control.
A high-key scene is made up of predominantly light tones and colors. A low-key scene is made up of dark tones and colors. Zone Matching controls exposure and contrast to improve reproduction of these scenes.
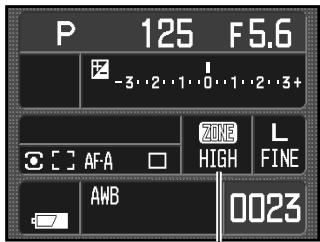
Zone Matching indicator
ISO MENU SETUP
The ISO range available is selected section 4 of the custom menu (p. 92). See page 51 for more on camera sensitivity and ISO. Two ranges are available:
ISO 100 - 1600
ISO 100 - 3200
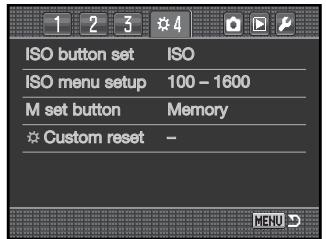
M-SET BUTTON SETUP
The function assigned to the memory set (M SET) button can be specified in section 4 of the custom menu (p. 92). Two options are available:
Memory - camera settings can be saved to the camera memory. For more information on this function, see page 63.
Menu shortcut - a shortcut to a specific menu section can be made.
Creating a menu shortcut
Display the menu section to which a shortcut is to be made. Press the M SET button (1); a confirmation screen opens.
Use the left/right keys to highlight "Yes." "No" cancels the operation.
Press the controller to execute the command on the confirmation screen.
In the recording and playback mode, each time the M SET button is pressed, the specified menu section is displayed.

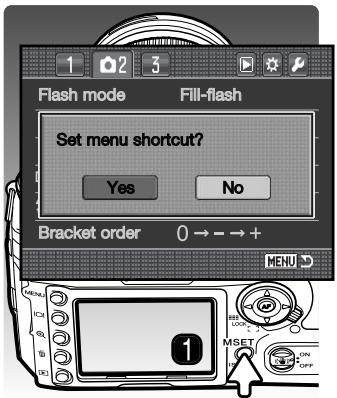
CUSTOM MENU RESET
The custom functions can be reset in section 4 of the custom menu (p. 92). When selected, a confirmation screen appears; choosing "Yes" resets the following functions and settings, "No" cancels the operation.
| AF/Shutter-release priority setup | AF priority | p. 94 |
| Focus-hold button setup | Focus hold | p. 94 |
| AF/MF button setup | Hold | p. 94 |
| AEL button setup | AE hold | p. 95 |
| AF with shutter-release button | On | p. 95 |
| Auto AF setup | Auto AF | p. 96 |
| Control-dial setup | Front dial: SS, Rear dial: F/no. | p. 96 |
| Control-dial (exposure comp.) setup | Off | p. 96 |
| Control dial lock | Off | p. 97 |
| Exposure compensation setup | Ambient & flash | p. 97 |
| AF illuminator | On | p. 97 |
| Shutter lock | On | p. 97 |
| AF area setup | 0.3 second display | p. 98 |
| Monitor display setup | Automatic | p. 98 |
| Recording display setup | Auto rotate | p. 98 |
| Anti-Shake viewfinder display setup | On | p. 98 |
| ISO button setup | ISO | p. 99 |
| ISO menu setup | 100 - 1600 | p. 100 |
| M-SET button setup | Memory | p. 100 |
SETUP MENU
The setup menu controls camera operation. See page 91 on how to open the setup menu.
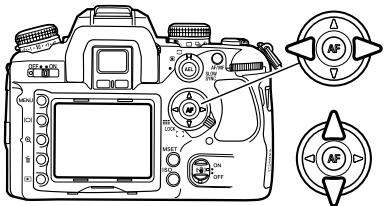
Use the left/right keys of the controller to highlight the appropriate menu tab; the menus change as the tabs are highlighted.
When the required menu section is displayed, use the up/down key to scroll through the menu options. Highlight the option whose setting needs to be changed.

Press the right controller key to display the settings; the current setting is indicated by an arrow. To return to the menu options, press the left key.
Use the up/down key to highlight the new setting. If “Enter” is displayed, press the central button of the controller to continue.

Press the central button of the controller to select the highlighted setting.
Once a setting has been selected, the cursor returns to the menu options and the new setting is displayed. Changes can continue to be made.
Camera Notes
The control dials can move the cursor in the menus. The front dial moves the cursor up and down. The rear dial moves it left and right.
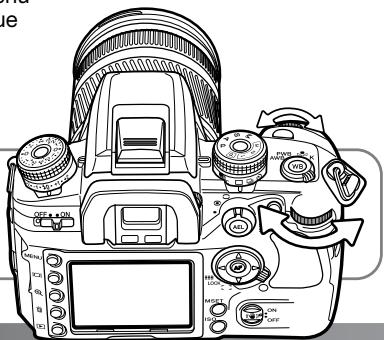
natural_image
Line drawing of a DSLR camera with control knobs and display screen (no text or symbols)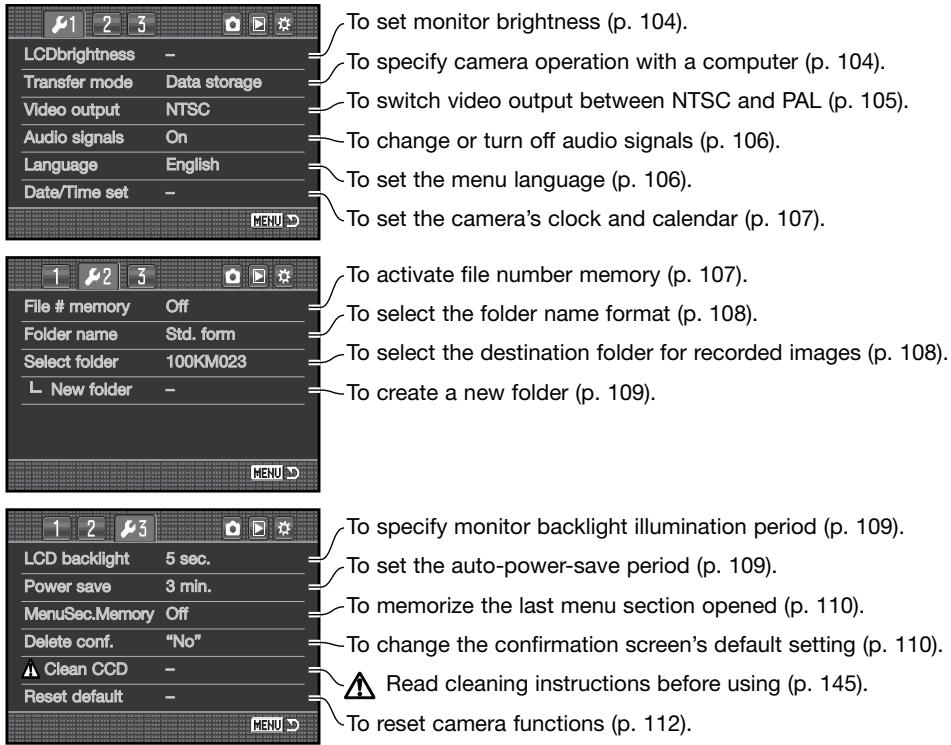
LCD BRIGHTNESS
Monitor brightness is adjusted in section 1 of the setup menu. Highlight "Enter" and press the central button of the controller to open the LCD brightness setup screen.
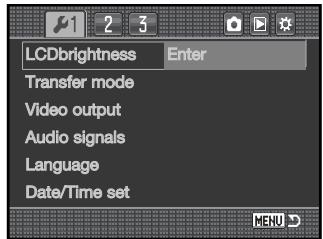
Brightness is controlled in eleven levels. Use the left/right controller keys to adjust the brightness, the monitor adjusts accordingly.
Press the central button of the controller to set the level and complete the operation. Press the menu button to close the screen without applying any changes.

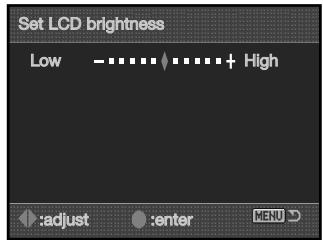
TRANSFER MODE
The data-transfer mode must be specified depending on whether the camera is used to transfer data to a computer or print images with a PictBridge compatible printer. Select the appropriate option:
Data storage - to transfer data between the camera and a computer. This option must be selected when moving image files to a computer or when using the DiMAGE Viewer or DiMAGE Master software.
PTP - to print images with a PictBridge compatible printer. See page 132 for more on PictBridge.
VIDEO OUTPUT
Camera images can be displayed on a television. The video output can be changed between NTSC and PAL. North America uses the NTSC standard and Europe uses the PAL standard. Check which standard is used in your region to play back images on your television set.
VIEWING IMAGES ON A TELEVISION
It is possible to view camera images on your television. The camera has a video-out terminal which can be used to connect the camera to a television using the supplied video cable.
- Turn off the television and the camera.
- Slide the terminal cover open (1) and insert the plug of the video cable into the camera's video-out terminal (2).
- Plug the other end of the video cable into the video input terminal on the television.
- Turn the television on.
- Change the television to the video channel.
- Turn on the camera and press playback button. The camera's monitors do not activate when the camera is attached to a television. The playback-mode display is visible on the television screen.
- View images as described in the playback section. Because of the broadcast standard used to display television images, image quality and resolution will appear lower than when displayed on a computer monitor.
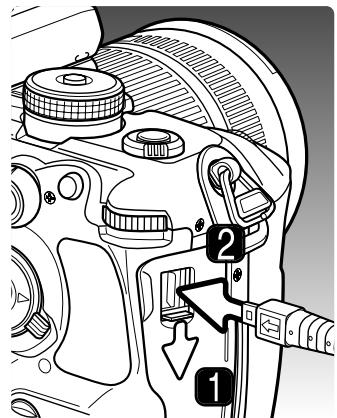
AUDIO SIGNALS
When the shutter-release button is pressed partway down, an audio signal gives a positive confirmation the AF system has focused. This signals can be turned off in section 1 of the setup menu (p. 102).
LANGUAGE
The language used in the menus can be changed. Highlight the current language and press the center of the controller to open the language setup screen.
Use the four-way keys of the controller to select the menu language.
Press the central button of the controller to set the language. Press the menu button to close the screen without making any changes.


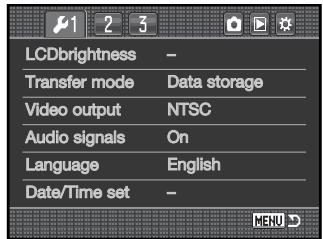
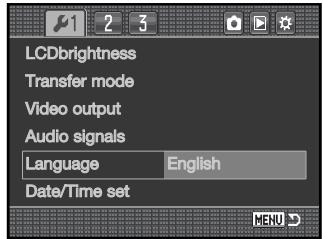
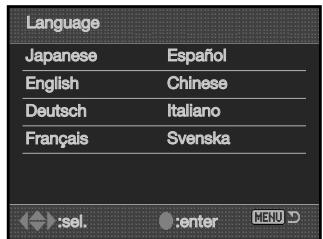
DATE AND TIME SETUP
It is important to accurately set the clock. When a still image is recorded, the date and time of the recording are saved with the image and are displayed during playback or can be read with the DiMAGE Viewer or DiMAGE Master software. When the Date/Time-set option is selected and entered in section 1 of the setup menu, the date/time screen is displayed.
Use the left/right keys of the controller or rear control dial to select the item to be changed.
Use the up/down keys or front control dial to change the item.
Press the central button of the controller to complete the operation.


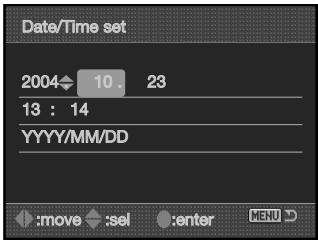
FILE NUMBER (#) MEMORY
When file number memory is selected, if a new folder is created, the first file stored in the folder will have a number one greater than the last file saved. This allows multiple folders to be created, but the image file numbers will be in the order in which they were shot. If the file number memory is disabled, the image file name will have a number one greater than the last image saved in the folder.
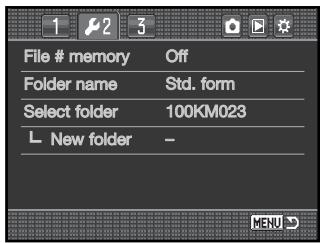
If file number memory is active and the memory card is changed, the first file saved to the new card will have a number one greater than the last file saved on the previous card if the new card does
not contain an image with a greater file number. If it does, the file number of the new image will be one greater than the greatest on the card.
FOLDER NAME
All recorded images are stored in folders on the memory card. Folder names come in two formats: standard and date.
Standard folders have an eight character name. The initial folder is named 100KM023. The first three digits are the folder's serial number, which increases by one each time a new folder is created. The next two letters refer to Konica Minolta, and the last three numbers indicate the camera used; 023 indicates a Dynax 7D.
A date folder name also starts with the three digit serial number and is followed by one register for the year, two register for the month, and two registers for the day: 100YMMDD. The folder 10141023 was created in 2004 on October 23rd.
With the date folder format selected, when an image is recorded a new folder with the day's date is created. All images recorded that day are placed in that folder. Images recorded on a different day are placed in a new folder with the corresponding date. When a new folder is created, the serial number in the image-file name is reset to 0001 unless file number memory is active. For more information on folder organization and file names, see page 126.
SELECT FOLDER
This option specifies in which folder images are saved. Only folders with a standard folder name can be selected. If the date folder name option is used, images are placed in a folder with the corresponding date of recording. Select folder is in section 2 of the setup menu (p. 102).
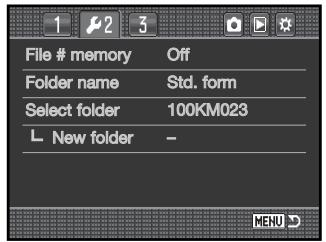

100KM023
(Standard)

10141023
(Date)
NEW FOLDER
This allows the creation of new folders. The folder-name option in section 2 of the setup menu specifies the folder-name format. If multiple date-format folders are created, only the last folder can be used for storing images.
Highlight “Enter” and press the center of the controller to create a new folder.
The new folder name is displayed briefly. Every time a new folder is created, the folder number increases automatically by one greater than the highest folder number on the memory card.
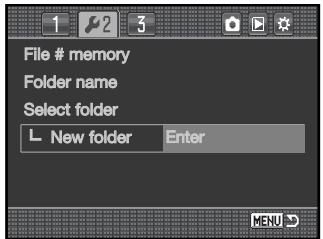
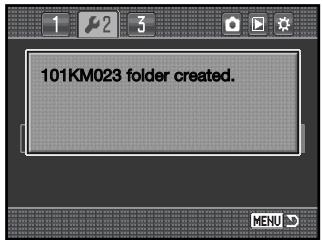
LCD BACKLIGHT
The LCD monitor backlight turns off to conserve power after a certain period. Press a camera button to restore the display. This period can be set to 5, 10, 30, or 60 seconds in section 3 of the setup menu (p, 102).
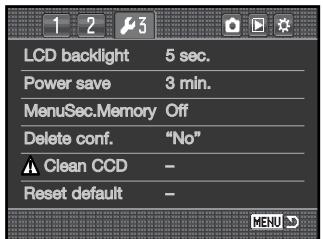
AUTO POWER SAVE
The camera shuts down to conserve battery power if no operation is made within a certain period. The length of this period can be changed to 1, 3, 5, 10, or 30 minutes. To restore power, press the shutter-release button partway down. When the camera is connected to the computer, the auto-power-save period is set to ten minutes. This period cannot be changed.
MENU SECTION MEMORY
The camera can remember which menu section was lasted opened. If the menu section memory function is on, when the menu button is pressed, the last menu section that was last displayed is opened. When menu section memory is off, section 1 of the recording or playback menu is displayed when the menu button is pressed.
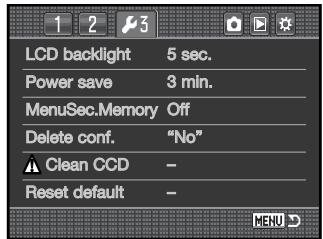
DELETE CONFIRMATION
Each time a delete command is used a confirmation screen appears confirming the action to erase the image data. When this screen opens, the no button is highlighted. This function allows the yes button to be initially highlighted to make deleting images easier. Care should be taken when deleting images as the data cannot be retrieved once erased.
![Delete? Yes No 15/24 2004.11.28 100-01:55 [0024/005]](/content/2025/01/165690/images/03cfb2e3c92934d20b426df65623b32dd31c677dcce584001d066dbe08e33188.jpg)
CLEAN CCD

Only clean the CCD when necessary. Improper cleaning may damage the CCD.
Dust can enter the camera body when changing lenses. The camera should have a lens or body cap mounted at all times. Confirm the rear of the lens and cap is free from dust before mounting on the body.
Clean the CCD in a dust-free environment. Use a blower brush to remove the dust - compressed air can damage the camera.
Accessory Notes
The DiMAGE Master software can remove the affects of dust from RAW images. This is done by taking a dust reference image before cleaning the CCD. For more on this process, see the DiMAGE Master manual.
The battery should be fully charged before cleaning the CCD. If battery power is low, this function cannot be used. The use of the optional AC adapter is recommended over the use of the battery. Cleaning the CCD without sufficient power will cause permanent damage.
Highlight “Enter” and press the center of the controller to begin the cleaning routine.
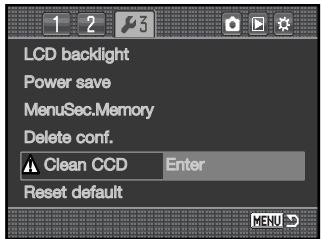
Before the CCD is exposed, a confirmation screen appears; choosing “Yes” executes opens the shutter and mirror, “No” cancels the cleaning operation.
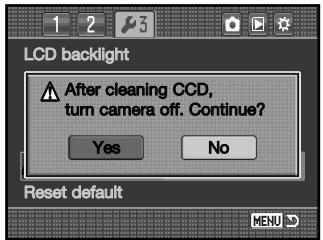
Remove the lens or body cap.
Use a blower brush to clean the CCD. Hold the body so it is leaning forward to prevent the dust blown from the CCD resettling in the camera. Do not touch the interior of the camera. If the camera starts beeping, power is low. Immediately stop cleaning and turn the camera off.
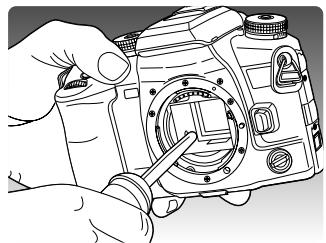
natural_image
Line drawing of a hand using a camera to adjust the lens (no text or symbols present)Turn the camera off to complete the operation. Replace the lens or body cap.
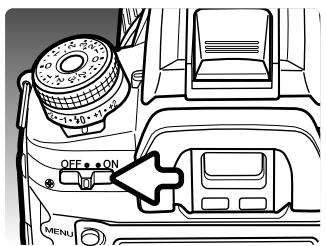
RESET DEFAULT
This option resets all camera modes and menus. When selected, a confirmation screen appears; choosing “Yes” resets the following functions and settings, “No” cancels the operation.
| Recording and Playback mode | ||
| Monitor display | Full display | p. 33 |
| Focus-area selection | Spot AF area | p. 55 |
| Preset white balance | Daylight ±0 | p. 60 |
| Custom white balance | Reset (Daylight) | p. 61 |
| Color temperature | 5500K | p. 62 |
| Camera sensitivity | ISO 100 | p. 51 |
| Memory | All registers reset | p. 63 |
| Playback display | Single frame | p. 34 |
| Recording menu | ||
| Image size | L: 3008 x 2000 | p. 66 |
| Image quality | Fine | p. 66 |
| Color mode | Natural | p. 68 |
| Digital Effects Control | Reset (0) | p. 69 |
| Flash mode | Fill flash or Red-eye reduction* | p. 71 |
| Flash control | ADI | p. 75 |
| Power ratio | 1/1 | p. 76 |
| Exposure bracketing setup | 0.3Ev / 3 frames | p. 70 |
| Flash bracketing setup | 0.3Ev / 3 frames | p. 70 |
| Bracketing order | Normal, underexpose, overexpose | p. 70 |
| Instant playback | 2 seconds, image & information | p. 77 |
| Noise reduction | On | p. 77 |
| Interval setup | 1 minute, 2 frames, no delay | p. 78 |
| Playback menu | ||
| View folder | All folders | p. 85 |
| Index format | 9 frame | p. 87 |
| Date imprint | Off | p. 90 |
| Custom menu | ||
| AF/Shutter-release priority setup | AF priority | p. 94 |
| Focus-hold button setup | Focus hold | p. 94 |
| AF/MF button setup | Hold | p. 94 |
| AEL button setup | AE hold | p. 95 |
| AF with shutter-release button | On | p. 95 |
| Auto AF setup | Auto AF | p. 96 |
| Control-dial setup | Front dial: SS, Rear dial: F/no. | p. 96 |
| Control-dial (exposure comp.) setup | Off | p. 96 |
| Control dial lock | Off | p. 97 |
| Exposure compensation setup | Ambient & flash | p. 97 |
| AF illuminator | On | p. 97 |
| Shutter lock | On | p. 97 |
| AF area setup | 0.3 second display | p. 98 |
| Monitor display setup | Automatic | p. 98 |
| Recording display setup | Auto rotate | p. 98 |
| Anti-Shake viewfinder display setup | On | p. 98 |
| ISO button setup | ISO | p. 99 |
| ISO menu setup | 100 - 1600 | p. 100 |
| M-SET button setup | Memory | p. 100 |
| Setup menu | ||
| LCD brightness | Reset | p. 104 |
| Transfer mode | Data storage | p. 104 |
| Audio signal | On | p. 106 |
| File number memory | Off | p. 107 |
| Folder name | Standard form | p. 108 |
| LCD backlight period | 5 seconds | p. 109 |
| Auto-power-save period | 3 minutes | p. 109 |
| Menu section memory | Off | p. 110 |
| Default confirmation | “No” | p. 110 |
* Whichever of the modes was last set
ACCESSORY NOTES
This section contains operation and compatibility information with camera accessories. Please read it in its entirety to achieve the best results with your camera.
AC ADAPTER AC-11 (SOLD SEPARATELY)
The AC Adapter AC-11 allows the camera to be powered from an electrical household outlet. The AC Adapter is recommended when the camera is interfaced with a computer or during periods of heavy use.

Always turn off the camera and confirm the access lamp is not lit before changing between power supplies.
Open the DC terminal cover from the right. The cover is attached to the body to prevent loss.
Insert the mini plug of the AC adapter into the DC terminal.
Insert the AC adapter plug into an electrical outlet.
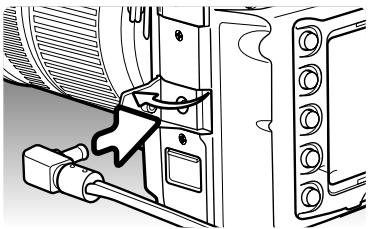
natural_image
Technical line drawing of a mechanical assembly with no visible text or symbolsABOUT THE BATTERY CHARGER CORD
The included AC cord is designed for the current of the sales region. Only use the cord in the region it was purchased.
| Region | Product code |
| Continental Europe, Korea, Singapore (220-240V) | APC-150 |
| Great Britain, Hong Kong (220V-240V) | APC-160 |
| United States, Canada, Japan, Taiwan (100V-120V) | APC-170 |
| China (220-240V) | APC-151 |
| Australia (220-240V) | APC-230 |
Accessory Notes
The External High-Power Battery Pack Kit EPB-100 is not compatible with this camera.
VERTICAL CONTROL GRIP VC-7D (SOLD SEPARATELY)
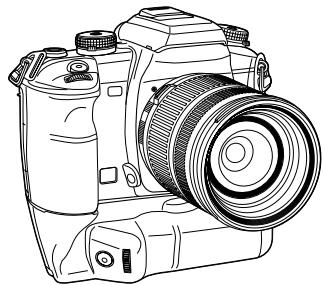
natural_image
Line drawing of a DSLR camera with lens and external frame (no text or symbols)The Vertical Control Grip VC-7D allows the camera to be used comfortably when held vertically and well as horizontally. The grip duplicates camera controls as well as being a portable power source for the camera. This accessory uses two NP-400 lithium-ion batteries or six AA-size Ni-MH batteries to power the camera. For more details on this or other accessories listed in this manual, contact your local Konica Minolta dealer.
FOCUSING-SCREEN COMPATIBILITY
This camera is supplied with a type G spherical acute matte focusing screen. Type M, L, and ML screens can also be used. Focusing screens must be installed by an authorized Konica Minolta service facility. Contact Konica Minolta for more information.
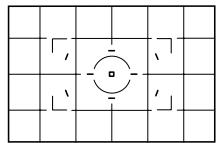
natural_image
Grid pattern with a central circle and four corner markings (no text or symbols)Type L / ML
LENS SHADOWING
Lens shadowing occurs when the lens or lens hood blocks part of the output from the built-in flash. Lens shadowing appears as a semi-circular shadow at the bottom (horizontal pictures) or side (vertical pictures) of the image. Remove the lens hood before using the built-in flash. Focus distance must be 1m / 3.3ft or greater. The built-in flash can not be used with the AF 600mm f/4 Apo G(HS).
SMOOTH FOCUS
Some lenses or lens and teleconverter combinations can be difficult to focus manually. The following procedure disconnects the body's AF system to make focusing easier. Metering accuracy and Anti-Shake performance is lower when using the function. This cannot be used with xi series or AF Power Zoom lenses.
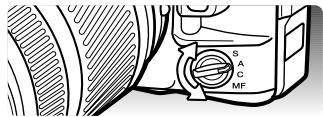
Turn the focus-mode dial to the manual-focus position.
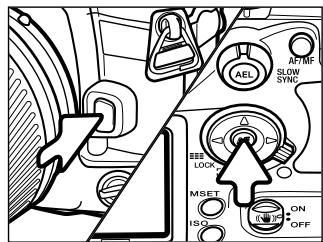
Simultaneously press and hold the lens release and the central button of the controller.
Release the lens release followed by the controller to disconnect the AF system.
![P 125 F5.6 -3..2..1..0..1..2..3+ Natural L ISO 100 FINE [ ] MF AMB 0023](/content/2025/01/165690/images/de249547f5bca99c7180761d45b79f914ac83f07038bf94daac73fcd6c8f926a.jpg)
An indicator warns the smooth-focus mode is active. To cancel the mode, repeat the procedure or change the position of the focus-mode dial.
Smooth-focus indicator
FOCAL-LENGTH CONVERSION
Because the CCD is smaller than a 35mm frame, the angle of view obtained at a specific focal length is not the same. To calculate the approximate equivalent 35mm focal length, multiply the focal length in use by 1.5. A 100mm lens gives about the same angle of view as a 150mm lens on a 35mm camera.
CCD-PLANE INDICATOR
For some technical photographic applications such as macro photography, the position of the CCD plane is necessary. The CCD-plane indicator is located next to the exposure-mode dial.
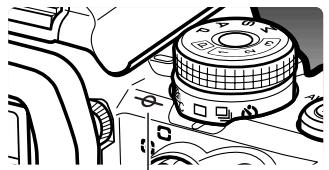
natural_image
Mechanical component diagram showing a cam and wheel assembly (no text or symbols visible)CCD-plane indicator
LENS COMPATIBILITY
All Konica Minolta AF lenses are compatible with this camera. MD and MC series lenses cannot be used. For our current line of lenses, contact your Konica Minolta dealer.
The AF Macro Zoom 3X - 1X f/1.7-2.8 cannot be used with Anti-Shake (p. 32); turn Anti-Shake off. If a lens is equipped with a macro release, the release cannot be used with Anti-Shake. Focus range limiters set to a range that does not include infinity cannot be used. The focus range limiter on the SSM-series or D-series macro lenses can be used at any set range. Anti-Shake may not work with products made by another manufacturer.
ATTACHING AN ACCESSORY FLASH UNIT
To extend the versatility of the camera, an accessory flash unit (sold separately) can be used. Always remove the accessory flash when the camera is not in use, and replace the accessory-shoe cap to protect the contacts.
Slide the accessory-shoe cap off as shown. Mount the flash unit on the accessory shoe by sliding it forward until it stops.
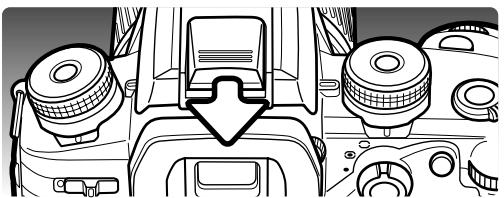
natural_image
Diagram of a vehicle dashboard and steering wheel assembly (no text or labels)FLASH COMPATIBILITY
The following flash units are compatible with this camera:
Program Flash 2500(D)
Program Flash 3600HS(D)
Program Flash 5600HS(D)
Macro Ring Flash 1200 with Macro Flash Controller
Macro Twin Flash 2400 with Macro Flash Controller
The 5400HS, 5400xi, and 5200i can be used with this camera with manual flash control only. The 4000AF, using the Flash Adapter FS-1100, can also be used with manual flash control.
HIGH-SPEED SYNC. (HSS)
This camera is compatible with the High Speed Sync. (HSS) function in the Program Flash 5600HS(D) and 3600HS(D). This allows the camera to use its full range of shutter speeds up to 1/4000 second.
Attach a compatible flash unit to the camera. Set the flash unit to HSS. When the shutter speed exceeds the camera sync. speed, the High Speed Sync. indicator (H) is displayed on the monitor and in the viewfinder.
HSS cannot be used with the 2-second self-timer drive mode nor the rear sync. flash mode.
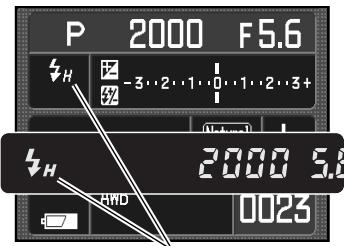
High Speed Sync. indicator
USING THE FLASH SYNC TERMINAL
The flash sync terminal allows a studio or location flash system to be connected to the camera with a standard PC cord. The terminal is compatible with both center positive (normal polarity) and center negative (positive polarity) flash units with a voltage of 400V or lower.
Open the flash sync. terminal cover from the right; the cover is attached to the body to prevent loss. Securely connect the flash's PC cord to the flash sync terminal. Confirm the flash is off before connecting the cable to prevent it from firing.
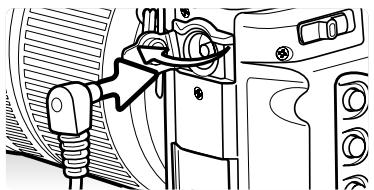
natural_image
Mechanical assembly diagram showing a valve inserted into a housing (no text or labels visible)To ensure correct exposures, use the manual exposure mode (p. 44). Set the shutter speed equal to or slower than the flash duration; refer to the flash unit's instruction manual.
If the built-in flash is raised when another flash unit is connected to the flash sync terminal, both flash units will fire. However, the camera's automatic flash control systems will not provide correct exposures. To use the built-in flash as a fill light, use manual flash control (p. 75).
The use of custom white balance is recommended (p. 61). When calibrating the camera, use the shutter speed and aperture settings require for the final exposure. A gray card may have to be used as the reference target with powerful flash units to reduce the intensity of the illumination. If custom white balance is not practical, use the preset daylight or flash setting or set the color temperature (p. 62) to the flash unit's color temperature if known; auto white balance is not recommended.
To make an exposure bracket, press and hold the AEL button during the bracketing series. The camera's flash-compensation dial has no affect on the flash exposure.
DATA-TRANSFER MODE
Read this section carefully before connecting the camera to a computer. Details on using and installing the DiMAGE Viewer software are found in the supplied software manual. These manuals do not cover the basic operation of computers or their operating systems; please refer to the manual supplied with your computer.
SYSTEM REQUIREMENTS
For the camera to be connected directly to the computer and used as a mass-storage device, the computer must be equipped with a USB port as a standard interface. The computer and the operating system must be guaranteed by their manufacturers to support USB interface. The following operating systems are compatible with the camera:
Windows 98, 98SE, Me, 2000 Professional, and XP
Macintosh OS 9.0 \~ 9.2.2 and Mac OS X 10.1.3 \~ 10.1.5, 10.2.1 \~ 10.2.8, 10.3 \~ 10.3.5
Compatibility with Windows XP is with the home or professional editions only. Check the Konica Minolta web site for the latest compatibility information:
North America: http://www.konicaminolta.us/
Europe: http://www.konicaminoltasupport.com
Users with Windows 98 or 98 second edition will need to install the driver software on the included DiMAGE software CD-ROM (p. 122). No special driver software is required for other Windows or Macintosh operating systems.
Customers who have bought a previous DiMAGE digital camera and have installed the Windows 98 driver software must repeat the installation procedure. The updated version of the driver software included on the supplied DiMAGE software CD-ROM is required for the operation of the this camera with a computer. The new software will have no affect on the performance of DiMAGE cameras.
A remote camera driver is supplied in the Windows edition of the DiMAGE Viewer CD-ROM. This driver is not compatible with this camera.
CONNECTING THE CAMERA TO A COMPUTER
A fully charged battery should be used when the camera is connected to a computer. The AC adapter (sold separately) is recommended over the use of batteries. For users with Windows 98, read the section on how to install the necessary driver before connecting the camera to a computer.
- Confirm the data-transfer option in section 1 of the setup menu is set to "Data storage" (p. 102). Turn the camera off.
- Start up the computer. The computer must be on before connecting the camera.
- Slide open the video out / USB port cover. Attach the smaller plug of the USB cable to the camera. The plug should be firmly attached.
- Attach the other end of the USB cable to the computer's USB port. The plug should be firmly attached. The camera should be connected directly to the computer's USB port. Attaching the camera to a USB hub may prevent proper operation.
- With a memory card inserted, turn on the camera. A screen appears to indicate the start of the connection process. When the connection is made, the camera's monitors turn off. To change the card while the camera is connected to a computer, see page 130.
With the camera properly connected to Windows XP or Mac OS X, a window may open to download image data; follow the instructions in the window. A drive icon, or volume, appears in My Computer or on the desktop; the volume name varies with memory card and operating system. If the volume does not appear, disconnect the camera, restart the computer, and repeat the procedure.
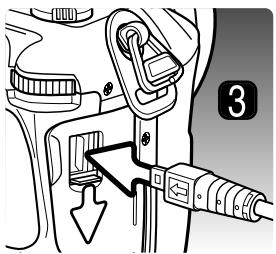
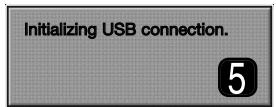
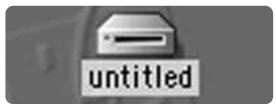
Desktop: Mac OS
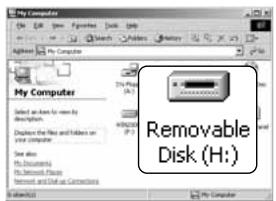
My Computer: Windows
CONNECTING TO WINDOWS 98 / 98 SECOND EDITION
The driver needs only to be installed once. If the driver cannot be installed automatically, it can be installed manually with the operating system's add-new-hardware wizard; see the instructions on the following page. During installation, if the operating system requests the Windows 98 CD-ROM, inset it into the CD-ROM drive and follow the accompanying instructions on the screen. No special driver software is required for other Windows operating systems.
Automatic Installation
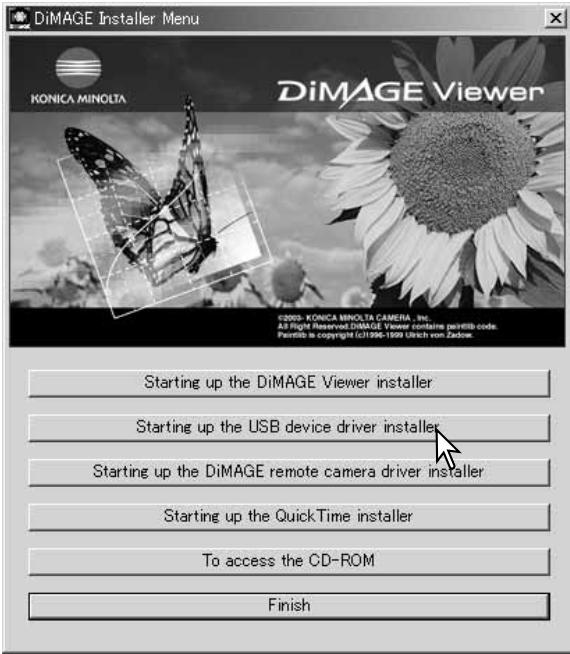
Before connecting the camera to the computer, place the DiMAGE Viewer CD-ROM in the CD-ROM drive. The DiMAGE installer menu should automatically activate. To automatically install the Windows 98 USB driver, click on the starting-up-the-USB-device-driver-installer button. A window appears to confirm that the driver should be installed; click "Yes" to continue.
When the driver has been successfully installed, a window appears. Click “OK.” Restart the computer before connecting the camera (p. 121).
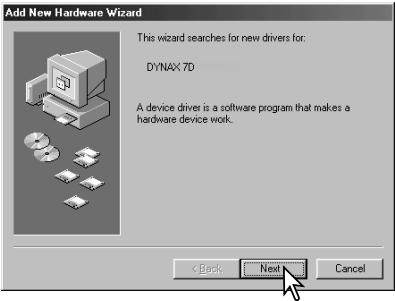
Manual installation
To install the Windows 98 driver manually, follow the instructions in the connecting-the-camera-to-a-computer section on page 121.
When the camera is plugged into the computer, the operating system will detect the new device and the add-new-hardware-wizard window opens. Place the DiMAGE Viewer CD-ROM in the CD-ROM drive. Click “Next.”
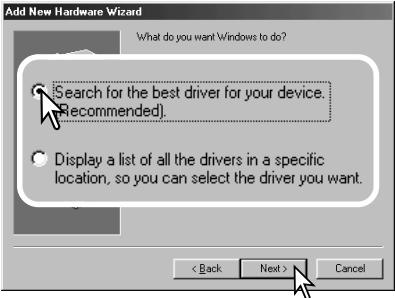
Choose the recommended search for a suitable driver. Click "Next."
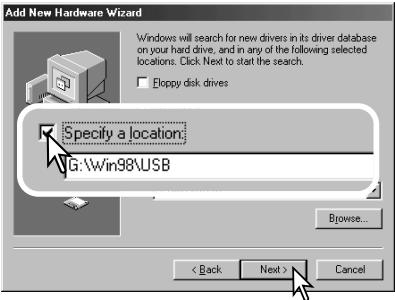
Choose to specify the location of the driver. The browse window can be used to indicate the driver location. The driver should be located in the CD-ROM drive at :\Win98\USB. When the location is shown in the window, click "Next."
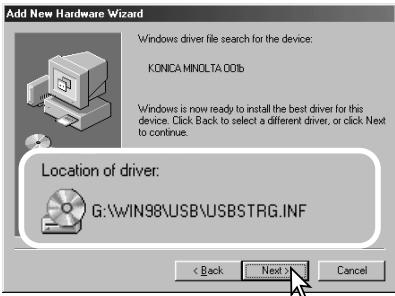
The add new hardware wizard confirms the location of the driver. One of three drivers may be located: MNLVENUM.inf, USBPDR.inf, or USBSTRG.inf. The letter designating the CD-ROM drive varies between computers. Click “Next” to install the driver in the system.
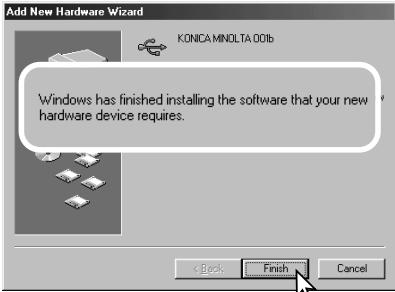
The last window confirms the driver has been installed. Click "Finish" to close the add new hardware wizard. Restart the computer.

When the my-computer window is opened, a new removable-disk icon is displayed. Double click on the icon to access the camera's memory card; see page 126.
AUTO POWER SAVE (DATA-TRANSFER MODE)
If the camera does not receive a read or write command within ten minutes, it will shut down to save power. When the camera shuts down, an unsafe-removal-of-device warning may appear on the computer monitor. Click “OK.” Neither the camera or computer will be damaged in this operation.
Unplug the USB cable and turn off the camera. Remake the USB connection by reattaching the cable and turning the camera on.
Konica Minolta History
On February 20th, 1962, John Glenn became the first American to orbit the Earth. On board his Friendship 7 spacecraft was a Minolta Hi-matic camera to record that historic event. The 4 hour, 55 minute, and 23 second flight orbited the Earth three times at an average speed of 28,000 kph (17,500 mph).
Mr. Glenn visited our Sakai camera factory in Japan on May 24th, 1963 to plant a palm tree to celebrate the occasion. The palm tree is still in the courtyard of the factory and stands over eight meters tall (26ft).
The camera? It was not lost. It is on display at the Smithsonian Institution's National Air and Space Museum in Washington D.C. This and other objects from John Glenn's Friendship 7 Mercury flight can be found in galley 210, “Apollo to the Moon.”
natural_image
Black-and-white photo of people gathered around a large leafy plant outdoors, with no visible text or symbols.MEMORY CARD FOLDER ORGANIZATION
Once the camera is connected to the computer, image files can be accessed by double clicking on icons. Image folders are located in the DCIM folder. To copy images, simply drag and drop the file icon into a location in the computer.
Drive Icon

Dcim

Misc
The misc. folder contains DPOF print files (p. 88).
Files and folders on the memory card can be deleted using the computer. Changing file names or adding other types of data to the card with a computer may cause the camera to malfunction.

100KM023

10141023
From left to right: standard folder and date folder (p. 108).

PICT0001.MRW

PICT0001.THM
RAW image

PICT0002.JPG
Extra fine, fine, or standard image

PICT0003.JPE

PICT0003.THM
Extra fine, fine, or standard image when using embedded Adobe RGB.
Image file names begin with "PICT" followed by a four-digit file number and a mrw, jpg, jpe, or thm extension. The thumbnail images (thm) are used in camera, DiMAGE Viewer, and DiMAGE Master operation.
When a new folder is created, the first three digits in the folder name is one greater than the largest folder number on the card. When the file number in the image file name exceeds 9,999, a new folder is created with a number one greater than the greatest folder number on the memory card: e.g. from 100KM023 to 101KM023.
The file number on the image file may not correspond to its frame number on the camera. As images are deleted in the camera, the frame counter adjust itself to show the number of images on the card and reassign the frame numbers accordingly. The file numbers on the image files do not change when an image is deleted. When a new image is recorded, it is assigned a number one greater than the largest file number in the folder. File numbers can be controlled with the file-number-memory function in section 2 of the setup menu (p. 107).
Camera Notes
Image files contain exif tag data. This data includes the time and date the image was recorded as well as the camera settings used. This data can be viewed with the camera or the DiMAGE Viewer and DiMAGE Master software.
If a camera image is opened in an image-processing application that does not support Exif tags, and then the image is saved overwriting the original data, the Exif tag information is erased. Some Exif compatible applications rewrite the Exif data preventing the DiMAGE Viewer or DiMAGE Master from reading it. When using software other than the DiMAGE Viewer and DiMAGE Master, always rename the image file to protect the exif tag data.
To view images correctly on your computer, the monitor's color space may need to be adjusted. Refer to your computer manual on how to calibrate the display to the following requirements: sRGB, with a color temperature of 6500K, and a gamma of 2.2.
DISCONNECTING THE CAMERA FROM THE COMPUTER
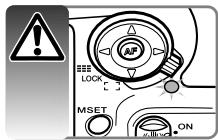
Never disconnect the camera when the access lamp is lit - the data or memory card may permanently be damaged.
Windows 98 / 98 Second Edition
Confirm that the access lamp is not lit. Turn off the camera and then disconnect the USB cable.
Windows Me, 2000 Professional, and XP
To disconnect the camera, click once on the unplug-or-eject-hardware icon located on the task bar. A small window opens indicating the device to be stopped.
Stop USB Mass Storage Device - Drive(H:)

3:45 PM
Click on the small window to stop the device. The safe-to-remove-hardware window will open. Turn off the camera and then disconnect the USB cable.
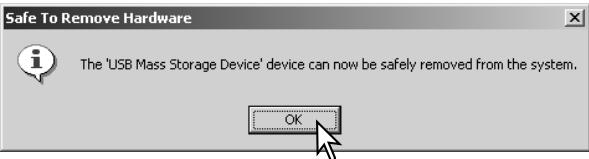
When more than one external device are connected to the computer, repeat the procedure above except right click on the unplug-or-eject-hardware icon. This opens the unplug-or-eject-hardware window after clicking on the small window indicating the unplug-or-eject-hardware routine.
Unplug or eject hardware
3:43 PM
The hardware devices to be stopped are displayed. Highlight the device by clicking on it then click "Stop."
A confirmation screen appears to indicate the devices to be stopped. Clicking "OK" stops the device.
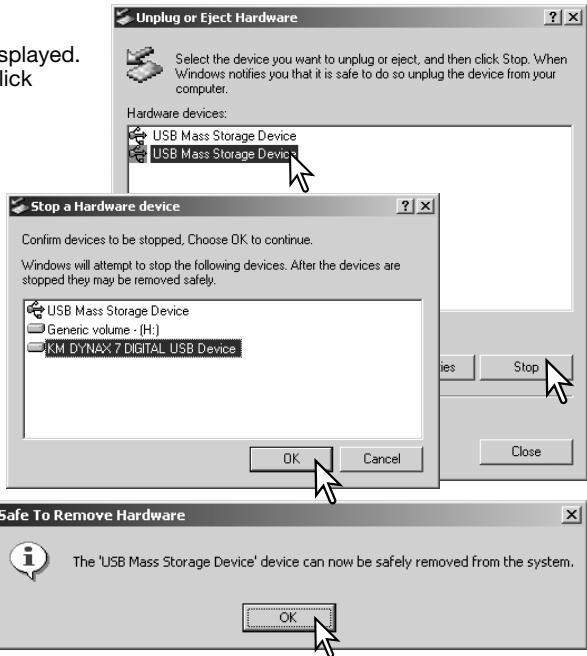
A third and final screen appears to indicate the camera can be safely disconnected from the computer; click OK. Turn off the camera and then disconnect the USB cable.

Macintosh
Confirm that the access lamp is not lit and then drag the mass-storage device icon and drop it into the trash. Disconnect the USB cable.

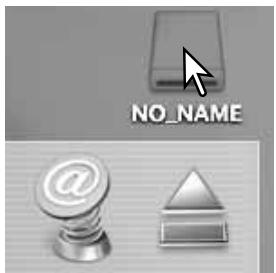
CHANGING THE MEMORY CARD (DATA-TRANSFER MODE)

Care should be taken when changing memory cards while the camera is attached to the computer. Data could be lost or damaged if the camera is not properly disconnected. Always confirm the access lamp is out before removing the memory card.
Windows 98 / 98 Second Edition
- Turn off the camera.
- Change the memory card.
- Turn on the camera to remake the USB connection.
Windows Me, 2000 Professional, and XP
- Stop the USB connection using the unplug-or-eject-hardware routine (p. 128).
- Turn off the camera.
- Change the memory card.
- Turn on the camera to remake the USB connection.
Macintosh
- Stop the USB connection by dragging the drive icon into the trash (p. 129).
- Turn off the camera.
- Change the memory card.
- Turn on the camera to remake the USB connection.
REMOVING THE DRIVER SOFTWARE - WINDOWS
- Insert a memory card in the camera and connect it to the computer with the USB cable. Other devices must not be connected to the computer during this procedure.
- Right click on the My-computer icon. Select "properties" from the drop-down menu.
Windows XP: from the start menu go to the control panel. Click on the performance and maintenance category. Click "System" to open the system properties window. - Windows 2000 and XP: select the hardware tab in the properties window and click the device-manager button.
Windows 98 and Me: click the device-manager tab in the properties window. - The driver file will be located in the universal-serial-bus-controller or other-devices location of the device manager. Click on the locations to display the files. The driver should be indicated with Konica Minolta, the camera name, or "USB Mass Storage Device." Under certain conditions, the driver name may not contain these names. However, the driver will be indicated by either a question mark or exclamation point.
- Click on the driver to select it.
- Windows 2000 and XP: click on the action button to display the drop-down menu. Select "uninstall." A confirmation screen will appear. Clicking "Yes" will remove the driver from the system.
Windows 98 and Me: click the remove button. A confirmation screen will appear. Clicking "Yes" will remove the driver from the system. - Disconnect the USB cable and turn off the camera. Restart the computer.
PICTBRIDGE
Confirm the transfer-mode option in section 1 of the setup menu is set to PTP. Connect the camera to a PictBridge compatible printer using the camera's USB cable. The larger plug on the cable is connected to the printer. Slide open the video out / USB port cover and insert the smaller plug of the cable into the camera. Turn the camera on; the PictBridge screen is displayed automatically.
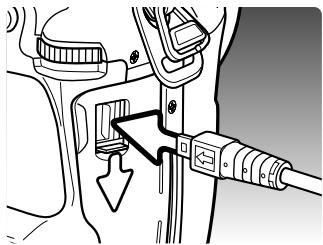
natural_image
Diagram of a car interior showing a valve mechanism and a directional arrow (no text or symbols)Individual still images can be selected for printing on the PictBridge screen; RAW and images with the embedded Adobe RGB color profile (p. 68) are not displayed and cannot be selected. For other printing options, see the menu navigation section on page 134.
Use the left/right keys of the controller to display the image to be printed.
Press the up key to select the number of copies to be printed. To deselect an image for printing, press the down key until the number of copies reaches zero. A maximum number of fifty images can be printed.
Repeat the previous steps until all the images to be printed are selected. Press the central button of the controller to continue.
Total number of prints
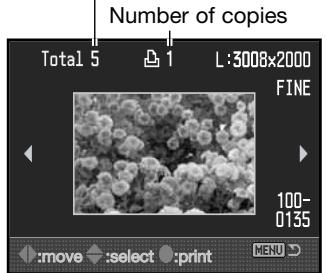


PictBridge screen
The display button switches between the single frame and index playback formats on the PictBridge screen. Enlarged playback, activated with the magnification button (p. 38), can be used to examine image files on the screen.
The number of prints in the print run are displayed as well as the print parameters selected with the menu. See the menu navigation section for more information (p. 134). Press the central button of the controller to begin printing, or press the menu button to return to the PictBridge screen.
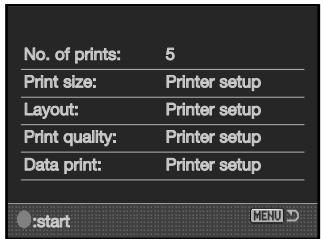
Once printing begins, the operation can be canceled by pressing the center of the controller. The printing-finished message indicates the end of the operation; turn the camera off to end the routine.
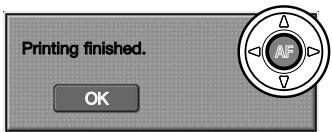
NOTES ON PRINTING ERRORS
If the battery is exhausted before the print run is complete, printing is canceled. Use a fully-charged battery or the optional AC adapter.
If a minor problem occurs during printing, such as the paper runs out, follow the procedure recommended for the printer; no action is required for the camera. If a major printer error occurs, press the center of the controller to end the routine. Refer to the printer manual for the correct procedure for the printer problem. Check the printer settings before starting again and deselect the images that were printed.
NAVIGATING THE PICTBRIDGE MENU
Pressing the menu button opens and closes the menu. The four-way keys of the controller and the control dials move the cursor in the menu. Pressing the central button of the controller enters a setting. The options that can be changed vary with the printer.
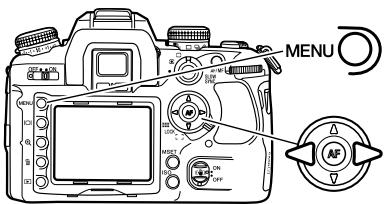
Activate the menu with the menu button. Tab 1 at the top of the menu is highlighted.
Use the left/right keys of the controller to highlight the appropriate menu tab; the menus change as the tabs are highlighted.
Use the up/down key to scroll through the menu options. Highlight the option whose setting needs to be changed.

With the menu option highlighted, press the right controller key; the settings are displayed with the current setting highlighted. If “Start” is displayed, press the center of the controller to continue.
Use the up/down key to highlight the new setting.

Press the central button of the controller to select the highlighted setting.
Once a setting has been selected, the cursor returns to the menu options and the new setting is displayed. To return to the PictBridge screen, press the menu button. Read the following sections on information on the menu options.
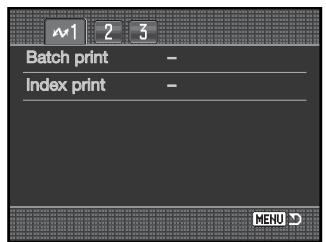
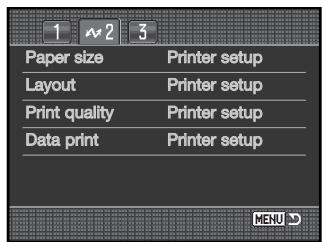
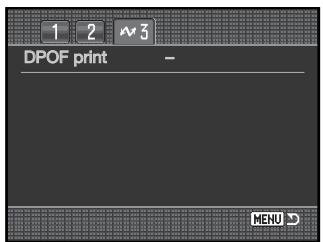
Index to menu functions
Batch print, 135
Data print, 137
DPOF print, 137
Index print, 135
Layout, 136
Paper size, 136
Print quality, 137
Batch print
Batch print in section 1 selects all still images on the memory card for printing. Two options are available:
All-frames - to print all images on the card. A screen opens so the number of copies of each image can be specified. A total number of fifty images can be printed.
Reset - to cancel changes made with the batch print option or with the print selection screen.
Index print
An index print of all still images on the memory card can be made. The quality and size of the print can be specified with the camera menu. The number of images per page varies with the printer. The print-setup confirmation screen is displayed before the print routine starts.

Paper size
The paper size of the print can be specified in section 2 of the PictBridge menu. The printer-setup option uses the size set with the printer.
Highlight the current size setting in the menu and press the central button of the controller to open the paper-size screen.
Use the four-way keys of the controller to highlight the paper size.
Press the central button of the controller to set the paper size.

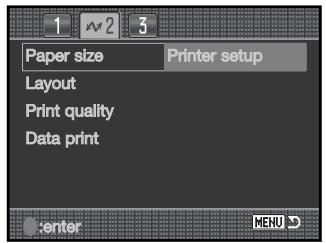

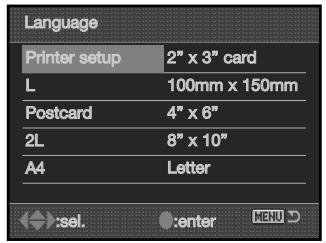

Printing Notes
The following are the dimensions for postcard, L, and 2L paper sizes in both millimeters and inches for your reference:
| Postcard | 100 X 148mm | 3.9 X 5.9 in. |
| L | 89 X 127mm | 3.5 X 5.0 in. |
| 2L | 127 X 178mm | 5.0 X 7.0 in. |
Layout
The layout of the print can be set in section 2 of the PictBridge menu. The printer-setup option uses the layout parameters of the printer. Borderless printing can be specified with the camera as well as the number of images per page.
Print quality
The print quality can be set in section 2 of the PictBridge menu. The printer-setup option uses the quality set with the printer. The fine quality can be specified with the camera.
Data print
Data can be printed with the image in section 2 of the PictBridge menu. The printer-setup option uses the options set with the printer. The date of capture and the file name can be selected for printing. Data printing can also be disabled with the menu.
DPOF print
DPOF print in section 3 allows still images and an index print selected with the DPOF printing options in section 2 of the playback menu to be printed from a DPOF compatible PictBridge printer. Simply select the start option from the menu to begin the routine.
The number of prints in the print run are displayed; an index print is counted as one. Press the central button of the controller to begin printing, or press the menu button to return to the PictBridge menu.
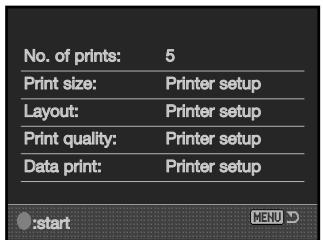
Once printing begins, the operation can be canceled by pressing the center of the controller. The printing-finished message indicates the end of the operation; press the center of the controller and turn the camera off to end the routine.
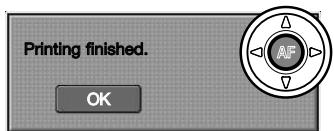
TROUBLESHOOTING
The section covers minor problems with basic camera operation. For major problems or damage to the camera or charger, or if a problem continues to reoccur frequently, contact a Konica Minolta service facility.
| Problem | Symptom | Cause | Solution |
| The camera will not work. | Nothing displayed on monitor. | The batteries are dead. | Recharge battery (p. 21). |
| The AC adapter is not connected properly. | Check that the adapter is connected to the camera and a live electrical outlet (p. 114). | ||
| Display mode set to off. | Change the display mode to full or basic (p. 33). | ||
| “Err” displayed on the monitor. | The camera is hot or it has been left in a very hot environment. | Turn off the camera and allow it to cool. If “Err” is still displayed on the camera after it cools, remove and replace the battery or power cord. | |
| Shutter will not release. | “0000” is displayed on the frame counter. | Memory card is full and unable to store an image at the image-quality or image-size setting on the camera. | Insert a new memory card (p. 24), delete some images (p. 36), or change the image-quality or image-size setting (p. 64). |
| “----” is displayed on the frame counter. | No memory card in the camera. | Insert a memory card (p. 24). | |
| Focus signal blinks. | AF/Shutter release priority in the custom menu is set to AF | See page 94 for more on this custom function. |
If the camera does not function normally, turn it off, remove and reinsert the battery, or unplug and reconnect the AC adapter. Always turn the camera off using the main switch otherwise the memory card may be damaged and camera settings reset.
| Problem | Symptom | Cause | Solution |
| Pictures are not sharp. | Focus signal is blinking. | Subject is too close. | Make sure the subject is within the focus range of the lens. |
| A special situation is preventing the autofocus system from focusing (p. 29) | Use the focus-lock function to focus on an object at the same distance as the subject (p. 30) or use manual focus (p. 52). | ||
| Pictures are taken indoors or in low-light situations without flash. | Slow shutter speeds result in blurred images when the camera is hand-held. | Use Anti-shake or a tripod, change the camera sensitivity to a higher setting (p. 51), or use the flash (p. 31). | |
| While using flash, the pictures are too dark. | The subject is beyond the flash range (p. 51). | Move closer to the subject or change the camera sensitivity to a higher setting (p. 51). | |
| A shadow appears on the bottom of the image. | Lens hood mounted when using flash. | The lens hood blocks the light from the built-in flash. | Always remove the lens hood when using the built-in flash. Also see the lens shadowing section on page 115. |
| Inaccurate exposures with very bright or dark scenes. | Shutter speed and/or aperture display blink. | Subject or scene is outside the exposure control range of the camera. | Adjust the exposure until the display stops blinking or change camera sensitivity (p. 51). |
| Arrows blink at each end of the Ev scale. | Subject or scene is outside the metering range of the camera. | In dark conditions, use the camera flash. Under bright light, use a neutral density filter on the lens to control the light levels. | |
| Anti-Shake does not work. | The viewfinder Anti-Shake scale is blinking. | CCD setup error. | Turn the camera off and on. If the Anti-Shake scale continues to blink, contact a Konica Minolta service facility. |
| Unable to see recorded images in playback. | Folder number not displayed. | Folder is not selected with the view-folder option in section 1 of the playback menu. | Select the folder with the menu (p. 82). |
CARE AND STORAGE
Read this section in its entirety to get the best results from your camera. With proper care, your camera will provide years of service.
CAMERA CARE
- Do not subject the camera to shock or impact.
- Turn off the camera when transporting.
- This camera is neither waterproof nor splashproof. Inserting or removing batteries or the memory card, or operating the camera with wet hands may damage the camera.
- When at the beach or near water, take care not to expose the camera to water or sand. Water, sand, dust, or salt can damage the camera.
- Do not leave the camera under direct sunlight. Do not point the lens directly at the sun; the CCD may be damaged.
CLEANING
- If the camera or the outside of the lens is dirty, gently wipe it with a soft, clean, dry cloth. If the camera or lens comes in contact with sand, gently blow away loose particles. Wiping may scratch the surface.
- To clean the lens surface, first blow away any dust or sand, then gently wipe the lens with a cloth or tissue designed for optics. Use lens-cleaning fluid if necessary.
- Never use organic solvents to clean the camera.
- Never touch the lens surface with your fingers.
STORAGE
- Store in a cool, dry, well-ventilated area away from dust and chemicals. For long periods of disuse, store the camera in an airtight container with a silica-gel drying agent.
- Remove the batteries and memory card from the camera when not in use for extended periods.
- Do not store the camera in an area with naphthalene or mothballs.
- During long periods of storage, operate the camera occasionally. When taking the camera out of storage, check that the camera is functioning properly before using.
OPERATING TEMPERATURES AND CONDITIONS
- This camera has been designed for use in temperatures from 0^ to 40^ (32°F to 104°F).
- Never leave the camera exposed to extreme high temperatures, such as in a car parked in the sun, or to extreme humidity.
- When taking the camera from a cold to a warm environment, place it in a sealed plastic bag to prevent condensation from forming. Allow the camera to come to room temperature before removing it from the bag.
MEMORY CARD CARE AND HANDLING
Memory Cards are manufactured with precision electronic components. The following may cause data loss or damage:
- Improper use of the card.
- Bending, dropping, or subjecting the card to impact.
- Heat, moisture, and direct sunlight.
- Static electrical discharge or electromagnetic fields near the card.
- Removing the card or interrupting the power supply while the camera or a computer is accessing the card (reading, writing, formatting, etc.).
- Touching the electrical contacts of the card with your fingers or metal objects.
- Using the card beyond its life. Purchasing a new card periodically may be necessary.
- When using a Microdrive, do not subject the camera to vibrations.
Konica Minolta has no responsibility for any loss or damage to data. It is recommended that a copy of the card data be made.
BATTERIES
- Battery performance decreases with temperature. In cold environments, we recommend keeping spare batteries in a warm place, such as the inside of a coat. Batteries can recover their power when they warm up.
- Do not store the battery when it is fully charged.
- When storing the battery for extended periods, recharge it for five minutes every six months. The battery may not be able to be charged if completely exhausted.
- A special built-in battery supplies power to the clock and memory when the camera is exhausted or removed. If the camera resets each time the battery is removed, the battery is exhausted. It must be replaced at a Konica Minolta service facility.
- Keep battery and camera charger contacts clean. Dirty contacts can prevent charging. If the contacts become dirty, wipe them with a cotton swab.
LCD MONITOR CARE
- The LCD monitor is manufactured using high-precision technology and more than 99.99% of the pixels operate properly. Less than 0.01% of the monitor pixels are displayed as color or bright points; this is not monitor defect and does not affect the recorded image.
- Do not apply pressure to the surface of the LCD monitor; it may be permanently damaged.
- In a cold environment, the LCD monitor may become temporarily dark. When the camera warms up, the display will function normally.
- If fingerprints are on the LCD monitor surface, gently wipe with a soft, clean, dry cloth.
COPYRIGHT
- TV program, films, video tapes, photographs, and other materials may be copyrighted. Unauthorized recording or duplication of such material may be contrary to copyright laws. Taking pictures or images of performances, exhibitions, etc. is prohibited without approval and can infringe on copyright. Images protected by copyright can only be used under the provisions within the copyright laws.
BEFORE IMPORTANT EVENTS OR JOURNEYS
- Check the camera's operation; take test pictures and purchase spare batteries.
- Konica Minolta has no responsibility for any damage or loss incurred by equipment malfunction.
QUESTIONS AND SERVICE
- If you have questions about your camera or charger, contact your local camera dealer or write to the Konica Minolta distributor in your area.
- Before shipping your camera or charger for repair, please contact a Konica Minolta service facility.
TECHNICAL SPECIFICATIONS
Number of effective pixels:
CCD:
Camera sensitivity (ISO):
Aspect ratio:
A/D conversion:
Autofocusing system:
AF sensitivity range:
Meter:
Metering range:
Shutter:
Flash guide number:
Flash sync.:
Flash coverage:
Built-in flash recycling time:
Viewfinder:
Field of view:
Eye relief:
Viewfinder magnification:
Monitor LCD:
Recording media:
File formats:
PRINT Image Matching III:
Menu languages:
Video output:
6.1 million
23.5 X 15.7mm interline primary-color CCD with a total of 6.3 million pixels
Auto, 100, 200, 400, 800, 1600, 3200 ISO equivalents
3:2
12 bit
TTL phase-detection system with CCD line sensor.
Ev -1 \~ +18 (at ISO 100)
14-segment honeycomb-pattern SPC
Ev ±0 \~ +20 (Spot: Ev +3 \~ +20) at ISO 100, f/1.4.
Electronically-controlled, vertical-traverse, focal-plane shutter
12 (in meters at ISO 100)
1/125s with Anti-Shake, 1/160s without Anti-Shake
Equal to a 24mm focal-length lens
3s (approx.)
Eye-level fixed glass pentaprism.
95% (approx.)
Approximately 25mm from the eyepiece or 21mm from the eyepiece cup at -1 diopter.
0.9x (50mm lens at infinity at -1 diopter).
2.5 inch TFT color
Type I and II CompactFlash cards, Microdrives.
JPEG and RAW.
DCF 2.0, DPOF, and Exif 2.21 compliant.
Yes
English, German, French, Spanish, Japanese, Italian, Swedish, and Chinese.
NTSC and PAL
Battery:
One Lithium-ion Battery NP-400
Optional power source:
AC adapter (AC-1L or AC-11)
Vertical Control Grip VC-7D
Battery performance (recording):
Approx. number of recorded images: 400 frames.
Based on the CIPA standard with a NP-400 lithium-ion battery, 512MB CompactFlash card.
Dimensions:
150.0 (W) X 106.0 (H) X 77.5 (D) mm
5.9 (W) X 4.2 (H) X 3.1 (D) in
Weight:
Approximately 760g (26.8 oz)
(without batteries or memory card)
Operating temperature:
0^ - 40^ (32^ - 104^)
Lithium-ion Battery Charger BC-400
Input voltage:
AC 100-240V, 50-60Hz
Weight:
86g (3.0 oz.)
Dimensions:
65 (W) X 90 (H) X 30 (D) mm
2.56 (W) X 3.54 (H) X 1.18 (D) in
Lithium-ion Battery NP-400
Voltage:
7.4V, 1500mAh
Weight:
85g (3.0 oz.)
Dimensions:
56.0 (W) X 39.5 (H) X 21.0 (D) mm
2.20 (W) X 1.56 (H) X 0.83 (D) in
Specifications are based on the latest information available at the time of printing and are subject to change without notice.
The following marks may be found on the product:

This mark on your camera certifies that this camera meets the requirements of the EU (European Union) concerning interference causing equipment regulations. CE stands for Conformité Européenne (European Conformity).
FCC Compliance Statement
Declaration on Conformity
Responsible Party: Konica Minolta Photo Imaging U.S.A. Inc.
Address: 725 Darlington Avenue, Mahwah, NJ 07430
Digital Camera: 7D

Tested To Comply□
With FCC Standards
FOR HOME OR OFFICE USE
This device complies with Part 15 of the FCC Rules. Operation is
subject to the following two conditions: (1) This device may not cause harmful interference, and (2) this device must accept any interference received, including interference that may cause undesired operation. Changes or modifications not approved by the party responsible for compliance could void the user's authority to operate the equipment. This equipment has been tested and found to comply with the limits for a Class B digital device, pursuant to Part 15 of the FCC Rules. These limits are designed to provide reasonable protection against harmful interference in a residential installation.
This equipment generates, uses and can radiate radio frequency energy and, if not installed and used in accordance with the instructions, may cause harmful interference to radio communications. However, there is no guarantee that interference will not occur in a particular installation. If this equipment does cause harmful interference to radio or television reception, which can be determined by turning the equipment off and on, the user is encouraged to try to correct the interference by one or more of the following measures:
- Reorient or relocate the receiving antenna.
- Increase the separation between the equipment and the receiver.
- Connect the equipment to an outlet on a circuit different from that to which the receiver is connected.
- Consult the dealer or an experienced radio/TV technician for help.
Do not remove the ferrite cores from the cables.
This Class B digital apparatus complies with Canadian ICES-003.
- DYNAX 7D
- BEFORE YOU BEGIN
- FOR PROPER AND SAFE USE
- NP-400 LITHIUM-ION BATTERIES
- DANGER
- WARNING
- GENERAL PRODUCT WARNINGS AND CAUTIONS
- CAUTION
- TABLE OF CONTENTS
- NAMES OF PARTS
- CAMERA BODY
- RECORDING MODE DISPLAY
- Camera Notes
- GETTING UP AND RUNNING
- ATTACHING A LENS
- REMOVING A LENS
- DIOPTER ADJUSTMENT
- INSTALLING THE MONITOR PROTECTION PANEL
- CHARGING THE BATTERY
- INSTALLING AND CHANGING THE BATTERY
- BATTERY CONDITION INDICATOR
- AUTO POWER SAVE
- System Accessories
- INSERTING AND CHANGING A MEMORY CARD
- TURNING ON THE CAMERA
- SETTING THE DATE AND TIME
- BASIC RECORDING
- SETTING THE CAMERA TO RECORD IMAGES AUTOMATICALLY
- HANDLING THE CAMERA
- BASIC RECORDING DISPLAY
- BASIC RECORDING OPERATION
- FOCUS SIGNALS
- SPECIAL FOCUSING SITUATIONS
- FOCUS LOCK
- CAMERA-SHAKE WARNING
- USING THE BUILT-IN FLASH
- ANTI-SHAKE SYSTEM
- DISPLAY BUTTON
- BASIC PLAYBACK
- ROTATING IMAGES
- DELETING SINGLE IMAGES
- CHANGING THE PLAYBACK DISPLAY
- ENLARGED PLAYBACK
- ADVANCED RECORDING
- EXPOSURE-MODE DIAL
- PROGRAM - P
- FULL-AUTO PROGRAM
- PROGRAM SHIFT - Ps/PA
- APERTURE PRIORITY - A
- Flash Sync. Speed
- SHUTTER PRIORITY - S
- About Shutter Speeds
- MANUAL EXPOSURE - M
- Bulb exposures
- EXPOSURE LOCK - AEL BUTTON
- ABOUT SLOW SYNC.
- EXPOSURE AND FLASH COMPENSATION
- METERING MODES
- CAMERA SENSITIVITY - ISO
- FOCUS-MODE DIAL
- AF-S
- AF-A
- AF-C
- MF
- AF / MF BUTTON
- DEPTH-OF-FIELD PREVIEW
- FOCUS-AREA SWITCH
- Spot AF
- Focus-area selection
- DRIVE MODES
- FRAMES-REMAINING COUNTER
- CONTINUOUS-ADVANCE NOTES
- SELF-TIMER NOTES
- BRACKETING NOTES
- ATTACHING THE EYEPIECE CAP
- OPTIONAL VIEWFINDER ACCESSORIES
- WHITE BALANCE
- AWB
- PWB
- Preset White Balance
- Custom White Balance
- Color Temperature
- About Color Temperature
- MEMORY - STORING CAMERA SETTINGS
- RECORDING MENU
- NAVIGATING THE RECORDING MENU
- IMAGE SIZE AND IMAGE QUALITY
- DiMAGE Viewer Notes
- COLOR MODE
- ABOUT ADOBE RGB
- DIGITAL EFFECTS (FX) CONTROL
- RECORDING MODE RESET
- BRACKETING SETUP
- BRACKETING ORDER
- FLASH MODES
- [Non-Text]
- lightning bolt
- REAR
- WL
- WIRELESS / REMOTE FLASH
- FLASH CONTROL
- MANUAL FLASH AND POWER RATIO
- INSTANT PLAYBACK
- NOISE REDUCTION
- INTERVAL
- A SHORT GUIDE TO PHOTOGRAPHY
- LIGHT SOURCES AND COLOR
- WHAT IS AN EV?
- PLAYBACK MENU
- NAVIGATING THE PLAYBACK MENU
- FRAME-SELECTION SCREEN
- DELETE
- FORMAT
- VIEW FOLDER
- LOCK
- INDEX PLAYBACK FORMAT
- SLIDE SHOW
- ABOUT DPOF
- DPOF SETUP
- DATE IMPRINT
- INDEX PRINT
- CANCEL PRINT
- OPENING THE CUSTOM & SETUP MENUS
- CUSTOM MENU
- AF/SHUTTER RELEASE PRIORITY SETUP
- FOCUS-HOLD BUTTON SETUP
- AF/MF BUTTON SETUP
- AEL BUTTON SETUP
- AF WITH SHUTTER RELEASE BUTTON
- AUTO AF SETUP
- CONTROL-DIAL SETUP
- CONTROL-DIAL (EXPOSURE COMPENSATION) SETUP
- CONTROL-DIAL LOCK
- EXPOSURE COMPENSATION SETUP
- AF ILLUMINATOR
- SHUTTER LOCK
- AF AREA SETUP
- MONITOR DISPLAY SETUP
- RECORDING DISPLAY SETUP
- ANTI-SHAKE VIEWFINDER DISPLAY SETUP
- ISO BUTTON SETUP
- ZONE MATCHING
- ISO MENU SETUP
- M-SET BUTTON SETUP
- Creating a menu shortcut
- CUSTOM MENU RESET
- SETUP MENU
- LCD BRIGHTNESS
- TRANSFER MODE
- VIDEO OUTPUT
- VIEWING IMAGES ON A TELEVISION
- AUDIO SIGNALS
- LANGUAGE
- DATE AND TIME SETUP
- FILE NUMBER (#) MEMORY
- FOLDER NAME
- SELECT FOLDER
- NEW FOLDER
- LCD BACKLIGHT
- MENU SECTION MEMORY
- DELETE CONFIRMATION
- CLEAN CCD
- Accessory Notes
- RESET DEFAULT
- AC ADAPTER AC-11 (SOLD SEPARATELY)
- ABOUT THE BATTERY CHARGER CORD
- VERTICAL CONTROL GRIP VC-7D (SOLD SEPARATELY)
- FOCUSING-SCREEN COMPATIBILITY
- LENS SHADOWING
- SMOOTH FOCUS
- FOCAL-LENGTH CONVERSION
- CCD-PLANE INDICATOR
- LENS COMPATIBILITY
- ATTACHING AN ACCESSORY FLASH UNIT
- FLASH COMPATIBILITY
- HIGH-SPEED SYNC. (HSS)
- USING THE FLASH SYNC TERMINAL
- DATA-TRANSFER MODE
- SYSTEM REQUIREMENTS
- CONNECTING THE CAMERA TO A COMPUTER
- CONNECTING TO WINDOWS 98 / 98 SECOND EDITION
- Manual installation
- AUTO POWER SAVE (DATA-TRANSFER MODE)
- Konica Minolta History
- MEMORY CARD FOLDER ORGANIZATION
- DISCONNECTING THE CAMERA FROM THE COMPUTER
- Stop USB Mass Storage Device - Drive(H:)
- Macintosh
- CHANGING THE MEMORY CARD (DATA-TRANSFER MODE)
- Windows 98 / 98 Second Edition
- Windows Me, 2000 Professional, and XP
- REMOVING THE DRIVER SOFTWARE - WINDOWS
- PICTBRIDGE
- NOTES ON PRINTING ERRORS
- NAVIGATING THE PICTBRIDGE MENU
- Batch print
- Paper size
- Printing Notes
- Layout
- Print quality
- Data print
- DPOF print
- TROUBLESHOOTING
- CARE AND STORAGE
- CAMERA CARE
- CLEANING
- STORAGE
- OPERATING TEMPERATURES AND CONDITIONS
- MEMORY CARD CARE AND HANDLING
- BATTERIES
- LCD MONITOR CARE
- COPYRIGHT
- BEFORE IMPORTANT EVENTS OR JOURNEYS
- QUESTIONS AND SERVICE
- TECHNICAL SPECIFICATIONS
Marque : MINOLTA
Modèle : DYNAX 7D
Catégorie : Appareil photo reflex numérique