
TS512MMP310 - Mémoire Flash USB TRANSCEND - Notice d'utilisation et mode d'emploi gratuit
Retrouvez gratuitement la notice de l'appareil TS512MMP310 TRANSCEND au format PDF.


| Interface | USB 2.0 |
| Capacité de stockage | Non précisé |
| Type de disque | Non précisé |
| Compatibilité OS | Non précisé |
| Alimentation | USB bus powered |
| Dimensions | Non précisé |
| Poids | Non précisé |
| Vitesse de transfert | Jusqu'à 480 Mbps (USB 2.0) |
| Couleur | Non précisé |
| Garantie | Non précisé |
| Logiciel inclus | Non précisé |
| Protection des données | Non précisé |
| Type de connecteur | USB Type A |
| Utilisation recommandée | Stockage externe général |
| Marque | Non précisé |
FOIRE AUX QUESTIONS - TS512MMP310 TRANSCEND
Questions des utilisateurs sur TS512MMP310 TRANSCEND
0 question sur cet appareil. Repondez a celles que vous connaissez ou posez la votre.
Poser une nouvelle question sur cet appareil
Téléchargez la notice de votre Mémoire Flash USB au format PDF gratuitement ! Retrouvez votre notice TS512MMP310 - TRANSCEND et reprennez votre appareil électronique en main. Sur cette page sont publiés tous les documents nécessaires à l'utilisation de votre appareil TS512MMP310 de la marque TRANSCEND.
MODE D'EMPLOI TS512MMP310 TRANSCEND
USB2.0
T.sonic™ 310
User's Manual
P/N : TS512MMP310
P/N:TS1GMP310
Transcend
Exceeding Your Expectations
Introduction 1
Package Contents 1
Features 1
System Requirements 1
Reminders 2
Caution: Risk of Deafness 2
Product Overview 2
Charging the Battery 3
LED Description 3
Basic Operation 4
Power On 4
Power Off 4
Play a Track 4
Pause a Track 4
Advance to Next Track 4
Reverse to Previous Track 4
Fast Forward 5
Fast Rewind 5
Increase Volume 5
Decrease Volume 5
Lock. 5
Driver Installation 6
Driver Installation for Windows® 98SE 6
Driver Installation for Windows® Me, 2000, and XP 6
Driver Installation for MacTM OS 10.0 or Later..
Driver Installation for LinuxTM Kernel 2.4 or Later 7
Utility Installation 8
PC-Lock Function 8
PC-Lock Function for Windows® 98SE, Me, 2000, and XP
Lock Your Computer 9
Unlock Your Computer 9
Boot-Up Function 9
System Requirements for the Boot-Up Function 9
Enabling the Boot-Up Function 10
Partition & Security Function 10
Partition Types 10
Access Data in the Private Area 11
Log Out of the Private Area. 12
Change Password 12
If You Forget the Password 13
Recovery Function 13
Safely Remove Your T.sonicTM 310 14
Remove the T.sonicTM 310 in Windows® 98SE 14
Remove the T.sonicTM 310 in Windows® Me, 2000, and XP 14
Remove the T.sonic™ 310 in Mac™ OS 10.0, or Later and Linux™ Kernel 2.4, or Later... 14
Troubleshooting 15
Specifications 17
Ordering Information 17
T.sonic Limited Warranty 18
Introduction
Congratulations on purchasing Transcend's T.sonic™ 310, a unique device that combines a USB Flash Drive with an MP3 Player. You can now store your files, folders, documents, photos and music on one tiny device that will also allow you to play your music. The T.sonic™ 310 plugs directly into your desktop or notebook computer, is easy to use and includes an amazing TouchPad controller.
Package Contents
The T.sonic™ 310 package includes the following items:
T.sonic™ 310
Lanyard Earphones
- Driver CD
USB extension cable
Quick Instruction Guide
Features
MP3 Player which supports MP3 and WMA formats
- USB 2.0 compliant and USB 1.1 backwards compatible
- Internal Li-ion battery supports up to 18 hours of continuous play when fully charged
- TouchPad controller
Easy Plug and Play installation
PC-Lock feature allows you to use the T.sonic™ 310 as a key to your computer
- Boot-Up feature allows you to make your T.sonic™ 310 a bootable device
- Partition feature allows you to create a private and password protected partition on your T.sonic™ 310
- Flash Drive is powered directly via the USB port
LED indicates the usage status of the T.sonic™ 310
System Requirements
Desktop or notebook computer with a working USB port
One of following operating systems:
- Windows® 98SE
- Windows®Me
- Windows® 2000
- Windows®XP
MacTM OS 10.0 or later
LinuxTM Kernel 2.4 or later
Reminders
- Keep your T.sonic™ 310 away from heat, direct sunlight, and moisture. Do not bend, flex, or drop your T.sonic™ 310.
- Make sure the LOCK switch is set to the "OFF" position before trying to Power-On the unit.
- Always plug or unplug your T.sonic™ 310 by grasping the unit's sides.
- Follow the procedures in the "Safely Remove Your T.sonic™ 310" section to remove your T.sonic™ 310 from the system.
Caution: Risk of Deafness
- Repeated or regular use of headphones or earphones at volume levels above 80 decibels can give a false impression that the audio level is not high enough. End users may try to progressively increase the volume control, therefore risking a dangerous noise level for their ears.
- To protect your health and your hearing, keep the volume of your MP3 player below 80 decibels and do not use it for an extended period of time. Stop use if symptoms like headaches, nausea, or hearing disorders occur.
- Your MP3 player is limited to a volume level of 100 decibels.
- Both the MP3 player and the earphones are compliant with the French regulation concerning musical Walkmans (24th July 1998 Order).
- Before using other headphones, confirm that their technical specifications are compatible with the original set.
Product Overview
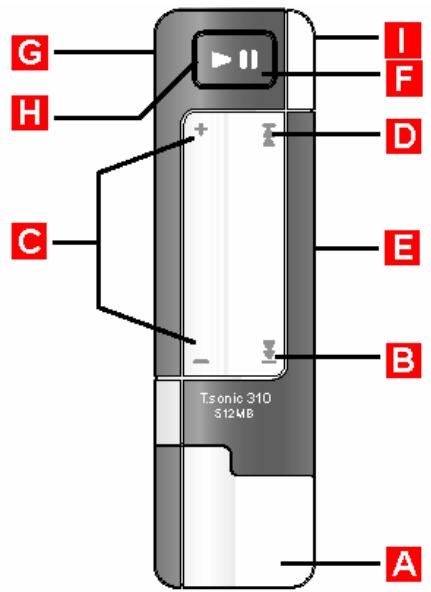
A:USB Connector
B:Fast FORWARD/NEXT Track
C: VOLUME UP/DOWN (Slide Up/Down)
D:FastREWIND/PREVIOUSTrack
E: LOCK Switch
F: PLAY/PAUSE & PWR ON/OFF Button
G: Earphones Jack = PWR ON/OFF
H:LED(PWR&Activity)Indicator
1:Neck Strap Hole
Charging the Battery

Before using the T.sonic™ 310 for the first time it is necessary to charge the battery for at least 12 hours.
- Plug the T.sonic™ 310 into your desktop or notebook computer.
- A red LED indicates the battery is being charged.
- When the LED turns green the battery is fully charged.
- It takes the T. sonic™ 310's battery approx. 4 hours to fully charge, and approx. 3 hours to become 80 percent charged.
- A fully charged battery will give you approx. 18 hours of continuous MP3 playtime.
LED Description

On first sighting a Red LED you have approximately 2 hours of battery life remaining
MP3 Player Mode
During Playback a Green LED indicates you do NOT need to charge the battery.
- A Red LED indicates that you need to charge the battery. On first seeing a Red LED you have approx. 2 hours of battery life left.
- If you wish to turn on your T.sonic™ 310 when the Lock switch is ON, the LED will appear Red in color.
- If you turn on your T.sonic™ 310 and no music files have been loaded onto the player, the LED will firstly be Green in color to indicate that the player is ON, but then it will Flash Red.
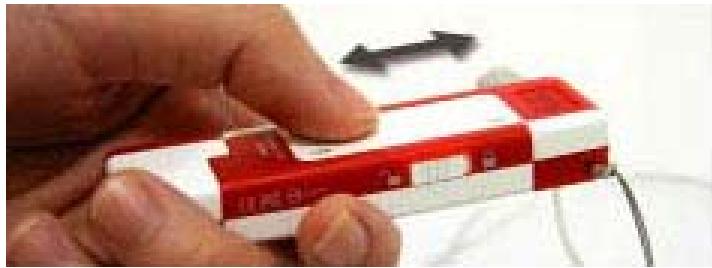
Flash Drive Mode
- A Green LED indicates that the battery is fully charged.
A Red LED indicates that you need to charge the battery.
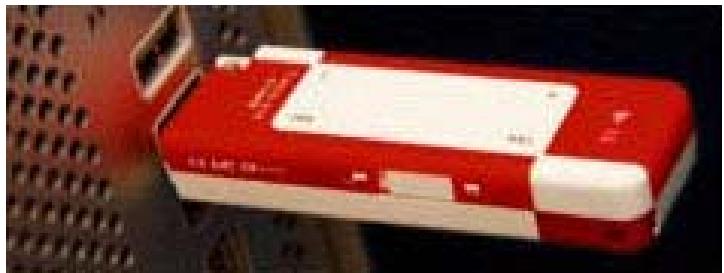
Basic Operation

To use as an MP3 Player you must plug in the Earphones. If the T.sonic™ 310 stops working, simply plug out and plug in the earphones to reset the player.
Power On
Plug in the Earphones and press the PLAY/PAUSE Button to power on the unit. A Green LED indicates activity and a positively charged battery, a Red LED indicates an illegal action, or that the battery needs to be charged.
Power Off
Press and hold the PLAY/PAUSE Button until the LED turns off (power-off sound heard), or unplug the earphones.
Play a Track
Press the PLAY/PAUSE Button to play an MP3, or WMA track.
Pause a Track
Press the PLAY/PAUSE Button during playback to pause a track. If pausing a track for more than 5 minutes, the T.sonic™ 310 will automatically turn off to save power.
Advance to Next Track
Tap/Touch the TouchPad [B] to advance to the next track.
Reverse to Previous Track
Tap/Touch the TouchPad [A] to go back to the previous track.
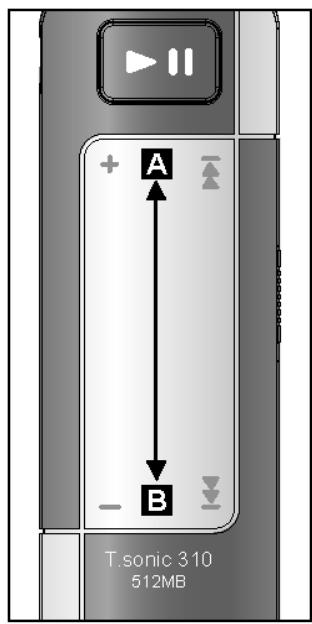
Touch Pad
Fast Forward
Press and hold the TouchPad [B] to Fast-Forward a track.
Fast Rewind
Press and hold the TouchPad [A] to Fast-Rewind a track.
Increase Volume
Slide up [B to A] on the TouchPad to increase the volume level.
Decrease Volume
Slide down [A to B] on the TouchPad to decrease the volume level.
Lock
When the Lock switch is set to the “ ” Locked position all of player's functions are disabled.
Driver Installation
Driver Installation for Windows® 98SE
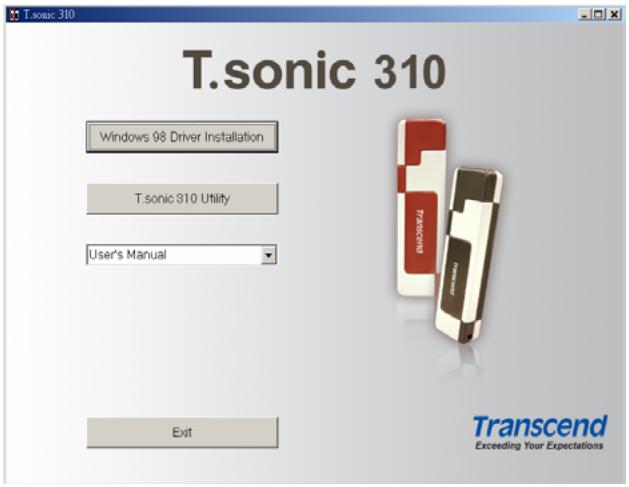
- Put the Driver CD into the CD-ROM (Auto-Run supported). Select the Windows 98 Driver Installation button.
- Select "Next" to continue.
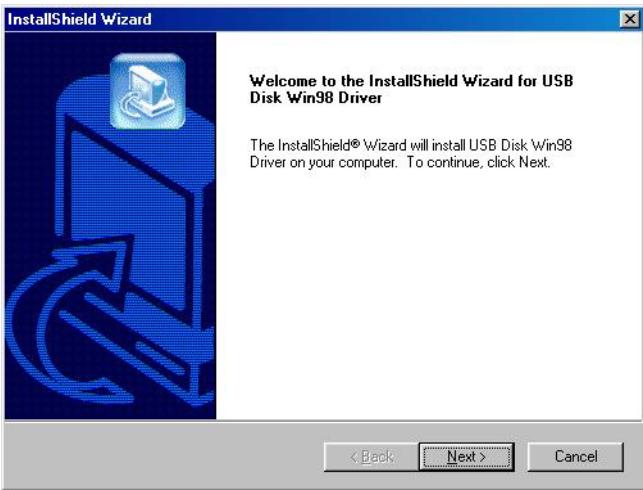
- The InstallShield Wizard will guide you through the installation process.
- After the drivers have been installed, plug your T.sonic™ 310 into an available USB port. The New Hardware Found dialogue boxes will appear.
- Your computer will automatically detect this new device. A new Removable Disk drive with a newly assigned drive letter will appear in the My Computer window.
Driver Installation for Windows® Me, 2000, and XP
No drivers are required. These Windows operating systems have built-in drivers to support the T.sonic™ 310. Simply plug your T.sonic™ 310 into an available USB port and Windows will install the files needed. A new Removable Disk drive with a newly assigned drive letter will appear in the
My Computer window.
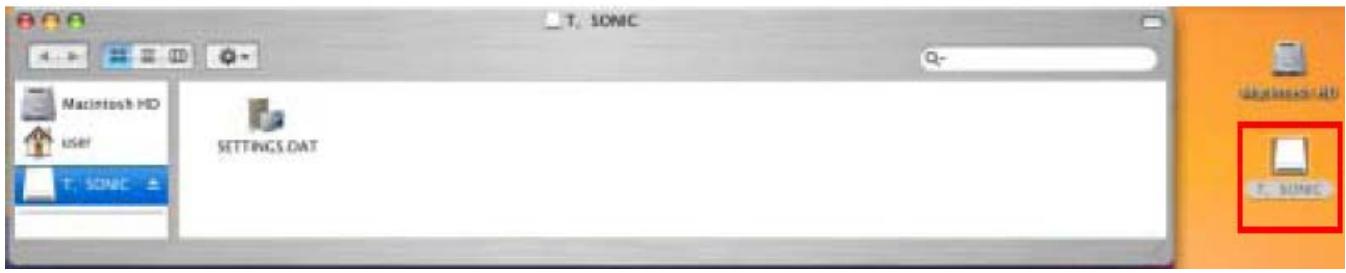
Driver Installation for Mac™ OS 10.0 or Later
No drivers are required. Just plug your T.sonic™ 310 into an available USB port and your computer will automatically detect it.
Driver Installation for Linux™ Kernel 2.4 or Later
No drivers are required. Just plug your T.sonic™ 310 into the USB port and mount it.
Example:
- Create directory for /mnt/T.sonic first:
mkdir /mnt/T.sonic
- mount T.sonic:
mount -a -t msdos /dev/sda1 /mnt/T.sonic
Utility Installation
- Put the Driver CD into the CD-ROM (Auto-Run supported). Select the T.sonic™ 310 Utility button.
- Follow the on-screen instructions to complete the utility installation.
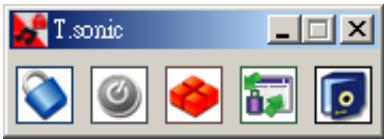
- Execute the utility program in Start -> Programs -> T.sonic 310 -> T.sonic 310 Utility.
PC-Lock Function
Once the PC-Lock function is enabled, you can use your T.sonic™ 310 as a key to lock your computer, protecting it from being used by other users.
The PC-Lock function is not supported in Mac or Linux Operating Systems.
To use the PC-Lock function, you must log in to the Windows OS with Administrator rights.
PC-Lock Function for Windows® 98SE, Me, 2000, and XP
- Select the PC-Lock button in the T.sonic™ 310 Utility window.
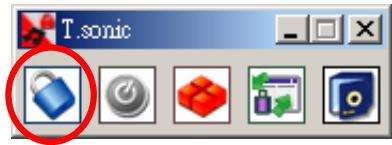
- The following window will appear.
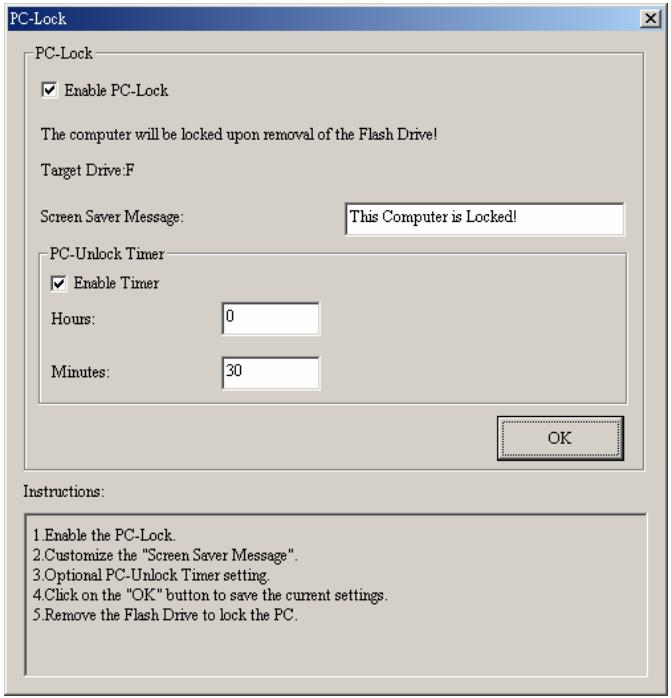
- In this window you can Enable the PC-Lock function, change the Screen Saver Message and the PC-Unlock Timer.
Lock Your Computer
After the PC-Lock function is enabled, your computer will be locked whenever you remove your T.sonic™ 310. If your computer is locked, the screen will display the locked status as shown below.
T.sonic
Transcend
Exceeding Your Expectations
Unlock Your Computer
To unlock your computer, you must re-insert your T.sonic™ 310. The locked status on the screen will disappear and you are now free to use your computer. The computer's locked status will also be relinquished automatically after the lock time has expired.
Boot-Up Function
T.sonic™ 310 can be configured to serve as an MS-DOS Boot Disk. Upon completion of this procedure, the T.sonic™ 310 can be used to boot-up your computer, allowing you to run MS-DOS programs. This does not make the T.sonic™ 310 a Rescue Disk for Windows, nor does it put Windows Startup files onto your T.sonic™ 310. After booting with T.sonic™ 310, if you wish to enter Windows, you must start Windows from your hard drive, or a previously created Rescue Disk.
To use the Boot-Up function, you must log in to the Windows OS with Administrator rights.
System Requirements for the Boot-Up Function
- A desktop or notebook computer that supports USB-ZIP, or USB-HDD as the First Boot Device in BIOS
Enabling the Boot-Up Function
- Select the Boot-Up button in the T.sonic™ 310 Utility window.
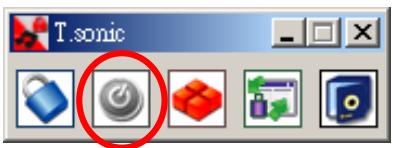
- The following window will appear, choose the boot-up type you need (USB HDD or USB ZIP, whichever has been set as the First Boot Device in BIOS) and select Create Boot Disk.
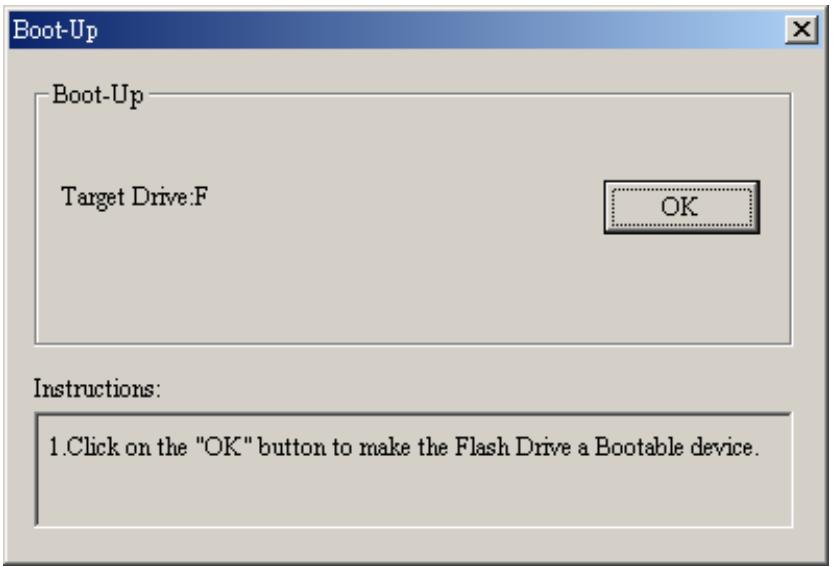
- Click on the "OK" button to make the Flash Drive a Bootable device.
Partition & Security Function
Partition Types
You can partition the T.sonic™ 310 into two partition types. The two types are:
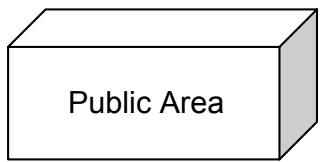
Type 1: "Public Area Only"
This is the default partition type for the T.sonic™ 310. It allows the entire volume of the T.sonic™ 310's memory to be accessed by anyone. No secure data area is established.
Type 2: "Public and Private Area"
T.sonic™ 310 is partitioned into a single Logical Unit Number (LUN) identified device, which contains a Public Area and a Private Area. Secure data can be established in the Security Area, which is protected by a password. Access to data in the Public Area is unrestricted.

- Select the Partition button in the T.sonic™ 310 Utility window.
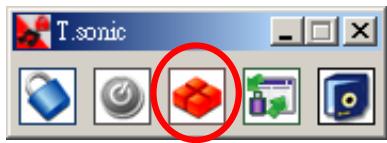
- The following window will appear.
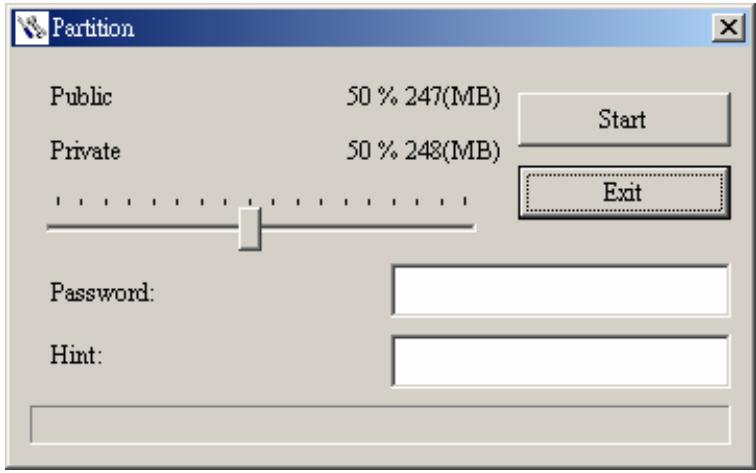
- Adjust the partition percentages to your liking using the partition bar. Key in a Password to login to the Private Area and a Hint as a reminder, just in case you forget your password.
- Click on the "Start" button to complete the partition setup.
Access Data in the Private Area
- Select the Login/out button in the T.sonic™ 310 Utility window.
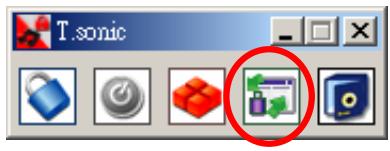
- The following window will appear.
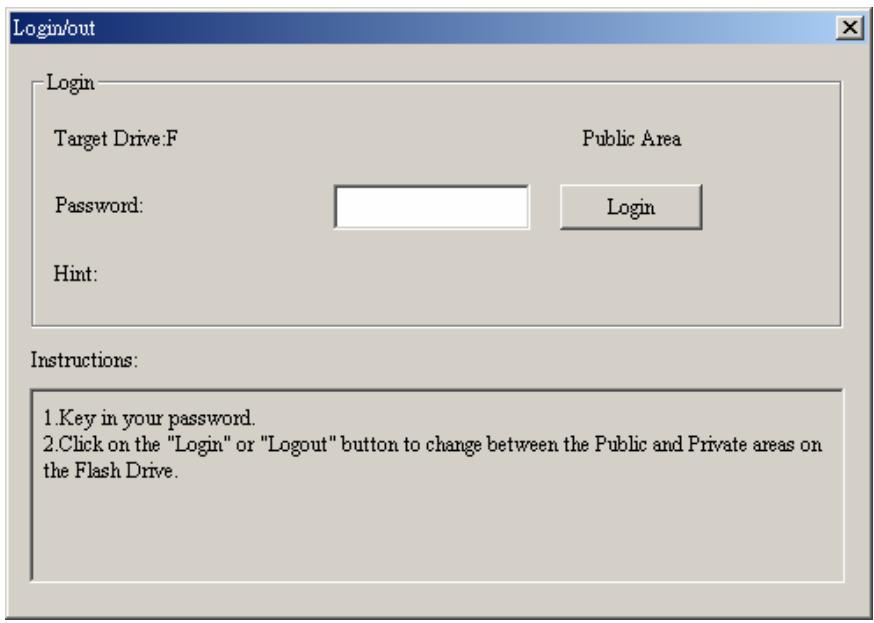
- Enter the correct password and select Login.
- The Private Area will now appear and is ready for use.
Log Out of the Private Area
- Make sure that all files are closed and that no data is being transferred to, or from your T.sonic™ 310.
- Click theLogout button in the T.sonic™ 310 Utility window. Once you have successfully completed the Log Out procedure for the Private Area of your T.sonic™ 310, only data in the Public Area will be accessible.
Change Password
- Select the Password button in the T.sonic™ 310 Utility window.
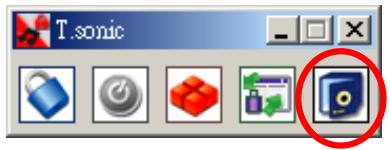
- The following window will appear.
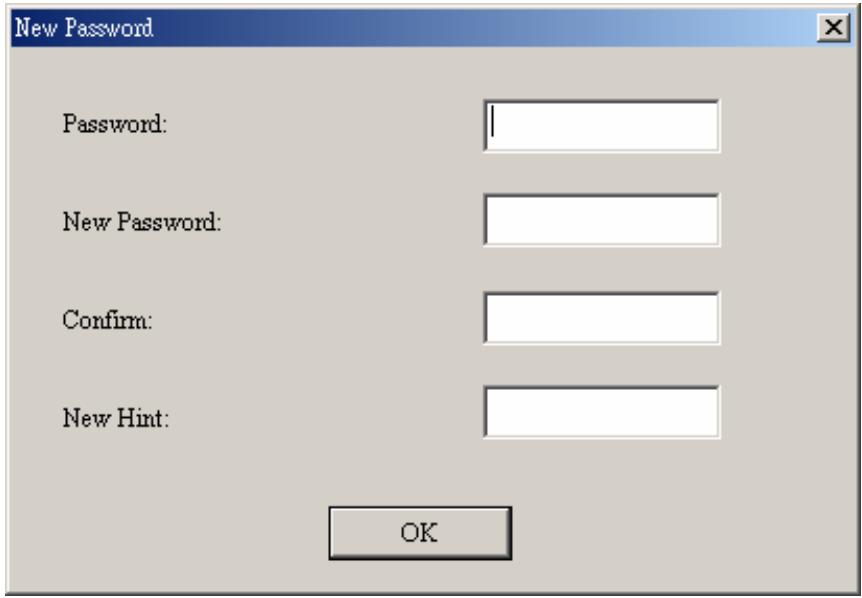
- Input the Old Password, and New Password and the Confirm New Password in each field (Maximum size for a password is 8 characters). You can also input a Password Hint to set up a reminder for your new password. Select "OK."
If You Forget the Password
If you forget your password, you can use the password hint to remember it. If you cannot recall the password using the password hint, then all you can do is run the Partition function again to repartition your T.sonic™ 310. Unfortunately, all your “Private area” data will be lost during this procedure. You will have the chance to make a backup copy of your data in the “Public area” but all data in the “Private area” is permanently lost.
Recovery Function
If your T.sonic™ 310 is ever damaged, you can use the Recovery program to restore the unit's default settings. Before using the Recovery function, please read the following sections carefully.
The Recovery function is not supported in the Mac or Linux Operating Systems.
To use the Recovery function, you must log in to the Windows OS with Administrator rights.
Running the Recovery program will erase all of the data on your T.sonic™ 310.
If there are bad blocks in the flash memory chip of the T.sonic™ 310, the memory size of the T.sonic™ 310 after running the Recovery program will be smaller than the original memory size.
- Execute the recovery utility in Start -> Programs -> T.sonic 310 -> Recovery
- The following window will appear.
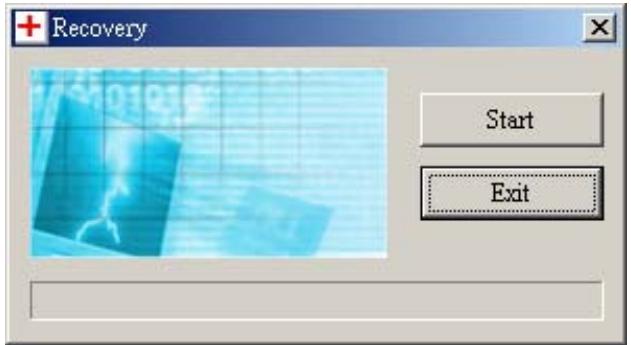
- Select "Start" to recover your T.sonic™ 310 to its factory defaults.
Safely Remove Your T.sonic™ 310
Remove the T.sonic™ 310 in Windows® 98SE
Unplug your T.sonic™ 310 from your system directly when data is not transferring.
Remove the T.sonic™ 310 in Windows® Me, 2000, and XP
- Select the icon on the system tray.
- The Safely remove Hardware pop-up menu will appear. Select to continue.

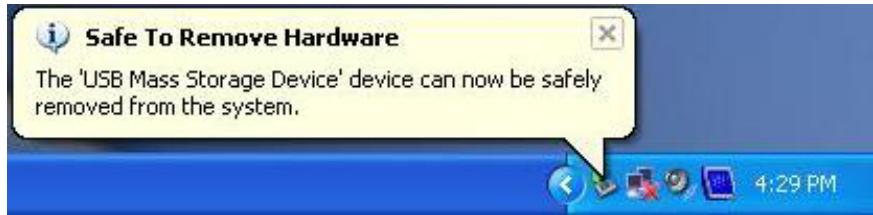
- A message box will appear stating: The 'USB Mass Storage Device' device can now be safely removed from the system.
Remove the T.sonic™ 310 in Mac™ OS 10.0, or Later and Linux™ Kernel 2.4, or Later
Drag and drop the Disk icon corresponding to your T.sonic™ 310 into the trashcan. Then unplug your T.sonic™ 310 from the USB port.
Troubleshooting
If an error occurs with your T.sonic™ 310, please first check the information listed below before taking your T.sonic™ 310 for repair. If you are unable to remedy a problem from the following hints, please consult your dealer, service center, or local Transcend branch office. Transcend also provides an FAQ and Support service on our websites.
Driver CD cannot auto-run in Windows
Enter Device Manager in the Control Panel and enable the Auto-Insert function of the CD-ROM drive. Alternatively, you can manually execute the t310.exe from the driver CD.
Operating system cannot detect the T.sonic™ 310
Check the following:
- Is your T.sonic™ 310 properly connected to the USB port? If not, unplug it and plug it in again.
- Is your T.sonic™ 310 connected to the Mac keyboard? If yes, unplug it and plug it into an available USB port on your Mac Desktop instead.
- Is the USB port enabled? If not, refer to the user's manual of your computer (or motherboard) to enable it.
- Is the necessary driver installed? If your computer is equipped with Windows® 98SE, you must insert the Driver CD into the CD-ROM and refer to the “Driver Installation for Windows 98SE” section to complete the driver installation before using your T.sonic™ 310. A driver is not required for Windows® ME/2000/XP, Mac™ OS 10.0 or later, or Linux™ Kernel 2.4 or later.
Cannot power on
Check the following:
- Is the T.sonic™ 310 connected to your computer? If yes, unplug it.
- Is the LOCK switch set to "HOLD"? If yes, set it to the "OFF" position.
- Are the Earphones connected to the earphone jack? If not, plug them in.
- Does the T.sonic™ 310 have sufficient battery power? If not, recharge it.
Cannot download MP3, or WMA files to the T.sonic™ 310
As required, uninstall the driver and re-install it.
Buttons don't work
Check to see if the LOCK switch is set to "HOLD". If yes, set it to the "OFF" position.
Cannot hear track playback
Check the following:
- Are there any MP3, or WMA files in the root directory of your T.sonic™ 310? If not, you must download music files from your computer or the Internet first (Only Mpeg I Layer 3 and WMA files compressed at a rate of 32Kbps-320Kbps are supported).
- Are the earphones properly connected to the earphone jack? If not, connect them properly.
- Is the volume loud enough? If not, adjust it by sliding up [B to A] on the TouchPad to increase the volume level.
Track playback sounds intermittent
Plug the earphones into the earphones jack again to make sure they are properly connected.
T.sonic™ 310 is NOT functioning correctly
If your T.sonic™ 310 ever stops responding or locks up, you can simply unplug and re-plug in the earphones to reset the T.sonic™ 310.
Cannot find the file that was just copied to the T.sonic™ 310
Re-copy the file and refer to the "Safely Remove Your T.sonic™ 310" section to remove the T.sonic™ 310 after the copy process is completed.
A File that was just deleted still appears
Re-delete the file and refer to the "Safely Remove Your T.sonic™ 310" section to remove the T.sonic after the delete process is completed.
The T.sonic™ 310 Utility cannot be executed
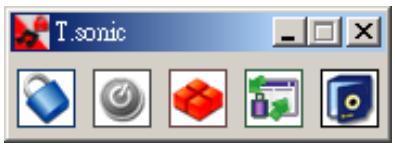
You must log in to the Windows OS with Administrator rights to execute the Utility.
Specifications
| • Size: | 85.5 mm × 23.8 mm × 12 mm |
| • Weight: | 29g (with battery) |
| • Data Retention: | Up to 10 years |
| • Erase Cycles: | > 100,000 times |
| • Signal-to-Noise Ratio: | > 83dB |
| • Estimated Battery Life: | 18 hours when fully charged |
| • Music Formats: | MP3 and WMA |
| • Compression Rates: | 32Kbps–320Kbps |
| • Certificates: | CE, FCC, BSMI |
Ordering Information
| Memory Size | Transcend P/N |
| 512MB | TS512MMP310 |
| 1GB | TS1GMP310 |
T.sonic Limited Warranty
"Above and beyond" is the set standard for customer service at Transcend. We consistently position ourselves to be significantly above the industry norm, which is all part of our commitment to Customer Satisfaction.
All Transcend Information, Inc. (Transcend) products are warranted and tested to be free from defects in material and workmanship and to conform to the published specifications. During the warranty period, should your Transcend T.sonic fail under normal use in the recommended environment due to improper workmanship or materials, Transcend will repair or replace your product with a comparable product. This warranty is subject to the conditions and limitations set forth herein.
Duration of Warranty: The Transcend product warranty is valid for a specific period, which begins on the date of purchase. Proof of purchase including the date of purchase, is required to collect on the warranty. Transcend will inspect the product and decide whether to repair or replace it. Transcend reserves the right to provide a functional equivalent product or a refurbished replacement product.
Limitations: This warranty does not apply to product failure caused by accidents, abuse, mishandling, improper installation, alteration, acts of nature, improper usage, or problems with electrical power. In addition, opening or tampering with the product casing, or any physical damage, abuse or alteration to the product's surface, including all warranty or quality stickers, product serial or electronic numbers will also void the product warranty. Transcend is not responsible for recovering any data lost due to the failure of a hard drive or flash memory device. Transcend's T.sonic must be used with devices that conform to the recommended industry standards. Transcend will not be liable for damages resulting from a third party device that causes the Transcend product to fail. Transcend shall in no event be liable for any consequential, indirect, or incidental damages, lost profits, lost business investments, lost goodwill, or interference with business relationships as a result of lost data. Transcend is also not responsible for damage or failure of any third party equipment, even if Transcend has been advised of the possibility. This limitation does not apply to the extent that it is illegal or unenforceable under applicable law.
Disclaimer: The foregoing limited warranty is exclusive. There are no other warranties, including any implied warranty of merchantability or fitness for a particular purpose. This warranty is not affected in any part by Transcend providing technical support or advice.
Online Registration: To expedite the warranty service, please register your Transcend Product within 30 days of purchase.
Register online at http://www.transcendusa.com/registration
Transcend
Exceeding Your Expectations
Transcend Information, Inc.
www.transcendusa.com