
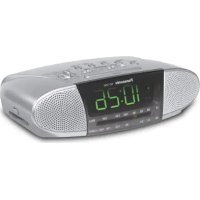
RC 6099 - Radio-réveil PANASONIC - Notice d'utilisation et mode d'emploi gratuit
Retrouvez gratuitement la notice de l'appareil RC 6099 PANASONIC au format PDF.


| Marque | Panasonic |
| Modèle | RC 6099 |
| Type de produit | Radio-réveil numérique |
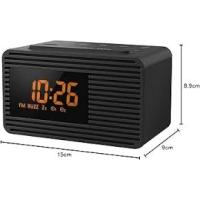
| Dimensions (L × H × P) | 231 × 60 × 153 mm |
| Poids | 680 g (sans batterie) |
| Alimentation principale | CA 120 V, 60 Hz |
| Consommation électrique | 5 W |
| Batterie de secours | 9 V (type 006P/6F22) |
| Gammes radio | FM 88-108 MHz, AM 525-1705 kHz |
| Haut-parleur | 8 cm (3 pouces) |
| Fonctions principales | Double réveil, radio FM/AM, mise en veille, répétition (snooze), affichage numérique avec indicateur PM |
| Réglage de la luminosité | Sélecteur Haut/Bas |
| Alarme radio (ALARM 1) | Volume progressif (tender wake-up), arrêt automatique après 59 min |
| Alarme sonore (ALARM 2) | Buzzer, arrêt automatique après 59 min |
| Fonction Snooze | 7 minutes de silence, puis reprise |
| Minuterie de sommeil (Sleep) | Jusqu'à 59 minutes, arrêt automatique |
| Antenne FM | Cordon d'alimentation (ajuster la direction) |
| Antenne AM | Ferrite intégrée (orienter l'appareil) |
| Prise écouteur | Jack 3,5 mm (casque non fourni) |
| Entretien et nettoyage | Chiffon doux légèrement humide avec détergent doux ; ne pas utiliser de solvants |
| Sécurité | Ne pas exposer à l'humidité ; débrancher avant nettoyage ; ne pas ouvrir le boîtier |
FOIRE AUX QUESTIONS - RC 6099 PANASONIC
Questions des utilisateurs sur RC 6099 PANASONIC
0 question sur cet appareil. Repondez a celles que vous connaissez ou posez la votre.
Poser une nouvelle question sur cet appareil
Téléchargez la notice de votre Radio-réveil au format PDF gratuitement ! Retrouvez votre notice RC 6099 - PANASONIC et reprennez votre appareil électronique en main. Sur cette page sont publiés tous les documents nécessaires à l'utilisation de votre appareil RC 6099 de la marque PANASONIC.
MODE D'EMPLOI RC 6099 PANASONIC
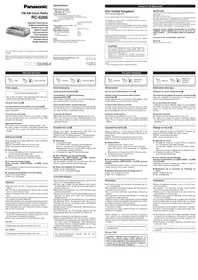
Panasonic
FM-AM Digital Clock Radio
RC-6099
Operating Instructions
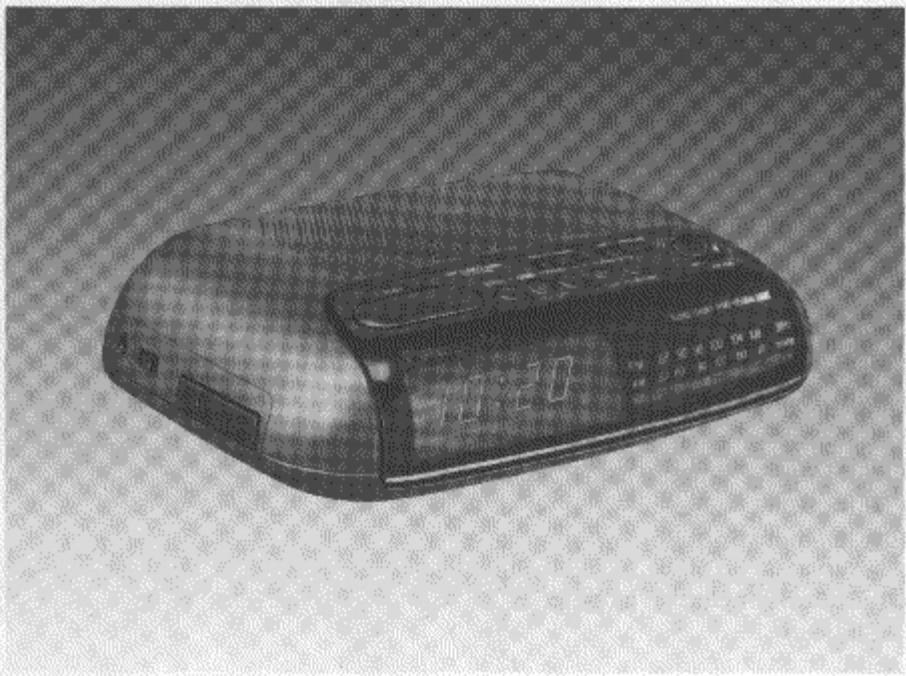
Before connection, operating or adjusting this product, please read these instructions completely.
Thank you for purchasing the FM-AM Digital Clock Radio, RC-6099.
For optimum performance and safety, please read these instructions carefully.
Table of Contents
Precautions 4
Safety 4
Installation 4
Environment 4
Placement. 5
Maintenance. 5
Service 5
Sure Time Battery Back-Up 6
Battery installation 6
When replacing the battery 6
Operation 7
Notes 7
To Set the Correct Time 8
Helpful Hints 9
How to use with earphone 9
Front Panel Controls and Functions 10
Radio Operation 12
Antennas 12
Operation for Dual Wake-Up System 13
Alarm time setting 13
Radio alarm (ALARM 1) 14
Buzzer alarm (ALARM 2) 15
Combination of the alarm 1 and the alarm 2 16
Special Features 17
Doze operation. 17
Radio sleep timer 18
Radio sleep timer and alarm 19
Product Service 19
Specifications 19
Index Back cover
- The following mark and symbols are located on bottom of the unit.
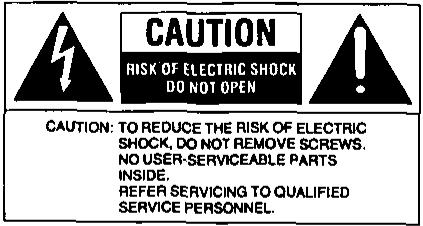

The lightning flash with arrowhead symbol, within an equilateral triangle, is intended to alert the user to the presence of uninsulated "dangerous voltage" within the product's enclosure that may be of sufficient magnitude to constitute a risk of electric shock to persons.

The exclamation point within an equilateral triangle is intended to alert the user to the presence of important operating and maintenance (servicing) instructions in the literature accompanying the appliance.
WARNING: TO REDUCE THE RISK OF FIRE OR ELECTRIC SHOCK, DO NOT EX-POSE THIS APPLIANCE TO RAIN OR MOISTURE.
Precautions
Before using this unit please read these operating instructions carefully. Take special care to follow the warnings indicated on the unit itself as well as the safety suggestions listed below.
Afterwards keep them handy for future reference.
Safety
- Power Source -- The unit should be connected to power supply only of the type described in the operating instructions or as marked on the unit.
-
Polarization -- If the unit is equipped with a polarized AC power plug (a plug having one blade wider than the other), that plug will fit into the AC outlet only one way. This is a safety feature. If you are unable to insert the plug fully into the outlet, try reversing the plug. If the plug should still fail to fit, contact your electrician to replace your obsolete outlet. Do not defeat the safety purpose of the polarized plug.
-
Power Cord Protection -- AC power supply cords should be routed so that they are not likely to be walked on or pinched by items placed upon or against them. Never take hold of the plug or cord if your hand is wet, and always grasp the plug body when connecting or disconnecting it.
- Nonuse Periods -- When the unit is not used, turn the power off. When left unused for a long period of time, the unit should be unplugged from the household AC outlet.
Installation
Environment
-
Water and Moisture -- Do not use this unit near water--for example, near a bathtub, washbowl, swimming pool, or the like. Damp basements should also be avoided.
-
Heat -- The unit should be situated away from heat sources such as radiators and the like. It also should not be placed in temperatures less than 5^ (41^) or greater than 35^ (95^) .
Placement
- Ventilation -- The unit should be situated so that its location or position does not interfere with its proper ventilation. Allow 10 cm (4") clearance from the rear of the unit.
- Foreign Material -- Care should be taken so that objects do not fall into and liquids are not spilled into the unit. Do not subject this unit to excessive smoke, dust, mechanical vibration, or shock.
- Magnetism -- The unit should be situated away from equipment or devices that generate strong magnetism.
-
Stacking -- Do not place heavy objects on top of the unit.
-
Surface -- Place the unit on a flat, level surface.
- Carts and Stands -- The unit should be used only with a cart or stand that is recommended by the manufacturer. The unit and cart combination should be moved with care. Quick stops,
excessive force, and uneven surfaces may cause the unit and cart combination to overturn.

- Wall or Ceiling Mounting -- The unit should not be mounted to a wall or ceiling, unless specified in this operating instructions.
Maintenance
Clean the cabinet, panel and controls with a soft cloth lightly moistened with mild detergent solution.
Do not use any type of abrasive pad, scouring powder or solvent such as alcohol or benzine.
Service
- Damage Requiring Service -- The unit should be serviced by qualified service personnel when:
(a) The AC power supply cord or the plug has been damaged; or
(b) Objects have fallen or liquid has been spilled into the unit; or
(c) The unit has been exposed to rain; or
(d) The unit does not appear to operate normally or exhibits a marked change in performance; or
(e) The unit has been dropped, or the enclosure damaged.
- Servicing -- The user should not attempt to service the unit beyond that described in the operating instructions. All other servicing should be referred to qualified service personnel.
Sure Time Battery Back-Up
The back-up battery will keep the clock and alarm time during a power interruption. When power is resumed, the digits of the clock will illuminate and will show the time.
The alarm "memory" is not affected by a power interruption—so there is no need to reset the alarm.
Battery installation
1
2
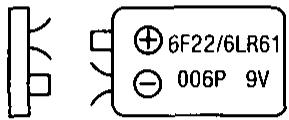
1 Connect a 9-Volt battery (not included) to the snaps, observing correct polarity.
A battery installed with incorrect polarity may leak and damage the unit.
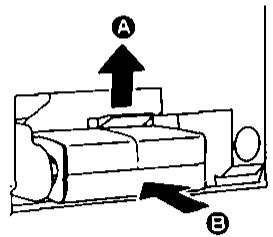
2
Place the battery in the compartment by inserting it in the direction of the arrow ③, while pushing the battery holder in the direction of the arrow A.
Note no battery cover is used.
When replacing the battery
Unplug the AC power cord from the AC outlet. After several seconds, plug it back into the outlet. If the digits flash continuously, replace the battery with a new one.
Replace the battery with a new one after one year of use (most batteries have a shelf life of approximately one year).
If an extended power failure or interruption occurs, replace the battery with a new one.
Operation
The sure time battery back-up is designed to hold the present time and the alarm time in the memory in the event of a power failure or interruption. (Such as when moving this unit to a different room.)
Whenever a power interruption occurs, the digits on the clock display will disappear. However, even though the clock face is completely blacked out, the 9-volt back-up battery will take over as the power source and the present time and the alarm time will be preserved.
Even if the power is not resumed by the wake-up time, the buzzer alarm will activate.
Notes
When the set is unplugged (not in use) for a long time, remove the back-up battery to prevent possible battery leakage.
Power failures may occur at any time of the night or day and can be of a long or short duration.
Most failures are so short that people don't even notice the interruption. These interruptions do, however, affect clocks which do not incorporate a battery back-up.
If the power is not resumed by the wake-up time, the radio alarm will not activate.
If the back-up battery goes dead during a power interruption, the present time and alarm time must also be reset after the interruption.
The back-up battery will be exhausted after about 14 hours of total (accumulative) use. (The battery life will vary depending on the frequency of the power interruption.)
After a power interruption, the time shown in the display window may not be always correct (it may gain or lose about six minutes per hour).
To Set the Correct Time
To set the correct time on the clock display, use the following procedure.
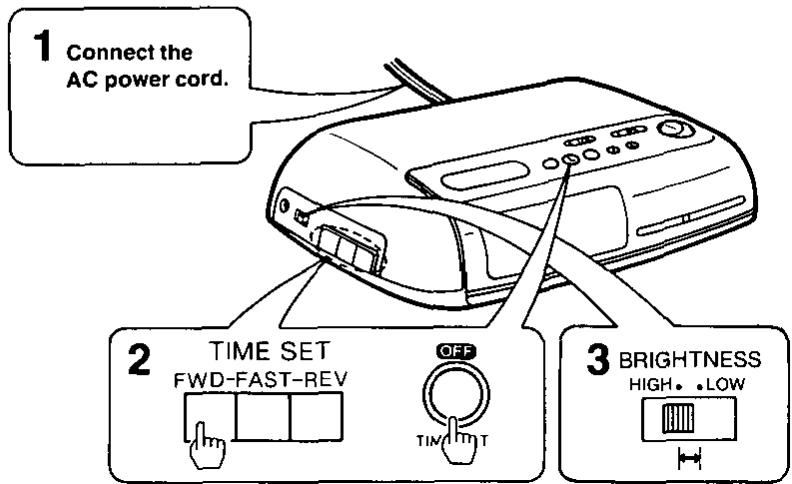
1 Connect the AC power cord to your household AC power outlet.
The clock display will begin to flash continuously.
2 While pressing the off/time set button, press and hold the time set buttons until the correct time appears on the clock display.
The digits should stop flashing.
To forward or reverse the displayed time rapidly, press and hold the FAST button with the FWD or REV button.
To forward or reverse the displayed time minute by minute, press the FWD or REV button repeatedly.
The seconds are automatically set to "0" when the FWD or REV button is pressed.
Observe the PM indicator. A green dot (PM indicator) indicates "PM" and no dot indicates "AM".
3 Set the brightness selector to "HIGH" or "LOW".
To increase the brightness of the time display, set this selector to "HIGH"; to decrease it, set to "LOW".
The correct time can usually be obtained by listening for time checks on the radio or from telephone time services.
The time set (FWD-FAST-REV) buttons can only activate when the off/time button is pressed.
Helpful Hints
Keep the set away from heating devices and electrical noise generating devices such as fluorescent lamps and motors.
The set should be kept free from dust, moisture, and vibration, and should not be exposed to direct sunlight.
Do not clean the plastic cabinet with benzine or thinner. Clean it with a solution of soap and water.
Avoid spray-type insecticides. Some insecticides contain chemicals that could cause cabinet deformation.
Do not connect the set to an AC outlet other than one supplying the specified voltage.
Avoid cuts, scratches, or poor connections in the AC power cord which may result in fire or electric shock hazard. Also excessive bending, pulling, or splicing of the cord should be avoided.
Do not unplug the AC power cord by pulling on the cord. To do so may cause premature failure or shock hazard.
If the set is not going to be used for a long period of time, remove the back up battery to prevent possible damage due to battery leakage.
How to use with earphone
Connect an earphone (not included) to the.
earphone jack.
When using an earphone avoid high volume levels, which may damage your ears.
Never fall asleep while using an earphone.
When earphone is in use, the buzzer alarm and radio alarm will still function, but only the buzzer alarm will be heard from the speaker.
Front Panel Controls and Functions
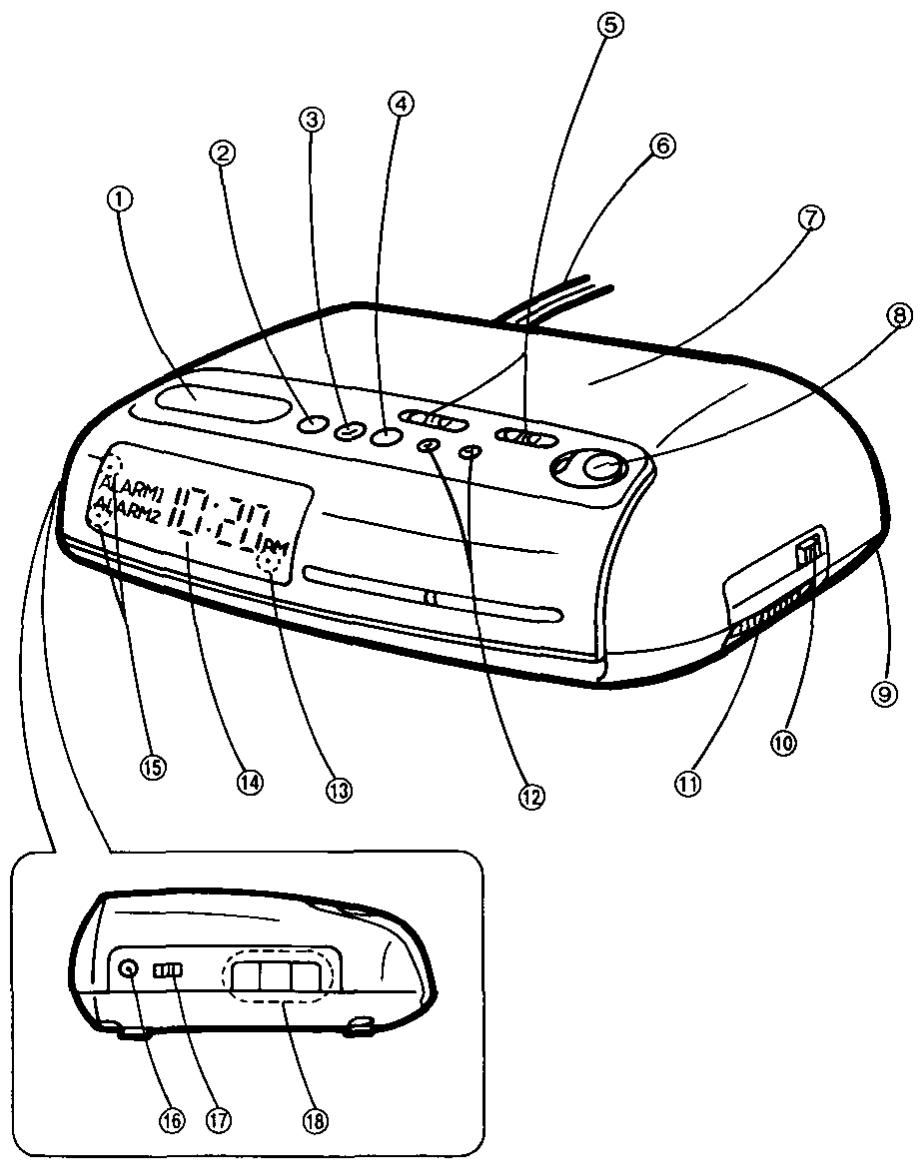
① Doze button (DOZE)
When the alarm activates, but you do not wish to wake up immediately, press this button. The alarm will be quiet for 7 minutes, then the alarm will operate again.
② Sleep button (SLEEP)
Press this button when you wish to fall a sleep while listening to music.
③ Off/time set button (OFF/TIME SET)
Press this button to shut off radio, alarm, doze and sleep operation.
④ Radio button (RADIO)
Press this button to listen to the radio.
⑤ Alarm 1 and 2 selectors (1—ALARM—2)
Set the alarm 1 selector to "RADIO", the alarm 1 indicator will light up. Set the alarm 2 selector to "BUZZER", the alarm 2 indicator will light up.
⑥ AC power cord
⑦ Speaker
Volume control (VOLUME)
⑨ Back-up battery compartment [bottom]
10 Band selector (BAND)
Select the desired band.
① Tuning control (TUNING)
Alarm 1 and 2 display/adjust buttons (DISPLAY/ADJUST)
Set the desired time by the time set buttons, while pressing this button. If the alarm 1 and 2 display/adjust buttons are pressed at the same time, the clock display shows the alarm 1 time.
PM indicator (PM)
14Clock display
15 Alarm 1 and 2 indicators
15 Earphone jack (3)
⑦ Brightness selector (BRIGHTNESS) To increase the brightness of the time display, set this selector to "HIGH", to decrease it, set to "LOW".
Time set buttons (TIME SET) [side] The FWD button forwards the displayed time and the REV button reverses it. To forward or reverse the displayed time rapidly, press and hold the FAST button with the FWD or REV button.
Radio Operation
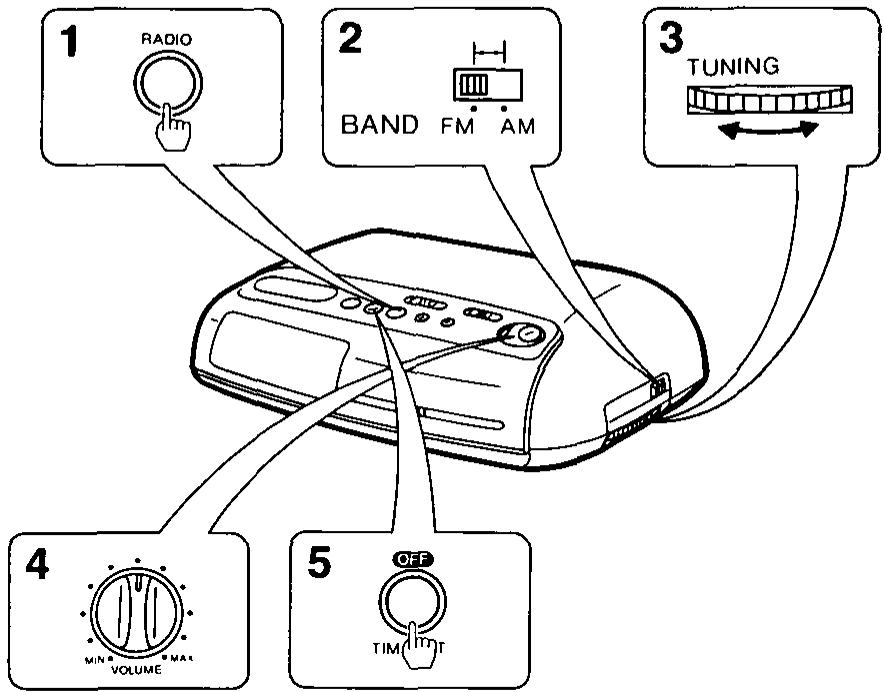
1 Press the radio button.
2 Set the band selector to "FM" or "AM".
3 Tune in the desired station with the tuning control.
Antennas
FM
The AC power cord functions as an FM antenna. To obtain the best FM reception, extend and change the direction of the AC power cord.
4 Adjust the volume control to the desired level.
5 To turn off the radio, press the off/time set button.
During the radio operation, the radio dial is illuminated. It is convenient to see the radio dial in a dark room.
AM
A sensitive ferrite core antenna is built in this set to assure excellent AM reception in most areas. To improve the reception of weak stations, turn the set in the direction which gives the best results.
Operation for Dual Wake-Up System
This set incorporates a dual wake-up system, you can set each alarm time to
any desired wake-up time in the following way.
Alarm time setting
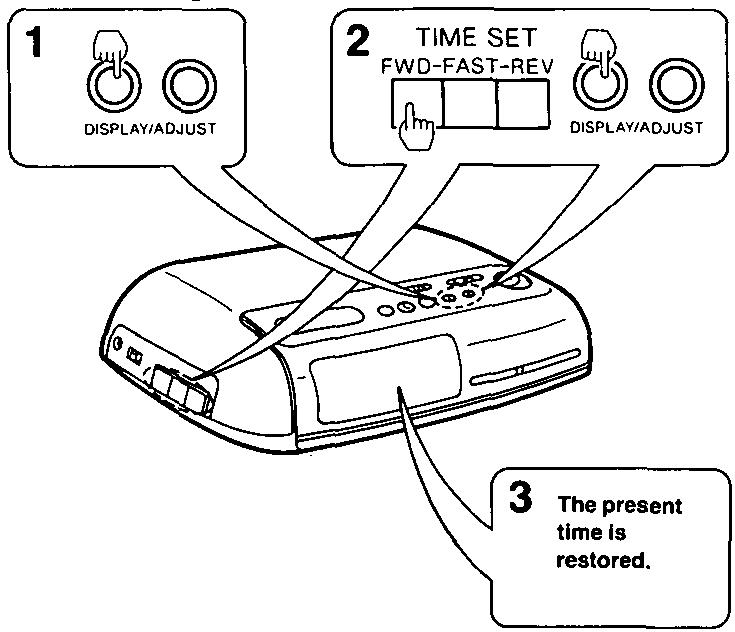
1 Press and hold the alarm 1 (or 2) display/adjust button. The clock display shows "12:00".
2 While pressing the alarm 1 (or 2) display/adjust button, press and hold the time set buttons until the desired wake-up time appears on the clock display.
Make sure the AM or PM setting is correct.
3 Release the alarm 1 (or 2) display/adjust button, and the present time is restored on the clock display.
To make sure of the preset time, press the alarm 1 (or 2) display/adjust button again.
If the alarm 1 and 2 display/adjust buttons are pressed at the same time, the clock display shows the alarm 1 time.
Operation for Dual Wake-Up System
(continued)
Radio alarm (ALARM 1)
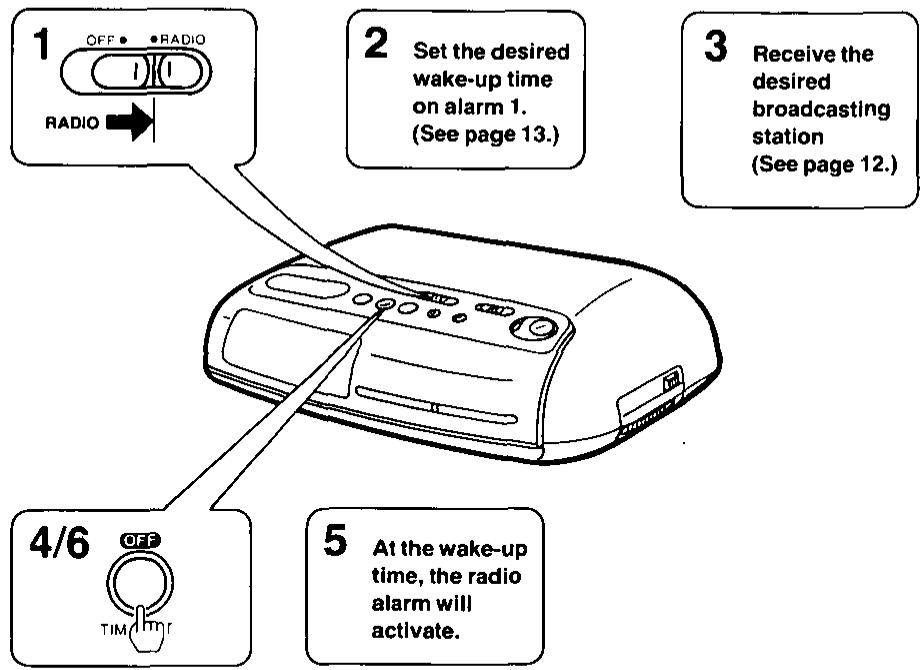
1 Set the alarm 1 selector to "RADIO".
The alarm 1 indicator will light up.
2 Set the desired wake-up time on alarm 1.
(See page 13.)
3 Tune in the desired broadcasting station.
(See page 12.)
4 Press the off/time set button.
5 At the set wake-up time, the radio alarm will activate.
The alarm will automatically shut off in about 59 minutes.
Tender wake-up
When the radio alarm is activated a low volume setting will be heard. The volume will then gradually increase to the level previously set by the volume control knob.
6 To shut off the alarm before automatic shut-off, press the off/time set button.
Buzzer alarm (ALARM 2)
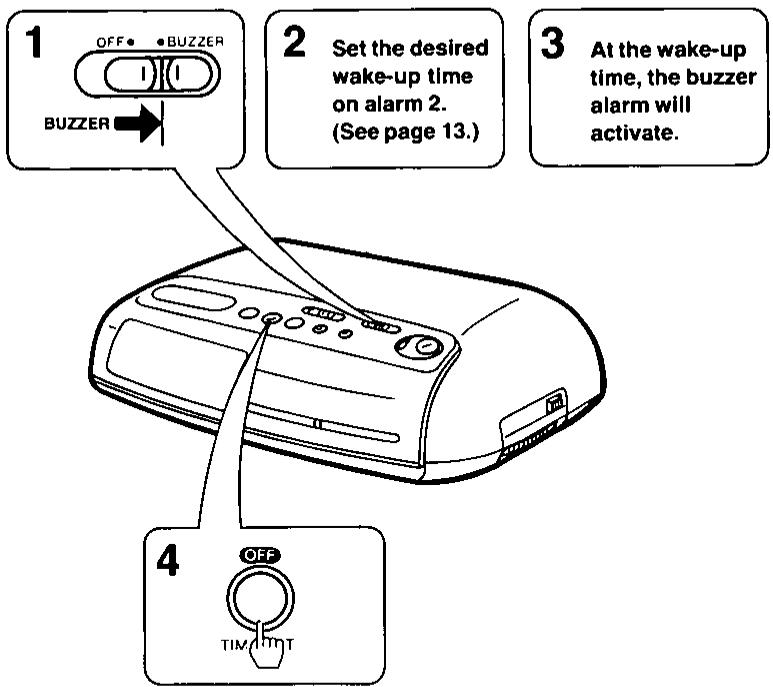
1 Set the alarm 2 selector to "BUZZER".
The alarm 2 indicator will light up.
2 Set the desired wake-up time on alarm 2.
(See page 13.)
3 At the set wake-up time, the buzzer alarm will activate.
The alarm will automatically shut off in about 59 minutes.
4 To shut off the alarm before automatic shut-off, press the off/time set button.
Operation for Dual Wake-Up System
(continued)
Combination of the alarm 1 and the alarm 2
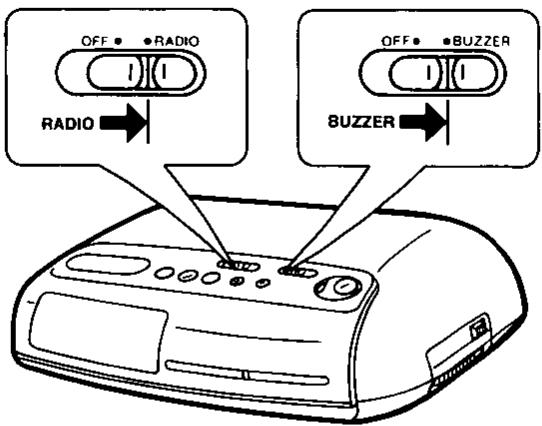
The radio alarm and the buzzer alarm are set at the same time, both alarms will activate simultaneously.
Combination of the Alarm 1 and the Alarm 2 permits the following convenience.
Example
Set the wake up time for weekday on the Alarm 1, and for weekend on the Alarm 2.
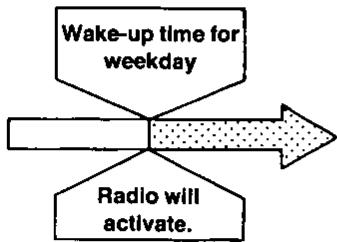
Alarm 1...... "RADIO"
Alarm 2. "OFF"
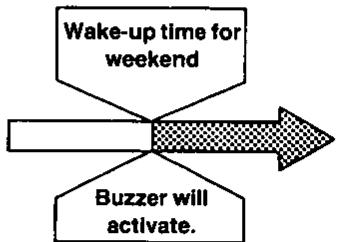
Alarm 1. "OFF"
Alarm 2... "BUZZER"
The alarm will activate automatically at the same time every day.
Make sure to set the Alarm 1 and 2
selector to "OFF" when you want to cancel the alarm.
Special Features
Doze operation
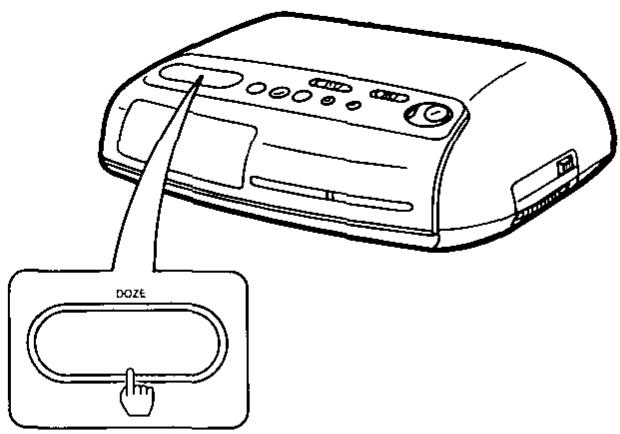
When the alarm activates, but you do not wish to wake up immediately, press the doze button.
The alarm will be quiet for 7 minutes, then the alarm will operate again.
If you do not need doze time and want to cancel the alarm, press the off/time set button.
While pressing the doze button, the seconds will also appear. (At this time, the clock display changes from hours and minutes to minutes and seconds.)
Special Features (continued)
Radio sleep timer
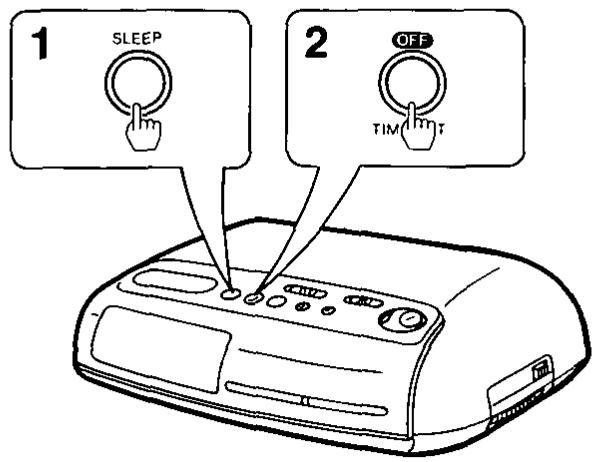
You can set the clock radio to play up to 59 minutes, then shut off automatically.
1 Press and hold the sleep button until the length of time for which you wish to listen to the radio.
Watch the display as it counts backwards from 59 to 00.
Release at time desired. When you release the sleep button, the correct time returns on the display.
During radio-listening, you can confirm the number of minutes remaining by pressing the sleep button and reading at the display.
You can change the length of time for which you wish to listen to the radio with the time set button while pressing the sleep button.
2 To cancel the sleep timer and shut off the radio, press the off/time set button.
Radio sleep timer and alarm
You can set the clock radio to play for the desired time (up to 59 minutes) and shut off automatically, then activate the alarm 1
1 Set the desired wake-up time and select the desired alarm mode (alarm 1 and/or alarm 2) as instructed above.
and/or alarm 2 automatically at the desired wake-up time.
2 Set the desired length of time for which you wish to listen to the radio.
(See page 18.)
Product Service
Do not attempt to remove the cover(s) or repair the unit yourself. Refer servicing to qualified personnel only.
Product information
For product service, product information or assistance in product operation, refer to the servicenter directory.
Specifications
Power
Requirement: AC; 120 V, 60 Hz
Power consumption; 5 W
Battery; 9 V (006P/6F22)
Radio Frequency
Range: FM; 88-108 MHz AM; 525-1705 kHz
Speaker: 8 cm (3")
Dimensions (W× H× D) .. 231× 60× 153mm (9%)× 2%)× 6%)
Weight: 680 g (1 lb. 8 oz) without battery
Design and Specifications are subject to change without notice.
Index
Alarm 1 and 2 display/ adjust buttons 13
Alarm 1 and 2 selectors (1-ALARM-2) 14, 15
Band selector 12
Doze button 17
Off/time set button 8,12
Radio button 12
Sleep button. 18, 19
Tender wake-up 14
Time set buttons 8
Tuning control 12
Panasonic Company
Division of Matsushita Electric Corporation of America
One Panasonic Way, Secaucus, New Jersey 07094
Panasonic Sales Company
Division of Matsushita Electric of Puerto Rico, Inc.
San Gabriel Industrial Park
65th Infantry Ave. Km.9.5
Carolina, P.R. 00630
- Panasonic
- FM-AM Digital Clock Radio
- RC-6099
- Table of Contents
- Precautions 4
- Sure Time Battery Back-Up 6
- To Set the Correct Time 8
- Helpful Hints 9
- Front Panel Controls and Functions 10
- Radio Operation 12
- Operation for Dual Wake-Up System 13
- Special Features 17
- Product Service 19
- Specifications 19
- Index Back cover
- Precautions
- Safety
- Installation
- Environment
- Placement
- Maintenance
- Service
- Sure Time Battery Back-Up
- Battery installation
- Connect a 9-Volt battery (not included) to the snaps, observing correct polarity.
- When replacing the battery
- Operation
- Notes
- To Set the Correct Time
- Helpful Hints
- How to use with earphone
- Front Panel Controls and Functions
- Radio Operation
- Antennas
- FM
- AM
- Operation for Dual Wake-Up System
- Alarm time setting
- Radio alarm (ALARM 1)
- Buzzer alarm (ALARM 2)
- Combination of the alarm 1 and the alarm 2
- Example
- Special Features
- Doze operation
- Special Features (continued)
- Radio sleep timer
- Press and hold the sleep button until the length of time for which you wish to listen to the radio.
- To cancel the sleep timer and shut off the radio, press the off/time set button.
- Radio sleep timer and alarm
- Product Service
- Product information
- Specifications
- Power
- Radio Frequency
- Speaker: 8 cm (3")
- Index
Marque : PANASONIC
Modèle : RC 6099
Catégorie : Radio-réveil