
MEDIA DISK - Disque dur multimédia MEMUP - Notice d'utilisation et mode d'emploi gratuit
Retrouvez gratuitement la notice de l'appareil MEDIA DISK MEMUP au format PDF.


| Type d'appareil | Télécommande |
| Alimentation | Piles (non précisées) |
| Connexion vidéo | Composite, S-Video, RCA |
| Connecteur USB | USB 2.0 |
| Fonction télécommande | Contrôle à distance infrarouge |
| Compatibilité | Équipements AV variés |
| Fonctions audio | Contrôle du volume, mute |
| Fonctions vidéo | Lecture, pause, arrêt, avance rapide, retour rapide |
| Indicateur | LED d'état |
| Mode veille | Oui |
| Installation logicielle | Non précisé |
| Dimensions | Non précisées |
| Poids | Non précisé |
| Matériau | Plastique |
| Utilisation | Contrôle de lecteur multimédia |
| Fonctionnalités supplémentaires | Retour au menu, navigation |
FOIRE AUX QUESTIONS - MEDIA DISK MEMUP
Questions des utilisateurs sur MEDIA DISK MEMUP
0 question sur cet appareil. Repondez a celles que vous connaissez ou posez la votre.
Poser une nouvelle question sur cet appareil
Téléchargez la notice de votre Disque dur multimédia au format PDF gratuitement ! Retrouvez votre notice MEDIA DISK - MEMUP et reprennez votre appareil électronique en main. Sur cette page sont publiés tous les documents nécessaires à l'utilisation de votre appareil MEDIA DISK de la marque MEMUP.
MODE D'EMPLOI MEDIA DISK MEMUP
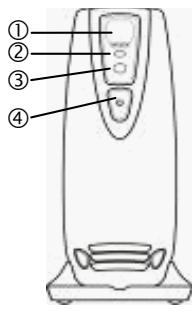
Fig. 1
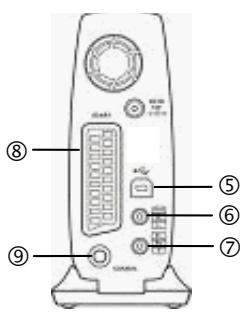
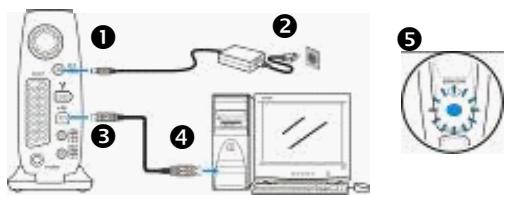
Fig. 3
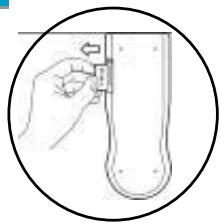
Fig.2
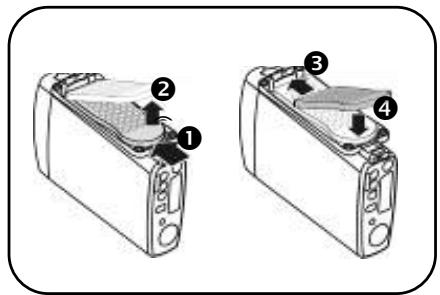
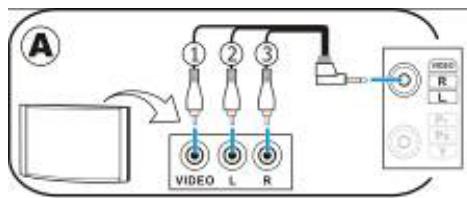
Fig. 4
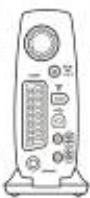
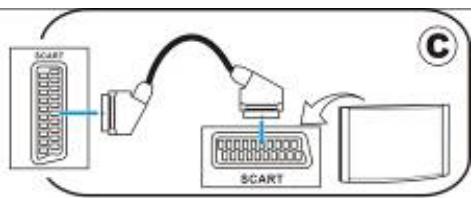
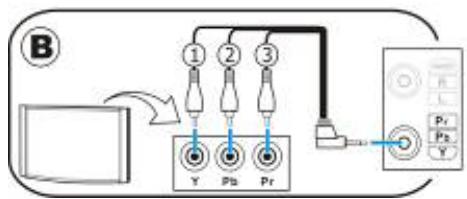
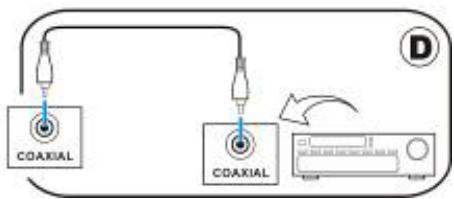
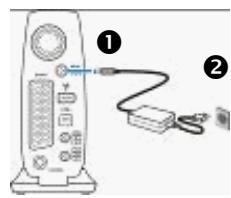
Fig.5
ON
OFF
Fig. 6
Precautions and Operation Notes
This device is not for in-car entertainment use.
Unstable power or vibration may damage the unit.
When in AV playback mode, make sure the unit's interface cable is disconnected from PC.
When using the remote, point the remote to the unit's remote receiver.
To change the video system output standard to match your TV, hold the button and press the MENU button until TV can show a stable image.
Parts Name and Functions (Fig 1)
① Remote receiver
③ Power and acces
④ Power button
⑥ AV connector
⑧ SCART connector
② Remote indicator (Red)
indicator (Blue)
⑤ USB 2.0 connector
⑦ Component connector
Coaxial digital out
The Remote Controller (Fig 2)
Using the Remote for the First Time
Pull the tab to enable the battery power of remote.
Taking out the Remote Controller
1: Push the bottom of remote forward.
2: The remote will be released from the stand.
Storing the Remote Controller
3: Insert the top of remote and push it forward.
4: Push the bottom of remote into the stand.
Use with Computer
Software Installation
- Do not connect the unit to a PC before installing the software that came with the installation CD.
- Insert the installation CD. Select "Install Driver and Utility" and the software to be installed will depend on your OS:
Windows 98SE will install device driver and utility Windows XP/2000/Me will install only the utility
Connecting PC with USB 2.0 (Fig. 3)
1~2: Connect the AC adaptor.
3~4: Connect the USB cable.
6: The blue LED will light up and PC will detect and recognize the unit automatically.
File Access
PC will detect and recognize the unit as a hard disk and assign a drive letter under "My Computer". You can access files in it like a regular hard disk.
Disconnecting from PC
- Click , or icon to disconnect the unit, and when the "safely removed" message appears, disconnect the interface cable.
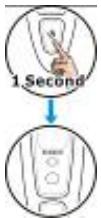
- Turn the unit off by pressing the power button until the blue LED goes out.
Use with AV Equipment (Fig. 4)
Video Connection
Choose one of the following video connections: Use the AV jack labeled Video, R, L. (A special cable is provided. Jack is yellow.) Use the component video jack labeled Y, Pb, Pr. (A special cable is provided. Jack is green, jack blue, jack red.) Use the SCART connector (cable not provided).
Audio Connection
Choose one of the following audio connections: Use the AV jack labeled Video, R, L. (A special cable is provided. Jack is white, jack red.) Use Coaxial digital audio out to an audio decoder (cable not provided).
AVPlayback(Fig.5)
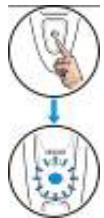
1~2: Connect the AC adapter. Press the Power button, the blue LED lights up.
Playback: Press button on the remote and the TV screen will display images. (If the unit does not respond and the red LED blinks 3 times, check and make sure the unit is not connected to a PC.)
Standby: Press button on the remote and the TV screen will stop displaying images.
When the unit is not in use for playback, leave it in standby mode. When you want to disconnect it from AV equipment, press Power button until the blue LED is off, and then remove the connections.
Navigation (Fig. 6)
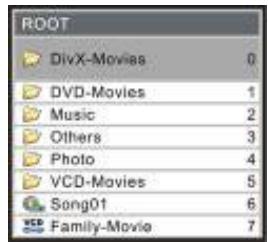
When the unit first enters playback mode, the screen will list the folders and the AV files under the "ROOT" folder. You can use the remote controller to select the folder or file to play.
Selection:
Press or button to select a file or folder. The selected is highlighted.
Entering a
Press button to enter the
folder:
selected folder.
Back to th
Press button to back to the previous layer of folder.
folder:
Playback:
Press PLAY button. If the selected folder doesn't contain any playable AV files, the folder will be entered.
Go back to
Wherever you navigate, you can
ROOT:
return to ROOT immediately after pressing the TITLE button.
Setup
Press SETUP button to enter the function setup menu.