
C9200DXN-PROSTUDIOEDITION - Imprimante couleur professionnelle OKI - Notice d'utilisation et mode d'emploi gratuit
Retrouvez gratuitement la notice de l'appareil C9200DXN-PROSTUDIOEDITION OKI au format PDF.
| Marque | OKI |
| Modèle | C9200DXN-PROSTUDIOEDITION |
| Type de produit | Imprimante couleur professionnelle |
| Dimensions (L x P x H) | 678 x 626 x 447 mm |
| Poids | 72 kg (160 lbs) |
| Alimentation électrique | 230 V, 50/60 Hz |
| Consommation électrique | En veille : 15 W, En fonctionnement : 600 W |
| Fonctions principales | Impression couleur, bac grande capacité (HCF), gestion des supports |
| Capacité des bacs | 4 bacs supplémentaires possibles (HCF + bac auxiliaire) |
| Types de supports | Papier standard, recyclé, photo mat jusqu'à 47 lb US Bond |
| Entretien et nettoyage | Nettoyer les rouleaux d'alimentation et les guides papier régulièrement |
| Sécurité | Utiliser au moins deux personnes pour soulever l'imprimante (72 kg) |
| Garantie | 1 an, pièces et main-d'œuvre |
| Service après-vente | Centres agréés Oki Data, tél. 1-800-OKI-DATA |
FOIRE AUX QUESTIONS - C9200DXN-PROSTUDIOEDITION OKI
Questions des utilisateurs sur C9200DXN-PROSTUDIOEDITION OKI
0 question sur cet appareil. Repondez a celles que vous connaissez ou posez la votre.
Poser une nouvelle question sur cet appareil
Téléchargez la notice de votre Imprimante couleur professionnelle au format PDF gratuitement ! Retrouvez votre notice C9200DXN-PROSTUDIOEDITION - OKI et reprennez votre appareil électronique en main. Sur cette page sont publiés tous les documents nécessaires à l'utilisation de votre appareil C9200DXN-PROSTUDIOEDITION de la marque OKI.
MODE D'EMPLOI C9200DXN-PROSTUDIOEDITION OKI
Installing the
High Capacity Feeder (HCF)
Caution!
- The printer weighs 160 lbs. (72 kg): use at least 2 people to lift the printer.
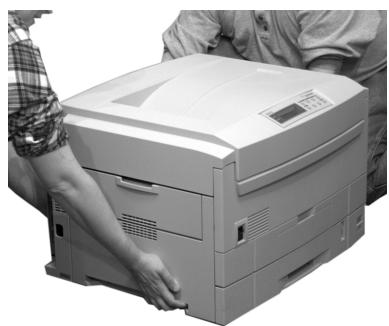
- Grasp the printer using the hand holds on the sides and on the back.
- Use proper lifting techniques.
Phase 1: Install the High Capacity Feeder (HCF)
You can install just the HCF or one auxiliary tray and
the HCF.
Before you start, find an extra person to help guide you in placing the printer on the pins.
1 Unpack the HCF and remove the shipping materials.
2 Turn the printer off and unplug the power cord.
3 Remove the interface cable.
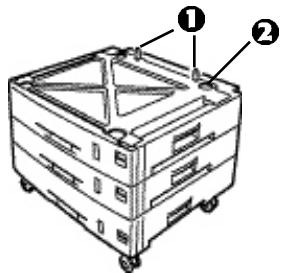
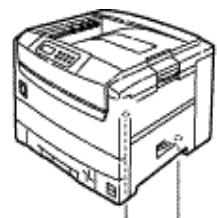
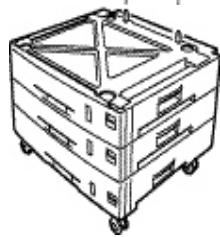
4 Move the HCF into position (paper trays facing front), noting the location of the pins (1) and connector (2).
5 If you are installing both the HCF and an auxiliary tray, place the auxiliary tray on top of the HCF, aligning the holes/connector in the bottom of the tray with pins/connector on the HCF.

6 Grasp and lift the printer by the hand holds on the sides and back.
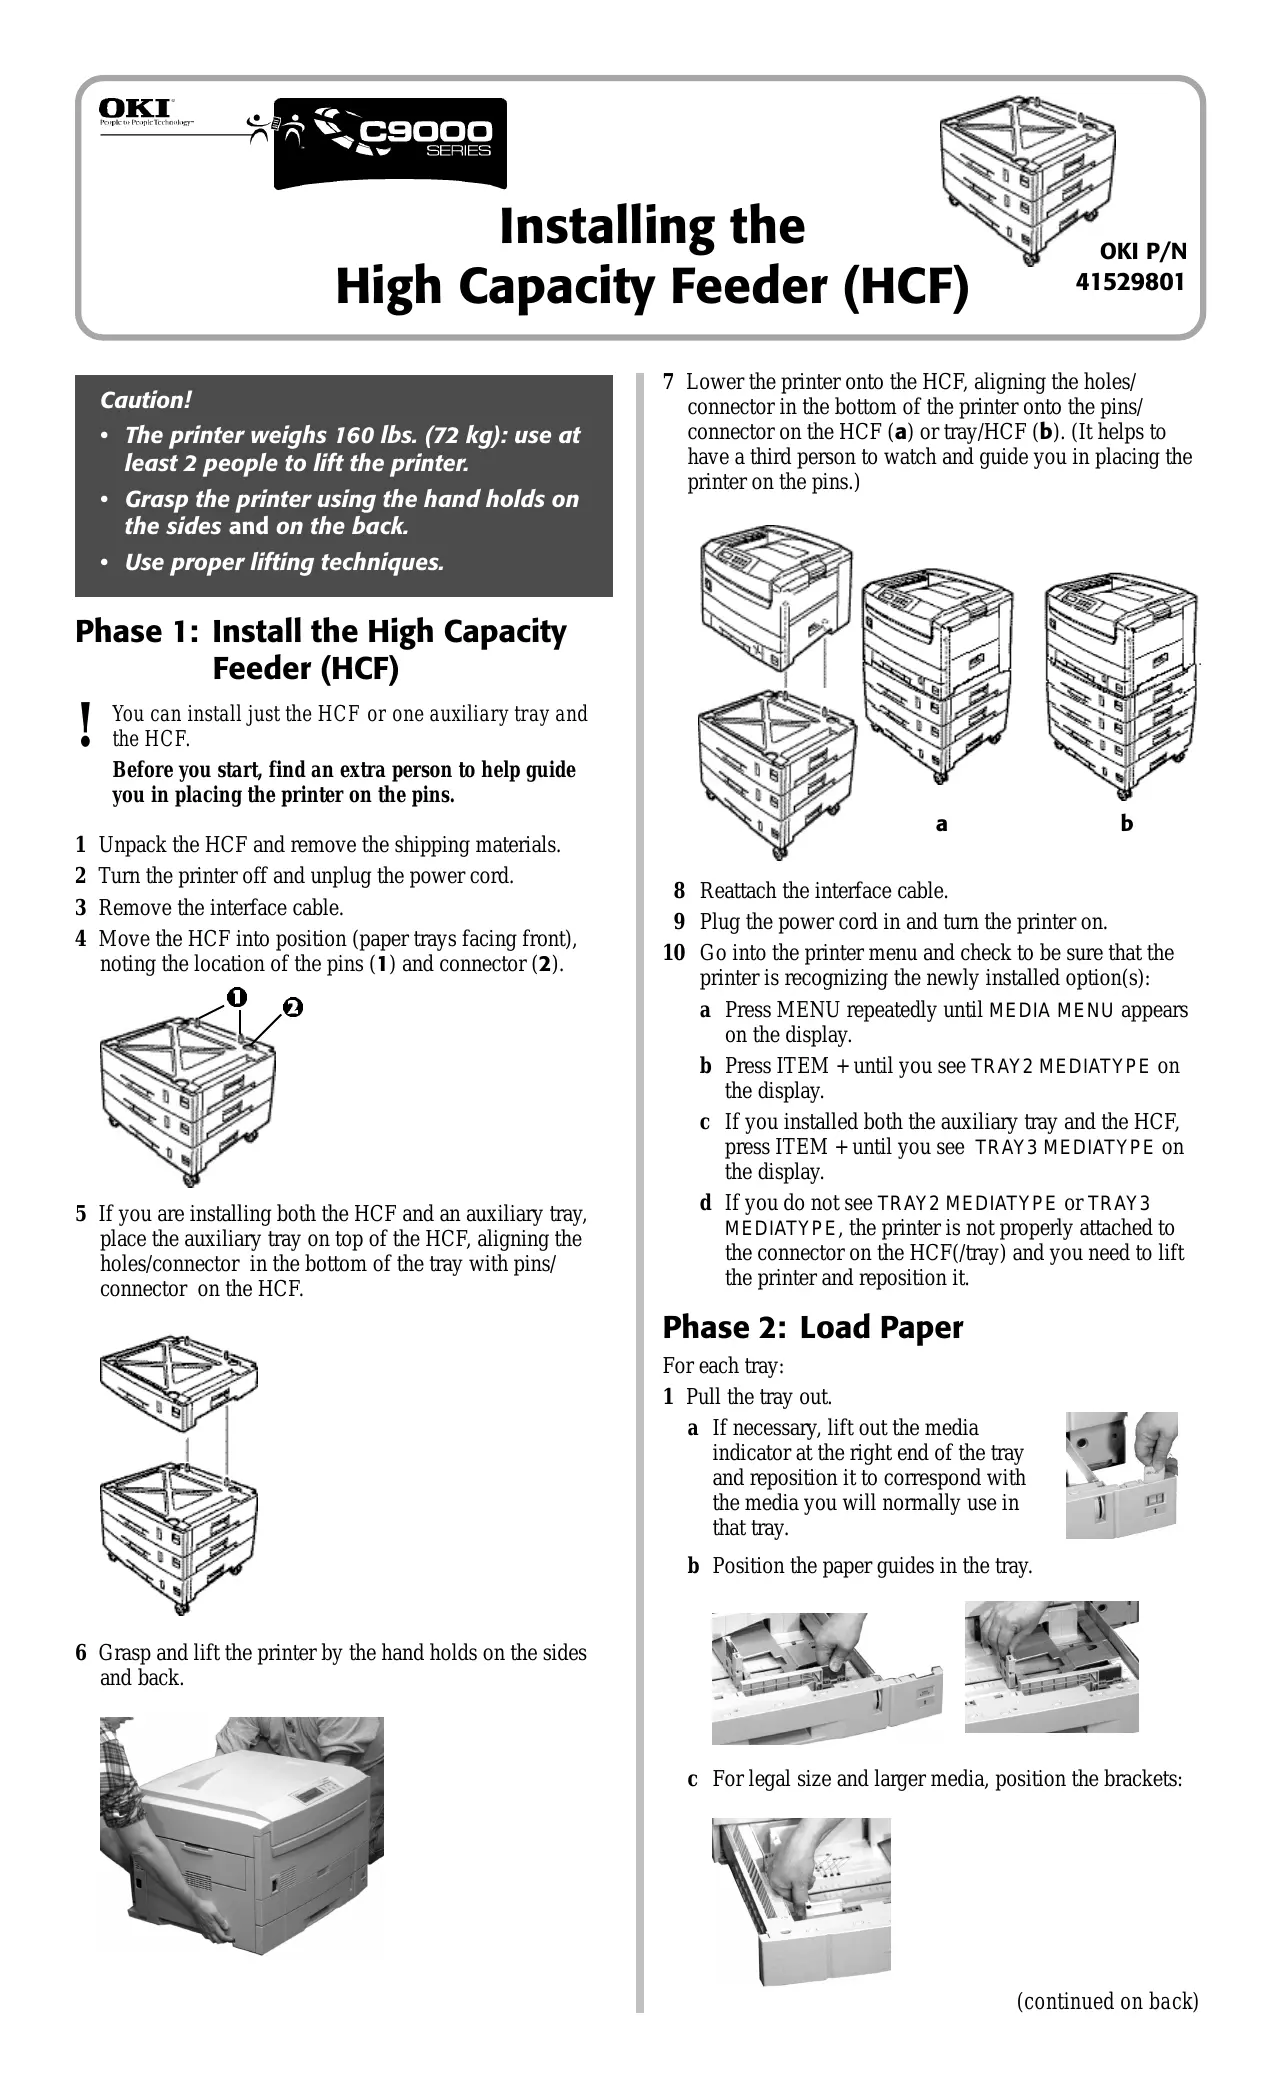
7 Lower the printer onto the HCF, aligning the holes/ connector in the bottom of the printer onto the pins/ connector on the HCF (a) or tray/HCF (b). (It helps to have a third person to watch and guide you in placing the printer on the pins.)
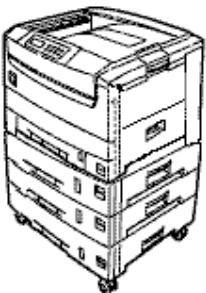
a
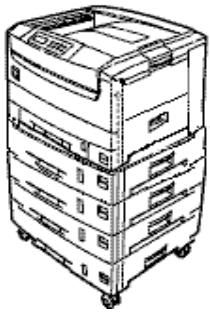
b
8 Reattach the interface cable.
9 Plug the power cord in and turn the printer on.
10 Go into the printer menu and check to be sure that the printer is recognizing the newly installed option(s):
a Press MENU repeatedly until MEDIA MENU appears on the display.
b Press ITEM + until you see TRAY2 MEDIATYPE on the display.
c If you installed both the auxiliary tray and the HCF, press ITEM + until you see TRAY3 MEDIATYPE on the display.
d If you do not see TRAY2 MEDIATYPE or TRAY3 MEDIATYPE, the printer is not properly attached to the connector on the HCF(/tray) and you need to lift the printer and reposition it.
Phase 2: Load Paper
For each tray:
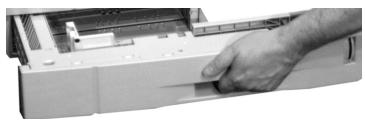
1 Pull the tray out.
a If necessary, lift out the media indicator at the right end of the tray and reposition it to correspond with the media you will normally use in that tray.
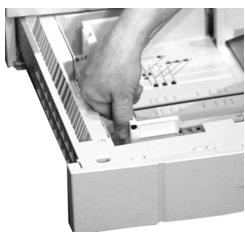
b Position the paper guides in the tray.
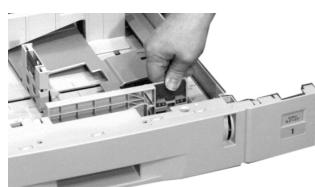
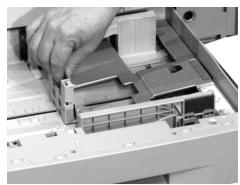
c For legal size and larger media, position the brackets:
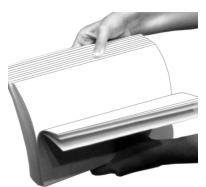
2 If loading paper, fan it.
3 Place the print media in the tray.
! Be sure to keep the media below the PAPER FULL mark.
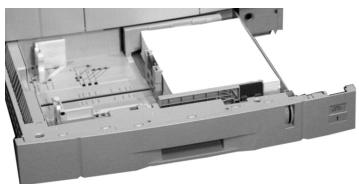
4 Gently push the tray back in.
5 You can use standard, recycled or matte photo paper up to 47 lb US Bond in the HCF trays. The default setting is Medium (20 to 24 lb. US Bond). If you will be using lighter or heavier paper in the HCF trays, enter the printer menu and set the media weight for the trays (see page 12 in your Handy Reference for more information):
a Press MENU repeatedly until MEDIA MENU appears on the display.
b Press ITEM + repeatedly until you see TRAY2 MEDIAWEIGHT on the display.
c Press VALUE + or VALUE - repeatedly until the desired setting appears on the second line of the display.
d Press SELECT to engage the new setting.
e Repeat steps b through d for TRAY3 MEDIAWEIGHT, TRAY4 MEDIAWEIGHT and if you also installed an auxiliary tray, for TRAY5 MEDIAWEIGHT.
f Press ON LINE to exit the menu.
Phase 3: Activate the HCF in the Printer Driver
Windows® PCL Driver
1 Click Start Settings Printers. The Printers dialog box opens.
2 Right click the OKI C9200 or C9400 PCL printer icon, then click Printing Preferences (Windows 2000), Properties (Windows Me, 98, 95) or Document Defaults (Windows NT 4.0).
3 In the Paper tab, click Device options.
4 Under Paper tray installed:, set the total number of trays installed (4 for printer + HCF or 5 for printer + HCF + auxiliary tray), then click OK.
5 Click OK, then close the Printers dialog box.
Windows PostScript® Driver
1 Click Start Settings Printers. The Printers dialog box opens.
2 Right click the OKI C9200 or C9400 PostScript printer icon, then click Properties.
3 Click the Device Settings tab (Windows 2000 and NT 4.0) or the Device Options tab (Windows Me, 98, 95).
4 Under Installable Options, click Additional Input Trays and select the number of additional trays installed (3 for HCF or 4 for HCF + auxiliary tray).
5 Click OK, then close the Printers dialog box.
Macintosh® PostScript Driver
1 Activate Chooser from the Apple menu.
2 Select LaserWriter 8.
3 Click Printer Setup.
4 Click Configure.
5 Change the Additional Input Trays setting to match the number of additional trays installed (3 for HCF or 4 for HCF + auxiliary tray).
6 Click OK twice and close Chooser.
Limited Warranty: U.S.
Oki Data Americas, Inc. (Oki Data) warrants this OPTION to be free from defect in material and workmanship and will remedy any such defect according to the terms of this Limited Warranty.
Oki Data will repair (or at its option, replace) at no charge, any defective part(s) of the OPTION for one (1) year from the date of purchase. This Limited Warranty extends to the original purchaser only. To make request or claim for service under this Limited Warranty the original purchaser must return the Oki Data product, shipping prepaid, in the original shipping container or equivalent, to Oki Data or an authorized Oki Data service center and assume the risk of loss or damage in transit. A written receipt for the product, showing the date of purchase, dealer's name, and item purchased must accompany any request or claim for work to be performed under this Limited Warranty. This Limited Warranty shall not apply if the product has been damaged due to abuse, misuse, misapplication, accident, or as a result of service or modification by any other than an authorized Oki Data service center.
THERE ARE NO EXPRESS WARRANTYES OTHER THAN THOSE ON THE FACE HEREOF AND DESCRIBED ABOVE. NO WARRANTYIES WHETHER EXPRESS OR IMPLIED, INCLUDING, BUT NOT LIMITED TO, ANY IMPLIED WARRANTYES OF MERCHANTABILITY OR FITNESS FOR A PARTICULAR
PURPOSE, SHALL EXTEND BEYOND THE RESPECTIVE WARRANTY PERIOD DESCRIBED ABOVE OF ONE (1) YEAR. Some states do not allow limitations on how long an implied warranty lasts, so the above limitation may not apply to you.
OKI DATA SHALL NOT BE RESPONSIBLE OR LIABLE FOR ANY SPECIAL, INCIDENTAL OR CONSEQUENTIAL DAMAGES OR LOSS ARISING FROM THE USE OF THIS PRODUCT. Some states do not allow the exclusion or limitation of incidental or consequential damages, so the above exclusion may not apply to you.
Additional information on obtaining service under this Limited Warranty is available by contacting the Oki Data dealer from whom the product was purchased, by contacting Oki Data directly at 1-800-OKI-DATA (U.S. and Canada), or by contacting one of the service depots listed below.
This Limited Warranty applies to this Oki Data Option. However, the procedure for obtaining service may vary outside the continental United States. Contact your Oki Data dealer for such warranty service information.
This warranty gives you specific legal rights, and you may also have other rights which vary from state to state.
For the most comprehensive, up-to-date listing of Oki Data authorized Service Centers, call 1-800-OKI-DATA (1-800-654-3282).
Oki Data Service Depot Information
UNITED STATES
Oki Data Americas, Inc.
2020 Bishops Gate Blvd.
Mt. Laurel, NJ 08054
Tel: 1-800-654-3282
Fax: 1-856-222-5247
CANADA
Oki Data Americas, Inc.
2735 Matheson Blvd. East, Unit 1
Mississauga, Ontario
Canada L4W 4MB
Tel: 800-654-3282
Fax: 905-238-4427
MEXICO
Oki Data de Mexico, S.A. de C.V.
Mariano Escobedo No. 748 - 8 Piso
Col Anzures, e.p. 11590
Mexico, DF
Tel: (525) 263-8780 Fax: (525) 263-8785
BRAZIL
Oki Data do Brasil, Ltda.
Rua Alexandre Dumas, 2220 - 8 andar
Chácara Sto Antonio
São Paulo 04717-004, Brasil
Tel: 55 11-3444-3500
Fax: 55 11-3444-3501