KuKirin S1 Pro - Trottinette électrique Kugoo - Notice d'utilisation et mode d'emploi gratuit
Retrouvez gratuitement la notice de l'appareil KuKirin S1 Pro Kugoo au format PDF.


| Type de produit | Trottinette électrique |
| Marque | Kugoo |
| Modèle | KuKirin S1 Pro |
| Dimensions (dépliée) | Environ 110 x 45 x 115 cm |
| Dimensions (pliée) | Environ 110 x 45 x 45 cm |
| Poids | Environ 15 kg |
| Charge maximale | 120 kg |
| Vitesse maximale | 25 km/h |
| Autonomie | 25-30 km |
| Type de moteur | Moteur sans balais (brushless) 350 W |
| Batterie | Lithium-ion 36 V / 7.5 Ah |
| Temps de charge | 4-6 heures |
| Freins | Frein à disque arrière et frein électrique |
| Pneus | Pneus avant et arrière de 8,5 pouces, sans chambre à air |
| Éclairage | Phare avant LED, feu arrière |
| Suspension | Suspension avant et arrière |
| Affichage | Écran LCD avec vitesse, batterie et mode |
| Modes de vitesse | Mode éco, mode standard, mode sport |
| Pliage | Mécanisme de pliage rapide |
| Entretien et nettoyage | Nettoyer avec un chiffon humide; vérifier la pression des pneus; charger la batterie régulièrement |
| Sécurité | Porter un casque; utiliser les feux la nuit; respecter le code de la route |
| Pièces détachées et réparabilité | Pneus, plaquettes de frein, batterie et chargeur disponibles |
| Informations générales | Utilisation en extérieur sur terrain sec; température de fonctionnement 0-40°C |
FOIRE AUX QUESTIONS - KuKirin S1 Pro Kugoo
Questions des utilisateurs sur KuKirin S1 Pro Kugoo
0 question sur cet appareil. Repondez a celles que vous connaissez ou posez la votre.
Poser une nouvelle question sur cet appareil
Téléchargez la notice de votre Trottinette électrique au format PDF gratuitement ! Retrouvez votre notice KuKirin S1 Pro - Kugoo et reprennez votre appareil électronique en main. Sur cette page sont publiés tous les documents nécessaires à l'utilisation de votre appareil KuKirin S1 Pro de la marque Kugoo.
MODE D'EMPLOI KuKirin S1 Pro Kugoo

Catalog
1.Schematic diagram of products and accessories 2
2.Main nodes 3
- Safety regulations 4
4.Product actegory 9
- Install the steering wheel 10
6.Layout 11
7.Adder circuit 12
8.Recharge 13
- Transport 13
10.Main functions 14
11.Main functions 15
- The starting point of the movement 16
13.Storage battery and charging device 17
14.Display 18
15.Keep in storage 20
- Diagnostics 21
17.Main features 22
18.Warranty service 23
- Service ticket 24
Product category

natural_image
Line drawing of a single electric scooter with extended wheels and suspension components (no text or symbols)Congratulations on purchasing the electric scooter of model S1 pro
1 Schematic diagram of products and accessories

natural_image
Line drawing of a single electric scooter with wheels and suspension components (no text or symbols)Spare parts:
1. User Manual.

2. Bolts.

3. Tool kits.
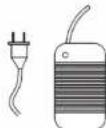
4. Charger.
2 Main nodes
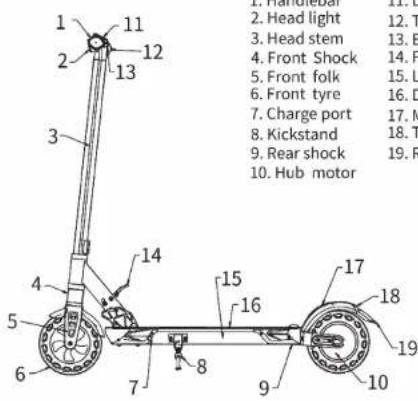
03
- Handlebar
- Head light
- Head stem
- Front Shock
- Front folk
- Front tyre
- Charge port
- Kickstand
- Rear shock
- Hub motor
- LED display
- Throttle lever
- Eletronic brake lever
- Folding switch
- Li-ion battery
- Deck pad
- Machanical brake
- Tail light
- Rear Fender
3 Safety regulations
It is important to carefully study the user manual before use!
- Only one adult passenger

- Please wear protective equipment before each ride.

- Don't break the traffic rules.
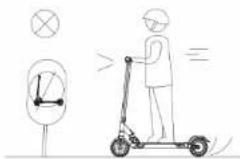
- Practice more driving
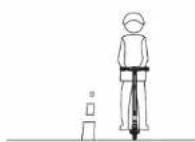
04
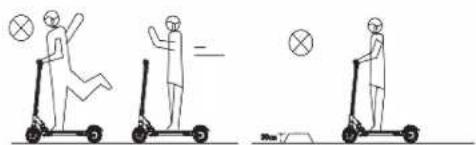
- In sports, put your hands on the steering wheel and your legs on the deck. Don't driving with one hand.
- Don't stay on a ridge or step more than 3cm.
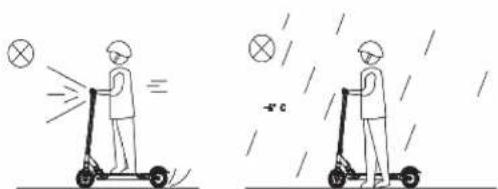
- For your safety, the maximum speed limit for electric aircraft is 30 km/h. Move over 15 km/h and turn on the headlights.
- Don't turn on the electric scooter when the temperature is under-5°C.
05
- Please slow down or get off when moving on uneven surface
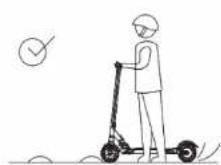
- Don't drive in puddles with water depth more than 4cm

- Not driving on slippery surfaces

- Don't drive in bad weather, such as rain or snow
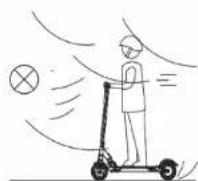
06
- Please do not exceed the maximum allowable load specified by the manufacturer and specify in this user manual.
- Do not use electric scooter when the ambient temperature is too low or too high. Keep electric locomotive away from flammable substances and open fire sources.


- Try to drive the E-scooter on a flat surface.
- Please observe the road traffic rules and signs. When driving on the road, keep the right direction.


Cruise check:
| Enable | Enable |
| indicator light | The indicator light doesn't work |
Headlamp:
| CLOSED | CLOSED |
| Headlights on and ready for use | The headlights are off. |
INDICATOR PRESIDENT:
| Headgear | Second gear | Third gear |
| First transport enabled | Second gear enable | Third transport enabled |
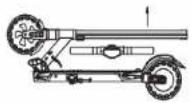
4 Product breakdown status
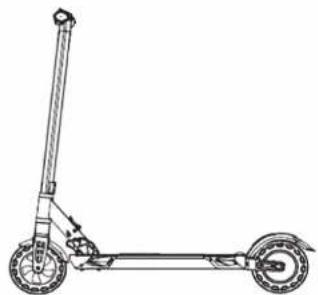
natural_image
Line drawing of a single scooter with wheels and suspension (no text or symbols)Product opening status

natural_image
Technical line drawing of a mechanical linkage assembly (no text or symbols)Product folding status
5 Install the steering wheel
- Pull and hold the pin out, then press down the folding tab, and finally raise the T-bar to unfold.
-
Plug in connector. Slide the stem onto the front fork. Be careful not to pinch wire.
-
Take the main wire out of the T-ber and head stem.
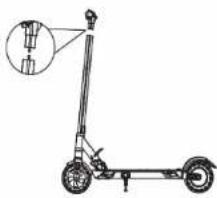
natural_image
Line drawing of a scooter with wheels and a small inset showing a component (no text or symbols)- Tighten the four handlebar screws securely with Allen wrench (screws and tool included in plastic bag).


6 Layout
Pressurize the rear wing, release the steering lever hook, and move the tiller forward as shown in the figure.


Pull the steering rod onto the support rod, make sure that the retaining pin goes into the groove, and lift the retaining rod up.


7 Adder circuit
Note: for your safety, the added value is only generated when the power is disconnected.
In order to fold, pull the steering rod forward, extend the pedal into the deck and move the lever of the positioner down. Then put down the tiller. Click to display the rudder stock hanging on the rear wing and folding complete.


Put the tiller back to the end. Click to display the rudder stock hanging on the rear wing and folding complete.


8 Recharge


- Open the rubber plug, then connect the adapter wire.
- Put the charging plug into power supply.
- When light is red mean the battery is charging and green it is full of charge.
9 Transport


You can Move the electric scooter to the back of the driver's pole in the folded state, as shown in the figure.
10 Main functions
A Power button
B Transfer
C Throttle lever
D Handlebar
E Display
F Brake lever

11 Main functions
Power button
Press and hold for 1 second to turn on the power, press and hold for 3 seconds to turn off the power
Transmission
Press the power button twice to switch from 1 to 3.1 - maximum transfer 9 km, 2 - maximum transfer 17 km / h, 3 - maximum transfer 30 km / h
Accelerator
Press the throttle lever smoothly, and the maximum speed is 30 km/h
Electronic brake
Press the reduction lever smoothly
Headlight
Press the power button twice to turn the lighting on or off
Emergency braking
For emergency braking, please press your foot on the rear wing, but it should be noted that the tread is often used.
Cruise control
Use the app to switch to cruise. In addition, the electric train will automatically turn to cruise at constant speed. To turn off cruise control, increase the throttle smoothly or decelerate smoothly.
12 Driving point

Please wear protective equipment before each ride.
- Training 1. Choose an open place to skate 2. Please turn on the electric scooter.
- start of sports Turn on the power 1. Put one leg on the deck 2. Push the second foot away, gently press the throttle lever to set the second foot to pedal.
- Stop Use the brake handle to reset the speed and stop completely, and do not press the lever to cause a sharp reverse. The handle controls the front wheel brake disc. For extreme braking, press the foot on the rear wing of the electric drive.


natural_image
Line drawing of a person riding a scooter (no text or symbols)13 Storage battery and charging device
Each S8 Pro model is provided with a lithium battery and charging device. Failure can result from the failure of the battery or other manufacturer's charging device or other type of charging device.
01 Accumulator
Please charge the battery completely before the first use. The battery can be charged at any time, and 800-1000 charging units can be calculated without losing the function of the battery. In the case of long-term unused, charge the battery at least every 3 months.
02 Charger
The charging device is equipped with an automatic circuit breaker system when the battery is fully charged. The charging time is 3-4 hours unless the battery is damaged due to improper charging. If the battery is not charged, contact the service center.
03 Dynamic charging
In the case of insufficient charging, the model uses kinetic energy generated by motion, and does not need to charge by motor
14 Display
A Battery capacity
B Speed
C Cruise control
D Headlight
E Total mileage
F Speed mode

Monitor
To enable the display when the power is off, press the K button multiple times/ When you move, you have to repeat your actions.
Headlight
In multiple moves, double-click the power button to turn on the light. your lights will be turned on and off.
Switch to a transmission, press the power button for one time, and when a continuous operation is switched to 1-3 and 3-1. When the power is off, the last installed transmission is retained in the setup.
Display error alert
| Fault | code | Exclusion method | |
| Connec | 1E | Check whether the connection with the rear headlamp is broken | |
| Motor | 2E | Check the connection between motor and controller | There is no connection between the controller and the motor. Please check whether the connection is interrupted or the network voltage is on 01-1 in scope |
| Throttle Lever | 3E | Check if the throttle lever is loose | When the power supply is disconnected, pull down the throttle lever and return the throttle to its original position. |
| Controller | 4E | Should be Replaced | |
| phase difference | 5E | There is no connection between the controller and the engine. Please check if there is any crack. Please check for broken connection or voltage on the network | |
| Voltage | 6E | Voltage drop protection failure | |
15 Keep in storage
Lubricating oil
Special grease is required every six months for the location of electric aircraft. Check if the electric car is faulty. Check every three months and tighten the bolts if necessary.
Battery
Turn off the power when charging or not in use. When not in use for a long time, keep the electric cooker in a safe place and do not cover the battery Charge electric tea cookers at least once every three months.
keep in storage
Don't store the electric cooker in the sun, keep it clean.
16 Diagnostics
Here are the main diagnostic solutions:
01 BLACK display
Possible cause: long time in direct sunlight
Possible solution: leave the electric cooker in the dark for a while
02 the value on the display does not show the actual reading
Possible cause: incorrect parameter setting
Possible solution: reset options
03 the display is opaque or shows discontinuous values
Possible causes: poor contact connection or battery not charged
Possible solutions: restart the electric vehicle or contact the service center
04 complete diagnosis
a. Power on
b. Battery charging
C. The front and rear brakes are released
d. All contacts connected
Please contact the service center to find the fault
17 Main features
| Item No | KugooKirin S1 Pro | |
| Dimensions | Packing Size(MM) | 1100X440X440 |
| Product Size(MM) | 1100X440X1090 | |
| Product Description | Max Speed | 30km/h |
| Range per charge | 30 KM | |
| Climbing capacity | 15° | |
| Required road surface; flat hard surface, top not more than 2cm, depth not more than 3 cm | ||
| Tyre | 8 inch | |
| Brake System | Electronic brake +Mechanical brake | |
| Shock absorber | Front and Rear | |
| Display | LED | |
| Water Proof | IP45 | |
| Headlamp | LED | |
| Motor | 350Watt | |
| Recharge | Input voltage | 110-220v50/60HZ |
| Lithium battery | 18650 | |
| Charge time | 3-5 hours | |
| Max Loading | 120kg | |
18 Warranty service
Within the validity period of guaranteed service Synchronize via Keep the payment check before the end of the warranty period, and the service is based on the purchase check presented. The start date of the warranty period is the date of purchase indicated on the check.
The following situations are not considered as guarantees, The guarantee service will be refused when the following conditions are determined: (1) Force majeure factor, traffic accidents or network problems; (2) The goods have been repaired before, or there are signs that they have been disassembled or modified outside the authorized service center; (3) There are indications that other manufacturers use components; (4) the products are used for commercial purposes; (5) the total mileage exceeds 2000 km.2. Natural wear, abrasion, paint damage, chemical contact marks, opened seals, opened or disassembled marks, warranty period expired, or Unauthorized modification is the reason for denial of warranty service. When puchasing goods, check whether the goods are damaged.
| Title | Letter of guarantee | Guarantee period |
| Controller | instrument panel | 1 yeae |
| Lithium battery | Lithium battery or protection board | 6 months |
| Body | motor wheel, steering wheel, brake, cable controller, fork wheel, bogie, wheel hub, folding mechanism | 1 yeae |
Attention! Tires, wheel tubes, headlights, panel covers, gloves, wings, rear headlights, decorations, pedals, charging ports and tools do not meet the warranty requirements.
19 Service ticket
Please fill in this form and seal it in the sales center to activate the after-sales service guarantee.
| Buyer Information | Name | Post office | ||
| address | ||||
| Tel | ||||
| Model data | Name | Sales date | ||
| model | Check number | |||
| Address | other | |||
| In facr, in print. Services required | ||||
Katalog
-
Schemat ideowy produktów i akcesoriów 28
-
Główne węzły 29
-
Zasady bezpieczeństwa 30
4.Kategoria produktu 35
5.Zamontowanie kierownicę 36
6.Uklad 37
- Obwód sumujący 38
8.Naładowanie 39
- Transport 39
10.Główne funkcje 40
11.Główne funkcje 41
- Punkt wyjścia ruchu 42
13.Akumulator i ładowarka 43
14.Wyświetlacz 44
15.Przechowywanie 46
16.Diagnostyka 47
17.Główne cechy 48
- Usluga gwarancyjna 49
19.Karta gwarancyjna 50
Kategoria produktu

natural_image
Line drawing of a single electric scooter with wheels and suspension components (no text or symbols)Gratulujemy zakupu skutera elektrycznego modelu S1 pro
1 Schemat ideowy produktów i akcesoriów
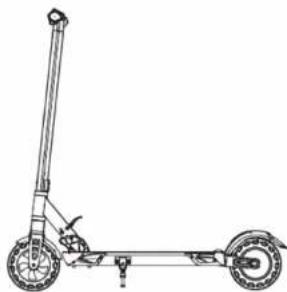
natural_image
Line drawing of a scooter with wheels and suspension rod (no text or symbols)Części zamienne:

1. Instrukcja obsługi.

2. Šruby.

3. Zestawy narzędzi.

4.Ładowarka.
2 Główne węzły
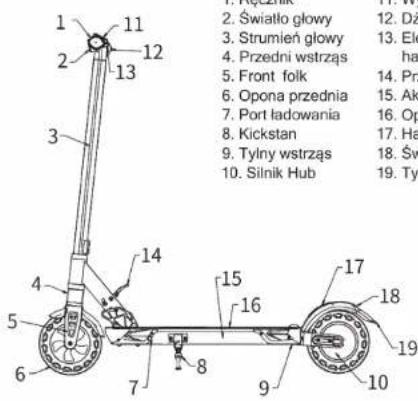
- Wyświetlacz LED
- Dźwignia przepustnicy
- Eletroniczna dźwignia hamulcowa
- Przelącznik składania
- Akumulator Li-jon
- Opakowanie pokładu
- Hamulec Machaniczny
- Światra końca
- Tylne ogrodzenie
3 Zasady bezpieczeństwa
Ważne jest, aby przed użyciem dokładnie zapoznać się z instrukcją obsługi!
- Tylko jeden dorosły pasażer
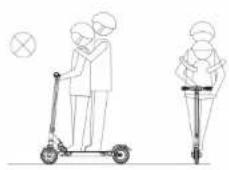
- Przed każdą jazda należy nosić sprzęt ochronny.

- Nie łamanie przepisów ruchu drogowego.

- Czwicz więcej jazdy.
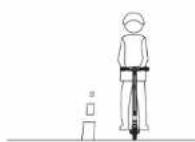
- Położ ręce na kierownicy, a nogi na pokładzie.
Nie zaleca jedżenie jedną ręką. - Nie stawaj na kalenicy lub schodami więcej niż 3 cm.

7.Ze względów bezpieczeństwa maksymalne ograniczenie prędkości dla hułajnog elektrycznych wynosi 30 km / h. Jazda z prędkością ponad 15 km / h trzeba włączyć reflektory.
8. Nie włączaj hulajnogi elektrycznej, gdy temperatura jest poniżej - 5 °C.
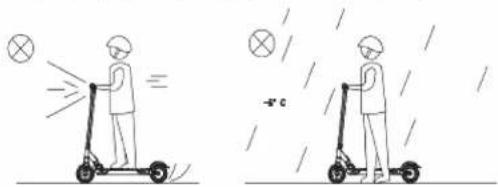
- Zwolnij lub wysiądź podczas
poruszania się po nierównej powierzchni

- Nie wjeźdzaj w kałuże o głębokości wody większej niż 4 cm

- Nie jeździć po śliskich
nawierzchniach

- Nie zaleca jazdy w złych warunkach pogodowych, takich jak opady deszczu lub śniegu.

- Prosimy nie przekraczać maksymalnego dopuszczalnego obciążenia określonego przez producenta i opisanego w niniejszej instrukcji obsługi.
- Nie jeździj skutera elektrycznego, gdy temperatura otoczenia jest zbyt niska lub zbyt wysoka.hulajnogą elektryczną należy trzymać z dala od substancji łatwopalnych i źródeł otwartego ognia.


- Należy prowadzić hulajnogę elektryczną po płaskiej powierzchni.
- Prosimy o przestrzeganie przepisów ruchu drogowego i znaków. Podczas jazdy po drodze zachowaj właściwy kierunek.
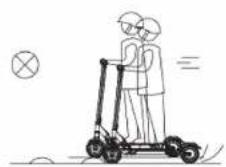

Sprawdź rejs:
| Włączony | Włączony |
| Kontrolka | Kontrolka nie działa |
Reflektor:
| Wyłączony | Wyłączony |
| Reflektory włączone i gotowe do użycia | Reflektory są wyłączone. |
Wskażniki:
| Pierwszy bieg | Drugi bieg | Trzeci bieg |
| Pierwszy bieg włączony | Włączony drugi bieg | Trzeci bieg włączony |
4 Stan rozkładania i składania

5 Zamontowanie kierownicę
- Pociągnij i przytrzymaj zawleczkę, potem naciśnij kartę zwijania, i w końcu zrównaj pasek T, aby się rozwinął.

- Podłącz złącze. Przesuń lodygę na przedni widelec. Uważaj, żeby nie uszczypnąć drutu.

natural_image
Line drawing of a scooter with two zoomed-in insets showing the front and side views (no text or symbols)- Wyjmij główny przewód z dziąsła i pnia głowy.

natural_image
Line drawing of a scooter with a mounted sensor and a close-up inset showing the front wheel (no text or symbols)- Mocno zapiąć cztery śruby kierownicy kluczem Allen (śruby i narzędzie w plastikowej torbie).
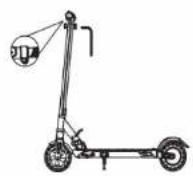
6 Rozkładanie
Zwiększa ciśnienie w tylnym błotniku, zwolnij hak dźwigni sterowej i przesuń sterownicę do przodu, jak pokazano na rysunku.
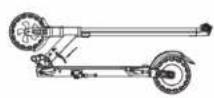

Wciągnij drążek sterowy na drążek podtrzymujący, upewnij się, że kolek ustalający wchodzi w rowek i podnieś drążek ustalający.


7 Obwód sumujący
Uwaga: ze względów bezpieczeństwa wartość dodana jest generowana tylko po odłączeniu zasilania.
Aby składać hulajnogę, należy pociągnąć drążek sterowy do przodu, wsunąć pedał do pokładu i przesunąć dźwignię ustawnika w dół. Następnie odłóż sterownicę. Kliknij, aby wyświetlić kolbę steru wiszącą na tylnym skrzydle i składaną w całości.
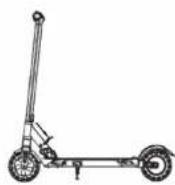

Odóż sterownicę z powrotem do końca. Kliknij, aby wyświetlić kolbę steru wiszącą na tylnym skrzydle i składaną w całości.


8 Naładowanie
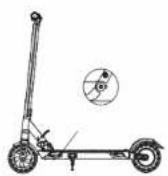


- Otwórz gumową wtyczkę i podłącz kabel adaptera.
- Podłączyć wtyczkę ładowania do zasilania.
- Gdy światło wskaźnikowe jest czerwone, oznacza to, że bateria jest naładowana i jest pełna energii.
9 Przenoszenie

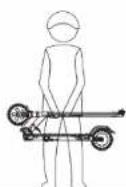
Możesz przesunąć hulajnogę elektryczną na tyl drążka kierowcy w stanie złożonym, jak pokazano na rysunku.
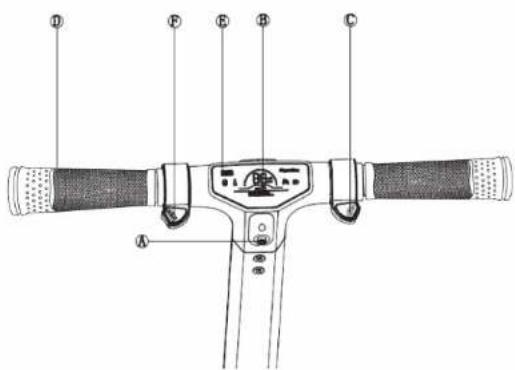
10 Główne funkcje
A Przycisk zasilania
B Tryb prędkości
C Dzwignia gazu
D Kierownica
E wyswietlacz
F Dźwignia hamulca
11 Główne funkcje
Przycisk zasilania
Naciśnij i przytrzymaj przez 1 sekundę, aby włączyć zasilanie, naciśnij i przytrzymaj przez 3 sekundy, aby wyłączyć zasilanie
Tryb prędkości
Naciśnij dwukrotnie przycisk zasilania, aby przełączyć z 1 na 3. 1-Maksymalna Prędkość 9 km/h, 2-Maksymalna prędkość 17 km / h, 3-Maksymalna prędkość 30 km / h.
Accelerator
Naciśnij płynnie dźwignię przepustnicy, a maksymalna prędkość to 30 km / h
Elektroniczny hamulec
Delikatnie naciśnij dźwignię redukcyjną
Reflektor
Naciśnij dwukrotnie przycisk zasilania, aby włączyć lub wyłączyć oświetlenie
Hamowanie awaryjne
Aby zahamować awaryjnie, proszę nacisnąć stopę na tylnym blotniku, ale należy zwrócić uwagę, że bieżnik jest często używany.
Tempomat
Użyj aplikacji, aby przełączyć się na rejs. Ponadtohulajnoga elektryczna automatycznie przełączy się na jazdę ze stałą prędkością. Aby wyłączyć tempomat, płynnie zwiększaj przepustnicę lub łagodnie zwalniaj.
12 Instrukcja jazdy
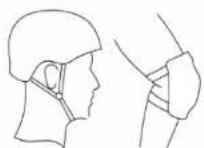
Przed każdą jazda należy nosić sprzęt ochronny.
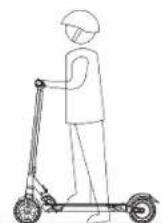
- Wybierz otwarte miejsce do jazdy .Włącz skuter elektryczny. Włącz zasilanie
- Polóż jedną nogę na pokładzie.
- Odepchnij drugą stopę, delikatnie naciśnij dźwignię przepustnicy, aby ustawić drugą stopę na pedał
- Nie użyj dźwigni hamulca, aby zresetować prędkość i całkowicie się zatrzymaj, i nie naciskaj dźwigni, aby spowodować gwałtowny cofanie. Uchwyt steruje tarczą hamulcową przedniego koła. W celu ekstremalnego hamowania naciśnij stopę na tylnym błotniku napędu elektrycznego.

natural_image
Line drawing of a person riding a scooter (no text or symbols)13 Akumulator i ładowarka
Każdy model S1 Pro jest wyposażony w baterię litową i ładowarkę. Awaria może wynikać z awarii akumulatora lub ładowarki innego producenta lub innego typu ładowarki.
01 Akumulator
Przed pierwszym użyciem należy całkowicie naładować baterię. Akumulator można ładować w dowolnym momencie, a 800-1000 jednostek ładowania można obliczyć bez utraty funkcji akumulatora. W przypadku długotrwałego nieużywania akumulator należy ładować co najmniej raz na 3 miesiące.
02 Ładowarka
Ładowarka wyposażona jest w automatyczny układ wyłącznika, gdy akumulator jest w pełni naładowany. Czas ładowania wynosi 3-4 godziny, chyba że bateria zostanie uszkodzona w wyniku niewłaściwego ładowania. Jeśli bateria nie jest naładowana, skontaktuj się z centrum serwisowym.
03 Dynamiczne ładowanie
W przypadku niewystarczającego ładowania model wykorzystuje energię kinetyczną generowaną przez ruch i nie wymaga ładowania silnikiem
14 Wyświetlacz
A Poziom baterii
B Prędkość
C Tempomat
D Reflektor
E Całkowity przebieg
F Tryb prędkości

Wyświetlacz
Aby włączyć wyświetlanie, gdy zasilanie jest wyłączone, naciśnij kilkakrotnie przycisk K. Kiedy się uchromia, należy powtarzać swoje działania.
Reflektor
W wielu ruchach kliknij dwukrotnie przycisk zasilania, aby włączyć światło. światła będą włączane i wyłączane.
Przełącz na transmisję, naciśnij przycisk zasilania przez jeden raz, a gdy ciągła praca zostanie przełączona na 1-3 i 3-1. Kiedy zasilanie jest wyłączone, ostatni zainstalowana transmisja jest zapisana w ustawieniach.
Wyświetlenie alertu o błędzie
| Usterka | komunikat | Metoda wykluczenia | |
| Połączenie | 1E | Sprawdź, czy połączenie z tylnym reflektorem nie jest przerwane | |
| Silnik | 2E | Sprawdź połączenie między silnikiem a sterownikiem | Nie ma połączenia między sterownikiem a silnikiem. Sprawdź, czy połączenie jest przerwane lub czy napięcie sieciowe ma zakres 01-1 |
| Dźwignia przepustnicy | 3E | Sprawdź, czy dźwignia przepustnicy jest lużne | Po odłączeniu zasilania pociągnij w dół dźwignię przepustnicy i ustaw przepustnicę w pierwotnym położeniu. |
| Kontroler | 4E | Należy go wymienić | |
| różnica w fazach | 5E | Nie ma połączenia między sterownikiem a silnikiem. Proszę sprawdzić, czy istnieje jakakołwiek rysa. Sprawdź, czy nie ma zerwanego połączenia lub napięcia w sieci | |
| Napięcie | 6E | Awaria zabezpieczenia przed spadkiem napięcia | |
15 Keep in storage
Smar
Do skutera elektrycznego wymagany jest zastosowanie specjalnych smaru co sześć miesięcy. Sprawdź, czy hulajnoga elektryczna nie jest uszkodzona. Sprawdź co trzy miesiące i w razie potrzeby dokręć śruby.
Bateria
Wyłącz zasilanie na czas ładowania lub kiedy nie używa. Gdy przez dłuższy czas nie jeżdził, przechowuj hulajnogę elektryczną w bezpiecznym miejscu i nie zakrywaj akumulatora. Hulajnogę elektryczną należy ładować przynajmniej raz na trzy miesiące.
Przechowywanie
Nie przechowuj skutera elektrycznego na słońcu, utrzymuj go w czystości.
16 Diagnostyka
Oto główne rozwiązania diagnostyczne:
01 Czarny wyświetlacz
Możliwa przyczyna: długi czas w bezpośrednim nasłonecznieniu
Możliwe rozwiązanie: pozostawienie hulajnogą elektryczną na chwilę w ciemności
02 Wartość na wyświetlaczu nie przedstawia aktualnego odczytu
Możliwa przyczyna: nieprawidłowe ustawienie parametrów
Możliwe rozwiązanie: opcje resetowania
03 Wyświetlacz jest nieprzejrzysty lub pokazuje nieciągłe wartości
Możliwe przyczyny: słabe połączenie styków lub akumulator nie jest naładowany
Możliwe rozwiązania: zrestartuj skuter elektryczny lub skontaktuj się z centrum serwisowym
04 Kompletna diagnoza
A. Zasilanie włączone
B. Ładowanie baterii
C. Hamulce przednie i tylne są zwolnione
D. Wszystkie kontakty połączone
Skontaktuj się z centrum serwisowym, aby znaleźć usterkę.
17 Główne cechy
| Nr. przedmiot | KugooKirin S1 PRO | |
| Wymiar | Wymiar opakowania (MM) | 1100X440X440 |
| Wymiar produktu (MM) | 1100X440X1090 | |
| Opis produktu | Maksymalna prędkość | 30km/h |
| Zasięg na jednym ładowaniu | ≤30 км | |
| Zdolność wspinaczkowa | 15° | |
| Wymagana nawierzchnia drogi: płaska, twarda nawierzchnia, górna nie więcej niż 2 cm, głębokość nie większa niż 3 cm | ||
| Opon | 8 cali | |
| Układ hamulcowy | Hamulec elektroniczny + hamulec mechaniczny | |
| Amortyzator | Przód i tyl | |
| Wyświetlacz | LED | |
| Wodoodporny | IP45 | |
| Reflektor | LED | |
| Silnik | 350Watt | |
| Ładowanie | Napięcie wejściowe | 110-220v 50/60HZ |
| Bateria litowa | 18650 | |
| Czas ładowania | 3-5 godziny | |
| Max obciążenia | 120kg | |
18 Usługa gwarancyjna
W okresie gwarancyjnym, prosimy o zachowanie dowodu płatności przed końcem okresu gwarancyjnego. Aby korzystać usługą gwarancyjną należy pokazać dowód zakupu. Data rozpoczęcia okresu gwarancyjnego jest data zakupu wskazanego na dowodzie płatności.
-
Gwarancja nie obejmuje usterek spowodowanych przez którąkolwiek z poniższych przyczyn i usługa gwarancyjna zostanie odzrucona w przypadku stwierdzenia następujących warunków: (1) Czynnik siły wyższej, wypadki drogowe lub problemy z siecią; (2) Towar był wcześniej naprawiany lub widać oznaki, że został zdemontowany lub zmodyfikowany poza autoryzowanym centrum serwisowym; (3) Istnieją przeslanki, ze jest używane komponenty od innych producentów; (4) produkty są używane do celów handlowych (5) Łączny przebieg przekracza 2000 km.
-
Powodem odmowy świadczenia usług gwarancyjnych jest naturalne zużycie, ścieranie, uszkodzenie lakieru, ślady kontaktu chemicznego, otwarte uszczelki, otwarte lub rozmontowane ślady, upłynął okres gwarancji lub nieautoryzowana modyfikacja. Proszę sprawdzić czy towar nie jest uszkodzony podczas zakupu.
| tytut | List gwarancyjny | Okres gwarancyjny |
| Kontrole | tablica przyrządów | rok |
| Bateria litowa | Bateria litowa lub płyta ochronna | 6 miesięcy |
| Budowa | koło silnikowe, kierownica, hamulec, sterownik linki,koło widelca, wózek, piasta koła, mechanizm składania | rok |
Uwaga! Opony, nadkola, reflektory, osłony paneli, rękawice, błotniki, tylne reflektory, ozdoby, pedały, gniazda ładowania i narzędzia nie spełniają wymagań gwarancyjnych.
19 Karta gwarancyjna
Proszę wypełniać ten formularz i zapieczętować go w punktu sprzedaży, aby aktywować gwarancję obsługi posprzedażowej.
| Informacja klienta | Nazwa | Adres | ||
| Adres | ||||
| Tel | ||||
| Wzór | Nazwa | Data zakupu | ||
| Model | Numer serialny | |||
| Adres | inny | |||
| Aby korzystać gwarancję wymagana jest karta gwarancyjna w formie druku. | ||||
- Catalog
- Main nodes
- Safety regulations
- Install the steering wheel
- Layout
- Adder circuit
- Recharge
- Transport
- Main functions
- Main functions
- Driving point
- Storage battery and charging device
- Display
- Monitor
- Headlight
- Keep in storage
- Battery
- Diagnostics
- Warranty service
- Service ticket
- Katalog
- Główne węzły
- Zasady bezpieczeństwa
- Zamontowanie kierownicę
- Rozkładanie
- Obwód sumujący
- Naładowanie
- Przenoszenie
- Główne funkcje
- Główne funkcje
- Instrukcja jazdy
- Akumulator i ładowarka
- Akumulator
- Ładowarka
- Dynamiczne ładowanie
- Wyświetlacz
- Wyświetlacz
- Reflektor
- Diagnostyka
- Usługa gwarancyjna
- Karta gwarancyjna
Marque : Kugoo
Modèle : KuKirin S1 Pro
Catégorie : Trottinette électrique