
ORA-2 - Sonneur d'alarme IROX - Notice d'utilisation et mode d'emploi gratuit
Retrouvez gratuitement la notice de l'appareil ORA-2 IROX au format PDF.


| Type de produit | Sonneur d'alarme |
| Marque | Irox |
| Modèle | ORA-2 |
| Alimentation | 2 piles AA (non incluses) |
| Dimensions (L x l x H) | 80 x 80 x 40 mm |
| Poids | 150 g (sans piles) |
| Type de son | Buzzer piézoélectrique, ≥ 85 dB à 1 mètre |
| Fonctionnement | Bouton poussoir à enfoncer pour déclencher l'alarme |
| Voyant lumineux | LED rouge de fonctionnement |
| Matériau du boîtier | Plastique ABS |
| Couleur | Blanc ou noir (selon version) |
| Utilisation | Intérieur uniquement |
| Température de fonctionnement | 0 °C à 40 °C |
| Entretien et nettoyage | Nettoyer avec un chiffon doux et sec ; ne pas utiliser de produits chimiques |
| Sécurité | Ne pas immerger dans l'eau ; tenir hors de portée des enfants |
| Pièces détachées et réparabilité | Piles remplaçables ; aucune autre pièce détachée disponible |
| Informations générales | Conforme aux normes CE ; usage domestique |
FOIRE AUX QUESTIONS - ORA-2 IROX
Questions des utilisateurs sur ORA-2 IROX
0 question sur cet appareil. Repondez a celles que vous connaissez ou posez la votre.
Poser une nouvelle question sur cet appareil
Téléchargez la notice de votre Sonneur d'alarme au format PDF gratuitement ! Retrouvez votre notice ORA-2 - IROX et reprennez votre appareil électronique en main. Sur cette page sont publiés tous les documents nécessaires à l'utilisation de votre appareil ORA-2 de la marque IROX.
MODE D'EMPLOI ORA-2 IROX

Radio Controlled Clock
with Foreign Time Setting, Summer / Winter Time Display, Dual Alarm, Dual Time display, Snooze and Light, Temperature, Calendar
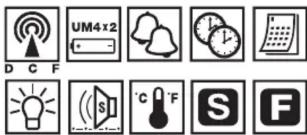
Instruction Manual
ORA-2
21
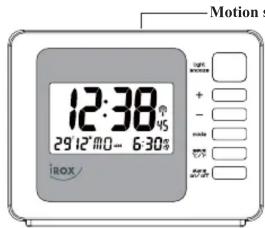

Battery compartment
22
KSPO:1764-10
IROX RC218 MANUAL 3(English)
SIZE: W75 X H80(mm)
BY Lai H Z 26/01/11
| INDICATOR | STANDING FOR | INDICATOR | STANDING FOR |
| RADIO SIGNAL | RADIO SIGNAL WEAKLY | ||
| D | DATE | 2° | REPEAT ALARM INDICATION |
| FOREIGN TIME INDICATION | M | MONTH | |
| PM | PM (12 HR DISPLAY ONLY) | SUMMER TIME INDICATION | |
| AM | AM (12 HR DISPLAY ONLY) | ° C | DEGREE CELSIUS |
| ALARM 1 | ° F | DEGREE FAHRENHEIT | |
| ALARM 2 | DUAL TIME | DUAL TIME |
*After the battery is installed, the LCD will turn on and beep for 2 seconds. The clock will automatically search the radio signal. It takes about 3-5 minutes to finish this process.
*If the radio signal is received, the date & time will be set automatically with radio control signal icon [💡] turns on.
*If the clock fails to receive the time signal, it will be in Time/Temperature display with the [♣] icon turns off. Then user can set the time manually.
*Radio-controlled signal will be scheduled to receive every hour.


23 24
Selecting Temperature/Alarm 1/Alarm 2/Dual time Display
*Press MODE will display the ALARM 1 time:
*Press MODE again will display the ALARM 2 time:
*Press MODE again will display the Dual Time:
*Press MODE again will display the Temperature:


Manual Time Setting
The system date and time can be set by pressing MODE for 3 seconds in Time/Temperature display with the [♣] icon turn off.
Setting the Time
*Press MODE: the hour digits are blinking and can be set by pressing + or - key.
*Press MODE again: the minute digits are blinking and can be set by pressing + or - key.
*Press MODE again: the year digits are blinking and can be set by pressing + or - key.
*Press MODE again: the month digits are blinking and can be set by pressing + or - key.
*Press MODE again: the date digits is blinking and can be set by pressing + or - key.


*Press MODE one last time: the normal time display appears.
Select 12 hour or 24 hour display format
*Press "+" will toggle the display format between 12 hour and 24 hour.
N.B.:1. If no key is pressed within 30 seconds, it will exit the Manual Time Setting Mode and go back to Time / Temperature Display without the data update.
- During any setting mode, press and hold + or - key for 2 seconds for fast setting.
Calendar
To change the weekday display from one language to another language, press — key for 3 seconds - the display will show the current language ① "52" for English — ② "55" for German — ③ "11" for Italian
① "E" for English → ② "E" for German → ③ "I" for Italian → ④ "F" for French → ⑤ "SP" for Spanish → ⑥ "JU" for Dutch → ⑦ "SU" for Swedish.
Press & Hold — key for 2 seconds will toggle to the other languages.
Setting the Alarm time
ALARM 1 setting
*Press ALARM to enter ALARM 1 Display [ ]
*Press MODE for about 3 seconds: the hour digits are blinking and can be set by pressing + or - key.
*Press MODE again: the minute digits are blinking and can be set by pressing + or - key.
*Press MODE again, the Alarm time is set and [ ] icon will turn on.
25 26
ALARM 2 setting
*Press ALARM to enter ALARM 2 Display [ ]
*Press MODE for about 3 seconds: the hour digits are blinking and can set by pressing + or - key.
*Press MODE again: the minute digits are blinking and can be set by pressing + or - key.
*Press MODE again, the Alarm time is set and [ ] icon will turn on.
Enable or Disable Alarm 1/Alarm 2:
*Press ALARM (ON/OFF) will enable ALARM 1 with [ ] icon turn on.
*Press ALARM (ON/OFF) again will enable ALARM 2 with [ ] icon turn on.
*Press ALARM (ON/OFF) again will enable both ALARM 1 and ALARM 2 with [ ] and [ ] icons to turn on.
*Press ALARM (ON/OFF) again will disable both ALARM 1 and ALARM 2 with [ ] and [ ] icons to turn off.


Activating the Alarm
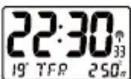
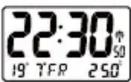
When the ALARM 1/ALARM 2 is ringing, the relative alarm icon [ ] / [ ] will be flashing.
* Press ALARM (ON/OFF) key to turn the alarm off.
* Press Light snooze button, alarm stops and the backlight will turn on for 5 seconds with deleted, the repeat alarm indicator (z 2 ) flashing. The alarm sounds again after 4 minutes.
* If the alarm is not turned off, it will stop automatically after 4 minutes.
Foreign Time Display & setting
* Press and hold + key for 3 seconds, the icon "F" will turn on.
* Press and hold MODE for 3 seconds in Foreign Time / Temperature display. The Foreign time can be set as described above by pressing + or - key.
* Press MODE key again to confirm the setting of foreign time.
* Press and hold + key for 3 seconds to choose between local and foreign time display.
Setting the Dual Time
* The dual time can be set by pressing MODE for 3 seconds in Dual Time Display. The hour will flash for input.
* Press MODE: the hour of dual time display digits are blinking and can be set by pressing + or - key.
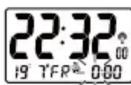
*Press MODE again: the minute of dual time display digits are blinking and can be set by pressing + or - key.
*Press MODE again to confirm the setting.
Light ON / OFF
*Press the [light snooze] button or swing your hand on above the clock, backlight will come on and turn off automatically after 5 seconds.
Temperature function
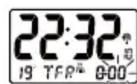
Press ° C/ ° F to select the temperature display between Celsius or Fahrenheit.


Receiving the DCF Time CODE
The clock will automatically receive the DCF time code every hour. Besides, you can force the clock to receive the signal by pressing "Wave" for 3 seconds, It will take 3-5 minutes to receive the radio signal. It the time signal is received, the [💡] icon will be on otherwise it will be off.

Attention! Please dispose of used batteries in an ecologically safe manner.

- RADIO CONTROLLED CLOCK
- SELECTING TEMPERATURE/ALARM 1/ALARM 2/DUAL TIME DISPLAY
- MANUAL TIME SETTING
- SETTING THE TIME
- CALENDAR
- SETTING THE ALARM TIME
- ALARM 1 SETTING
- ALARM 2 SETTING
- ENABLE OR DISABLE ALARM 1/ALARM 2
- ACTIVATING THE ALARM
- FOREIGN TIME DISPLAY & SETTING
- SETTING THE DUAL TIME
- LIGHT ON / OFF
- TEMPERATURE FUNCTION
- RECEIVING THE DCF TIME CODE
Marque : IROX
Modèle : ORA-2
Catégorie : Sonneur d'alarme