
E-35 - Clavier arrangeur ROLAND - Notice d'utilisation et mode d'emploi gratuit
Retrouvez gratuitement la notice de l'appareil E-35 ROLAND au format PDF.

| Type de produit | Clavier arrangeur |
| Marque | Roland |
| Modèle | E-35 |
| Nombre de touches | 61 touches |
| Polyphonie | 32 voix |
| Sons internes | 128 sonorités (Groupes A et B) |
| Styles musicaux | Styles internes + cartes optionnelles |
| Alimentation | Adaptateur secteur ACJ-12V/2A (12V DC) |
| Consommation | Environ 12 W |
| Dimensions (L x P x H) | Environ 1000 x 300 x 100 mm |
| Poids | Environ 8 kg |
| Connecteurs | Prise casque (PHONES), prises MIDI In/Out, prise pédale Sustain (DF-2/DP-6), sorties stéréo L/Mono R, fente carte Style |
| Haut-parleurs intégrés | Oui, coupure automatique avec casque |
| Fonctions principales | Modes de clavier (Upper, Lower, Arranger, etc.), split, intelligence d'accords, accompagnement automatique, morceaux de démonstration, rotations (Fills), intro/ending, synchronisation |
| Sortie audio | Prise stéréo L/Mono R, jack 6,35 mm |
| Pédale | Sustain (optionnel) |
| Entretien et nettoyage | Utiliser un chiffon sec et doux. Éviter solvants ou produits abrasifs. |
| Sécurité | Utiliser exclusivement l'adaptateur fourni. Ne pas ouvrir l'appareil. Éviter l'humidité. |
| Pièces détachées et réparabilité | Contacter un revendeur Roland agréé pour toute pièce ou réparation. |
| Informations générales | Appareil numérique de classe B conforme aux normes canadiennes de perturbations radioélectriques. |
FOIRE AUX QUESTIONS - E-35 ROLAND
Questions des utilisateurs sur E-35 ROLAND
0 question sur cet appareil. Repondez a celles que vous connaissez ou posez la votre.
Poser une nouvelle question sur cet appareil
Téléchargez la notice de votre Clavier arrangeur au format PDF gratuitement ! Retrouvez votre notice E-35 - ROLAND et reprennez votre appareil électronique en main. Sur cette page sont publiés tous les documents nécessaires à l'utilisation de votre appareil E-35 de la marque ROLAND.
MODE D'EMPLOI E-35 ROLAND
| CLASS B | NOTICE |
| This digital apparatus does not exceed the Class B limits for radio noise emissions set out in the Radio Interference Regulations of the Canadian Department of Communications. | |
| CLASSE B | AVIS |
| Cel'articleil numérique ne dépasse pas les limites de la classe B au niveau des émissions de bruits radioélectriques fixés | |
Prise casque (PHONES) Pour jour a tou gre, branchez un casque stéreo standard (RH-12/RH-100) a cette prise et ainsi vous pourrez jour et vous exerçuer isolément. Si vous branche la fiche du casque à la prise PHONES, cei déconnectera les haut-parleurs internes. Le contrôle de Volume Général ajustère le volume du casque.
Prise d'alimentation
Pour le branchement au réseau électrique, utilisez exclusivement l'Adaptateur AC foum avec votre E-35: (Modèle ACJ - 12V/2A.).
Interrupteur général.
Prises MIDI
Voir Section MIDI.
Prise PEDALE SUSTAIN.
Grace a cette pédale optionnelle (DF-2/DP-6), de fonctions SUSTAIN peuvent être contrôlées au pied.
Voir PEDALE SUSTAIN.
Prises Stereo OUT
Vivre E-35 peut être branché à une amplification externe (Hi-Fi, magnétophone, etc.), pour amplifier ultérieurement le son. Quand vous effectue le branchement à une amplification Mono, servez-vous tous de la prise "L(MONO)"
(27)Adaptatseur AC.
| OPERATION | BEDIENUNG | FONCTIONNEMENT | <REFERENCE> | <ANMERKUNGEN> | <REFERENCE> |
| SETTING UP THE MUSIC STAND | ANBRINGEN DES NOTEN-STANDERS | MONTAGE DU PUPITRE | When connecting to external amplifi- cation, an optional stereo expression pedal (FV-200) can be used to control the overall volume. See the following illustration for connecting procedure. | Beim Anschluß an eine externe Ver- stärkeranlage kann das als Sonderzu- behör erhäftsliche Stereo-Ausblicks- Pedal FV-200 zur Regelung der Ge- rammlautstärke verwendet werden. Das Pedal wird gemäß der folgenden Abbil- dung angeschloben. | En cas de connexion avec une amplif- cation externene, une pedale d'expression stéreo (FV-200) optionnelle peut être ub- lisée pour contrer le volume général. Suviez le diagramme suivant pour les connexions. |
| Supplied with your E-35 is a musc board carton. To attach to keyboard, in- ser the two feet into the two holes located on the top panel. | Im Versandkarton finden Sie neben dem Keyboard selbst noch einen pas- senden Notenstandner, dessen Fußen- fach in die Löscher in der oberen Abdeckung gesteckt werden. | Votre instrument est doté d'un pupitre. Voues le trouverez dans le carton d'emballage du clavier. Pour le monter sur toute clavier, introduze les deux peds dans les deux trous places en haut du panneau antérieur. | |||
| POWER ON | EINSCHALTEN | MISE SOUS TENSION | |||
| Connect the E-35 to AC Line only through the AC ADAPTOR [27] sup- plied with your instrument. Make sure that the AC ADAPTOR shows the cor- rect voltage. Press the Power On/Off switch [21]. | Verbinden Sie das in der Ausstattung enthaltene AC-NETZTEIL [27] mit sem 9V-Anschluß auf die Rückseite des E-35. Verbinden Sie dann das Netzel mit der Steckdose. Drücken Sie den Netschalter [21]. | Branchez l'Adaptateur AC [27] en dot- tion à la prise 12V se trouvant sur le panneau arrière de l'instrument. Bran- chez l'Adaptateur à la prise secteur AC. Vérifie que le voltage de l'Adaptateur corresponde au voltage du secteur. Presse l'interrupteur On/Off [21] | |||
| MASTER VOLUME | GESAMTLAUTSTÜRKE | VOLUME GENERAL | |||
| The keyboard can now be played in the Full Keyboard mode using the preselected A 11 (PIANO 1) tone. For the best sound reproduction make sure that the MASTER VOLUME slider is moved to the referenced pos- sition. | Mit der als Vorgabe gewähten Klang- farbe A 11 (PIANO 1) kann nun auf dem ganzen Manual des Keyboards ge- speilt werden. Zunachst sollie zichoch sichergestellt werden, daß der VOLUME- Schieberegier ungebärz zwischen Stu- fe 6 und ? steht. | Le clavier peut maintainant jourer en "clavier entier" en utilisant le ton pré- selectionné A 11 (PIANO 1). Pour obtenir une(Meilleure écoute, pla- cez le volume au niveau de reférieance. | |||
| DEMO SONGS | DEMO-SONGS | MORCEAUX DE DEMONSTRATION | KEYBOARD MODE | KEYBOARD MODE | KEYBOARD MODE (MODES DE CLAVIER) |
| Inside the E-35, four Demo Songs are stored which can be played to ex- perience the excellent qualities of the instrument's tones and Music Styles and effects. | Im E-35 sind 4 Demo Songs engespe- chert, die Ihnen die Qualität der Klar- ge und der Arrangements zeigen. | Dans le E-35 sont stockées 4 morceaux de démonstration qu neuent être re- produits pour approuvier les excellente qualités des sons de l'instrument ains que des styles musicaux et des effets. | The keyboard can be played in the fol- lowing modes: UPPER, LOWER, M. BASS, ARRANGER, M. DRUMS, S. EFFECTS (or full keyboard mode) sim- ply by pressing the corresponding but- ton in the KEYBOARD MODE Section. | Das Keyboard kann in folgenden Modi- gaspieten werden: UPPER, LOWER, M. BASS, ARRANGER, M. DRUMS, S. EFFECTS (oder voller Keyboard- Modus), indem die jeweiligen Tasmen im KEYBOARD MODE-BERECH gedrucht werden. | Le clavier peutetre you dans les mo- des UPPER, LOWER, M. BASS, AR- RANGER, M. DRUMS, S. EFFECTS (ou CLAYER COMPLET) en enfo- cant simplement le bouton correspond- dont dans la section KEYBOARD MODE. |
| [47] VARIETY START/STOP [16] | [28] KEYBOARD MODE [29] LYNCOY [30] LOWER [31] M BASS [32] ARRANGI [33] HOO [34] S TICKLE [35] [36] | ||||
| 1. Press DEMO button [28] in MUSIC STYLE Section and simultaneously: Deo Song 1 - 4 to hear Demo Song 1 - 4 separately. - or - Press DEMO button [28] and START/STOP button [16] to near all Demo Songs in sequence. | 1. Drucken Sie die DEMO-Taste [28] im "MUSIC STYLE" - Bedienvfli und gleichzeitig; 2. Drucken Sie eine der BANK-Ti#,... 1 bis 4, um die Songs 1 - 4 separant abzuhoren. - oder - Drucken Sie die DEMO-Taste [28] und die START/STOP-Taste [16], um alle vier Songs in einer Kette zu horen. | 1. Pressez la touche DEMO [28] dans la section "MUSIC STYLE" et en meme temps; 2. Pressez les touches BANK 1 a 4 pour entendre septrement les mor- ceaux 1 a 4. - ou - Pressez la touche DEMO [28] et la touche START/STOP [16] pour ent- endre tous les morceaux de demonstration enchahnes. | A PIANO sound can be played, for example, on the full keyboard by selec- ting it with the UPPER MODE; like- wise, a STRING tone can be played on the full keyboard by selecting it with the LOWER MODE. More sections can be selected at the same time, e.g. the ARRANGER MODE can be selected on the left side of the keyboard (delimited by the split point) while the UPPER MODE is selected on the right side. Moreover, the ARRANGER + LO- WER can be played on the left side of the split point, and in UPPER MODE on the right side of the split point. Other possible combinations are: - M. BASS on the left side of the split point and UPPER on the right one. - LOWER on the left side of the split point and UPPER on the right one. - LOWER + M. BASS on the left s- de of the split point and UPPER on the right side. | Ein PIANO Sound Kann beispisiewe auf der ganzen Tasstur gespielt we- der, indem er mit dem UPPER MODE gewählt wird; ebenso kann an STRING Klang im LOWER MODE auf der ganzen Tasstur gespielt werden. Gleichzeitig können mehrere Bereiche gewählten werden. Bespielsweise kann arrangerner MODE der linken Seite der Tasstur zugeordnet werden, während der UPPER MODE nur für die rechte Klavatturasse gewährt wird. Darüber hinaus kann der ARRANGER + LOWER links vom Splitpunkt ge- spielt werden, während UPPER der rechten Seite zugeordnet ist. Andere möglich kombinationen sind: - M. BASS auf der LINken und UP- PER auf der rechten Seite des Split- punkts. - LOWER auf der LINken und UPPER auf der rechten Seite des Split- punkts. - LOWER und M. BASS auf der lin- ken Seite des Splitpunkts und UP- PER auf der rechten Seite. | Vous pourrez donc, par exemple, jouer un son de Piano sur toute l'extension du claverien en choisisssant UPPER et, tomours sur tout le claverien, jouer un son de STRING en selectionnant LOWER. Il est possible aussi de selectionner piu- seurs sections en même temps. Vous pourrez, par exemple, selectionner le mode ARRANGER sur la partie gauche du claverien et le mode UPPER dans la partie de drole. Vous pouze aussi jouer l'ARRANGER + LOWER sur la partie a gauche du SPLIT et sur la pa- te de drole jouer en UPPER. D'autres examples de quèques combi- naisons possibles sont les suivants: - M. BASS a gauche du Split et UP- PER a drole du Split; - LOWER a gauche et UPPER a drole; - LOWER + M. BASS a gauche et UPPER a drole. |
| [All DEMO Press "START"] | |||||
| While the Demo Songs are being performed, the E-35 cannot be played and no MIDI message can be received. The Demo Songs data cannot be sent out through MIDI OUT. 3. To stop playing any Demo Song, press the START/STOP button [16] or DEMO button [28]. | Während des Spiëiens eines Demo- Songs kann der E-35 nicht gespielt werden und keine MIDI-Ereignisse empflanzen. Die Daten der Demo Songs werden nicht über MIDI gesendet. 3. Mit einem Drucken der START/STOP-Taste [16] oder DEMO-Taste [28] wird die Wieder- gabe der Demo-Songs gestopt. | Quand les morceaux de démonstra- tion sont reproducés, ie E-35 ne peut étreuer you et aucun message MIDI n est recu. Les données des morceaux de dé- monstration ne sont pas transmises par la MIDI OUT. 3. Pour cesser la reproduction des moecaux de démonstration, pressez la touche START/STOP [16] ou la touche DEMO [28]. | A PIANO sound can be played, for example, on the full keyboard by selec- ting it with the UPPER MODE; like- wise, a STRING tone can be played on the full keyboard by selecting it with the LOWER MODE. More sections can be selected at the same time, e.g. the ARRANGER MODE can be selected on the left side of the keyboard (delimited by the split point) while the UPPER MODE is selected on threight side. Moreover, the ARRANGER + LO- WER can be played on the left side of the split point, and in UPPER MODE on the right side of the split point. Other possible combinations are: - M. BASS on the left side of the split point and UPPER on the right one. - LOWER on the left side of the split point and UPPER on the right one. - LOWER + M. BASS on the left s- de of the split point an upper on the right side. | ||
| Following is a list of the Demo Songs and composers. Demo 1 - TO THE MOON" by: Lugi Brutti/Roberto Lancotti © 1991 Demo 2 - BREAK IT" by: Lugi Brutti/Roberto Lancotti © 1991 Demo 3 - BLUE FOG" by: Lugi Brutti/Roberto Lancotti © 1991 Demo 4 - PAPRIKA" by: Lugi Brutti/Roberto Lancotti © 1991. | Die Demo-Songs wurden komponiert von: Demo 1 - "TO THE MOON" by: Lugi Brutti/Roberto Lancotti © 1991 Demo 2 - BREAK IT" by: Lugi Brutti/Roberto Lancotti © 1991 Demo 3 - BLUE FOG" by: Lugi Brutti/Roberto Lancotti © 1991 Demo 4 - PAPRIKA" by: Lugi Brutti/Roberto Lancotti © 991. | Musique des morceaux de démonstra- tion par: Demo 1 - "TO THE MOON" by: Lugi Brutti/Roberto Lancotti © 1991 Demo 2 - BREAK IT" by: Lugi Brutti/Roberto Lancotti © 1991 Demo 3 - BLUE FOG" by: Lugi Brutti/Roberto Lancotti © 1991 Demo 4 - PAPRIKA" by: Lugi Brutti /Roberto Lancotti © 1991. | |||
Vou aurez aussi la possibilité de jour de votre clavier en mode "Split" (clavier divisé). Un son sur le côte gauche du clavier et un autre son sur le côte droit. Pour diviser le clavier, presssez le bouton LOWER [30] dans la section KEYBOARD MODE. La diode s'allumera.
Le clavier sera maintainant divisé entre les touches SI 3 et DO 4 de la seconde octave. Le Son émus a partir de la note la plus grave jusqu'à au SI 3 de la seconde octave sera nomme Son "LOWER" (inférieur). Pour sélectionner le son LOWER dans cette section, il faudra agrir sur les boutons SELECT [39] de la section TONE (voir SELECTION SON LOWER). Pour sélectionner le son UPPER émis a partir de la note C 4 jusqu'à la note la plus argue, il faudra agrir sur les boutons SELECT de la section TONE (voir SELECTION SON UPPER).
WAHL DER UTEREN KLANGFARBE
WAHL DER UTEREN KLANGFARBE
Pour activer la fonction LOWER TONE il faut presser le bouton "LOWER" [30] dans la section KEYBOARD MODE. La Led correspondante s'allume. L'E-35 selectionne toujours, a la mise sous tension et avec le bouton "LOWER" presse, le son "72 SLOW STRINGS", groupe A.
Pour selectionner un son différent pour le coté gauche du Split (Lower), presse les boutons SELECT [39] dans la section TONE, jusqu'à ce que la Led LOWER correspondante ne s'allume. Pour selectionner l'un des 128 sons, pressez le bouton GROUP [40] pour selectionner le groupe "A" ou "B", plus pressez un bouton BANK (pour selectionner le premier chiffre du son) et enfin pressze un bouton de Nombre pour le deuxieme chiffre. Example: pour selectionner le son 17 BASSOON (groupe B): Pressez le bouton GROUP et selectionnez le groupe "B". Puis pressez le fou
ton BANK 1 et selectionne le banque 1.Enfin presses le bouton numero 7. L'afficheur indiquera B 17.
The Display will show the new Music Das Display wird Nummer und Namen L'afficheur indiquera le numero et le Style number and name. des neuen Rhythmus aneigen. nom du nouveau style selectionné.

D'autres rythmes sont disponibles sur les Cartes Styles que vous pourrez acheter chez leur revendeur Roland.
Pour jour des styles écrites sur la Carte Style:
1. Insérez la Carte Style dans la fente CARD [22] sur le panneau arrêté du E-35.
2. Pressez le bouton CARD [50] dans la section MUSIC STYLE.
3. Pressez l'un des boutons de NUMBER dans la section MUSIC
STYLE pourCHOISIRleStyle danslacarte.
Si vous inserez une Carte de Styies
Dans cette £-35 vous n'étricacerez pas les rhytmes internes.
N'enlevez pas la Carte Skye quand en 1925, ne s'est pas qu'en 1930.
votre E-35 est en train d executer un rhythme de la carte.
En enfontant le bouton CARD sans introduire la Carte, l'afficheur indu.
moue la corte, l'articulin quera le message suvant:
Si you enonceze le bouton CARD en
ayant une Carte melega dans la fente (n'appartenant pas au E-35).
I'afficheur indiquera le message
suvant:
Pressing the HOLD button [37] in the ARRANGER section (Led lights) will activate a memory circuit which will continue to play the chord after the keys are released. It will memorize and hold the notes until the next note(s) is played. Mit der Taste HOLD [37] im ARRANGER-Bedienfeld aktivieren Sie einen Speicherschaltkreis für den gespiieten Akkord, d.h. der Akkord erklangt, bis ein neuer Akkord gespielt wird. Le fait de presser la touche HOLD [37] de la section ARRANGER (la diode s'allume) activera un circuit de mémoire qui permettra à l'accord de continuer à jouer après que les touches ont été reliées. Cet accord est mémoire jusqu'à ce que de nouvelles touches soient enfinçées.
Pressing the SYNC START button [9] Bei gedrückter SYNC START-Taste Le bouton SYNC START [9] synchron- nisera le depart du rythme avec I'enf-on cement d'une touche dans la parte of the keyboard if LOWER or MANU- boards eine Taste angeschlagen wird gauche du clavier si avec LOWER ou position (or when any Key is played on the full keyboard when the UPPER met lower oder MANUAL DRUMS en fonction (et avec I'enfocation de n'importe quelle touche dans tout le clavier si la seule Led UPPER est allum-mee).Le bouton SYNC START peut etre selectionne avant de presser le bouton INTRO/ENDING (la Led commencera a clignoter); si maintainant now start the Style with an "in- production". Anschlagen erer Taste durch einen you enoncez une note you ferez par- tir le rythme avec une "introduction"
REVOLVING BASS REVOLVING BASS
Pendant que I'on joue d'un style original, un "Fill-In" peut être insère en pressant la touche "TO ORIGINAL" [13]. Il en résultat un "Break" (FILL-IN) d'une mesure et à la fin de celle-ci, un retrout au style original.
Pendant que I'on joue d'une variation, presser la touche "TO VARIATION" entraîne un break d'une mesure plus un retrout à la variation. Si I'on joue d'un style original et si I'on pressé la touche "TO VARIATION", un break d'une mesure est déclenché et ensuite le style passée automatiquement en mode variation. Pareillement si I'on joue d'une variation et si I'on presse la touche "TO ORIGINAL" un break d'une mesure est déclenché et est suivi d'un retrout au style original.
Si I'une ou l'autre des touches de FILL-IN est pressée dans les trois premiers temps d'une mesure (deux premiers dans les styles Walzer a trois temps et premier seulement dans les styles Polka a deux temps) le FILL-IN se déclenché pour la fin de cette mesure. Si I'une ou l'autre des touches FILL-IN est pressée durant le 4ème temps (3ème dans les styles vaise et deuxieme dans le style Polka), cette manoeuvre sera interprétable comme une préselection de FILL-IN devant démarrer à la mesure suivante.
INTRO/FIN
L'ARRANGER peut être pilote soit par des accords soit en utilisant la fonction CHORD INTELLIGENCE.
Le bouton CHORD INT. [38] (intelligence d'accord) (Led allumée), vous permet de jouer des accords dans la section gauche du clavier avec un ou deux doigns seulement. L'ARRANGER doit être en position ON. Le système CHORD INTELLIGENCE vous permet de jouer, par exemple, des accords majeurs, mineurs, septieme, mineurs septieme, septieme majeurs, diminue, augmenté, quarte suspendue, septieme suspendue.
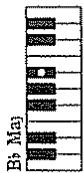
Beim Anschlagen einer Taste des unteren Manualabschnitts wird der zugehörige Akkord produziert, z.B. C-Dur bei C, G-Dur bei G usw. Il suffit de jouer une note dans la partie gauche du clavier pour produit un accord majoré de même nom que la noite, ainsi, jouer un do donne un accord de do majoré, un sol, un accord de sol majoré, etc.
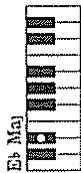
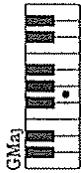
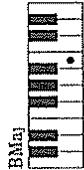
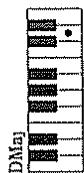
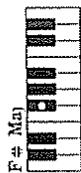
Accords Majeurs Septieme (Maj7) Les accords de septieme mayeurs peuvent etre formes en jouant la note tonique de I'accord et la note situe immeditatement a sa gauche.
| FUNCTION | TRANSMITTED | RECOGNIZED | REMARKS | |
| Basic Channel | Default Changed | X X | 1-16 1-16 each | Can be memorized |
| Mode | Default Messages Altered | X X * * * * * * * * * * | Mode 3 Mode 3, 4 (m = 1) | *2 |
| Note Number | True voice | X * * * * * * * * * * | 0-127 0-127 | |
| Velocity | Note ON Note OFF | X X | ○ X | |
| After Touch | Key's Ch's | X X | *1 *1 | |
| Pitch Bender | X | *1 | Resolution: 12 bit | |
| Control Change | 0,32 1 5 6,38 7 10 11 65 66 67 84 91 93 98,99 100, 101 120 121 | X X X X X X X X X X X X X X X X X X X X X X X X X X X X X X X X X X X X X X X X X X X X X X X X X X X X X X X X X X X X X X X X X X X X X X X X X X X X X X X X X X X X X X X X X X X X X X X X X X X X X Y X Y X Y X Y Y Y Y Y Y Y Y Y Y Y Y Y Y Y Y Y Y Y Y Y Y Y Y Y Y Y Y Y Y Y Y Y Y Y Y Y Y Y Y Y Y Y Y Y Y Y Y Y Y Y Y Y Y Y Y Y Y Y Y Y Y Y Y Y Y Y Y Y Y Y Y Y Y Y Y Y Y Y Y Y Y Y Y Y Y Y Y Y Y Y Y Y Y Y Y Y Y Y YY Y Y Y Y Y Y Y Y Y Y Y Y Y Y Y Y Y Y Y Y Y Y Y Y Y Y Y Y Y Y Y Y Y Y Y Y Y Y Y Y Y Y Y Y Y Y Y Y Y Y Y Y Y Y Y Y Y Y Y Y Y Y Y Y Y Y Y Y Y Y Y Y Y Y Y Y Y Y Y Y Y Y Y Y Y Y Y Y Y Y Y Y Y Y Y Y Y Y Y YY YYY YYY YYY YYY YYY YYY YYY YYY YYY YYY YYY YYY YYY YYY YYY YYY YYY YYY YYY YYY YYY YYY YYY YYY YYY YYY YYY YYY YYY YYY YYY YYY YYY YYY YYY YYY YYY YYY YYY YYY YYY YYY YYY YYY YYY YYY YYY YYY YYY YYY Y YY YYY YYY YYY YYY YYY YYY YYY YYY YYY YYY YYY YYY YYY YYY YYY YYY YYY YYY YYY YYY YYY YYY YYY YYY YYY YYY YYY YYY YYY YYY YYY YYY YYY YYY YYY YYY YYY YYY YYY YYY YYY YYY YYY YYY YYY YYY YYY YYY Y YY Y YY Y YY Y YY Y YY Y YY Y YY Y YY Y YY Y YY Y YY Y YY Y YY Y YY Y YY Y YY Y YY Y YY Y YY Y YY Y YY Y YY Y YY Y YY Y YY Y YY Y YY Y YY Y YY Y YY Y YY Y YY Y YY Y YY Y YY Y YY Y YY Y YY Y YY Y YY Y YY Y YY Y YY Y YY Y YY Y YY Y YY Y YY Y YY Y YY YYY YYY YYY YYY YYY YYY YYY YYY YYY YYY YYY YYY YYY YYY YYY YYY YYY YYY YYY YYY YYY YYY YYY YYY YYY YYY YYY YYY YYY YYY YYY YYY YYY YYY YYY YYY YYY YYY YYY YYY YYY YYY YYY YYY YYY YYY YYY YYY Yyy YYY YYY YYY YYY YYY YYY YYY YYY YYY YYY YYY YYY YYY YYY YYY YYY YYY YYY YYY YYY YYY YYY YYY YYY YYY YYY YYY YYY YYY YYY YYY YYY YYY YYY YYY YYY YYY YYY YYY YYY YYY YYY YYY YYY YYY YYY YYY YYY YYY Yyy Yyy Yyy Yyy Yyy Yyy Yyy Yyy Yyy Yyy Yyy Yyy Yyy Yyy Yyy Yyy Yyy Yyy Yyy Yyy Yyy Yyy Yyy Yyy Yyy Yyy Yyy Yyy Yyy Yyy Yyy Yyy Yyy Yyy Yyy Yyy Yyy Yyy Yyy Yyy Yyy Yyy Yyy Yyy Yyy Yyy Yyy Yyy Yyy Yyy YYY YYY YYY YYY YYY YYY YYY YYY YYY YYY YYY YYY YYY YYY YYY YYY YYY YYY YYY YYY YYY YYY YYY YYY YYY YYY YYY YYY YYY YYY YYY YYY YYY YYY YYY YYY YYY YYY YYY YYY YYY YYY YYY YYY YYY YYY YYY YYY Y YY Y BB BB BB BB BB BB BB BB BB BB BB BB BB BB BB BB BB BB BB BB BB BB BB BB BB BB BB BB BB BB BB BB BB BB BB BB BB BB BB BB BB BB BB BB BB BB BB BB BB BB BB BB BB BB BB BB BB BB BB BB BB BB BB BB BB BB BB BB BB BB BB BB BB BB BB BB BB BB BB BB BB BB BB BB BB BB BB BB BB BB BB BB BB BB BB BB BB BB BB BBBB BB BB BB BB BB BB BB BB BB BB BB BB BB BB BB BB BB BB BB BB BB BB BB BB BB BB BB BB BB BB BB BB BB BB BB BB BB BB BB BB BB BB BB BB BB BB BB BB BB BB BB BB BB BB BB BB BB BB BB BB BB BB BB BB BB BB BB BB BB BB BB BB BB BB BB BB BB BB BB BB BB BB BB BB BB BB BB BB BB BB BB BB BB BB BB BB BB BB BBbb BB BB BB BB BB BB BB BB BB BB BB BB BB BB BB BB BB BB BB BB BB BB BB BB BB BB BB BB BB BB BB BB BB BB BB BB BB BB BB BB BB BB BB BB BB BB BB BB BB BB BB BB BB BB BB BB BB BB BB BB BB BB BB BB BB BB BB BB BB BB BB BB BB BB BB BB BB BB BB BB BB BB BB BB BB BB BB BB BB BB BB BB BB BB BB BB BB BB BB bb BB BB BB BB BB BB BB BB BB BB BB BB BB BB BB BB BB BB BB BB BB BB BB BB BB BB BB BB BB BB BB BB BB BB BB BB BB BB BB BB BB BB BB BB BB BB BB BB BB BB BB BB BB BB BB BB BB BB BB BB BB BB BB BB BB BB BB BB BB BB BB BB BB BB BB BB BB BB BB BB BB BB BB BB BB BB BB BB BB BB BB BB BB BB BB BB BB BB BB(bb) | *3 (MSB only) *1 *3 *1 *1 *1 *1 *3 *1 *1 *1 *1 *1 *1 *1 *1 *1 *1 *1 *1 *1 *1 *1 *1 *1 *1 *1 *1 *1 *1 *1 *1 *1 *1 *1 *1 *1 *1 *1 *1 *1 *1 *1 *1 *1 *1 *1 *1 *1 *1 *1 *1 *1 *1 *1 *1 *1 *1 *2 (123-127) *2 Recognized as m = 1 even if m = 1 *3 O X can be selectable only using the receive switch of control change (all) | |
| Notes | *1 O X can be selectable *2 Recognized as m = 1 even if m = 1 *3 O X can be selectable, only using the receive switch of control change (all) | |||