
CTM_2023 - Grille pain DELONGHI - Notice d'utilisation et mode d'emploi gratuit
Retrouvez gratuitement la notice de l'appareil CTM_2023 DELONGHI au format PDF.


| Type de produit | Grille-pain |
| Marque | De'Longhi |
| Modèle | CTM 2023 (également CTM 4023 pour 4 tranches) |
| Nombre de tranches | 2 (CTM 2023) / 4 (CTM 4023) |
| Réglage de brunissage | 6 niveaux (1 = clair, 6 = foncé) |
| Fonction décongélation | Oui (voyant lumineux, temps prolongé automatiquement) |
| Fonction réchauffage | Oui (temps fixe non réglable, voyant lumineux) |
| Fonction arrêt/annulation | Oui (interrompt le cycle à tout moment) |
| Voyants lumineux | Décongélation, réchauffage |
| Plateau ramasse-miettes | Amovible, à vider régulièrement. Modèle 4 tranches : un de chaque côté |
| Nettoyage extérieur | Chiffon doux humide, essuyer avec un chiffon sec. Ne pas immerger |
| Nettoyage intérieur | Secouer à l'envers au-dessus d'un évier. Ne pas utiliser d'objets pointus |
| Sécurité - Mise à la terre | Obligatoire (prise avec terre) |
| Sécurité - Utilisation par enfants | Interdit sans surveillance adulte |
| Alimentation | 220–240 V ~ (vérifier plaque signalétique) |
| Fusible recommandé | 13 A (type BS 1363) |
| Matériau du boîtier | Plastique et métal |
| Pièces détachées et réparabilité | Plateau ramasse-miettes remplaçable. Pour toute réparation, contacter un service technique agréé |
| Dimensions | Non spécifiées (environ 30 x 20 x 20 cm pour 2 tranches) |
| Poids | Non spécifié (environ 1,5 kg) |
FOIRE AUX QUESTIONS - CTM_2023 DELONGHI
Questions des utilisateurs sur CTM_2023 DELONGHI
0 question sur cet appareil. Repondez a celles que vous connaissez ou posez la votre.
Poser une nouvelle question sur cet appareil
Téléchargez la notice de votre Grille pain au format PDF gratuitement ! Retrouvez votre notice CTM_2023 - DELONGHI et reprennez votre appareil électronique en main. Sur cette page sont publiés tous les documents nécessaires à l'utilisation de votre appareil CTM_2023 de la marque DELONGHI.
MODE D'EMPLOI CTM_2023 DELONGHI
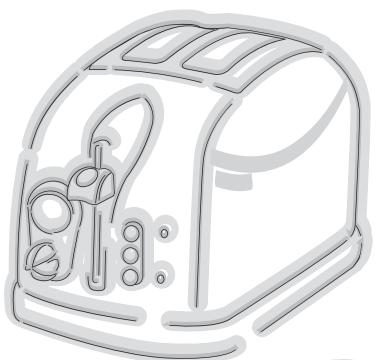
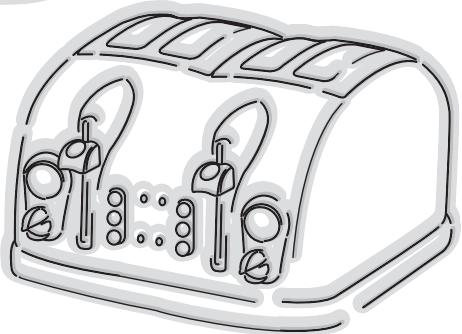
TOASTER CTM 2023/CTM 4023

Living innovation
Description of Appliance
The following terms are used throughout the instruction manual
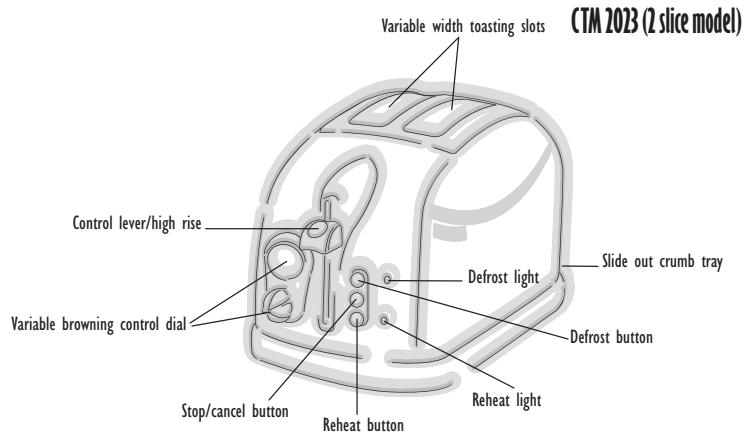
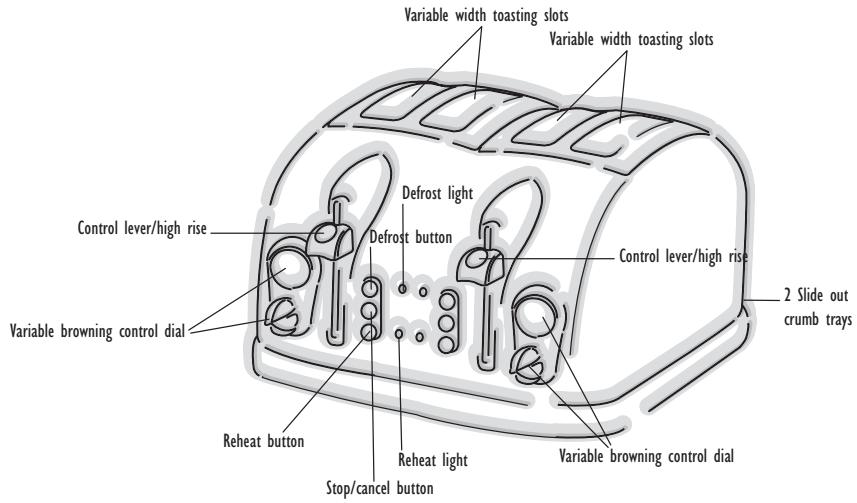
CTM 4023 (4 slice model)

Toster CTM 2023/4023
Living innovation
Thank you for choosing this De'Longhi Toaster. To get the best results from your new toaster it is advisable to read these instructions carefully before using the appliance. This is the only way to ensure optimum results and maximum safety.
Using for the first time
- Carefully unpack the toaster and remove all of the packaging material.
- Place the toaster on a flat working surface away from water taps and sinks.
- Before using for the first time, to eliminate the new smell, operate the toaster without bread inside for at least 5 minutes. Ensure there is plenty of ventilation in the room.
- Check that the mains supply corresponds to the voltage on the the appliance rating plate. Connect the appliance to a correctly earthed power socket (minimum rating 10A) only. The manufacturer declines all liability for any accidents due to the incorrect earthing of the appliance.
- Please read safety warnings and electrical requirements before using this appliance.
Using the Toaster
- Ensure control lever is raised
- Plug into a suitable mains supply socket.
- Insert up to two slices of bread into toasting slots or up to four slices if using 4-slice model
- Turn the variable browning control dial to required setting (1=lightest, 6= darkest)
- Press down control lever until it locks
- Once the chosen level of browning has been reached, the toast will automatically rise ready for removal from the slots
- If the first slices are not browned sufficiently, select a higher setting next time
Using the Defrost Button
- To toast frozen bread, place in the toasting slots
- Press down control lever until it locks
- Press the "Defrost Button". The "Defrost Light" will remain on while the defrost function is in use, and toasting time will be automatically extended
Using the Reheat Button
- Press down control lever until it locks.
- Press the reheat button. The reheat light will remain on whilst the reheat function is in use.
- Please note that this is a fixed reheat time which cannot be adjusted by the browning control.
Using the Stop/Cancel Button
- Should you want to interrupt the toasting process, simply press the stop/cancel button at any time.
Warning
Do not force control lever to eject toast etc. Always use the stop/cancel button.
Using the Reheat Button
Press down control lever and press the reheat button. The reheat light will remain on whilst the reheat function is in use. Please note that this is a fixed reheat time which cannot be adjusted by the browning control.
Crumb tray
The crumb tray should be emptied regularly as a build-up of crumbs could be a potential fire hazard. After toasting, allow the toaster to cool down thoroughly, then slide out the crumb tray and empty. Please note the 4-slice model has a slide out crumb tray on each side.
Hints and Tips for better toasting
- If your toaster is not plugged in and switched on, the control lever will not lock in the down position.
- For best results use bread slices of even thickness, size and freshness.
Select a lower setting if:
a) using stale bread (toasts more quickly than fresh bread)
b) using thin bread (toasts more quickly than thick bread)
- To remove smaller items such as muffins, crumpets and bagels the control lever can be lifted approximately 20mm above the starting position.
- To achieve even browning, we suggest a minimum of 30 seconds between each toasting to allow the control to automatically reset.
- Never use the toaster without bread inserted.
- Do not use very thin ar broken slices of bread
- Do not insert other foods that may drip during the cooking process. As well as making the cleaning procedure more difficult it may be a potential fire hazard. It is also very important to clean the crumb tray before each use.
- Do not insert (by force) foods that are too by for the slots.
- Do not insert forks or other utensils into the toaster in order to remove bread, as it may damage the resistance coils of the appliance. Remove the plug from the socket and turn the appliance over, gently shaking it to remove the lodged items.

Living innovation
Toster CTM 2023/4023
Cleaning and Maintenance
- Before cleaning, switch off at the mains remove plug and allow to cool
- To clean the inside, turn toaster upside down over the sink and gently shake
- Empty the crumb tray regularly - see "Crumb tray" section
- Use a soft dampened cloth to wipe the outside of the toaster and dry with a soft, dry cloth
DO NOT use metal polish or harsh scouring agents
DO NOT immerse your toaster in water - DO NOT use any sharp or pointed articles for cleaning the inside as this will damage the heating element
- NEVER put metal objects or your fingers into the toasting slots.
SafetyWarnings
- The appliance is exclusively for the use for which it has been manufactured. Any other use is to be considered inappropriate and therefore dangerous. The manufacturer cannot be held responsible for eventual damage caused by inappropriate, improper or irresponsible use and/or for repairs made to the product by unauthorised personnel.
After removing the appliance from the packaging, make sure that the product is complete and in perfect condition. - The plastic bag in which the appliance was packaged should be kept out of reach of children as it poses a suffocation hazard.
- In order to remove the dust that may have accumulated on the appliance, simply dust it off with a soft cloth.
- Before inserting the plug into the electrical socket, make certain:
- The voltage of the socket corresponds to the value indicated on the information label, attached to the appliance.
- The electrical socket is adequately earthed, the manufacturer declines any responsibility for the lack of observation of this norm.
- In the case of incompatibility between the socket and the plug of the appliance, have it replaced by a qualified technician. The use of adapters, multiple socket units and/or extension cables is not recommended. Whenever it may be necessary to use such equipment, it is advisable to use only simple or multiple adapters or extension cables which comply with the current safety standards, and make sure not to exceed the voltage limit of the adapter or extension cable.
-
When the appliance is plugged into the electrical socket and whilst switched on never place hands into the bread toasting slots.
-
Never allow the appliance to be used by children or used without adult supervision.
- Do not touch the appliance with wet or damp hands.
- The metal sides of the toaster and the areas surrounding the bread slots become very hot during use: operating the toaster should be carried out touching only the plastic dials and handles.
- Bread is a foodstuff which may catch fire. Do not use this appliance under or next to curtains or other combustible material.
- Do not cover the appliance while it is in use.
- Do not use the appliance with bare or wet feet.
- Unplug the appliance from the electrical socket when it is not in use.
- Do not unplug the appliance from the outlet by pulling on the cord.
- Do not leave the appliance exposed to the elements, (rain, direct sunlight, frost, etc.).
- Before doing any cleaning unplug the appliance from the electrical socket. Do not immerse the appliance, the plug, or the electrical cable in water.
- In case of breakage or improper cable functioning of the appliance, turn off the appliance without tampering with it. For necessary repairs or replacement of the electrical cable, consult the technical service centre authorised by the manufacturer.
As with any electrical appliance, whilst the instructions aim to cover as many eventualities as possible, caution and common sense should be applied when operating your appliance, particularly in the vicinity of young children.
This appliance conforms to the Directive 89/336/CEE relative to electromagnetic compatibility.
The materials and the objects destined for contact with food products are in compliance with the regulations of the EEC directive 89/109
Electrical Requirements
Before using this appliance ensure that the voltage indicated on the product corresponds with the main voltage in your home, if you are in any doubt about your supply contact your local electricity company.
The flexible mains lead is supplied connected to a B.S. 1363 fused plug having a fuse of 13 amp capacity. Should this plug not fit the socket outlets in your home, it should be cut off and replaced with a suitable plug, following the procedure outlined below.
Note: Such a plug cannot be used for any other appliance and should therefore be properly disposed of, (having removed the fuse) and not left where children might find it and plug it into a supply socket - with the obvious consequent danger.
N.B. We recommend the use of good quality plugs and wall sockets that can be switched off when the machine is not in use.
Important: the wires in the mains lead fitted to this appliance are coloured in accordance with the following code:
GREEN AND YELLOW
BLUE
BROWN
EARTH
NEUTRAL
LIVE
As the colours of the wires in the mains lead of this appliance may not correspond with the coloured markings identifying the terminals in your plug, proceed as follows:
The wire which is coloured green and yellow must be connected to the terminal in the plug which is marked with the letter E or by the earth symbol or coloured green or green and yellow.
The wire which is coloured blue must be connected to the terminal which is marked with the letter N or coloured black.
The wire which is coloured brown must be connected to the terminal which is marked with the letter L or coloured red.
When wiring the plug, ensure that all strands of wire are securely retained in each terminal. Do not forget to tighten the mains lead clamp on the plug. If your electricity supply point has only two pin socket outlets, or if you are in doubt, consult a qualified electrician. Should the mains lead ever require replacement, it is essential that this operation be carried out by a qualified electrician and should only be replaced with a flexible cord of the same size. If the plug is a moulded-on type the fuse cover must be refitted. If the fuse cover is lost, the plug must not be used until a replacement cover is obtained. The colour of the correct replacement fuse cover is that of the coloured insert in the base of the fuse recess or elsewhere on the plug. Always state this colour when ordering a replacement fuse cover. Only 13amp replacement fuses which are asa approved to B.S. 1362 should be fitted.
This appliance conforms to the Norms EN 55014 regarding the suppression of radio interference.
Warning
this appliance must be earthed
Green and Yellow to
Earth
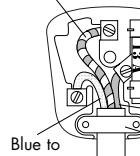
Neutral
13 amp Fuse
Brown to Live
Cord Clamp

Toster CTM 2023/4023
Living innovation
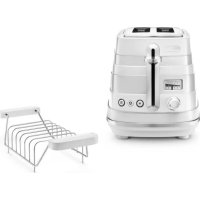
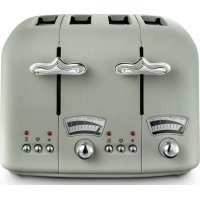
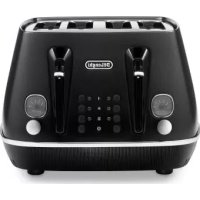
Marque : DELONGHI
Modèle : CTM_2023
Catégorie : Grille pain