LDX-4P-RX - Bryter Smart-AVI - Gratis bruksanvisning og manual
Finn enhetens veiledning gratis LDX-4P-RX Smart-AVI i PDF-format.

Brukerspørsmål om LDX-4P-RX Smart-AVI
0 spørsmål om dette apparatet. Svar på dem du kjenner, eller still ditt eget.
Still et nytt spørsmål om dette apparatet
Last ned instruksjonene for din Bryter i PDF-format gratis! Finn veiledningen din LDX-4P-RX - Smart-AVI og ta den elektroniske enheten tilbake i hendene. På denne siden er alle dokumenter som er nødvendige for bruken av enheten din publisert. LDX-4P-RX av merket Smart-AVI.
BRUKSANVISNING LDX-4P-RX Smart-AVI
TECHNICAL SPECIFICATIONS
| VIDEO | |
| Format (4) DVI-D Single | Link |
| Maximum Pixel Clock 165 MHz | |
| Input Interface (TX) (4) DVI-D 29-pin (Female) | |
| Output Interface (RX) (4) DVI-D 29-pin (Female) | |
| Resolution Up to 1920 x | 1200 @ 60HzandUp to 4K/2K (3840x2160)@ 30Hz |
| DDC 5 volts p-p(TTL) | |
| Input Equalization Automatic | |
| Input Cable Length Up to 20 ft. | |
| Output Cable Length Up to 20 ft. | |
| AUDIO | |
| Signal Type | Stereo Audio |
| Bandwidth | 15MHz, 0dB |
| Impedance | 100 Ohm |
| Connector 3.5 mini jack, Female | |
| USB | |
| Signal Type | USB 1.1 |
| Input Interface (TX) | (1) USB Type B (Female) |
| Output Interface (RX) (2) | USB Type A (Female) |
| RS232 | |
| Input Interface (2) DB9 | (Female) |
| Output Interface (2) DB9 | (Male) |
| Control Up to 115 Kbps | |
WHAT'S IN THE BOX?
| PART NO. | DESCRIPTION |
| LDX-4PS | Quad DVI-D, USB, Dual RS-232, and Audio Extender. Includes: [LDX-4P-TX, LDX-4P-RX, 2x (PS5VDC3A)] |
OTHER
| Power External 100-240 VAC/5VDC3A@15W | |
| Dimensions | 5.125 in W x 1 in H x 3.625 in D |
| Weight | 1 lb. |
| Operating Temp. | 0-55 °C (32-131°F) |
| Storage Temp. | -20-85 °C (-4-185 °F) |
| Humidity | Up to 95% |
| Max ResolutionVideo ExtensionDistance | 245 ft. w/ CAT6 STP |
TRANSMIT ON DB9 FEMALE
| PIN | Name | Description |
| 2 | TxD | Transmit Data on DB9 Female |
| 3 | RxD | Receive Data on DB9 Female |
| 5 | GND | Ground |
RECEIVE ON DB9 FEMALE
| PIN | Name | Description |
| 2 | RxD | Receive Data on DB9 Female |
| 3 | TxD | Transmit Data on DB9 Female |
| 5 | GND | Ground |

Designed and
Manufactured In the USA
800.AVI.2131
Tel: (818) 503-6200 Fax: (818) 503-6208
11651 Vanowen St. North Hollywood, CA 91605
SmartAVI.com
Smart-AM
SMART AUDIO VIDEO INNOVATION
LDX-4P
natural_image
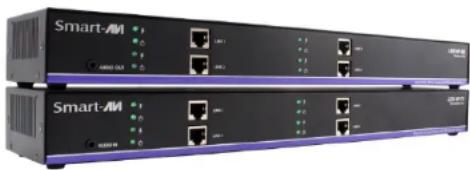
Two Smart-AM server units with network ports and indicator lights (no visible text or labels)Quad-Head DVI-D, USB Keyboard, Mouse and Audio Extender Over Cat5e/6
EXTEND QUAD DVI-D, DUAL RS232, USB KEYBOARD, MOUSE AND AUDIO UP TO 245 FEET OVER DUAL CAT5/5E/6 CABLE
USER MANUAL
INTRODUCTION
Using HDBaseT technology, the LDX-4P DVI extender is capable of sending quad DVI-D signals up to 245 feet over two conventional and inexpensive CAT5/5e/6 cable. HDBaseT technology is superior to older DVI extenders that require special CAT6 shielded cable to go a short distance. The SDX-4P also has USB keyboard and mouse, audio and RS232 extension, giving you the ability to control your displays or devices remotely.
FEATURES
- Extends dual DVI-D up to 245 feet (75m) from the source
- HDCP Support
• Supports up to 1920x1200 digital video resolution @ 60 Hz
• Supports 4K/2K (3840x2160) video resolution @ 30Hz
• Automatic DDC Learning
• USB Keyboard and Mouse extension
• Uncompressed Video HDBaseT
• RS232 extension allows for remote control of displays
• External power adapter for transmitter and receiver unit
• Supports Stereo Sound - Compatible with Windows, Mac and Linux Operating Systems

APPLICATION DIAGRAM

flowchart
graph LR
    A["Computer"] --> B["LDX-4P (Transmitter)"]
    B --> C["245 ft."]
    C --> D["LDX-4P (Receiver)"]
    D --> E["Device 1"]
    D --> F["Device 2"]
    D --> G["Device 3"]
    D --> H["Device 4"]
    D --> I["Device 5"]
    D --> J["Device 6"]
    D --> K["Device 7"]
    D --> L["Device 8"]
    D --> M["Device 9"]
    D --> N["Device 10"]
    D --> O["Device 11"]
    D --> P["Device 12"]
    D --> Q["Device 13"]
    D --> R["Device 14"]
    D --> S["Device 15"]
    D --> T["Device 16"]
    D --> U["Device 17"]
    D --> V["Device 18"]
    D --> W["Device 19"]
    D --> X["Device 20"]
    D --> Y["Device 21"]
    D --> Z["Device 22"]
    D --> AA["Device 23"]
    D --> AB["Device 24"]
    D --> AC["Device 25"]
    D --> AD["Device 26"]
    D --> AE["Device 27"]
    D --> AF["Device 28"]
    D --> AG["Device 29"]
    D --> AH["Device 30"]
    D --> AI["Device 31"]
    D --> AJ["Device 32"]
    D --> AK["Device 33"]
    D --> AL["Device 34"]
    D --> AM["Device 35"]
    D --> AN["Device 36"]
    D --> AO["Device 37"]
    D --> AP["Device 38"]
    D --> AQ["Device 39"]
    D --> AR["Device 40"]
    D --> AS["Device 41"]
    D --> AT["Device 42"]
    D --> AU["Device 43"]
    D --> AV["Device 44"]
    D --> AW["Device 45"]
    D --> AX["Device 46"]
    D --> AY["Device 47"]
    D --> AZ["Device 48"]
    D --> BA["Device 49"]
    D --> BB["Device 50"]
    D --> BC["Device 51"]
    D --> BD["Device 52"]
    D --> BE["Device 53"]
    D --> BF["Device 54"]
    D --> BG["Device 55"]
    D --> BH["Device 56"]
    D --> BI["Device 57"]
    D --> BJ["Device 58"]
    D --> BK["Device 59"]
    D --> BL["Device 60"]
    D --> BM["Device 61"]
    D --> BN["Device 62"]
    D --> BO["Device 63"]
    D --> BP["Device 64"]
    D --> BQ["Device 65"]
    D --> BR["Device 66"]
    D --> BS["Device 67"]
    D --> BT["Device 68"]
    D --> BU["Device 69"]
    D --> BV["Device 70"]
CONNECTING THE LDX-4P
- Power off all devices.
- Connect the four DVI-D sources (computer) to the two DVI-D ports on the back of the SDX-4P-TX.
- Connect a USB source (computer) to the USB port on the SDX-4P-TX.
- Optionally connect RS232 for control functions.
- Connect the SDX-4P-TX to the SDX-4P-RX using four CAT5/5e/6 cables.
- Connect a DVI-D compatible display to each of the two DVI-D ports on the back of the SDX-4PRX.
- Connect USB keyboard and mouse to the USB ports on the SDX-4P-RX.
- Optionally connect RS232 to control third-party devices.
- Connect the power to the SDX-4P-RX and the SDX-4P-TX.
- Power on the display and then the computer.
The EDID of your display will be learned automatically.
LDX-4P (RX/TX) FRONT
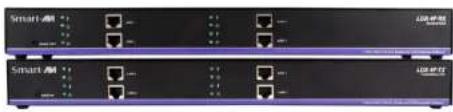
natural_image
Front view of two black network switches with ports and indicator lights (no visible text or labels)LDX-4P (RX/TX) REAR
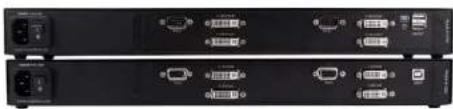
natural_image
Front view of two black electronic equipment racks with ports and connectors (no visible text or labels)To reach maximum distances with HDBaseT technology, it is recommended to use the best possible quality cable available. CAT5e/6 shielded cabling is ideal for best performance.