
V-AVM650DN - Car radio VARTA - Free user manual and instructions
Find the device manual for free V-AVM650DN VARTA in PDF.


| Product Type | Car Stereo |
| Brand | Varta |
| Model | V-AVM650DN |
| Mounting Size | Double DIN (approx. 178 x 100 mm) |
| Dimensions (W x H x D) | 178 x 100 x 160 mm (approx.) |
| Weight | 1.2 kg (approx.) |
| Power Supply | 12V DC (negative ground) |
| Maximum Power Output | 4 x 50 Watts |
| RMS Power Output | 4 x 22 Watts |
| Display | 6.2-inch TFT LCD touchscreen |
| Audio Playback | CD, MP3, WMA, WAV, FLAC |
| Radio Bands | FM, AM |
| Bluetooth | Yes (hands-free calling, audio streaming) |
| USB Port | Front (for mass storage devices) |
| Auxiliary Input | 3.5 mm front panel |
| GPS Navigation | Not integrated (supports optional external module) |
| Steering Wheel Control | Compatible (adapter may be required) |
| Equalizer | 7-band graphic equalizer |
| Remote Control | Included (wireless IR) |
| Working Temperature | -20°C to +60°C |
| Maintenance | Clean with dry soft cloth; avoid liquids |
| Safety | Disconnect battery before installation; use fuses as specified |
| Spare Parts & Repairability | Contact Varta service center; fuse replacement by user |
| General Information | For car use only; ISO mounting kit compatible |
Frequently Asked Questions - V-AVM650DN VARTA
User questions about V-AVM650DN VARTA
0 question about this device. Answer the ones you know or ask your own.
Ask a new question about this device
Download the instructions for your Car radio in PDF format for free! Find your manual V-AVM650DN - VARTA and take your electronic device back in hand. On this page are published all the documents necessary for the use of your device. V-AVM650DN by VARTA.
USER MANUAL V-AVM650DN VARTA
Thank you for buying our product. It is recommended to read this manual all through to avoid any failures in its work.
Contents
Contents....2
Important safeguards ....4
Accessories and Hardware....5
Installation 7
Controls 13
Front panel....13
Inner panel....13
Remote control....14
Basic Operation....16
Radio operations....19
RDS operations....21
DISC operations....23
USB/SD operations....33
Bluetooth operations....36
TV Tuner operations....43
Other modes....45
Equalizer....47
Setup....49
Handling discs ....56
V-AVM650D

Troubleshooting Guide....57
Specifications....58
Important safeguards
- Using the device at temperature below -10^ C may cause the breakage of the device. BEFORE USING PLEASE HEAT UP THE PASSENGER COMPARTMENT TO THE RECOMMENDED TEMPERATURE!
- Read carefully through this manual to familiarize yourself with this high-quality sound system.
- Disconnect the vehicle's negative battery terminal while mounting and connecting the unit.
- When replacing the fuse, be sure to use one with an identical amperage rating. Using a fuse with a higher amperage rating may cause serious damage to the unit.
• DO NOT attempt to disassemble the unit. Laser beams from the optical pickup are dangerous to the eyes.
- Make sure that pins or other foreign objects do not get inside the unit; they may cause malfunctions, or create safety hazards such as electrical shock or laser beam exposure.
- If you have parked the car for a long time in hot or cold weather, wait until the temperature in the car becomes normal before operating the unit.
• DO NOT open covers and do not repair yourself. Consult the dealer or an experienced technician for help.
- Make sure you disconnect the power supply and aerial if you will not be using the system for a long period or during a thunderstorm.
- Make sure you disconnect the power supply if the system appears to be working incorrectly, is making an unusual sound, has a strange smell, has smoke emitting from it or liquids have got inside it. Have a qualified technician check the system.
- The unit is designed for negative terminal of the battery, which is connected to the vehicle metal. Please confirm it before installation.
- Do not allow the speaker wires to be shorted together when the unit is switched on. Otherwise it may overload or burn out the power amplifier.
Accessories and Hardware

| No. | Item | Diagram | Quantity | No. | Item | Diagram | ||
| 1 | DVD player  | 1 | 13 | BoltM5.0x24.0 |  | 1 | ||
| 2 | Assembly bar | 1 14 | Harness | cable 1 |  | 1 | ||
| 3 | Nut | 4 15 | Harness | cable 2 | 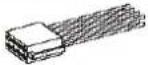 | 1 | ||
| 4 | Spring gasket 1ø9.0xø5.2xT1.3 | 2 16 | Harness | cable 3 |  | 1 | ||
| 5 | Spring gasket 2ø7.3xø4.3xT1.1 | 1 | 17 | Antenna |  | 1 | ||
| 6 | Spring gasket 3ø8.3xø5.2xT1.4 | 1 | 18 | Unit ring |  | 1 | ||
| 7 | Flat Gasketø8.0xø4.4xT1.0 | 1 | 19 | Trim ring | 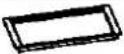 | 1 | ||
| 8 | ScrewM4.0x10.0 | 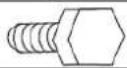 | 1 | 20 | Remote |  | 1 | |
| 9 | ScrewM5.0x19.0 |  | 1 | 21 | Glasses clothes |  | 1 | |
| 10 | ScrewM5.0x7.0 |  | 2 | 22 | Owner'smanual |  | 1 | |
V-AVM650D
VARTA
| 11 | ScrewM5.0x9.0 | 6 | 23 | Warranty | Card | 1 | ||
| 12 | Extended box |  | 1 | 24 | ConsumerInformation |  | 1 | |
Installation

- Be sure to connect the color-coded leads according to the diagram. Incorrect connections may cause the unit to malfunction or damage the vehicle's electrical system.
- Be sure to connect the speaker (-) leads to the speaker (-) terminal. Never connect the left and right channel speaker cables to each other or to the vehicle body.
• Make sure all the connections are completely correct before turning on your unit. - When replacing the fuse(s), the replacement must be of the same amperage as shown on the fuse holder.
- Do not block vents or radiator panels. Blocking them will cause heat to build up inside and may result in fire.
- After completing the installation, please press RESET button on the unit with pointed object (such as ball-point pen) to set the unit to initial status.
- Use only the parts included with unit to ensure proper installation. The use of unauthorized parts can cause malfunction.
- Consult with your nearest dealer if installation requires the drilling or other modifications of the vehicle.
- Install the unit where it does not interfere with driver's actions and cannot injure the passenger if there is a sudden stop, like an emergency stop.
- The semiconductor laser will be damaged if it overheats, so don't install the unit in hot place, for example, near a heater outlet.
V-AVM650D

Control cables connections
- Auto Brightness Control To avoid the display being too bright at night time, if the cable for headlight is connected to ILLUMI, turning on the headlight dim the backlight of LCD and TFT and vice versa.
- Telephone Mute If the MUTE is connected, other audio outputs mute when a telephone call is received by the car phone.
- When Reverse Driving If a rear view camera is connected to the unit, the playing source switches to CAMERA automatically when you start reverse driving. As the reverse driving is done, the playing source switches to the last mode.
- When Parking Brake applied - If "PRK SW" cable is connected to hand brake switch, the video view to the TFT monitor will be controlled by this function. Parking cable function ceases when the playing source is CAMERA. - The monitor displays the blue screen with warning information to prevent the driver watching other contents during driving, but the passengers at the rear seats can watch normally.
- TFT Monitor Protection The unit will protect the movement mechanism automatically when the monitor's movement is blocked.
Installation Method A
If the meter panel of your car has a two-din dish, and the fireproofing board is capable of screw cap, you can choose this method.
- Screw a specialized M5 bolt to the screw at the empennage of this unit.
- Screw down the fix-up iron bar with the fireproofing board.
- Put the unit into the dash and screw down the M5 bolt with the fireproofing board.

V-AVM650D

Installation Method B
-
Choose a perfect position according to the depth of the dash; attach two brackets (for Left and Right side respectively.) to the unit, using 4pcs of M5X6 screw to screw down the bracket with the unit.
-
Put the unit into the dash and screw down the bracket to the meter panel with suitable screw.

Wiring connection

flowchart
graph TD
    A["GPS"] --> B["Ant"]
    B --> C["GPS CONNECTOR"]
    C --> D["Media Link Bus"]
    D --> E["MZ-TFT Touch Screen (Sold Separately)"]
    E --> F["NAV Bus"]
    F --> G["External A/V System"]
    G --> H["AUX IN 2"]
    H --> I["AUX IN 1"]
    I --> J["*Media Link"]
    J --> K["VIOLED OUT2"]
    K --> L["VIDEO OUT1"]
    L --> M["VIDEO OUT"]
    M --> N["REAR AUDIO OUT"]
    N --> O["WIRELESS HEADPHONE (OPTIONAL)"]
    O --> P["External Power Amplifier"]
    P --> Q["P.CONT"]
    Q --> R["BLUE/WHITE"]
    R --> S["BONE"]
    S --> T["GREEN/WHITE(+)"]
    T --> U["BATTERY"]
    U --> V["IGNITION SWITCH"]
    V --> W["ACC"]
    W --> X["FUSE FILTER/(20A)"]
    X --> Y["MUTE"]
    Y --> Z["ANT. CONT"]
    Z --> AA["Cell Phone"]
    AA --> AB["Auto Antenna"]
    AB --> AC["GREEN/BLACK(-)"]
    AC --> AD["WHITE(+)"]
    AD --> AE["FRONT L"]
    AE --> AF["REAR R"]
    AF --> AG["RED BY(+)"]
    AG --> AH["PURPLE(+)"]
    AH --> AI["PURPLE/BLACK(-)"]
    AI --> AJ["FRONT R"]
    AJ --> AK["WHITE(+)"]
    AK --> AL["FRONT L"]
    AL --> AM["GREEN/BLACK(-)"]
    AM --> AN["GREEN/BLACK(-)"]
    AN --> AO["WHITE(+)"]
    AO --> AP["FRONT L"]
    AP --> AQ["GREEN/BLACK(-)"]
    AQ --> AR["PURPLE(+)"]
    AR --> AS["PURPLE/BLACK(-)"]
    AS --> AT["RED BY(+)"]
    AT --> AU["PURPLE/BLACK(-)"]
    AU --> AV["GREEN/BLACK(-)"]
    AV --> AW["PURPLE/BLACK(-)"]
    AW --> AX["RED BY(+)"]
    AX --> AY["PURPLE/BLACK(-)"]
    AY --> AZ["GREEN/BLACK(-)"]
    AZ --> BA["PURPLE/BLACK(-)"]
    BA --> BB["PURPLE/BLACK(-)"]
    BB --> BC["RED BY(+)"]
    BC --> BD["PURPLE/BLACK(-)"]
    BD --> BE["PURPLE/BLACK(-)"]
    BE --> BF["PURPLE/BLACK(-)"]
    BF --> BG["PURPLE/BLACK(-)"]
    BG --> BH["PURPLE/BLACK(-)"]
    BH --> BI["PURPLE/BLACK(-)"]
    BI --> BJ["PURPLE/BLACK(-)"]
    BJ --> BK["PURPLE/BLACK(-)"]
    BK --> BL["PURPLE/BLACK(-)"]
    BL --> BM["PURPLE/BLACK(-)"]
    BM --> BN["PURPLE/BLACK(-)"]
    BN --> BO["PURPLE/BLACK(-)"]
    BO --> BP["PURPLE/BLACK(-)"]
    BP --> BQ["PURPLE/BLACK(-)"]
    BQ --> BR["PURPLE/BLACK(-)"]
    BR --> BS["PURPLE/BLACK(-)"]
    BS --> BT["PURPLE/BLACK(-)"]
    BT --> BU["PURPLE/BLACK(-)"]
    BU --> BV["PURPLE/BLACK(-)"]
    BV --> BW["PURPLE/BLACK(-)"]
    BW --> BX["PURPLE/BLACK(-)"]
    BX --> BY["PURPLE/BLACK(-)"]
    BY --> BZ["PURPLE/BLACK(-)"]
    BZ --> CA["PURPLE/BLACK(-)"]
    CA --> CB["PURPLE/BLACK(-)"]
    CB --> CC["PURPLE/BLACK(-)"]
    CC --> CD["PURPLE/BLACK(-)"]
    CD --> CE["PURPLE/BLACK(-)"]
    CE --> CF["PURPLE/BLACK(-)"]
    CF --> CG["PURPLE/BLACK(-)"]
    CG --> CH["PURPLE/BLACK(-)"]
    CH --> CI["PURPLE/BLACK(-)"]
    CI --> CJ["PURPLE/BLACK(-)"]
    CJ --> CK["PURPLE/BLACK(-)"]
    CK --> CL["PURPLE/BLACK(-)"]
    CL --> CD
    CD --> CM["MINT"]
    CM --> CN["MUTE"]
    CN --> CO["MUTE"]
    CO --> CP["MUTE"]
    CP --> CS["MUTE"]
    CS --> CT["MUTE"]
    CT --> CU["MUTE"]
    CU --> CV["MUTE"]
    CV --> CW["MUTE"]
    CW --> CX["MUTE"]
    CX --> CY["MUTE"]
    CY --> CZ["MUTE"]
    CZ --> DA["MUTE"]
    DA --> DB["MUTE"]
    DB --> DC["MUTE"]
    DC --> DD["MUTE"]
    DD --> DE["MUTE"]
    DE --> DF["MUTE"]
    DF --> DG["MUTE"]
    DG --> DH["MUTE"]
    DH --> DI["MUTE"]
    DI --> DJ["MUTE"]
    DJ --> DK["MUTE"]
    DK --> DL["MUTE"]
    DL --> DV["MUTE"]
    DV --> DW["MUTE"]
    DW --> DX["MUTE"]
    DX --> DXB["MUTE"]
    DXB --> DXC["MUTE"]
    DXC --> DXD["MUTE"]
    DXD --> DXE["MUTE"]
    DXE --> DXF["MUTE"]
    DXF --> DXG["MUTE"]
    DXG --> DXH["MUTE"]
    DXH --> DXI["MUTE"]
    DXI --> DXJ["MUTE"]
    DXJ --> DXK["MUTE"]
V-AVM650D
Parking brake cable connections



Reverse driving cable connections

flowchart
graph LR
    A["Car Frame"] --> B["Reverse Driving Signal Light"]
    B --> C["Pink Cable"]
    C --> D["Reverse Driving Cable"]
    D --> E["Car Battery"]
    E --> F["Car Frame"]
    G["Gearbox"] --> H["Sensor"]
    style A fill:#f9f,stroke:#333
    style F fill:#f9f,stroke:#333
    style G fill:#ccf,stroke:#333
Front panel
- TFT display
- SRC/POWER button
- MUTE/CALL button
- VOL+/- button
- REAR zone button
- UP/DOWN/LEFT/RIGHT/ENTER cursor (joystick)
- EQ button
- WIDE/PIC button
- DISP button
- CH UP/DOWN button
- BAND/LOC/DX button
- PIP button
- OPEN/TILT button
- Auto Dimmer Sensor
- RESET button
Inner panel
-
EJECT button
-
Disc loading slot.
-
SD card slot


V-AVM650D
Remote control
- POWER button
- SRC button
- SETUP button
- VOL+/- button
- TITLE button
- MUTE button
- MENU button
- AUDIO button
- PRESET UP/DOWN button
- BAND/ II▶ (SLOW PLAYBACK) button
- SLIDE UP/DOWN button
- GOTO/CALL button
- TILT UP/DOWN button
- RPT/A-B button
- RPT button
- EJECT button
- PIP button
- UP/DOWN/LEFT/RIGHT/ENTER cursor (joystick)
- FRONT/REAR switch
- ANGLE button
- SUBTITLE button
- PIC button
- WIDE button
- STOP buttona
- DISP/CLEAR button


V-AVM650D

- NUMBER buttons
- RDM button
- SCN button
Notes of remote control using:
- Aim the remote control at the remote sensor of the unit.
- Remove the battery from the remote control or insert a battery insulator if the battery has not been used for a month or longer.
- DO NOT store the remote control under direct sunlight or in high temperature environment, or it may not function properly.
- The battery can work for 6 months under normal condition. If the remote control doesn't work, please change the battery.
- Use "button shaped" lithium battery "CR2025" (3V) only.
- DO NOT recharge, disassemble, heat or expose the battery in fire.
- Insert the battery in proper direction according to the (+) and (-) poles.
- Store the battery in a place where children cannot reach to avoid a risk of accident.
Uninstall Battery
Slide out the battery compartment tray at the bottom on the back of the remote control.

Install battery
Insert the battery to the battery tray with proper direction according to the (+) and (-) poles.

Turn on/off the power
Press SRC/POWER button on to unit or POWER button on the RC to turn the unit on.
Press and hold this button to turn the unit off.
Enter password
You need to enter password when you use this unit for the first time or after changing the car battery. You can try 6 times when your password is wrong and the unit will power off automatically after you have tried for 6 times.
| ******** | ||
| 1 | 2 | 3 |
| 4 | 5 | 6 |
| 7 | 8 | 9 |
| 0 | ||
If you want to continue, turn your unit on and try to enter password again. The password is 012345 (If this password is not correct, please ask the dealer). The password is changeable (for more information see item "Rating").
Volume
Press VOL+/- on the unit or RC to increase/decrease the sound volume. The maximum level of volume is 40.
Mute
Press MUTE button on the unit or RC to turn the sound off. Press it again to resume.
Playing source selection
Open the "SOURCE MENU", and then touch the option you need or select the option: FRONT, REAR, DISC, SD, USB, NAV, RADIO, BT, TV, AUX 1, AUX 2, CAMERA, OFF by moving the cursor (joystick) and then confirm.

Note: When some devices are not ready, they cannot be selected.
Open/close the monitor
Press OPEN/TILT button on the unit or OPEN/CLOSE button on the RC to slide down/up the monitor.
Changing the monitor tilting angle
You can adjust the monitor angle to get more convenient position. Press and hold OPEN/TILT button and then press CH UP/DOWN buttons repeatedly to change monitor angle. Also you can adjust the monitor angle by pressing TILT UP/DOWN buttons.
Changing the display mode
Press WIDE button repeatedly the display modes will be changed as follows:

flowchart
graph LR
    A["CINEMA"] --> B["NORMAL"]
    B --> C["STANDBY"]
    C --> D["CINEMA"]
V-AVM650D

If the unit cannot work correctly, you should reset the unit by pressing the RESET button on the panel with a pointed object, (such as a ballpoint pen).
Picture setup
Press and hold WIDE button the picture menu will appear. Adjust BRIGHT and CONTRAST (COLOR) items with cursor buttons. Press WIDE button shortly to choose between BRIGHT and CONTRAST.
Radio operations

Select radio mode
Open the "Source Menu" and select "Radio".
Select band
Press BAND/SLOW PLAYBACK button on the RC or BAND/LOC/DX button, or touch repeatedly the BAND icon on the screen to select bands in the following order: FM1 - FM2 - FM3 - AM1 - AM2.
Search for a station automatically
To search for a station along the increasing frequencies press RIGHT cursor button on the RC or on the unit. To search for a station along the decreasing frequencies press LEFT cursor button on the RC or on the unit.
Notes: To stop searching, repeat the operation above or press other buttons having radio function. When a station is received, searching stops and the station is played. If the unit receives a stereo broadcasting, the indicator light of Stereo "ST" on the display will be lighted.
Search for a station manually
To search for a station manually, press repeatedly UP/DOWN cursor button on the RC or on the unit, or touch the numeric keypad icon and then touch the number buttons to input the radio station frequency numbers. During manually searching, the frequency will be changed in steps.
Presetting stations automatically
Press ENTER cursor button on the RC or on the unit, or touch the AS icon on the screen. Only stations with sufficient signal strength will be detected and stored in the memory.
Notes: To stop automatic presetting, press other buttons having radio functions. After automatic presetting, the previous stations frequency will be overwritten. The unit has 5 bands, such as FM1, FM2, FM3, AM1, AM2, and each band can store 6 stations; hence the unit can store 30 stations in all.
Presetting stations manually
Method 1: Press the number buttons on the RC.
Method 2: Press the MEM icon on the screen to open the station preset menu. Then press one of the 6 buttons of the menu. The menu will be closed automatically. If you want to exit, press EXIT button.
Notes: After manual presetting, the previous stations frequency will be overwritten. Number buttons 1 to 6 corresponds to station P1 to P6. For each band, P1 to P6 can store 1 station.
Recall the preset stations
Press the corresponding number button on the RC or touch an onscreen preset button to select the corresponding stored station.
Preview scan
Press SCN button on the RC or touch the PS icon on the screen. Preview scan searching is such a process that the searching pauses when a station is received and then played for 10 seconds. After being played, the unit continues the process until the whole band is detected.
Note: To stop preview scan, repeat the operation above again.
Local radio station searching
Press and hold BAND/LOC/DX button on the unit or press the LOC icon on the screen to open pr close LOCAL function. DX (distance) seeking mode is contrary of LOC mode. You can receive more stations with this seeking mode. When LOCAL seeking is on, only those radio stations with strong radio signal could be received.
Notes: When the local radio station searching is on, the indicator light "LOC" lights up; whereas the light goes off. The unit will switch to distant seeking mode after LOCAL seeking is closed.

RDS is available only in FM bands. The unit provides basic functions of RDS, including PI (Program Identification), radio station name, RT (Radio Text), CT (Clock Time), AF (Alternative Frequency), TA (Traffic Announcement) and PTY (Program Type) Selection.
AF function
Alternative Frequencies Lists are used for the same program service and used in conjunction with the PI code (Program Identification code) to assist automatic tuning. Using this information, a radio can automatically search out another station that is playing the same material. This is useful when the station you are listening to is fading out.
To activate AF function press AF button on the screen. To cancel the function, press the button repeatedly.
Note: During auto switching radio frequency, some interference could be heard. Turning off AF function can settle this problem.
TA function
The TA (Traffic Announcement flag) function lets the unit receive traffic announcements automatically no matter what media source is playing back. The TA function can be activated for a TP (Traffic Program) station broadcasting traffic information.
To activate TA function, press TA button on the screen. To cancel the function, press the button repeatedly.
Note: Receiving traffic announcements under other modes When TA is activated and a traffic announcement is received, the current playing source will be overridden by the traffic announcement if the current radio band is
V-AVM650D

FM and the “TA” indicator lights up, indicating that the unit is waiting for traffic announcements. The unit returns to the original source after the traffic announcement has been received.
PTY function
PTY is the abbreviation for Program Type which is a code defining the type of program being broadcast (e.g. News or Rock).
Program service (PS)
Used for receiver displays of an 8 character alpha numeric Program Service name which may use Upper or Lower case characters, e.g. {BBC_4_FM}, {Classic_}. The function is for indicating and cannot be operated.
CT (Clock time)
Some stations broadcast the time and date within the encoded RDS signal. The clock time is automatically adjusted when “CT” is set to “On”.
RT (Radio Text)
When this function is activated, the unit will display short message data transmitted from the provider, such as station information, the name of the current broadcasting song and the artist name. The function is for indicating and cannot be operated.
TP (Traffic Program Flag)
A flag indicating whether the station broadcasts traffic announcements at some time in the day. The function is for indicating and cannot be operated.
Insert a disc
Upon inserting a disc, the unit will change to disc mode automatically.
Notes: Please confirm whether there is a disc in the unit before you insert another one. The unit will exit current playing source and enter DVD mode when one disc is inserted. Some recorded discs, such as CD-R, CD-RW, DVD-R, DVD+R, DVD-RW, DVD+RW cannot be played back because of different recording status. Otherwise, the discs without being closed could not be played back.
Eject the disc
Press EJECT button on the RC or on the unit.
Notes: After ejecting the disc, the unit reverts to SD card mode automatically if you have inserted one SD card, or the unit reverts to radio mode. You can eject a disc with the unit powered off. The unit remains off after the disc is ejected.
Using the touch screen controls
The touch key areas for DCD playback are outlined below:

A - Open "Source Menu"
B - Display onscreen control menu
Onscreen control buttons
| Disc typeIcon | MP3/WMA | CD | VCD | DVD | MPEG | |
 | Numeric keypad | Numeric keypad | Numeric keypad | Numeric keypad | Numeric keypad | Numeric keypad |
 | Setup menu | Setup menu Setup menu Setup | menu Setup menu | Setup menu | Setup menu | |
 | - Fast forward Fast forward Fast forward Fast forward | - | ||||
 | - Fast rewind Fast rewind Fast rewind | Fast rewind - | ||||
 | Previous | Previous | Previous | Previous | Previous | Previous |
 | Next | Next | Next | Next | Next | Next |
 | Play/Pause | Play/Pause | Play/Pause | Play/Pause | Play/Pause | Play/Pause |
 | Stop | Stop | Stop | Stop | Stop | Stop |
 | - | - | A second menu | A second menu | A second menu | - |
 | Repeat | Repeat | Repeat | Repeat | Repeat | Repeat |
V-AVM650D
VARTA
 | Random | Random | Random | - | Random | - |
 | - | - | - | - | - | Rotate clockwise |
 | - | - | - | - | - | Rotate anticlockwise |
 | - - Zoom out - - Zoom out | |||||
 | - - Zoom in - - Zoom in | |||||
 | Music files - - Music files Music files | |||||
 | Picture files - - Picture files Picture files | |||||
 | Video files | - | - | - | Video files | Video files |
| EQ | EQ setup | EQ setup | EQ setup | EQ setup | EQ setup | EQ setup |
| PBC | - | - | PBC | - | - | - |
| A-B | - - A-B repeat A-B repeat | - | - | - | ||
| All | All files - - All files | All files | All files | |||
| Back | - | - | Exit menu | Exit menu | Exit menu | Exit menu |
V-AVM650D
VARTA
| AUDIO | - | - | Channel switching | Dialogue language | Dialogue language | - |
| SUBTITLE | - | - | - | Subtitle language | Subtitle language | - |
| DISP | - | - | Display information | Display information | Display information | Display information |
| MENU | - | - | DVD | MENU | ||
| TITLE | - | - | - | DVD | TITLE | |
| REAR | Rear zone Rear zone Rear zone Rear zone | Rear zone Rear zone | ||||
| PIP | PIP source PIP source PIP source PIP source PIP source PIP source | |||||
| DIR+ | Next folder - - - - | Next folder | ||||
| DIR- | Previous folder | - | - | - | - | Previous folder |
| SLIDE | - | - | - | - | - | Picture slide modes |
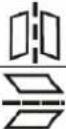 | - | - | - | - | - | Reverse horizontally |
| - | - | - | - | - | Reverse vertically | |
| ↑ | - | - | - | - | - | Select the previous |
| - | - | - | - | - | Select the next | |
Stop playback temporarily
To stop playback temporarily, press ENTER cursor button on the RC or on the unit. To resume normal play, repeat the operation.
Stop playback entirely
Press STOP button on the RC.
- For DVD/VCD discs: do the above operation for the first time, playback is paused and the break point is stored. When you start playback again, playback starts from where it has been stopped (resume play). Do the above operation twice, playback is canceled. When you start playback again, for DVD, playback starts from the beginning of the last title; for VCD, playback starts from the beginning of the disc.
- For other discs: do the above operation, playback is canceled. When you start playback again, playback starts from the beginning of the file.
Display file list
There are two methods to display file list when the picture or video file of one disc contained MP3, WMA, JPEG, MPEG files is played back:
- Using the remote control. Press the STOP button on the RC.
- Using the touch screen. Open onscreen control buttons and press the STOP button.
Fast forward/Fast reverse
When a DVD, VCD or CD disc is played back, press DOWN cursor button on the RC or on the unit repeatedly. Notes: When a music CD disc is played back, the audio output remains open if the fast forward playback is applied. When an MP3 or JPEG disc is played back, this function is prohibited.
Slow forward/Slow reverse
When a DVD, VCD or CD disc is played back, repeatedly press BAND/SLOW PLAYBACK button on the RC or BAND/LOC/DX button on the unit.
Play a next or previous file
To go to next/previous file, press RIGHT/LEFT cursor button on the RC or on the unit.
Repeat playback
Press repeatedly RPT button on the RC.
| Disc type Repeat mode |
| DVD Repeat chapter – Repeat title – Repeat off |
| VCD (PBC off) Repeat one – Repeat all – Repeat off |
| CD Repeat one – Repeat all – Repeat off |
| MP3/WMA Repeat one – Repeat folder – Repeat all – Repeat off |
| MPEG Repeat one – Repeat folder – Repeat all – Repeat off |
| Picture Repeat one – Repeat folder – Repeat all – Repeat off |
Note: When a VCD is played back, this function is prohibited if the PBC is on. Turning off the power or switching playing source to other modes and back will cancel this function.
Repeat A-B
Press the RPT/A-B button repeatedly. When a DVD, VCD or CD disc is played back, you can play back the contents between the time points from A to B repeatedly.

V-AVM650D

Random playback
Press the RDM button on the RC repeatedly. When this function is on, the contents in the disc will be played back randomly.

Intro playback
Press SCN button on the RC. When this function is on, the unit will play back the first 10 seconds of each track of a VCD or CD disc. You can search the file you desired using this function. To cancel this function, repeat the operation above.
Search for a particular file
When a DVD, VCD or CD disc is played back, you can search for a particular chapter/track by pressing the number buttons on the RC. For example, if you want to select the 15th track, you should press number buttons [1], [5] and then confirm by pressing ENTER button.
GOTO search
Enter the GOTO search and select search mode by pressing GOTO button repeatedly.
- For DVD: using the onscreen number buttons select either title, or chapter or time for search.
- For VCD (PBC is off) and MPEG files: using the onscreen buttons select either track or time for search.
- For CD, MP3 and picture file: using the onscreen number buttons select the file for search.
Press GOTO button once more to exit the GOTO search mode.
Using DVD menu/title
This function is only available for the DVD discs having "Menu/Title".
- Enter the DVD Menu/Title by pressing MENU or TITLE buttons. You can select the languages, subtitles and etc.
V-AVM650D

- Select the menu item by moving the cursor to the needed item; then confirm it.
Select audio channel
Press the AUDIO button repeatedly.
- For DVD: you can select one language to listen to if the disc has multi-language audio.
- For VCD and CD: you can select the audio channel to play.
Note: Left channel and right channel cannot work properly if the audio files are not recorded correctly.
Select subtitle language
Press SUBTITLE button repeatedly to select subtitle languages.
Note: This function is invalid if the DVD disc playing without multi-language subtitles.
Select multi-angle views
Press the ANGLE button repeatedly to select view angles.
Note: This function is invalid if the DVD disc playing without multi-angle.
PBC function
Press the MENU button on the RC to activate the PBC function. This function is available for the VCD discs with PBC function (Version 2.0 or later).
Notes: When PBC is on, playback goes back to the track list and starts from the first track. When PBC is on, fast motion playback, slow motion playback or skip search is available but repeat playback and searching for a particular chapter or track is prohibited. If you do the operation of random playback, scan playback or searching playback when PBC is on, PBC will be off automatically.
V-AVM650D

Zoom in/out
When picture or video files are played back, you can zoom in/out the image by pressing the zoom icon after opening onscreen control buttons.
Rotate picture
When one picture file is played back, you can rotate the picture to get proper view angle.
- Rotate anticlockwise by pressing the corresponding onscreen button.
- Rotate clockwise by pressing the corresponding onscreen button.
- Reverse horizontal by pressing the corresponding onscreen button.
- Reverse vertically by pressing the corresponding onscreen button.
Select picture slide mode
When one picture file is played back, you can press onscreen SLIDE button to select different picture slide mode to get entertaining effects. The unit has many built-in slide modes.
Playback information display
Touch the top center area of the display or press the DISP button on the unit when playing back DVD and VCD discs and the playback information will be displayed on the top area of the display.
- Playback information display for DVD
Title: 5/8 Chapter: 2/18 00:18:18
(1)
(2)
(3)
- DVD Title information. "5/8" indicates that this DVD has 8 titles and the title playing back now is the fifth title.
- DVD Chapter information. "2/18" indicates that current title has 18 chapters and the chapter playing back now
V-AVM650D

is the second chapter.
- Elapsed time of the current title.
- Playback information display for VCD

-
Disc type.
-
PBC function indicator. "PBC On" indicates that PBC function has been activated.
-
VCD Track information. "6/18" indicates that this VCD has 18 tracks and the track playing back now is the sixth title.
-
Elapsed time of the current track.
Select SD/USB mode
Open the "Source Menu" and select "SD".
Notes: The unit will switch to SD card mode or USB mode after a SD card or USB device has been inserted. The unit supports hot swap.
Using the touch screen controls
The operation is the same as DVD mode.
Onscreen control buttons
Onscreen control buttons under SD/USB mode are the same as disc mode.
Stop playback temporarily
The operation is the same as disc mode.
Stop playback entirely
The operation is the same as disc mode.
Display file list
The operation is the same as disc mode.
Fast forward/Fast reverse
The operation is the same as disc mode.
V-AVM650D

Play the next or previous file
The operation is the same as disc mode.
Repeat playback
The operation is the same as disc mode.
Random playback
The operation is the same as disc mode.
Intro playback
The operation is the same as disc mode.
Search for a particular file
The operation is the same as disc mode.
GOTO search
The operation is the same as disc mode.
Zoom in/out
The operation is the same as disc mode.
Rotate picture
The operation is the same as disc mode.
V-AVM650D

Select picture slide mode
The operation is the same as disc mode.
Playback information display
The operation is the same as disc mode.
Bluetooth operations

Onscreen control buttons
 | Numeric keypad | |
 | Voice transfer | |
| [HTBK] | Phone | |
| [6CST] | Pairing | |
| [HKA3] | Connection | |
 | Disconnection | |
| [1560] | Cancel | |
 | Call | |
 | Hang-up | |
 | Microphone mute | |
 | Stereo mode |
Bluetooth is a wireless transmission way for short distance. The built-in bluetooth can connect with the mobile phones having bluetooth function. After connecting, you can control your mobile phone through the unit.
Select Bluetooth mode
Open the "Source Menu" and then select "BT".
Work modes of built-in bluetooth
There are two work modes of the built-in bluetooth, which are phone mode and stereo mode. You can switch to its corresponding mode by pressing phone icon or music icon on the screen.
1. Phone mode
You can use these functions as followings under phone mode:
- Phone pairing The built-in bluetooth will become an identified device to your mobile phone after pairing.
- Phone connection
You can control your mobile phone after connecting, e.g. hand-free, browsing call list and telephone directory.
- Hand-free
You can answer a call or dial a number through DVD front panel keys, remote control keys or touch screen.
- Browsing call list
The latest records of missed calls, received calls and dialed calls will be displayed on the screen.
• Browsing telephone directory
You can browse the telephone directory of your mobile phone.
2. Stereo mode
You can use these functions as follows under stereo mode:
- Stereo pairing
The built-in bluetooth will become an identified device to your mobile phone after pairing.
V-AVM650D

- Stereo connection
You can do the operations of stereo play and remote control after connecting. - Stereo play
You can play the audio files of your mobile phone through the unit. - Stereo remote control
You can control the playback of your mobile phone through the unit.
Pairing
There are two pairing modes according to the built-in bluetooth work modes.
1. Phone pairing
- Set the work mode of the built-in bluetooth to phone mode and then press the pairing icon.
• Power on the bluetooth of your mobile phone. - You should select the built-in bluetooth after your mobile phone has detected it and your mobile phone will ask you to enter the pairing code.
- Enter the pairing code to pair. The built-in bluetooth will exit pairing mode after pairing successfully.
Notes: The built-in bluetooth will exit pairing mode if there is no pairing order from your mobile phone during pairing time (60s) and one message, which is "Phone pairing failed", will be displayed on the screen. The built-in bluetooth will exit pairing mode if you press the cancel icon during pairing time (60s) and the message, which is "Phone pairing canceled", will be displayed on the screen. If your mobile phone can not detected the built-in bluetooth after trying time and again, it's may be that the bluetooth module of your mobile phone does not work normally. Please restart your mobile phone and try it again.
2. Stereo pairing
- Set the work mode of the built-in bluetooth to stereo mode and then press the pairing icon.
- Open the audio play software of your mobile phone and set playback mode to Bluetooth.
- You should select the built-in bluetooth after your mobile phone has detected it and your mobile phone will ask you to enter the pairing code.
V-AVM650D

- Enter the pairing code to pair. The built-in bluetooth will exit pairing mode after pairing successfully.
Notes: The built-in bluetooth will exit pairing mode if there is no pairing order from your mobile phone during pairing time (60s) and one message, which is “Stereo pairing failed”, will be displayed on the screen. The built-in bluetooth will exit pairing mode if you press the cancel icon during pairing time (60s) and one message, which is “Stereo pairing canceled”, will be displayed on the screen. If your mobile phone can not detected the built-in bluetooth after trying time and again, it's may be that the bluetooth module of your mobile phone does not work normally. Please restart your mobile phone and try it again.
Connection
There are two connection modes according to the built-in bluetooth work modes.
1. Phone connection
There are four connection modes.
- Connect after power on The built-in bluetooth will auto connect with the mobile phone that has been connected at the last time in 10s from power on.
- Manual connect
You can built the connection between the bluetooth and your mobile phone by sending connection order from your mobile or pressing the connection button on the screen when the built-in bluetooth and your mobile phone disconnected if you have set the “connect” option of “bluetooth” of “setup” to “Manual”.
- Auto connect
After disconnecting with your mobile phone, the built-in bluetooth will send connection order automatically in 20s if you have set the “connect” option of “bluetooth” of “setup” to “Autos”.
Notes: After the connection has been built, “Connected” will be displayed on the screen until the built-in bluetooth gets your mobile phone name. Your mobile phone name, signal intensity, battery status will be displayed after the built-in bluetooth has got the information of your mobile phone. If you have transferred voice to your mobile phone during talking and haven't transfer voice back to the built-in bluetooth before hang-up, auto connection will expire, so you should connect the built-in bluetooth with your mobile phone manually at the next time. Some mobile phone
V-AVM650D

will shut down its bluetooth power after disconnecting and the built-in bluetooth cannot connect with them under this condition.
- Disconnect
You can break the connection between the built-in bluetooth and your mobile phone by operating your phone or pressing the disconnection button. After disconnecting, “Disconnected” will be displayed on the screen and signal intensity and battery status are empty.
2. Stereo connection
There are three connection modes.
- Connection request from the built-in bluetooth
Changing the work mode of the built-in bluetooth to stereo mode, pressing the connection button on the screen, the built-in bluetooth will connect with your mobile phone and your mobile phone will open audio playback software.
- Connection request from your mobile phone
Opening audio playback software of your mobile phone, playing one audio file, setting playback mode to bluetooth, selecting the built-in bluetooth from the bluetooth device list, the built-in bluetooth will change the work mode to stereo mode automatically. If the built-in bluetooth cannot be found in the device list of your mobile phone, you should pair and connect your mobile phone with the built-in bluetooth first.
- Disconnect
You can break the connection between the built-in bluetooth and your mobile phone by operating your phone or pressing the disconnection button.
Answer one call
The built-in bluetooth changes the work mode to phone mode automatically and displays the calling number when one call is coming in. The built-in bluetooth will put through the call automatically if you have set the “Auto Answer” option of “Bluetooth” of “Setup” to “On”, whereas you should put through the call manually.
Dialing
You can dial using mobile phone, the remote control, the touch screen, telephone directory and call records.
1. Dialing through mobile phone
"Dialing..." will be displayed on the screen after dialing.
2. Dialing through the remote control
Open the dial panel, press the needed number buttons. Then press GOTO button on the RC. When you want to rectify the number you entered, press repeatedly DISP/CLEAR button on the RC.
3. Dialing through the touch screen
Press the numeric keypad icon on the screen to open dial panel.
Press the numeric buttons on the keypad to enter call number.
Press CLEAR button to delete numbers from the last one.
Press the call button to dial.
Press the hang-up button to cancel.
Press the EXIT button to exit dial panel.
4. Dialing through telephone directory or call records
Select the number you want to call and then press the call button to dial after the built-in bluetooth get the information of call records or telephone directory.
Note: You cannot dial under stereo mode.
Hangup
You can ring off by pressing the hang-up key on your mobile phone or the screen, or the MUTE/CALL button on front panel of the unit.
Voice transfer
After connecting, pressing the voice transfer button on the screen under the conditions of calling, dialing or talking to break voice connection between the built-in bluetooth and your mobile phone and transfer voice to your mobile
V-AVM650D

phone. To transfer voice to the built-in bluetooth, do the operation again.
Note: Some mobile phone will transfer voice to them automatically after you put through one call.
Microphone mute
The unit will close the built-in microphone by pressing the microphone mute button when you are talking using the built-in bluetooth and the other side on the line cannot hear your voice. To cancel this function, do the operation again.
Browse call numbers
There are four options in the menu list, including missed calls, received calls, dialed calls and phone book. When you press one of them, the built-in bluetooth will get corresponding information from your mobile phone. The latest 30 numbers of each option can be displayed at most.
Stereo playback
If you want to play music files in your mobile phone, you should pair and connect your mobile phone with the built-in bluetooth. The built-in bluetooth will switch to stereo mode automatically after connecting and you can control the audio playback of your mobile phone by pressing the following buttons on the bluetooth screen: PLAY/PAUSE, PREVIOUS, NEXT, STOP.
Select TV tuner mode
Open the "Source Menu" and select "TV".
Auto search
To search for a TV channel along the increasing channels press RIGHT cursor button on the RC or on the unit. To search for a TV channel along the decreasing channels press LEFT cursor button on the RC or on the unit.
Notes: To stop auto searching press other buttons having TV function. When a TV channel is received, searching stops and the channel is played. If no TV channel is detected, the tuning channel stops at the very beginning channel when the process of searching is finished.
Manual search
To tune to a TV channel along the increasing channels press RIGHT cursor button repeatedly on the RC or on the unit. To tune to a TV channel along the decreasing channels press LEFT cursor button repeatedly on the RC or on the unit.
Notes: To stop manual searching press other buttons having TV function.
Auto store
Press the ENTER cursor button to search for all TV channels in the whole range and storing the TV channels automatically. To stop auto presetting, press other buttons having TV functions.
Preview scan
Press SCN button on the RC to scan the preset TV channels and play each channel for 10 seconds. To stop auto presetting, press other buttons having TV functions.
V-AVM650D

Playing the previous/next available TV channel
Press Up or DOWN cursor buttons to change to the previous or next TV channel.
Play a particular TV channel
To play a particular TV channel, press the number buttons on the RC to enter the number of the needed channel.
AUX
External peripheral devices with RCA audio and video outputs can be connected with the unit. For more details, please refer to Electrical Connections Overall Diagram.
To enter AUX IN mode, open the "Source Menu" and select "AUX IN".
Camera
The rearview camera can be connected with the unit. The playing source will change to “CAMERA” mode automatically when you reverse your car. For more details, please refer to Electrical Connections Overall Diagrams To enter camera mode, open the “Source Menu” and select “Camera”.
NAVI
External suited navigation devices can be connected with the unit. For more details, please refer to Electrical Connections Overall Diagrams.
To enter navigation mode, open the “Source Menu” and then select “NAVI” after the external navigation device is ready.
Note: For the operations under navigation mode, please refer to the user manual of the navigation device.
PIP mode
When the external video source is TV, AUX IN or navigation, you can look through them by this function. Press PIP button to activate it.
Rear zone mode
The unit has real and powerful multi-zone function. The driver and passenger sitting on the driver's seat can enjoy music or listen to the radio, meanwhile, the passengers sitting on the backseat can watch videos or play games.
V-AVM650D

Besides, control interface of the front and rear zone are GUI (Graphical User Interface) and you can control dual zones independently at the same time.
Press REAR button to activate the function. The operations under rear zone mode are the same as the front zone. You can operate the rear zone with the remote control after switching FRONT/REAR to REAR position.
Equalizer
Audio control allows you to easily adjust the audio system to get the best possible sound effect.
- Enter EQ setup mode
Press EQ button on the front panel or press EQ button on the screen twice to enter the EQ mode.
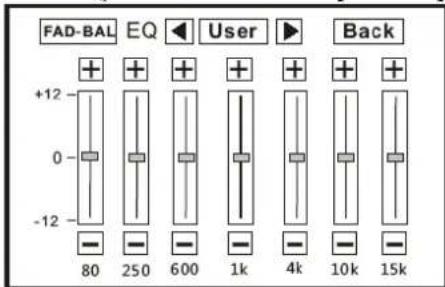
- Select EQ mode
Press LEFT/RIGHT buttons on the top to change EQ mode.
- Adjust EQ parameters
To adjust EQ parameters, touch and drag the EQ parameters of adjustment bar or press +/- buttons on the screen.
- Adjust Front/Rear/Left/Right fader and balance
You can adjust front/back/left/right balance of the speaker to get larruping listening effect according to the surroundings and your interest.
- Open FAD-BAL menu
Press FAD-BAL button on the screen to enter the FAD-BAL mode.
V-AVM650D


- Adjust FAD-BAL parameters
Touch and drag the EQ parameters adjustment bar or press +/- buttons on the screen.
- Exit EQ mode
Press BACK button on the screen to exit EQ mode
Notes: The EQ modes are: User, Rock, Hip Hop, Dance, Latin, Rave, Urban and Acoustic. The EQ mode will change to "User" automatically when you adjust EQ parameters under the modes besides "User".
Press SETUP button on the RC or touch setup icon on the display to enter the setup mode.
Use cursor buttons to navigate in menu (LEFT, RIGHT, UP, DOWN), and confirm settings (ENTER).
Note: All of the following setting can be done by touching the option directly.
User Interface of setup menu
The following menu appears after entering the setup mode. The "General" sub-menu is highlighted by default.

General
- Clock mode
12Hr: the clock is displayed in the type of 12 hours such as 11:18 AM.
24Hr: the clock is displayed in the type of 24 hours such as 20:18.
- Clock Adjust
Adjust the clock displayed on the TFT screen.
- Video input
AUTO: Set the color system of the TFT screen automatically by the unit according to the input video formats.
NTSC: Set the color system of the TFT screen to NTSC
V-AVM650D

PAL: Set the color system of the TFT screen to PAL.
SECAM: Set the color system of the TFT screen to SECAM.
- Parking
On: Image displays only when your car has been parked.
Off: Image displays always.
Language
- OSD
Select the menu language, which you want menu to be displayed.
- DVD Audio
Select the dialogue language of DVD.
Notes: If the DVD disc does not contain the audio file in the selected language, the dialogues you listen to will be in the default language. You can change the language by pressing AUDIO button on the remote control.
- DVD Subtitle
Select the language of DVD subtitles.
Notes: If the DVD disc has the subtitle file in the selected language, the subtitle will be displayed in the selected language. If the DVD disc does not contain the subtitle file in the selected language, the subtitle will be displayed in the default language. You can change the language by pressing SUBTITLE button on the remote control.
- Disc Menu
Select disc menu language.
Notes: If the DVD disc has the selected language, the DVD MENU/TITLE will be displayed in the selected language. If the DVD disc does not contain the selected language, the DVDMENU/TITLE will be displayed in the default language.
Audio
• DRC
V-AVM650D

Set the dynamic range of Dolby digital DVD discs.
On: Playback more dynamic audio with Bass.
Off: Normal output.
- Audio mode
Surround: 5.1 channels surround audio outputs.
Stereo: 2 channels stereo audio outputs.
- Pro Logic II
Music: Set the Audio effect to music mode.
Movie: Set the Audio effect to movie mode.
Matrix: Set the Audio effect to matrix mode.
- Sub.W Filter
You can get different bass effect when you set different cut off frequency of sub filter. According to the acoustics surroundings of your car, select a proper frequency: 50Hz, 80Hz, 100Hz, 120Hz and 150Hz.
Speaker
- 4CH : Center and subwoofer speakers audio outputs are closed.
• 4.1 CH : Center speaker's audio output is closed.
• 5.1 CH : All speakers' audio outputs are opened.
- Test Tone: Test the quality and level of each channel.
The unit has time delay function and you can adjust the position of sound field by this function. This function is available only for the DVD and DivX files which have Dolby Digital audio tracks.
- You can set time delay to RL, RR and Center speakers. Delay menu will be opened after you touch the icons of those speakers. The delay ranges of RL and RR speakers are 0-15ms and center speaker (when 5.1CH is selected) is 0\~5ms.
Touch the Sub icon to open phase menu when you select 4.1CH or 5.1CH.
- 0^ : Subwoofer output IN phase.
V-AVM650D

- 180^ : Subwoofer output OUT OF phase.
Bluetooth
- Bluetooth
On: Built-in bluetooth module is on.
Off: Built-in bluetooth module is off.
- Auto Answer
On: Answer automatically when one call is coming in.
Off: Answer manually when one call is coming in.
- Connect
Auto : Built-in bluetooth connects with the bluetooth device automatically after disconnecting.
Manual : Built-in bluetooth connects with the bluetooth device manually after disconnecting.
- Pairing code
You should enter the pairing code when the built-in bluetooth is pairing with another bluetooth device. The original pairing code is 1234 and you can change the pairing code when the built-in bluetooth is on.
RDS
• RDS
On: RDS function is opened.
Off: RDS function is closed.
• CT
On: The clock time is on.
Off: The clock time is off.
- Tuner Region
The unit provides several radio systems and you can select a correct radio system according to your country.
• TA VOL
Set relative volume to other audio sources. The range of TA VOL is 0-20.
Rating
Some DVD discs have built-in parental lock, which prevents the unauthorized persons to watch restricted contents and prevents children to watch some scenes as force or eroticism especially.
- Password
The original password of the unit is null. You should change the password ASAP after buying the unit.
Method of changing password:
Locate the cursor on the “password” option, enter a new 6-digit password by pressing the numeric keys on the remote control and then confirm.
- Rating
The unit has some watching level as followings:
- Kid safe: A movie rating that allows admission to children.
- G: A movie rating that allows admission to persons of all ages.
- PG: A movie rating that allows admission of persons of all ages but suggests parental guidance in the case of children.
- PG-13: A movie rating that allows admission of persons of all ages but suggests parental guidance in the case of children under the age of 13.
- PG-R: PG-related.
- R: A movie rating that allows admission only to persons of a certain age, usually 17, unless accompanied by a parent or supervisor.
- NC-17: A movie rating that does not allow admission to persons under the age of 17.
- Adult: A movie rating that allows admission to the adult only.
Procedures of changing the rating:
Enter your password (or default password 012345) to unlock the parental lock. Using the remote control or using the touch screen (Touch the "Password" option, opening the numeric keypad, and then press the numeric buttons to enter your password.).
V-AVM650D

Note:
- The password is cleared after the parental lock is opened.
- Change the rating. Select an appropriate rating from the "rating" menu.
- Close the parental lock. Enter a password and confirm to close the parental lock.
- Load Factory.
To restore the default settings relating with DVD playback (e.g.: DVD Audio, DVD Subtitle), press the RESET option only.
Hardware
- Camera
Normal: Actual scenes shot by the camera are displayed on the TFT monitor while reverse driving (just like what you see).
Mirror: The mirror images of actual scenes are displayed on the TFT monitor while reverse driving (just like looking from the rearview mirror).
- TFT Set Open
Auto: The TFT panel automatically opens when the unit is turned on.
Manual: When the ignition is turned off the TFT panel remains open if it was opened previously.
Off: The TFT panel opens only by pressing OPEN button when the unit is turned on.
- Auto Dimmer
On: Auto dimmer is on. The unit will adjust the TFT backlight according to the light intensity.
Off: Auto dimmer is off. The TFT backlight will not change.
P. VOL
P.VOL means Programmable Volume. This function is designed for preventing too sharp change when you switch the current playing source to another.
- Source
V-AVM650D

Select one playing source that you want to change its volume.
- Level
You can set the level of volume from -6 to 6.
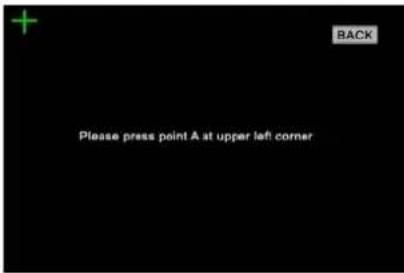
TS CAL
When the touch operation is not sensitive or valid, you should calibrate the touch screen through “CAL Screen” function. Calibrate the touch screen just following the screen instructions after entering the “TS CAL” mode.
Handling discs
- Dirty, scratched or warped discs may cause skip ping or noise.
- Handle the disc only by the edges. To keep clean do not touch its surface.
• Discs should be stored in their cases after use to avoid scratches. - Do not expose discs to direct sunlight, high humidity, high temperature or dust.

natural_image
Illustration of a hand holding a circular object with a ring, next to a close-up of the object's ring (no text or symbols)- Prolonged exposure to extreme temperature can wrap the disc (such as leaving the discs in your car during summertime).
- Do not stick or write anything on either side of disc. Sharp writing instruments, or the inks used in some felt-tip pens, may damage its surface.
- DO NOT touch the unlabeled side. DO NOT attach any seal, label or data protection sheet to either side of a disc.
Cleaning the cabinet
Wipe with a soft cloth. If the cabinet is very dampen (not dropping wet) the cloth with a weak solution of soapy water, and then wipe clean.
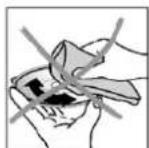
Cleaning discs
Fingerprints should be carefully wiped from the surface of disc with a soft cloth. Unlike conventional records, compact discs have no grooves to collect dust and macroscopic dirt, so gently wiping them with a soft cloth should remove must panicles.
Wipe in a straight motion from the center to the edge.
Never use thinner benzine, record cleaner or anti static spray on a compact disc.
Such chemicals can damage its plastic surface.

Troubleshooting Guide

| Problem | Cause/Solution |
| No power | Check and make sure whether the fuse is blown, replace with the proper value if necessary. |
| Some errors occur in the LCD or no function when pressing the button | Press RESET button. |
| Unable to receive stations | Check and make sure whether the antenna is inserted or the antenna is properly connected, if so, insert the antenna or connect it properly. |
| Poor effect on receiving a station | Antenna may not be of the proper length. Check if the antenna is fully extended or broken; if broken, replace the antenna with a new one. |
| CDs cannot be loaded | Another CD is loaded in the mechanism. |
| Sound skips | The CD is dirty or damaged |
| No images | The Video line from main unit to the TV is not connected properly. |
| Warning information is shown on the monitor at all times. | Correct the connection according to Electrical Connection Overall Diagram. |
| Images skip | Improper setting of the color system. Set the color system according to the connected television. |
| The touch function abate | Turn on the power again;Press RESET button. Touch the touching buttons after closing the front panel for 2 seconds. |
| Remote controller does not work | Change the battery or install it correctly. |
Note: If any of the problem persist after check list had been made, consult your nearest service dealer. Never attempt to disassemble your unit by yourself.
| General | |
| Power supply 12 V | |
| Max. power output 50 W x 5 | |
| Dimensions (d/w/h) | 162+18x178x100 mm |
| FM Section | |
| Frequency range 65.0 – 74.0 MHz/87.5 – 108 MHz | |
| Usable sensitivity 20 dBμV | |
| Preset memory stations 18 | |
| Frequency response 40 Hz – 14 kHz | |
| AM Section | |
| Frequency range 522 – 1620 KHz | |
| Preset memory stations 12 | |
| CD player section | |
| Playback | DVD/SVCD/DVCD/VCD/DivX/XviD/CDDA/MP3/WMA//HDCD/Picture-CD/JPEG/MPEG4 |
| File format support DVD/DVD±R/DVD±RW/CD/CD-R/CD-RW/USB/SD/MMC | |
| Frequency response 20 Hz – 20 KHz | |
| Signal-to-noise ratio 80 dB | |
| DSP sound effect ACOUSTIC/URBAN/RAVE/LATIN/DANCE/HIP HOP/ROCK/USER | |
| TFT Monitor | |
| Screen | 6.5 inches |
| Resolution 400 X 234 | |
| Brightness | 350 ^2 cd/m |
| Contrast | 300 |
V-AVM650D

| Line Out | |
| Output | 6 channel RCA line out (2V) + 2 channels line out rear (2V) |
| Environment | |
| Operating temperature -20 | ^ - +70 ^ |
Due to continuous product improvement, specifications and design are subject to change without prior notice.

АИ49
V-AVM650D

natural_image
Simple line drawing of a container with an open lid and a small rectangular opening, no text or symbols present.Установка батарейки


- Contents
- V-AVM650D
- Important safeguards
- Accessories and Hardware
- Installation
- Control cables connections
- Installation Method A
- Installation Method B
- Front panel
- Inner panel
- Remote control
- FRL
- Notes of remote control using:
- Turn on/off the power
- Enter password
- Volume
- Mute
- Playing source selection
- Open/close the monitor
- Changing the monitor tilting angle
- Changing the display mode
- Picture setup
- Radio operations
- Select radio mode
- Select band
- Search for a station automatically
- Search for a station manually
- Presetting stations automatically
- Presetting stations manually
- Recall the preset stations
- Preview scan
- Local radio station searching
- AF function
- TA function
- PTY function
- Program service (PS)
- CT (Clock time)
- RT (Radio Text)
- TP (Traffic Program Flag)
- Insert a disc
- Eject the disc
- Using the touch screen controls
- Stop playback temporarily
- Stop playback entirely
- Display file list
- Fast forward/Fast reverse
- Slow forward/Slow reverse
- Play a next or previous file
- Repeat playback
- Repeat A-B
- Random playback
- Intro playback
- Search for a particular file
- GOTO search
- Using DVD menu/title
- Select audio channel
- Select subtitle language
- Select multi-angle views
- PBC function
- Zoom in/out
- Rotate picture
- Select picture slide mode
- Playback information display
- Select SD/USB mode
- Onscreen control buttons
- Play the next or previous file
- Bluetooth operations
- Select Bluetooth mode
- Work modes of built-in bluetooth
- Phone mode
- Stereo mode
- Pairing
- Phone pairing
- Stereo pairing
- Connection
- Phone connection
- Stereo connection
- Answer one call
- Dialing
- Dialing through mobile phone
- Dialing through the remote control
- Dialing through the touch screen
- Dialing through telephone directory or call records
- Hangup
- Voice transfer
- Microphone mute
- Browse call numbers
- Stereo playback
- Select TV tuner mode
- Auto search
- Manual search
- Auto store
- Playing the previous/next available TV channel
- Play a particular TV channel
- AUX
- Camera
- NAVI
- PIP mode
- Rear zone mode
- Equalizer
- User Interface of setup menu
- General
- Language
- Audio
- Speaker
- Bluetooth
- RDS
- Rating
- Procedures of changing the rating:
- Note:
- Hardware
- - Camera
- - TFT Set Open
- - Auto Dimmer
- VOL
- - Source
- TS CAL
- Handling discs
- Cleaning the cabinet
- Cleaning discs
- Troubleshooting Guide
Brand : VARTA
Model : V-AVM650DN
Category : Car radio