
MS588 - Barcode scanners Unitech - Free user manual and instructions
Find the device manual for free MS588 Unitech in PDF.


| Product Type | Barcode Scanner |
| Brand | Unitech |
| Model | MS588 |
| Scan Engine | Linear Imager |
| Scan Rate | 100 scans per second |
| Supported Interfaces | USB, RS232, Keyboard Wedge |
| Readable Symbologies | 1D codes: UPC, EAN, Code 39, Code 128, Interleaved 2 of 5, etc. |
| Read Distance | 0 to 20 inches (typical) |
| Weight | 150 g |
| Dimensions (W x D x H) | 16.5 x 6.5 x 9.5 cm |
| Power Source | USB bus power or external power adapter (5V DC) |
| Operating Temperature | 0°C to 50°C |
| Storage Temperature | -20°C to 70°C |
| Humidity | 5% to 95% non-condensing |
| Drop Resistance | 1.5 m to concrete |
| Protection Rating | IP42 |
| Cable Length | 2 m |
| Color | Black |
| Certifications | CE, FCC |
| Maintenance | Clean lens with a soft, dry cloth |
| Replacement Parts | Cable, scanner assembly (available from Unitech) |
| Repairability | Service by authorized Unitech repair centers |
Frequently Asked Questions - MS588 Unitech
User questions about MS588 Unitech
0 question about this device. Answer the ones you know or ask your own.
Ask a new question about this device
Download the instructions for your Barcode scanners in PDF format for free! Find your manual MS588 - Unitech and take your electronic device back in hand. On this page are published all the documents necessary for the use of your device. MS588 by Unitech.
USER MANUAL MS588 Unitech
natural_image
Exterior view of a white and black unit cell device labeled 'unitech' with a yellow central button (no additional text or symbols visible)User's Manual
Version 1.0
Preface
About This Manual
This manual explains how to install, operate and maintain the MS588 2D scanners.
No part of this publication may be reproduced or used in any form, or by any electrical or mechanical means, such as photocopying, recording, or information storage and retrieval systems, without permission in writing from the manufacturer. The material in this manual is subject to change without notice.
© Copyright 2013 Unitech Electronics Co., Ltd. All rights reserved.
Unitech global website address: http://www.ute.com
Regulatory Compliance Statements
FCC Warning Statement
This equipment has been tested and found to comply with the limits for a Class B digital device, pursuant to part 15 of the FCC rules. These limits are designed to provide reasonable protection against harmful interference in a residential installation. This equipment generates, uses and can radiate radio frequency energy and, if not installed and used in accordance with the instructions, may cause harmful interference with radio communications. However, there is no guarantee that interference will not occur in a particular installation. If this equipment does cause harmful interference with radio or television reception, which can be determined by turning the equipment off and on, the user is encouraged to try to correct the interference by one or more of the following measures:
— Reorient or relocate the receiving antenna.
— Increase the separation between the equipment and receiver.
— Connect the equipment into an outlet on a circuit different from that to which the receiver is connected.
— Consult the dealer or an experienced radio/TV technician for help.
-
This Transmitter must not be co-located or operating in conjunction with any other antenna or transmitter.
-
This equipment complies with FCC RF radiation exposure limits set forth for an uncontrolled environment. To maintain compliance with FCC RF exposure requirements, avoid direct contact to the transmitting antenna during transmitting.
-
Any changes or modifications (including the antennas) made to this device that are not expressly approved by the manufacturer may void the user's authority to operate the equipment.
FCC Label Statement
This device complies with part 15 of the FCC rules. Operation is subject to the following two conditions:
- This device may not cause harmful interference, and
- This device must accept any interference received, including interference that may cause undesired operation.
RF Radiation Exposure Statement
For body contact during operation, this scanner has been tested and meets FCC RF exposure guidelines when used with an accessory that contains no metal and that positions the handset a minimum of 1.5 cm from the body. Use of other accessories may not ensure compliance with FCC RF exposure guidelines.
Canadian Compliance Statement
This Class B Digital apparatus meets all requirements of the Canadian Interference-Causing Equipment Regulations.
European Conformity Statement
Declaration of Conformity with regards to the R&TTE 1999/5/EC and EMC 89/336/ EEC directives.
RoHS Statement
unitech
Green Product

This device conforms to RoHS (Reduction Of Hazardous Substances) European Union regulations that set maximum concentration limits on hazardous materials used in electrical and electronic equipment.
Taiwan NCC Warning Statement
The following items covered under the Unitech Limited Warranty are free from defects during normal use:
z MS588 - 1-year limited warranty.
Warranty becomes void if equipment is modified, improperly installed or used, damaged by accident or neglect, or if any parts are improperly installed or replaced by the user.
Use only the adapter supplied. Using the wrong adapter may damage the unit and will void the warranty.
Table of Contents
Preface
About This Manual .... i
Regulatory Compliance Statements.... ii
FCC Warning Statement .... ii
FCC Label Statement.... ii RF
Radiation Exposure Statement.... ii
Canadian Compliance Statement.... ii
European Conformity Statement .... iii
RoHS Statement.... iii
Taiwan NCC Warning Statement.... iii
Warranty ....iii
Chapter 1
Introduction .... 1
Introducing the MS588.... 1
Report Version....1
Package Contents....2
USB Interface 3
Connecting a USB Interface.... 3
USB Host Parameters....4
USB Device Type 4
USB Transmission Speed Parameters 4
USB Country Keyboard Types - Country Codes 6
Simulated Caps Lock 7
USB CAPS Lock Override.... 8
ASCII Character Set for USB 8
RS-232 Interface....16
Connecting an RS232 Interface 16
RS-232 Host Types 17
Baud Rate....18
Parity 19
Stop Bit Select.... 19
Data Bits....19
Check Receive Errors.... 20
Hardware Handshaking.... 20
Software Handshaking 21
Host Serial Response Time-out.... 23
RTS Line State 23
Beep on
Intercharacter Delay.... 24
ASCII Character Set for Serial Hosts 25
Chapter 2
Output Data Editing....29
Transmit Code ID Character.... 29
Prefix/Suffix Values 29
Scan Data Transmission Format.... 30
FN1 Substitution Values....31
Chapter 3
Bar code Setup Menu....33
User Preferences ....33
Set Default Parameter.... 33
Parameter Scanning 33
Beeper Volume 33
Suppress Power-up Beeps.... 34
Beeper Duration 34
Trigger Modes 34
Low Power Mode 35
Time Delay to Low Power Mode 35
Video Mode 36
Image File Format Selector 36
Video View Finder 37
Mirrored Image.... 37
Beep After Good Decode 37
Chapter 4
Bar code Symbologies....39
Introduction.... 39
Symbol Code Identifiers.... 40
UPC-A 41
Enable/Disable UPC-A.... 41
Transmit UPC-A CheckDigit 41
UPC-A Preamble.... 41
UPC-E 42
Enable/Disable UPC-E 42
Transmit UPC-E Check Digit 42
UPC-E Preamble.... 42
Code 39....43
Enable/Disable Code 39 43
Code 39 Check Digit Verification.... 43
Transmit Code 39 CheckDigit.... 43
Code 39 Full ASCII Conversion.... 44
Set Lengths for Code 39....44
Code 93....45
Set Lengths for Code 93.... 45
Code 11 46
Enable/Disable Code 11.... 46
Set Lengths for Code 11 46
UPC-E1 47
Decode UPC/EAN/JAN Supplementals 49
EAN-8/JAN-8....50
Enable/Disable EAN-8/JAN-8 50
Code 128....50
Enable/Disable Code 128 50
Set Lengths for Code 128....50
GS1-128 (formerly UCC/EAN-128) 51
Enable/Disable GS1-128.... 51
ISBT 128 ....52
Enable/Disable ISBT 128....52
Convert UPC-E to UPC-A 52
Convert UPC-E to UPC-A (Enable/Disable) 52
Convert UPC-E1 to UPC-A 52
Convert UPC-E1 to UPC-A (Enable/Disable) 52
Convert Code 39 to Code 32....53
Convert Code 39 to Code 32 (Enable/Disable) 53
Convert I 2 of 5 to EAN-13....53
Convert 12 of 5 to EAN-13 (Enable/Disable).... 53
Trioptic Code 39....53
Enable/Disable Trioptic Code39 53
Discrete 2 of 5....54
Enable/Disable Discrete 2 of 5.... 54
Set Lengths for Discrete 2 of 5.... 54
Interleaved 2 of 5 55
Enable/Disable Interleaved 2 of 5.... 55
Set Lengths for Interleaved 2 of 5.... 55
Codabar 56
Enable/Disable Codabar 56
Set Lengths for Codabar 56
MSI 57
Enable/Disable MSI....57
Set Lengths for MSI 57
Matrix 2 of 5....59
Enable/Disable Matrix 2 of 5.... 59
Set Lengths for Matrix 2 of 5.... 59
Inverse 1D 60
Postal Code Symbologies 60
US Postnet 60
UK Postal 61
Japan Postal 61
GS1 (Globe Standard 1) DataBar.... 61
GS1 DataBar Limited 61
GS1 DataBar Limited Security Level 61
GS1 DataBar Expanded....62
Netherlands KIX Code 62
Australia Post.... 63
Composite Symbologies 63
Composite CC-C 63
Composite CC-A/B....63
Composite TLC-39....63
2D Symbologies.... 64
PDF417 64
MicroPDF417 64
Code 128 Emulation.... 64
Data Matrix....64
Data Matrix Inverse 65
Decode Mirror Images (Data Matrix Only).... 65
Maxicode....66
QR Code 66
QR Inverse....66
MicroQR 67
Aztec 67
Aztec Inverse 67
Redundancy Level 67
Security Level....69
Intercharacter Gap Size 69
Macro PDF Features.... 70
Macro PDF Transmit / Decode Mode Symbols.... 70
Transmit Macro PDF ControlHeader 71
Escape Characters.... 72
Flush Macro Buffer 72
Abort Macro PDF Entry 72
Appendix A
Sample Bar codes 73
2D Bar codes....73
Data Matrix....73
Maxicode....73
QR Code 73
PDF417 73
MicroPDF417 73
US Postnet 74
UK Postal 74
1D Bar codes....74
EAN-13 74
EAN-8 74
UPC-A....74
UPC-E 74
Interleave 2 of 5....74
Code 39 75
Code 128 75
EAN 128....75
Codabar 75
MSI....75
GS1 Limited 75
Appendix B
Numeric Bar codes....77
Appendix C
ASCII Character Sets 79
Appendix D
Worldwide Support 89
Chapter 1
Introduction
Introducing the MS588
Your new scanner has been configured at the factory with default settings.
Since many host systems have unique formats and protocol requirements, Unitech provides a wide range of configurable features that may be selected using this bar code based configuration tool. Once the configuration is completed, the scanner stores the settings in nonvolatile memory (NOVRAM). NOVRAM saves the settings when the power is turned off.
Turn off the computer's power before connecting the scanner, and then power up the computer once the scanner is fully connected.
You can change a parameter value in the way described below:
— Scan the appropriate bar codes in this guide. These new values replace the standard default values in memory.
NOTE: Most computer monitors allow scanning the bar codes directly on the screen. When scanning from the screen, be sure to set the document magnification to a level where you can see the bar code clearly, and bars and/or spaces are not merging.
Select a host type (see each host chapter for specific host information) after the power-up beep signal activates. This is only necessary upon the first power-up when connected to a new host.
To return all features to default values, scan the Set Default bar code in Chapter 3. Throughout the programming bar code menus, asterisks (*) indicate default values.

Report Version
Scan the bar code below to report the version of software currently installed in the decoder.
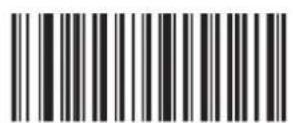
Report Software Version
Package Contents
Please make sure the following contents are in the MS588 package box. If something is missing or damaged, please contact your Unitech representative.
Scanner package
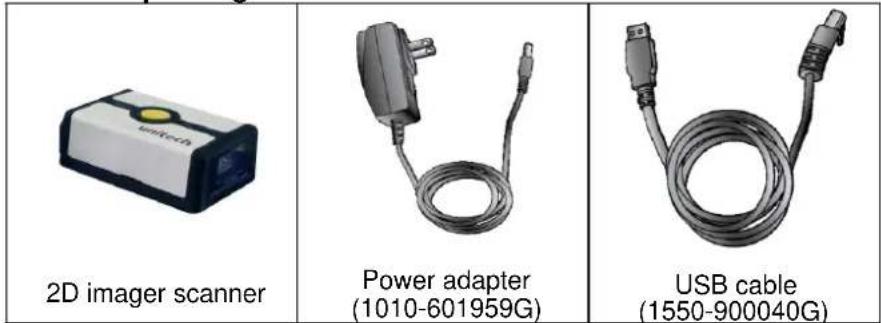
Note:
-
The items included in the package may be different, depending on your order. Save the box and packaging material for future use in case you need to store or ship the scanner.
-
When you receive and unpack the package at first time, if any item above is lost, please contact the dealer you bought from, immediately.
[Scanner Body Aspect]
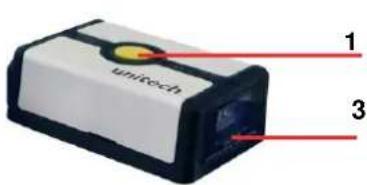
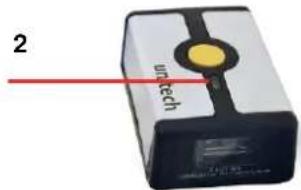
| 1 | Trigger | 2 | LED indicator |
| 3 | Laser Exit Window | 4 |
USB Interface
This chapter describes how to set up the digital scanner with a USB host. The digital scanner connects directly to a USB host, or a powered USB hub, which powers it. No additional power supply is required.
Note: Most computer monitors allow scanning the bar codes directly on the screen. When scanning from the screen, be sure to set the document magnification to a level where you can see the bar code clearly, and bars and/or spaces are not merging.
Connecting a USB Interface
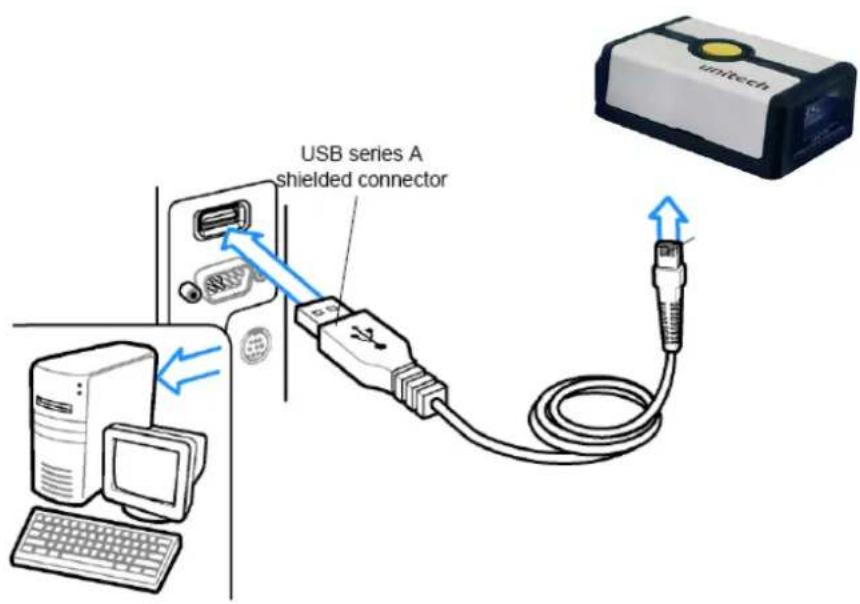
The digital scanner also interfaces with other USB hosts which support USB Human Interface Devices (HID).
Note: Interface cables vary depending on configuration. The connectors illustrated above are examples only. The connectors may be different than those illustrated, but the steps to connect the digital scanner are the same.
-
Connect the modular connector of the USB interface cable to the cable interface port on the digital scanner.
-
Plug the series A connector in the USB host or hub, or plug the Plus Power connector in an available port of the IBM SurePOS terminal.
-
Select the USB device type by scanning the appropriate bar code from USB Device Type.
-
On first installation when using Windows, the software prompts to select or install the Human Interface Device driver. To install this driver, provided by Windows, click Next through all the choices and click Finished on the last choice. The digital scanner powers up during this installation.
-
To modify any other parameter options, scan the appropriate bar codes in this chapter.
USB Host Parameters
USB Device Type
Select the desired USB device type.
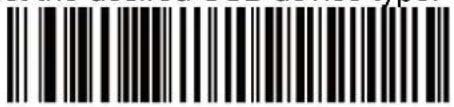
HID Keyboard Emulation
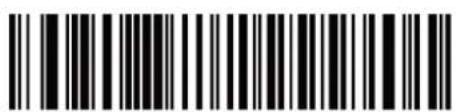
USB Virtual COM
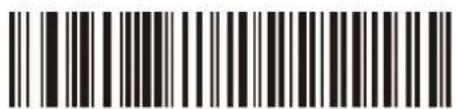
USB OPOS Hand-Held
USB Transmission Speed Parameters
Use the following parameters to speed USB data transmission:
z USB Polling Interval - When using more current USB systems, use this parameter to set a lower interval in order to increase data transmission speed.
z Quick Keypad Emulation - When configured as a USB HID keyboard device, use this parameter to increase the data transmission speed of a mix of both printable (7-bit) and full (8-bit) ASCII characters.
USB Polling Interval
This option speeds data transmission for all USB devices except CDC. Scan a bar code below to set the polling interval. The polling interval determines the rate at which data can be sent between the scanner and the host computer. A lower number indicates a faster data rate. The default value is 8 msec.
Changing the polling interval re-initializes the scanner.

CAUTION
Ensure your host machine can handle the selected data rate. Selecting a data rate that is too fast for the host can result in lost data.
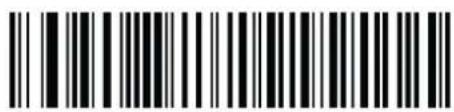
1 msec
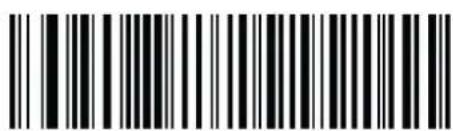
2 msec
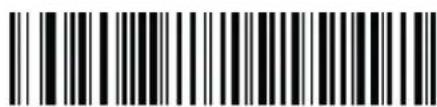
3msec
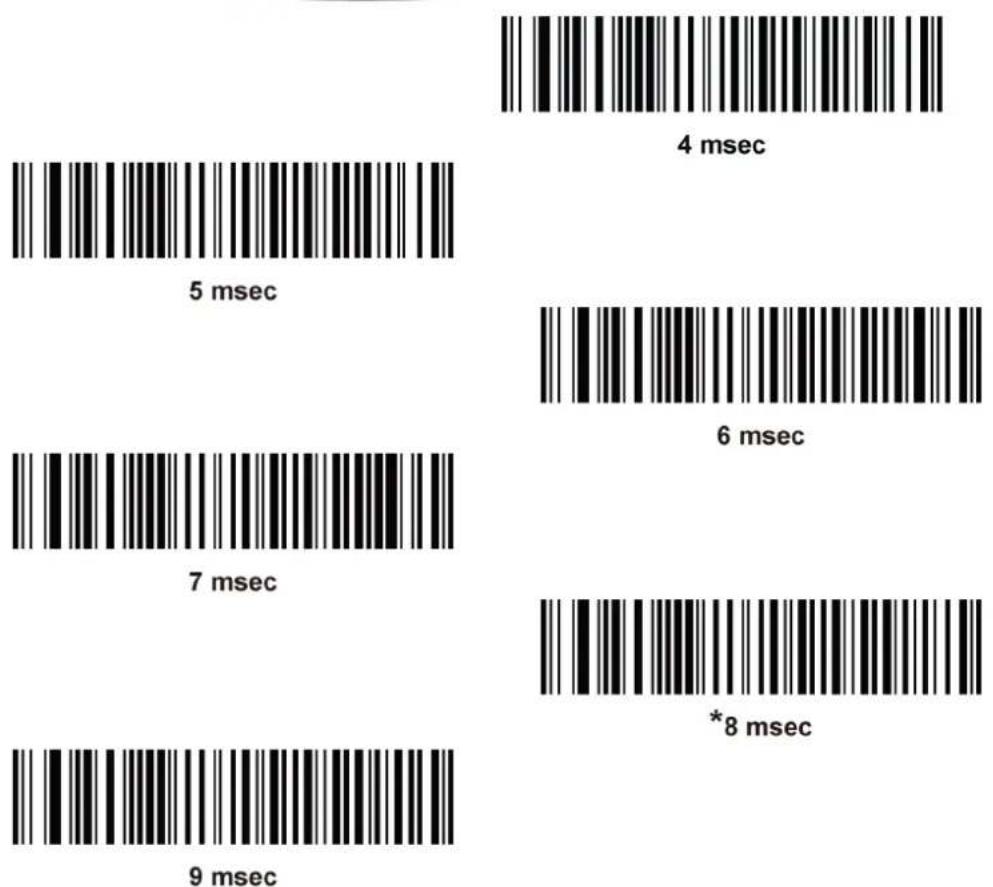
Quick Keypad Emulation
This option applies only to the HID Keyboard Emulation Device and if Emulate Keypad below is enabled. This parameter enables a quicker method of keypad emulation where ASCII sequences are only sent for ASCII characters not found on the keyboard. The default value is Disable.
This option applies only to the HID keyboard emulation device when Emulate Keypad is enabled. This parameter enables a quicker method of emulation utilizing the numeric keypad. The default value is Disable.
NOTE: This feature is not compatible with Fast HID Keyboard mode.
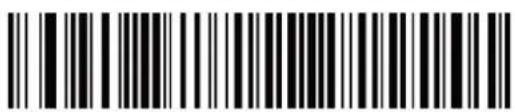
Enable
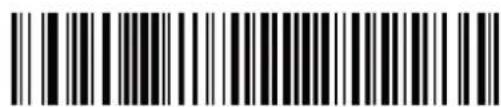
*Disable
Emulate Keypad
Enable this to send all characters as ASCII sequences over the numeric keypad. For example ASCII A transmits as "ALT make" 0 6 5 "ALT Break".
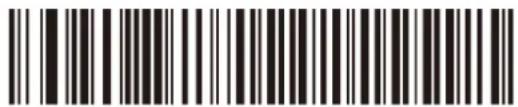
*Disable Keypad Emulation
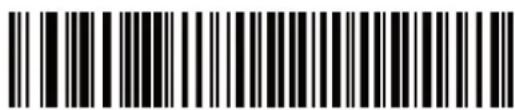
Enable Keypad Emulation
Emulate Keypad with Leading Zero
Enable this to send character sequences sent over the numeric keypad as ISO characters which have a leading zero. For example ASCII A transmits as "ALT MAKE" 0 0 6 5 "ALT BREAK".
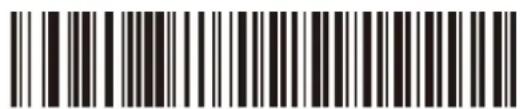
*Disable Keypad Emulation with Leading Zero
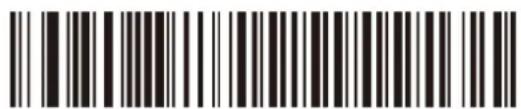
Enable Keypad Emulation with Leading Zero
USB Country Keyboard Types - Country Codes
Scan the bar code corresponding to the keyboard type. This setting applies only to the USB HID Keyboard Emulation device.
Note: When changing USB country keyboard types the decoder automatically resets and issues the standard startup beep sequences.
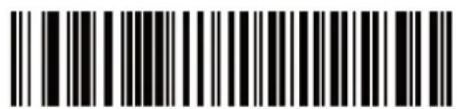
* North American Standard USB Keyboard
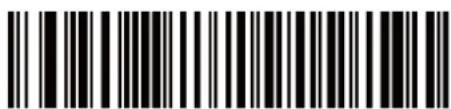
German Windows
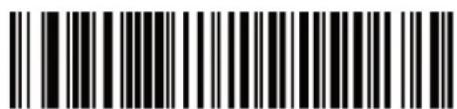
French Windows
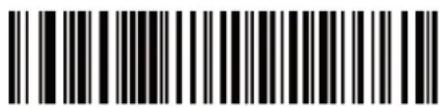
French Canadian Windows 95/98
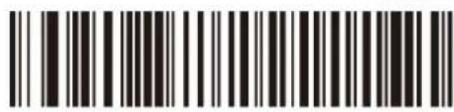
French Canadian Windows 2000/XP
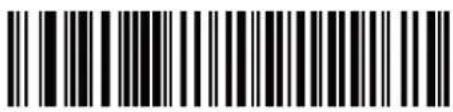
French Belgian Windows
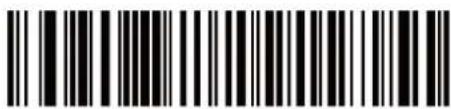
Spanish Windows
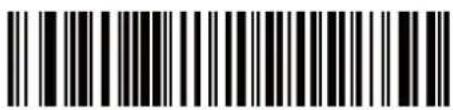
Italian Windows
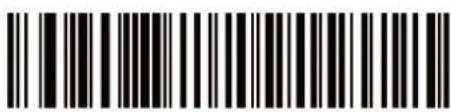
Swedish Windows
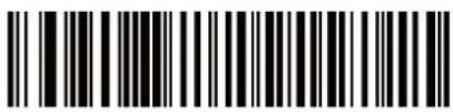
UK English Windows
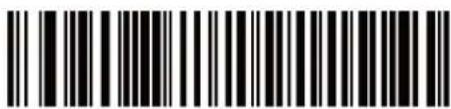
Japanese Windows (ASCII)
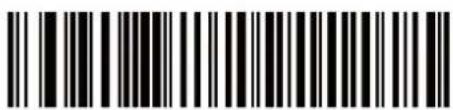
Portuguese-Brazilian Windows
Simulated Caps Lock
Enable this to invert upper and lower case characters on the bar code as if the Caps Lock state is enabled on the keyboard. This inversion occurs regardless of the keyboard's Caps Lock state. Note that this only applies to alpha characters.
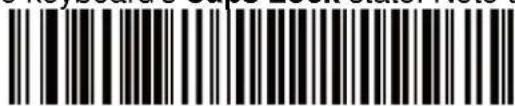
*Disable Simulated Caps Lock
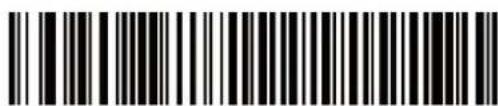
Enable Simulated Caps Lock
USB CAPS Lock Override
This option applies only to the HID Keyboard Emulation device. Enable this to preserve the case of the data regardless of the state of the Caps Lock key. This setting is always enabled for the Japanese, Windows (ASCII) keyboard type and cannot be disabled.
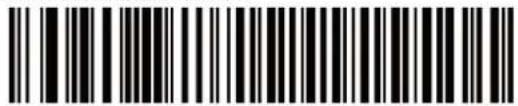
Override Caps Lock Key (Enable)
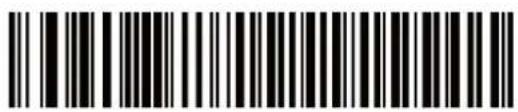
*Do Not Override Caps Lock Key (Disable)
Note: If both Simulated Caps Lock and Caps Lock Override are enabled, Caps Lock Override takes precedence.
ASCII values under 32 are normally sent as a control-key sequences. Enable this parameter to send the keys in bold in place of the standard key mapping. Table entries that do not have a bold entry remain the same whether or not you enable this parameter.
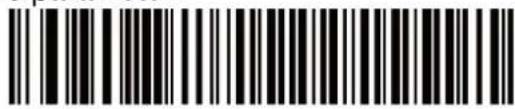
*Disable Function Key Mapping
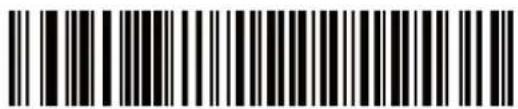
Enable Function Key Mapping
ASCII Character Set for USB
USB Prefix/Suffix Values
| Prefix/ Suffix Value | Full ASCII Code 39 Encode Character | Keystroke |
| 1000 | %U | CTRL 2 |
| 1001 | A | CTRL A |
| 1002 | B | CTRL B |
| 1003 | C | CTRL C |
| 1004 | D | CTRL D |
| 1005 | E | CTRL E |
| 1006 | F | CTRL F |
| 1007 | G | CTRL G |
| 1008 | H | CTRL H/BACKSPACE ^1 |
| Prefix/ Suffix Value | Full ASCII Code 39 Encode Char.acter | Keystroke |
| 1009 | I | CTRL I/HORIZONTAL TAB^{1} |
| 1010 | J | CTRL J |
| 1011 | K | CTRL K |
| 1012 | L | CTRL L |
| 1013 | M | CTRL M/ENTER^{1} |
| 1014 | N | CTRL N |
| 1015 | O | CTRL O |
| 1016 | P | CTRL P |
| 1017 | Q | CTRL Q |
| 1018 | R | CTRL R |
| 1019 | S | CTRL S |
| 1020 | T | CTRL T |
| 1021 | U | CTRL U |
| 1022 | V | CTRL V |
| 1023 | W | CTRL W |
| 1024 | X | CTRL X |
| 1025 | Y | CTRL Y |
| 1026 | Z | CTRL Z |
| 1027 | %A | CTRL [/ESC ^1 |
| 1028 | %B | CTRL \ |
| 1029 | %C | CTRL ] |
| 1030 | %D | CTRL 6 |
| 1031 | %E | CTRL - |
| 1032 | Space | Space |
| 1033 | /A | ! |
| 1034 | /B | “ |
| 1035 | /C | # |
| 1036 | /D | $ |
| 1037 | /E | % |
| 1038 | /F | & |
| 1039 | /G | ‘ |
| 1040 | /H | ( |
| 1041 | /I | ) |
| 1042 | /J | * |
| 1043 | /K | + |
| 1044 | /L | , |
| 1045 | - | - |
| 1046 | . | . |
| 1047 | /O | / |
| 1048 | 0 | 0 |
| 1049 | 1 | 1 |
| 1050 | 2 | 2 |
| 1051 | 3 | 3 |
| 1052 | 4 | 4 |
| 1053 | 5 | 5 |
| 1054 | 6 | 6 |
| 1055 | 7 | 7 |
| 1056 | 8 | 8 |
| 1057 | 9 | 9 |
| 1058 | /Z | : |
| 1059 | %F | ; |
| 1060 | %G | < |
| 1061 | %H | = |
| 1062 | %I | > |
| 1063 | %J | ? |
| 1064 | %V | @ |
| 1065 | A | A |
| 1066 | B | B |
| 1067 | C | C |
| 1068 | D | D |
| 1069 | E | E |
| 1070 | F | F |
| 1071 | G | G |
| 1072 | H | H |
| 1073 | I | I |
| 1074 | J | J |
| 1075 | K | K |
| 1076 | L | L |
| 1077 | M | M |
| 1078 | N | N |
| 1079 | O | O |
| 1080 | P | P |
| 1081 | Q | Q |
| 1082 | R | R |
| 1083 | S | S |
| 1084 | T | T |
| 1085 | U | U |
| 1086 | V | V |
| 1087 | W | W |
| 1088 | X | X |
| 1089 | Y | Y |
| 1090 | Z | Z |
| 1091 | %K | [ |
| 1092 | %L | \ |
| 1093 | %M | ] |
| 1094 | %N | ^ |
| 1095 | %O | - |
| 1096 | %W | ` |
| 1097 | +A | a |
| 1098 | +B | b |
| 1099 | +C | c |
| 1100 | +D | d |
| 1101 | +E | e |
| 1102 | +F | f |
| 1103 | +G | g |
| 1104 | +H | h |
| 1105 | +I | i |
| 1106 | +J | j |
| 1107 | +K | k |
| 1108 | +L | l |
| 1109 | +M | m |
| 1110 | +N | n |
| 1111 | +O | o |
| 1112 | +P | p |
| 1113 | +Q | q |
| Prefix/ Suffix Value | Full ASCII Code 39 Encode Character | Keystroke |
| 1114 | +R | r |
| 1115 | +S | s |
| 1116 | +T | t |
| 1117 | +U | u |
| 1118 | +V | v |
| 1119 | +W | w |
| 1120 | +X | x |
| 1121 | +Y | y |
| 1122 | +Z | z |
| 1123 | %P | { |
| 1124 | %Q | | |
| 1125 | %R | } |
| 1126 | %S | ~ |
^1 The keystroke in bold transmits only if you enable Function Key Mapping. Otherwise, the unbolded keystroke transmits.
USB ALT Key Character Set
| ALT Keys | Keystroke |
| 2064 | ALT 2 |
| 2065 | ALT A |
| 2066 | ALT B |
| 2067 | ALT C |
| 2068 | ALT D |
| 2069 | ALT E |
| 2070 | ALT F |
| 2071 | ALT G |
| 2072 | ALT H |
| 2073 | ALT I |
| 2074 | ALT J |
| 2075 | ALT K |
| 2076 | ALT L |
| 2077 | ALT M |
| 2078 | ALT N |
| 2079 | ALT O |
| 2080 | ALT P |
| 2081 | ALT Q |
| 2082 | ALT R |
| 2083 | ALT S |
| 2084 | ALT T |
| 2085 | ALT U |
| 2086 | ALT V |
| 2087 | ALT W |
| 2088 | ALT X |
| 2089 | ALT Y |
| 2090 | ALT Z |
USB GUI Key Character Set
| GUI Key | Keystroke |
| 3000 | Right Control Key |
| 3048 | GUI 0 |
| 3049 | GUI 1 |
| 3050 | GUI 2 |
| 3051 | GUI 3 |
| 3052 | GUI 4 |
| 3053 | GUI 5 |
| 3054 | GUI 6 |
| 3055 | GUI 7 |
| 3056 | GUI 8 |
| 3057 | GUI 9 |
| 3065 | GUI A |
| 3066 | GUI B |
| 3067 | GUI C |
| 3068 | GUI D |
| 3069 | GUI E |
| 3070 | GUI F |
| 3071 | GUI G |
| 3072 | GUI H |
| 3073 | GUI I |
| 3074 | GUI J |
| 3075 | GUI K |
| 3076 | GUI L |
| 3077 | GUI M |
| 3078 | GUI N |
| 3079 | GUI O |
| 3080 | GUI P |
| 3081 | GUI Q |
| 3082 | GUI R |
| 3083 | GUI S |
| 3084 | GUI T |
| 3085 | GUI U |
| 3086 | GUI V |
| 3087 | GUI W |
| 3088 | GUI X |
| 3089 | GUI Y |
| 3090 | GUI Z |
Note: GUI Shift Keys - The Apple™ iMac keyboard has an apple key on either side of the space bar.
Windows-based systems have a GUI key to the left of the left ALT key, and to the right of the right ALT key.
USB F Key Character Set
| F Keys | Keystroke |
| 5001 | F1 |
| 5002 | F2 |
| 5003 | F3 |
| 5004 | F4 |
| 5005 | F5 |
| 5006 | F6 |
| 5007 | F7 |
| 5008 | F8 |
| 5009 | F9 |
| 5010 | F10 |
| 5011 | F11 |
| 5012 | F12 |
| 5013 | F13 |
| 5014 | F14 |
| 5015 | F15 |
| 5016 | F16 |
| 5017 | F17 |
| 5018 | F18 |
| 5019 | F19 |
| 5020 | F20 |
| 5021 | F21 |
| 5022 | F22 |
| 5023 | F23 |
| 5024 | F24 |
USB Numeric Keypad Character Set
| Numeric Keypad | Keystroke |
| 6042 | * |
| 6043 | + |
| 6044 | undefined |
| 6045 | - |
| 6046 | . |
| 6047 | / |
| 6048 | 0 |
| 6049 | 1 |
| 6050 | 2 |
| 6051 | 3 |
| 6052 | 4 |
| 6053 | 5 |
| 6054 | 6 |
| 6055 | 7 |
| 6056 | 8 |
| 6057 | 9 |
| 6058 | Enter |
| 6059 | Num Lock |
USB Extended Keypad Character Set
| Extended Keypad | Keystroke |
| 7001 | Break |
| 7002 | Delete |
| 7003 | PgUp |
| 7004 | End |
| 7005 | Pg Dn |
| 7006 | Pause |
| 7007 | Scroll Lock |
| 7008 | Backspace |
| 7009 | Tab |
| 7010 | Print Screen |
| 7011 | Insert |
| 7012 | Home |
| 7013 | Enter |
| 7014 | Escape |
| 7015 | Up Arrow |
| 7016 | Down Arrow |
| 7017 | Left Arrow |
| 7018 | Right Arrow |
RS-232 Interface
This chapter describes how to set up the digital scanner with an RS-232 host. Use the RS-232 interface to connect the digital scanner to point-of-sale devices, host computers, or other devices with an available RS-232 port (e.g., com port).
Connecting an RS232 Interface
Connect the digital scanner directly to the host computer.
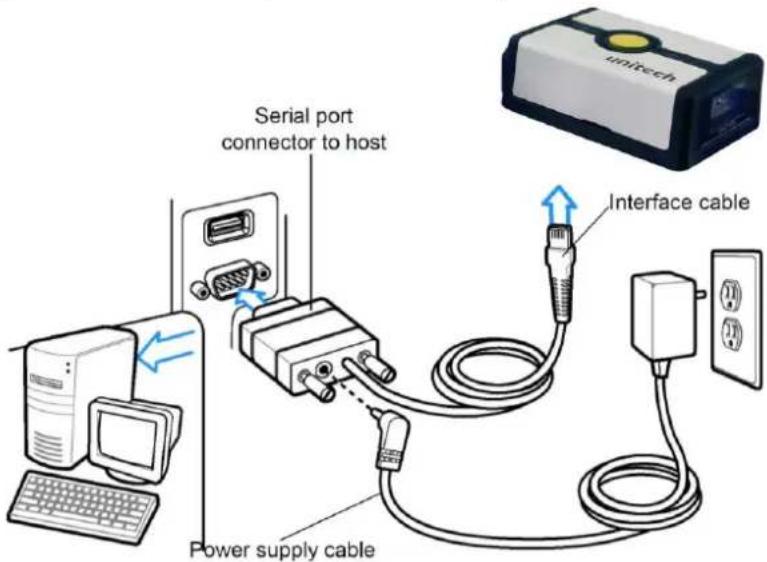
Note: Interface cables vary depending on configuration. The connectors illustrated in above are examples only. The connectors may be different than those illustrated, but the steps to connect the digital scanner are the same.
- Attach the modular connector of the RS-232 interface cable to the cable interface port on the digital scanner.
- Connect the other end of the RS-232 interface cable to the serial port on the host.
-
Connect the power supply to the serial connector end of the RS-232 interface cable. Plug the power supply into an appropriate outlet.
-
Select the RS-232 host type by scanning the appropriate bar code from RS-232 Host Types.
- To modify any other parameter options, scan the appropriate bar codes in this chapter.
RS-232 Host Types
To select an RS-232 host interface, scan one of the following bar codes.
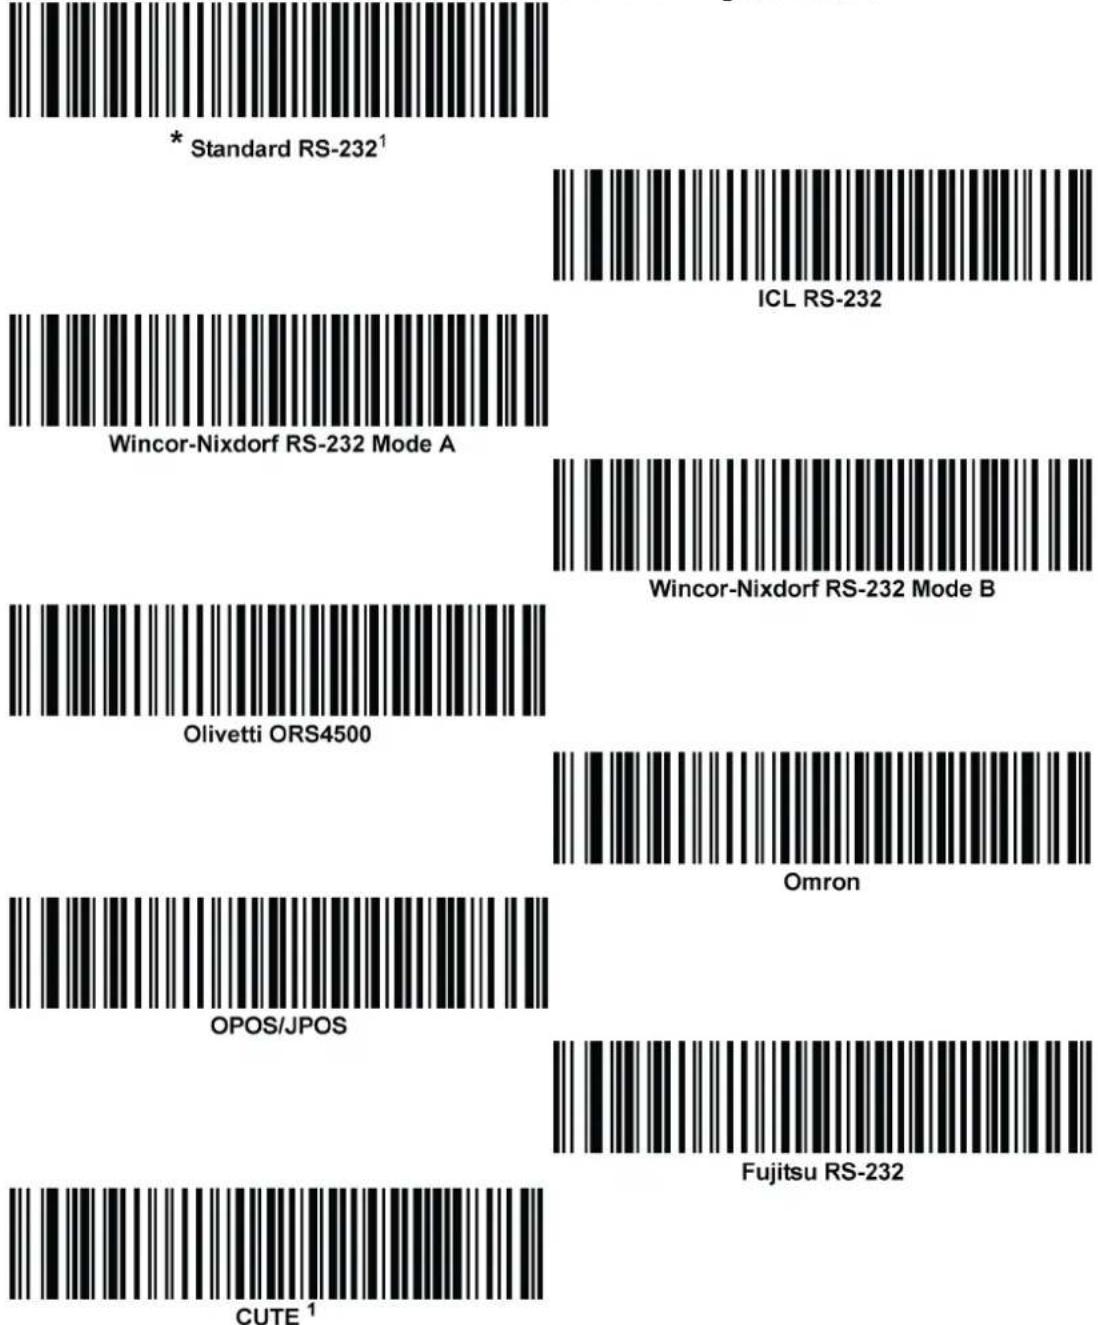
^1 Scanning Standard RS-232 activates the RS-232 driver, but does not change port settings (e.g., parity, data bits, handshaking). Selecting another RS-232 host type bar code changes these settings. The CUTE host disables all parameter scanning, including Set Defaults. If you inadvertently select CUTE, scan *Enable Parameter Bar code Scanning, and then change the host selection.
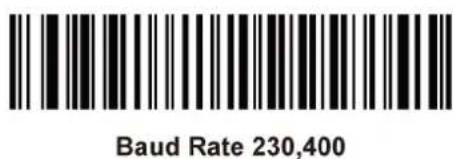
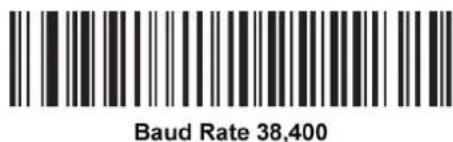
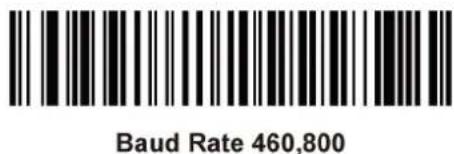
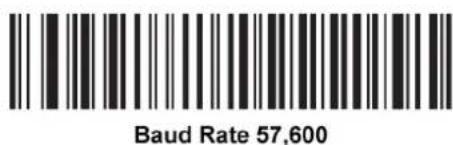
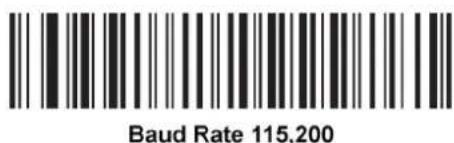
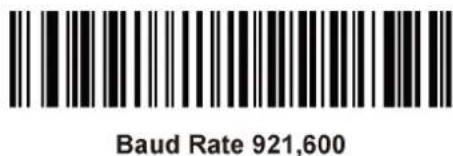
Baud Rate
Baud rate is the number of bits of data transmitted per second. Set the digital scanner's baud rate to match the baud rate setting of the host device. Otherwise, data may not reach the host device or may reach it in distorted form.
Note: The digital scanner does not support baud rates below 9600.
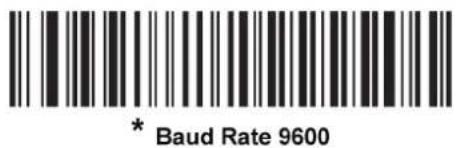
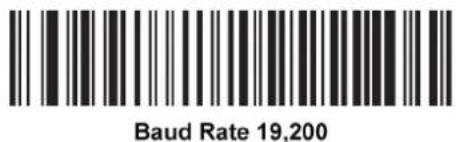
Parity
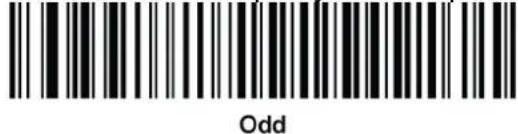
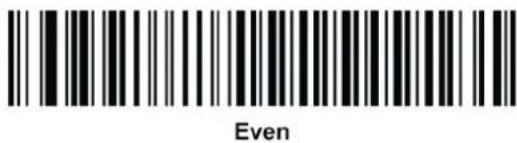
A parity check bit is the most significant bit of each ASCII coded character. Select the parity type according to host device requirements.
z Select Odd parity to set the parity bit value to 0 or 1, based on data, to ensure that the coded character contains an odd number of 1 bits.
z Select Even parity to set the parity bit value is set to 0 or 1, based on data, to ensure that the coded character contains an even number of 1 bits.
z Select None when no parity bit is required.
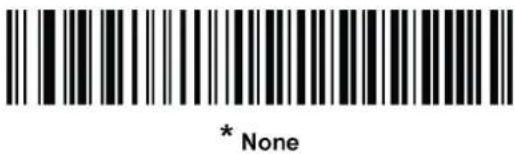
Stop Bit Select
The stop bit(s) at the end of each transmitted character marks the end of transmission of one character and prepares the receiving device for the next character in the serial data stream. Select the number of stop bits (one or two) based on the number the receiving terminal is programmed to accommodate. Set the number of stop bits to match host device requirements.
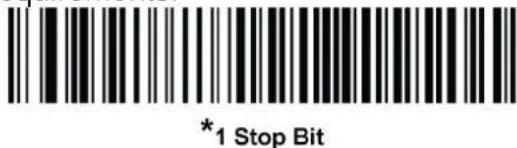
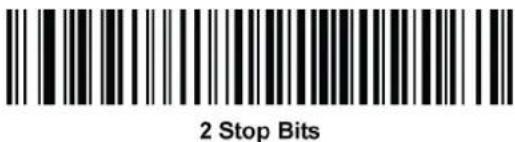
Data Bits
This parameter allows the digital scanner to interface with devices requiring a 7-bit or 8-bit ASCII protocol.
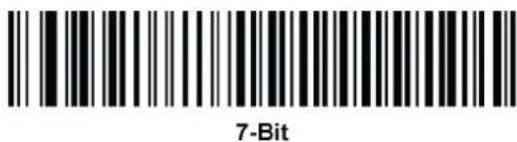
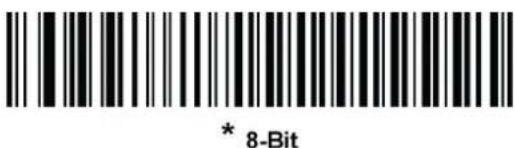
Check Receive Errors
Select whether or not to check the parity, framing, and overrun of received characters. The parity value of received characters is verified against the parity parameter selected above.
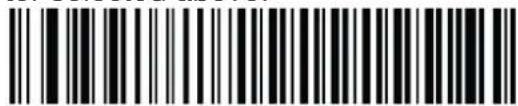
* Check For Received Errors
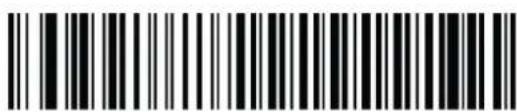
Do Not Check For Received Errors
Hardware Handshaking
The data interface consists of an RS-232 port designed to operate either with or without the hardware handshaking lines, Request to Send (RTS), and Clear to Send (CTS).
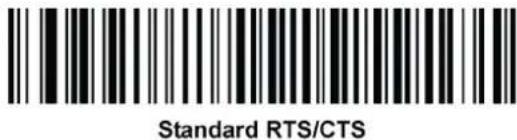
Disable Standard RTS/CTS handshaking to transmit scan data as it becomes available. Select Standard RTS/CTS handshaking to transmit scan data according to the following sequence:
z The digital scanner reads the CTS line for activity. If CTS is asserted, the scanner waits up to Host Serial Response Time-out for the host to de-assert the CTS line. If, after Host Serial Response Time-out (default), the CTS line is still asserted, the scanner sounds a transmit error, and discards any scanned data.
When the CTS line is de-asserted, the digital scanner asserts the RTS line and waits up to Host Serial Response Time-out for the host to assert CTS. When the host asserts CTS, the scanner transmits data. If, after Host Serial Response Time-out (default), the CTS line is not asserted, the scanner sounds a transmit error, and discards the data.
z When data transmission completes, the digital scanner de-asserts RTS 10 msec after sending the last character.
z The host should respond by negating CTS. The digital scanner checks for a de-asserted CTS upon the next transmission of data.
During the transmission of data, the CTS line should be asserted. If CTS is deasserted for more than 50 ms between characters, the digital scanner aborts transmission, sounds a transmission error, and discards the data.
If this communication sequence fails, the digital scanner issues an error indication. In this case, the data is lost and must be rescanned.
If hardware handshaking and software handshaking are both enabled, hardware handshaking takes precedence.
Note: The DTR signal is jumpered to the active state.
z None: Scan this bar code to disable hardware handshaking.
z Standard RTS/CTS: Scan this bar code to select Standard RTS/CTS Hardware Handshaking.
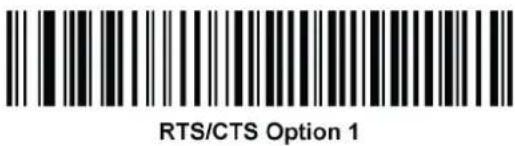
z RTS/CTS Option 1: If you select RTS/CTS Option 1, the digital scanner asserts RTS before transmitting and ignores the state of CTS. The scanner de-asserts RTS when the transmission completes.
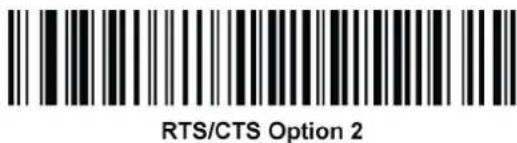
z RTS/CTS Option 2: If you select Option 2, RTS is always high or low (user-programmed logic level). However, the digital scanner waits for CTS to be asserted before transmitting data. If CTS is not asserted within Host Serial Response Time-out (default), the scanner issues an error indication and discards the data.
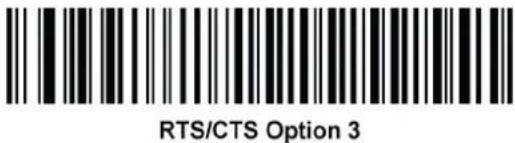
z RTS/CTS Option 3: If you select Option 3, the digital scanner asserts RTS prior to any data transmission, regardless of the state of CTS. The scanner waits up to Host Serial Response Time-out (default) for CTS to be asserted. If CTS is not asserted during this time, the scanner issues an error indication and discards the data. The digital scanner de-asserts RTS when transmission is complete.
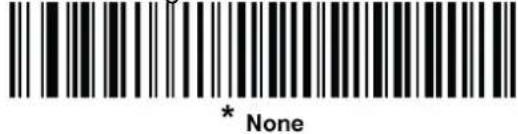
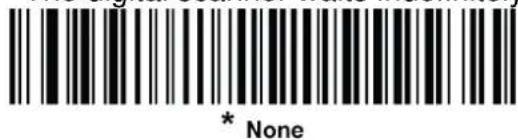
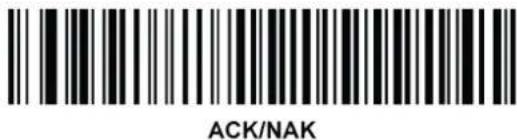
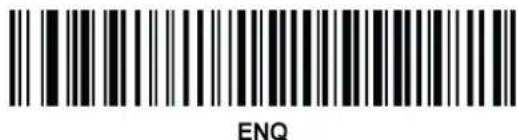
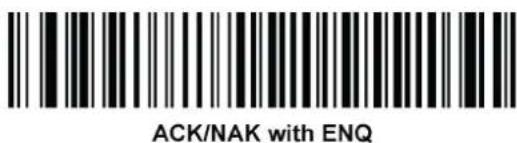
Software Handshaking
This parameter offers control of the data transmission process in addition to, or instead of that offered by hardware handshaking. There are five options.
If software handshaking and hardware handshaking are both enabled, hardware handshaking takes precedence.
z None: Select this to transmit data immediately. The digital scanner expects no response from the host.
z ACK/NAK: If you select this option, after transmitting data, the digital scanner expects either an ACK or NAK response from the host. When it receives a NAK, the scanner transmits the same data again and waits for either an ACK or NAK. After three unsuccessful attempts to send data after receiving NAKs, the digital scanner issues an error indication and discards the data.
The digital scanner waits up to the programmable Host Serial Response Time-out to receive an ACK or NAK. If the scanner does not get a response in this time, it issues an error indication and discards the data. There are no retries
when a time-out occurs.
z ENQ: If you select this option, the digital scanner waits for an ENQ character from the host before transmitting data. If it does not receive an ENQ within the Host Serial Response Time-out, the digital scanner issues an error indication and discards the data. The host must transmit an ENQ character at least every Host Serial Response Time-out to prevent transmission errors.
z ACK/NAK with ENQ: This combines the two previous options. For re-transmissions of data, due to a NAK from the host, an additional ENQ is not required.
z XON/XOFF: An XOFF character turns the digital scanner transmission off until the scanner receives an XON character. There are two situations for XON/XOFF:
3/4 The digital scanner receives an XOFF before has data to send. When the scanner has data to send, it waits up to Host Serial Response Time-out for an XON character before transmission. If it does not receive the XON within this time, the digital scanner issues an error indication and discards the data.
3/4 The digital scanner receives an XOFF during a transmission. Data transmission then stops after sending the current byte. When the digital scanner receives an XON character, it sends the rest of the data message. The digital scanner waits indefinitely for the XON.
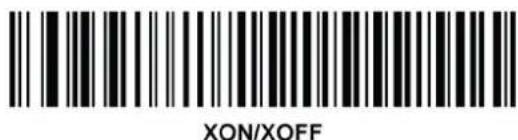
Host Serial Response Time-out
This parameter specifies how long the digital scanner waits for an ACK, NAK, or CTS before determining that a transmission error occurred. This only applies when in one of the ACK/NAK software handshaking modes, or RTS/CTS hardware handshaking mode.
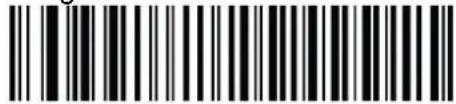
* Minimum: 2 Sec
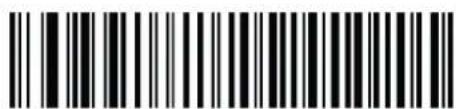
Low: 2.5 Sec
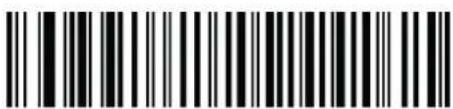
Medium: 5 Sec
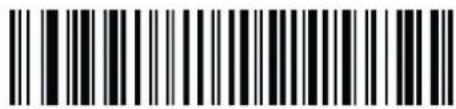
High: 7.5 Sec
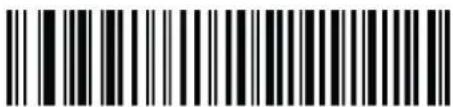
Maximum: 9.9 Sec
RTS Line State
This parameter sets the idle state of the Serial Host RTS line. Scan a bar code below to select Low RTS or High RTS line state.

* Host: Low RTS
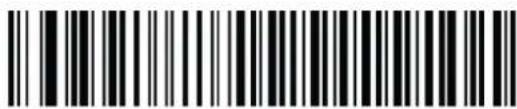
Host: High RTS
Beep on
If you enable this parameter, the digital scanner issues a beep when it detects a

Beep On
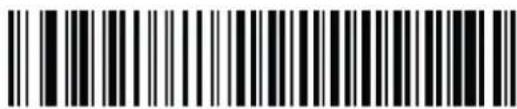
* Do Not Beep On
Intercharacter Delay
This parameter specifies the intercharacter delay inserted between character transmissions.
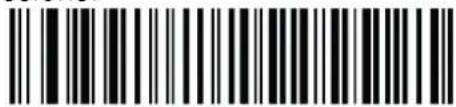
* Minimum: 0 msec
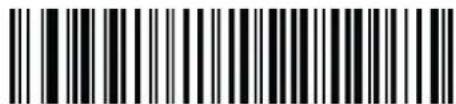
Low: 25 msec
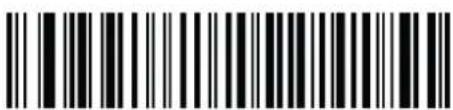
Medium: 50 msec
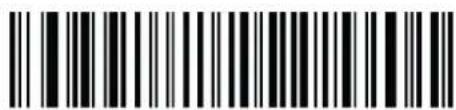
High: 75 msec
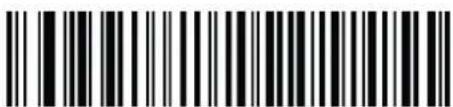
Maximum: 99 msec
ASCII Character Set for Serial Hosts
You can assign the values in the table made below as prefixes or suffixes for ASCII character data transmission.
| Prefix/Suffix Value | Full ASCII Code 39 Encode Character | ASCII Character |
| 1000 | %U | NUL |
| 1001 | A | SOH |
| 1002 | B | STX |
| 1003 | C | ETX |
| 1004 | D | EOT |
| 1005 | E | ENQ |
| 1006 | F | ACK |
| 1007 | G | BELL |
| 1008 | H | BCKSPC |
| 1009 | I | HORIZ TAB |
| 1010 | J | LF/NW LN |
| 1011 | K | VT |
| 1012 | L | FF |
| 1013 | M | CR/ENTER |
| 1014 | N | SO |
| 1015 | O | SI |
| 1016 | P | DLE |
| 1017 | Q | DC1/XON |
| 1018 | R | DC2 |
| 1019 | S | DC3/XOFF |
| 1020 | T | DC4 |
| 1021 | U | NAK |
| 1022 | V | SYN |
| 1023 | W | ETB |
| 1024 | X | CAN |
| 1025 | Y | EM |
| 1026 | Z | SUB |
| 1027 | %A | ESC |
| 1028 | %B | FS |
| 1029 | %C | GS |
| 1030 | %D | RS |
| 1031 | %E | US |
| 1032 | Space | Space |
| 1033 | /A | ! |
| 1034 | /B | " |
| 1035 | /C | # |
| 1036 | /D | $ |
| 1037 | /E | % |
| 1038 | /F | & |
| 1039 | /G | ' |
| 1040 | /H | ( |
| 1041 | /I | ) |
| 1042 | /J | * |
| 1043 | /K | + |
| 1044 | /L | , |
| 1045 | - | - |
| 1046 | . | . |
| 1047 | /O | / |
| 1048 | 0 | 0 |
| 1049 | 1 | 1 |
| 1050 | 2 | 2 |
| 1051 | 3 | 3 |
| 1052 | 4 | 4 |
| 1053 | 5 | 5 |
| 1054 | 6 | 6 |
| 1055 | 7 | 7 |
| 1056 | 8 | 8 |
| 1057 | 9 | 9 |
| 1058 | /Z | : |
| 1059 | %F | ; |
| 1060 | %G | < |
| 1061 | %H | = |
| 1062 | %I | > |
| 1063 | %J | ? |
| 1064 | %V | @ |
| 1065 | A | A |
| 1066 | B | B |
| 1067 | C | C |
| 1068 | D | D |
| 1069 | E | E |
| 1070 | F | F |
| 1071 | G | G |
| 1072 | H | H |
| 1073 | I | I |
| 1074 | J | J |
| 1075 | K | K |
| 1076 | L | L |
| 1077 | M | M |
| 1078 | N | N |
| 1079 | O | O |
| 1080 | P | P |
| 1081 | Q | Q |
| 1082 | R | R |
| 1083 | S | S |
| 1084 | T | T |
| 1085 | U | U |
| 1086 | V | V |
| 1087 | W | W |
| 1088 | X | X |
| 1089 | Y | Y |
| 1090 | Z | Z |
| 1091 | %K | [ |
| 1092 | %L | \ |
| 1093 | %M | ] |
| 1094 | %N | ^ |
| 1095 | %O | _ |
| 1096 | %W | ` |
| 1097 | +A | a |
| 1098 | +B | b |
| 1099 | +C | c |
| 1100 | +D | d |
| 1101 | +E | e |
| 1102 | +F | f |
| 1103 | +G | g |
| 1104 | +H | h |
| 1105 | +I | i |
| 1106 | +J | j |
| 1107 | +K | k |
| 1108 | +L | l |
| 1109 | +M | m |
| 1110 | +N | n |
| 1111 | +O | o |
| 1112 | +P | p |
| 1113 | +Q | q |
| 1114 | +R | r |
| 1115 | +S | s |
| 1116 | +T | t |
| 1117 | +U | u |
| 1118 | +V | v |
| 1119 | +W | w |
| 1120 | +X | x |
| 1121 | +Y | y |
| 1122 | +Z | z |
| 1123 | %P | { |
| 1124 | %Q | | |
| 1125 | %R | } |
| 1126 | %S | ~ |
| 1127 | Undefined | |
| 7013 | ENTER |
Chapter 2
Output Data Editing
Transmit Code ID Character
A Code ID character identifies the code type of a scanned bar code. This is useful when decoding more than one code type. In addition to any single character prefix already selected, the Code ID character is inserted between the prefix and the decoded symbol.
Select no Code ID character, a Symbol Code ID character, or an AIM Code ID character.
Note: If you enable Symbol Code ID Character or AIM Code ID Character, and enable Transmit "No Read" Messag, the digital scanner appends the code ID for Code 39 to the NR message.
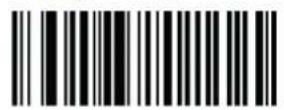
Symbol Code ID Character
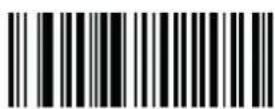
AIM Code ID Character
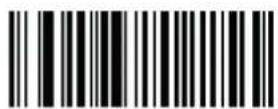
* None
Prefix/Suffix Values
You can append a prefix and/or one or two suffixes to scan data for use in data editing. To set a value for a prefix or suffix, scan a four-digit number (i.e., four bar codes) that corresponds to that value.
When using host commands to set the prefix or suffix, set the key category parameter to 1, then set the 3-digit decimal value.
To correct an error or change a selection, scan Cancel.
Cancel
Note: To use Prefix/Suffix values, first set the Scan Data Transmission Format as shown below.
Scan Prefix
Scan Suffix 1
Scan Suffix 2
Data Format Cancel
Scan Data Transmission Format
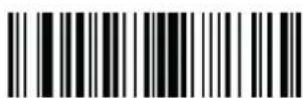
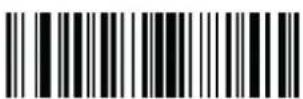
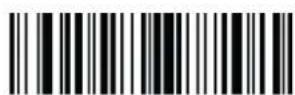
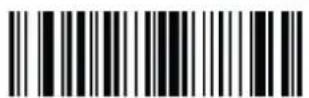
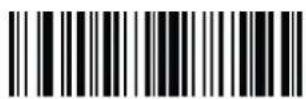
To change the scan data format, scan one of the following eight bar codes corresponding to the desired format.
Note: If using this parameter, do not use ADF rules to set the prefix/suffix.
To set values for the prefix and/or suffix, see Prefix/Suffix Values.
* Data As Is
FN1 Substitution Values
The wedge and USB HID keyboard hosts support a FN1 Substitution feature. Enabling this substitutes any FN1 character (0x1b) in an EAN128 bar code with a value. This value defaults to 7013 (Enter key).
When using host commands to set the FN1 substitution value, set the key category parameter to 1, and then set the 3-digit keystroke value. See the ASCII character set table for the current host interface for the desired value.
To select a FN1 substitution value via bar code menus:
- Scan the bar code below.
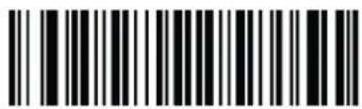
Set FN1 Substitution Value
- Locate the keystroke desired for FN1 substitution in the ASCII character set table in the appropriate host interface chapter. Enter the 4-digit ASCII value by scanning each digit.
To correct an error or change the selection, scan Cancel.
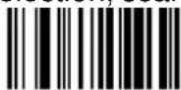
Cancel
Chapter 3
Bar code Setup Menu
User Preferences
Set Default Parameter
You can reset the digital scanner to factory defaults. Scan the bar code below to reset the digital scanner to its default settings.
Set Defaults (Factory Default)
Scan this bar code to reset all default parameters.
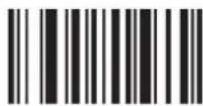
* Set Defaults
(Factory Defaults)
Parameter Scanning
To disable decoding of parameter bar codes, scan the Scanning bar code below. Note that the parameter bar code can still be decoded. To enable decoding of parameter bar codes, either scan Enable Parameter Scanning or Set All Defaults.
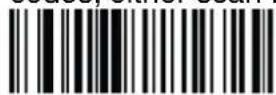
* Enable Parameter Bar Code Scanning
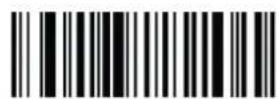
Disable Parameter Bar Code Scanning
Beeper Volume
To select a beeper volume, scan the Low Volume, Medium Volume, or High Volume bar code.
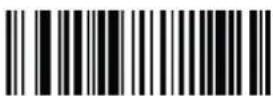
Low Volume
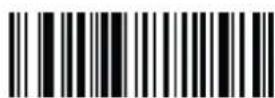
Medium Volume
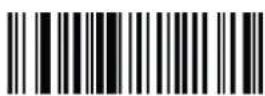
* High Volume
Suppress Power-up Beeps
Select whether or not to suppress the digital scanner's power-up beeps.
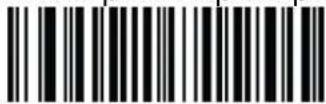
* Do Not Suppress Power-up Beeps
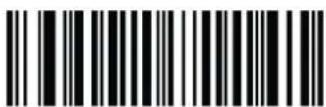
Suppress Power-up Beeps
Beeper Duration
To select the duration for the beeper, scan one of the following bar codes.
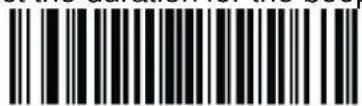
Short
* Medium
Long
Trigger Modes
Select one of the following trigger modes for the digital scanner:
3/4 Standard (Level) - A trigger pull activates decode processing. Decode processing continues until the bar code decodes, you release the trigger, or the Decode Session Timeout occurs.
3/4 Presentation (Blink) - The digital scanner activates decode processing when it detects a bar code in its field of view. After a period of non-use, the digital scanner enters a low power mode, in which the LEDs turn off until the digital scanner senses motion.
3/4 Host - A host command issues the triggering signal. The decoder interprets an actual trigger pull as a Level triggering option.
3/4 Auto Aim - This trigger mode turns on the LED aiming dot when the scanner is lifted. A trigger pull activates decode processing. After 2 seconds of inactivity the aiming pattern shuts off.
3/4 Auto Aim with Illumination - This trigger mode turns on the aiming pattern and internal illumination LEDs when the decoder senses motion. A trigger pull activates decode processing. After 2 seconds of inactivity the aiming pattern and internal illumination LEDs automatically shut off.
*Standard (Level)
Presentation (Blink)
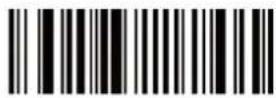
Host
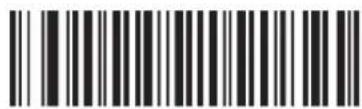
Auto Aim
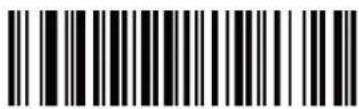
Auto Aim with Illumination
Low Power Mode
This parameter determines whether or not the digital scanner enters low power mode after a decode attempt. If disabled, power remains on after each decode attempt.
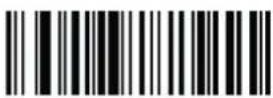
* Disable Low Power Mode
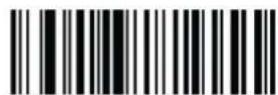
Enable Low Power Mode
Time Delay to Low Power Mode
This parameter sets the time the decoder remains active after decoding. After a scan session, the decoder waits this amount of time before entering Low Power Mode.
Note: This parameter only applies when Power Mode is set to Low.
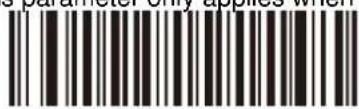
*1 Second
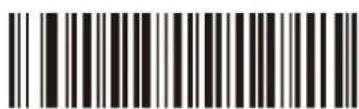
5 Seconds
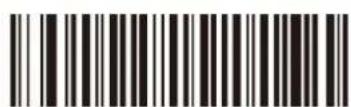
1 Minute
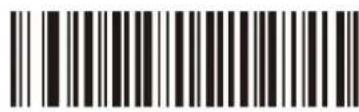
5 Minutes
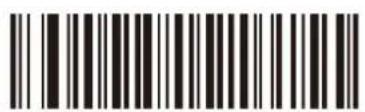
15 Minutes
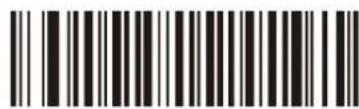
1 Hour
Video Mode
In this mode the decoder behaves as a video camera as long as the trigger is active. Upon trigger release, the decoder returns to Decode Mode. Scan the Video Mode bar code to temporarily enter Video Capture Mode.

Snapshot Mode
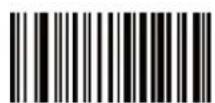
Video Mode
Image File Format Selector
Select an image format appropriate for the system (BMP, TIFF, or JPEG). The decoder stores captured images in the selected format.
BMP File Format
*JPEG File Format
TIFF File Format
Video View Finder
Select Enable Video View Finder to project the video view finder while in Image Mode, or Disable Video View Finder to turn the video view finder off.
*Disable Video View Finder
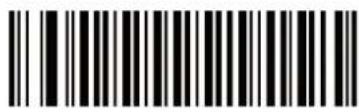
Enable Video View Finder
Mirrored Image
Enable this to scan images in reverse, or mirrored, as if seen through a mirror. This mode is useful in applications requiring scanning through a mirror and using symbologies that do not decode in reverse.
Enabling this mode when using snapshot, video, or video viewfinder mode transmits images as mirrored images.
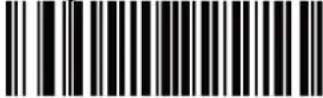
*Disable Mirrored Image
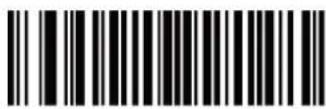
Enable Mirrored Image
Beep After Good Decode
Scan a bar code below to select whether or not the decoder issues a beep signal after a good decode. If selecting Do Not Beep After Good Decode, beeper signals still occur during parameter menu scanning and to indicate error conditions.
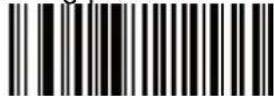
*Beep After Good Decode (Enable)
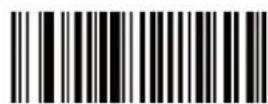
Do Not Beep After Good Decode (Disable)
Chapter 4
Bar code Symbologies
Introduction
This section allows you to change settings for each symbology. After selecting a symbology from the scanner settings section, you can change the options for that symbology. To change any attribute's setting, double click it in the settings workspace. Below is a list of supported symbologies with configurable settings. For in depth options for each symbology, please refer to the help file.
1D Symbologies
| UPC/EAN | PDF417 |
| Bookland EAN | MicroPDF417 |
| UCC Coupon Code | Data Matrix |
| ISSN EAN | Data Matrix Inverse |
| Code 128 | Maxicode |
| GS1-128 | QR Code |
| ISBT 128 | MicroQR |
| Code 39 | QR Inverse |
| Trioptic Code 39 | Aztec |
| Code 32 | Aztec Inverse |
| Code 93 | |
| Code 11 | Postal Codes |
| Interleaved 2 of 5 | US Postnet |
| Discrete 2 of 5 | US Planet |
| Codabar | UK Postal |
| MSI | Japan Postal |
| Chinese 2 of 5 | Australian Postal |
| Matrix 2 of 5 | Netherlands KIX Code |
| Korean 3 of 5 | USPS 4CB/One Code/Intelligent Mail |
| Inverse 1D | UPU FICS Postal |
| GS1 DataBar | |
| Composite Codes |
Symbol Code Identifiers
The Symbol Code Characters are listed below in the table.
| Code Character | Code Type |
| A | UPC-A, UPC-E, UPC-E1, EAN-8, EAN-13 |
| B | Code 39, Code 32 |
| C | Codabar |
| D | Code 128, ISBT 128, ISBT 128 Concatenated |
| E | Code 93 |
| F | Interleaved 2 of 5 |
| G | Discrete 2 of 5, or Discrete 2 of 5 IATA |
| H | Code 11 |
| J | MSI |
| K | GS1-128 |
| L | Bookland EAN |
| M | Trioptic Code 39 |
| N | Coupon Code |
| R | GS1 DataBar Family |
| S | Matrix 2 of 5 |
| T | UCC Composite, TLC 39 |
| U | Chinese 2 of 5 |
| V | Korean 3 of 5 |
| X | ISSN EAN, PDF417, Macro PDF417, Micro PDF417 |
| z | Aztec, Aztec Rune |
| P00 | Data Matrix |
| P01 | QR Code, MicroQR |
| P02 | Maxicode |
| P03 | US Postnet |
| P04 | US Planet |
| P05 | Japan Postal |
| P06 | UK Postal |
| P08 | Netherlands KIX Code |
| P09 | Australia Post |
| P0A | USPS 4CB/One Code/Intelligent Mail |
| P0B | UPU FICS Postal |
UPC-A
Enable/Disable UPC-A
To enable or disable UPC-A, scan the appropriate bar code below.
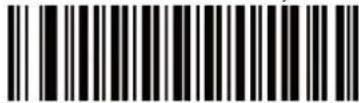
*Enable UPC-A
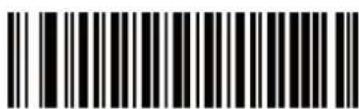
Disable UPC-A
Transmit UPC-A Check Digit
The check digit is the last character of the symbol used to verify the integrity of the data. Scan the appropriate bar code below to transmit the bar code data with or without the UPC-A check digit. It is always verified to guarantee the integrity of the data.
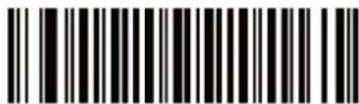
*Transmit UPC-A Check Digit
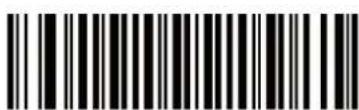
Do Not Transmit UPC-A Check Digit
UPC-A Preamble
Preamble characters are part of the UPC symbol, and include Country Code and System Character. There are three options for transmitting a UPC-A preamble to the host device: transmit System Character only, transmit System Character and Country Code ("0" for USA), and transmit no preamble. Select the appropriate option to match the host system.
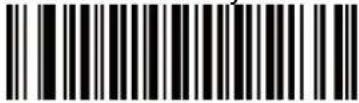
No Preamble ()
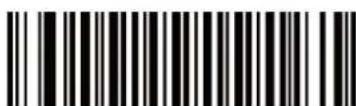
*System Character (
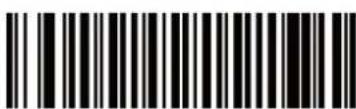
System Character & Country Code
(< COUNTRY CODE> < SYSTEM CHARACTER> < DATA>)
UPC-E
Enable/Disable UPC-E
To enable or disable UPC-E, scan the appropriate bar code below.
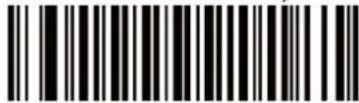
*Enable UPC-E
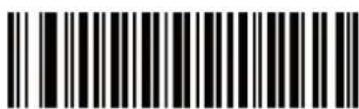
Disable UPC-E
Transmit UPC-E Check Digit
The check digit is the last character of the symbol used to verify the integrity of the data. Scan the appropriate bar code below to transmit the bar code data with or without the UPC-E check digit. It is always verified to guarantee the integrity of the data.
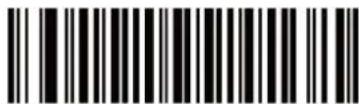
*Transmit UPC-E Check Digit
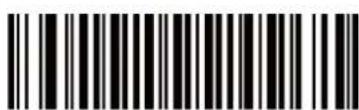
Do Not Transmit UPC-E Check Digit
UPC-E Preamble
Preamble characters are part of the UPC symbol, and include Country Code and System Character. There are three options for transmitting a UPC-E preamble to the host device: transmit System Character only, transmit System Character and Country Code ("0" for USA), and transmit no preamble. Select the appropriate option to match the host system.
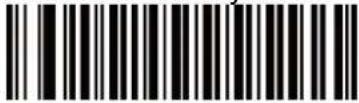
No Preamble ()
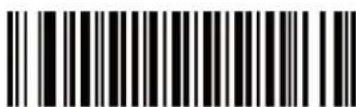
*System Character (
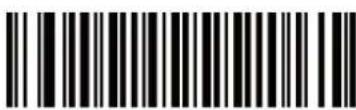
System Character & Country Code
(< COUNTRY CODE> < SYSTEM CHARACTER> < DATA>)
Code 39
Enable/Disable Code 39
To enable or disable Code 39, scan the appropriate bar code below.
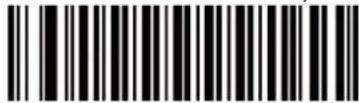
*Enable Code 39
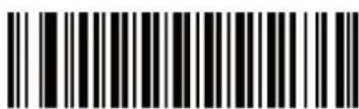
Disable Code 39
Code 39 Check Digit Verification
Enable this feature to check the integrity of all Code 39 symbols to verify that the data complies with specified check digit algorithm. Only Code 39 symbols which include a modulo 43 check digit are decoded. Enable this feature if the Code 39 symbols contain a Modulo 43 check digit.
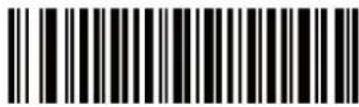
Enable Code 39 Check Digit
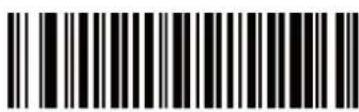
*Disable Code 39 Check Digit
Transmit Code 39 Check Digit
Scan a bar code below to transmit Code 39 data with or without the check digit.
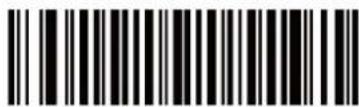
Transmit Code 39 Check Digit (Enable)
Code 39 Full ASCII is a variant of Code 39 which pairs characters to encode the full ASCII character set. To enable or disable Code 39 Full ASCII, scan the appropriate bar code below.
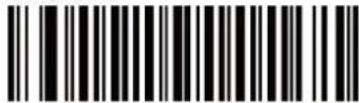
Enable Code 39 Full ASCII
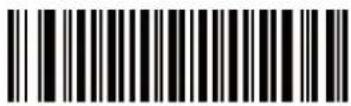
*Disable Code 39 Full ASCII
Note: You cannot enable Trioptic Code 39 and Code 39 Full ASCII simultaneously.
Code 39 Full ASCII to Full ASCII Correlation is host-dependent, and is therefore described in the ASCII Character Set Table for the appropriate interface. See the section -- ASCII Character Set for USB -- or the section -- ASCII Character Set for Serial Hosts.
Set Lengths for Code 39
The length of a code refers to the number of characters (i.e., human readable characters), including check digit(s) the code contains. Set lengths for Code 39 to any length, one or two discrete lengths, or lengths within a specific range. If Code 39 Full ASCII is enabled, Length Within a Range or Any Length are the preferred options.
Note: When setting lengths for different bar code types, enter a leading zero for single digit numbers.
z One Discrete Length - Select this option to decode only Code 39 symbols containing a selected length. Select the length using the numeric bar codes in the appendix of Numeric Bar Codes. For example, to decode only Code 39 symbols with 14 characters, scan Code 39 – One Discrete Length, and then scan 1 followed by 4. To correct an error or change the selection, scan the Cancel bar code.
z Two Discrete Lengths - Select this option to decode only Code 39 symbols containing either of two selected lengths. Select lengths using the numeric bar codes in the appendix of Numeric Bar Codes. For example, to decode only Code 39 symbols containing either 2 or 14 characters, select Code 39 – Two Discrete Lengths, and then scan 0, 2, 1, and then 4. To correct an error or change the selection, scan the Cancel bar code.
z Length Within Range - Select this option to decode a Code 39 symbol with a specific length range. Select lengths using numeric bar codes in the appendix of Numeric Bar Codes. For example, to decode Code 39 symbols containing between 4 and 12 characters, first scan Code 39 – Length Within Range. Then scan 0, 4, 1, and 2 (enter a leading zero for single digit numbers). To correct an error or change the selection, scan the Cancel bar code.
z Any Length - Select this option to decode Code 39 symbols containing any number of characters within the decoder's capability.
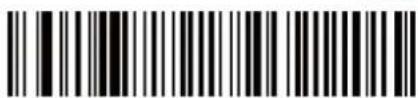
Code 39 - One Discrete Length
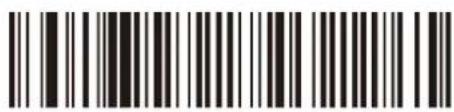
Code 39 - Two Discrete Lengths
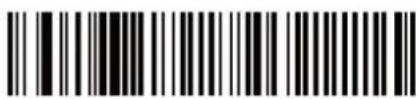
*Code 39 - Length Within Range
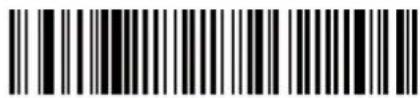
Code 39 - Any Length
Code 93
Enable Code 93
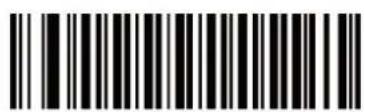
*Disable Code 93
Set Lengths for Code 93
The length of a code refers to the number of characters (i.e., human readable characters), including check digit(s) the code contains. Set lengths for Code 93 to any length, one or two discrete lengths, or lengths within a specific range.
z One Discrete Length - Select this option to decode only Code 93 symbols containing a selected length. Select the length using the numeric bar codes in the appendix of Numeric Bar Codes. For example, to decode only Code 93 symbols with 14 characters, scan Code 93 – One Discrete Length, and then scan 1 followed by 4. To correct an error or to change the selection, scan the Cancel bar code.
z Two Discrete Lengths - Select this option to decode only Code 93 symbols containing either of two selected lengths. Select lengths using the numeric bar codes in the appendix of Numeric Bar Codes. For example, to decode only Code 93 symbols containing either 2 or 14 characters, select Code 93 – Two Discrete Lengths, and then scan 0, 2, 1, and then 4. To correct an error or to change the selection, scan the Cancel bar code.
z Length Within Range - Select this option to decode a Code 93 symbol with a specific length range. Select lengths using the numeric bar codes in the appendix of Numeric Bar Codes. For example, to decode Code 93 symbols containing between 4 and 12 characters, first scan Code 93 – Length Within Range. Then scan 0, 4, 1, and 2 (enter a leading zero for single digit numbers). To correct an error or change the selection, scan the Cancel bar code.
z Any Length - Scan this option to decode Code 93 symbols containing any number of characters within the decoder's capability.

Code 93 - One Discrete Length

Code 93 - Two Discrete Lengths

*Code 93 - Length Within Range

Code 93 - Any Length
Code 11
Enable/Disable Code 11
To enable or disable Code 11, scan the appropriate bar code below.
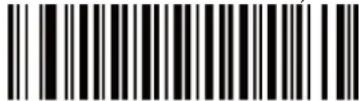
Enable Code 11
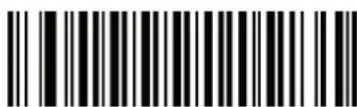
*Disable Code 11
Set Lengths for Code 11
The length of a code refers to the number of characters (i.e., human readable characters), including check digit(s) the code contains. Set lengths for Code 11 to any length, one or two discrete lengths, or lengths within a specific range.
z One Discrete Length - Select this option to decode only Code 11 symbols containing a selected length. Select the length using the numeric bar codes in the appendix of Numeric Bar Codes. For example, to decode only Code 11 symbols with 14 characters, scan Code 11 – One Discrete Length, and then scan 1 followed by 4. To correct an error or to change the selection, scan the Cancel bar code.
z Two Discrete Lengths - Select this option to decode only Code 11 symbols containing either of two selected lengths. Select lengths using the numeric bar codes in the appendix of Numeric Bar Codes. For example, to decode only Code 11 symbols containing either 2 or 14 characters, select Code 11 – Two Discrete Lengths, and then scan 0, 2, 1, and then 4. To correct an error or to change the selection, scan the Cancel bar code.
z Length Within Range - Select this option to decode a Code 11 symbol with a specific length range. Select lengths using numeric bar codes in the appendix of Numeric Bar Codes. For example, to decode Code 11 symbols containing between 4 and 12 characters, first scan Code 11 - Length Within Range. Then scan 0, 4, 1, and 2 (enter a leading zero for single digit numbers). To correct an error or change the selection, scan the Cancel bar code.
z Any Length - Scan this option to decode Code 11 symbols containing any number of characters within the decoder's capability.

Code 11 - One Discrete Length

Code 11 - Two Discrete Lengths

*Code 11 - Length Within Range

Code 11 - Any Length
UPC-E1
UPC-E1 is disabled by default.
To enable or disable UPC-E1, scan the appropriate bar code below.
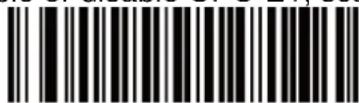
Enable UPC-E1
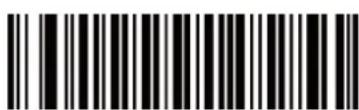
*Disable UPC-E1
Note: UPC-E1 is not a UCC (Uniform Code Council) approved symbology.
Transmit UPC-E1 Check Digit
The check digit is the last character of the symbol used to verify the integrity of the data. Scan the appropriate bar code below to transmit the bar code data with or without the UPC-E1 check digit. It is always verified to guarantee the integrity of the data.
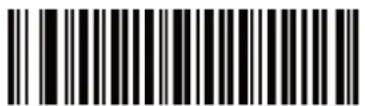
*Transmit UPC-E1 Check Digit
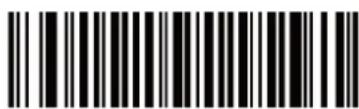
Do Not Transmit UPC-E1 Check Digit
UPC-E1 Preamble
Preamble characters are part of the UPC symbol, and include Country Code and System Character. There are three options for transmitting a UPC-E1 preamble to the host device: transmit System Character only, transmit System Character and Country Code ("0" for USA), and transmit no preamble. Select the appropriate option to match the host system.
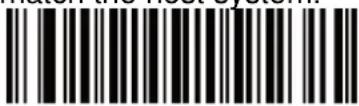
No Preamble ()
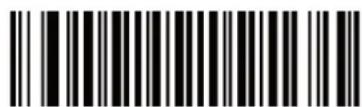
*System Character (
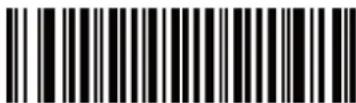
System Character & Country Code
(< COUNTRY CODE>
EAN-13/JAN-13
Enable/Disable EAN-13/JAN-13
To enable or disable EAN-13/JAN-13, scan the appropriate bar code below.
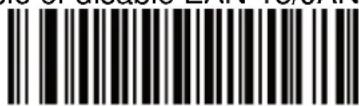
*Enable EAN-13/JAN-13
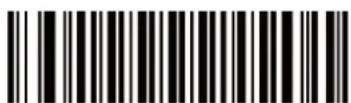
Disable EAN-13/JAN-13
Bookland EAN
Enable/Disable Bookland EAN
To enable or disable Bookland EAN, scan the appropriate bar code below.
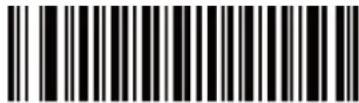
*Enable Bookland EAN
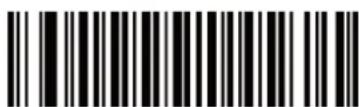
Disable Bookland EAN
Note: If Bookland EAN is enabled, select a Bookland ISBN Format. Also select either Decode UPC/EAN Supplementals, Autodiscriminate UPC/EAN Supplementals, or Enable 978/979 Supplemental Mode in Decode UPC/EAN/JAN Supplementals.
Bookland ISBN Format
If Bookland EAN is enabled, select one of the following formats for Bookland data:
z Bookland ISBN-10 - The decoder reports Bookland data starting with 978 in traditional 10-digit format with the special Bookland check digit for backward-compatibility. Data starting with 979 is not considered Bookland in this mode.
z Bookland ISBN-13 - The decoder reports Bookland data (starting with either 978 or 979) as EAN-13 in 13-digit format to meet the 2007 ISBN-13 protocol.
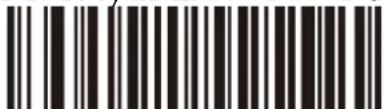
*Bookland ISBN-10
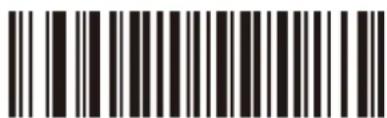
Bookland ISBN-13
Decode UPC/EAN/JAN Supplementals
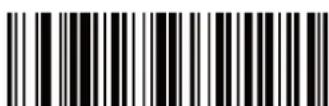
Decode UPC/EAN/JAN Only With Supplementals
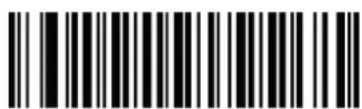
*Ignore Supplementals
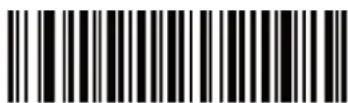
Autodiscriminate UPC/EAN/JAN Supplementals
EAN-8/JAN-8
Enable/Disable EAN-8/JAN-8
To enable or disable EAN-8/JAN-8, scan the appropriate bar code below.
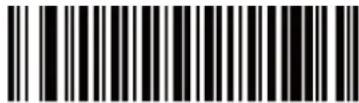
*Enable EAN-8/JAN-8
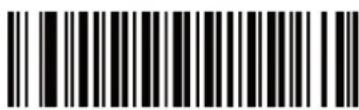
Disable EAN-8/JAN-8
Code 128
Enable/Disable Code 128
To enable or disable Code 128, scan the appropriate bar code below.
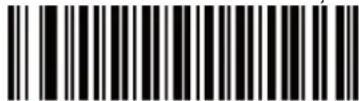
*Enable Code 128
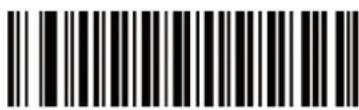
Disable Code 128
Set Lengths for Code 128
The length of a code refers to the number of characters (i.e., human readable characters), including check digit(s) the code contains. Set lengths for Code 128 to any length, one or two discrete lengths, or lengths within a specific range.
Note: When setting lengths for different bar code types, enter a leading zero for single digit numbers.
z One Discrete Length - Select this option to decode only Code 128 symbols containing a selected length. Select the length using the numeric bar codes in the appendix of Numeric Bar Codes. For example, to decode only Code 128 symbols with 14 characters, scan Code 128 - One Discrete Length, and then scan 1 followed by 4. To correct an error or change the selection, scan the Cancel bar code.
z Two Discrete Lengths - Select this option to decode only Code 128 symbols containing either of two selected lengths. Select lengths using the numeric bar codes in the appendix of Numeric Bar Codes.
For example, to decode only Code 128 symbols containing either 2 or 14 characters, select Code 128 - Two Discrete Lengths, and then scan 0, 2, 1, and then 4. To correct an error or change the selection, scan the Cancel bar code.
z Length Within Range - Select this option to decode a Code 128 symbol with a specific length range. Select lengths using numeric bar codes in the appendix of Numeric Bar Codes. For example, to decode Code 128 symbols containing between 4 and 12 characters, first scan Code 128 – Length Within Range. Then scan 0, 4, 1, and 2 (enter a leading zero for single digit numbers). To correct an error or change the selection, scan the Cancel bar code.
z Any Length - Select this option to decode Code 128 symbols containing any number of characters within the decoder's capability.

Code 128 - One Discrete Length

Code 128 - Two Discrete Lengths

Code 128 - Length Within Range

*Code 128 - Any Length
GS1-128 (formerly UCC/EAN-128)
Enable/Disable GS1-128
To enable or disable GS1-128, scan the appropriate bar code below.
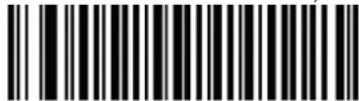
*Enable GS1-128
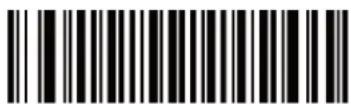
Disable GS1-128
ISBT 128
Enable/Disable ISBT 128
ISBT 128 is a variant of Code 128 used in the blood bank industry. Scan a bar code below to enable or disable ISBT 128. If necessary, the host must perform concatenation of the ISBT data.
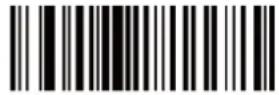
*Enable ISBT 128
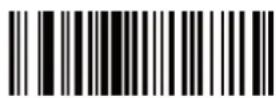
Disable ISBT 128
Convert UPC-E to UPC-A
Convert UPC-E to UPC-A (Enable/Disable)
Enable this to convert UPC-E (zero suppressed) decoded data to UPC-A format before transmission. After conversion, the data follows UPC-A format and is affected by UPC-A programming selections (e.g., Preamble, Check Digit). Disable this to transmit UPC-E decoded data as UPC-E data, without conversion.
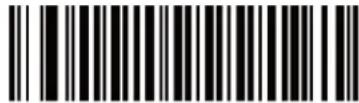
Convert UPC-E to UPC-A (Enable)
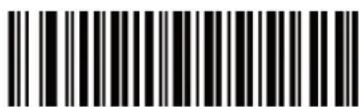
*Do Not Convert UPC-E to UPC-A (Disable)
Convert UPC-E1 to UPC-A
Convert UPC-E1 to UPC-A (Enable/Disable)
Enable this to convert UPC-E1 decoded data to UPC-A format before transmission. After conversion, the data follows UPC-A format and is affected by UPC-A programming selections (e.g., Preamble, Check Digit).
Disable this to transmit UPC-E1 decoded data as UPC-E1 data, without conversion.
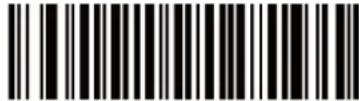
Convert UPC-E1 to UPC-A (Enable)
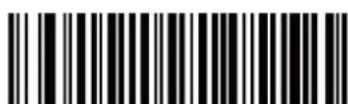
*Do Not Convert UPC-E1 to UPC-A (Disable)
Convert Code 39 to Code 32
Convert Code 39 to Code 32 (Enable/Disable)
Code 32 is a variant of Code 39 used by the Italian pharmaceutical industry. Scan the appropriate bar code below to enable or disable converting Code 39 to Code 32.
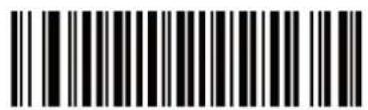
Enable Convert Code 39 to Code 32
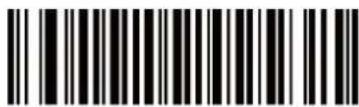
*Disable Convert Code 39 to Code 32
Note: Code 39 must be enabled for this parameter to function.
Convert I 2 of 5 to EAN-13
Convert 12 of 5 to EAN-13 (Enable/Disable)
Enable this parameter to convert 14-character I 2 of 5 codes to EAN-13, and transmit to the host as EAN-13. To accomplish this, the I 2 of 5 code must be enabled, and the code must have a leading zero and a valid EAN-13 check digit.
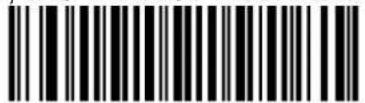
Convert | 2 of 5 to EAN-13 (Enable)
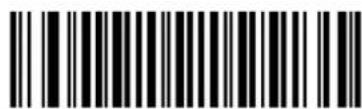
*Do Not Convert I 2 of 5 to EAN-13 (Disable)
Trioptic Code 39
Enable/Disable Trioptic Code 39
Trioptic Code 39 is a variant of Code 39 used in the marking of computer tape cartridges. Trioptic Code 39 symbols always contain six characters. To enable or disable Trioptic Code 39, scan the appropriate bar code below.
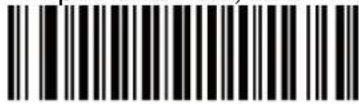
Enable Trioptic Code 39
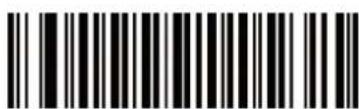
*Disable Trioptic Code 39
Note: You cannot enable Trioptic Code 39 and Code 39 Full ASCII simultaneously.
Enable/Disable Discrete 2 of 5
To enable or disable Discrete 2 of 5, scan the appropriate bar code below.
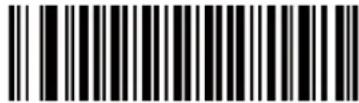
Enable Discrete 2 of 5
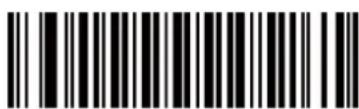
*Disable Discrete 2 of 5
Set Lengths for Discrete 2 of 5
The length of a code refers to the number of characters (i.e., human readable characters), including check digit(s) the code contains. Set lengths for D 2 of 5 to any length, one or two discrete lengths, or lengths within a specific range. The range for Discrete 2 of 5 lengths is 0 - 55.
z One Discrete Length - Select this option to decode only D 2 of 5 symbols containing a selected length. Select the length using the numeric bar codes in the appendix of Numeric Bar Codes. For example, to decode only D 2 of 5 symbols with 14 characters, scan D 2 of 5 - One Discrete Length, and then scan 1 followed by 4. To correct an error or to change the selection, scan the Cancel bar code.
z Two Discrete Lengths - Select this option to decode only D 2 of 5 symbols containing either of two selected lengths. Select lengths using the numeric bar codes in the appendix of Numeric Bar Codes. For example, to decode only D 2 of 5 symbols containing either 2 or 14 characters, select D 2 of 5 - Two Discrete Lengths, and then scan 0, 2, 1, and then 4. To correct an error or to change the selection, scan the Cancel bar code.
z Length Within Range - Select this option to decode a D 2 of 5 symbol with a specific length range. Select lengths using numeric bar codes in the appendix of Numeric Bar Codes. For example, to decode D 2 of 5 symbols containing between 4 and 12 characters, first scan D 2 of 5 - Length Within Range. Then scan 0, 4, 1, and 2 (enter a leading zero for single digit numbers). To correct an error or change the selection, scan the Cancel bar code.
z Any Length - Scan this option to decode D 2 of 5 symbols containing any number of characters within the decoder's capability.
Note: Due to the construction of the D 2 of 5 symbology, it is possible for a scan line covering only a portion of the code to transmit as a complete scan, yielding less data than is encoded in the bar code. To prevent this, select specific lengths (D 2 of 5 - One Discrete Length, Two Discrete Lengths) for D 2 of 5 applications.
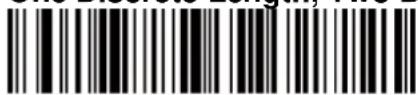
*D 2 of 5 - One Discrete Length
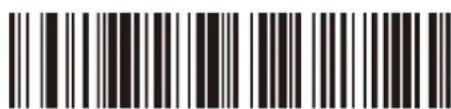
D 2 of 5 - Two Discrete Lengths
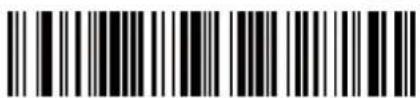
D 2 of 5 - Length Within Range
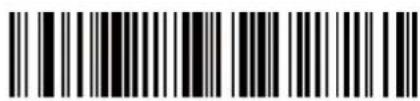
D 2 of 5 - Any Length
Interleaved 2 of 5
Enable/Disable Interleaved 2 of 5
To enable or disable Interleaved 2 of 5, scan the appropriate bar code below, and select an Interleaved 2 of 5 length.
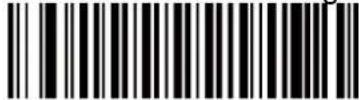
Enable Interleaved 2 of 5
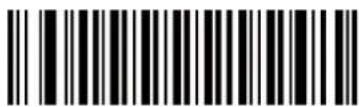
*Disable Interleaved 2 of 5
Set Lengths for Interleaved 2 of 5
The length of a code refers to the number of characters (i.e., human readable characters), including check digit(s) the code contains. Set lengths for 12 of 5 to any length, one or two discrete lengths, or lengths within a specific range. The range for Interleaved 2 of 5 lengths is 0 - 55.
z One Discrete Length - Select this option to decode only I 2 of 5 symbols containing a selected length. Select the length using the numeric bar codes in the Appendix of Numeric Bar Codes. For example, to decode only I 2 of 5 symbols with 14 characters, scan I 2 of 5 – One Discrete Length, then scan 1 followed by 4. To correct an error or to change the selection, scan the Cancel bar code in Appendix B.
z Two Discrete Lengths - Select this option to decode only I 2 of 5 symbols containing either of two selected lengths. Select lengths using the numeric bar codes in the Appendix of Numeric Bar Codes. For example, to decode only I 2 of 5 symbols containing either 2 or 14 characters, select I 2 of 5 – Two Discrete Lengths, then scan 0, 2, 1, and then 4. To correct an error or to change the selection, scan the Cancel bar code in Appendix B.
z Length Within Range - Select this option to decode an I 2 of 5 symbol with a specific length range. Select lengths using numeric bar codes in the Appendix of Numeric Bar Codes. For example, to decode I 2 of 5 symbols containing between 4 and 12 characters, first scan I 2 of 5 - Length Within Range. Then scan 0, 4, 1, and 2 (enter a leading zero for single digit numbers). To correct an error or change the selection, scan the Cancel bar code in Appendix B.
z Any Length - Scan this option to decode I 2 of 5 symbols containing any number of characters within the decoder's capability.
NOTE
Due to the construction of the 12 of 5 symbology, it is possible for a scan line
covering only a portion of the code to transmit as a complete scan, yielding less
data than is encoded in the bar code. To prevent this, select specific lengths (12 of 5
- One Discrete Length, Two Discrete Lengths) for 12 of 5 applications.
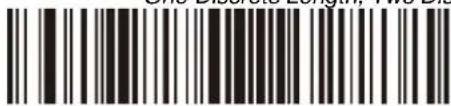
*1 2 of 5 - One Discrete Length
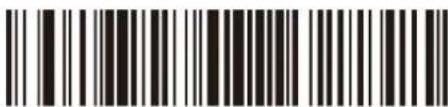
12 of 5 - Two Discrete Lengths
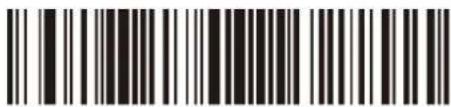
12 of 5 - Length Within Range
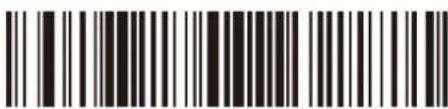
12 of 5 - Any Length
Codabar
Enable/Disable Codabar
To enable or disable Codabar, scan the appropriate bar code below.
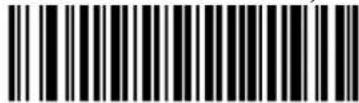
Enable Codabar
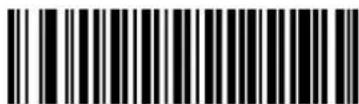
*Disable Codabar
Set Lengths for Codabar
The length of a code refers to the number of characters (i.e., human readable characters), including check digit(s) the code contains. Set lengths for Codabar to any length, one or two discrete lengths, or lengths within a specific range.
z One Discrete Length - Select this option to decode only Codabar symbols containing a selected length. Select the length using the numeric bar codes in the appendix of Numeric Bar codes. For example, to decode only Codabar symbols with 14 characters, scan Codabar - One Discrete Length, then scan 1 followed by 4. To correct an error or to change the selection, scan Cancel.
z Two Discrete Lengths - Select this option to decode only Codabar symbols containing either of two selected lengths. Select lengths using the numeric bar codes in the appendix of Numeric Bar codes. For example, to decode only Codabar symbols containing either 2 or 14 characters, select Codabar - Two Discrete Lengths, then scan 0, 2, 1, and then 4. To correct an error or to change the selection, scan Cancel.
z Length Within Range - Select this option to decode a Codabar symbol with a specific length range. Select lengths using numeric bar codes in the appendix of Numeric Bar codes. For example, to decode Codabar symbols containing between 4 and 12 characters, first scan Codabar - Length Within Range. Then scan 0, 4, 1, and 2 (enter a leading zero for single digit numbers). To correct an error or change the selection, scan Cancel.
z Any Length - Scan this option to decode Codabar symbols containing any number of characters within the decoder's capability.
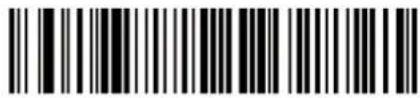
Codabar - One Discrete Length

Codabar - Two Discrete Lengths
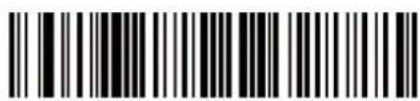
*Codabar - Length Within Range
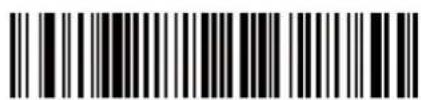
Codabar - Any Length
MSI
Enable/Disable MSI
To enable or disable MSI, scan the appropriate bar code below.
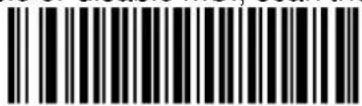
Enable MSI
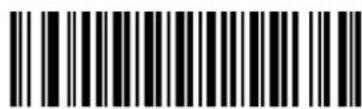
*Disable MSI
Set Lengths for MSI
The length of a code refers to the number of characters (i.e., human readable characters), including check digit(s) the code contains. Set lengths for MSI to any length, one or two discrete lengths, or lengths within a specific range.
z One Discrete Length - Select this option to decode only MSI symbols containing a selected length. Select the length using the numeric bar codes in the appendix of Numeric Bar Codes. For example, to decode only MSI symbols with 14 characters, scan MSI - One Discrete Length, and then scan 1 followed by 4. To correct an error or to change the selection, scan the Cancel bar code.
z Two Discrete Lengths - Select this option to decode only MSI symbols containing either of two selected lengths. Select lengths using the numeric bar codes in the appendix of Numeric Bar Codes. For example, to decode only MSI symbols containing either 2 or 14 characters, select MSI - Two Discrete Lengths, and then scan 0, 2, 1, and then 4. To correct an error or to change the selection, scan the Cancel bar code.
z Length Within Range - Select this option to decode a MSI symbol with a specific length range. Select lengths using numeric bar codes in the appendix of Numeric Bar Codes. For example, to decode MSI symbols containing between 4 and 12 characters, first scan MSI - Length Within Range. Then scan 0, 4, 1, and 2 (enter a leading zero for single digit numbers). To correct an error or change the selection, scan the Cancel bar code.
z Any Length - Scan this option to decode MSI symbols containing any number of characters within the decoder's capability. Note: Due to the construction of the MSI symbology, it is possible for a scan line covering only a portion of the code to transmit as a complete scan, yielding less data than is encoded in the bar code. To prevent this, select specific lengths (MSI - One Discrete Length, Two Discrete Lengths) for MSI applications.

MSI - One Discrete Length
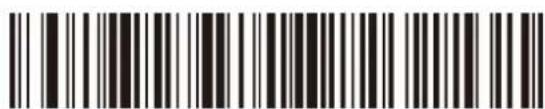
MSI - Two Discrete Lengths

*MSI - Length Within Range

MSI - Any Length
Matrix 2 of 5
Enable/Disable Matrix 2 of 5
To enable or disable Matrix 2 of 5, scan the appropriate bar code below.
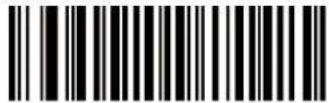
Enable Matrix 2 of 5 (01h)
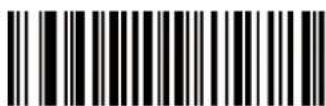
*Disable Matrix 2 of 5 (00h)
Set Lengths for Matrix 2 of 5
The length of a code refers to the number of characters (i.e., human readable characters), including check digit(s) the code contains. Set lengths for Matrix 2 of 5 to any length, one or two discrete lengths, or lengths within a specific range.
z One Discrete Length - Select this option to decode only Matrix 2 of 5 symbols containing a selected length. Select the length using the numeric bar codes in the appendix of Numeric Bar Codes. For example, to decode only Matrix 2 of 5 symbols with 14 characters, scan Matrix 2 of 5 - One Discrete Length, and then scan 1 followed by 4. To correct an error or to change the selection, scan the Cancel bar code.
z Two Discrete Lengths - Select this option to decode only Matrix 2 of 5 symbols containing either of two selected lengths. Select lengths using the numeric bar codes in the appendix of Numeric Bar Codes. For example, to decode only Matrix 2 of 5 symbols containing either 2 or 14 characters, select Matrix 2 of 5 - Two Discrete Lengths, and then scan 0, 2, 1, and then 4. To correct an error or to change the selection, scan the Cancel bar code.
z Length Within Range - Select this option to decode a Matrix 2 of 5 symbol with a specific length range. Select lengths using the numeric bar codes in the appendix of Numeric Bar Codes. For example, to decode Matrix 2 of 5 symbols containing between 4 and 12 characters, first scan Matrix 2 of 5 - Length Within Range. Then scan 0, 4, 1, and 2 (enter a leading zero for single digit numbers). To correct an error or change the selection, scan the Cancel bar code.
z Any Length - Scan this option to decode Matrix 2 of 5 symbols containing any number of characters within the decoder's capability.
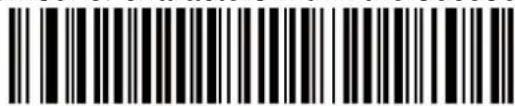
*Matrix 2 of 5 - One Discrete Length
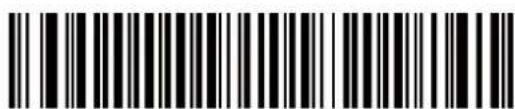
Matrix 2 of 5 - Two Discrete Lengths
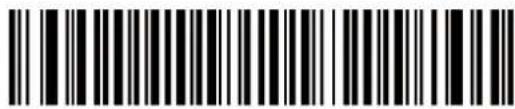
Matrix 2 of 5 - Length Within Range
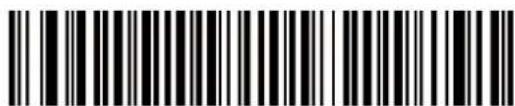
Matrix 2 of 5 - Any Length
Inverse 1D
This parameter sets the 1D inverse decoder setting. Options are:
z Regular Only - the decoder decodes regular 1D bar codes only.
z Inverse Only - the decoder decodes inverse 1D bar codes only.
z Inverse Autodetect - the decoder decodes both regular and inverse 1D bar codes.
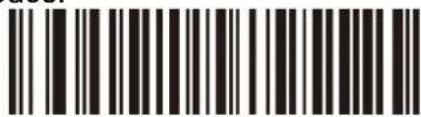
*Regular
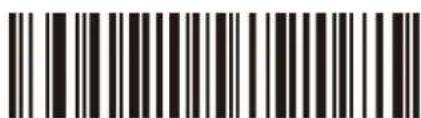
Inverse Autodetect
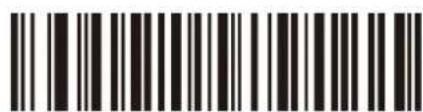
Inverse Only
Postal Code Symbologies
US Postnet
To enable or disable US Postnet, scan the appropriate bar code below.
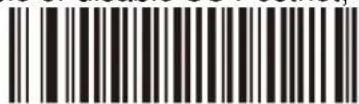
Enable US Postnet
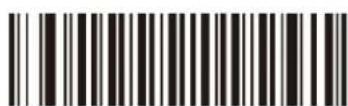
*Disable US Postnet
UK Postal
To enable or disable UK Postal, scan the appropriate bar code below.
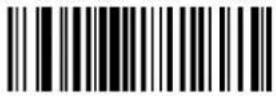
Enable UK Postal
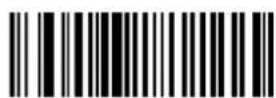
*Disable UK Postal
Japan Postal
To enable or disable Japan Postal, scan the appropriate bar code below.
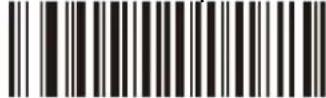
Enable Japan Postal
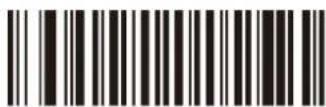
*Disable Japan Postal
GS1 (Globe Standard 1) DataBar
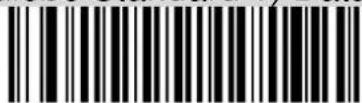
*Enable GS1 DataBar
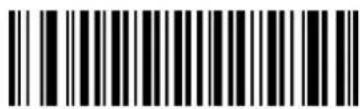
Disable GS1 DataBar
GS1 DataBar Limited
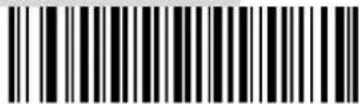
Enable GS1 DataBar Limited
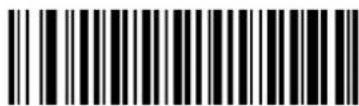
*Disable GS1 DataBar Limited
GS1 DataBar Limited Security Level
The decoder offers four levels of decode security for GS1 DataBar Limited bar codes. There is an inverse relationship between security and decoder aggressiveness. Increasing the level of security may result in reduced aggressiveness in scanning, so only choose the level of security necessary.
z Level 1 – No clear margin required. This complies with the original GS1 standard, yet might result in erroneous1 decoding of the DataBar Limited bar code when scanning some UPC symbols that start with the digits "9" and "7".
z Level 2 – Automatic risk detection. This level of security may result in erroneous decoding of DataBar Limited bar codes when scanning some UPC symbols. If a misdecode is detected, the decoder operates in Level 3 or Level 1.
z Level 3 – Security level reflects newly proposed GS1 standard that requires a 5X trailing clear margin.
z Level 4 – Security level extends beyond the standard required by GS1. This level of security requires a 5X leading and trailing clear margin.
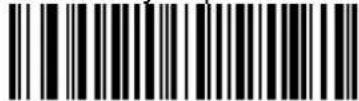
Security Level 1
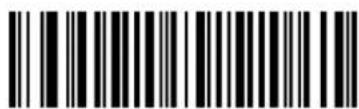
Security Level 2
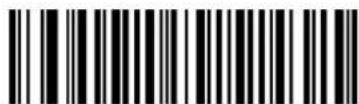
*Security Level 3
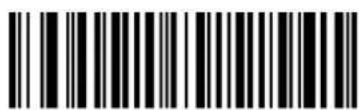
Security Level 4
Note: It may result in erroneous decoding due to Databar Limited and UPC symbologies.
GS1 DataBar Expanded
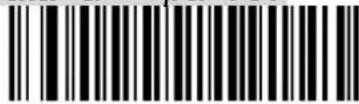
*Enable GS1 DataBar Expanded
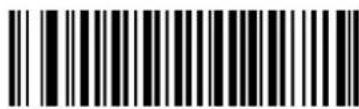
Disable GS1 DataBar Expanded
Netherlands KIX Code
To enable or disable Netherlands KIX Code, scan the appropriate bar code below.
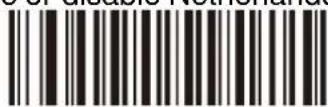
Enable Netherlands KIX Code
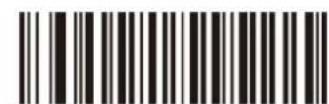
*Disable Netherlands KIX Code
Australia Post
To enable or disable Australia Post, scan the appropriate bar code below.
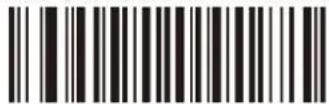
Enable Australia Post
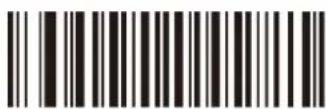
*Disable Australia Post
Composite Symbologies
Composite CC-C
Scan a bar code below to enable or disable Composite bar codes of type CC-C.
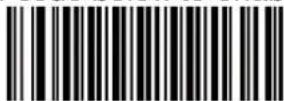
Enable CC-C
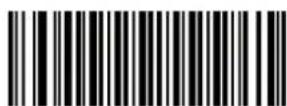
*Disable CC-C
Composite CC-A/B
Scan a bar code below to enable or disable Composite bar codes of type CC-A/B.
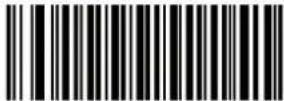
Enable CC-A/B
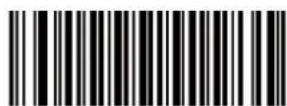
*Disable CC-A/B
Note: If you enable this code type, also see the section -- UPC Composite Mode.
Composite TLC-39
Scan a bar code below to enable or disable Composite bar codes of type TLC-39.
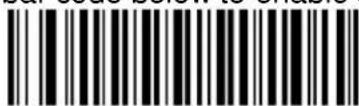
Enable TLC39
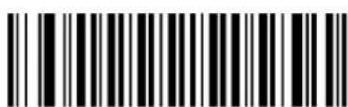
*Disable TLC39
2D Symbologies
PDF417
To enable or disable PDF417, scan the appropriate bar code below.
*Enable PDF417
Disable PDF417
MicroPDF417
To enable or disable MicroPDF417, scan the appropriate bar code below.
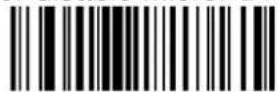
Enable MicroPDF417
*Disable MicroPDF417
Code 128 Emulation
Enable this parameter to transmit data from certain MicroPDF417 symbols as Code 128. AIM Code ID Character must be enabled for this parameter to work.
AIM Code ID Character
Scan a bar code below to enable or disable Code 128 Emulation.
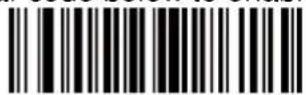
Enable Code 128 Emulation
*Disable Code 128 Emulation
Data Matrix
To enable or disable Data Matrix, scan the appropriate bar code below.
*Enable Data Matrix
Disable Data Matrix
Data Matrix Inverse
This parameter sets the Data Matrix inverse decoder setting. Options are:
z Regular Only - the decoder decodes regular Data Matrix bar codes only.
z Inverse Only - the decoder decodes inverse Data Matrix bar codes only.
z Inverse Autodetect - the decoder decodes both regular and inverse Data Matrix bar codes.
*Regular
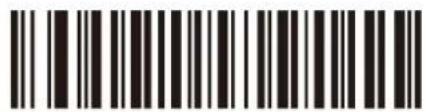
Inverse Only
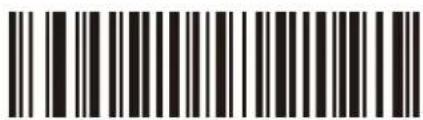
Inverse Autodetect
Decode Mirror Images (Data Matrix Only)
Select an option for decoding mirror image Data Matrix bar codes:
z Always - decode only Data Matrix bar codes that are mirror images
z Never - do not decode Data Matrix bar codes that are mirror images
z Auto - decode both mirrored and unmirrored Data Matrix bar codes.
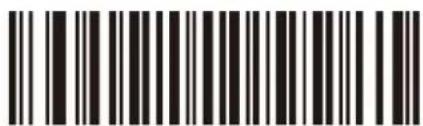
Never
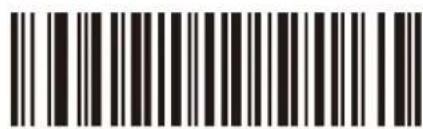
Always
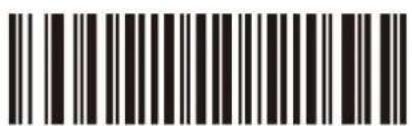
* Auto
Maxicode
To enable or disable Maxicode, scan the appropriate bar code below.
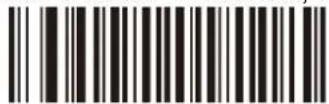
Enable Maxicode
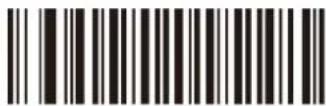
*Disable Maxicode
QR Code
To enable or disable QR Code, scan the appropriate bar code below.
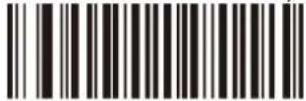
*Enable QR Code
Disable QR Code
QR Inverse
This parameter sets the QR inverse decoder setting. Options are:
z Regular Only - the decoder decodes regular QR bar codes only.
z Inverse Only - the decoder decodes inverse QR bar codes only.
z Inverse Autodetect - the decoder decodes both regular and inverse QR bar codes.
*Regular
Inverse Only
Inverse Autodetect
MicroQR
To enable or disable MicroQR, scan the appropriate bar code below.
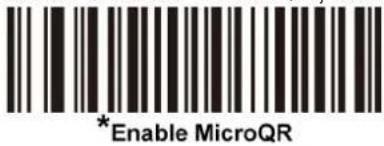
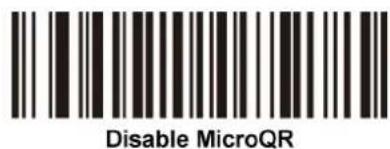
Aztec
To enable or disable Aztec, scan the appropriate bar code below.
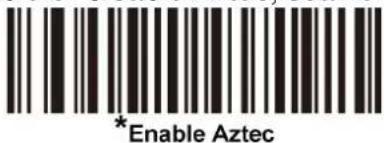
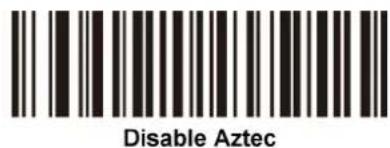
Aztec Inverse
This parameter sets the Aztec inverse decoder setting. Options are:
z Regular Only - the decoder decodes regular Aztec bar codes only.
z Inverse Only - the decoder decodes inverse Aztec bar codes only.
z Inverse Autodetect - the decoder decodes both regular and inverse Aztec bar codes.
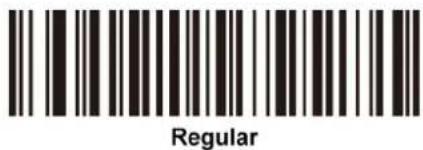
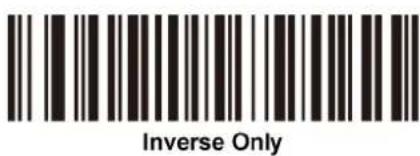
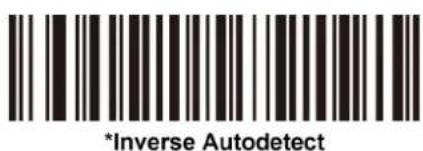
Redundancy Level
The decoder offers four levels of decode redundancy. Select higher redundancy levels for decreasing levels of bar code quality. As redundancy levels increase, the decoder's aggressiveness decreases.
Select the redundancy level appropriate for the bar code quality.
Redundancy Level 1
The following code types must be successfully read twice before being decoded:
| Code Type | Code Length |
| Codabar | 8 characters or less |
| MSI | 4 characters or less |
| D 2 of 5 | 8 characters or less |
| I 2 of 5 | 8 characters or less |
Redundancy Level 2
The following code types must be successfully read twice before being decoded:
| Code Type | Code Length |
| All | All |
Redundancy Level 3
Code types other than the following must be successfully read twice before being decoded. The following codes must be read three times:
| Code Type | Code Length |
| MSI | 4 characters or less |
| D 2 of 5 | 8 characters or less |
| I 2 of 5 | 8 characters or less |
| Codabar | 8 characters or less |
Redundancy Level 4
The following code types must be successfully read three times before being decoded:
| Code Type | Code Length |
| All | All |
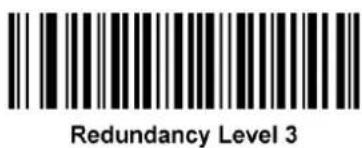
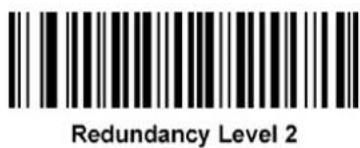
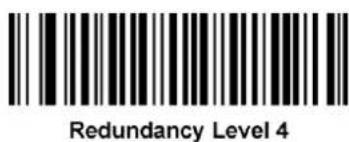
Security Level
The decoder offers four levels of decode security for delta bar codes, which include UPC/EAN and Code 93. Select increasing levels of security for decreasing levels of bar code quality. There is an inverse relationship between security and decoder aggressiveness, so choose only that level of security necessary for any given application.
z Security Level 0: This setting allows the decoder to operate in its most aggressive state, while providing sufficient security in decoding most "in-spec" bar codes.
z Security Level 1: This default setting eliminates most misdecodes.
z Security Level 2: Select this option if Security level 1 fails to eliminate misdecodes.
z Security Level 3: If you selected Security Level 2 and misdecodes still occur, select this security level. Be advised, selecting this option is an extreme measure against mis-decoding severely out of spec bar codes. Selecting this level of security significantly impairs the decoding ability of the decoder. If you need this level of security, try to improve the quality of the bar codes.
Security Level 0
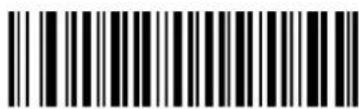
*Security Level 1
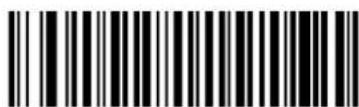
Security Level 2
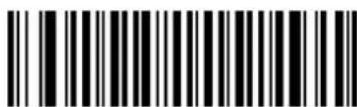
Security Level 3
Intercharacter Gap Size
The Code 39 and Codabar symbologies have an intercharacter gap that is typically quite small. Due to various bar code-printing technologies, this gap can grow larger than the maximum size allowed, preventing the decoder from decoding the symbol. If this problem occurs, scan the Large Intercharacter Gaps parameter to tolerate these out-of-specification bar codes.
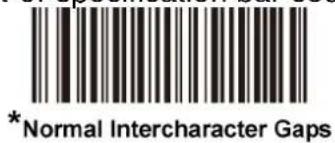
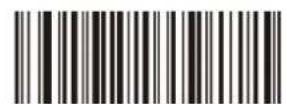
Large Intercharacter Gaps
Macro PDF Features
Macro PDF is a special feature for concatenating multiple PDF symbols into one file. The decoder can decode symbols that are encoded with this feature, and can store more than 64 Kb of decoded data stored in up to 50 MacroPDF symbols.
CAUTION: When printing, keep each Macro PDF sequence separate, as each sequence has unique identifiers. Do not mix bar codes from several Macro PDF sequences, even if they encode the same data. When scanning Macro PDF sequences, scan the entire sequence without interruption. When scanning a mixed sequence, two long low beeps (Low/Low) indicates an inconsistent file ID or inconsistent symbology error.
Macro PDF User Indications
In this mode the decoder provides the following feedback.
| User Scans | Passthrough All Symbols | Transmit Any Symbol in Set | Buffer All Symbols | |||
| Beep | T | Beep | T | Beep | T | |
| Last Macro PDF in set | Decode Beep | Y | Decode Beep | Y | Decode Beep | Y |
| Any Macro PDF in set except last | Decode Beep | Y | Decode Beep | Y | 2 Short Low | N |
| Macro PDF is not in current Set | Decode Beep | Y | 2 Long Low | N | 2 Long Low | N |
| Invalid formatted Macro PDF | Decode Beep | Y | 2 Long Low | N | 2 Long Low | N |
| Macro PDF from a set has already been scanned | Decode Beep | Y | 4 Long Low | N | 4 Long Low | N |
| Out of Macro PDF memory | N/A | 3 Long Low | N | 3 Long Low | N | |
| Any non-Macro PDF scanned during a set | N/A | - | 4 Long Low | N | 4 Long Low | N |
| Flush Macro PDF | Low High | N | 5 Long Low | N | 5 Long Low | Y |
| Abort Macro PDF | High LowHigh Low | N | High LowHigh Low | N | High LowHigh Low | N |
Notes:
- The beep only sounds if the *BEEPER_ON signal is connected.
- The column marked T indicates whether the symbol is transmitted to the host.
N = No transmission.
Macro PDF Transmit / Decode Mode Symbols
Select one of the options below for handling Macro PDF decoding. In Buffer All Symbols the decoder can handle sets of up to 50 maximum-sized Macro PDF symbols. In all other modes there is no limit to the size of the MacroPDF set.
Buffer All Symbols / Transmit Macro PDF When Complete: This transmits all decode data from an entire Macro PDF sequence only when the entire sequence is scanned and decoded. Use the beeper and LED signals provided with the MS588 when using this mode to ensure proper user feedback. If the decode data exceeds the limit of 50 symbols, there is no transmission because the entire sequence was not scanned. Use the parameter Flush Macro Buffer to purge the buffer.
z Transmit Any Symbol in Set / No Particular Order: This transmits data from each Macro PDF symbol as decoded, regardless of the sequence (although some error handling is performed). When selecting this mode, enable Transmit Macro PDF Control Header. Also use the beeper and LED signals provided with the MS588 to ensure proper user feedback.
z Passthrough All Symbols: This transmits and decodes all Macro PDF symbols and performs no processing. In this mode the host is responsible for detecting and parsing the Macro PDF sequences.
Use this mode when the decoder's BEEPER_ON signal is not used to drive a beeper. In the other modes, some Macro PDF scanning sequences provide audible feedback only, so if BEEPER_ON is not used, no user feedback is provided. All actions marked No Transmission provide no feedback unless the BEEPER_ON signal is used.
By using Passthrough All Symbols mode every user decode is transmitted to the host where the host software can provide the appropriate feedback.
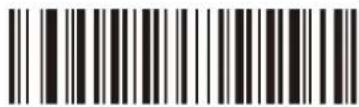
Buffer All Symbols / Transmit Macro PDF When Complete
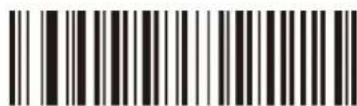
Transmit Any Symbol in Set / No Particular Order
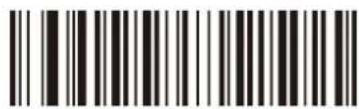
*Passthrough All Symbols
Transmit Macro PDF Control Header
When enabled, this activates transmission of the control header, which contains the segment index and the file ID, in Macro PDF symbols. For example, the field may be: \92800000\725\120\343. The five digits after the \928 are the segment index (or block index), and \725\120\343 is the file ID.
Enable this when selecting Transmit Any Symbol in Set / No Particular Order for the Macro PDF Transmit/Decode Mode Symbols, and disable this when selecting Buffer All Symbols / Transmit Macro PDF When Complete. This parameter has no effect when Passthrough All Symbols is selected.

Enable Macro PDF Control Header Transmit
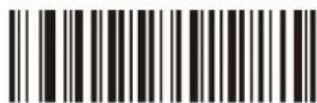
*Disable Macro PDF Control Header Transmit
Escape Characters
This enables the backslash () character as an Escape character for systems that can process transmissions containing special data sequences. Scan a bar code below to either format special data according to the GLI (Global Label Identifier) protocol, or to disable this parameter. This parameter only affects the data portion of a Macro PDF symbol transmission; the Macro PDF Control Header (if enabled) is always sent with GLI formatting.
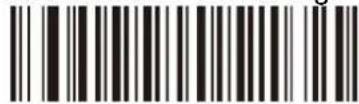
GLI Protocol
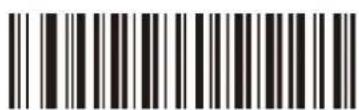
*None
Flush Macro Buffer
This flushes the buffer of all decoded Macro PDF data stored to that point, transmits it to the host device, and aborts from Macro PDF mode.
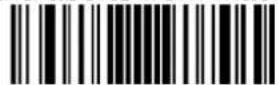
Flush Macro PDF Buffer
Abort Macro PDF Entry
This clears all currently-stored Macro PDF data in the buffer without transmission and aborts from Macro PDF mode.
Abort Macro PDF Entry
Appendix A
Sample Bar codes
2D Bar codes
Data Matrix
Maxicode
natural_image
Abstract pattern with concentric circles and dot textures (no text or symbols)QR Code
PDF417
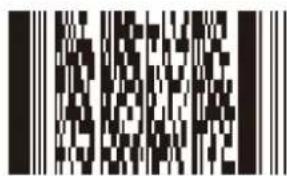
MicroPDF417
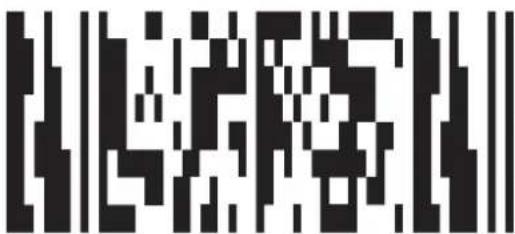
US Postnet

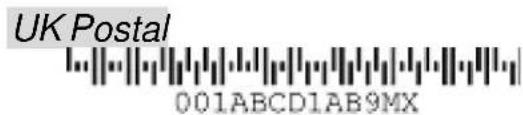
1D Bar codes
EAN-13
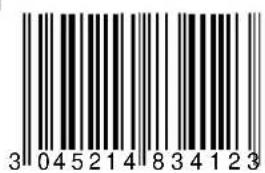
EAN-8
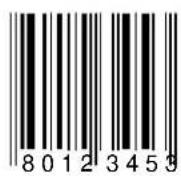
UPC-A
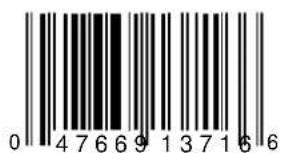
UPC-E
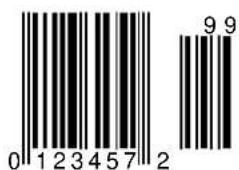
Interleave 2 of 5
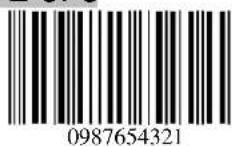
Code 128
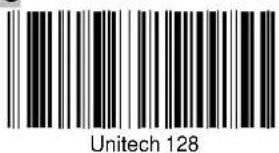
Code 39
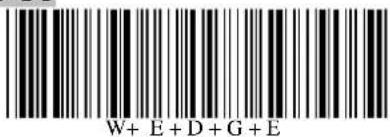
EAN 128
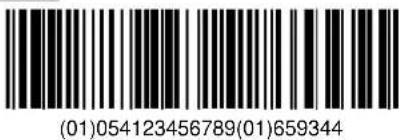
Codabar
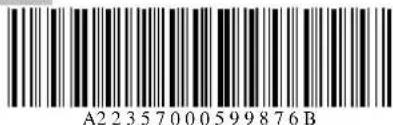
MSI
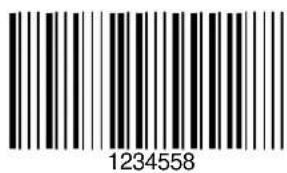
GS1 Limited
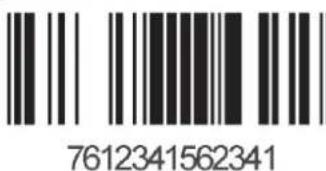
Appendix B
Numeric Bar codes
For parameters requiring specific numeric values, scan the appropriately numbered bar code(s).
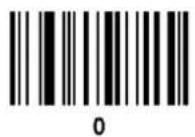
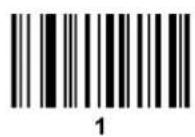
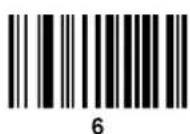
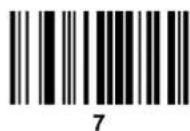
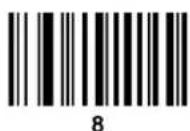
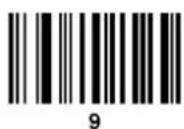
Cancel
To correct an error or change a selection, scan the bar code below.
Cancel
ASCII Character Sets
ASCII Value Table
| ASCII Value | Full ASCII Code 39 Encode Char | Keystroke |
| 1000 | %U | CTRL 2 |
| 1001 | A | CTRL A |
| 1002 | B | CTRL B |
| 1003 | C | CTRL C |
| 1004 | D | CTRL D |
| 1005 | E | CTRL E |
| 1006 | F | CTRL F |
| 1007 | G | CTRL G |
| 1008 | H | CTRL H/BACKSPACE ^1 |
| 1009 | I | CTRL I/HORIZONTAL TAB^{1} |
| 1010 | J | CTRL J |
| 1011 | K | CTRL K |
| 1012 | L | CTRL L |
| 1013 | M | CTRL M/ENTER^{1} |
| 1014 | N | CTRL N |
| 1015 | O | CTRL O |
| 1016 | P | CTRL P |
| 1017 | Q | CTRL Q |
| 1018 | R | CTRL R |
| 1019 | S | CTRL S |
| 1020 | T | CTRL T |
| 1021 | U | CTRL U |
| 1022 | V | CTRL V |
| 1023 | W | CTRL W |
| 1024 | X | CTRL X |
| 1025 | Y | CTRL Y |
| 1026 | Z | CTRL Z |
| 1027 | %A | CTRL [ |
| 1028 | %B | CTRL \ |
| 1029 | %C | CTRL] |
| 1030 | %D | CTRL 6 |
| 1031 | %E | CTRL - |
| 1032 | Space | Space |
| 1033 | /A | ! |
| 1034 | /B | “ |
| 1035 | /C | # |
| 1036 | /D | $ |
| 1037 | /E | % |
| 1038 | /F | & |
| 1039 | /G | ‘ |
| 1040 | /H | ( |
| 1041 | /I | ) |
| 1042 | /J | * |
| 1043 | /K | + |
| 1044 | /L | , |
| 1045 | - | - |
| 1046 | . | . |
| 1047 | /o | / |
| 1048 | 0 | 0 |
| 1049 | 1 | 1 |
| 1050 | 2 | 2 |
| 1051 | 3 | 3 |
| 1052 | 4 | 4 |
| 1053 | 5 | 5 |
| 1054 | 6 | 6 |
| 1055 | 7 | 7 |
| 1056 | 8 | 8 |
| 1057 | 9 | 9 |
| 1058 | /Z | : |
| 1059 | %F | ; |
| 1060 | %G | < |
| 1061 | %H | = |
| 1062 | %I | > |
| 1063 | %J | ? |
| 1064 | %V | @ |
| 1065 | A | A |
| 1066 | B | B |
| 1067 | C | C |
| 1068 | D | D |
| 1069 | E | E |
| 1070 | F | F |
| 1071 | G | G |
| 1072 | H | H |
| 1073 | I | I |
| 1074 | J | J |
| 1075 | K | K |
| 1076 | L | L |
| 1077 | M | M |
| 1078 | N | N |
| 1079 | O | O |
| 1080 | P | P |
| 1081 | Q | Q |
| 1082 | R | R |
| 1083 | S | S |
| 1084 | T | T |
| 1085 | U | U |
| 1086 | V | V |
| 1087 | W | W |
| 1088 | X | X |
| 1089 | Y | Y |
| 1090 | Z | Z |
| 1091 | %K | [ |
| 1092 | %L | \ |
| 1093 | %M | ] |
| 1094 | %N | ^ |
| 1095 | %O | _ |
| 1096 | %W | ' |
| 1097 | +A | A |
| 1098 | +B | B |
| 1099 | +C | C |
| 1100 | +D | D |
| 1101 | +E | E |
| 1102 | +F | F |
| 1103 | +G | G |
| 1104 | +H | H |
| 1105 | +I | I |
| 1106 | +J | J |
| 1107 | +K | K |
| 1108 | +L | L |
| 1109 | +M | M |
| 1110 | +N | N |
| 1111 | +O | O |
| 1112 | +P | P |
| 1113 | +Q | Q |
| 1114 | +R | R |
| 1115 | +S | S |
| 1116 | +T | T |
| 1117 | +U | U |
| 1118 | +V | V |
| 1119 | +W | W |
| 1120 | +X | X |
| 1121 | +Y | Y |
| 1122 | +Z | Z |
| 1123 | %P | { |
| 1124 | %Q | I |
| 1125 | %R | } |
| 1126 | %S | ~ |
The keystroke in bold transmits only if you enabled Function Key Mapping. Otherwise, the unbold keystroke transmits.
ALT Key Standard Default Tables
| ALT Keys | Keystroke |
| 2064 | ALT 2 |
| 2065 | ALT A |
| 2066 | ALT B |
| 2067 | ALT C |
| 2068 | ALT D |
| 2069 | ALT E |
| 2070 | ALT F |
| 2071 | ALT G |
| 2072 | ALT H |
| 2073 | ALT I |
| 2074 | ALT J |
| 2075 | ALT K |
| 2076 | ALT L |
| 2077 | ALT M |
| 2078 | ALT N |
| 2079 | ALT O |
| 2080 | ALT P |
| 2081 | ALT Q |
| 2082 | ALT R |
| 2083 | ALT S |
| 2084 | ALT T |
| 2085 | ALT U |
| 2086 | ALT V |
| 2087 | ALT W |
| 2088 | ALT X |
| 2089 | ALT Y |
| 2090 | ALT Z |
USB GUI Key Character Set
| GUI Key | Keystroke |
| 3000 | Right Control Key |
| 3048 | GUI 0 |
| 3049 | GUI 1 |
| 3050 | GUI 2 |
| 3051 | GUI 3 |
| 3052 | GUI 4 |
| 3053 | GUI 5 |
| 3054 | GUI 6 |
| 3055 | GUI 7 |
| 3056 | GUI 8 |
| 3057 | GUI 9 |
| 3065 | GUI A |
| 3066 | GUI B |
| 3067 | GUI C |
| 3068 | GUI D |
| 3069 | GUI E |
| 3070 | GUI F |
| 3071 | GUI G |
| 3072 | GUI H |
| 3073 | GUI I |
| 3074 | GUI J |
| 3075 | GUI K |
| 3076 | GUI L |
| 3077 | GUI M |
| 3078 | GUI N |
| 3079 | GUI O |
| 3080 | GUI P |
| 3081 | GUI Q |
| 3082 | GUI R |
| 3083 | GUI S |
| 3084 | GUI T |
| 3085 | GUI U |
| 3086 | GUI V |
| 3087 | GUI W |
| 3088 | GUI X |
| 3089 | GUI Y |
| 3090 | GUI Z |
| Note: GUI Shift Keys - The AppleTM iMac keyboard has an apple key on either side of the space bar. Windows-based systems have a GUI key to the left of the left ALT key, and to the right of the right ALT key. | |
PF Key Standard Default Table
| PF Keys | Keystroke |
| 4001 | PF 1 |
| 4002 | PF 2 |
| 4003 | PF 3 |
| 4004 | PF 4 |
| 4005 | PF 5 |
| 4006 | PF 6 |
| 4007 | PF 7 |
| 4008 | PF 8 |
| 4009 | PF 9 |
| 4010 | PF 10 |
| 4011 | PF 11 |
| 4012 | PF 12 |
| 4013 | PF 13 |
| 4014 | PF 14 |
| 4015 | PF 15 |
| 4016 | PF 16 |
F key Standard Default Table
| F Keys | Keystroke |
| 5001 | F 1 |
| 5002 | F 2 |
| 5003 | F 3 |
| 5004 | F 4 |
| 5005 | F 5 |
| 5006 | F 6 |
| 5007 | F 7 |
| 5008 | F 8 |
| 5009 | F 9 |
| 5010 | F 10 |
| 5011 | F 11 |
| 5012 | F 12 |
| 5013 | F 13 |
| 5014 | F 14 |
| 5015 | F 15 |
| 5016 | F 16 |
| 5017 | F 17 |
| 5018 | F 18 |
| 5019 | F 19 |
| 5020 | F 20 |
| 5021 | F 21 |
| 5022 | F 22 |
| 5023 | F 23 |
| 5024 | F 24 |
Numeric Key Standard Default Table
| Numeric Keypad | Keystroke |
| 6042 | * |
| 6043 | + |
| 6044 | Undefined |
| 6045 | - |
| 6046 | . |
| 6047 | / |
| 6048 | 0 |
| 6049 | 1 |
| 6050 | 2 |
| 6051 | 3 |
| 6052 | 4 |
| 6053 | 5 |
| 6054 | 6 |
| 6055 | 7 |
| 6056 | 8 |
| 6057 | 9 |
| 6058 | Enter |
| 6059 | Num Lock |
Extended Keypad Standard Default Table
| Extended Keypad | Keystroke |
| 7001 | Break |
| 7002 | Delete |
| 7003 | Pg Up |
| 7004 | End |
| 7005 | Pg Dn |
| 7006 | Pause |
| 7007 | Scroll Lock |
| 7008 | Backspace |
| 7009 | Tab |
| 7010 | Print Screen |
| 7011 | Insert |
| 7012 | Home |
| 7013 | Enter |
| 7014 | Escape |
| 7015 | Up Arrow |
| 7016 | Dn Arrow |
| 7017 | Left Arrow |
| 7018 | Right Arrow |
Appendix D
Worldwide Support
Unitech's professional support team is available to quickly answer questions or technical-related issues. Should a set of equipment problem occurs, please contact the nearest Unitech regional service representative. For complete contact information please visit the Web sites listed below:
| Region | Web Site |
| Global Operation Center | http://www.ute.com |
| Unitech Taiwan | http://tw.ute.com |
| Unitech Asia Pacific & Middle East | http://apac.ute.com ; http://india.ute.com |
| Greater China Division | http://cn.ute.com |
| Unitech Japan | http://jp.ute.com |
| Unitech America | http://us.ute.com ; http://can.ute.com |
| Unitech Latin America | http://latin.ute.com |
| Unitech Europe | http://eu.ute.com |
- User's Manual
- Preface
- About This Manual
- Regulatory Compliance Statements
- FCC Warning Statement
- FCC Label Statement
- RF Radiation Exposure Statement
- Canadian Compliance Statement
- European Conformity Statement
- RoHS Statement
- Taiwan NCC Warning Statement
- Table of Contents
- About This Manual .... i
- Regulatory Compliance Statements.... ii
- FCC Label Statement.... ii RF
- Warranty ....iii
- Chapter 1
- Introduction .... 1
- Introducing the MS588.... 1
- Package Contents....2
- USB Interface 3
- USB Host Parameters....4
- RS-232 Interface....16
- Chapter 2
- Chapter 3
- Chapter 4
- Bar code Symbologies....39
- EAN-8/JAN-8....50
- Code 128....50
- GS1-128 (formerly UCC/EAN-128) 51
- ISBT 128 ....52
- Convert UPC-E to UPC-A 52
- Convert UPC-E1 to UPC-A 52
- Convert Code 39 to Code 32....53
- Convert I 2 of 5 to EAN-13....53
- Trioptic Code 39....53
- Discrete 2 of 5....54
- Interleaved 2 of 5 55
- Codabar 56
- MSI 57
- Matrix 2 of 5....59
- Inverse 1D 60
- Postal Code Symbologies 60
- Composite Symbologies 63
- 2D Symbologies.... 64
- Appendix A
- Sample Bar codes 73
- 2D Bar codes....73
- 1D Bar codes....74
- Appendix B
- Numeric Bar codes....77
- Appendix C
- ASCII Character Sets 79
- Appendix D
- Worldwide Support 89
- Introduction
- Introducing the MS588
- Report Version
- Package Contents
- USB Interface
- Connecting a USB Interface
- USB Host Parameters
- USB Device Type
- USB Transmission Speed Parameters
- USB Polling Interval
- Quick Keypad Emulation
- Emulate Keypad
- Emulate Keypad with Leading Zero
- USB Country Keyboard Types - Country Codes
- Simulated Caps Lock
- USB CAPS Lock Override
- ASCII Character Set for USB
- RS-232 Interface
- Connecting an RS232 Interface
- RS-232 Host Types
- Baud Rate
- Parity
- Stop Bit Select
- Data Bits
- Check Receive Errors
- Hardware Handshaking
- Software Handshaking
- Host Serial Response Time-out
- RTS Line State
- Beep on
- Intercharacter Delay
- ASCII Character Set for Serial Hosts
- Output Data Editing
- Transmit Code ID Character
- Prefix/Suffix Values
- Scan Data Transmission Format
- FN1 Substitution Values
- Bar code Setup Menu
- User Preferences
- Set Default Parameter
- Set Defaults (Factory Default)
- Parameter Scanning
- Beeper Volume
- Suppress Power-up Beeps
- Beeper Duration
- Trigger Modes
- Low Power Mode
- Time Delay to Low Power Mode
- Video Mode
- Image File Format Selector
- Video View Finder
- Mirrored Image
- Beep After Good Decode
- Bar code Symbologies
- Symbol Code Identifiers
- UPC-A
- Enable/Disable UPC-A
- Transmit UPC-A Check Digit
- UPC-A Preamble
- UPC-E
- Enable/Disable UPC-E
- Transmit UPC-E Check Digit
- UPC-E Preamble
- Code 39
- Enable/Disable Code 39
- Code 39 Check Digit Verification
- Transmit Code 39 Check Digit
- Set Lengths for Code 39
- Code 93
- Set Lengths for Code 93
- Code 11
- Enable/Disable Code 11
- Set Lengths for Code 11
- UPC-E1
- Transmit UPC-E1 Check Digit
- UPC-E1 Preamble
- EAN-13/JAN-13
- Bookland EAN
- Enable/Disable Bookland EAN
- Bookland ISBN Format
- Decode UPC/EAN/JAN Supplementals
- EAN-8/JAN-8
- Enable/Disable EAN-8/JAN-8
- Code 128
- Enable/Disable Code 128
- Set Lengths for Code 128
- GS1-128 (formerly UCC/EAN-128)
- ISBT 128
- Enable/Disable ISBT 128
- Convert UPC-E to UPC-A
- Convert UPC-E to UPC-A (Enable/Disable)
- Convert UPC-E1 to UPC-A
- Convert UPC-E1 to UPC-A (Enable/Disable)
- Convert Code 39 to Code 32
- Convert Code 39 to Code 32 (Enable/Disable)
- Convert I 2 of 5 to EAN-13
- Convert 12 of 5 to EAN-13 (Enable/Disable)
- Trioptic Code 39
- Enable/Disable Trioptic Code 39
- Enable/Disable Discrete 2 of 5
- Set Lengths for Discrete 2 of 5
- Interleaved 2 of 5
- Enable/Disable Interleaved 2 of 5
- Set Lengths for Interleaved 2 of 5
- Codabar
- Enable/Disable Codabar
- Set Lengths for Codabar
- MSI
- Enable/Disable MSI
- Set Lengths for MSI
- Matrix 2 of 5
- Enable/Disable Matrix 2 of 5
- Set Lengths for Matrix 2 of 5
- Inverse 1D
- Postal Code Symbologies
- UK Postal
- Japan Postal
- GS1 DataBar Limited Security Level
- Australia Post
- Composite Symbologies
- Composite CC-C
- Composite CC-A/B
- Composite TLC-39
- 2D Symbologies
- PDF417
- MicroPDF417
- Code 128 Emulation
- Data Matrix
- Data Matrix Inverse
- Decode Mirror Images (Data Matrix Only)
- Maxicode
- QR Code
- QR Inverse
- MicroQR
- Aztec
- Aztec Inverse
- Redundancy Level
- Redundancy Level 1
- Redundancy Level 2
- Redundancy Level 3
- Redundancy Level 4
- Security Level
- Intercharacter Gap Size
- Macro PDF Features
- Macro PDF User Indications
- Notes:
- Macro PDF Transmit / Decode Mode Symbols
- Transmit Macro PDF Control Header
- Escape Characters
- Flush Macro Buffer
- Abort Macro PDF Entry
- Sample Bar codes
- 2D Bar codes
- 1D Bar codes
- Numeric Bar codes
- Cancel
- ASCII Character Sets
- Worldwide Support
Brand : Unitech
Model : MS588
Category : Barcode scanners