
MS140 - Barcode scanners Unitech - Free user manual and instructions
Find the device manual for free MS140 Unitech in PDF.


| Product Type | Barcode slot reader (decoded) |
| Model | MS140 (MS140-3 Keyboard Wedge, MS140-2 RS232) |
| Interfaces | Keyboard wedge (PS/2, AT, XT, Mac ADB), RS232 serial port |
| Supported Symbologies | Code 39, UPC/EAN, Interleaved 2 of 5, Standard 2 of 5, Code 128, Codabar, MSI, Code 11, Code 93, etc. |
| Power Supply | Powered via keyboard port (wedge) or RS232 port (serial); no external adapter required |
| Dimensions (approx.) | 150 mm x 70 mm x 50 mm (estimated) |
| Weight (approx.) | 200 g (estimated) |
| Setup Methods | Keyboard wedge: swipe setup label, press Shift keys, or use scanner configuration manager; RS232: via terminal utility or batch setup labels |
| Configuration Software | Scanner Configuration Manager (Windows 95/98); downloadable from unitech-adc.com |
| Adjustable Parameters | Device selection, baud rate, parity, data bits, CTS/RTS, ACK/NAK, BCC, Xon/Xoff timeout, beep tone, intercharacter delay, interblock delay, function code, caps lock, language, double verification, label type, output level, terminator, code ID, preamble/postamble, symbology-specific settings |
| Default Baud Rate (RS232) | 9600 bps, 8 data bits, no parity |
| Default Keyboard Wedge Device | IBM PC/AT |
| Installation | Plug between keyboard and computer (wedge) or into serial port (RS232); power cycle required |
| Maintenance | Keep slot clean; no user-serviceable parts; refer to manual for cleaning |
| Safety | Turn off power before connecting/disconnecting; use only with compatible computers |
| Reparability | No spare parts listed; contact Unitech support for repairs |
| General Information | Decoded slot reader; supports batch setup for multiple scanners; includes beep indicator |
Frequently Asked Questions - MS140 Unitech
User questions about MS140 Unitech
0 question about this device. Answer the ones you know or ask your own.
Ask a new question about this device
Download the instructions for your Barcode scanners in PDF format for free! Find your manual MS140 - Unitech and take your electronic device back in hand. On this page are published all the documents necessary for the use of your device. MS140 by Unitech.
USER MANUAL MS140 Unitech
There are two models of the MS140 decoded slot reader available:
• The MS140-3 keyboard wedge slot reader which supports PC/AT, XT, notebooks and Macintosh computers
• The MS140-2 RS232 interface slot reader that supports computers with RS232 serial port.
Both of these readers support the most popular bar code symbologies, like Code 39, UPC/EAN, Interleaved 2 of 5, Standard 2 of 5, Code 128, Codabar, MSI, Code 11, Code 93, etc.
MS140-3 Keyboard Wedge
Setup of the keyboard wedge reader can be done in three different ways:
• Via computer keyboard of a desktop PC. Or
- By Scanner Configuration Manager Software to configure the scanner setting through the keyboard port.
Or
• By using the custom labels (batch setup).
Installation:
The picture below illustrates how to connect the reader to your computer. Follow these procedures for installation:
- Turn off computer power.
- Unplug keyboard from computer. Plug the reader into computer's keyboard port and the keyboard into the reader.
- Turn on power. One long beep from the reader indicates successful power-up.
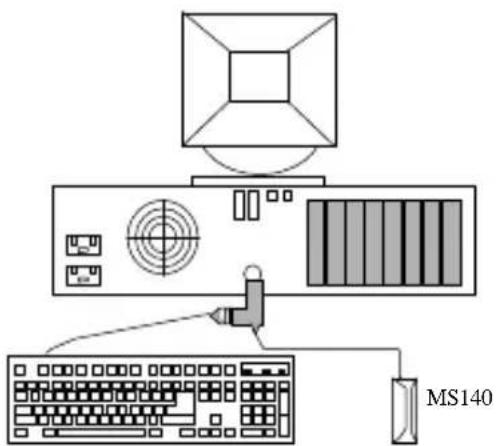
The default device ID of the reader is set to PC/AT. If your computer is not a PC/AT, please perform the setup on a PC/AT machine first in order to select a correct device ID. The device ID “06” (Keyboardless) is for notebook computers.
Keyboard Wedge Setup
The reader's behavior can be changed via a setup routine in the reader. Setup can be performed on a PC/AT computer with any text editor program, such as Notepad, WordPad, etc. After the text editor program is running, there are three different ways to enter setup:
- Swipe the “Keyboard Wedge Setup Label” bar code located on the cover page of this manual. Or
- Press the left and right SHIFT keys simultaneously within the first 20 keystrokes after computer power up. (This will apply when the reader has device ID set to PC/AT interface only. Swipe the “Enter Setup” label if you have this manual handy.) Or
• Use custom labels (batch setup).
When the reader enters the setup mode, a selection menu will be displayed on the screen. Please refer to the MS140 Setup Manual Section.
MS140-2 RS232 Wedge
Setup of the RS232 wedge reader can be done in two different ways:
• Through a modem communication utility (such as HyperTerminal). Or
• Via custom labels (batch setup).
Installation:
The picture below shows how to connect the reader to your computer. Use the following procedures for installation:
- Turn off computer power.
- Plug the reader into the computer's RS232 port.
- Turn on power. One long beep from the reader indicates successful power-up.
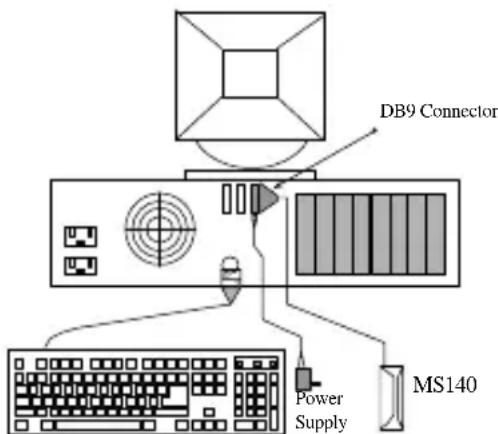
The default baud rate of the reader is set to 9600, no parity, and 8 data bits.
RS232 Interface Setup
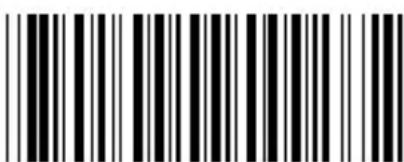
The reader's behavior can be changed through a setup routine in the reader. Setup can be performed (at 9600 baud rate, 8bits and no parity) with any modem communication utility, such as Windows' HyperTerminal. To enter Setup mode, start the Communication utility on the PC and swipe “RS232 Interface Setup Label” bar code label located on the back page of this manual. On entering the Setup mode, a selection menu will be displayed on the screen as follow:
MS140 SETUP MENU
Follow the prompts and make your selections accordingly. The setup procedure is that simple. (Use Ctrl_R in lieu of the shift key in a string input procedure. This method allows the user to input ASCII characters into a string.)
Batch Setup
If more than one scanner needs to be configured, you can duplicate the settings of the Master Scanner to the others. This is done by producing a set of custom setup labels (derived from the master scanner) and then scanning these labels to configure the other scanners. Selecting the Dump command in setup mode or swiping the “Dump Setting” label below will dump the settings of the reader to the screen as one or several ASCII string(s). Use any barcode printing software, select Code 39 symbology, and use the output string(s) to generate barcode labels. You can then scan these batch setup labels to duplicate the settings.
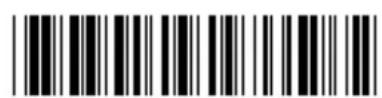
Dump Setting
(Feel free to duplicate or photocopy)
Scanner Configuration Manager
Scanner Configuration Manager is a utility program to configure scanner settings on a computer using the Windows 95/98 operating system. Use the program to define the settings and then download the parameters to the scanner. Download the program from our web site at www.unitech-adc.com.
Selectable Parameters and their Defaults
| Parameters | Selections | Default | |
| Keyboard Wedge Device Selection | IBM PC/AT, PS/2 mod 40, 60, 80 etc IBM PS/2 Model 25, 56, 70, 90 Macintosh ADB bus Keyboardless Wedge (Notebook) | IBM PC/AT | |
| RS232 Interface Baud Rate | 0-300; 1-600; 2-1200; 3-2400; 4-4800; 5-9600; 6-19200 | 9600 | |
| Parity | 0-Even;1-Odd;2-Mark;3-Space;4-None | None | |
| Data bits | 0-7 bits; 1-8 bits | 8 bits | |
| CTS/RTS | 0-Ignore; 1-RTS Enabled at Power on; 2-RTS Enabled in communication | Ignore | |
| ACK/NAK | 0-Off; 1-On | Off | |
| BCC Character | 0-Off; 1-On | Off | |
| Xon/Xoff Time out | 0-1 sec; 1-3 sec; 2-10 sec; 3-Unlimited | 1 sec | |
| Beep Tone None/Low/Medium/High/Low to High/High to Low | Medium | ||
| Beep Tone (On ACK) | None/Low/Medium/High/Low to High/High to Low | High | |
| Intercharacter delay | 0 ms/1 ms/2 ms/5 ms/10 ms/30 ms/50 ms/100 ms | 0 ms | |
| Interblock delay 0 ms/10 ms/50 ms/100 ms/500 ms/1 second/3 second/5 second | 0 ms | ||
| Function Code On/Off On | |||
| CapsLock | Auto_trace/Low Case/Upper Case | Auto_trace | |
| Language | US/UK/Swiss/Swedish/Spanish/Norwegian/Italian/German/French/Alt Key Mode/Danish | US | |
| Double verification | Off/1~7 On(Verify 1~7 times) | Off | |
| Label Type | Positive /Positive and Negative | Positive | |
| Output of Wand | Bar high, space low/Bar low, space high | Bar high, space low | |
| Level Duration | 200 us/600 us | 200 us | |
| Terminator | Enter/Return /Field Exit/None | Enter | |
| Code ID | Disable/Enable | Disable | |
| Define Code ID | 00- Code 39 Full ASCII01- Code 39 Standard02- EAN-1303- UPC-A04- EAN-805- UPC-E06- I 2 of 507- Codabar08-Code 12809-Code 93 | 10- S 2 of 511- MSI12- EAN 12813- Code 3214- Delta Code15- Label Code16- Plessey Code17- Code 1118-Toshiba Code | |
| Data Length | Exclude/ Include | Exclude | |
| Preamble | Define up to 16 characters | None | |
| Postamble | Define up to 16 characters | None | |
| Code 39 | Disable/Enable Enable | ||
| Full ASCII/Standard | Full ASCII | ||
| Check Digit Check and Send/ Check but Not Send/ Not Check | Not Check | ||
| Send/Not Send Start & Stop Not Send | |||
| Min 0 / Max 48 0 / 48 | |||
| Interleaved 2 of 5 Fix Length On/Off Check Digit Check First Digit Suppressed/ Last Digit Not Suppressed/ Not Suppressed. Min 4 / Max 64 | Disable/Enable Enable | ||
| Fix Length On/Off Off | |||
| Not Send/ Not Check | Not Check | ||
| Suppressed/ Not Suppressed. | Not Suppressed | ||
| 10 / 64 | |||
| Standard 2 of 5 / Toshiba Check Digit Check Min 1 / Max 48 | Disable/Enable Disable | ||
| Fix Length On/Off On | |||
| Not Send/ Not Check | Not Check | ||
| 4/48 | |||
| Code 32 Leading Character Tailing Character | Disable/Enable Disable | ||
| Send / No Send Send | |||
| Send /No Send Send | |||
| Telepen Standard/Numeric | Disable/Enable Disable | ||
| Set Standard | |||
| UCC/EAN 128 | Disable/Enable | Enable | |
| Code ID Disable/Enable Disable | |||
| Code 128 / Label Code | Disable/Enable Enable | ||
| Min 1 / Max 64 1 / 64 | |||
| MSI / Plessey Code CD Double Module Min 1 / Max 16 | Disable/Enable Disable | ||
| CD Send / No Send No Send | |||
| Module 10/ CD Double Module 11 Plus 10/CD single Module 10 | CD Double Module 10 | ||
| 1 / 16 | |||
| Code 93 Min 1 / Max 48 | Disable/Enable Enable | ||
| 1 / 48 | |||
| Code 11 One/Two CD CD Send / No Send | Disable/Enable Disable | ||
| Two CD | |||
| No Send | |||
| Min 1 / Max 48 | 1 / 48 | ||
| Codebar | Disable/Enable Disable | ||
| Start & Stop Send/No Send | No Send | ||
| CD Calculate & Send/CD Calculate but no Send/CD not Calculate | CD not Calculate | ||
| CLSI Format On/Min 3 / Max 48 | Off Off | ||
| 3 / 48 | |||
| Label Code IV& V | Disable/Enable Disable | ||
| Checksum Send/No Send Send | |||
| UPC-ACD Send / No Send | Disable/Enable Enable | ||
| Leading Digit Send / No Send | Send | ||
| Send | |||
| UPC-ELeading Digit Send | Disable/Enable Enable | ||
| d / No Send Send | |||
| CD Send / No Send | No Send | ||
| Zero Expansion On | On / Off Off | ||
| Disable/Enable NSC=1 | Disable | ||
| EAN-13CD Send / No Send | Disable/Enable Enable | ||
| Leading Digit Send / No Send | Send | ||
| Send | |||
| Bookland EAN Enable | Disable / Disable Disable | ||
| EAN-8Leading Digit Send | Disable/Enable Enable | ||
| d / No Send Send | |||
| CD Send / No Send | Send | ||
| Supplement CodeTransmitted if PresentSpace Added / Not Added | Two Add-on Code Off / On | Off | |
| Five Add-on Code Off / On | Off | ||
| Present/ Must Present | Must Present | ||
| Not Added Not Added | |||
| Delta DistanceCodeCheck Digit Send | Disable/Enable Disable | ||
| Check Digit Calculated / Not Calculated | Calculated | ||
| / No Send No Check | |||
User's Manual
MS140-2 or MS140I-2
RS232 Interface
Slot Reader
RS232 Interface Setup Label
Brand : Unitech
Model : MS140
Category : Barcode scanners