
VT-5002 - Wall socket V-TAC - Free user manual and instructions
Find the device manual for free VT-5002 V-TAC in PDF.


| Product Type | Wall Socket |
| Model | VT-5002 |
| Brand | V-TAC |
| Color | White |
| Material | Polycarbonate (flame retardant) |
| Dimensions (H x W x D) | 86 mm x 86 mm x 45 mm |
| Weight | Approx. 100 g |
| Rated Voltage | 250 V AC |
| Rated Current | 16 A |
| Frequency | 50/60 Hz |
| Number of Sockets | 1 |
| Socket Type | Type F (CEE 7/4) with grounding |
| Installation | Flush mounting, 60 mm box depth required |
| Protection Rating | IP20 (indoor use only) |
| Safety Features | Child safety shutters |
| Operating Temperature | -20°C to +55°C |
| Certifications | CE, RoHS, UKCA |
| Cleaning | Wipe with a dry, soft cloth. Do not use abrasive cleaners. |
| Warranty | 2 years |
Frequently Asked Questions - VT-5002 V-TAC
User questions about VT-5002 V-TAC
0 question about this device. Answer the ones you know or ask your own.
Ask a new question about this device
Download the instructions for your Wall socket in PDF format for free! Find your manual VT-5002 - V-TAC and take your electronic device back in hand. On this page are published all the documents necessary for the use of your device. VT-5002 by V-TAC.
USER MANUAL VT-5002 V-TAC
WEEE Number: 80133970
INSTALLATION INSTRUCTION
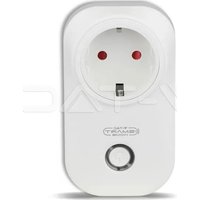
WIFI MINI SMART SOCKET-USB

works with amazon alexa
works with the Google Assistant
02 YEAR WARRANTY*
INTRODUCTION & WARRANTY
Thank you for selecting and buying V-TAC Product. V-TAC will serve you the best. Please read these instructions carefully before starting the installation and keep this manual handy for future reference. If you have any other query, please contact our dealer or local vendor from whom you have purchased the product. They are trained and ready to serve you at the best. The warranty is valid for 2 years from the date of purchase. The warranty does not apply to damage caused by incorrect installation or abnormal wear and tear. The company gives no warranty against damage to any surface due to incorrect removal and installation of the product.
Note:
- This device requires Wi-Fi Frequency 2.4Ghz
- Indoor use only
- Working Condition: -20°C to 60°C
- Store Humidity: RH10% - RH80%
- Operating frequency (maximum transmitted power) 2400MHz -2483.5MHz (20dBm)
SPECIFICATIONS
| Model Number | SKU | Input Voltage | Max Current | Wireless Standard | Material | Max Watt |
| VT-5002 | 8416 | AC:90-250V, 50/60Hz | 10A | Wi-Fi 2.4Ghz | PC | 2200 |
| VT-5002-BS | 8428 | AC:90-250V, 50/60Hz | 10A | Wi-Fi 2.4Ghz | PC | 2200 |
APP INSTALLATION
Download eWeLink APP by via APP Store Google Play Store (OR) Scan the below QR code to download the eWeLink APP, FAQ

GOOGLE PLAY

IOS

FAQ

MULTI-LANGUAGE MANUAL
WARNING
- Please make sure to turn off the power before starting the installation.
- Must be installed by professional electrician.
- Plug in fully to the wall outlet while using
- Do not insert a conductor or other tools to the socket hole
- Do not use in bathroom and other damp locations
-
Please keep the device out of the reach of children to avoid danger
-
Please ensure the security of the electricity, resistive load current cannot be higher than 10A

This marking indicates that this product should not be disposed of with other household wastes.

Caution, risk of electric shock.
INSTALLATION
- Switch OFF the power.
- Plug in the smart plug, and switch ON The power.
- If the indicator light blinks on the smart plug, it indicates the smart plug is working properly.
Step 1: Open the eWeLink App and register. If you already have an existing account with eWeLink, please proceed to logging in.
Step 2: To Add a New device tap on the “+” sign(as shown)


Step 3: Make sure your Smart device is powered ON
1) Tap and hold on the power button for 5 seconds to make the device available in pairing mode. Once in pairing mode the LED will start blinking 3 times repeatedly.
2) Tap on Next to start the pairing of device with the app. (Shown in the image)
Note: If you are facing any trouble while pairing in Quick Pairing mode please try to pair the device in Compatible Pairing Mode (Click on the link as shown on the image).

Step 4: Select your Wifi name and enter the password and tap on Next.
Step 5: Give a name to your device (Ex: Smart Plug/ smart switch) & tap on complete.


flowchart
graph TD
    A["My devices"] --> B["Complete"]
Step 6: Your device is now paired and will appear (Ex: as shown in the below image).
a) To turn the device ON/OFF tap on the ON/OFF icon(as shown in the below image).
b) To enter more settings of the Smart device tap on the Name(Ex: Smart Plug as shown below)

Step 7: eWeLink offers multiple features such as;
a) Share - This function allows you to share the access with another user.
b) Schedule: Schedule timer allows you to turn the device ON/OFF with flexibility of choosing date and time. This feature also allows Repeat mode using which you can set the desired configuration to daily OR any day of the week.
c) Timer : Timer function allows you to set "day-hour-minute" using which you can schedule the device to Turn ON/OFF

ALEXA SETTINGS
Step 1: Install the Amazon Alexa app via the App Store (iOS) or the Play Store (Android) and register. If you already have an existing account with Amazon Alexa, please proceed to logging in.

Step 3: On the Home page of Amazon Alexa App, Tap on the icon as shown on the image below.

natural_image
Blue rectangular background with a black arrow pointing diagonally down-right (no text or symbols)Step 2: Once you are on the Amazon Alexa home page, tap on the lower right icon — where the arrow is pointed— to add a new device and Enable Skills.

Step 4: Tap on "Skills & Games" as show below

Step 5: On the Search bar as shown type "eWeLink" and tap on the eWeLink skill as shown on the below image.
Search

Step 7: Enter Login credentials of eWeLink and then tap on Log In. If you do not have a existing account please register by tapping on the register.

Step 6: Tap on "ENABLE TO USE" to link eWeLink skill with Amazon Alexa app.
V-TAC Smart Home
eWeLink Rated: Guidance Suggested 0


Step 8: a)Once you have successfully linked V-TAC Skill close the window & (b)tap on Discover device. Make sure Smart device is paired with eWeLink app.
a)


V-TAC has been successfully linked.
What to do next:
→ Close this window to discover smart-home devices you can control with Alexa.

b)
Discover Devices

Smart Home devices must be discovered before they can be used with Alexa.

Step 9: Discover your smart device on Alexa. Once you have enabled the skill
A) You can use voice command "Alexa discover devices" to the Alexa device which you have.
B) To add device manually on home page tap on and tap on Add device, select the device which you are adding and tap on discover device. (Ref Image B)


Note: Discovering the device must be done every time the device's name is changed on the app.
ALEXA Commands
Now, you can control your smart device using voice commands on Alexa. Below are few example commands on how to use Alexa device:
➢! Alexa, turn ON Smart Plug
➢! Alexa, turn OFF Smart Plug
THINGS TO REMEMBER BEFORE STARTING INSTALLATION:
- eWeLink App & Amazon Alexa App
- Make sure you have Amazon Alexa Device(including Echo, Echo Tap, or Echo Dot)
- Smart Home Device
- Stable Wifi network
GOOGLE HOME SETTINGS
Step 1:
a&b) Install the Google Home app via the App Store (iOS) or the Play Store (Android) and register. If you already have an existing account with Google Home, please proceed to logging in. c) Create a New Home/choose from the existing home if any. d) Power ON the Google Home device and connect it to the App. (Then Proceed to step 2)
a. Welcome home
Your content and devices all in one place

natural_image
Abstract geometric shapes including a triangle, circle, and rectangle (no text or symbols)GET STARTED >
b. Choose account
This account will be used to personalize your experience
c. Choose a home
You will be able to control the devices and services in this home.

Create another home
d. Plug in your device
Make sure your device is nearby and connected to power, then try again

Step 2: Once you are on the Google home page, tap on the Add "+" icon- to add a new device and skill. And then tap on set up device as shown in below image.
a.

Play
Office

Broadcast


Add

Settings
Office
1 device

Office Speaker
Pause
b.

Add to Home

Set up device

Add home member

Create speaker group

Create new home
Add services

Music and audio

Videos and photos
Step 3: Make sure the Smart device is paired with eWeLink app before starting step 3. Tap on the arrow section as highlighted in the below image.
Set up
Set up new devices or add existing devices and services to your home
New devices

Set up new devices
Google Home, smart displays and devices labelled 'Made for Google' such as C by GE smart bulbs
Works with Google

Have something already set up?
Link your smart home services such as Philips Hue and TP-Link

Step 5: Sign In with your eWeLink Login credentials to Link the Smart Home device

Step 4: Type "eWeLink" on the search bar and tap on eWeLink icon from the drop down options as shown below.

eWeLink

Linked
Add new

eWeLink

Step 6:
a. Account will now be linked, please stay on the page you will be redirected in few seconds to select the device to add to your home. b. Select the device and tap on Next as show in image(b)
a. Done
assistant.google.com

Account is now Linked
b. ×
Choose device

Step 7: Select the Home where you would like to add the Smart Device under. (Or) you can create a New home in order to add the Smart Device to it.
Step 8: You have successfully added V-TAC Smart device to your Google home App.
Choose a home
You will be able to control the devices and services in this home.

Smart-Home

Office

Smart Home

Create another home
Smart-Home

Add

Settings
Master bedroom
1 device

Smart Plug

Off

On
Step 9: You can turn the device On/OFF by taping On/Off options as shown below. (OR) You can tap on the name(Ex:Smart Plug as shown below) to redirect to new page.
Smart-Home

Add

Settings
Master bedroom
1 device


Smart Plug
Off

On

Smart Plug
Master bedroom

On
Google Commands:
Now, you can control your smart device using voice commands on Google Home. Below are a few example voice commands on how to use Google Home device:
➢! OK Google, turn ON Smart Plug
➢! OK Google, turn OFF Smart Plug
THINGS TO REMEMBER BEFORE STARTING INSTALLATION:
- eWeLink App & Google Home App
- Make sure you have Google Home Device
- Smart Home Device
- Stable Wifi network
- INSTALLATION INSTRUCTION
- INTRODUCTION & WARRANTY
- Note:
- SPECIFICATIONS
- APP INSTALLATION
- WARNING
- INSTALLATION
- ALEXA SETTINGS
- ALEXA Commands
- THINGS TO REMEMBER BEFORE STARTING INSTALLATION:
- GOOGLE HOME SETTINGS
- Step 1:
- a. Welcome home
- b. Choose account
- c. Choose a home
- d. Plug in your device
- Set up
- Step 6:
- Choose a home
- Smart-Home
- Master bedroom
- Smart Plug
- Google Commands:
Brand : V-TAC
Model : VT-5002
Category : Wall socket