
PSP5UHIJ - Vacuum Cleaner Profilo - Free user manual and instructions
Find the device manual for free PSP5UHIJ Profilo in PDF.


| Brand | Profilo |
| Model | PSP5UHIJ |
| Product Type | Bagless Upright Vacuum Cleaner |
| Dimensions (WxDxH) | 30 x 25 x 110 cm |
| Weight | 5.5 kg |
| Power Supply | 220-240 V, 50/60 Hz |
| Power Consumption | 1200 W |
| Suction Power | 250 Air Watts |
| Dust Capacity | 1.5 L |
| Filtration System | HEPA washable filter |
| Cleaning Features | Adjustable suction, brush roll on/off, crevice tool, upholstery brush |
| Noise Level | 75 dB |
| Cord Length | 8 m |
| Operating Radius | 12 m |
| Maintenance | Empty dust bin after each use; wash filter every 3 months |
| Safety Features | Thermal overload protection, automatic shutoff |
| Spare Parts | Replacement filters, brush roll, belts available |
| Accessories Included | Combination crevice/upholstery tool, floor brush |
| Warranty | 2 years |
Frequently Asked Questions - PSP5UHIJ Profilo
User questions about PSP5UHIJ Profilo
0 question about this device. Answer the ones you know or ask your own.
Ask a new question about this device
Download the instructions for your Vacuum Cleaner in PDF format for free! Find your manual PSP5UHIJ - Profilo and take your electronic device back in hand. On this page are published all the documents necessary for the use of your device. PSP5UHIJ by Profilo.
USER MANUAL PSP5UHIJ Profilo
natural_image
Line drawing of a vacuum cleaner with a handle and wheels (no text or symbols)Bagless vacuum cleaner
https://digitalguide.bsh-group.com?mat-no=8001244647
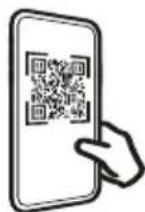
[en] Scan the QR code or visit the website to open the Further Notices for Use. You can find additional information about your appliance or accessory here.
natural_image
Line drawing of a cylindrical object with a flanged top and side ports (no text or symbols)A

natural_image
Line drawing of a curved, textured object resembling a tool or device (no text or symbols)B

natural_image
Technical line drawing of a mechanical connector or fitting (no text or symbols)C

natural_image
Technical line drawing of a laboratory pipette setup with a beaker and control panel (no text or labels)D
natural_image
Line drawing of a handheld device with a handle and control knob (no text or symbols)-

natural_image
Line drawing of a vacuum cleaner with handle and screwdriver (no text or symbols)The image is too blurry to recognize any text content.

natural_image
Technical line drawing of a mechanical component with no visible text or symbolsD

natural_image
3D illustration of a mechanical component with a curved handle and flanged base (no text or symbols)-
natural_image
Technical line drawing of a mechanical device with handle and internal components (no text or symbols)-

natural_image
Line drawing of a tool or plunger with a tapered handle and handle (no text or symbols)G
natural_image
Line drawing of a mechanical component with no visible text or symbols[Non-Text]

The image is too blurry to recognize any text content.

3
4

natural_image
Diagram showing a blue cable being twisted with black arrows indicating rotational motion (no text or symbols)5
natural_image
Diagram of a vacuum cleaner with blue and black arrows indicating rotational motion (no text or symbols)6

natural_image
Diagram of a blue mechanical device with a black arrow indicating rotation or change, no text or symbols present.7

natural_image
Diagram showing a blue cylindrical object with a black double-headed arrow indicating vertical displacement (no text or symbols)8
natural_image
Diagram of a car's rear wheel and side-mounted sensor, showing mechanical components and a blue tool (no text or symbols)9
natural_image
Diagram of a car interior showing a blue mechanical component with a black arrow pointing to it (no text or symbols present)10

11
natural_image
Diagram of a washing machine with a blue cover and black adjustment knob, showing mechanical components (no text or symbols)The image is too blurry to recognize any text content.

natural_image
Diagram showing a blue cable being inserted into a connector with black arrows indicating direction (no text or symbols)13
natural_image
Diagram of a car interior with blue hoses and numbered components (no text or symbols)The image is too blurry to recognize any text content.

natural_image
Diagram of a blue and white mechanical device with coiled tubing, showing a component with a numbered arrow (no text or symbols present)15

natural_image
Illustration of a car's airbag with blue hoses and a checkmark indicating inspection (no text or symbols)The image is too blurry to recognize any text content.

natural_image
Line drawing of a hand inserting a small component into a cylindrical device (no text or symbols)17
natural_image
Diagram showing a device being inserted into a blue plastic container with an arrow indicating the process (no text or symbols present)The image is too blurry to recognize any text content.

natural_image
Diagram of a device with an open lid and a blue octagonal base, showing internal components and a black arrow indicating rotation (no text or symbols present)19

natural_image
Illustration of a hand holding a blue 3D block with motion lines indicating movement (no text or symbols)
natural_image
Illustration of a blue showerhead spraying water onto a hexagonal base (no text or symbols)The image is too blurry to recognize any text content.

21

natural_image
3D diagram of a mechanical device with open and closed casing, showing internal components (no text or symbols)The image is too blurry to recognize any text content.

natural_image
Illustration of a hand operating a blue vacuum cleaner with a black upward arrow indicating the process (no text or symbols present)23

natural_image
Illustration of a hand using a tool to adjust or install a mechanical component, with no visible text or symbols.The image is too blurry to recognize any text content.
natural_image
Diagram of a cleaning or cleaning device with a blue lid and arrow indicating the component (no text or symbols present)25

natural_image
Illustration of a blue showerhead spraying water onto a textured base (no text or symbols)The image is too blurry to recognize any text content.
natural_image
Illustration of a hand pouring liquid into a trash bin (no text or symbols)27

natural_image
Technical illustration of a blue and white vacuum cleaner with internal components (no text or symbols)The image is too blurry to recognize any text content.

natural_image
Diagram of a blue mechanical component with a black arrow pointing to a specific part (no text or symbols present)29
natural_image
Diagram of a blue plastic component being inserted into a mechanical housing (no text or symbols visible)The image is too blurry to recognize any text content.

31

natural_image
Illustration showing a hand pressing a grid on a blue plastic tray and another hand using a spray gun to lift a grid into a container (no text or symbols)The image is too blurry to recognize any text content.

natural_image
Blue electronic component with grid pattern and a circular dial showing 24-hour operation (no text or symbols on the component itself)33

The image is too blurry to recognize any text content.
natural_image
Diagram of a blue automotive component with a black arrow pointing to a grid-like structure (no text or symbols)35
The image is too blurry to recognize any text content.

37

natural_image
Technical diagram of a mechanical component with an arrow pointing to a blue rectangular block (no text or symbols present)The image is too blurry to recognize any text content.

natural_image
Illustration of a hand holding a blue rectangular object with motion lines, no text or symbols present39
natural_image
Illustration of a blue showerhead spraying water onto a blue surface (no text or symbols)
The image is too blurry to recognize any text content.
41

Safety
- Read this instruction manual carefully.
- Keep the instruction manual and the product information safe for future reference or for the next owner.
■ Do not connect the appliance if it has been damaged in transit. Only use this appliance:
■ With genuine parts and accessories. Damage caused by using third-party products is not covered under the warranty.
■ For cleaning surfaces.
■ In private households and in enclosed spaces in a domestic environment at room temperature.
■ Up to an altitude of max. 2000 m above sea level.
Do not use the appliance:
■ For vacuum-cleaning persons or animals.
■ For vacuuming up harmful, sharp-edged, hot or burning substances.
■ For vacuuming up damp substances or liquids.
■ For vacuuming up highly flammable or explosive materials and gases.
■ For vacuuming up ash or soot from stoves and central heating systems.
■ For vacuuming up toner dust from printers and photocopiers.
■ For vacuuming up building rubble.
Disconnect the appliance from the power supply when:
■ cleaning the appliance.
This appliance may be used by children aged 8 or over and by people who have reduced physical, sensory or mental abilities or inadequate experience and/or knowledge, provided that they are supervised or have been instructed on how to use the appliance safely and have understood the resulting dangers.
Children must not play with the appliance.
Cleaning and user maintenance must not be performed by children unless they are being supervised.
▶ Repairs to the appliance should only be carried out by trained specialist staff.
▶ Only use genuine spare parts when repairing the appliance.
If the power cord of this appliance is damaged, it must be replaced by the manufacturer, the manufacturer's Customer Service or a similarly qualified person in order to prevent any risk.
▶ Never operate a damaged appliance.
▶ Never operate an appliance with a cracked or fractured surface.
▶ Never pull on the power cord to unplug the appliance. Always unplug the appliance at the mains.
▶ Never pull or carry the appliance by the power cord.
▶ If the appliance or the power cord is damaged, immediately unplug the power cord or switch off the fuse in the fuse box.
▶ Call customer services.
▶ Only use the appliance in enclosed spaces.
▶ Never expose the appliance to intense heat or humidity.
- Do not use steam- or high-pressure cleaners to clean the appliance.
▶ Never let the power cord come into contact with hot appliance parts or heat sources.
▶ Never let the power cord come into contact with sharp points or edges.
▶ Never kink, crush or modify the power cord.
- Connect and operate the appliance only in accordance with the specifications on the rating plate.
- When cleaning the appliance, do not use flammable substances or substances that contain alcohol.
▶ Pull out the power cord completely.
- Keep clothing, hair, fingers and other body parts away from the openings on the appliance and the moving parts.
▶ Never point the pipe or the nozzles towards eyes, hair, ears or mouths.
- When vacuuming stairs, ensure that there are no persons underneath the appliance.
- When taking a break from vacuuming, switch off the appliance and pull out the mains plug.
▶ Retract the power cord.
- When the cord is being rewound automatically, ensure that the mains plug is not thrown in the direction of persons, body parts, animals or objects.
en Preventing material damage
- Keep packaging material away from children.
▶ Do not let children play with packaging material.
Preventing material damage
▶ Never place the appliance on the hose.
▶ Regularly check the running surfaces of the nozzles for wear.
▶ Replace worn nozzles.
▶ Never operate the appliance without the motor protection filter.
▶ Never operate the appliance without the exhaust filter.
Included with the appliance
After unpacking all parts, check for any damage in transit and completeness of the delivery.
→ Fig. 1
| A | Telescopic tube with adjusting sleeve ^1 |
| B | Handle |
| C | Hose |
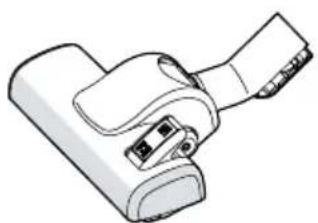
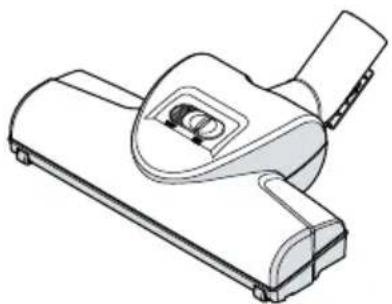
| D | Adjustable floor nozzle ^1 |
| E | Hard floor nozzles ^1 |
| F | Turbo nozzle ^1 |
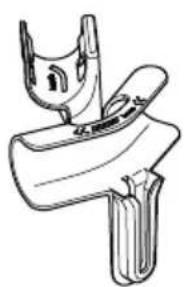
| G | Combination nozzle |
| H | Hose holder ^1 |
| I | Mattress nozzle ^1 |
^1 Depending on the appliance specifications
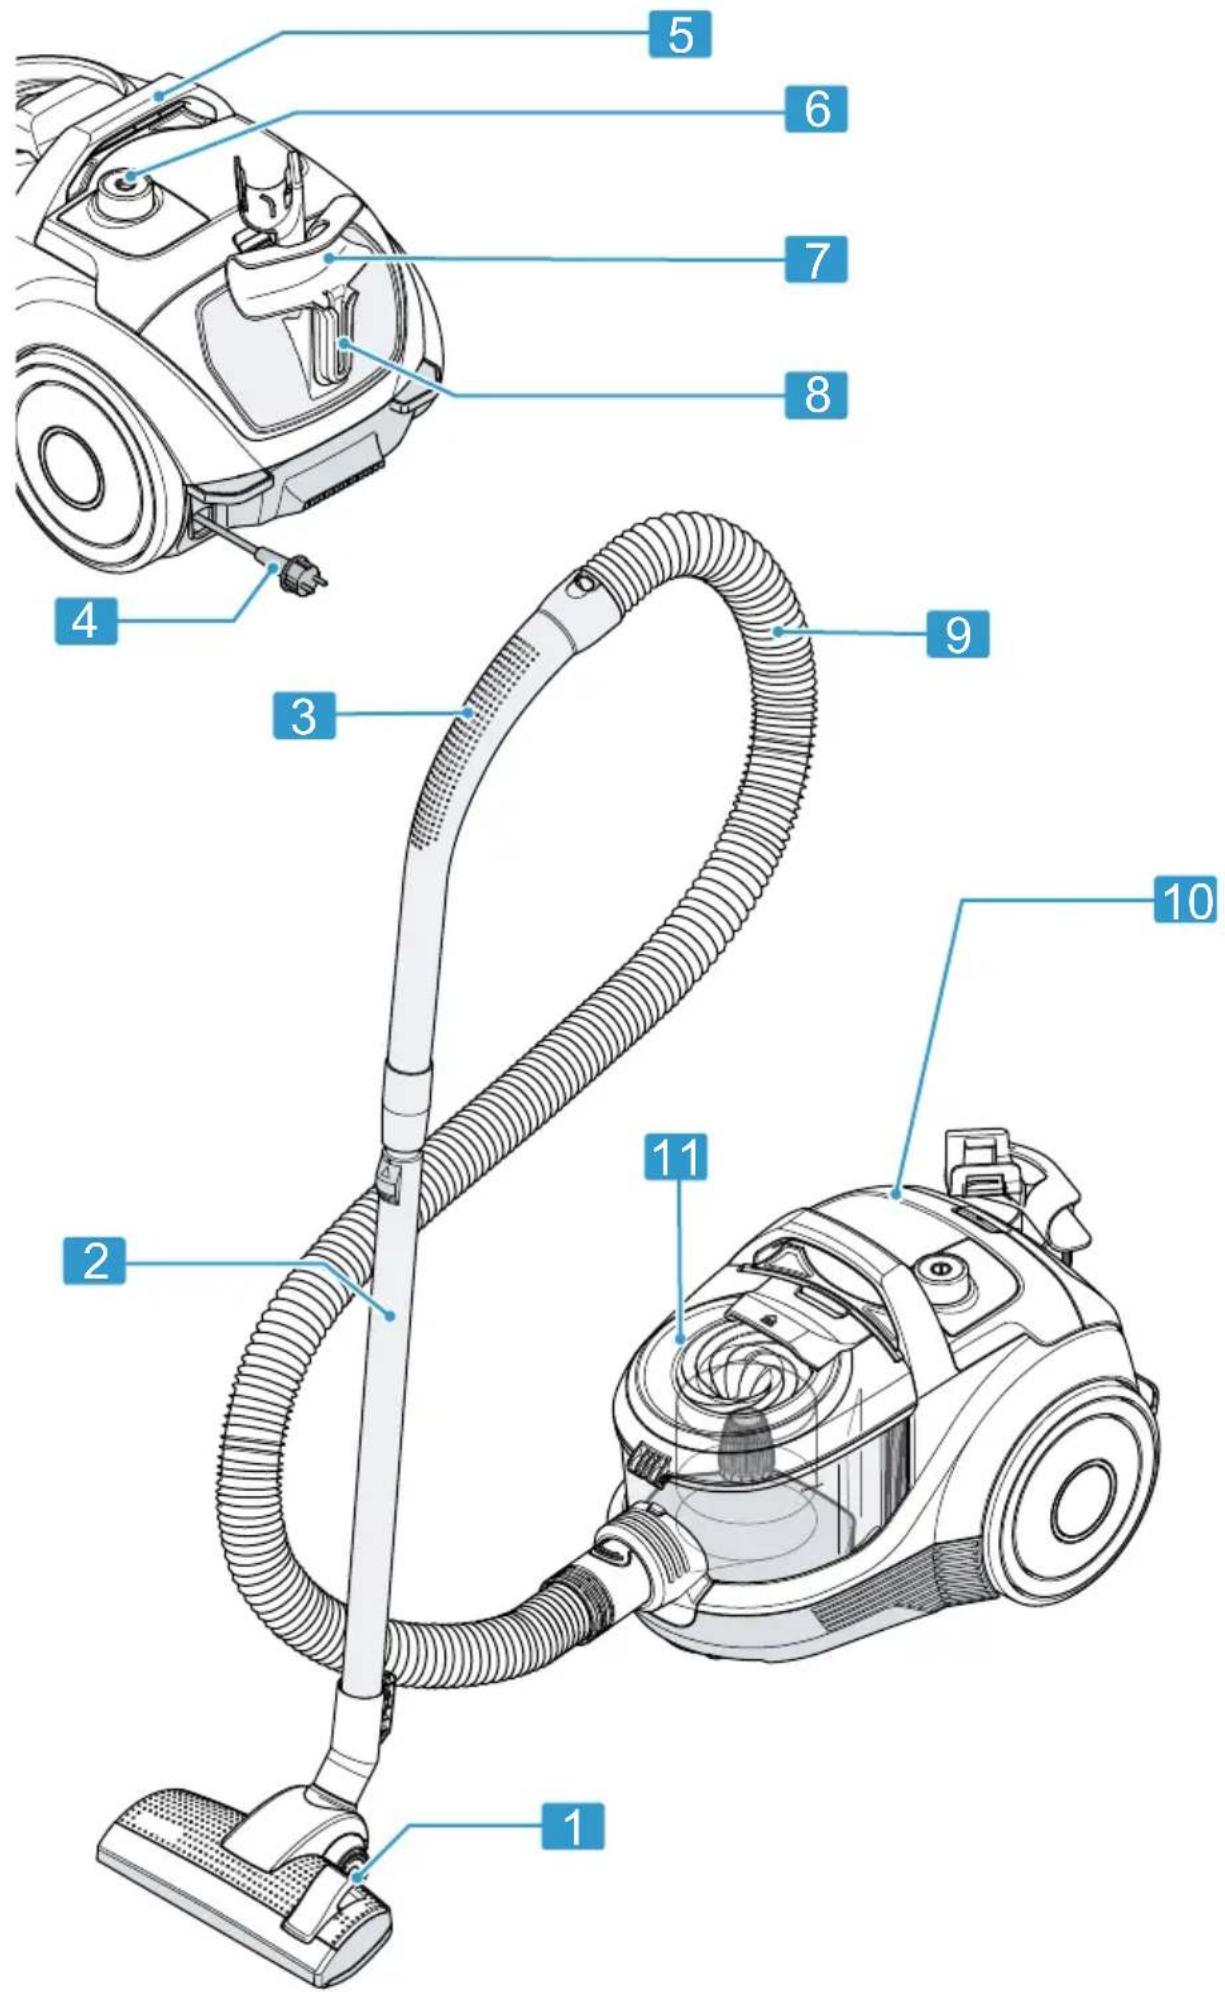
Overview
→ Fig. 2
| 1 | Adjustable floor nozzle ^1 |
| 2 | Telescopic tube with adjusting sleeve ^1 |
| 3 | Handle ^1 |
| 4 | Power cord |
| 5 | Carrying handle |
^1 Depending on the appliance specifications
| 6 | Power control and on/off switch |
| 7 | Hose holder ^1 |
| 8 | Storage aid |
| 9 | Hose |
| 10 | Rear flap |
| 11 | Dust container ^1 |
^1 Depending on the appliance specifications
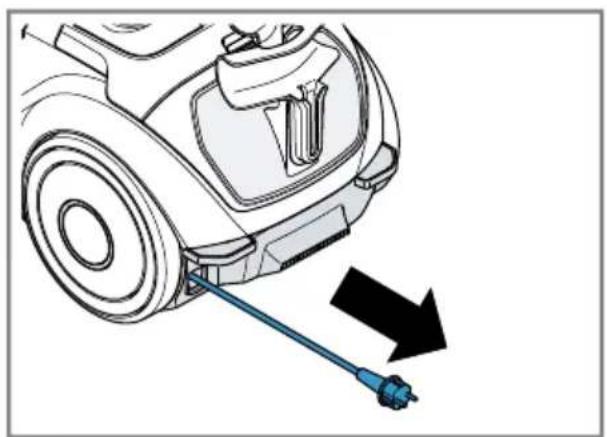
Operating the appliance
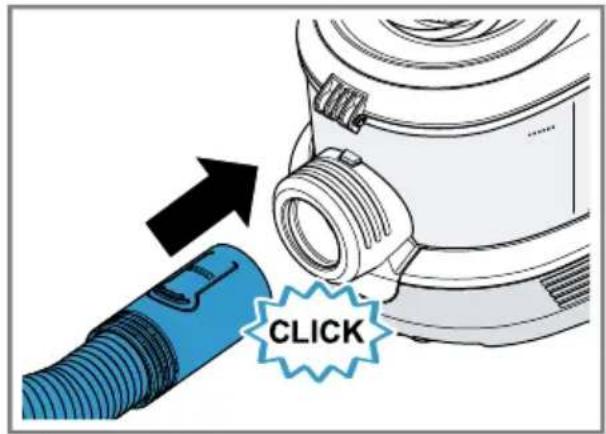
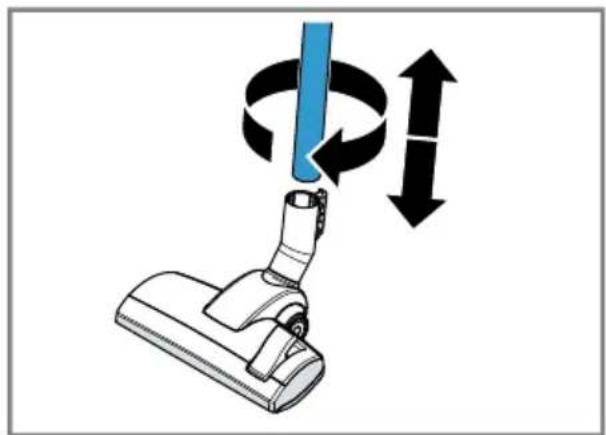
Follow the illustrated instructions.
Assembling and disassembling the appliance
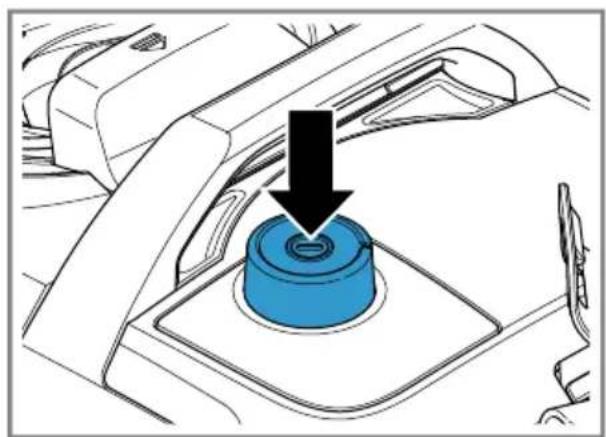
→ Fig. 3 - 7
Operating the appliance
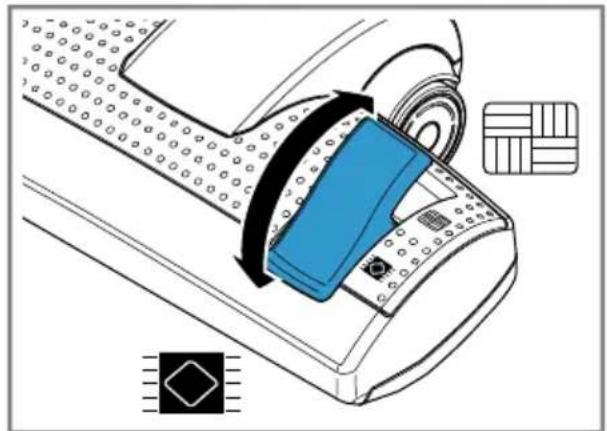
→ Fig. 8 - 13
Storing the hose
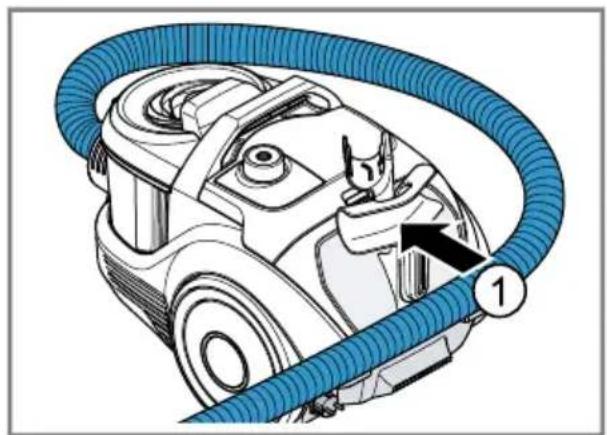
→ Fig. 14 - 16
Cleaning and servicing
Follow the illustrated instructions.
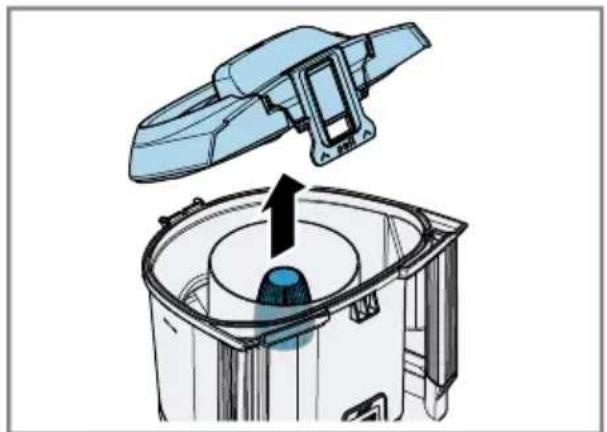
Note: It is recommended cleaning the filter of the dust container whenever you empty the container. It should however be done at least once a month.
Cleaning the filter in the dust container
→ Fig. 17 - 22
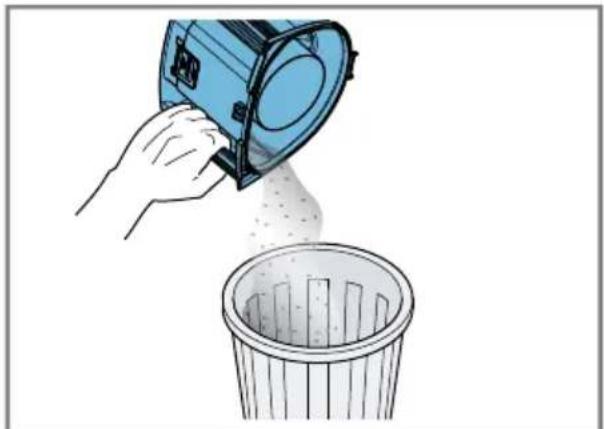
Cleaning the dust container
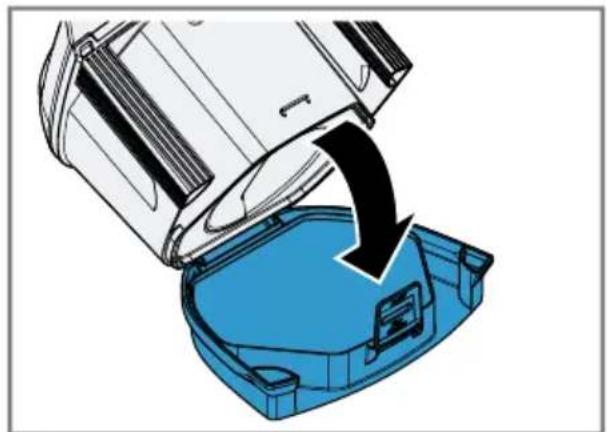
→ Fig. 23 - 28
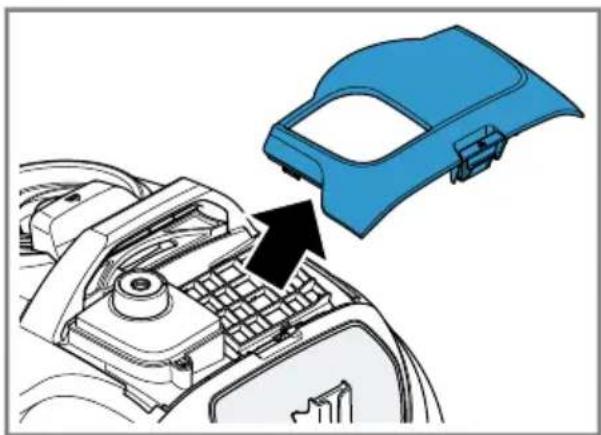
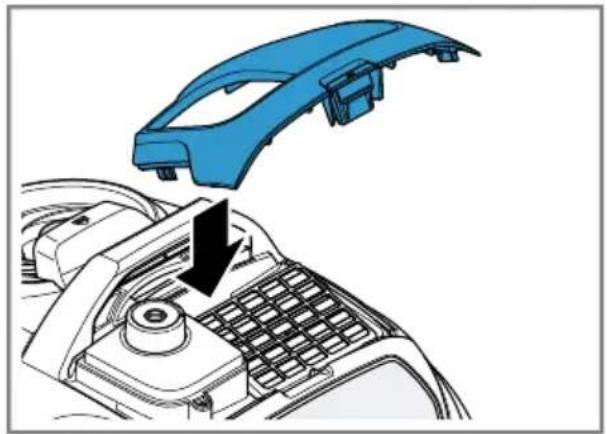
Cleaning the exhaust filter
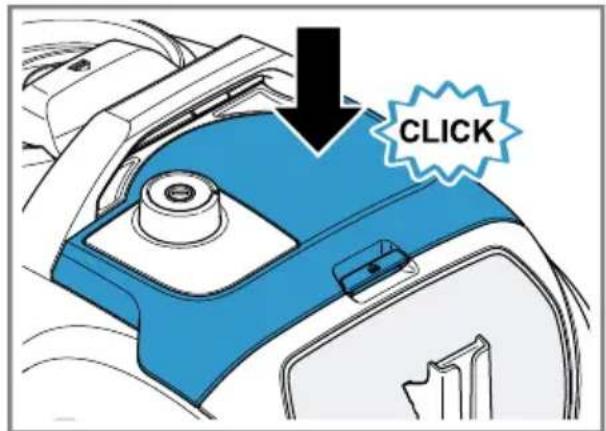
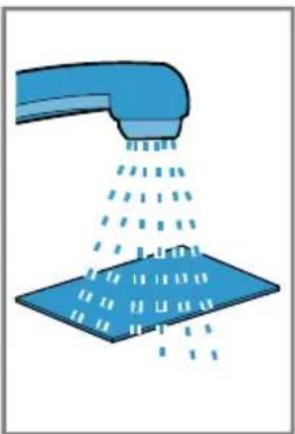
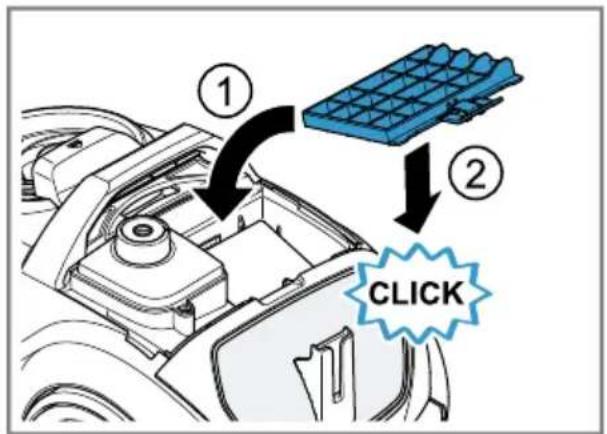
→ Fig. 29 - 36
Cleaning the exhaust filter fleece
→ Fig. 29 - 35
Troubleshooting
▶ Repairs to the appliance should only be carried out by trained specialist staff.
▶ Only use genuine spare parts when repairing the appliance.
If the power cord of this appliance is damaged, it must be replaced by the manufacturer, the manufacturer's Customer Service or a similarly qualified person in order to prevent any risk.
Disposing of old appliance
- Unplug the appliance from the mains.
- Cut through the power cord.
- Dispose of the appliance in an environmentally friendly manner.
Information about current disposal methods are available from your specialist dealer or local authority.
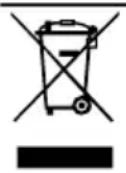
This appliance is labelled in accordance with European Directive 2012/19/EU concerning used electrical and electronic appliances (waste electrical and electronic equipment - WEEE).
The guideline determines the framework for the return and recycling of used appliances as applicable throughout the EU.
Warranty conditions
You can make warranty claims for your appliance under the following conditions.
The guarantee conditions for this appliance are as defined by our representative in the country in which it is sold. Details regarding these conditions can be obtained from the dealer from whom the appliance was purchased. The bill of sale or receipt must be produced when making any claim under the terms of this guarantee.

Güvenlik
Bandrol ve Seri No. :


- Safety
- en Preventing material damage
- Preventing material damage
- Included with the appliance
- Overview
- Operating the appliance
- Assembling and disassembling the appliance
- Storing the hose
- Cleaning and servicing
- Cleaning the filter in the dust container
- Cleaning the dust container
- Cleaning the exhaust filter
- Cleaning the exhaust filter fleece
- Troubleshooting
- Disposing of old appliance
- Warranty conditions
- Güvenlik
Brand : Profilo
Model : PSP5UHIJ
Category : Vacuum Cleaner