
EBB7116 - Oven VOX - Free user manual and instructions
Find the device manual for free EBB7116 VOX in PDF.


| Product Type | Built-in Electric Oven |
| Brand | VOX |
| Model | EBB7116 |
| Height | 59.5 cm |
| Width | 59.5 cm |
| Depth | 54.5 cm |
| Weight | 32 kg |
| Power Supply | 220-240 V ~ 50/60 Hz |
| Energy Efficiency Class | A |
| Oven Capacity | 60 L |
| Cooking Modes | Conventional, Fan Forced, Grill, Top Heat, Bottom Heat, Defrost |
| Temperature Range | 50 °C - 250 °C |
| Interior Light | Yes |
| Timer | Yes, with automatic shut-off |
| Child Lock | Yes |
| Cleaning Type | Enamel interior, easy-clean catalytic panels |
| Drawer | Storage drawer included |
| Safety Features | Overheating protection, automatic shut-off, cool-touch door |
| Spare Parts Availability | Heating elements, thermostat, door gasket, fan motor available |
| Repairability Index | 7.5/10 |
Frequently Asked Questions - EBB7116 VOX
User questions about EBB7116 VOX
0 question about this device. Answer the ones you know or ask your own.
Ask a new question about this device
Download the instructions for your Oven in PDF format for free! Find your manual EBB7116 - VOX and take your electronic device back in hand. On this page are published all the documents necessary for the use of your device. EBB7116 by VOX.
USER MANUAL EBB7116 VOX
natural_image
Abstract black-and-white geometric pattern with diagonal stripes (no text or symbols)VOX
ELECTRONICS
GBR
SRB
MKD
SVN
HRV
GRC
EBB7226 - EBB7116
OPERATING INSTRUCTIONS BUILT- IN OVEN UPUTSTVO ZA UPOTREBU UGRADNA RERNA УПАТСТВА ЗА РАКУВАНЬЕ ВГРАДНА РЕРНА NAVODILA ZA UPORABO UGRADBENA РЕĆNICA UPUTSTVO ZA UPORABU UGRADBENA РЕČICA ЕГХЕІРІДІО ХРНЗТН ЕНТОІХІЗМЕНОЗ ФОУРНОЗ

EBB7226
EBB7116
OPERATING AND INSTALLATION
INSTRUCTIONS OF
BUILT-IN OVEN
Dear Customer,
Our goal is to offer you high quality products that exceed your expectations. Your appliance is produced in state of the art facilities and is carefully tested for quality. This manual is prepared to help you use your appliance, which has been manufactured using the most recent technology, with confidence and maximum efficiency. Before using your appliance, carefully read this guide which includes basic information on safe installation, maintenance and use. Please contact your nearest Authorized Service Centre for the installation of your product.
Contents
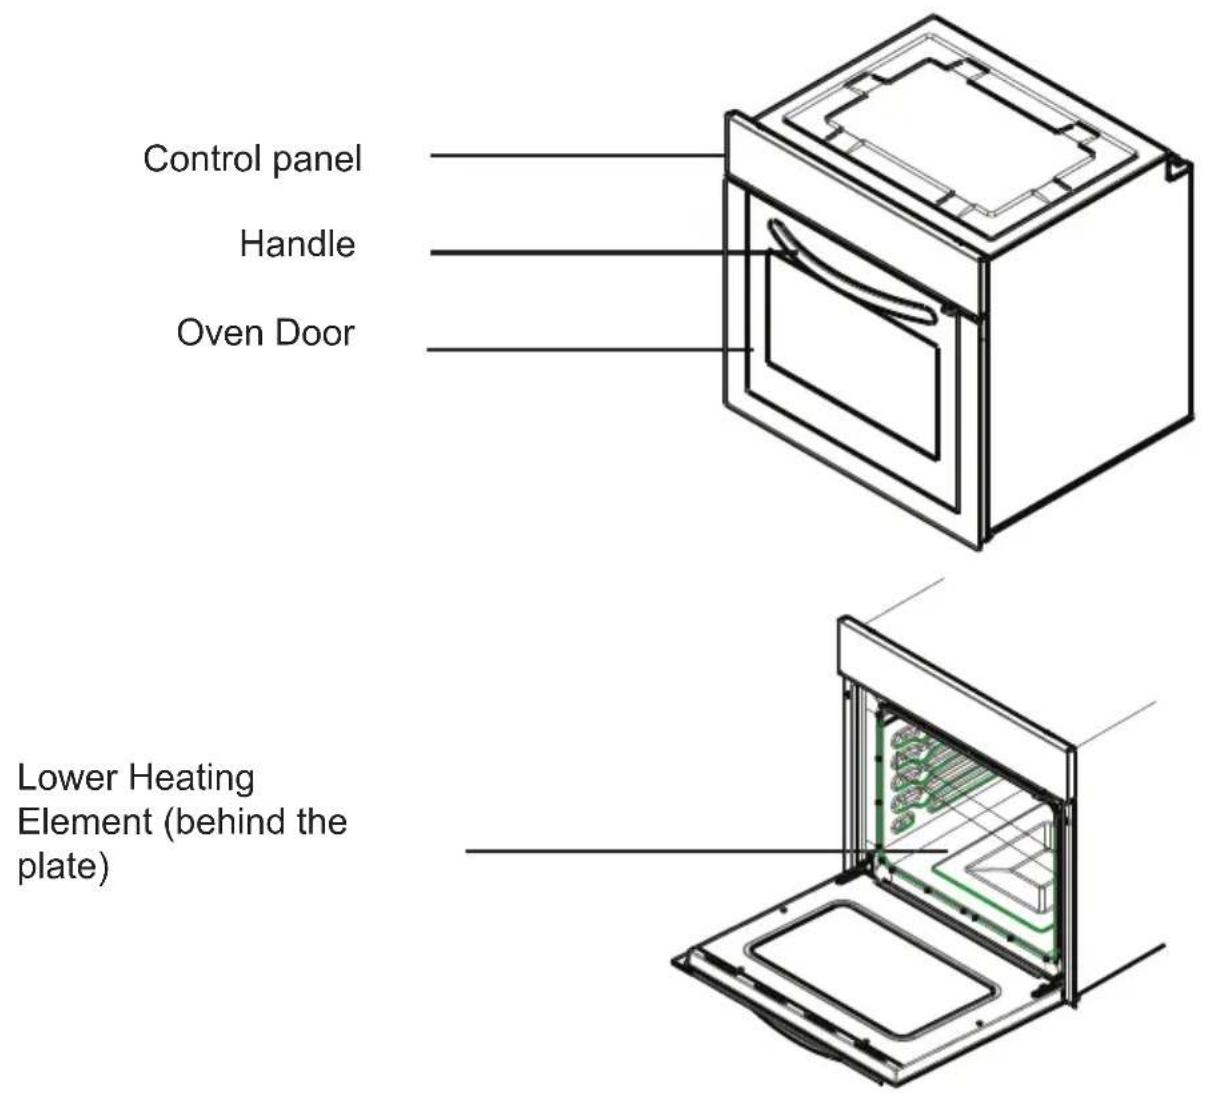
Presentation and size of product
Warnings
Preparation for installation and use
Using the oven
Cleaning and maintenance of your product
Service and Transport
PRESENTATION AND SIZE OF PRODUCT
Upper Heating Element (behind the plate)
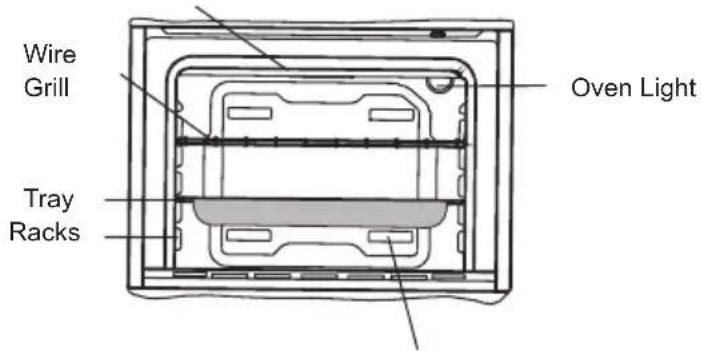
Air Outlet Shutters
SAFETY WARNINGS
READ THESE INSTRUCTIONS CAREFULLY AND COMPLETELY BEFORE USING YOUR APPLIANCE, AND KEEP THEM IN A CONVENIENT PLACE FOR REFERENCE WHEN NECESSARY.
THIS MANUAL IS PREPARED FOR MORE THAN ONE MODEL. YOUR APPLIANCE MAY NOT HAVE SOME OF THE FEATURES THAT ARE EXPLAINED IN THIS MANUAL. WHILE YOU ARE READING THE OPERATING MANUAL, PAY A SPECIAL: ATTENTION TO THE EXPRESSIONS THAT HAVE IMAGES.
General Safety Warnings
- This appliance can be used by children aged 8 years and above and persons with reduced physical, sensory or mental capabilities or lack of experience and knowledge if they have been given supervision or instruction concerning use of the appliance in a safe way and understand the hazards
involved. Children shall not play with the appliance. Cleaning and user maintenance shall not be done by children without supervision.
- WARNING: The appliance and its accessible parts become hot during use. Care should be taken to avoid touching the heating elements. Children under the age of 8 should stand away from the appliance unless continuously supervised.
- WARNING: Fire hazard: do not store items on the cooking surfaces.
- WARNING: If the surface is cracked, switch the appliance off to avoid the possibility of electric shock.
- The appliance is not intended to be ope-
rated by means of an external timer or separate remote-control system.
- The appliance becomes hot during use. Care should be taken to avoid touching heating elements inside the oven.
- During use, handles held for short periods in normal use can become hot.
- Do not use harsh abrasive cleaners or sharp metal scrapers to clean the oven door glass and other surface since they can scratch the surface, which can cause the glass to shatter or cause damage to the surface.
- Do not use steam cleaners to clean the appliance.
- WARNING: Ensure that the appliance is
switched off before replacing the lamp to avoid the possibility of electric shock.
- CAUTION: Accessible parts may become hot when cooking or grilling. Young children should be kept away from the appliance.
- Your appliance is produced in accordance with all applicable local and international standards and regulations.
- Maintenance and repair work must be carried out only by authorized service technicians. Installation and repair work that is carried out by unauthorized technicians may endanger you. Altering or modifying the specifications of the appliance in any way is hazardous.
- Prior to installation, ensure that the local distribution conditions (nature of the gas and gas pressure or electricity voltage and frequency) and the requirements of the appliance are compatible. The requirements for this appliance are stated on the label.
- CAUTION: This appliance is designed only for cooking food and is intended for indoor domestic household use only and should not be used for any other purpose or in
any other application, such as for non-domestic use or in a commercial environment or room heating.
- Do not try to lift or move the appliance by pulling on the door handle.
- All possible security measures have been taken to ensure your safety. Since the glass may break, you should be careful while cleaning it to avoid scratching. Avoid hitting or knocking on the glass with accessories.
- Ensure that the supply cord is not wedged during the installation. If the supply cord is damaged, it must be replaced by the manufacturer, its service agent or similarly qualified persons in order to prevent a hazard.
- While the oven door is open, do not let children climb on the door or sit on it.
Installation Warnings
- Do not operate the appliance before it is fully installed.
- The appliance must be installed by an authorized technician and put into use. The manufacturer is not responsible for any damage that might be caused by defective placement and installation by unauthorized persons.
- When you unpack the appliance, make sure that it was not damaged during transportation. In the event of any defect; do not use the appliance and contact a qualified service agent immediately. As the materials used for packa-
ging (nylon, staplers, styrofoam... etc.) may cause harmful effects to children, they should be collected and disposed of immediately.
- Protect your appliance against atmospheric effects. Do not expose it to effects such as sun, rain, snow etc.
- The surrounding materials of the appliance (cabinet) must be able to withstand a temperature of a min. of 100°C.
During use
- When you first run your oven, a certain smell will emanate from the insulation materials and the heater elements. For this reason, before using your oven, run it empty at the maximum temperature for 45 minutes. At the same time you need to properly ventilate the environment in which the product is installed.
- During use, the outer and inner surfaces of the oven become hot. While opening the oven door, step back to avoid the hot steam coming out of the oven. A risk of burns may occur.
- Do not put flammable or combustible materials, in or near the appliance when it is in operation.
• Always use oven gloves to remove and replace food in the oven. - Do not leave the cooker while co-oking with solid or liquid oils. They may catch fire as a result of of extreme heating. Never pour water on to flames that are caused by oil. Cover the saucepan or frying
pan with its cover to choke the flame that has arisen in this case and turn the cooker off.
- If you are not going to use the appliance for a long time, remove the plug from the socket. Keep the main control switched off. Additionally, when not using the appliance, shut the gas valve off.
- Make sure the appliance control knobs are always in the “0” (stop) position when it is not being used.
- The trays incline when pulled out. Be careful not to let hot liquid spill over.
- When the door or drawer of the oven is open, do not leave anything on it. You may unbalance your appliance or break the cover.
- Do not put heavy things or flammable or ignitable goods (nylon, plastic bag, paper, cloth...etc.) into the drawer. This includes cookware with plastic accessories (e.g. handles).
- Do not hang towels, dishcloths or clothes from the appliance or its handles.
- During cleaning and maintenance
- Always turn the appliance off before operations such as cleaning or maintenance. You can do this after removing the plug for the appliance off or turning the main switches off.
- Do not remove the control knobs to clean the control panel.
• TO MAINTAIN THE EFFICIENCY AND SAFETY OF YOUR APPLI-
ANCE, WE RECOMMEND YOU ALWAYS USE ORIGINAL SPARE PARTS AND ONLY CALL OUR AUTHORIZED SERVICE AGENTS SHOULD SUCH A NEED ARISE.
PREPARATION FOR INSTALLATION AND USE
Manufactured with best quality parts and materials, this modern, functional and practical oven will meet your needs in all respects. Make sure to read the manual to obtain successful results and not to experience any problems in the future. The information given below contain rules that are necessary for correct positioning and service operations. They should be read in detail especially by the technician who will position the appliance.
CONTACT THE AUTHORIZED SERVICE FOR THE INSTALLATION OF YOUR OVEN!
CHOOSING A PLACE FOR THE OVEN
-There are several points to pay attention to when choosing a place for your oven. Make sure to take our recommendations below into account in order to prevent any problems and dangerous situations, which may occur later!
-When choosing a place for the oven, attention should be paid that there are no flammable or combustible materials in the close vicinity, such as curta-
ins, oil, cloth etc., which quickly catch fire.
-Furniture surrounding the oven must be made of heat resistant materials - more than 50C^ of the room temperature.
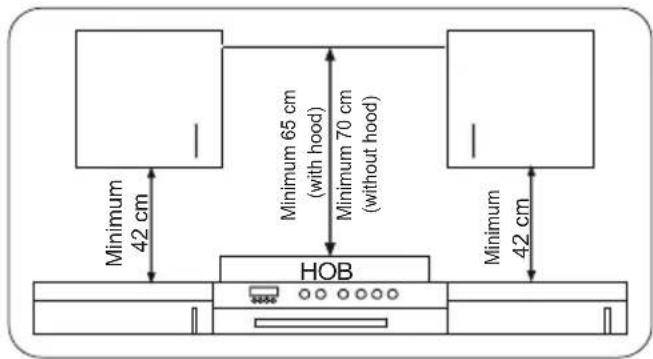
Required changes to wall cabinets and exhaust fans above the built-in combined product as well as minimum heights from the oven board are shown in Figure 1. Accordingly, the exhaust fan should be at a minimum height of 65 cm from the hob board. If there is no exhaust fan, the height should not be less than 70 cm.
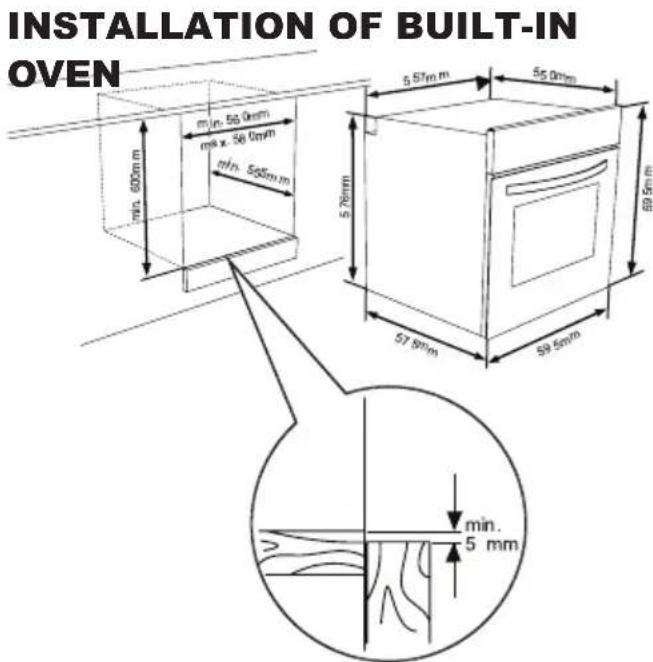
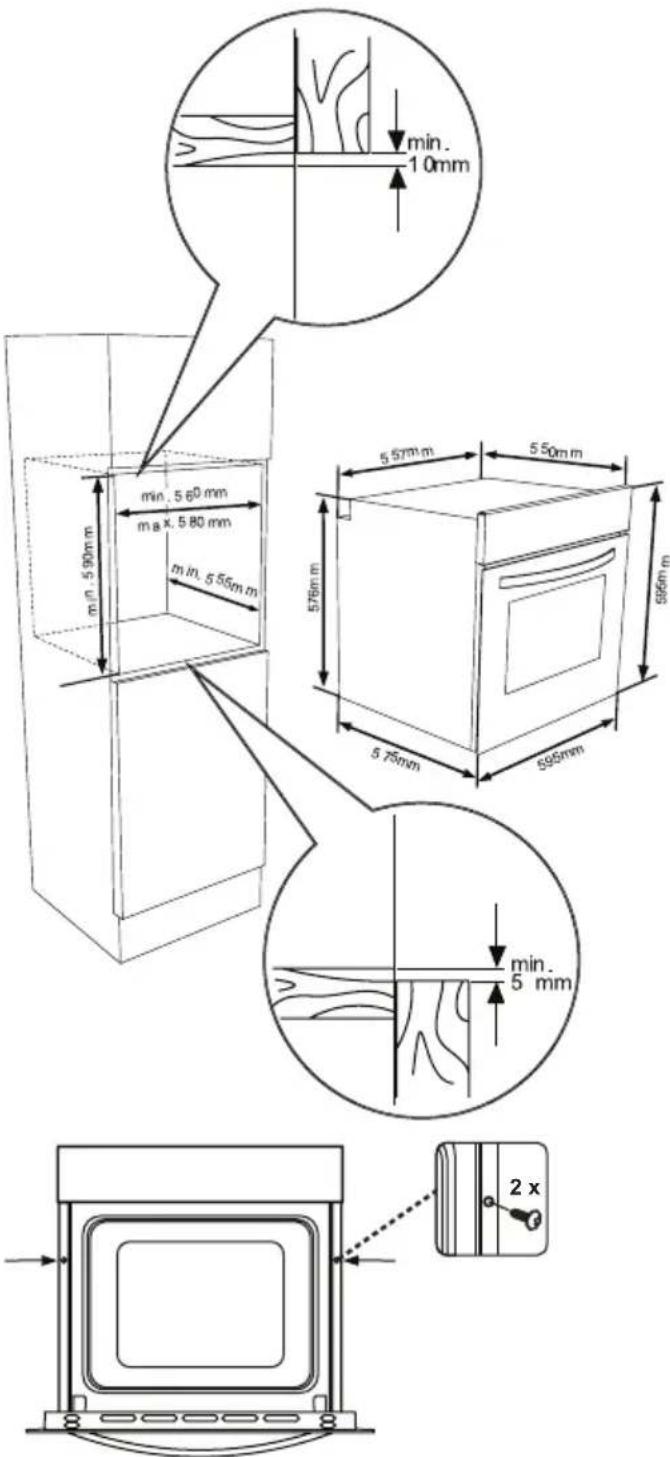
Insert the oven into the cabinet by pushing it forward. Open the oven door and insert 2 screws in the holes located on the oven frame. When the product frame touches the wooden surface of cabinet, tighten the screws.
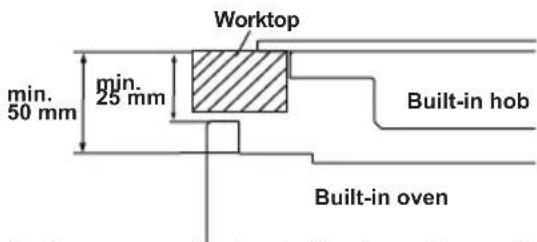
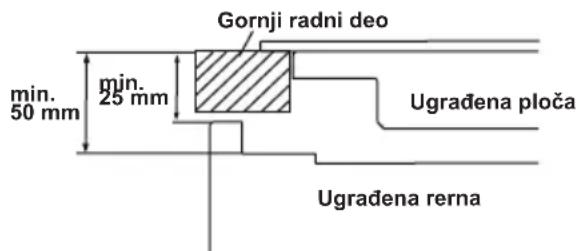
If the oven is installed under a hob, the distance between the worktop and the top panel of the oven must be a minimum of 50 mm and the distance between the worktop and the top of control panel must be a minimum of 25 mm.
WIRING AND SAFETY OF THE BUILT IN OVEN
The instructions given below must be followed explicitly during wiring:
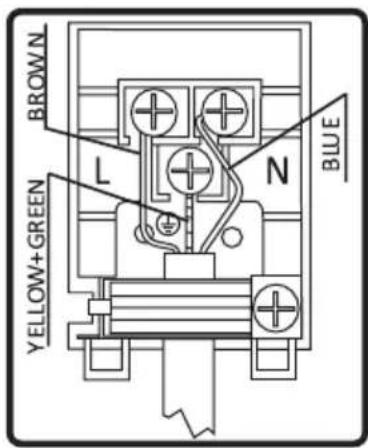
- The grounding cable must be connected via the screw with the grounding mark. The supply cable connection must be carried out as shown in figure. If there is no grounded outlet conforming to regulations in the installation environment, call the Authorized Service Centre immediately.
-The grounded outlet must be in close proximity to the appliance. Never use an extension cord.
-The supply cable should not contact the product's hot surface.
-In the event of any damage to the supply cable, make sure to call the Authorized Service Centre. The cable must be replaced by the Authorized Service technician.
-Wiring of the appliance must be performed by the Authorized Service technician. A H05VV-F type supply cable must be used.
-Faulty wiring may damage the appliance. Such damage will not be covered under the warranty.
-The appliance is designed to connect
to 220-240V\~. If the electricity is different than the value given above, call the Authorized Service Centre immediately.
-The manufacturer declares that its bears no liability of any kind for damage and loss arising from not complying with safety standards!
USING THE OVEN
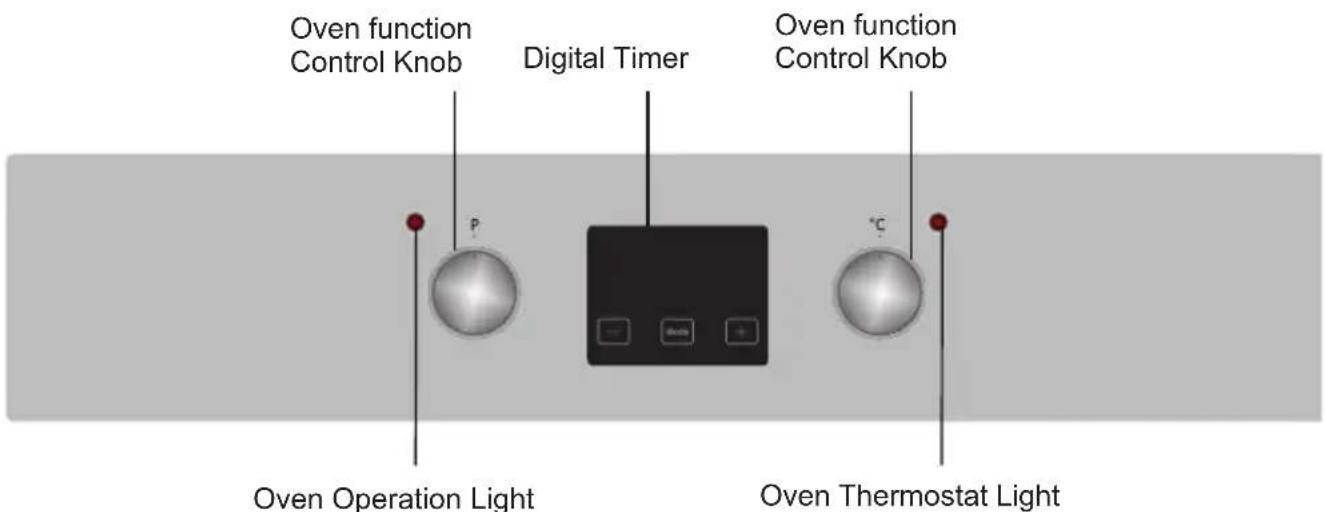
Control Panel
Oven
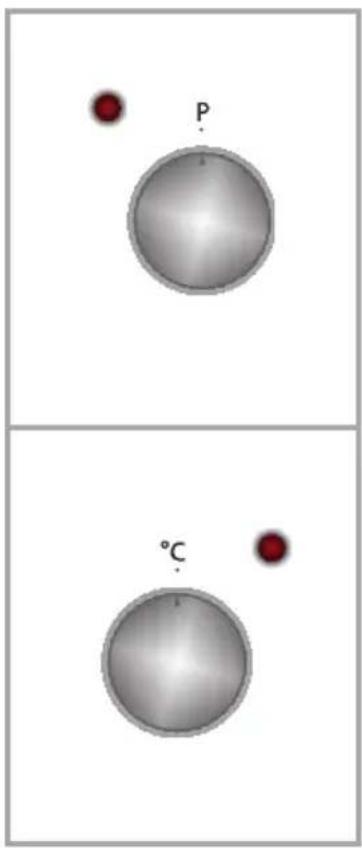
Function Control Knob
To select the desired cooking function, turn the knob to the related symbol the details of the oven functions are explained in the next section.
Thermostat Control Knob
To select the desired temperature, turn the knob to the related degrees the details of the oven functions are explained in the next section.
chemical
Diagram showing two spherical atoms labeled P and °C, with red dots indicating positions on each sphereOven Functions
* The functions of your oven may be different due to the model of your product.

Oven Lamp:
Only the oven light will be turned on and it will remain on in all cooking functions.

Defrost Function:
The oven's warning lights will be turned on, the fan will start operating.
To use the defrost function, take your frozen food and place it in the oven on a shelf placed in the third slot from the bottom. Placing an oven tray under the defrosting food to catch the water accumulated due to the melting ice is recommended. This function will not cook or bake your food, it will only help defrost it.

Turbo Function
The oven's thermostat and warning lights will be turned on, the ring heating element and fan will start operating.
The turbo function evenly disperse the heat in the oven. All foods on all racks will be cooked evenly. It is recommended to pre-heat the oven about 10 minutes.

Fan Function:
The oven's thermostat and warning lights will be turned on, the upper and lower heating elements and fan will start operating.
This function is very good for baking
pastries. Cooking is carried out by the lower and upper heating elements within the oven and by the fan providing air circulation, which will give the food a slightly grilled effect. Pre-heating the oven for about 10 minutes is recommended.

Static Cooking Function:
The oven's thermostat and warning lights will be turned on, the lower and upper heating elements will start operating. The static cooking function emits heat, ensuring even cooking of the food on the lower and upper shelves. This is ideal for making pastries, cakes, baked pasta, lasagne and pizza. Pre-heating the oven for 10 minutes is recommended and it is best to cook on only one shelf at a time when using this function.

Pizza Function:
The oven's thermostat and warning lights will be turned on, the ring and lower heating elements and fan will start operating.
Fan and lower heating function is ideal for baking food, such as pizza, equally in a short time. While the fan evenly disperses the heat of the oven, the lower heating element ensures the baking of food dough.

Grilling Function:
The oven's thermostat and warning lights will be turned on, the grill heating element will start operating. This function is used for grilling and toasting foods. Use the upper shelves of the oven. Brush the wire
grid lightly with oil to stop foods sticking and place foods in the centre of the grid. Always place a tray beneath to catch any oil or fat drippings. Pre-heating the oven for about 10 minutes is recommended. Warning: When grilling, the oven door must be closed and the oven temperature should be adjusted to 190^ C.

Faster Grilling Function:
The oven's thermostat and warning lights will be turned on, the grill and upper heating elements will start operating. The function is used for faster grilling and for covering a larger surface area, such as grilling meats. Use the oven's upper shelves. Brush the wire grid lightly with oil to stop foods sticking and place foods in the centre of the grid. Always place a tray beneath to catch any oil or fat drippings. Pre-heating the oven for about 10 minutes is recommended. Warning: When grilling, the oven door must be closed and the oven temperature should be adjusted to 190^

Double Grill and Fan Function:
The oven's thermostat and warning lights will be turned on, the grill and upper heating elements and fan will start operating.
This function is used for faster grilling of thicker foods and for covering a larger surface area. Both the upper heating elements and grill will be energised along with the fan to ensure even cooking.
Use the upper shelves of the oven. Brush the wire grid lightly with oil to stop foods sticking and place foods in the centre of the grid. Always place a tray beneath to catch any oil or fat drippings. Preheating the oven for about 10 minutes is recommended.
Warning: When grilling, the oven door must be closed and the oven temperature should be adjusted to 190^ C.

Vap Clean Function
Set your oven function and thermostat to vap clean function. symbol. Spill 200-250ml of water (about 1 cup) is stated into the small tray on the oven base. VapClean run approximately 20 minutes and prepare your oven to clean easily.
Use of digital timer

MODE


Time Adjustment:
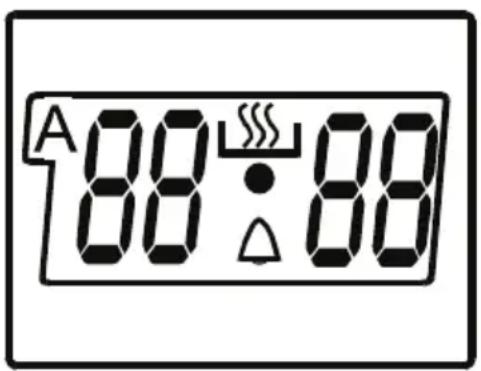
The time must be adjusted before starting to use the oven. Following the power supply to the oven, the symbol (A) and the three “0” on the screen will begin to flash. Press the (+) and (-) keys simultaneously. The symbol will appear on the screen. Also, the dot in the middle of the screen will begin to flash. Using the (+) and (-)
buttons, adjust the day's time while this dot is flashing. After the adjustment, it should be expected that the dot will be lit continuously.
Following the power supply to the oven, when the symbol (A) and the three “0” on the screen begin to flash, the oven can not be operated using the control buttons. When the (+) and (-) buttons are pressed simultaneously for time adjustment, the symbol will appear on the screen. When this symbol appears on the screen, you can manually operate the oven. As the adjusted time will be reset in the event of a power failure, time adjustment operation will have to performed again.
Audible Warning Time Adjustment:
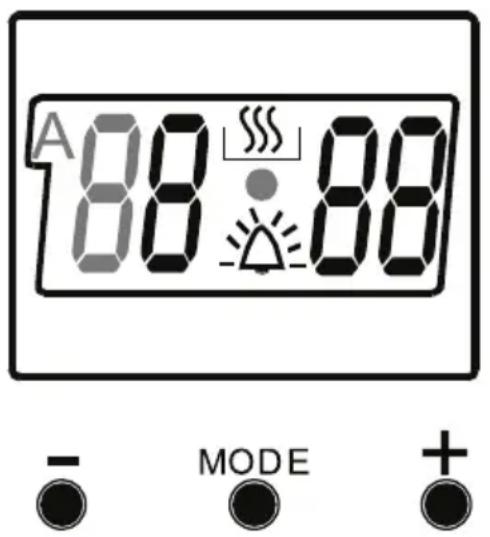
The time must be adjusted before starting to use the oven. Following the power supply to the oven, the symbol (A) and the three “0” on the screen will begin to flash. Press the (+) and (-) keys simultaneously.
The symbol will appear on the screen. Also, the dot in the middle of
the screen will begin to flash. Using the (+) and (-) keys, adjust the day's time while this dot is flashing. After the adjustment, it should be expected that the dot will be lit continuously. This function can be used to recieve audible warning at the completion of the adjusted time period.
Press the MODE key in the middle. The symbol will flash on the screen. Also three “0”s will appear. Adjust the desired time period for the warning by using (+) and (-) keys while the symbol is flashing. Some time after the completion of the adjustment, the symbol will begin to light continuously. When the symbol begins to light continuously, the audible warning time adjustment is done.
The audible warning time can be set to a time between the time range of 0 and 23.59.
When the set time is up, the timer gives an audible warning and the symbol begins to flash on the screen. Pressing any key will stop the audible warning and the symbol disappears on the screen.
Audible Warning time adjustment is for warning purposes only. The oven will not be activated at this function.
Adjustment of the cooking time:
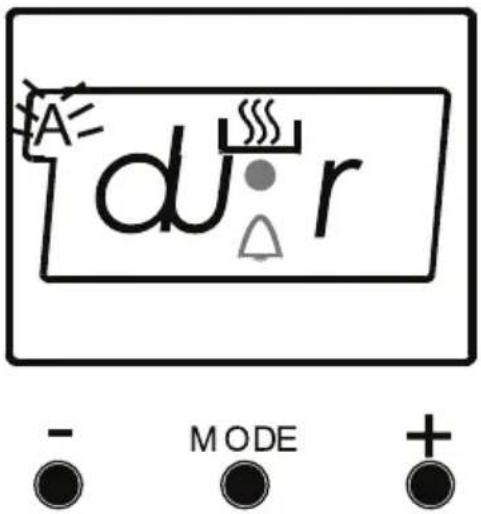
This function is used to cook in the desired time range. The foods to be cooked are put into the oven. The oven is adjusted to the desired cooking function. The oven thermostat is adjusted to the desired degree depending on the dish to be cooked. Keep pressing on the MODE button until you see “stop” on the timer screen. When you see “stop” on the timer screen, the symbol (A) will begin to flash. Adjusted the cooking period for the food you wish to cook, by using the (+) and (-) buttons while the timer is in his position. Some time after the adjustment operation is completed, the day’s time will appear on the screen and the symbols (A) and will begin to continuously light on the screen. While doing this, the oven will also start to operate.
A cooking period between the time range of 0 and 10 hours can be set.
At the completion of the set duration, the timer will stop the oven and give an audible warning. Also, the symbol (A) will begin to flash on the screen. After bringing the oven button and oven thermostat button to 0 position, pressing any button of the timer will end the audible warning. Also, the timer wil be brought to manual use function.
Adjustment of the cooking end time
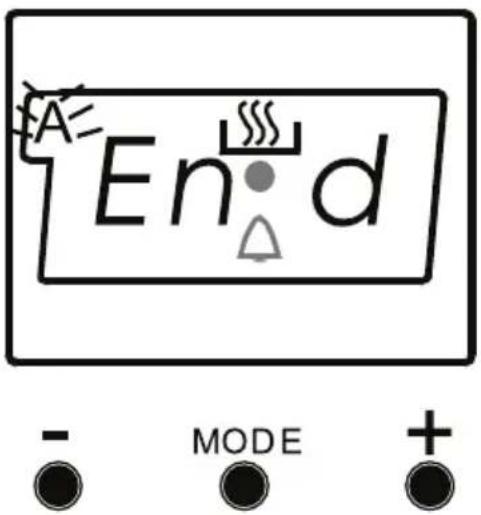
This function is used to cook according to desired finishing time. The food to be cooked is put into the oven. The oven is adjusted to the desired cooking function. The oven thermostat is adjusted to the desired degree depending on the dish to be cooked. Keep pressing on the MODE button until you see “end” on the timer screen, the symbol (A) and the day’s time will respectively begin to flash.
Adjust the finishing time for the food you wish to cook, by using the (+) and (-) keys while the timer is in this position. Some time after the adjustment operation is completed, the day's time will appear on the screen and the symbols (A) and will begin to continuously light on the screen. While doing this, the oven will also start to operate.
You can set a time which can be up to 10 hours after the day's time.
At the completion of the set duration, the timer will stop the oven and give audible warning. Also the symbol (A) will begin to flash on the screen. After bringing the oven button and oven thermostat button to 0 position, pressing any button of the timer will end the audible warning. Also, the timer will be brought to manual use function.
Full-Automatic Programming:
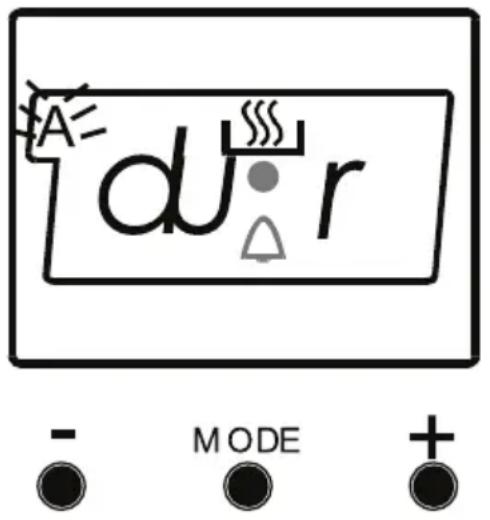
This function is used to cook after a certain period of time, within a certain duration. The food to be cooked is put into the oven. The oven is adjusted to the desired cooking function. The oven thermostat is adjusted to the desired degree depending on the dish to be cooked.
First; keep pressing on the MODE button until you see “stop” on the timer screen. When you see “stop” on the timer screen, the symbol (A) will begin to flash. Adjust the cooking period for the food you wish to cook, by using the (+) and (-) keys while timer is in this position. Some time after the adjustment operation is completed, the day's time will appear on the screen and the symbols (A) and will begin to continuously light on the screen.
A cooking period between the time range of 0 and 10 hours can be set.
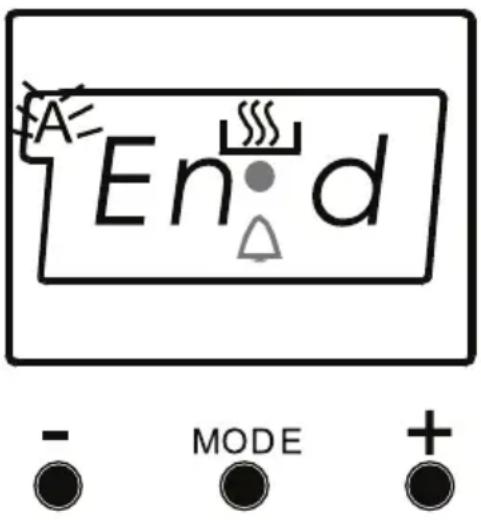
Second; keep pressing on the MODE button until you see “end” on the timer screen. When you see “end” on the timer screen, the symbol (A) and the cooking end time begin to flash. Adjust the finishing time for the food by using the (+) and (-) keys while the timer is in this position. Some time after the adjustment operation is completed, the day’s time will appear on the screen and the symbol (A) will begin to continuously light on the screen.
You can set a time which can be up 23.59 hours after the time obtained by adding the cooking period the day's time.
The oven will start operating at the time calculated by deducting the cooking period from the set finishing time, and will stop at the set finishing time.
The timer will give an audible warning and the symbol (A) will begin to flash. After bringing the oven button and oven thermostat button to 0 position, pressing any button of the timer will end the audible warning. Also, time of day will be displayed on timer
Using the mechanical timer
natural_image
Gray 3D sphere with a checkmark above it, no text or symbols presentManual Operation
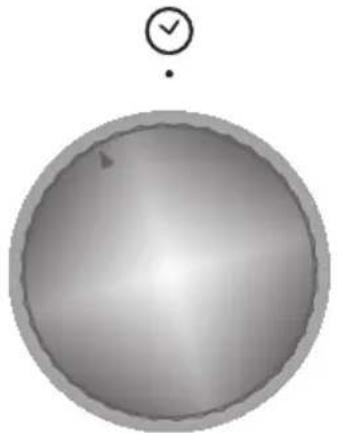
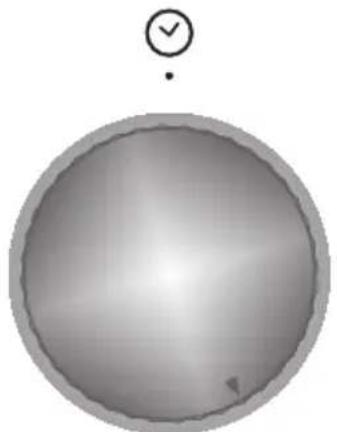
When you set the timer button to the position indicating M as shown on the picture, you can continuously run your oven. When the timer button is in the 0 position, the oven will not operate.
natural_image
Gray circular object with a checkmark and dot above it, no text or symbols present.Operating by adjusting the time
Set the desired cooking time by turning the timer button to a certain time range between 0 - 100 minutes. At the end of this time period, the oven will stop working and the timer will give an audible warning once.
| DISHES | TURBO LOWER-UPPER LOWER-UPPER FAN GRILL | |||||||||||
| Thermostat pos. (°C) | Rack pos. | Cooking period (min) | Thermostat pos. (°C) | Rack pos. | Cooking period (min) | Thermostat pos. (°C) | Rack pos. | Cooking period (min) | Thermostat pos. (min) | Rack pos. | Cooking period (min) | |
| Layered pastry | 170-190 1-2 | -3 35-45 17 | 0-190 1-2 35-45 | 170-190 1-2 25-35 | ||||||||
| Cake 150-170 | 1-2-3 30-40 17 | 0-190 1-2 | 30-40 150-170 | 1-2-3 25-35 | ||||||||
| Cookie 150-170 | 1-2-3 25-35 | 170-190 1-2 | 30-40 150-170 | 1-2-3 25-35 | ||||||||
| Grilled meatballs | 200 4 10-15 | |||||||||||
| Watery food | 175-200 | 2 | 40-50 | 175-200 | 2 | 40-50 | 175-200 | 2 | 40-50 | |||
| Chicken | 200 | 1-2 | 45-60 | 200 | 1-2 | 45-60 | 200 | * | 50-60 | |||
| Chop | 200 | 3-4 | 15-25 | |||||||||
| Beefsteak | 200 4 15-25 | |||||||||||
| Two-tray cake | 160-180 | 1-4 30-40 | ||||||||||
| Two-tray pastry | 170-190 | 1-4 35-45 | ||||||||||
| * Cook with roasted chicken skewer... | ||||||||||||
Accessories
The product is supplied with accessories. You can also use accessories you purchase from other sources, but they must be heat and flame resistant. You can also use glass dishes, cake moulds and oven trays that are appropriate for use in an oven. Follow the manufacturer's instructions when using other accessories. In the event small size dishes are used, place the dish onto the wire grid, as it will completely be on the middle part of the grid. If the food to be cooked does not cover the oven tray completely, if the food is taken from the deep freezer or the tray is being used for collecting the food's juices that flow during grilling, form changes can be observed in the tray. This is due to the high temperatures that occur during cooking. The tray will return to its old form when the tray cools down after cooking. This is a normal physical event that occurs during heat transfer. Do not place hot glass trays and dishes into a cold environment straight from the oven to avoid breaking the tray or dish. Do not put onto cold and wet surfaces. Place on a dry kitchen cloth and allow to cool slowly. When using the grill in your oven; we recommend you use the grid that was supplied with the product (where appropriate). When using the wire grid; put a tray onto one of the lower shelves to allow the oil to be collected. Water may be added to the tray to assist in cleaning. As explained in the corresponding clauses, never attempt to use the gas operated grill burner without the grill protection lid. If your oven has a gas operated grill burner, but the grill heat shield is missing, or if it is damaged and cannot be used, request a spare part from the nearest Authorized Service Centre.
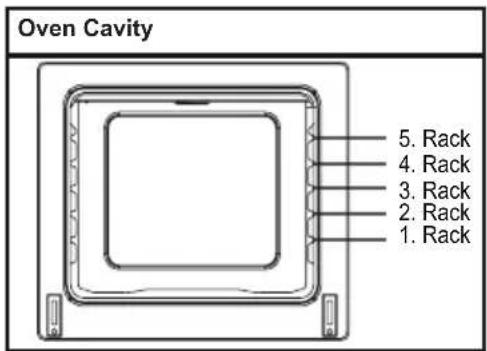
Oven Accessories
The accessories for your oven may be different due to the model of your product.
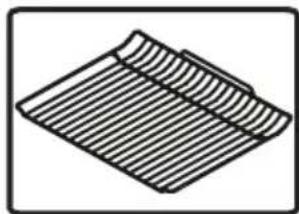
Wire grid
natural_image
Isometric line drawing of a folded or corrugated object with horizontal grooves (no text or symbols)The wire grid is used to grill or place different cookwares on it.
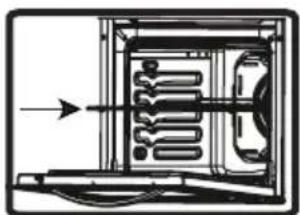
WARNING- Fit the grid correctly into any corresponding rack in the oven cavity and push it to the back.
natural_image
Diagram of a refrigerator interior with heat exchanger and ventilation duct (no text or labels)Shallow Tray
The shallow tray is used to bake pastry such as flans etc. To locate the tray correctly in the cavity, put it to any rack and
push it to the back.
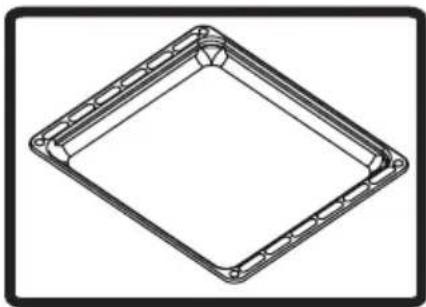
natural_image
Pure geometric diagram of a diamond-shaped frame with no text, numbers, or symbolsDeep Tray
The deep tray is used to cook stews. To locate the tray correctly in the cavity, put it to any rack and push it to the back.
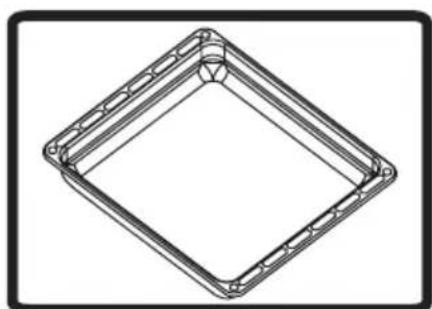
natural_image
Technical line drawing of a square frame with bolt holes (no text or symbols)CLEANING AND MAINTENANCE OF YOUR OVEN
CLEANING
Before starting to clean your oven, be sure that all control buttons are off and your appliance has cooled down. Unplug the appliance.
Do not use cleaning materials containing particles that might scratch the enamelled and
painted parts of your oven. Use cream cleaners or liquid cleaners, which do not contain particles. As they might harm the surfaces, do not use caustic creams, abrasive cleaning powders, rough wire wool or hard tools. In the event the excess liquids spill over and your oven should burn, this may cause damage to the enamel. Clean up the split liquids immediately. Do not use steam cleaners to clean the oven.
Cleaning the interior of the oven
Make sure to unplug the oven before you start cleaning it. You will obtain best results if you clean the oven interior while the oven is slightly warm. Wipe your oven with a soft piece of cloth dampened with soap and water after each use. Then wipe it again, this time with a wetted cloth, and wipe it dry. Complete cleaning using dry and powder type cleaners. For product with catalytic enamel frames, the rear and side walls of the
inner frame do not require cleaning. However; depending on usage, replacing them after a certain period of time is recommended.
MAINTENANCE
Replacing the Oven Light
The change of oven lamp must be done by by an authorized technician. The rating of the bulb should be 230V, 25Watt, Type E14,T300 before changing the lamp, the oven should be switched off and it should be cool.
The lamp design is specific for use in household cooking appliances and it is not suitable for household room illumination.
SERVICE AND TRANSPORT
REQUIREMENTS BEFORE CONTACTING SERVICE
If the oven does not operate:
The oven may have be switched off, or disconnected On models fitted with a timer, the time may not be regulated.
If the oven does not heat:
the heat may be not adjusted with the oven's heater control switch.
If the interior lighting lamp does not light:
The electricity must be inspected. It must be inspected to see whether the lamps are defective. If they are defective, you can change them following the guide.
Cooking (if the lower-upper parts do not cook equally):
Control the shelf locations, cooking period and heat values according to the manual.
Apart from these issues, if you are experiencing any problems with your product, please call to the Authorized Service Centre.
INFORMATION RELATED TO TRANSPORT
If you need any transport:
Keep the original product packaging and use the original case for carrying. Follow the transport instructions on the case. Tape the cooker on upper parts,
hats and heads and saucepan carriers to the cooking panels.
Place a paper between the upper cover and cooking panel, cover the upper cover, than tape to the side surfaces of the oven.
Tape cardboard or paper onto the front cover on interior glass of the oven as it will be suitable to the trays, for the wire grill and trays in your oven not damage to the oven's cover during transport. Also tape the oven's covers to the side walls.
If you do not have the original case :
Take appropriate measures to secure the external surfaces (glass and painted surfaces) and of the oven to protect it against possible blows.
natural_image
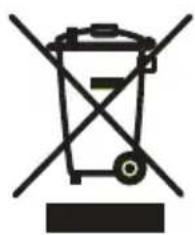
Symbol of a trash bin with crossed lines indicating no waste or discharge (no text or labels)The symbol on the product or on its packaging indicates that this product may not be treated as household waste. Instead it shall be handed over the applicable collection point for recycling of electrical and electronic equipment. By ensuring this product is disposed of correctly, you will help prevent potential negative con-
sequences for the environment and human health, which could otherwise be caused by inappropriate waste handling of this product. For more detailed information about recycling this product, please contact your local city offices, your household waste disposal service or the shop where you purchased the product.

EBB7226
EBB7116
RUKOVANJE I INSTALACIJA
UPUTSTVA ZA
Ugradnu rernu
Poštovani korisniče,
Ubacite rernu u ormarić tako što ćete je gurnuti napred. Otvorite vrata rerne i ubacite 2 šrafa u rupe koje su locirane na okviru rerne. Dok okvir proizvoda dodiruje drvenu površinu ormarića, zategnite šrafove.
chemical
Two molecular diagrams showing a spherical structure with labeled point P and a separate sphere with point °C, likely representing a chemical reaction or temperature change.Funkcije rerne
natural_image
Gray 3D sphere with a checkmark above it, no text or symbols presentManuelno rukovanje
natural_image
Gray circular object with a checkmark and dot above it, no text or symbols present.Rukovanje podešavajući vreme
natural_image
Isometric view of a folded or corrugated material with parallel grooves (no text or symbols)natural_image
Diagram of a device interior with internal components and directional arrows indicating flow or movement (no text or symbols)Plitka tacna
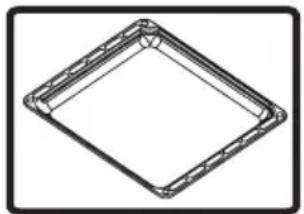
Plitka tacna se koristi za pečenje testa kao što su flanovi itd. Da biste locirali tacnu pravilno u unutrašnjosti rerne, stavite je na bilo koji stalak i gurnite je nazad.
natural_image
Pure geometric diagram of a diamond-shaped frame with no text, numbers, or symbolsDuboka tacna
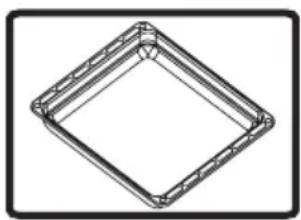
Duboka tacna se koristi za kuvanje paprikaša. Da biste locirali tacnu pravilno u unutrašnjosti rerne, stavite je na bilo koji stalak i gurnite je nazad.
natural_image
Pure geometric diagram of a diamond-shaped frame with no text, numbers, or symbolsČIŠĆENJE I ODRŽAVANJE VAŠE RERNE
ČIŠĆENJE
natural_image
Symbol of a trash bin with crossed lines indicating no waste or discharge (no text or labels)Simbol na proizvodu ili na njegovom pakovanju naznačava da ovaj proizvod možda neće biti tretiran kao otpad iz domaćinstva. Umesto toga će se predati primenljivoj tački za preuzimanje zarad recikliranja električne
i elektronske opreme. Starajući se da ovaj proizvod bude pravilno uklonjen, pomoćićete da se spreče potencijalne negativne posledice za okruženje i ljudsko zdravlje, što može da u suprotnom izazove neodgovarajuće upravljanje otpadom ovog proizvoda. Za detaljnije informacije o recikliranju ovog proizvoda, molimo vas da kontaktirajte vašu lokalnu gradsku kancelariju, uslugu otklanjanja vašeg otpada iz domaćinstva ili prodavnicu gde ste kupili proizvod.

EBB7226
EBB7116
natural_image
Technical line drawing of a rectangular device interior with internal components and mounting holes (no text or symbols)natural_image
Simple 3D-rendered sphere with a checkmark and dot above it (no text or symbols)Рачно користење
natural_image
Simple 3D-rendered sphere with a checkmark above it, no text or symbols present.natural_image
Isometric view of a folded or corrugated material with parallel grooves (no text or symbols)natural_image
Diagram of a refrigerator interior showing internal compartments and wiring (no text or labels)Плиток плех
natural_image
Pure geometric diagram of a diamond-shaped frame with no text, numbers, or symbolsДлабок плех
natural_image
Pure geometric diagram of a diamond-shaped frame with no text, numbers, or symbolsnatural_image
Symbol of a trash bin with crossed lines indicating no waste or plastic (no text or labels)natural_image
Abstract black and white geometric pattern with diagonal stripes (no text or symbols)VOX
ELECTRONICS
EBB7226
EBB7116
UPORABA IN NAMESTITEV
NAVODILA ZA
VGRADNO PEČICO
Dragi kupec,

Način


Nastavitev časa:
natural_image
Simple 3D sphere with a checkmark and dot above it, no text or symbols present.Ročno delovanje
natural_image
Gray circular object with a checkmark and dot above it, no text or symbols present.natural_image
Isometric line drawing of a folded or corrugated material with parallel ridges (no text or symbols)natural_image
Diagram of a refrigerator interior with ventilation ducts and airflow direction arrow (no text or labels)Plitki pladenj
natural_image
Pure geometric diagram of a square frame with no text, numbers, or symbolsGloboki pladenj
natural_image
Pure geometric diagram of a diamond-shaped frame with no text, numbers, or symbolsČIŠČENJE IN VZDRŽEVANJE PEČICE
ČIŠČENJE
natural_image
Symbol of a trash bin with crossed lines indicating no waste or discharge (no text or labels)natural_image
Technical line drawing of a mechanical component with a 2x magnified inset showing a small circular feature (no text or symbols)Pećnicu umetnite u kuhinjski ormarić tako da ju gurate prema naprijed. Otvorite vrata pećnice i umetnite 2 vijka u otvore koji se nalaze na okviru pećnice. Kad okvir proizvoda dodirne drvenu površinu ormarića, zategnite vijke.
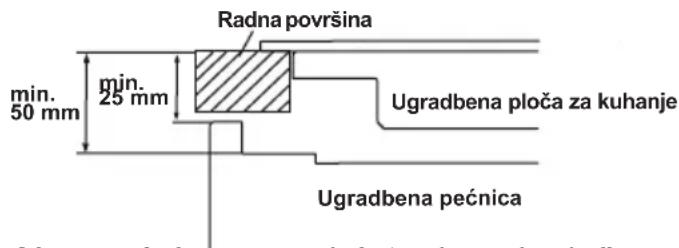
Ako pećnicu ugrađujete ispod ploče za kuhanje, razmak između radne površine i gornjeg dijela ploče pećnice mora biti minimalno 50 mm, a razmak između radne površine i gornjeg dijela upravljačke ploče mora biti minimalno 25 mm.
OŽIČENJE I SIGURNOST UGRADBENE PEĆNICE
natural_image
Gray 3D sphere with a checkmark above it, no text or symbols presentRučni rad
natural_image
Simple grayscale sphere with a checkmark above it, no text or symbols present.natural_image
Isometric line drawing of a folded or corrugated object with horizontal grooves (no text or symbols)natural_image
Diagram of a server rack with internal components and wiring, no text or symbols presentPlitak pladanj
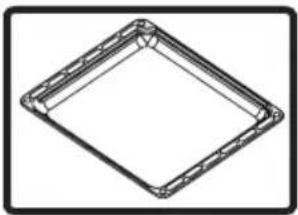
Plitak pladanj koristi se za pečenje poslastica, npr. tarta, kiša itd. Pladanj se ispravno postavi tako da se postavi u vodilice i gurne do kraja.
natural_image
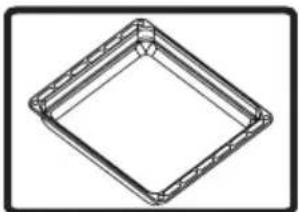
Pure geometric diagram of a square frame with no text, numbers, or symbolsDubok pladanj
Dubok pladanj koristi se za kuhanje gulaša. Pladanj se ispravno postavi tako da se postavi u vodilice i gurne do kraja.
natural_image
Pure geometric diagram of a diamond-shaped frame with no text, numbers, or symbolsČIŠĆENJE I ODRŽAVANJE PEĆNICE
ČIŠĆENJE
natural_image
Symbol of a trash bin with crossed lines indicating no waste or discharge (no text or labels)natural_image
Simple 3D-rendered sphere with a checkmark above it, no text or symbols presentnatural_image
Gray gradient sphere with rounded edges, no text or symbols visiblenatural_image
Isometric view of a folded or corrugated material with parallel grooves (no text or symbols)natural_image
Diagram of a refrigerator interior showing internal compartments and ventilation ducts (no text or labels)Ρηχό ταψί
natural_image
Pure geometric diagram of a diamond-shaped frame with no text, numbers, or symbolsΒαθύ ταψί
natural_image
Pure geometric diagram of a diamond-shaped frame with no text, numbers, or symbolsnatural_image
Symbol of a trash bin with crossed lines indicating no waste or plastic discharge (no text or labels)- VOX
- ELECTRONICS
- EBB7226 - EBB7116
- Contents
- PRESENTATION AND SIZE OF PRODUCT
- SAFETY WARNINGS
- General Safety Warnings
- Installation Warnings
- During use
- PREPARATION FOR INSTALLATION AND USE
- CONTACT THE AUTHORIZED SERVICE FOR THE INSTALLATION OF YOUR OVEN!
- CHOOSING A PLACE FOR THE OVEN
- WIRING AND SAFETY OF THE BUILT IN OVEN
- USING THE OVEN
- Control Panel
- Oven
- Function Control Knob
- Thermostat Control Knob
- Oven Functions
- Oven Lamp:
- Defrost Function:
- Turbo Function
- Fan Function:
- Static Cooking Function:
- Pizza Function:
- Grilling Function:
- Faster Grilling Function:
- Double Grill and Fan Function:
- Vap Clean Function
- Use of digital timer
- Time Adjustment:
- Adjustment of the cooking time:
- A cooking period between the time range of 0 and 10 hours can be set.
- Adjustment of the cooking end time
- You can set a time which can be up 23.59 hours after the time obtained by adding the cooking period the day's time.
- Using the mechanical timer
- Manual Operation
- Operating by adjusting the time
- Accessories
- Oven Accessories
- Shallow Tray
- Deep Tray
- CLEANING AND MAINTENANCE OF YOUR OVEN
- CLEANING
- Cleaning the interior of the oven
- MAINTENANCE
- Replacing the Oven Light
- SERVICE AND TRANSPORT
- REQUIREMENTS BEFORE CONTACTING SERVICE
- INFORMATION RELATED TO TRANSPORT
- Funkcije rerne
- Manuelno rukovanje
- Rukovanje podešavajući vreme
- Plitka tacna
- Duboka tacna
- ČIŠĆENJE I ODRŽAVANJE VAŠE RERNE
- ČIŠĆENJE
- Рачно користење
- Плиток плех
- Длабок плех
- Nastavitev časa:
- Ročno delovanje
- Plitki pladenj
- Globoki pladenj
- ČIŠČENJE IN VZDRŽEVANJE PEČICE
- ČIŠČENJE
- OŽIČENJE I SIGURNOST UGRADBENE PEĆNICE
- Ručni rad
- Plitak pladanj
- Dubok pladanj
- ČIŠĆENJE I ODRŽAVANJE PEĆNICE
- Ρηχό ταψί
- Βαθύ ταψί
Brand : VOX
Model : EBB7116
Category : Oven