
6510 - Mobile Phone BLACKBERRY - Free user manual and instructions
Find the device manual for free 6510 BLACKBERRY in PDF.


| Product Type | Mobile Phone / Smartphone |
| Brand | BlackBerry |
| Model | 6510 |
| Dimensions | 113 x 74 x 20 mm (4.45 x 2.91 x 0.79 in) |
| Weight | 136 g (4.80 oz) |
| Display Type | Monochrome graphic LCD |
| Display Resolution | 160 x 160 pixels |
| Keyboard | Full QWERTY keyboard with backlight |
| Navigation | Trackwheel and Escape button |
| Operating System | BlackBerry OS |
| Battery Type | Removable Li-Ion 900 mAh |
| Standby Time | Up to 120 hours |
| Talk Time | Up to 4 hours |
| Internal Memory | 2 MB |
| Connectivity | USB 1.1, Serial port, Infrared |
| Network | GSM 900 / 1800 / 1900 MHz |
| Data Services | GPRS |
| Push email support | |
| Messaging | SMS, MMS |
| Organizer | Calendar, Contacts, Tasks, Notes |
| Web Browser | HTML browser (WAP 2.0) |
| Security | Password protection, remote wipe |
| Additional Features | Speakerphone, vibration alert, integrated hands-free |
| Replaceable Parts | Battery, SIM card |
Frequently Asked Questions - 6510 BLACKBERRY
User questions about 6510 BLACKBERRY
0 question about this device. Answer the ones you know or ask your own.
Ask a new question about this device
Download the instructions for your Mobile Phone in PDF format for free! Find your manual 6510 - BLACKBERRY and take your electronic device back in hand. On this page are published all the documents necessary for the use of your device. 6510 by BLACKBERRY.
USER MANUAL 6510 BLACKBERRY
BlackBerry 6510 from Nextel®
Handheld User Guide
BlackBerry 6510 from Nextel software version 3.6
Handheld User Guide
Last revised: 27 May 2003
Part number: PDF-05259-013
At the time of publication, this documentation complies with software version 3.6
© 2003 Research In Motion Limited. All Rights Reserved. The BlackBerry and RIM families of related marks, images and symbols are the exclusive properties of Research In Motion Limited. RIM, Research In Motion, 'Always On, Always Connected', the "envelope in motion" symbol and the BlackBerry logo are registered with the U.S. Patent and Trademark Office and may be pending or registered in other countries. All other brands, product names, company names, trademarks and service marks are the properties of their respective owners.
The handheld and/or associated software are protected by copyright, international treaties and various patents, including one or more of the following U.S. patents: 6,278,442; 6,271,605; 6,219,694; 6,075,470; 6,073,318; D445,428; D433,460; D416,256. Other patents are registered or pending in various countries around the world. Visit www.rim.com/patents.shtml for a current listing of applicable patents.
Nextel, the Nextel logo, Nextel Direct Connect, Push-to-Talk, PTT, and all other Nextel product and/or service names referenced throughout this guide are either a trademark, service mark or registered trademark of Nextel Communications, Inc. All rights reserved.
While every effort has been made to achieve technical accuracy, information in this document is subject to change without notice and does not represent a commitment on the part of Research In Motion Limited, or any of its subsidiaries, affiliates, agents, licensors, or resellers. There are no warranties, express or implied, with respect to the content of this document.
Research In Motion Limited
295 Phillip Street
Waterloo, ON N2L 3W8
Canada
Published in Canada
Contents
Important safety information....9
Important safety/compliance information....14
FCC compliance statement (USA) 17
Industry Canada Certification....18
About this guide ....19
Audience....19
Conventions 19
Related resources 21
Getting to know your handheld 23
Using the keyboard and trackwheel 24
Activating backlighting....28
Navigating applications 28
Configuring your handheld's options 36
Tips for using your handheld....36
Email and PIN messages....37
Message icons ....38
Sending email and PIN messages.... 39
Setting message options 43
Inserting symbols....46
Formatting your messages....47
Using cut, copy, and paste.... 52
Using the Find feature.... 53
Adding attachments to messages 55
Customizing the auto signature.... 55
Receiving delivery confirmation....56
Reading email or PIN messages....57
Receiving long email messages....60
Managing attachments 61
Tips for email and PIN messages ....63
Receiving SMS messages 65
Message icons ....66
Setting SMS options 66
Reading SMS messages 66
Tips for reading SMS messages ....67
Managing messages and call logs 69
Filing email messages....70
Using wireless email reconciliation....72
Saving messages....73
Editing messages....75
Resending messages 77
Marking messages as opened....78
Marking messages as unopened ....79
Searching messages and phone call logs 80
Managing calls on the Messages screen.... 86
Deleting messages and call logs....87
Tips for managing messages and call logs ......91
Address Book 93
Address Book icons....94
Setting Address Book options 94
Adding addresses 95
Adding pauses and waits to phone numbers 101
Changing user-defined field names 101
Adding group addresses....102
Using Remote Address Lookup.... 103
Managing Address Book entries....105
Tips for using the Address Book application.... 107
Using Nextel Direct Connect™....109
Before you begin.... 110
Using the Push-to-Talk™ button 110
Placing Nextel Direct Connect calls....110
Answering Nextel Direct Connect calls.... 116
Ending Nextel Direct Connect calls....116
Tips for using Nextel Direct Connect.... 117
Phone....119
Phone icons 120
Before you begin.... 121
Placing phone calls.... 121
Answering phone calls 123
Ending phone calls.... 125
Using shortcuts when you place calls 126
Setting the volume 127
Putting phone calls on hold.... 127
Muting phone calls 128
Placing one-time phone calls.... 129
Placing phone calls using links 129
Managing phone calls on the Phone screen 130
Customizing Phone options 131
Calling voice mail.... 139
Using phone call notes 141
Using pauses and waits.... 143
Placing three-way calls.... 144
Viewing phone status 146
Placing emergency calls 147
Tips for using the Phone application 148
Browsing web pages....149
Before you begin.... 150
Navigating web pages.... 151
Setting configuration options ....154
Setting general options.... 155
Using the Find feature....157
Downloading images....158
Viewing web addresses.... 158
Using bookmarks ....159
Using bookmark subfolders 162
Saving web pages to your Messages screen.... 164
Closing the application.... 166
Tips for browsing web pages 166
Attachments....169
Before you begin.... 170
Attachment service views 170
Opening attachments.... 171
Setting attachment service options.... 174
Navigating attachments ....175
Using the Find feature.... 178
Deleting attachments ....179
Tips for using the attachment service ....179
Tasks 181
Tasks icons 182
Setting task options.... 182
Adding tasks 183
Managing tasks....184
Tips for using the Tasks application 186
Calendar 187
Calendar icons ....188
Before you begin.... 188
Setting Calendar options.... 189
Changing views.... 190
Navigating in the Calendar application ....192
Enabling wireless calendar synchronization 194
Adding appointments 196
Managing appointments ....200
Managing meeting requests 203
Tips for using the Calendar application 207
MemoPad 209
Setting MemoPad options.... 210
Adding memos ....210
Managing memos.... 211
Tips for using the MemoPad application 212
Calculator 213
Performing mathematical operations....214
Performing measurement conversions 214
Closing the Calculator.... 215
Tips for using the Calculator application 215
Options 217
Setting the Alarm 218
Locking the keyboard 219
Customizing notification profiles 220
Setting the Auto On/Off feature.... 229
Customizing handheld options.... 231
Handheld options 231
Troubleshooting 245
Frequently asked questions 246
Handheld error messages 254
Index 277
Important safety information
Please read these safety and operation instructions before operating the BlackBerry Wireless Handheld TM or any BlackBerry TM Wireless Handheld charging units. Retain these instructions for future use.

Note: Refer to "Important safety/compliance information" on page 14 for more information on safety regulations for your BlackBerry 6510 Wireless Handheld™.
ELECTRICAL SAFETY
This handheld (model number R6510IN) is intended for use when supplied with USB cable HDW-04162-001, Travel Charger accessory ASY-04078-001 (ACC-04074-001), Automotive Charger accessory ASY-04195-001 (ACC-04173-001), or any other charging units provided or specifically approved by Research In Motion Limited (RIM) for use with this equipment. Other usage will invalidate any warranty provided with this apparatus and may be dangerous.

Warning: Before use, please ensure that the mains voltage is in accordance with the input voltage printed on the power supply. To be operated on mains with a circuit breaker rated 16A max. Protect against beating rain. For indoor use only.
Important safety information
ACCESSORIES
Use only those accessories approved by RIM. The use of any accessories not approved by RIM for use in conjunction with the handheld will invalidate any approval or warranty applicable to the handheld and may be dangerous.
DRIVING
Check the laws and regulations on the use of wireless devices in the areas where you drive. Always obey them. The use of any alert device to operate a vehicle's lights or horn on public roads is not permitted.
Avoid using the handheld in any environment requiring your full attention, such as when driving a vehicle. If you need to use your handheld while driving, have a passenger in the vehicle use the handheld for you, or find a safe location to halt your vehicle prior to using the handheld. Do not use any charging unit as a means of storing your handheld while in a vehicle.
RF signals may affect improperly installed or inadequately shielded electronic systems in motor vehicles. Check with the manufacturer or its representative regarding your vehicle. You should also consult the manufacturer of any equipment that has been added to your vehicle.
For Vehicles Equipped With An Air Bag
An air bag inflates with great force. DO NOT place objects, including both installed or portable wireless equipment, such as the BlackBerry Wireless Handheld, in the area over the air bag or in the air bag deployment area. If in-vehicle wireless equipment is improperly installed and the air bag inflates, serious injury could result.
ELECTRONIC DEVICES
Most modern electronic equipment is shielded from RF signals. However, certain electronic equipment may not be shielded against the RF signals from your wireless handheld.
Pacemakers
Consult a physician or the manufacturer of your pacemaker if you have any questions regarding the effect of RF signals on your pacemaker. If you have a pacemaker, ensure that you are using the handheld in accordance with the safety requirements associated with your particular pacemaker, which may include the following:
• Always keep the handheld more than 20 cm (six inches) from the pacemaker when the handheld is turned ON;
- Do not carry the handheld in a breast pocket;
- If the handheld has a voice option, use the ear opposite the pacemaker for making and receiving calls to minimize the potential for interference.
- If you have any reason to suspect that interference is taking place, turn your handheld OFF immediately.
Hearing Aids
Some digital wireless devices may interfere with some hearing aids. In the event of such interference, consult Nextel ® or contact the manufacturer of your hearing aid to discuss alternatives.
Other Medical Devices
If you use any other personal medical device, consult the manufacturer of your device to determine if it is adequately shielded from external RF energy. Your physician may be able to assist you in obtaining this information.
Turn your handheld OFF in health care facilities when any regulations posted in these areas instruct you to do so. Hospitals or health care facilities may be using equipment that could be sensitive to external RF energy.
Posted Facilities
Turn your handheld OFF in any facility where posted notices so require.
Important safety information
BLASTING AREAS
To avoid interfering with blasting operations, turn the wireless feature of your handheld OFF when in a “blasting area” or in areas posted: “Turn off two-way radio.” Obey all signs and instructions.
POTENTIALLY EXPLOSIVE ATMOSPHERES
Turn your handheld OFF when in any area with a potentially explosive atmosphere and obey all signs and instructions. Sparks in such areas could cause an explosion or fire resulting in bodily injury or even death.
Areas with a potentially explosive atmosphere are often, but not always, clearly marked. They include fueling areas such as gasoline/petrol stations; below deck on boats; fuel or chemical transfer or storage facilities; vehicles using liquefied petroleum gas (such as propane or butane); areas where the air contains chemicals or particles, such as grain, dust, or metal powders; and any other area where you would normally be advised to turn off your vehicle engine.
ADDITIONAL SAFETY GUIDELINES
Battery: Discard the handheld properly. As the unit contains a lithium-ion battery, neither the handheld nor the lithium battery should be disposed of in fire. Dispose of the lithium battery in accordance with the laws and regulations in your area governing disposal of such cell types. To recharge the battery, use approved battery chargers only. Keep the battery away from children.

Warning: The battery may present a fire or chemical burn hazard if mistreated. Do not disassemble, crush, puncture, or heat the battery above 60 degrees Celsius. Do not allow metal objects to contact the battery terminals. Only use a battery that has been approved by Research In Motion Limited. The use of another battery may present a risk of fire or explosion.
Power source: Charging units should be operated only from the type of power source indicated on the marking label and are intended for indoor use only. Do not use the travel charger or any other charging units outside or in any area exposed to the elements. Refer to the operating instructions in this manual for more information on the battery and power supply.
Do not overload wall outlets, extension cords, or integral convenience receptacles as this may result in a risk of fire or electric shock. To reduce the risk of damage to the cord or the plug, pull the plug rather than the cord when you disconnect the apparatus from the wall outlet or convenience receptacle.
12 BlackBerry Wireless Handheld
Liquids and foreign objects: Never push objects of any kind into the BlackBerry Wireless Handheld or any accessories through openings as they may short-out parts and this may result in a fire or electric shock. Do not use the handheld or any accessories near water (for example near a bathtub, or a sink, in a wet basement, near a swimming pool, etc.). Never spill liquid of any kind on the handheld or any accessories. Unplug the USB cable from your computer and the travel charger from the wall before cleaning.
Stability: Do not place the handheld, charging unit, or any accessories on any unstable surface, such as a cart, stand, tripod, bracket, or table. It may fall, thereby potentially causing serious injury to a child or adult, and/or serious damage to the handheld, charging unit, or any accessories. Take care when using the handheld with any charging units to place the charging unit in a secure and stable spot and route the power cord in a way that reduces the risk of injury to others, such as by tripping or choking.
Care: Do not use liquid or aerosol cleaners or solvents. Clean only with a dry cloth.
High heat: The handheld and any accessories should be situated away from any heat sources, such as radiators, heat registers, stoves, or other apparatus (including amplifiers) that produce heat.
Power Cord: Protect the power cord from being walked on or pinched particularly at plugs, convenience receptacles, and the point where they exit from the apparatus. Unplug this apparatus during lightning storms or when unused for long periods of time.
Service: Unplug the USB cable from your computer and the travel charger from the wall and refer the handheld, charging unit, and any accessories for service to qualified service personnel if:
- the power supply cord, plug, or connector to the handheld is damaged
- liquid has been spilled or objects have fallen into the handheld, charging unit, or any electrical accessories
- the handheld, charging unit, or accessory has been exposed to rain or water
- the handheld, charging unit, or accessory becomes very hot to the touch
- the handheld, charging unit, or accessory has been dropped or damaged in any way
- the external antenna components have been damaged in any way
- the handheld, charging unit, or accessory does not operate normally by following the instructions contained in this guide
Important safety information
- the handheld, charging unit, or accessory exhibits a distinct change in performance.
All servicing should be undertaken by qualified service personnel.
Do not attempt to disassemble the handheld, charging unit, or any accessories.

Warning: To reduce the risk of fire or electric shock, do not expose this apparatus to rain or moisture. Adjust only those controls that are covered in this guide. An improper adjustment of other controls may result in damage and will often require extensive work by a qualified technician to restore the handheld or its accessories to their normal operation.
Failure to observe all safety instructions contained in this guide will void the Limited Warranty, and may lead to suspension or denial of services to the offender, or legal action, or both.
Important safety/compliance information
EXPOSURE TO RADIO FREQUENCY SIGNALS
Your wireless handheld portable device is a low power radio transmitter and receiver. When it is ON, it receives and also sends out radio frequency (RF) signals. Your wireless handheld complies with U.S. Federal Communications Commission (FCC) and Industry Canada (IC) guidelines respecting safety levels of RF exposure for handheld wireless devices, which in turn are consistent with the following safety standards previously set by Canadian, U.S., and international standards bodies:
- ANSI/IEEE C95.1-1999, IEEE Standard for Safety Levels with Respect to Human Exposure to Radio Frequency Electromagnetic Fields, 3kHz to 300 GHz
- National Council on Radiation Protection and Measurements (NCRP) Report 86, -1986, Biological Effects and Exposure Criteria for Radio Frequency Electromagnetic Fields
- Health Canada, Safety Code 6, 1999, Limits of Human Exposure to Radiofrequency Electromagnetic Fields in the Frequency Range from 3 kHz to 300 GHz
14 BlackBerry Wireless Handheld
- International Commission on Non-Ionising Radiation Protection (ICNIRP) 1998, Guidelines for limiting exposure to time-varying electric, magnetic, and electromagnetic fields (up to 300 GHz)
To maintain compliance with FCC and IC RF exposure guidelines, use only RIM supplied or approved accessories. The RIM handheld is designed to be carried in an approved holster when carried on your body. When carrying the BlackBerry Wireless Handheld while switched on, use the specific RIM holster that has been tested for compliance. Use of non-RIM approved accessories may violate FCC and IC RF exposure guidelines and may void your warranty.
SPECIFIC ABSORPTION RATE DATA
THIS MODEL WIRELESS HANDHELD MEETS GOVERNMENT REQUIREMENTS FOR EXPOSURE TO RADIO WAVES.
Your wireless handheld is a radio transmitter and receiver. It is designed and manufactured not to exceed the emission limits for exposure to radio frequency (RF) energy set by the Federal Communications Commission (FCC) of the U.S. Government and Industry Canada of the Canadian Government (IC). These limits are part of comprehensive guidelines and establish permitted levels of RF energy for the general population. The guidelines are based on standards that were developed by independent scientific organizations through periodic and thorough evaluation of scientific studies. The standards include a substantial safety margin designed to assure the safety of all persons, regardless of age and health.
The exposure standard for wireless mobile handhelds employs a unit of measurement known as the Specific Absorption Rate, or SAR. The SAR limit set by the FCC/IC is 1.6W/kg.* Tests for SAR are conducted using standard operating positions specified by the FCC/IC with the handheld transmitting at its highest certified power level in all tested frequency bands. Although the SAR is determined at the highest certified power level, the actual SAR level of the handheld while operating can be well below the maximum value. This is because the handheld is designed to operate at multiple power levels so as to use only the power required to reach the network. In general, the closer you are to a wireless base station antenna, the lower the power output.
Before a wireless handheld model is available for sale to the public, it must be tested and certified to the FCC/IC that it does not exceed the limit established by the government-adopted requirement for safe exposure. The tests are performed in positions and locations (e.g., at the ear and worn on the body) as required by the FCC/IC for each model. The highest SAR value for this model handheld when
Important safety information
tested for use at the ear is 0.919 W/kg and when worn on the body, as described in this user guide, is 0.491 W/kg. (Body-worn measurements differ among wireless handheld and phone models, depending upon available accessories and FCC/IC requirements). While there may be differences between the SAR levels of various wireless devices and at various positions, they all meet the government requirement for safe exposure.
The FCC has granted an Equipment Authorization for this model handheld with all reported SAR levels evaluated as in compliance with the FCC RF emission guidelines. SAR information on this model handheld is on file with the FCC and can be found under the Display Grant section of http://www.fcc.gov/oet/fccid after searching on FCC ID L6AR6510IN.
Additional information on Specific Absorption Rates (SAR) can be found on the Cellular Telecommunications & Internet Association (CTIA) web site at http://www.wow-com.com.
The long-term characteristics or the possible physiological effects of Radio Frequency Electromagnetic fields have not been evaluated by UL.
* In the United States and Canada, the SAR limit for mobile handhelds used by the public is 1.6 watts/kg (W/kg) averaged over one gram of tissue for the body or head (4.0 W/kg averaged over 10 grams of tissue for the extremities - hands, wrists, ankles and feet). The standard incorporates a substantial margin of safety to give additional protection for the public and to account for any variations in measurements.
ANTENNA CARE
Use only the supplied integral antenna. Unauthorized antenna modifications or attachments could damage the handheld and may violate applicable laws and regulations by causing radio frequency (RF) energy to be above the recommended limits. Any such unauthorized use, modification or attachment will invalidate the warranty provided with the handheld and may be dangerous.
If the external antenna components have been damaged in any way, refer the handheld for service to qualified service personnel. Operation with a damaged antenna could damage the handheld and may result in dangerous usage conditions.
AIRCRAFT
Federal Aviation Administration (FAA)/FCC regulations prohibit using the radio of your handheld while in the air. Switch the radio of your handheld OFF before boarding an aircraft. The effect of the use of your handheld's radio in an aircraft is unknown. Such use may affect aircraft instrumentation, communication and performance, may disrupt the network, may otherwise be dangerous to the operation of the aircraft, and may be illegal. All other applications of your handheld may be used in accordance with airline regulations for electronic devices.
FCC compliance statement (USA)
FCC Class B Part 15
This device complies with Part 15 of the FCC Rules. Operation is subject to the following two conditions:
- This device may not cause harmful interference, and
- This device must accept any interference received, including interference that may cause undesired operation.

Warning: Changes or modifications to this unit not expressly approved by the party responsible for compliance could void the user's authority to operate this equipment.
This equipment has been tested and found to comply with the limits for a Class B digital device, pursuant to Part 15 of the FCC Rules. These limits are designed to provide reasonable protection against harmful interference in a residential installation. This equipment generates, uses, and can radiate radio frequency energy and, if not installed and used in accordance with the manufacturer's instructions, may cause interference harmful to radio communications.
There is no guarantee, however, that interference will not occur in a particular installation. If this equipment does cause harmful interference to radio or television reception, which can be determined by turning the equipment off and on, the user is encouraged to try to correct the interference by one or more of the following measures:
- Reorient or relocate the receiving antenna.
- Increase the separation between the equipment and receiver.
Important safety information
- Connect the equipment into an outlet on a circuit different from that to which the receiver is connected.
- Consult the dealer or an experienced radio/TV technician for help.
Industry Canada Certification
This device complies with Industry Canada RSS 119, under certification number 2503A-R6510IN.
Class B compliance
This device complies with the Class B limits for radio noise emissions as set out in the interference-causing equipment standard entitled “Digital Apparatus,” ICES-003 of Industry Canada.
About this guide
This guide provides information and procedures for using the applications on your handheld.
Audience
This guide is for new handheld users who require help using handheld applications and for experienced users who want to learn more about the handheld applications, including time-saving tips and tricks.
Before you use this guide, complete the steps in the “Getting Started” chapter of the Getting Started Guide. You should be able to send and read a test email message.

Note: Depending on your Nextel service plan or your integration option, some applications or services might not be available on your handheld. Contact Nextel Customer Care for more information on available services. Refer to the Getting Started Guide for more information on your integration options.
Conventions
This guide uses the following conventions to describe information about your handheld:
Integration with new or ISP email account
Information that appears in this format, prefaced by Integration with new or ISP email account, pertains to handhelds that are configured for these integration options. You can use the features that are described in the sections that are marked with this note if you have integrated your handheld with an email account that uses the BlackBerry Web Client.
About this guide
Integration with enterprise email account
Information that appears in this format, prefaced by Integration with enterprise email account, pertains to handhelds that are configured for this integration option. You can use the features that are described in the sections that are marked with this note if you have integrated your handheld with an enterprise email account that uses the BlackBerry Enterprise Server or the BlackBerry Desktop Redirector.
Microsoft Exchange
Information that appears in this format, prefaced by Microsoft Exchange, pertains to handhelds that are set up with a Microsoft® Exchange enterprise email account that uses the BlackBerry Enterprise Server or the BlackBerry Desktop Redirector. You have a Microsoft Exchange email account if Microsoft Outlook® is your email client and if, in Outlook, on the Tools menu, you click Services, the dialog box lists Microsoft Exchange Server as a service.
Lotus Domino
Information that appears in this format, prefaced by Lotus Domino, pertains to handhelds that are set up with a Lotus® Domino™ email account that uses the BlackBerry Enterprise Server. You have a Lotus Domino email account if you use Lotus Notes® as your email client.

Note: Notes contain important information on the associated topic.

Tip: Tips provide optional or time-saving information on the associated topic.

Warning: Warnings advise you of the potential for data loss or damage to your handheld.
A list of tips appears at the end of each chapter.
Your handheld has four font size options: 8, 10, 12, and 15-point. The illustrations in this guide show the 10-point font size option and depict your handheld's menu items as they would appear if you integrated your handheld with an enterprise email account that uses the BlackBerry Enterprise Server or the BlackBerry Desktop Redirector.
Depending on your Nextel service plan, some applications or services might not be available on your handheld. In addition, the configuration for browsing web pages might be different. This guide assumes that you have the ability to use all the handheld's applications or services.
You can set the locale and the date and time format on your handheld. The date and time can be set to a 12-hour or 24-hour clock and the handheld status section of the screen reflects the format that you select. The graphics in this guide use the 12-hour clock and the English (United States) locale.
Related resources
This Handheld User Guide is the correct guide for you if you have set up your handheld using the procedures in the Getting Started Guide. This guide provides complete information on your handheld's keys and provides procedures for using your handheld's applications.
Additional documentation is available for your BlackBerry Wireless Handheld:
- Getting Started Guide — This printed guide contains installation and setup information for your handheld.
- Quick Reference Card — This card provides shortcuts and tips for using your handheld.
- Desktop Software Online Help — Each tool in the desktop software offers online Help. The Desktop Software Online Help consists of the ASCII Translator Online Help, the Application Loader Online Help, the Backup and Restore Online Help, the Desktop Manager Online Help, the Intellisync Online Help, the Netscape Address Book Help, and the Frequently Asked Questions Online Help. To view procedures for and information on the desktop software's tools, in any active window, click Help.
Integration with enterprise email account
If you have integrated your handheld with an enterprise email account, that uses the BlackBerry Enterprise Server, the Desktop Software Online Help also consists of the BlackBerry Wireless Synchronization Translator Online Help and the Redirector Settings Online Help. If you have integrated your handheld with a Microsoft Exchange email account that uses the BlackBerry Enterprise Server or the BlackBerry Desktop Redirector, the Desktop Redirector Online Help is available.
- README.txt — This text file contains information about the features of this software release. You can read this file at the end of the desktop software installation. To read the file at a later time, open it from the directory in which you installed the desktop software.
- BlackBerry Web Client Online Help — If you have integrated your handheld with an email account that uses the BlackBerry Web Client, you can configure your email settings in the BlackBerry Web Client. For information on configuring
About this guide
and using the BlackBerry Web Client, click Help in any BlackBerry Web Client window.
- Nextel Services Guide — This guide provides information on setting up the BlackBerry Web Client and using exciting Nextel services. It also provides other useful information for operating your handheld.
Chapter 1 Getting to know your handheld
This section provides information on the following topics:
• Using the keyboard and trackwheel
- Activating backlighting
• Navigating applications
- Configuring handheld options
• Tips for using your handheld
Getting to know your handheld

BlackBerry 6510 Wireless Handheld
Using the keyboard and trackwheel
Your handheld's keyboard provides access to the alphabetic characters. The keyboard also features ten special keys: the Symbol key, the Backspace key, the Enter key, the Space key, two Shift keys, the Alt key, the Escape button, a PTT TM (Push-to-Talk TM ) button, and a Power button. You can use the Power button to activate backlighting and you can generate numbers, punctuation marks, and special characters by pressing the Alt key in combination with the alphabetic keys. The trackwheel helps you navigate, view, and select items on each screen. To scroll through menu items or text, hold the Alt key and roll the trackwheel or hold the Alt key and press the Back or Forward keys. To select applications and menu options, click (press) the trackwheel.
The following table describes special keyboard and trackwheel combinations that can help you navigate applications, type text, and configure options on your handheld.
| Key Function | |
 Power button Power button | Turning on and turning off the power; activating backlightingPress thePowerbutton to turn on the handheld.When your handheld is on, press thePowerbutton to activate backlighting. Press it again to turn off backlighting. Backlighting turns off automatically if you do not press any keys or roll the trackwheel for 20 seconds.Hold thePowerbutton to turn off the handheld. |
| [WS90]Trackwheel | Scrolling and selectingRoll the trackwheel to scroll through text lines, fields, and menu itemsClick the trackwheel to open menus and select options. |
 Push-to-TalkTmbutton Push-to-TalkTmbutton | Speaking and listening during Nextel Direct ConnectTMcallsDuring a Nextel Direct Connect call, press and hold thePush-to-TalkTM(PTTTM)button to speak to your contact. Release the PTTbutton to listen to your contact. |
| [6487]Character + roll | Typing special charactersWhen you are composing a message or typing text, hold a letter and roll the trackwheel to scroll through other characters. When the desired character, symbol, or mark appears, release the letter. |
 theAltkey theAltkey | Typing Alt charactersTheAltkey activates the numbers and symbols that are above the letters printed on the keys.Press theAltkey to affect the next character that you type.Hold theAltkey to affect all the characters that you type.AnAicon appears in the upper right corner of your screen when theAltkey is activated. |
| [6536]Alt key + roll | Scrolling horizontally and vertically, and changing optionsHold theAltkey and roll the trackwheel to move the cursor horizontally across lines.Hold theAltkey and roll the trackwheel to scroll through field options.On the Home screen, hold theAltkey and roll the trackwheel to move the cursor vertically. |
Getting to know your handheld
| Key Function | |
 Alt key + click Alt key + click | Selecting text for cut, copy, and paste; hiding and moving icons on the Home screenOn any screen on which you can type text, hold the Alt key and click the trackwheel to enter selection mode. Roll the trackwheel to select the text.On the Home screen, hold the Alt key and click the trackwheel to view the menu. Click Move Icon or Hide Icon. |
 Alt key + Back key Alt key + Back key | Scrolling horizontally and changing optionsHold the Alt key and press the Back key to move the cursor horizontally across lines.Hold the Alt key and press the Back key to scroll through field options.In the Calendar application, hold the Alt key and press the Back key to move to the previous day, week, or month. |
 Alt key + Forward key Alt key + Forward key | Scrolling horizontally; changing optionsHold the Alt key and press the Forward key to move the cursor horizontally across lines.Hold the Alt key and press the Forward key to scroll through field options.In the Calendar application, hold the Alt key and press the Forward key to move to the next day, week, or month. |
 Left Shift key Left Shift key Right Shift key Right Shift key | Capitalizing lettersPress either Shift key to capitalize the next character that you type.Hold either Shift key while you type to capitalize all letters.Hold a letter to capitalize it. This feature only works when Key Rate is set to Slow or Fast on the Screen/Keyboard screen.An up arrow icon appears in the upper right corner of your screen when a Shift key is active. |
 Alt key + Right Shift key Alt key + Right Shift key | Activating CAP-lockPress the Alt key and the Right Shift key to activate capital letter-lock mode. Any key that you press is capitalized.Press a Shift key again to return to regular mode.Press the Alt key and the Right Shift key when you are connected to a phone call to activate CAP-lock mode. Any key that you press inserts the associated character.An up arrow icon appears in the upper right corner of your screen when CAP-lock mode is activated. |
 Left Shift key +Alt key Left Shift key +Alt key | Activating NUM-lockPress the Left Shift key and the Alt key to activate number-lock mode. Press a key to insert the character that appears above the primary letter.Press the Alt key again to return to regular mode.An N icon appears in the upper right corner of your screen when NUM-lock mode is activated. |
 Shift key + roll Shift key + roll | Selecting multiple items from a listHold either Shift key and roll the trackwheel to select multiple items from a list. |
 Enter key Enter key | Inserting carriage returns; choosing selected itemsPress the Enter key to move your cursor to a new line.Press the Enter key to choose a selected item. |
 Backspace key Backspace key | Deleting charactersPress the Backspace key to move the cursor backward and to delete characters to the left of the cursor.With one or more characters selected, press the Backspace key to delete only those characters. |
 Alt key +Backspace key Alt key +Backspace key | Deleting charactersPress the Alt key and the Backspace key to erase the selected character.Continue pressing the Alt key and the Backspace key to erase characters to the right of the cursor. |
 Escape button(under trackwheel) Escape button(under trackwheel) | Exiting screens or menusPress the Escape button to close a menu or cancel an action.Press the Escape button to return to the Home screen.While you are connected to a phone call or a Nextel Direct Connect call, hold the Escape button to end the call. |
Getting to know your handheld
| Key Function | |
 | Inserting a space; scrolling through field optionsPress the Space key to insert a space between characters while you type.Press the Space key to insert the at sign (@) and periods in Email fields.Press the Space key to scroll through field options. |
 | Opening the symbols library for extra charactersPress the Symbol key to open a symbols library, from which you can insert symbols. In this dialog box, select a symbol by clicking the trackwheel or pressing the letter under the desired symbol. |
| Symbol key |
Activating backlighting
In low light conditions, you can increase the readability of the LCD screen and keyboard by using the backlighting feature.
To activate backlighting, press the Power button. If you do not press any keys or use the trackwheel for twenty seconds, the backlighting turns off automatically.
The handheld's backlighting turns on automatically when you receive a phone call.
To turn off the backlighting manually, press the Power button.
Navigating applications
The LCD screen provides access to your handheld's applications. When you turn on your handheld, the Home screen appears. The handheld status section at the top of the screen displays various handheld status information, including the date and time, the wireless coverage indicator, and the battery power indicator. The handheld status section also appears on the screen when you are in the Alarm application. The time and wireless coverage indicator appear on the screen when you are in the Messages, Saved Messages, and Phone applications and when you are on the Search Results screen.
On the Home screen, you can open each application. On each application screen, you can view application menus. On some screens, you can change settings or options.
To open applications
The application icons appear on the Home screen. To open an application, select its icon and click the trackwheel. You can also press the Enter key to open a selected application.
You can also press the underlined character in an application name to open the application. To use shortcut keys, in the Phone application, on the General Options screen, the Dial from Home Screen field must be set to No. Refer to "Setting general phone options" on page 136 for more information.
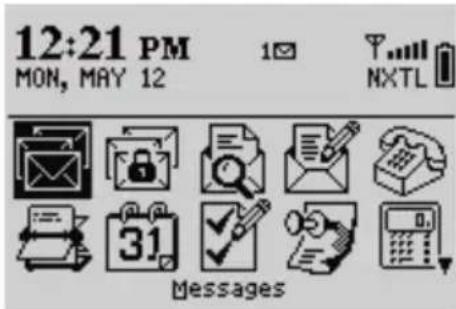
Home screen - Messages icon
To navigate menus
Menus provide a list of available options or actions for the current application. To open an application screen's menu, click the trackwheel. The menu appears on the right side of the screen.
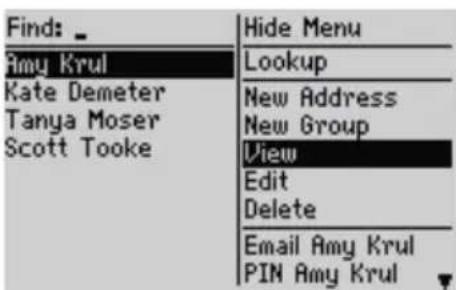
Find screen menu - View item
To select a menu item, use the trackwheel to scroll to the item, and then click the trackwheel. To close the menu, press the Escape button.
To scroll through options
There are four ways to change the configurable options on your handheld. These alternatives apply to all screens on which you can change settings, such as the Date/Time, New Appointment, or Alarm screens.
- Use the menu: With the cursor in an option field, click the trackwheel to view the menu, and then click Change Option. A dialog box appears in which you can scroll through your options. When you reach the option that you prefer, click the trackwheel.
- Use the Alt key + roll: Hold the Alt key and roll the trackwheel to scroll through the options. Release the Alt key when you reach the preferred option.
- Use the keyboard: You can press the letter or number that represents your choice. For example, if you are in a time field, press the first number of the hour that you want to specify.
- Use the Space key: You can press the Space key to scroll through your options. Release the Space key when the preferred option appears. This guide uses the Space key method to describe how to set field options.
To use links
When you receive a message, your handheld recognizes phone numbers, Nextel Direct Connect ™ Numbers, personal identification numbers (PINs), web site addresses, and email addresses in the body of the message and converts them into links. When you select an underlined link and click the trackwheel to view the menu, you can choose to dial the phone number or Nextel Direct Connect Number, browse the web page, or send an email or PIN message to your contact, based on the link that you select.

Note: Depending on your Nextel service plan, you might not be able to open a web page using links in your email messages. Contact Nextel Customer Care for more information.
Handheld icons
Icons indicate Nextel wireless network coverage, battery power, and handheld status, denote application screens, and provide navigational aid.
Application icons

Note: Depending on your Nextel service plan, some applications or services might not be available on your handheld. As a result, some of the following icons might not appear on the screen. Contact Nextel Customer Care for more information on available services.
| Icon Description | |
 Messages Messages | Receive, read, reply to, compose, save, and delete email and PIN messages. Receive, read, save, and delete SMS messages. |
 Saved Messages Saved Messages | Store messages for future viewing. |
 Search Messages Search Messages | Locate messages. |
 Compose Compose | Type and send email and PIN messages. |
 Phone Phone | Place and mute phone calls, put phone calls on hold, and initiate three-way calls. Make notes while on calls. Place Nextel Direct Connect calls. |
 Address Book Address Book | Store your personal directory of contact information, such as addresses, phone numbers, fax numbers, Nextel Direct Connect Numbers, and email addresses. Use the search tool to locate a specific contact. |
 Calendar Calendar | Manage appointments using Day, Agenda, Week, or Month view. Enable wireless calendar synchronization. |
 Tasks Tasks | Add, edit, and delete tasks, and mark tasks as complete. |
Getting to know your handheld
| Icon Description | |
 | Compose, edit, and delete notes and memos. |
| MemoPad | |
 | Perform basic mathematical operations and measurement conversions. |
| Calculator | |
 | Set the Alarm on your handheld to notify you at a specific time every day or only on weekdays. |
| Alarm | |
 | Open a web page with news, weather, and game information. Browse and save web pages, view web page addresses, and set options. |
| Nextel Online | |
 | Open a web page with support and account information. |
| nextel.com | |
 | Browse web pages and view web page addresses securely using your corporate Mobile Data Service. Save web pages and set Browser options. |
| BlackBerry Browser | |
 | Customize how the handheld notifies you of email and PIN messages, saved web pages, phone calls, appointments, alarms, SMS messages, and Nextel Direct Connect calls and Call Alerts. |
| Profiles | |
 | Set the password, customize AutoText, set the date and time, and program the automatic on/off feature. |
| Options | |
 | Lock your keyboard to prevent accidentally typing characters. |
| Keyboard Lock | |
32 BlackBerry Wireless Handheld
| Icon Description | |
 Lock Lock | Lock the handheld with a password security screen. The Keyboard Lock icon changes to the Lock icon after you set a password. |
 Turn Wireless On/Turn Wireless Off Turn Wireless On/Turn Wireless Off | Turn off the handheld's radio when it might interfere with other radio communications, such as when you are on an airplane, or when you prefer not to receive messages. You cannot place or answer phone calls (except for emergency phone calls), place or answer Nextel Direct Connect calls, send or receive messages, or browse web pages until you turn on the radio again. |
 Turn Power Off Turn Power Off | Turn off the handheld when you want to conserve battery power. All queued messages are delivered to your handheld after you turn it on again. |
Handheld status icons
| Icon Description | |
 | battery power indicator |
 | charging indicator |
 | wireless coverage indicator |
 | data is being sent |
 | data is being received |
| [CTHS] | Alt mode is active |
 | Shift mode is active; Cap-lock mode is active |
| [C82K] | Num-lock mode is active |
Getting to know your handheld
| Icon Description | |
 | unread message waiting |
 | Alarm is set |
| [x886] | text telephone (TTY) is enabled |
 | service book pending |
Network status icons
The capitalization of the letters that appear below the wireless coverage indicator represents the level of your connection to the Nextel wireless network. When a capital N appears, you can place and answer phone calls, and receive SMS messages. When a capital X appears, you can place and receive Nextel Direct Connect calls. When a capital T and L appear, you can send and receive email and PIN messages, and browse web pages.
| Icon Description | |
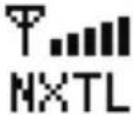 | You can send and receive email and PIN messages. You can also place and answer phone calls and Nextel Direct Connect calls, browse web pages, and receive SMS messages. |
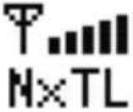 | You can send and receive email and PIN messages. You can also place and answer phone calls, browse web pages, and receive SMS messages. You cannot place and answer Nextel Direct Connect calls. |
 | You can place and answer phone calls and Nextel Direct Connect calls, and receive SMS messages. You cannot send and receive email and PIN messages, or browse web pages. |
 | |
 | You can place and answer phone calls and receive SMS messages. You cannot send and receive email and PIN messages, browse web pages, or place and answer Nextel Direct Connect calls. |
 | You can place and answer Nextel Direct Connect calls. You cannot send and receive email and PIN messages, receive SMS messages, place and answer phone calls, or browse web pages. |
 | Your handheld's radio is turned on, but your handheld is not registered with the Nextel wireless network. You cannot send and receive email and PIN messages, receive SMS messages, place and answer phone calls and Nextel Direct Connect calls, or browse web pages. |
 | You are roaming into a wireless network's coverage area that is not part of your home network, or your handheld is within an area of wireless coverage, but it is not connected to the Nextel wireless network. Contact Nextel Customer Care for more information.You can place emergency phone calls only. You cannot send and receive email and PIN messages, receive SMS messages, place and answer Nextel Direct Connect calls, browse web pages, answer phone calls, or place phone calls to non-emergency numbers.You can continue to use the other handheld applications. Any pending email or PIN messages are sent after you return to an area of Nextel wireless coverage. |
 | Your handheld is not in an area of wireless coverage. You cannot send and receive email and PIN messages, receive SMS messages, place and answer phone calls and Nextel Direct Connect calls, or browse web pages. You can continue to use your handheld's other applications. Any pending messages are sent after you return to an area of Nextel wireless coverage. |
Navigational icons
| Icon Description | |
| [3707] | cursor position |
| [50105] | more items are available above; scroll up with the trackwheel to view them |
| [3032] | more items are available below; scroll down with the trackwheel to view them |
Getting to know your handheld
Configuring your handheld's options
After you are familiar with your handheld, you should configure some of its basic options. Refer to "Options" on page 217 for more information on selecting notification profiles and setting the Auto On/Off feature.
Tips for using your handheld
- Press the first letter of an item in an options list or menu to move directly to that item.
- Press the Space key twice to insert a period when you are typing text (the letter following the period is capitalized automatically).
- Type the first letters of the name, or the initials separated by a space, to find a specific contact on the To or Find screens.
- Hold a letter to capitalize it.
- Press the Escape button to exit any menu, dialog box, or screen and to return to the active application. On the main screen of any application, press the Escape button to return to the Home screen.
- While you are connected to a phone call or Nextel Direct Connect call, on the Active Call screen, hold the Escape button to end the call.
Chapter 2 Email and PIN messages
This section provides information on the following topics:
- Message icons
- Sending email and PIN messages
- Setting message options
- In s e r t i n g s y m b o l s
- Formatting your messages
• Using cut, copy, and paste
• Using the Find feature
- Adding attachments to messages
- Customizing the auto signature
• Receiving delivery confirmation
- Reading email or PIN messages
• Receiving long email messages
- Managing attachments
- Tips for email and PIN messages
Email and PIN messages
Message icons
These icons appear on the screen to indicate the status of pending, sent, and received email and PIN messages.
| Icon Description | |
 | message is being sent |
 | message is pending (will be sent later) |
 | message was sent to the network |
 | PIN message was delivered to the recipient's handheld |
 | draft of email or PIN message is saved (not sent) |
 | unread message transmission error |
 | message returned, message transmission error |
 | unopened message |
 | opened message |
 | email message is filedYou can only file email messages if you have integrated your handheld with an enterprise email account that uses the BlackBerry Enterprise Server or the BlackBerry Desktop Redirector. |
| == | high importance |
Sending email and PIN messages
After you activate your handheld, you can send and receive email and PIN messages.
To send an email message
- On the Home screen, click the Compose icon. The To screen appears.
- Select a contact for which you have saved an email address and click the trackwheel to view the menu. Click Email.
![To: [Use Once] Amy Krul Carolyn Busch Kate Demeter Tanya Moser Hide Menu Email Carolyn Busch PIN Carolyn Busch Call Carolyn Busch SMS Carolyn Busch Lookup New Address New Group View](/content/2026/05/990810/images/adb06ce3794ec2181f099c98ff1ad4f02df308e3bb276241f6410c1e7dfbd94f.jpg)
To screen menu - Email item

Note: If you are sending an email message to a contact with multiple email addresses, you are prompted to select which address to use.
- In the Subject field, type a subject and press the Enter key. Type your message.

Tip: To send the message from a specific service (for example, Desktop or Web Client), scroll to the top of the message. In the Using field, press the Space key until the preferred service appears. Any subsequent messages are also sent from this service.
- Click the trackwheel to view the menu. Click Send. You return to the Messages screen.
If you are in an area of wireless coverage that is sufficient for sending email messages, a check mark appears beside the message within a short period of time. This icon indicates that your message was transmitted successfully. You can send email messages if NXTL or NxTL and one or more bars appear with the wireless coverage indicator in the handheld status section of the screen.
Email and PIN messages
If you are not in an area of sufficient wireless coverage, you do not need to cancel sending your email or PIN message. Your handheld sends the message automatically when you return to an area with sufficient wireless coverage.
Refer to "Message icons" on page 38 for more information on the icons that appear on the Messages screen.

Note: You can set your default service book on the Message Services screen. On the Home screen, click the Options icon. The Options screen appears. Click Message
Services. Refer to "Message Services" on page 235 for more information. Refer to the Getting Started Guide for more information on service books and how to use them on your handheld.
To send a PIN message
A personal identification number (PIN) is a number that is used to identify each handheld on the network. If you know the PIN of another person's handheld, you can add it to your Address Book and use it to send a PIN message directly to that person.

Note: PIN messages are not routed through your existing email system. They do not appear in your desktop email program.
Check the Status screen of the Options application to locate the PIN for your handheld.
To send a PIN message
- On the Home screen, click the Compose icon. The To screen appears.
- Select a contact for which you have saved a PIN and click the trackwheel to view the menu. Click PIN.
![To: [Use Once] Amy Krul Carolyn Busch Kate Demeter Tanya Moser Hide Menu Email Carolyn Busch PIN Carolyn Busch Call Carolyn Busch SMS Carolyn Busch Lookup New Address New Group View](/content/2026/05/990810/images/8dfa96db92efc48dc2fa1bae363474e6ddba9db76bf064966993491760221d8f.jpg)
To screen menu - PIN item
-
In the Subject field, type a subject and press the Enter key. Type your message.
-
Click the trackwheel to view the menu. Click Send. You return to the Messages screen.
If you are in an area of wireless coverage that is sufficient for sending PIN messages, a check mark appears beside the message within a short period of time. This icon indicates that your message was transmitted successfully. You can send PIN messages if NXTL or NxTL and one or more bars appear with the wireless coverage indicator in the handheld status section of the screen. A D appears with the check mark when the message is delivered to your contact's handheld.
If you are not in an area of sufficient wireless coverage, you do not need to cancel sending your email or PIN message. Your handheld sends the message automatically when you return to an area with sufficient wireless coverage.
Refer to "Message icons" on page 38 for more information on the icons that appear on the Messages screen.
To send a message to several contacts at one time
You can send a message to more than one recipient and choose whether the recipients are addressed directly (To), carbon copied (CCed), or blind carbon copied (BCCed).
- On the Home screen, click the Compose icon. The To screen appears.
- Select a contact and click the trackwheel to view the menu. Click a send method (either email or PIN). For this example, click Email.
- While you are composing the message, click the trackwheel to view the menu. Click Add To, Add Cc, or Add Bcc. For this example, click Add Cc. The Select Address screen appears, listing your contacts.
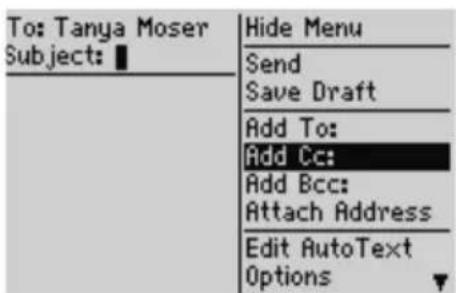
To screen menu - Add Cc item
- Select a name and click the trackwheel to view the menu. Click Email. Continue to add names until all desired recipients are added to the message.
Email and PIN messages

Tip: To search for a contact quickly, type the first letters of your contact's name.
-
In the Subject field, type a subject and press the Enter key. Type your message.
-
Click the trackwheel to view the menu. Click Send.
Your message is sent, addressed as you have specified.

Note: By default, the send method that was selected for the first recipient is used for all recipients.
If you are sending a message to more than one PIN, the check mark changes to a D when the message is delivered to all the recipients' handhelds.
To send a message to a one-time recipient
You can send a message without adding the recipient to your Address Book by selecting the [Use Once] option.
- On the Home screen, click the Compose icon. The To screen appears.
- Select [Use Once] and click the trackwheel to view the menu. Click a send method (either email or PIN). For this example, click Email. The One Time Email screen appears.
![To: [Use Once] Kate Demeter Tanya Moser Hide Menu Email... PIN... Phone... Lookup New Address New Group Options Close](/content/2026/05/990810/images/0c485d25972dd1a1a4564bc2cb79f8b8527a8f0b63f31040178c3f299acc544b.jpg)
To screen menu - Email item
- Type your contact's email address. Click the trackwheel to view the menu. Click Continue.
- Type a subject in the Subject field and press the Enter key. Type your message.
- Click the trackwheel to view the menu. Click Send.
42 BlackBerry Wireless Handheld
You return to the Messages screen, and you can view the status of your sent message.
To send a message using a link
Your handheld recognizes email addresses in the body of messages and converts them into links. You can select an underlined link and use it to send a message.
- On the Home screen, click the Messages icon. The Messages screen appears.
- Select a received message that contains a link. Click the trackwheel to view the menu. Click Open.
- Select the link to which you want to send a message. Click the trackwheel to view the menu. Click a send method (either email or PIN). For this example, click Email.
- Type a subject in the Subject field and press the Enter key. Type your message.
- Click the trackwheel to view the menu. Click Send.
You return to the Messages screen, and you can view the status of your sent message.

Note: Links can also appear in the other handheld applications. You can send messages from any of those applications by following the procedure described above.
Setting message options
You can change the settings for all email or PIN messages or only for the one that you are currently composing.
To set message options
You can customize the following message options for all email and PIN messages.
- Display Time: Select whether you want the Messages screen to display the time that the message is sent or received. By default, this option is set to Yes.
Email and PIN messages
- Display Name: Select whether you want the Messages screen to display the name of the sender or the recipient. By default, this option is set to Yes.
- Confirm Delete: Select whether you want to be prompted before messages are deleted permanently. By default, this option is set to Yes.
- Consider PIN Level 1: Select whether you want PIN messages to be considered high priority. By default, this option is set to Yes.
- Auto More: Select whether you want the next section of a long message to be delivered to your handheld automatically. By default, this option is set to Yes.
- Delete On: Select whether you want email messages to be deleted from your handheld only, deleted from both your handheld and the desktop, or whether you want the handheld to prompt you during manual or wireless email reconciliation. By default, this option is set to Mailbox & Handheld.
Integration with enterprise email account
If you have integrated your handheld with an enterprise email account that uses the BlackBerry Enterprise Server or the BlackBerry Desktop Redirector, you can also set the Hide Filed Messages field. Select whether you want the Messages screen to display filed email messages.

Note: If your handheld is enabled for wireless email reconciliation, you can also set the Wireless Reconcile and Conflicts fields.
- Wireless Reconcile: Select whether you want to reconcile messages between your desktop email program and your handheld automatically. By default, this option is set to Yes.
-
Conflicts: Select which location dominates if a message is moved or deleted on both your handheld and your desktop. By default, this option is set to Mailbox Wins.
Refer to "Using wireless email reconciliation" on page 72 for more information. -
On the Home screen, click the Messages icon. The Messages screen appears.
- Click the trackwheel to view the menu. Click Options. The Message List Options screen appears.
- In the fields that you want to set, press the Space key until the preferred option appears.
| Message List Options | |
| Display Time: | Yes |
| Display Name: | Yes |
| Confirm Delete: | Yes |
| Hide Filed Messages: | No |
| Consider PIN Level 1: | Yes |
| Auto More: | Yes |
| Desktop | |
| Delete on: | Handheld |
Message List Options screen - setting options
- Click the trackwheel to view the menu. Click Save.
You return to the Messages screen.

Tip: You can also change the message options on the Saved Messages screen.
To set current message options
Changes that you make to the current message options apply only to the message that you are currently composing. They do not apply to all messages. Refer to "To set message options" on page 43 for more information on customizing options for all email and PIN messages.
-
On the Home screen, click the Compose icon. The To screen appears.
-
Select a contact and click the trackwheel to view the menu. Click a send method (email or PIN). For this example, click Email.
-
Click the trackwheel to view the menu. Click Options. The Current Message Options screen appears.
-
In the Importance field, press the Space key to change the importance level of the message that you are composing. Select from Low, Normal, or High.
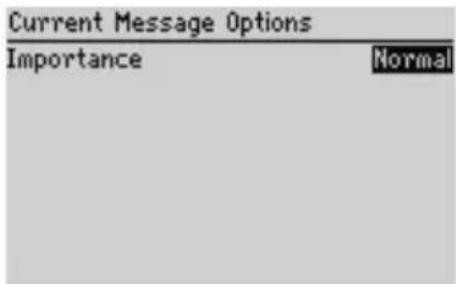
Current Message Options screen - setting options
- Click the trackwheel to view the menu. Click Save.
Email and PIN messages

Note: If you send a message with high importance, an exclamation mark appears beside the message on the Messages screen.
Inserting symbols
You can insert symbols into your messages from your handheld's symbols library.
To insert symbols
-
On the Home screen, click the Compose icon. The To screen appears.
-
Select a contact and click the trackwheel to view the menu. Click a send method (email or PIN). For this example, click Email.
-
While composing your message, press the Symbol key. A dialog box displays the symbols that are available.
![To: Tanya Moser Sub Plea rep C < { « ~ = _ " ^ %. Q W E R T Y U I O P ] > } >> \ ; ` " & A S D F G H J K L $ € ¥ £ - 1 Z X C U B N M](/content/2026/05/990810/images/d00f2686c619bd512a42b7b5eb9fd37120f25f25a16e9cb516ad2965a37e5f27.jpg)
Composing a message - inserting symbols
-
Select the symbol that you want to use.
-
Click the trackwheel to insert the symbol in your message. (You can also press the associated letter that appears under the symbol.)
The symbol is inserted in the message.

Tip: To insert symbols on the New Address, Edit Address, Search Messages, and New AutoText screens, press the Symbol key.
To insert bullet characters into your messages, press the Symbol key. In the dialog box that appears, press B.
To insert special characters
-
On the Home screen, click the Compose icon. The To screen appears.
-
Select a contact and click the trackwheel to view the menu. Click a send method (either email or PIN). For this example, click Email.
-
While you are composing a message, hold a letter and roll the trackwheel to scroll through the accents, symbols, or marks associated with that character. When the preferred character appears, release the letter key.
Formatting your messages
Your handheld has features that can reduce your typing time. It also has an AutoText feature that automatically replaces certain text that you type with preprogrammed text.
Automatic capitalization
When you compose a message, you do not have to press a Shift key to capitalize letters; your handheld has two methods of capitalizing letters.
- When you type, the first letter that you type is capitalized automatically. When you type a period followed by a space, the next letter that you type is capitalized. Your handheld recognizes the beginning of a new sentence and capitalizes the letter for you. If you do not want the letter that follows a period to be capitalized, type the letter and then press the Backspace key. Type the letter again.
- If you want to capitalize any other letter, press and hold that letter until it is capitalized. For this feature to work, you must set the Key Rate option on the Screen/Keyboard screen to either Slow or Fast. Refer to "Screen/Keyboard" on page 236 for more information.
Automatic punctuation
To insert a period automatically at the end of a sentence or word, press the Space key twice. The next letter that you type is capitalized.
To insert a lowercase letter after a period, press the Backspace key and type the letter again. The letter appears in lowercase.
Email and PIN messages
Email and number fields
You can type an email address in an Email field without pressing the Alt key. When you type an email address, instead of pressing the Alt key and L to insert the at sign (@), press the Space key. When you press the Space key again, a period is inserted.
You can type numbers in the Work, Home, Mobile, Pager, Fax, DCID, and PIN fields without pressing the Alt key. To type a number in any of these fields, press the associated character key. For example, to display the number 4, press S. You can do this for all numbers, for parentheses, and for the -, +, * and . characters.

Note: You can only type numbers and hexadecimal characters in the PIN field.
Number lock
You can activate number-lock (NUM-lock) mode to type numbers without pressing the Alt key. Press the Left Shift key and the Alt key. NUM-lock mode is activated and you can type numbers on any screen. Press the Alt key to turn off NUM-lock mode.
Using AutoText
The AutoText feature automatically replaces certain text that you type with preprogrammed text. You can configure the default AutoText entries and add new ones to meet your specific needs. You can use AutoText to automatically perform the following actions:
• compose frequently used phrases or messages with a few keystrokes
• correct commonly misspelled words
- replace abbreviations and acronyms with complete words
- insert phrases in a message by typing only one keyword
- insert punctuation and symbols in your message without using the Alt key or the symbols library

Note: Several shortcuts are built into the AutoText feature for inserting macros in messages. Refer to "To add a new AutoText entry using a macro" on page 50 for more information.
48 BlackBerry Wireless Handheld
AutoText example
- On the Home screen, click the Compose icon. The To screen appears.
- While you are composing your message, type the text hte. The text hte is a default AutoText entry that tells your handheld to automatically replace that text with the correctly spelled word the.

Composing a message - incorrect spelling
- Press the Space key. The correctly spelled word replaces the error.
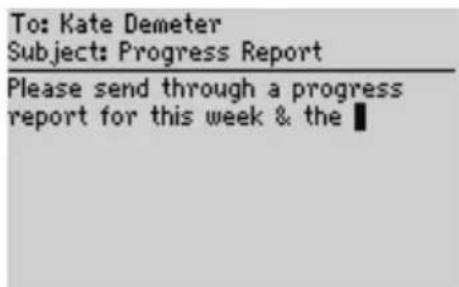
Composing a message - AutoText-corrected spelling
To add a new AutoText entry
- On the Home screen, click the Options icon. The Options screen appears.
- Click AutoText. The AutoText screen displays a list of default AutoText entries.
- Click the trackwheel to view the menu. Click New. The AutoText: New screen appears.
- In the Replace field, type a keyword.
- In the With field, type the replacement text.
- In the Using field, press the Space key to select either SmartCase or Specified Case.
Email and PIN messages

Note: If you select SmartCase, the capitalization of the AutoText entry changes depending on the context of the sentence in which it is used. For example, if the word appears at the beginning of a sentence, it is capitalized automatically.
If you select Specified Case, the capitalization of the AutoText entry appears exactly as you have typed it in the Replace field.
- The list of AutoText entries changes depending on the locale that you select for your handheld. When you add new entries, you can set whether you want them to be available in all locales or in a specific locale only. In the Locale field, press the Space key to select the locale in which you want your new AutoText entry to be available. The default is your handheld's default locale.

Note: The locale that you set on this screen does not change the locale for your handheld. You can change your default locale in the Options application, on the Localization screen. Refer to "Localization" on page 234 for more information.
- Click the trackwheel to view the menu. Click Save.

AutoText: New screen menu - Save item
The new AutoText entry appears in the AutoText entries list, in alphabetical order. When you use this AutoText entry in a message and press the Space key, the corresponding text is inserted into your message.
To add a new AutoText entry using a macro
You can use AutoText macros to quickly type variable items such as the current date and time, your handheld's phone number and PIN, and owner information.
- On the Home screen, click the Options icon. The Options screen appears.
- Click AutoText. The AutoText screen displays a list of default AutoText entries.
-
Click the trackwheel to view the menu. Click New. The AutoText: New screen appears.
-
In the Replace field, type a keyword. For this example, type a short form for the date.
-
In the With field, click the trackwheel to view the menu. Click Insert Macro. The Insert Macro dialog box appears.
-
Select one of the following macros: Short date, Long date, Short time, Long time, Owner name, Owner info, Phone Number, Private ID, Handheld PIN, Backspace, Delete, and %. For this example, click Short Date.
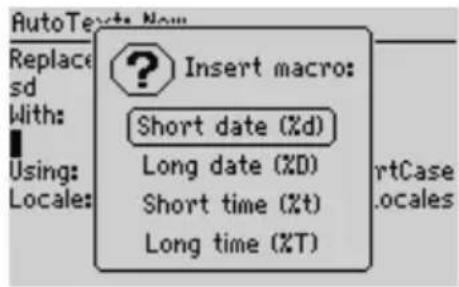
Adding an AutoText entry - Inserting a macro
-
In the Using field, press the Space key to select either SmartCase or Specified Case.
-
In the Locale field, press the Space key to set the locale in which you want this AutoText entry to be available.
-
Click the trackwheel to view the menu. Click Save.
You can test your new entry by typing the keyword while composing a message. The value for the macro is inserted in your message.
To perform an AutoText search
Instead of scrolling through your list of AutoText entries, you can perform a search to find an entry quickly.
-
On the Home screen, click the Options icon. The Options screen appears.
-
Click AutoText. The AutoText screen displays a list of default AutoText entries.
-
Type the first letter, or first few letters, of the entry that you want to find. For this example, type the letter t. The screen displays the word Find, followed by the letter t.
-
The AutoText screen displays the entries beginning with the letter t. Select the preferred entry or type additional letters to further specify entries. Click the trackwheel to edit or delete the entry.
Email and PIN messages
To edit an AutoText entry
- On the Home screen, click the Options icon. The Options screen appears.
- Click AutoText. The AutoText screen displays a list of AutoText entries. Select the entry that you want to edit.
- Click the trackwheel to view the menu. Click Edit. The AutoText: Edit screen appears.
- Press the Alt key and roll the trackwheel to scroll horizontally while you edit the text in the Replace and With fields.
- To edit the Using and Locale fields, press the Space key until the preferred option appears.
- Click the trackwheel to view the menu. Click Save.
You return to the AutoText screen and you can view your changes.

Tip: To edit AutoText entries when you are composing a message, click the trackwheel to view the menu. Click Edit AutoText.
You can also edit AutoText entries in the Backup and Restore tool of the desktop software. Refer to the Backup and Restore Online Help for more information.
To delete an AutoText entry
If you do not want to keep an AutoText entry (either a default entry or an entry that you have added), you can delete it.
- On the Home screen, click the Options icon. The Options screen appears.
- Click AutoText. The AutoText screen displays a list of default AutoText entries. Select the entry that you want to delete.
- Click the trackwheel to view the menu. Click Delete. A dialog box prompts you to confirm that you want to delete the entry. Click Delete.
You return to the AutoText screen and the entry is no longer listed.
Using cut, copy, and paste
You can cut, copy, and paste text in email and PIN messages, Address Book entries, phone call notes, memos, appointments, notification profiles, web pages, and tasks. You can also copy text from one application and paste it into another. For example, you can copy the text from a memo and paste it into a message.
52 BlackBerry Wireless Handheld
To cut and copy text in a message
-
On the Home screen, click the Compose icon. The To screen appears.
-
While you are composing a message, place your cursor beside the text that you want to cut or copy.
-
Hold the Alt key and click the trackwheel to enter selection mode. Roll the trackwheel to select the lines of text that you want to cut or copy.

Tip: To select one character at a time, hold the Alt key or the Shift key while you roll the trackwheel.
- Click the trackwheel to view the menu. Click Cut or Copy.
To paste text into a message
-
On the Home screen, click the Compose icon. The To screen appears.
-
While you are composing a message, place your cursor where you want to paste the text.
-
Click the trackwheel to view the menu. Click Paste.

Tip: To replace or delete existing text, hold the Alt key and click the trackwheel to enter selection mode. Roll the trackwheel to select the text, and then start typing. The text that you type replaces the characters that you have selected.
Using the Find feature
Your handheld's Find feature locates specific words and numbers within sent and received messages. You can use this feature in messages on the Messages, Saved Messages, and Search Results screens.
The Find feature differs from the Search Messages application because the Search Messages application enables you to specify search terms to locate specific messages and phone call logs. The Find feature locates specific words and numbers in an open message.
Email and PIN messages
To use the Find feature in a sent or received message
- On the Home screen, click the Messages icon. The Messages screen appears.
- Select an email or PIN message and click the trackwheel to view the menu. Click Open.
- Scroll to the top of the message. Click the trackwheel to view the menu. Click Find. The Search for dialog box appears.

Tip: The Find feature only locates a word or number that appears at or following your cursor. To search the entire message, place your cursor at the top of the message.
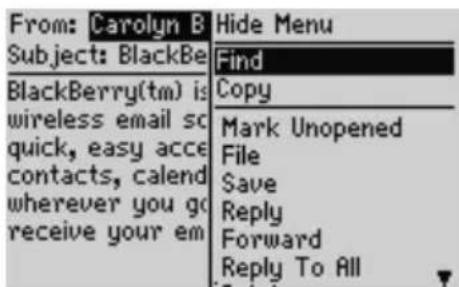
Received email message menu - Find item
- Type a word or number that you want to locate within the message and click the trackwheel. The cursor moves to the first occurrence of the word or number that you specify.
- After you locate a specific word or number, you can search for that word or number again. Click the trackwheel to view the menu. Click Find Next.
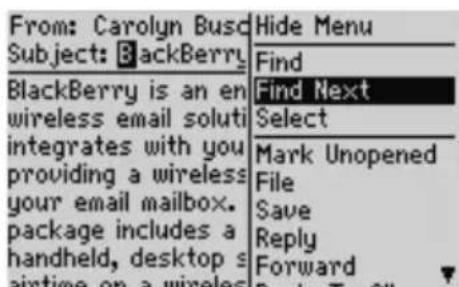
Received email message menu - Find Next item
The next occurrence of the word or number that you typed is selected.

Note: If the word or number is not found, the Not found dialog box appears.
54 BlackBerry Wireless Handheld
Adding attachments to messages
You can send an Address Book entry to another handheld as an attachment to your email or PIN message.
To attach Address Book entries
- On the Home screen, click the Compose icon. The To screen appears.
- Select an existing contact (or add a new one if necessary) and click the trackwheel to view the menu. Click a send method (either email or PIN). For this example, click Email.
- After you compose your message, click the trackwheel to view the menu. Click Attach Address. The Attach screen appears, listing all of your contacts.
- Select a contact and click the trackwheel to view the menu. Click Continue. You return to your message and the Address Book entry for the contact that you selected is added to your message.
- Click the trackwheel to view the menu. Click Send.

Composing a message - Address Book attachment
Refer to "Adding addresses" on page 95 for information on how to add a new Address Book entry.
Customizing the auto signature
You can specify an auto signature that is appended to all email messages that you send from your handheld.
Integration with enterprise email account
You can customize your auto signature in the desktop software's Redirector Settings tool, on the General tab. Refer to the following procedure for information on customizing your auto signature.
Email and PIN messages
Integration with new or ISP email account
You can customize your auto signature in the BlackBerry Web Client. Refer to the BlackBerry Web Client Online Help for more information.
To customize the auto signature
- In the BlackBerry Desktop Manager, double-click the Redirector Settings icon. The Redirector Settings window appears.
- On the General tab, in the Auto signature section, click in the text box. Edit this text to customize your auto signature.
- Click OK to return to the BlackBerry Desktop Manager.

Note: The auto signature is only appended to email messages; it is not appended to PIN messages.
The auto signature does not appear while you are composing an email message on your handheld; it is appended to your message when you send it.
To disable the auto signature, delete all text in the auto signature text box.
Receiving delivery confirmation
You can receive confirmation that an email message was delivered to another person's handheld.

Note: You can only receive delivery confirmation of your email messages if you have integrated your handheld with an enterprise email account that uses the BlackBerry Enterprise Server or the BlackBerry Desktop Redirector.
To receive delivery confirmation
- On the Home screen, click the Compose icon. The To screen appears.
- Select the recipient of your message and click the trackwheel to view the menu. Click Email.
- In the Subject field, type
, followed by your subject line. To insert angle brackets, press the Symbol key and insert them from the Symbols dialog box.
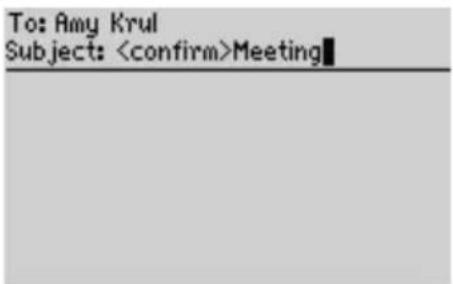
Composing a message - specifying delivery confirmation
- Type your message.
- Click the trackwheel to view the menu. Click Send.
After the message is delivered to the recipient's handheld, you receive a new message indicating that your sent message arrived.
Reading email or PIN messages
When you receive a new message, you receive visual notification in the handheld status section of the screen, and any other notification, depending on how you have configured your handheld's notification profiles.
To read a message
- On the Home screen, click the Messages icon. The Messages screen appears. Messages are listed in chronological order, grouped by date.
- Select a received email or PIN message and click the trackwheel to view the menu. Click Open.
Received email message actions
After you read the email or PIN message, click the trackwheel to view the menu, and then click one of the following menu items:
Mark Unopened: This action marks the current email or PIN message as unopened. When you return to the Messages screen, the unopened icon is displayed. Refer to "Marking messages as unopened" on page 79 for more information.
Email and PIN messages
File: This action files the current email message in a folder that you specify. If you reconcile your email messages between your handheld and your desktop, email messages that are filed on your handheld are moved to the corresponding desktop folder. Refer to "Filing email messages" on page 70 for more information.
Integration with enterprise email account
You can only file messages if you have integrated your handheld with an enterprise email account that uses the BlackBerry Enterprise Server or the BlackBerry Desktop Redirector.
Save: This action saves the open email or PIN message. Messages that are saved on your handheld are copied to the Saved Messages screen. Refer to "Saving messages" on page 73 for more information.
Reply: This action sends a reply to the sender of the open email or PIN message and includes the text of the original message as part of the reply. All of the original message is sent, even if it was truncated on your handheld.
Forward: This action forwards the open email or PIN message to the contact(s) that you specify. You can forward received email messages to a PIN address. You can also forward received PIN messages to an email address. If an attachment is included with the message, it is also forwarded. The original text of the message is forwarded, along with any additional text that you type.
Reply to All: This action sends a reply to all recipients of the message and includes the text of the original message as part of the reply.

Note: If you click the Reply or Reply to All menu items, but you do not want to include the original text in your message, you can delete it. While you are composing your reply, click the trackwheel to view the menu. Click Delete Original Text.
Integration with enterprise email account
If you reply to an email message using your handheld, the corresponding message in your desktop email program is marked as opened and replied to. If you forward a message, the corresponding message is marked as opened and forwarded.
Delete: This action deletes the open email or PIN message. Refer to "Deleting messages and call logs" on page 87 for more information.
More: This action requests the remaining portions of a long email message from your desktop email program. This action is only available if the email message text is greater than 2 KB.
More All: This action requests all the remaining sections of a long email message from your desktop email program. It is available only if, on the Message List Options screen, you set the Auto More field to No.
Email: This action sends an email message to the sender or a recipient of the open email or PIN message. This option is only available when your cursor is in the From or To field of the open message and an email address for this contact is saved in your Address Book.
PIN: This action sends a PIN message to the sender or a recipient of the open email or PIN message. This option is only available when your cursor is in the From or To field of the open message and a PIN for this contact is saved in your Address Book.
Call: This action places a phone call to the sender or a recipient of the open email or PIN message. This option is only available when your cursor is in the From or To field of the open message and a phone number for this contact is saved in your Address Book.
Alert: This option places a Nextel Direct Connect Call Alert to the sender or a recipient of the open email or PIN message. This option is only available when your cursor is in the From or To field of the open message and a Nextel Direct Connect Number for this contact is saved in your Address Book.
Show Address: This action shows the full SMTP email address or PIN for the recipient or sender. This option is only available when your cursor is in the From or To field of the open email or PIN message with a person's name showing as it appears in an Address Book entry.
Show Name: This action shows the first and last name of the sender or the recipient. This option is only available if your cursor is in the From or To field of the open email or PIN message and the full SMTP email address or PIN for the contact appears. The contact must be in your Address Book.
View Folder: This action shows the folder in which your email message is stored.
Integration with enterprise email account
The View Folder menu item is available only if you have integrated your handheld with an enterprise email account that uses the BlackBerry Enterprise Server or the BlackBerry Desktop Redirector, and you have reconciled your email messages to transfer your desktop folders to your handheld.
View Contact: This action shows the Address Book entry for the recipient or sender. This option is only available if the contact is saved in your Address Book.
Add to Address Book: This action adds the contact information for the sender of the email or PIN message to the Address Book. This option is only available if the contact is not in your Address Book.
Previous Item: This action closes the current item and opens the previous item (if a previous item exists).
Email and PIN messages
Next Item: This action closes the current item and opens the next item (if a next item exists).
Next Unopened Item: This action closes the current item and opens the next unopened item (if an unopened item exists).
Receiving long email messages
Occasionally, an email message that you receive might be larger than the size that the network can transmit to your handheld at one time. In this case, the maximum amount of data is sent to your handheld and the rest remains at your desktop.
You can request more of a message manually or set your Message List Options so that your handheld receives more of a message automatically when you finish reading the delivered section.

Note: If you receive a PIN message that is larger than the size that the network can transmit to your handheld, the message Original Message Truncated appears at the end of the message. You cannot receive the rest of the PIN message.
To receive more of a message automatically
If you want the remaining sections of a long message to be requested and delivered to your handheld automatically, on the Message List Options screen, set the Auto More field to Yes. Refer to "Setting message options" on page 43 for more information.
When the Auto More option is enabled, your handheld requests and receives more of long messages automatically as you read through the delivered portion.
To request more of a message manually
You can request more or all of a long message manually, if, on the Message List Options screen, you set the Auto More field to No.
- On the Home screen, click the Messages icon. The Messages screen appears.
- Open an email message. If the message is truncated, the message More available appears at the end of the message, followed by the remaining number of bytes to be sent.
- Click the trackwheel to view the menu. Select one of the following options:
- To request another section of the message, click More.
• To request the rest of the message, click More All.
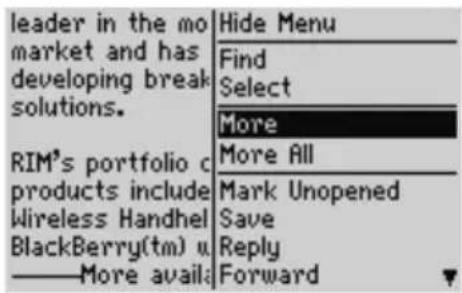
Open email message menu - More item
If you are in an area of sufficient wireless coverage for receiving email messages, and you selected More from the menu, the next section of the message is sent to you. If you selected More All, the remaining part of the message is sent. It appears at the end of the existing message.

Tip: You can return to the Messages screen while you are waiting for the rest of the message. You are notified when your handheld receives the next part of the message and the message is marked unopened on the Messages screen. Select the message and open it by pressing the Enter key. PressG to resume reading the message where you last stopped reading it.
Managing attachments
You might receive an email or PIN message on your handheld that contains an attachment. You can view Address Book attachments that are sent from other handhelds, and then add them to your Address Book.

Note: To use the attachment service, the following requirements must be met:
- If your handheld is integrated with an enterprise email account, your handheld must be enabled on a BlackBerry Enterprise Server version 3.6 or later for Microsoft Exchange or on a BlackBerry Enterprise Server version 2.2 or later for Lotus Domino.
- If you use the BlackBerry Web Client, Nextel must enable your handheld for the attachment service.
Refer to "Opening attachments" on page 171 for more information on viewing file attachments.
To open Address Book attachments
If you have received an email or PIN message with an Address Book attachment, you can view the attachment and add the entry to your handheld's Address Book.
- On the Home screen, click the Messages icon. The Messages screen appears.
Email and PIN messages
- Open a received message. The number of Address Book attachments appears at the top of the message. Scroll to the end of the message; the name of the Address Book attachment appears beside a book icon.
![From: Amy Krul Subject: Address [1 Attachment] I've attached Tanya's address. Let me know if you need anything else. Tanya Moser](/content/2026/05/990810/images/5f2e50539f6525e47f44ae87b7be257593689a3aa39fc531537ed90fe05f63ee.jpg)
Open email message with Address Book attachment
-
With your cursor in the name of the Address Book attachment, click the trackwheel to view the menu. Click View Attachment. A virtual business card appears listing contact information.
-
Click the trackwheel to view the menu. Select one of the following options:
• If the contact is not in your Address Book, click Add to Address Book.
- If the contact is already in your Address Book, but you want to update the information, click Update Address.
- The attachment is added to your Address Book and you return to the open attachment. Click the trackwheel to view the menu. Click Close.
You return to the open message.
To forward messages with file attachments
If you receive an email message on your handheld that has a file attached to it, you can forward the message.
- On the Home screen, click the Messages icon. The Messages screen appears.
- Open a received email message. The number of file attachments appears at the top of the message. Scroll to the end of the message; the name and size of the file attachment appear.
![From: Tanya Moser Subject: File [1 Attachment] Here is the file you need. <> application: seminar.doc (22K)](/content/2026/05/990810/images/a4deebce240741e1571659d643b38678730cd08affc8154035724b497b3b6517.jpg)
Received email message with file attachment
- Click the trackwheel to view the menu. Click Forward. The Select Address screen appears.
- Select a recipient and click the trackwheel to view the menu. Click Email. Type any additional text that you want to add to the message. Your message includes the file attachment.
- Click the trackwheel to view the menu. Click Send.
You return to the Messages screen, and you can view the status of the sent email message.
Tips for email and PIN messages
Composing messages
- Press C to compose a new message in the Messages or Saved Messages applications.
- Press the Alt key and roll the trackwheel to scroll horizontally in any application in which you can type or view text.
- Press the Space key to insert the at sign (@) and period characters in an Email field.
- Press the Space key twice to insert a period when you are typing text (the letter that follows the period is capitalized automatically).
- Type the first letters of the name, or the initials separated by a space, to find a specific contact on the To screen.
- Hold a letter to capitalize it (you must have Key Rate enabled).
- When you are typing text or composing a message, hold a letter and roll the trackwheel to scroll through other characters. When the preferred character appears, release the letter.
- Press the Alt key and the Right Shift key to turn on CAP-lock mode. Press a Shift key to turn it off.
- Press the Left Shift key and the Alt key to turn on NUM-lock mode. Press the Alt key to turn it off.
Email and PIN messages
Using cut, copy, and paste
- Press the Alt key and click the trackwheel to enter selection mode.
- Hold a Shift key and roll the trackwheel to select the next character. Roll the trackwheel to select the line of text.
- In selection mode, press the Alt key and click the trackwheel to copy the selected text or character.
- In selection mode, press the Backspace key to delete the selected text or character.
- Press the Escape button to exit selection mode.
- Press a Shift key and the Backspace key to cut the selected text or character.
- Press a Shift key and click the trackwheel to paste the selected text or character.
Reading messages
- To open messages quickly, on the Messages screen, press the Enter key or double-click the trackwheel.
- Hold the Alt key and roll the trackwheel to move up or down a page in the Messages application.
- Press the Enter key to move down a page in an open message. Press the Alt key and the Enter key to move up a page.
- Press T to go to the top of a list or received message.
- Press B to go to the bottom of a list or received message.
- Press the Space key in the body of a received message, or on the Messages screen, to move down a page. Press a Shift key and the Space key to move up a page.
- Press G to return to the last cursor position in a message.
- Press N to go to the next date on the Messages screen.
- Press P to go to the previous date on the Messages screen.
- Press U to go to the next unread message on the Messages screen.
- Press R in an open message or on the Messages screen to reply to the sender.
- Press L in an open message or on the Messages screen to reply to all recipients.
- Press F in an open message or on the Messages screen to forward the message.
Chapter 3 Receiving SMS messages
This section provides information on the following topics:
- Message icons
• B e f o r e y o u b e g i n
• Receiving an SMS message - Setting SMS options
- Reading SMS messages
- Tips for reading SMS messages
Message icons
These icons appear on the screen to indicate the status of SMS messages.
| Icon Description | |
 | unopened message |
 | opened message |
Setting SMS options
You can set whether you want SMS messages to be saved on your SIM card. Refer to "SMS" on page 241 for more information.
Reading SMS messages
After you activate your handheld, and if you are in an area of sufficient wireless coverage, you can receive SMS messages that are up to 140 characters long from Nextel. An SMS-compatible number is a phone number (Work, Home, Mobile, or Pager) that has SMS capabilities.

Tip: You can locate your handheld's SMS-compatible phone number on the Subscriber Identity Module (SIM) card screen. If a phone number does not appear on this screen, contact Nextel Customer Care.
When you receive a new SMS message, your handheld displays notification on the Home screen, and provides other notification, depending on how you have configured your handheld's notification profiles.
To read an SMS message
-
On the Home screen, click the Messages icon. The Messages screen appears. Messages are listed in chronological order, grouped by date.
-
Select a received SMS message and click the trackwheel to view the menu. Click Open.
The new message appears on your screen.
Received SMS messages options
After you read the SMS message, click the trackwheel to view the menu. Click one of the following menu items:
Mark Unopened: This action marks the current SMS message as unopened. When you return to the Messages screen, the unopened icon is displayed. Refer to "Marking messages as unopened" on page 79 for more information.
Save Message: This option saves the open SMS message. As with email and PIN messages, SMS messages that are saved on the handheld are copied to the Saved Messages screen. Refer to "Saving messages" on page 73 for more information.
Delete: This option deletes the open SMS message. Refer to "Deleting messages and call logs" on page 87 for more information on deleting messages.
Previous Item: This option closes the current item and opens the previous item (if a previous item exists).
Next Item: This option closes the current item and opens the next item (if a next item exists).
Next Unopened Item: This option closes the current item and opens the next unopened item (if an unopened item exists).
Tips for reading SMS messages
- To open messages quickly, on the Messages screen, press the Enter key or double-click the trackwheel.
- Hold the Alt key and roll the trackwheel to move up or down a page on the Messages screen.
- Press the Enter key to move down a page in an open message. Press the Alt key + the Enter key to move up a page.
- Press T to go to the top of the message list.
- Press B to go to the bottom of the message list.
- Press N to go to the next date on the Messages screen.
- Press P to go to the previous date on the Messages screen.
- Press U to go to the next unread item on the Messages screen.
Receiving SMS messages
Chapter 4 Managing messages and call logs
This section provides information on the following topics:
- Filing email messages
• Using wireless email reconciliation - Saving messages
- Editing messages
- Resending messages
• Marking messages as opened - Marking messages as unopened
- Searching messages and phone call logs
- Managing calls on the Messages screen
- Deleting messages and call logs
- Tips for managing messages and call logs

Note: Some of the following procedures apply to email messages only.
Depending on your Nextel service plan, the Phone application might not be available on your handheld. Contact Nextel Customer Care for more information on available services.
Managing messages and call logs
Filing email messages
After you install the desktop software and reconcile your email messages, you can file email messages into folders. Refer to the Intellisync Online Help for more information on manual email reconciliation.
The first time that you reconcile your email messages between your handheld and your desktop, the names and structure of the folders in your desktop email program are imported to your handheld. When you file an email message on your handheld and reconcile with your desktop, the message is moved and filed as you have specified.

Note: You can only file email messages if you have integrated your handheld with an enterprise email account that uses the BlackBerry Enterprise Server or the BlackBerry Desktop Redirector. Refer to the Getting Started Guide for more information on your integration options.
If you enable wireless email reconciliation, the names and structure of the folders in your desktop email program are imported to your handheld automatically. When you file messages on your handheld, the messages on your desktop are also filed. Refer to "Using wireless email reconciliation" on page 72 for more information.

Note: You cannot file PIN messages.
You cannot create a new folder on your handheld. If you want a new folder on your handheld, you must create it in your desktop email program, and then reconcile your email messages to transfer the new folder to your handheld.
Integration with enterprise email account
If you are a Microsoft Exchange user, and you set up personal folder email reconciliation, you must reconcile your personal folders manually, even if you have enabled wireless email reconciliation on your handheld. Refer to the Intellisync Online Help for more information on configuring email reconciliation and reconciling email messages.
To file an email message
-
On the Home screen, click the Messages icon. The Messages screen appears.
-
Select the email message that you want to file and click the trackwheel to view the menu. Click File. The Select Folder screen appears.
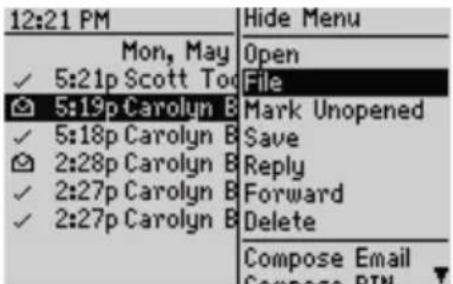
Messages screen menu - File item
- Select the folder in which you want to store the message. To expand the folders that appear on the Select Folder screen, select a folder that has a plus sign (+) beside it, click the trackwheel to view the menu, and click Expand.

Tip: To collapse folders, select a folder with a minus sign (-) beside it, click the trackwheel to view the menu, and then click Collapse.
- Click the trackwheel to view the menu. Click File.
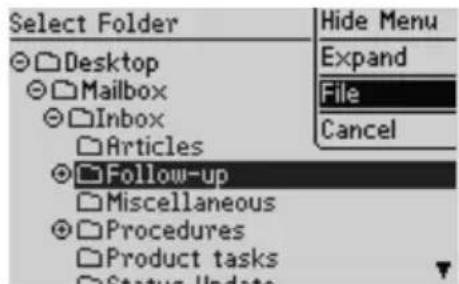
Select Folder screen menu - File item
You return to the Messages screen.

Tip: You can also file an open message. While you are reading a message, click the trackwheel to view the menu. Click File.
If you do not want to show filed messages in the Messages application, on the Message List Options screen, set the Hide Filed Messages option to Yes. To locate your filed email message, you must perform a search. Refer to "Searching in folders" on page 82 for more information.
When a message arrives at your handheld, it appears in the Inbox folder. If you file an email message but want to remove it from the folder in which you have filed it, file the message in the Inbox folder.
Filed messages are stored in your handheld's memory. If your handheld is low on memory space, delete any unnecessary filed messages. If you have enabled wireless email reconciliation, however, messages that you delete on your handheld are also deleted from your desktop.
Using wireless email reconciliation
You can use wireless email reconciliation to automatically reconcile messages between your desktop email program and your handheld. If you enable wireless email reconciliation, any message that you file or delete on your handheld is also filed or deleted on your desktop and likewise, messages that are filed or deleted on the desktop are also changed on the handheld.
Microsoft Exchange
Read and unread messages are also reconciled between your desktop and handheld if your handheld is enabled for wireless email reconciliation on a BlackBerry Enterprise Server version 3.6 or later for Microsoft Exchange.

Note: To use wireless email reconciliation, one of the following requirements must be met:
- If your handheld is integrated with an enterprise email account, your handheld must be enabled for wireless email reconciliation on a BlackBerry Enterprise Server version 3.6 or later for Microsoft Exchange or on a BlackBerry Enterprise Server version 2.2 or later for Lotus Domino.
- If you use the BlackBerry Web Client, Nextel must enable your handheld for wireless email reconciliation.
Contact Nextel Customer Care for more information on whether you can use wireless email reconciliation.
To enable wireless email reconciliation
- On the Home screen, click the Messages icon. The Messages screen appears.
- Click the trackwheel to view the menu and click Options. The Message List Options screen appears.
- In the Wireless Reconcile field, press the Space key until On appears.
- In the Conflicts field, set which location should dominate if a message has been moved or deleted from both your handheld and your desktop. Press the Space key until the preferred option appears.
- Click the trackwheel to view the menu. Click Save.
Your messages are filed or deleted automatically over the wireless network.
To reconcile email messages from your handheld
If you have enabled wireless email reconciliation, changes made to messages on your handheld are reflected on your desktop within a short period of time. If there are pending changes on your handheld that you want to reconcile, you can reconcile the email messages from your handheld manually.
- On the Home screen, click the Messages icon. The Messages screen appears.
- Click the trackwheel to view the menu. Click Reconcile Now.
Your handheld reconciles them between your handheld and desktop email program.
Saving messages
You can save messages that you want to keep for future reference. If your handheld must delete messages to free memory, it does not delete saved messages.

Note: You cannot save phone call logs in the Saved Messages application. If you want to keep the details of a particular phone call, edit the notes that are associated with the phone call and forward them to the email address that is associated with your handheld. You can save that email message to keep the details of the phone call. You cannot save Nextel Direct Connect call logs in the Saved Messages application.
To save a message
-
On the Home screen, click the Messages icon. The Messages screen appears.
-
Select a message and click the trackwheel to view the menu. Click Open.
-
In the open message, click the trackwheel to view the menu. Click Save. A Marking item as saved dialog box appears briefly on the screen. The message is copied in the Saved Messages application but also remains on the Messages screen.
Managing messages and call logs
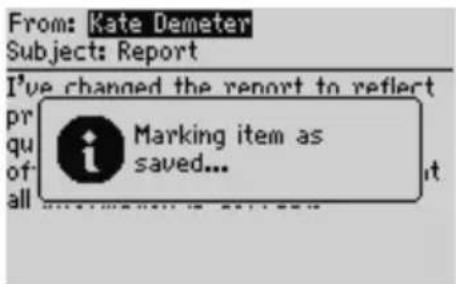
Open message - Marking item as saved dialog box
-
Click the trackwheel to view the menu. Click Close. The Messages screen appears. Press the Escape button to return to the Home screen.
-
Click the Saved Messages icon. The Saved screen displays a copy of the message. The original message remains on the Messages screen.
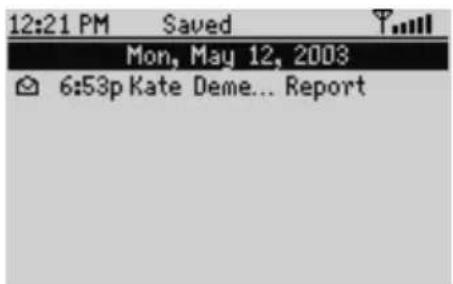
Saved Messages screen - saved message
After the message is saved, you can delete the message from the Messages screen. Refer to "Deleting messages and call logs" on page 87 for more information on deleting messages.
To remove messages from the Saved Messages screen
If you want to delete a saved message, you must delete it from the Saved Messages screen.

Warning: If you delete a message from the Messages screen and from the Saved Messages screen, the message no longer appears anywhere on your handheld.
-
On the Home screen, click the Saved Messages icon. The Saved Messages screen appears.
-
Select a saved message and click the trackwheel to view the menu. Click Delete.
74 BlackBerry Wireless Handheld
- A dialog box appears prompting you to confirm that you want to delete the message. Click Delete.
You return to the Saved Messages screen, and the message is no longer listed.
Integration with enterprise email account
If you have integrated your handheld with an enterprise email account that uses the BlackBerry Enterprise Server, and your handheld has wireless email reconciliation enabled, email messages that are deleted from your handheld are also deleted from your desktop email program. If you enable this feature, saved messages that you delete from your handheld are also deleted from your desktop during wireless email reconciliation.
To save a draft of an email or PIN message
You might want to save an email or PIN message that you have not yet finished composing, so that you can complete and send it later.

Note: When you save a draft of an email or PIN message, the message appears on the Messages screen only. It does not appear on the Saved Messages screen. If your handheld deletes old messages to free memory space, it might delete drafts.
- On the Home screen, click the Compose icon. The To screen appears.
- While you are composing an email or PIN message, click the trackwheel to view the menu and click Save Draft. The Messages screen appears.
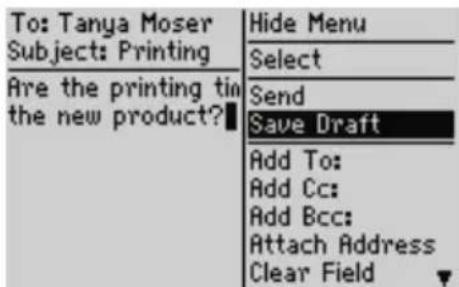
Composing a message menu - Save Draft item
An icon beside the email or PIN message indicates that the message is saved but has not been sent. Open the message to resume composing it. You can save, send, or delete the message.
Editing messages
After you send an email or PIN message, you can edit its text and add or change a recipient, and then send it again.
Managing messages and call logs
To edit an email or PIN message
- On the Home screen, click the Messages icon. The Messages screen appears.
- Select a sent email or PIN message that you want to edit and click the trackwheel to view the menu. Click Open.
- In the open message, click the trackwheel to view the menu. Click Edit. The text of the message appears.

Opened message menu - Edit item
- Edit the message. Click the trackwheel to view the menu. Click Send.
You return to the Messages screen.

Tip: You can use your handheld's cut, copy, and paste feature when you edit messages. Refer to "Using cut, copy, and paste" on page 52 for more information.
To change the recipient of an email or PIN message
- On the Home screen, click the Messages icon. The Messages screen appears.
- Select a sent message for which you want to change the recipient and click the trackwheel to view the menu. For this example, select a sent email message and click Open.
- In the open message, click the trackwheel to view the menu. Click Edit. The text of the message appears.
- In the To field, select the recipient of the message. Click the trackwheel to view the menu and click Change Address. The Select Address screen appears.
-
Select the new recipient of the message and click the trackwheel to view the menu. Click Email.
-
Make any additional changes to the message and click the trackwheel to view the menu. Click Send.
You return to the Messages screen and the edited message is sent to the new recipient.

Note: You can also change the address of a message when you are composing it. In the message, scroll to the To field to select the recipient of the message. Click the trackwheel to view the menu and click Change Address. Select the new recipient and click the trackwheel to view the menu. Click the send method (email or PIN).
If you want to change the recipient of a message after you have sent it, you must use the same send method as you used for the original message.
Resending messages
If, for some reason, your PIN or email message is not sent properly on the first attempt, you can resend the message.

Note: If you want to resend an email message because of a failed transmission, scroll to the top of the original message to determine why it was not sent properly. Refer to "Message status field error messages" on page 263 for more information.
To resend a message
-
On the Home screen, click the Messages icon. The Messages screen appears.
-
Select the sent message that you want to resend and click the trackwheel to view the menu. Click Open. The text of the message appears.
-
Click the trackwheel to view the menu and click Resend.
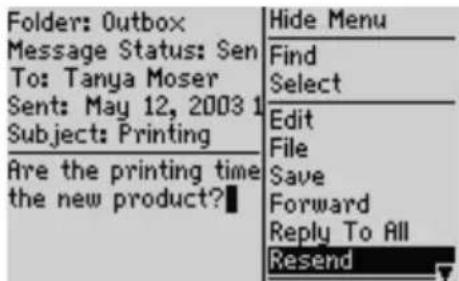
Sent message menu - Resend item
When you resend a message that was sent successfully on the first attempt, a copy of the original message is sent and the original message remains on the Messages screen.
Managing messages and call logs
When you resend a message that was not sent successfully on the first attempt, the original message is sent again.
Marking messages as opened
If you have many email, PIN, or SMS messages that you have not read on your handheld but you have read them on your desktop, you might want to mark them as opened.

Note: You cannot mark placed or received phone calls on the Messages screen as opened. You can mark missed phone calls as opened.
To mark a message as opened
- On the Home screen, click the Messages icon. The Messages screen appears.
- Select an unopened message and click the trackwheel to view the menu. Click Mark Opened.

Messages screen menu - Mark Opened item
The message is marked as opened.
To mark all messages as opened
- On the Home screen, click the Messages icon. The Messages screen appears.
- Select a date field. Click the trackwheel to view the menu and click Mark Prior Opened.
![12:21 PM 8:0 Hide Menu Wed, J 11:14a Kate [ ] 11:14a Kate [ ] ✓ 11:13a Kate [ ] Tue, J ✓ 7:26p Scott 6:53p Kate [ ] 6:48p Scott Mark Prior Opened Delete Prior Compose Email Compose PIN Place Call Search Options Close](/content/2026/05/990810/images/41be09bad4cca421d9604ae11b8faf99c92e01945c8344535811374d2fd3366e.jpg)
Messages screen menu - Mark Prior Opened item
All messages in the list prior to the date that you select are marked as opened.
Marking messages as unopened
You can mark email, PIN, or SMS messages on your handheld as unopened. This is helpful if you have opened an important message and would like to remind yourself to reread and respond to the message at a later time.

Note: You cannot mark placed or received phone calls on the Messages screen as unopened. You can mark missed phone calls as unopened.
Integration with enterprise email account
If your handheld is enabled for wireless email reconciliation on BlackBerry Enterprise Server version 3.6 or later for Microsoft Exchange and you mark messages as opened, the messages are also marked as opened on your desktop. Refer to "Using wireless email reconciliation" on page 72 for more information.
To mark a message as unopened
- On the Home screen, click the Messages icon. The Messages screen appears.
- Select an opened message and click the trackwheel to view the menu. Click Mark Unopened.
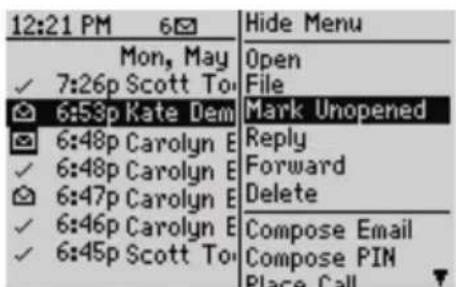
Messages screen menu - Mark Unopened item
The message is marked as unopened.
Searching messages and phone call logs
Use your handheld's Search Messages application to locate specific messages, phone call logs, and Nextel Direct Connect call logs that are stored on your handheld. You can specify and save the terms of several searches and use them at any time, or you can perform a one-time search. There are several default searches preprogrammed on your handheld.

Tip: You can also search for messages on the Messages and Saved Messages screens.
You do not need to complete all the fields on the Search Messages screen. The more fields that you complete, the narrower the search is.
When you search for filed messages, your handheld searches only the messages on your handheld. It does not search the messages on your desktop.
Integration with enterprise email account
You can only search for the email messages that you have saved in folders if you have integrated your handheld with an enterprise email account that uses the BlackBerry Enterprise Server or the BlackBerry Desktop Redirector. Refer to the Getting Started Guide for more information on your integration options.
You must reconcile your email messages using your desktop software before the names and structures of the folders in your desktop email program are imported to your handheld. Refer to the Intellisync Online Help for more information on reconciling email messages manually. Refer to "Using wireless email reconciliation" on page 72 for more information on reconciling email messages over the Nextel wireless network.
To perform a search
- On the Home screen, click the Search Messages icon. The Search screen appears.
- In the Name field, type a name, email address, PIN, phone number, or Nextel Direct Connect Number.

Tip: In the Search Messages application, you can retrieve a name that is stored in your Address Book instead of typing it. With your cursor in the Name field, click the trackwheel to view the menu. Click Select Name. On the Select Address screen, select the name for which you want to search. Click the trackwheel to view the menu and click Continue. You return to the Search screen and the name that you selected appears in the Name field.
-
In the In field, press the Space key to select the field in which the name you have typed should appear.
-
In the Subject field, type the keywords that you want to find. When you type text in this field, the Search Messages application searches for phrases that contain these characters in the subject line of email and PIN messages.
- In the Message field, type the keywords that you want to find. When you type text in this field, the Search Messages application searches for phrases that contain these characters in the body of email, PIN, SMS messages, or phone call notes.

Search screen - specifying keywords
Integration with enterprise email account
If you are searching for email messages, select the folder in which you want to search. The default is All Folders, but you can select a specific folder. In the Folder field, press the Space key. The Select Folder screen appears, listing the structure of your folders. Select the folder in which you want to search and click the trackwheel to view the menu. Click Select Folder. Refer to "Searching in folders" on page 82 for more information on navigating and searching in folders.

Select Folder screen - selecting a folder
- In the Show and Type fields, press the Space key until the preferred option appears.

Tip: In the Show field, select Sent and Received to display all messages, phone call logs, and Nextel Direct Connect call logs that meet the search criteria.
- After you set the terms of your search, click the trackwheel to view the menu.
Managing messages and call logs
- To perform a one-time search without saving any of the terms that you have specified, click Search.
- To save the terms of your search, click Save. The Save Search screen appears. In the Title field, type a name for this set of search terms. In the Shortcut Key field, type a shortcut key for this search. Click the trackwheel to view the menu. Click Save.

Save Search screen menu - Save item
The results of your search are displayed on the Search Results screen. If you save your search, the name of your search appears in the handheld status section of the screen.

Note: After you save a search and specify a shortcut key, you can press the Alt key and the shortcut key to perform the search on the Messages or the Saved Messages screens.
To clear a field, click the trackwheel to view the menu. Click Clear Field. If you want to clear all the fields, click the trackwheel to view the menu. Click New. The fields on the Search screen are reset to the default values.
After you perform a search, you can delete messages and phone call logs from the Search Results screen. The messages and phone call logs are also deleted from the Messages screen.
Searching in folders
The following tips can help you navigate and search your folders when you specify search terms for email messages.
- Selecting a very specific folder limits the scope of your search. If you search a low-level folder and do not find any email messages with your search terms, return to a higher-level folder and select a less-specific folder to search.
- If you select a folder for your search but want to return to searching in All Folders, in the Folder field, click the trackwheel to view the menu. Click All Folders.
To recall a search
-
On the Home screen, click the Search Messages icon. The Search screen appears.
-
Click the trackwheel to view the menu and click Recall. Your saved searches are listed.
-
To view the terms of the search, click the trackwheel to view the menu and click Select Search.
The terms of your search are displayed on the Search screen.

Tip: You can quickly recall the terms of your last search. On the Search screen, click the trackwheel to view the menu and then click Last. The terms of the last search that you performed are displayed on the screen.
To edit a search
-
On the Home screen, click the Search Messages icon. The Search screen appears.
-
Click the trackwheel to view the menu. Click Recall. Your saved searches are listed.
-
Select the search that you want to edit. Click the trackwheel to view the menu and click Edit Search. The Save Search screen appears.

Search screen menu - Edit Search item
-
Edit the search criteria.
-
Click the trackwheel to view the menu. Click Save.
The results of your search are displayed on the Search Results screen.
Managing messages and call logs
To edit a search once
-
On the Home screen, click the Search Messages icon. The Search screen appears.
-
Click the trackwheel to view the menu. Click Recall. Your saved searches are listed.
-
Select the search that you want to change. Click the trackwheel to view the menu. Click Select Search. The details of the search are displayed.

Search screen menu - Select Search item
-
Edit the search criteria. Click the trackwheel to view the menu.
-
If you do not want to save the changes, click Search.
- If you want to save your changes, click Save. The Save Search screen appears. Type a title and a shortcut key for your search. Click the trackwheel to view the menu and click Save.
To delete a search
- On the Home screen, click the Search Messages icon. The Search screen appears.
- Click the trackwheel to view the menu. Click Recall. Your saved searches are listed.
- Select the search that you want to delete. Click the trackwheel to view the menu. Click Delete Search. A dialog box prompts you to confirm the deletion.
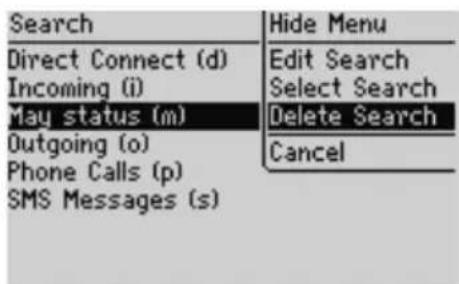
Search screen menu - Delete Search item
4. Click Delete.
You return to the Search screen and the search is no longer listed.
To search for a sender or recipient
When you select an email or PIN message on the Messages screen, you can search for all the messages that relate to the sender or recipient of the message. This feature is helpful if you want to search for all messages that were either sent to or received from a particular person.

Note: Phone call logs are not listed as part of the sender or recipient search.
- On the Home screen, click the Messages icon. The Messages screen appears.
- Select a message from a sender or recipient for whom you want to search. For this example, to search for all messages that relate to a particular sender, select a received message and click the trackwheel to view the menu. Click Search Sender.

Messages screen menu - Search Sender item

Note: To search for all messages that relate to a particular recipient, select a sent message and click the trackwheel to view the menu. Click Search Recipient.
The Search Results screen displays all messages that have been received from that sender.
Managing messages and call logs
To search email and PIN messages by subject
You can view all email and PIN messages that relate to the Subject field of a message. You can then file, delete, save the messages, or mark them as unopened.

Note: You cannot search by subject for phone calls, Nextel Direct Connect calls, or SMS messages.
-
On the Home screen, click the Messages icon. The Messages screen appears.
-
Select an email or PIN message that has a subject for which you want to search. Click the trackwheel to view the menu. Click Search Subject.

Messages screen menu - Search Subject item
All email or PIN messages with that subject appear, including sent messages, replies, and forwarded messages.
Managing calls on the Messages screen
You can set whether you want your phone calls and Nextel Direct Connect calls to be logged on the Messages screen. Each call is saved on this screen with the date, time, length of the call, the name of the caller or recipient, and any associated call notes. Managing phone calls and Nextel Direct Connect calls on your Messages screen is similar to managing email, PIN, and SMS messages.

Note: You can customize the Phone application so that your phone calls and Nextel Direct Connect calls are not logged on the Messages screen. Refer to "Customizing call logging" on page 133 for more information on setting call logging.
To place phone calls from the Messages application
You can place a phone call from the Messages application.
-
On the Home screen, click the Messages icon. The Messages screen appears.
-
Click the trackwheel to view the menu and click Place Call. The Select Address screen appears.
-
Select the contact that you want to call and click the trackwheel to view the menu. Click Call.

Note: If you have saved more than one phone number for a contact, you are prompted to select the number that you want to call.
The Active Call screen appears and your handheld dials the phone number of the contact that you selected.

Tip: To end a call, click the trackwheel to view the menu and click End Call. You can also hold the Escape button.
To view call logs on the Messages screen
You can open and view the call log for any received or placed phone call or Nextel Direct Connect call.
-
On the Home screen, click the Messages icon. The Messages screen appears.
-
Select a placed or received phone call or Nextel Direct Connect call and click the trackwheel to view the menu. Click Open. The View Call Log screen appears. The details for the call are listed.

Note: In the View Call Log window, you can send an email or PIN message, forward the call log, place a phone call or Nextel Direct Connect Call Alert, or edit the phone call notes. You can also view the contact's Address Book information or view the entire Address Book. On the View Call Log screen, click the trackwheel to view the menu. Click the appropriate menu item.
Deleting messages and call logs
Although your handheld has ample memory space for storing messages and call logs, you should delete unnecessary items to manage your list more efficiently. If your handheld's memory is full and you receive new messages, phone calls, or
Managing messages and call logs
Nextel Direct Connect calls, your handheld deletes the oldest messages and call logs on the Messages screen to accommodate new ones; saved messages are not deleted.
Integration with enterprise email account
If you have integrated your handheld with an enterprise email account that uses the BlackBerry Enterprise Server, and you have enabled wireless email reconciliation, any messages that you delete on your handheld are also deleted on your desktop. Refer to "Using wireless email reconciliation" on page 72 for more information on enabling this feature.
To delete a message or call log
-
On the Home screen, click the Messages icon. The Messages screen appears.
-
Select the message or call log that you want to delete and click the trackwheel to view the menu. Click Delete.

Warning: If you make any notes for your phone call, they are deleted when you delete the call log. If you do not want to delete the call notes, forward them to the email address of your handheld. Refer to "To forward call notes" on page 143 for more information.
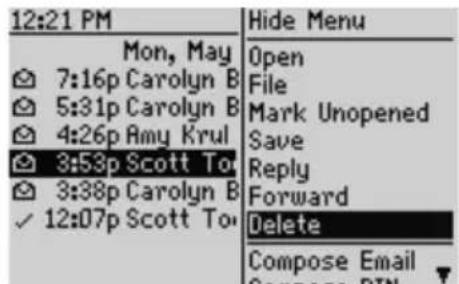
Messages screen menu - Delete item
- A dialog box prompts you to confirm that you want to delete the item. Click Delete.
You return to the Messages screen and the message or call log is no longer listed.

Note: You can delete an open message. You can also delete messages from the Search Messages and Saved Messages screens.
If you request more of an email message, you should not delete the message until you have received the rest of it. Refer to "Receiving long email messages" on page 60 for more information on receiving long email messages.
If you delete an SMS message from the Messages screen, it is deleted from your handheld's SIM card if, on the SMS screen, you set the Leave messages on SIM Card field to No. Refer to "SMS" on page 241 for more information on deleting SMS messages from your SIM card.
To delete multiple items by date
- On the Home screen, click the Messages icon. The Messages screen appears.
- Select a date field and click the trackwheel to view the menu. Click Delete Prior.
![12:21 PM 8 Mon, N Mark Prior Opened 11:14a Kate [ ] 11:14a Kate [ ] ✓ 11:13a Kate [ ] Fri, N ✓ 7:26p Scott 6:53p Kate [ ] 6:48p Scott Delete Prior Compose Email Compose PIN Place Call Search Options Close](/content/2026/05/990810/images/63a689df7cb3f2de1bc404786812f74541e78c2ce71685ba1507d0f6c5b5eb13.jpg)
Messages screen menu - Delete Prior item
- A dialog box appears that prompts you to confirm before all the items prior to and including that date are deleted. Click Delete.
You return to the Messages screen and the items are no longer listed.
To delete email messages on your handheld and your desktop
Integration with enterprise email account
If you have integrated your handheld with an enterprise email account that uses the BlackBerry Enterprise Server or the BlackBerry Desktop Redirector, you can configure your message options so that email messages that are deleted from your handheld are also deleted from your desktop each time that you reconcile email messages using the desktop software's Intellisync tool.

Note: If you have enabled wireless email reconciliation and set the Delete On field to Mailbox & Handheld, messages that are deleted on your handheld are also deleted on your desktop. Likewise, messages that are deleted on your desktop are also deleted on your handheld. Refer to "Using wireless email reconciliation" on page 72 for more information.
-
On the Home screen, click the Messages icon. The Messages screen appears.
-
Click the trackwheel to view the menu and click Options. The Message List Options screen appears.
-
In the Delete On field, press the Space key until Mailbox & Handheld appears.
Managing messages and call logs
| Message List Options | |
| Display Time: | Yes |
| Display Name: | Yes |
| Confirm Delete: | Yes |
| Hide Filed Messages: | No |
| Consider PIN Level 1: | Yes |
| Auto More: | Yes |
| Desktop | |
| Delete on: | Handheld |
Message List Options screen - Delete On field
- Click the trackwheel to view the menu. Click Save.

Note: Any filed email messages that you delete on your handheld are also deleted from the corresponding desktop folder if on the Message List Options screen, the Delete On field is set to Mailbox & Handheld.
Email messages that are deleted using the Delete Prior option are not deleted on your desktop. Refer to "To delete multiple items by date" on page 89 for more information on deleting multiple messages.
To empty the deleted messages folder on your desktop
You can permanently delete messages from your desktop's Deleted Items folder using your handheld. This feature is useful if your desktop mailbox is full and you want to free space for new messages.

Note: To delete messages from your desktop's Deleted Items folder, your handheld must be integrated with an enterprise email account that uses the BlackBerry Enterprise Server, and wireless email reconciliation must be enabled for your handheld.
- On the Home screen, click the Messages icon. The Messages screen appears.
- Click the trackwheel to view the menu and click Options. The Message List Options screen appears.
- Click the trackwheel to view the menu. Click Purge Deleted Items. A dialog box appears that prompts you to confirm the action. Click Yes.
Your desktop's Deleted Items folder is emptied.
Tips for managing messages and call logs
- Press the Alt key + I to view all incoming items on the Messages or Saved Messages screens.
- Press the Alt key + O to view outgoing items on the Messages or Saved Messages screens.
- Press the Alt key + P to view all phone call logs on the Messages or Saved Messages screens.
- Press the Alt key + D to view all Nextel Direct Connect call logs on the Messages or Saved Messages screens.
- Press the Alt key + S to view all SMS messages on the Messages or Saved Messages screens.
- Press the Alt key + U to switch between marking a message or a missed phone call as opened or unopened.
- Press M to open the Messages screen on the Search Results screens or in the Saved Messages application.
- Press V to open the Saved Messages screen on the Search Results screens or in the Messages application.
- Press S to open the Search Messages screen in the Saved Messages or Messages applications.
- To use these shortcuts on the Home screen, in the Phone options, on the General Options screen, set the Dial from Home Screen field to No.
- Press the Space key on the Select Folder screen, when a folder marked with a plus sign (+) is selected, to expand the subfolders.
- Press the Enter key on the Select Folder screen to file a message in the selected folder.
- Press the Backspace key with a date field selected to delete all messages prior to and including the selected date.
Managing messages and call logs
Chapter 5 Address Book
This section provides information on the following topics:
- Address Book icons
- Setting Address Book options
- Adding addresses
- Adding pauses and waits to phone numbers
- Changing user-defined field names
- Adding group addresses
• Using Remote Address Lookup
• Managing Address Book entries - Tips for using the Address Book application
Address Book
Address Book icons
These icons appear on the screen to provide additional information about your Address Book entries.
| Icon Description | |
 | phone number in Address Book entry has a pause inserted |
 | phone number in Address Book entry has a wait inserted |
 | Address Book entry is attached; this icon appears in email and PIN messages that contain Address Book attachments |
Setting Address Book options
You can customize the following Address Book options.
- Sort By: Select how you want to sort the addresses in your Address Book. By default, this option is set to First Name.
- Confirm Delete: Select whether you want to be prompted before Address Book entries are deleted. By default, this option is set to Yes.
- Allow Duplicate Names: Select whether you want to allow the same name to appear more than once in the Address Book. By default, this option is set to Yes.
To set Address Book options
- On the Home screen, click the Address Book icon. The Find screen appears.
- Click the trackwheel to view the menu. Click Options. The Address Book Options screen appears.
- In the fields that you want to set, press the Space key until the preferred option appears.

Address Book Options screen - setting options
- Click the trackwheel to view the menu. Click Save.
You return to the Find screen.
Adding addresses
You can add contacts to your handheld Address Book to create a database. You can add addresses to your Address Book manually, or you can add them from messages, phone call logs, links, and Remote Address Lookup results. You can also add and update contacts from the Phone screen.

Note: Depending on your Nextel service plan, the Phone application might not be available on your handheld. Contact Nextel Customer Care for more information on available services.
Integration with enterprise email account
If you have integrated your handheld with an enterprise email account that uses the BlackBerry Enterprise Server or the BlackBerry Desktop Redirector, you can also add Address Book entries by importing them from your desktop email program. Refer to the Backup and Restore Online Help for more information.
To add addresses manually
- On the Home screen, click the Address Book icon. The Find screen appears.
- Click the trackwheel to view the menu and click New Address. The New Address screen appears.
- Type your contact's information and press the Enter key at the end of each field.
Address Book
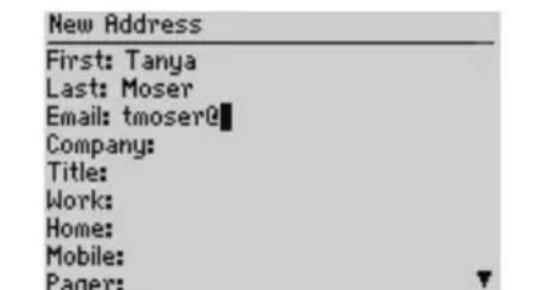
New Address screen - adding an address

Tip: You can save up to three email addresses for the same contact. To add another email address, click the trackwheel to view the menu and click Add Email Address. An additional Email field appears on the New Address screen. When you compose an email message to a contact with multiple email addresses, you are prompted to select which address to use.
- Click the trackwheel to view the menu. Click Save.
Your new contact appears on the Find screen in alphabetical order.

Note: If you have typed a company name in the Company field, the company name appears on the Find screen beside the contact's name.
To add addresses from received messages and call logs
When you receive a new message, phone call, or Nextel Direct Connect call from a contact who is not currently in your handheld's Address Book, you can add the email address, PIN, phone number, or Nextel Direct Connect Number from the open message or call log.
-
On the Home screen, click the Messages icon. The Messages screen appears.
-
Open a received message, phone call log, or Nextel Direct Connect call log from a contact who is not currently in your Address Book and scroll to the top of the message. For this example, open a received email message. Place your cursor in the From field and click the trackwheel to view the menu.
-
Click Add To Address Book. The New Address screen displays the contact's information.
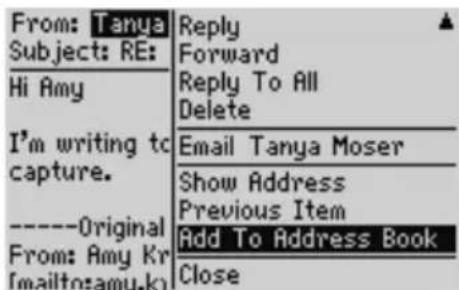
Received message From field menu - Add To Address Book item
-
Add any additional information that you want to include for this contact.
-
Click the trackwheel to view the menu. Click Save.
The contact is added to your Address Book and you return to the open message.
To add addresses from links
You can also add contacts to your Address Book from links that appear in your messages.
- On the Home screen, click the Messages icon. The Messages screen appears.
- Open a received message that contains a link. Email addresses, PINs, phone numbers, or Nextel Direct Connect Numbers for other recipients of the message might appear in the message, followed by a link for the recipient. Links can also appear in the body of the message. For this example, select an email address link for the contact that you want to add to your Address Book.
- Click the trackwheel to view the menu. Click Add to Address Book. The New Address screen appears.
- Add a name for this contact and type any additional information that you want to add.
- Click the trackwheel to view the menu. Click Save.
The contact is added to your Address Book and you return to the open message.
To add addresses from the Phone screen
- On the Home screen, click the Phone icon. The Phone screen appears.
- Select a phone number or Nextel Direct Connect Number that is not associated with a contact in your Address Book. Click the trackwheel to view the menu and click Add To Address Book. The New Address screen appears.
Address Book

Note: If you selected a phone number, it appears in the Work field. If you selected a Nextel Direct Connect Number, it appears in the DCID field.
- Add a name for this contact and type any additional information that you want to add.
- Click the trackwheel to view the menu. Click Save.
You return to the Phone screen, and the number is replaced with the name that you specified for the contact.
To update addresses from the Phone screen
- On the Home screen, click the Phone icon. The Phone screen appears.
- Select a number that is listed on the Phone screen. To add this phone number to an existing Address Book entry, click the trackwheel to view the menu and click Copy.
- Click the trackwheel to view the menu. Click View Address Book.
- Select the Address Book entry that you want to update and click the trackwheel to view the menu. Click Edit.
- Select the number field in which you want to insert the number. Click the trackwheel to view the menu and click Paste. The number is inserted in the field.
- Click the trackwheel to view the menu. Click Save.

Note: If the contact whose Address Book entry you want to update is listed on the Phone screen, you can open the entry on the Phone screen. Copy the phone number or Nextel Direct Connect Number. Select the contact and click the trackwheel to view the menu. Click View Address. The contact's Address Book entry appears. Click the trackwheel to view the menu and click Edit. Paste the number into the appropriate field.
Address Book fields
The New Address screen contains the following fields:
Salutation: Type a salutation for your contact. This field accepts letters, numbers, and symbols.
First: Type your contact's first name. This field accepts letters, numbers, and symbols.
Last: Type your contact's last name. This field accepts letters, numbers, and symbols.

Tip: Type your contact's full name in the First field and press the Enter key. The first name appears in the First field and the last name appears in the Last field.
Email: Type your contact's email address. This field accepts letters, numbers, and symbols. You can press the Space key to insert the at sign (@); press it again to insert a period. If you continue to press the Space key, you continue to insert periods.
Company: Type the name of the company for which your contact works. This field accepts letters, numbers, and symbols.
Title: Type your contact's job title. This field accepts letters, numbers, and symbols.
Work: Type your contact's business phone number. This field accepts numbers, parentheses, and the x, -, +, *, #, and . characters, which can be typed without pressing the Alt key.
Home: Type your contact's home phone number. This field accepts numbers, parentheses, and the x, -, +, *, #, and . characters, which can be typed without pressing the Alt key.
Mobile: Type your contact's cellular phone number. This field accepts numbers, parentheses, and the x, -, +, *, #, and . characters, which can be typed without pressing the Alt key.
Pager: Type your contact's pager number. This field accepts numbers, parentheses, and the x, -, +, *, #, and . characters, which can be typed without pressing the Alt key.

Note: You can add pauses and waits in the Work, Home, Mobile, and Pager fields to insert additional numbers (such as extensions or passwords) in your contact's phone number. Refer to "Adding pauses and waits to phone numbers" on page 101 for more information.
Type x or ext in the Work, Home, and Mobile fields to specify a phone number extension. When you place a phone call, you are prompted to dial the extension.
Fax: Type your contact's fax number. This field accepts numbers, parentheses, and the x, -, +, *, #, and . characters, which can be typed without pressing the Alt key.
Address Book
DCID: Type your contact's Nextel Direct Connect Number or your contact's talkgroup number. This field accepts numbers and the * and # characters, which can be typed without pressing the Alt key.

Note: Your Nextel Direct Connect Number is composed of your Area ID, your Network ID, and your Member ID. In the DCID field, type your Nextel Direct Connect Number in the format of ArealD*NetworkID*MemberID.
PIN: Type the personal identification number (PIN) of your contact's handheld. This field accepts numbers, which can be typed without pressing the Alt key. You can also type hexadecimal characters in this field.
Address 1: Type your contact's street address. This field accepts letters, numbers, and symbols.
Address 2: Type any further information for the address. This second address field is provided for long addresses. This field accepts letters, numbers, and symbols.
City: Type your contact's city. This field accepts letters, numbers, and symbols.
State/Prov: Type your contact's state or province. This field accepts letters, numbers, and symbols.
ZIP/Postal Code: Type your contact's ZIP code or postal code. This field accepts letters and numbers. You must press the Alt key to type numbers in this field.
Country: Type your contact's country. This field accepts letters, numbers, and symbols.
User 1, User 2, User 3, User 4: Customize these fields to type special information for each contact. Refer to "Changing user-defined field names" on page 101 for more information on customizing these fields.
Notes: Type any additional information that you want to keep about your contact. This field accepts letters, numbers, and symbols. Press the Enter key to move to a new line.
Microsoft Exchange
When you synchronize your Address Book between your handheld and desktop, the DCID number that you type for your contact is mapped to the Radio Phone field on the All Fields tab for your contact in Microsoft Outlook. Refer to the Intellisync Online Help for more information on field mapping.
Adding pauses and waits to phone numbers
You can add pauses and waits in the Work, Home, Mobile, and Pager fields to insert additional numbers (such as extensions or passwords) to the phone number. When you place a phone call, you do not need to type the additional numbers. You are prompted to type the remaining numbers (for a wait) or your handheld enters the remaining numbers after two seconds (for a pause).

Note: Depending on your Nextel service plan, the Phone application might not be available on your handheld. Contact Nextel Customer Care for more information on available services.
To add pauses and waits
- On the Home screen, click the Address Book icon. The Find screen appears.
- Open an existing Address Book entry or create a new one.
- In the Work, Home, Mobile, or Pager field, type the first part of the phone number and click the trackwheel to view the menu.
- Click Add Wait or Add Pause.

Tip: In the Work, Home, Mobile or Pager field, you can also type the first part of the phone number, and then press the Alt key + B to insert a wait, or the Alt key + N to insert a pause.
-
Type the remaining part of the phone number.
-
Click the trackwheel to view the menu. Click Save.
The contact appears on the Find screen in alphabetical order.

Note: Refer to "Using pauses and waits" on page 143 for more information on placing phone calls to phone numbers that contain pauses or waits.
Changing user-defined field names
You can change the field name for the User 1, User 2, User 3, and User 4 fields in the Address Book.
Address Book
To change user-defined field names
- On the Home screen, click the Address Book icon. The Find screen appears.
- Click the trackwheel to view the menu and click New Address. The New Address screen appears.
- Select a user-defined field (User 1, User 2, User 3, or User 4) and click the trackwheel to view the menu.

New Address screen menu - Change Field Name item
- Click Change Field Name. Delete the current name of the field. Type a new field name and click the trackwheel.
The field name is changed for all of your contacts.
Adding group addresses
After you add individual addresses to your Address Book, you can create a group email address. When you send a message to a group address, the email message is sent to all members of the group.
To add group addresses
-
On the Home screen, click the Address Book icon. The Find screen appears
-
Click the trackwheel to view the menu. Click New Group. The New Group screen appears.
-
Type a name for your group. Click the trackwheel to view the menu.
-
Click Add Member. The Select Address screen appears.
-
Select the name of the contact whose email address you want to add to the group. Click the trackwheel to view the menu. Click Continue. The New Group screen appears with the contact added as a new member.

Note: If an email address is not included in a contact's address information, you cannot add that contact to your group.
- Repeat steps 4 and 5 to add more members to your group address.
- After you add all desired contacts to the group address, click the trackwheel to view the menu. Click Save Group.
You return to the Find screen and the new group appears in your list of contacts.
Using Remote Address Lookup
You can search for addresses in your company's address directory using the Remote Address Lookup feature. You can add Remote Address Lookup results to your handheld Address Book.

Note: To use the Remote Address Lookup feature, your handheld must be integrated with an enterprise email account and your handheld must be enabled on a BlackBerry Enterprise Server version 3.5 or later for Microsoft Exchange or on a BlackBerry Enterprise Server version 2.2 or later for Lotus Domino. Contact Nextel Customer Care for more information on whether you can use Remote Address Lookup.
To add Address Book entries from Remote Address Lookup results
- On the Home screen, click the Address Book icon. The Find screen appears.
- Type the name of the contact that you want to find and click the trackwheel to view the menu. Click Lookup. On the Address Book screen, at the top of the address list, the status of your search and the search criteria are displayed.

Tip: You can perform multiple remote address lookups at one time. To perform multiple lookups, repeat step 2.
If no results are found for a particular search, the corresponding search field displays No Matches.
- After the search is complete, select the Search Result field and click the trackwheel to view the menu. Click View Lookup. The results of your search are displayed.
- Select a contact and click the trackwheel to view the menu. Click Add.
Address Book

Tip: If multiple contacts are listed, and you want to add all of the contacts to your Address Book, click Add All.
You can use the Remote Address Lookup feature on any Find screen.
Remote Address Lookup actions
When you select the results of a Remote Address Lookup search, you can perform one of the following actions:
Add: This action adds the contact information for a selected contact to your handheld Address Book.
Add All: This action adds the contact information for all the listed contacts to your handheld Address Book. If, in the Address Book application, on the Address Book Options screen, you set the Allow Duplicate Names field to No, you are prompted with the following options when you attempt to add a duplicate entry:
- Ignore: This option ignores the selected contact and does not add it to your Address Book.
- Ignore All: This action ignores all of the duplicate contacts listed and does not add them to your Address Book.
- Replace: This action replaces the contact information that is stored on your handheld with the information for the selected contact in the lookup results.
- Replace All: This action replaces the contact information that is stored on your handheld with the information in the lookup results for all of the duplicate contacts that are listed.
Delete: This action deletes the selected contact from the search results list.
Delete Lookup: This action deletes the lookup results.
Lookup: This action displays a dialog box that enables you to edit existing search criteria or type new criteria.
Resolve: This action adds the selected contact to your Address Book temporarily. After you resolve a contact, you can send messages to this contact or view the lookup results that are associated with the contact for as long as it remains in your Address Book.
View: This action displays a virtual business card that lists the available information for the selected contact.
104 BlackBerry Wireless Handheld
Get more results: This action only appears if more lookup results are available than the number that is listed on the screen. This action requests more lookup results from the server. The server sends a maximum of 20 results at one time.
Email: This action sends an email message to the selected contact. This option is only available when an email address for this contact is saved in your remote Address Book.
Call: This action places a phone call to the selected contact. This option is only available when a phone number for this contact is saved in your remote Address Book.
Managing Address Book entries
You can view, search, edit, and delete the Address Book entries on your handheld.
To view individual Address Book entries
- On the Home screen, click the Address Book icon. The Find screen appears.
- Select the name of the contact whose information you want to view. Click the trackwheel to view the menu and click View.
A virtual business card lists the contact information that you have typed and any notes that you have included.

Tip: To move to a number or an email field in the business card, press the first letter of the field name. For example, if you press F, the cursor moves to the Fax field.
To view group Address Book entries
- On the Home screen, click the Address Book icon. The Find screen appears.
- Select the name of the group that you want to view. Click the trackwheel to view the menu. Click View Group. A screen lists the members of your group.
- To view the contact information for one of the group members, select the contact and click the trackwheel to view the menu. Click View Member.
The contact information for the selected member appears.
Address Book
To search local Address Book entries
-
On the Home screen, click the Address Book icon. The Find screen appears.
-
Type the first letter, or letters, of the name of the contact that you want to find. The letter or letters that you type appear at the top of the screen.
Your handheld searches the first, last, and company names of contacts to find the first instance of the letters that you type. As you type more letters for your search, fewer matches appear.
- To return to your complete list of contacts, click the trackwheel to view the menu and click View All.
To edit individual Address Book entries
-
On the Home screen, click the Address Book icon. The Find screen appears.
-
Select the Address Book entry that you want to edit and click the trackwheel to view the menu. Click Edit. The Edit Address screen appears.
-
Edit the contact information. Click the trackwheel to view the menu. Click Save.

Tip: To clear fields on the New Address or Edit Address screens, click the trackwheel to view the menu and click Clear Field.
You can use your handheld's cut, copy, and paste feature when you edit addresses. Refer to "Using cut, copy, and paste" on page 52 for more information.
To edit group Address Book entries
-
On the Home screen, click the Address Book icon. The Find screen appears.
-
Select the name of the group that you want to edit. Click the trackwheel to view the menu. Click Edit Group. The Edit Group screen lists the members of your group.
-
Select a group member and click the trackwheel to view the menu. Select one of the following options:
- To replace the selected member with another contact in your Address Book, click Change Member.
• To delete the selected member from the group, click Delete Member.
• To add a new member to the group, click Add Member.
- Click the trackwheel to view the menu. Click Save Group.
The group Address Book entry is changed as you specified.
To delete Address Book entries
- On the Home screen, click the Address Book icon. The Find screen appears.
- Select the contact that you want to delete. Click the trackwheel to view the menu and click Delete. A dialog box prompts you to confirm the deletion.
- Click Delete.
You return to the Find screen, and the entry is no longer listed.
To delete group Address Book entries
- On the Home screen, click the Address Book icon. The Find screen appears.
- Select the name of the group that you want to delete. Click the trackwheel to view the menu. Click Delete Group. A dialog box prompts you to confirm the deletion.
- Click Delete.
You return to the Find screen, and the group is no longer listed.
Tips for using the Address Book application
- Press number keys, without pressing the Alt key, to insert numbers in the Work, Home, Mobile, Pager, Fax, DCID, and PIN fields.
- Press the Space key to insert the at sign (@) and periods in an Email field.
- Type the first letters of the name, or the initials separated by a space, to find a specific contact on the Find screen.
- Type your contact's full name in the First field and press the Enter key. The first name appears in the First field and the last name appears in the Last field.
Address Book
Chapter 6 Using Nextel Direct Connect™
This section provides information on the following topics:
- Before you begin
• Using the Push-to-Talk™ button - Placing Nextel Direct Connect calls
• Answering Nextel Direct Connect calls
• Ending Nextel Direct Connect calls - Tips for using Nextel Direct Connect
Before you begin
Nextel Direct Connect is a digital two-way radio feature that enables you to communicate with your contacts instantly. Your handheld offers a variety of advanced Nextel Direct Connect capabilities. You can place Private Calls, Call Alerts, and Group Calls. You must know your contact's Nextel Direct Connect Number to place Nextel Direct Connect calls.

Note: Refer to "Phone" on page 119 for information on aspects of the Phone application that also apply to Nextel Direct Connect, such as phone icons, using shortcuts when you place calls, setting the volume, customizing phone options, and viewing phone status. Refer to Nextel.com for more information on Nextel Direct Connect.
Using the Push-to-Talk™ button
During a Nextel Direct Connect call, press and hold the Push-to-Talk (PTT) button to speak to your contact. When you press the PTT button, the handheld beeps to indicate that you are the current speaker. Release the PTT button to listen to your contact. When you release the PTT button, your contact's handheld beeps to indicate that you are finished speaking.

Note: You can customize how your handheld notifies you of Direct Connect calls and whether your handheld beeps to indicate the current speaker. Refer to "Customizing notification profiles" on page 220 for more information.
Placing Nextel Direct Connect calls
You can place Nextel Direct Connect Private Calls, Call Alerts, and Group Calls if, in the handheld status section of the screen, NXTL, NXTl, NXtl, or nXtl and one or more bars appear with the wireless coverage indicator.
Placing one-time Nextel Direct Connect Calls
You can place Nextel Direct Connect Private Calls, Call Alerts, and Group Calls without adding the contact or talkgroup to your handheld's Address Book.
To place a one-time Nextel Direct Connect Private Call
-
On the Home screen, click the Phone icon. The Phone screen appears.
-
Select One Time Dial and click the trackwheel. The Phone Number/DCID dialog box appears.
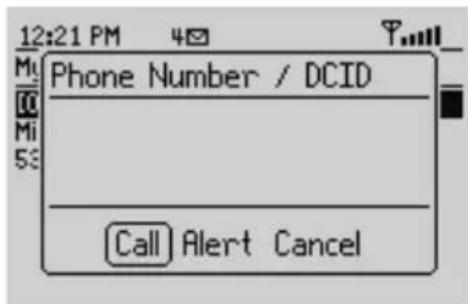
Phone screen - placing a one-time Private Call

Tip: On the Phone screen, you can also press the Space key to open the Phone Number/DCID dialog box.
-
Type your contact's Nextel Direct Connect Number. Press the PTT button. The handheld beeps to indicate that the call is placed.
-
Press and hold the PTT button to speak to your contact. Release the PTT button to listen to your contact.
To place a one-time Nextel Direct Connect Call Alert
A Call Alert is a discreet way to notify a contact that you want to speak to using Nextel Direct Connect.
- On the Home screen, click the Phone icon. The Phone screen appears.
- Select One Time Dial and click the trackwheel. The Phone Number/DCID dialog box appears.
- Type your contact's Nextel Direct Connect Number. Click Alert. The Ready To Alert dialog box appears and displays your contact's Nextel Direct Connect Number.
- Press the PTT button. The Alert Sent dialog box appears. The Alert Successful dialog box appears after your contact receives notification of the alert.
- Press and hold the PTT button to speak to your contact. Release the PTT button to listen to your contact.
To place a one-time Nextel Direct Connect Group Call
A Group Call enables you to communicate with a group of people that have been set up by Nextel as a talkgroup. Each talkgroup is assigned a number and you use this number to place Group Calls.
After you join a talkgroup, your handheld monitors the activity of the talkgroup. When a talkgroup member places a Group Call, you receive visual notification or other notification, depending on how you have configured your handheld's notification profiles.
- On the Home screen, click the Phone icon. The Phone screen appears.
- Select One Time Dial and click the trackwheel. The Phone Number/DCID dialog box appears.
- Press #. Dial the number of the talkgroup.
- Click Join. The Joining Talkgroup dialog box indicates that your handheld is attempting to join the talkgroup. The Talkgroup Joined dialog box appears after your handheld successfully joins the talkgroup.

Note: After you join a talkgroup, your handheld monitors the activity of the talkgroup. If you want to place a Group Call to your talkgroup, proceed with steps 5 through 8.
- On the Phone screen, select One Time Dial and click the trackwheel. The Phone Number/DCID dialog box appears.
- Press #. Dial the number of the talkgroup that you joined.
- Press the PTT button. The handheld beeps to indicate that the call is placed.
- Press and hold the PTT button to speak to your talkgroup. Release the PTT button to listen to other contacts in the group.
Placing Nextel Direct Connect calls from the Phone screen
You can use the PTT button to place Nextel Direct Connect Private Calls, Call Alerts, and Group Calls from the Phone screen.
To place a Nextel Direct Connect Private Call from the Phone screen
-
On the Home screen, click the Phone icon. The Phone screen appears and displays the last 20 contacts that you called.
-
Select a contact for whom you have saved a Nextel Direct Connect Number. Press the PTT button.
The Active Call screen displays Private Call In Use, the contact's Address Book information, and your handheld's Nextel Direct Connect Number.
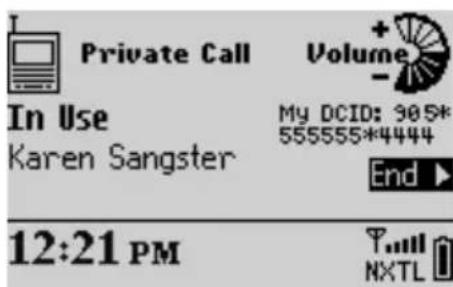
Active Call screen - Private Call In Use
- Press and hold the PTT button to speak to your contact. Release the PTT button to listen to your contact.

Note: While you are on a call, you can still use the other handheld applications. You are not, however, able to send or receive email or PIN messages or browse web pages. You can receive SMS messages.
To use the other handheld applications while you are on a call, on the Active Call screen, click the trackwheel to view the menu. Click Hide Call. You return to the last application that you were using. To return to the Phone application again, on the Home screen, click the Phone icon. You cannot press the Escape button to return to the last application that you were using. Pressing the Escape button while the Active Call screen is displayed ends the call.
A volume indicator appears on the right side of the screen. Roll the trackwheel to increase or decrease the volume. Refer to "Setting the volume" on page 127 for more information.

Tip: If the audio quality of your call decreases during the call, extend the antenna fully.
To end the call, click the trackwheel to view the menu. Click End Call. On the Active Call screen, you can also hold the Escape button to end the call. You return to the Home screen.

Note: Your handheld has built-in shortcuts that you can use when you place calls. Refer to "Using shortcuts when you place calls" on page 126 for more information.
Icons appear on the Active Call and Messages screens to provide additional information about the Phone application. Refer to "Phone icons" on page 120 for more information.
You can also place a Nextel Direct Connect Private Call from the other handheld applications. Select a contact for whom you have saved a Nextel Direct Connect Number. Press the PTT button.
If you are placing a Nextel Direct Connect Private Call to a contact with a different Area ID and Network ID as you, on the Phone screen, (Fleet) appears after the contact's name. If you are placing a Nextel Direct Connect Private Call to a contact with the same Area ID and Network ID as you, on the Phone screen, (Private) appears after the contact's name.
To place a Nextel Direct Connect Call Alert from the Phone screen
- On the Home screen, click the Phone icon. The Phone screen appears and displays the last 20 contacts that you called.
- Select a contact for whom you have saved a Nextel Direct Connect Number. Click the trackwheel to view the menu. Click Alert. The Ready To Alert dialog box appears and displays the Address Book information that you have saved for your contact.
![12:21 PM 20 My Number: 151 [One Time Dial] Tanya Moser Hide Menu Alert New Call Call Voice Mail View Address View Address Book Delete Status Options](/content/2026/05/990810/images/bc88ad14e2b610d881950b8ea2ae90a226e0639522abe72390c37732872fbd64.jpg)
Phone screen - Alert item
- Press the PTT button. The Alert Sent dialog box appears. The Alert Successful dialog box appears after your contact receives notification of the alert.
If your contact responds to the Call Alert, the Active Call screen displays Private Call In Use, the Address Book information that you have saved for your contact, and your handheld's Nextel Direct Connect Number.
- Press and hold the PTT button to speak to your contact. Release the PTT button to listen to your contact.

Note: You can also place a Nextel Direct Connect Call Alert from the other handheld applications. Select a contact for whom you have saved a Nextel Direct Connect Number. Click the trackwheel to view the menu. Click Alert.
To place a Nextel Direct Connect Group Call from the Phone screen
- On the Home screen, click the Phone icon. The Phone screen appears and displays the last 20 contacts that you called.
- Select a talkgroup and click the trackwheel to view the menu. Click Join. The Joining Talkgroup dialog box indicates that your handheld is attempting to join the talkgroup. The Talkgroup Joined dialog box appears after your handheld successfully joins the talkgroup.
![12:21 PM 2E My Number: 151 [One Time Dial] Group1 at work Tanya Moser Hide Menu Join New Call Call Voice Mail View Address View Address Book Delete Status Options](/content/2026/05/990810/images/9c3d46658618d130af8deacad81b84a1920d19d259cb6ccab76d38cd9158bd0c.jpg)
Phone screen - Join item

Note: After you join a talkgroup, your handheld monitors the activity of the talkgroup. If you want to place a Group Call to your talkgroup, proceed with steps 3 and 4.
- On the Phone screen, select the talkgroup that you joined and press the PTT button.
The Active Call screen displays Talkgroup In Use, the Address Book information that you have saved for your talkgroup, and your handheld's Nextel Direct Connect Number. The Active Call screen also displays the Nextel Direct Connect Number of the talkgroup member who is currently speaking.
- Press and hold the PTT button to speak to your talkgroup. Release the PTT button to listen to other contacts in the group.

Note: Although you may be a member of more than one talkgroup, you can only join one talkgroup at a time. If you join a new talkgroup, you are no longer connected to the previous talkgroup.
Answering Nextel Direct Connect calls
When you receive a Nextel Direct Connect call, you receive visual notification or other notification, depending on how you have configured your handheld's notification profiles. Refer to "Customizing notification profiles" on page 220 for more information.

Note: If you are using another handheld application when you receive a Nextel Direct Connect call, the action is interrupted by the call. When the call ends, you return to the last application that you were using before you received the call.
When you receive an incoming call, the contact's name and the Nextel Direct Connect Number appear if the contact is in your Address Book.
To answer a Nextel Direct Connect Private Call or Group Call
When you receive a Nextel Direct Connect Private Call or Group Call, press and hold the PTT button to speak to your contact or talkgroup. Release the PTT button to listen.
To answer a Nextel Direct Connect Call Alert
When you receive a Nextel Direct Connect Call Alert, the Alert From dialog box appears on your handheld's screen, prompting you to respond to or queue the alert. You might receive other notification, depending on how you have configured your handheld's notification profiles.
- To respond to the Call Alert, press the PTT button. The Active Call screen appears and displays Private Call In Use, the Address Book information that you have saved for your contact, and your handheld's Nextel Direct Connect Number. Press and hold the PTT button to speak to your contact. Release the PTT button to listen to your contact.
- To queue the Call Alert, click Queue. The Call Alert is logged on the Messages screen as an unopened message.
Ending Nextel Direct Connect calls
To end your Nextel Direct Connect call, click the trackwheel to view the menu. Click End Call.
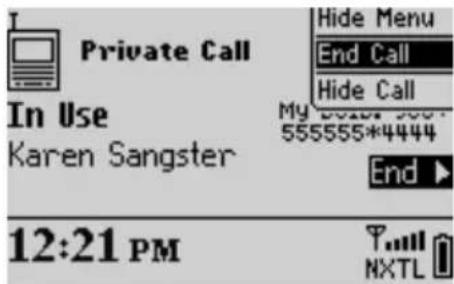
Active Call screen - End Call item

Tip: On the Active Call screen, hold the Escape key to end the call. You can also hold the button on the headset to end the call.
You can view the duration of your last Nextel Direct Connect call and of all Nextel Direct Connect calls. Refer to "Viewing phone status" on page 146 for more information.
Tips for using Nextel Direct Connect
- While connected to a Nextel Direct Connect call, press and hold the PTT button to speak to your contact. Release the PTT button to listen to your contact.
• In number fields, type numbers without using the Alt key - On the Phone screen, when you are not connected to a call, press the Space key to open the Phone Number/DCID dialog box.
- On the Phone screen, type a letter to open the Call screen. All contacts whose names contain that letter are displayed.
Using Nextel Direct Connect™
Chapter 7 Phone
This section provides information on the following topics:
- Phone icons
• B e f o r e y o u b e g i n
- Placing phone calls
• Answering phone calls
• Ending phone calls
• Using shortcuts when you place calls
- Setting the volume
- Putting phone calls on hold
- M ut i n g p h o n e c a l l s
- Placing one-time phone calls
- Placing phone calls using links
• Managing phone calls on the Phone screen
- Customizing Phone options
- Calling voice mail
• Using phone call notes
- Using pauses and wait
- Placing three-way calls
- Viewing phone status
- Placing emergency calls
• Tips for using the Phone application
Phone
Phone icons
These icons appear on the Active Call and Messages screens to provide additional information about the Phone application.

Note: Depending on your Nextel service plan and the services that are enabled for your Phone application, the following text and icons might not appear or they might differ. Contact Nextel Customer Care for more information.
| Icon Description | |
 0:05 0:05 | phone call in progress; this icon appears on the Active Call screen and records the length of the call |
 | Nextel Direct Connect call in progress; this icon appears on the Active Call screen |
 | indicates the current volume level; this icon appears on the Active Call screen |
 | phone call is muted; this icon appears on the Active Call screen |
 | phone call is in progress; this icon appears in the handheld status section of the screen of the handheld applications while you are connected to a phone call, and records the length of the call |
 | indicates that call forwarding of all phone calls is enabled; this icon appears in the handheld status section of the screen |
 | indicates a placed or received phone call; this icon appears on the Messages screen |
 | indicates that a voice mail message is waiting in your voice mailbox; if your SIM card is provisioned for voice mail and a new voice mail message is waiting, this icon, along with the number of new voice mail messages, appears in the handheld status section of the screenIf you have an unopened voice mail message when you turn on your handheld, a dialog box appears on your handheld's screen to inform you of the unopened voice mail messages. |
| [GB5] | indicates a Nextel Direct Connect call log; this icon appears on the Messages screen |
 Missed Call Missed Call | indicates an unopened missed call; this icon appears on the Messages screen |
 Missed Call Missed Call | indicates an opened missed call; this icon appears on the Messages screen |
 Call Alert Call Alert | indicates an unopened Call Alert; this icon appears on the Messages screen |
 Call Alert Call Alert | indicates an opened Call Alert; this icon appears on the Messages screen |
Before you begin
Your handheld is equipped with an integrated speaker and microphone. On your handheld, you can use the automated functions that are available to touch-tone phones. If you use the optional headset with your handheld, insert the headset connector into the headset jack on the side of your handheld before you use the Phone application.
The Phone screen displays the phone number of your handheld.

Note: Depending on your Nextel service plan, the Phone application might not be available on your handheld. Contact Nextel Customer Care for more information on available services.
To use certain features of the Phone application, such as call forwarding, you must subscribe to them. Contact Nextel Customer Care for more information.
Placing phone calls
You can place phone calls if, in the handheld status section of the screen, NXTL, NxTL, NXTl, NXtl, or Nxtl and one or more bars appear with the wireless coverage indicator.
Phone
To place phone calls
- On the Home screen, click the Phone icon. The Phone screen appears.
- Begin typing the name of the contact whom you want to call. The Call screen appears, listing all contacts that contain the letters that you have typed.
- Select the name of your contact and click the trackwheel to view the menu.
- Click Call.
![12:21 PM 8 Call: T_ [Use Once] Tanya Moser Hide Menu Call Tanya Moser Lookup View All New Address New Group View Edit Delete](/content/2026/05/990810/images/ccdfd59888fc9d27b7adf9a9373c5f9ae0a69cd4c1471e27557bf4c5b66c4a18.jpg)
Select Address screen menu - Call item

Note: If you have specified more than one phone number for a contact, you are prompted to select the phone number that you want to call.
If you have entered x or ext in the Work, Home, and Mobile fields to specify a phone number extension, you are prompted to dial the extension. In the Dial Extension dialog box, click Dial.
Refer to "Adding addresses" on page 95 for more information on adding contacts to your Address Book.
The Active Call screen displays Calling and the Address Book information that you have saved for your contact. Your handheld dials the phone number that you have selected.
After the recipient answers your call, the Active Call screen displays Connected. A call timer appears in the upper left of the screen, displaying the length of your call.

Note: While you are on a call, you can still use your handheld's other applications. You are not, however, able to send or receive email or PIN messages or browse web pages. You can receive SMS messages.
To use the other handheld applications while you are on a call, on the Active Call screen, click the trackwheel to view the menu. Click Hide Call. You return to the Home screen, where you can select an application. To return to the Phone application, click the Phone icon.
On the Active Call screen, a volume indicator appears in the upper right of the screen. Roll the trackwheel to increase or decrease the volume.

Tip: If the audio quality of your phone call decreases during the call, extend the antenna fully.
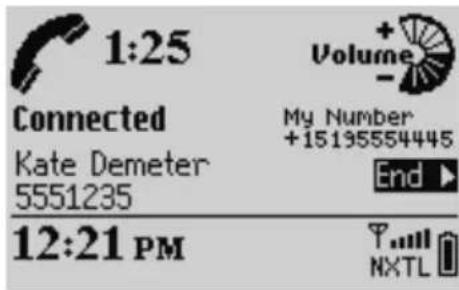
Active Call screen
To end the call, click the trackwheel to view the menu. Click End Call. The handheld beeps to indicate that the call has ended. On the Active Call screen, you can also hold the Escape button to end the call.
To exit the Phone application and return to the last application in which you were working before you placed the phone call, click the trackwheel to view the menu and then click Close.

Note: If you attempt to place a call when the handheld's radio is off, you are prompted to turn on the radio before you can continue.
You can also place a phone call from the Messages or Saved Messages screens. Click the trackwheel to view the menu. Click Place Call. The Select Address screen appears.
Select the contact that you want to call and click the trackwheel to view the menu. Click Call.
Answering phone calls
When you receive a phone call, you receive visual notification and any other notification, depending on how you have configured your notification profiles. Refer to "Customizing notification profiles" on page 220 for more information on setting your notification profiles.
The handheld's backlighting turns on automatically when you receive a phone call.

Note: When you receive an incoming call, the contact's name and phone number appear if the contact is in your Address Book. The contact's name and phone number also appear if you have subscribed to a caller identification service.
Phone
To answer phone calls
When you receive a new phone call, a dialog box appears on your handheld's screen, prompting you to answer or ignore the call.
- If you are not connected to any other phone calls and want to answer the call, click Answer. You are connected to the call.
- If you are not connected to any other phone calls and want to answer the call and put the caller on hold, click Answer And Hold. You are connected to the call but it is put on hold immediately. To resume your call, click the trackwheel to view the menu. Click Resume.
- If you are already connected to a phone call but have finished your conversation and want to answer the incoming call, click Answer - Drop Current. The first phone call is disconnected and you are connected to the incoming call.
- If you are already connected to a phone call but have not finished your conversation and want to answer the incoming call, click Answer - Hold Current. The current phone call is put on hold and you are connected to the incoming call.
- If you do not want to answer the incoming phone call, click Ignore. The caller hears a busy signal or is directed to your voice mail, depending on your service plan.

Note: You must subscribe to a call waiting service for the Answer And Hold, Answer - Drop Current, and Answer - Hold Current items to appear when you receive an incoming call. Also, in the Phone options, on the Call Waiting screen, Call Waiting must be enabled for these items to appear.
If you are already connected to a call when you receive a new phone call, you can set up a three-way call. Refer to "Placing three-way calls" on page 144 for more information.
You can also press the button on the headset to answer a call.
If you are composing an email or PIN message or are using another handheld application when you receive a phone call, the action is interrupted until you answer or ignore the phone call. If you answer the phone call, the Active Call screen appears. To return to the last application that you were using, click the trackwheel to view the menu and click Hide Call. You return to the last application that you were using. You cannot press the Escape button to return to the last application that you were using. Pressing the Escape button while the Active Call screen is displayed prompts you to end the phone call.
To answer phone calls when the handheld is locked
If your handheld is locked with a password when you receive a phone call, you can answer the call without typing your password. When the Incoming Call dialog box appears, click to answer or ignore the call.
After you answer the call, click the trackwheel. The Handheld is locked dialog box appears. Click Unlock to type your password and unlock the handheld or click Cancel to close the dialog box.
Refer to "Security" on page 237 for more information on setting a password and locking your handheld.
To swap phone calls
If you are connected to two phone calls but want to alternate between talking to each contact, you can swap calls.
- On the Home screen, click the Phone icon. The Phone screen appears.
- While you are connected to two calls, click the trackwheel to view the menu. Click Swap.

Note: While you are connected to more than one call, the End Call, Swap, Join, Volume, Mute, and Notes items appear on the menu of the other handheld applications.
Ending phone calls
When you finish with your call, click the trackwheel to view the menu. Click End Call. The handheld beeps to indicate that the call has ended.

Phone screen menu - End Call item
Phone

Tip: On the Active Call screen, hold the Escape button to end the phone call. The handheld beeps to indicate that the call has ended.
You can also hold the button on the headset to end the call.
After the phone call ends, the Phone screen displays your list of contacts.

Note: If your handheld's battery becomes too low, a Low Battery message appears to the left of the wireless coverage indicator and the handheld beeps. You are not disconnected from your phone call at this point, but you should end your phone call and recharge your handheld's battery as soon as possible.
Using shortcuts when you place calls
Your handheld has built-in shortcuts that you can use when you place calls.
To dial phone numbers quickly
To place calls on the Phone screen quickly, press the Space key. The Phone Number/DCID dialog box appears. Type the phone number and click Call.

Tip: To type a phone number extension, hold the 8 key until the letter X appears. Type the phone number extension.
If, in the Phone application, on the General Options screen, you set the Dial from Home screen field to Yes, you can dial numbers quickly from the Home screen. On the Home screen, type the phone number and click the trackwheel to view the menu. Click Call.
To alpha-dial
When you call a contact, your handheld enters number-lock mode automatically. You can use the alpha-dialling feature to type letters when you enter a phone number or while you are on a call.
• To type one letter, press the Right Shift key and type the letter.
- To type multiple letters, press the Alt key and the Right Shift key. Your handheld enters character mode and you can type multiple letters. To turn off character mode, press the Right Shift key.
To dial corporate extensions
If you regularly call contacts at the same company with different extensions, you can configure your handheld's Smart Dialing screen so that you only need to dial the extension. When you type x, followed by the extension number, the handheld automatically dials the company's main phone number as you have set it on the Smart Dialing screen. After a brief period of time, the extension is dialed. Refer to "To set corporate smart dialing options" on page 138 for more information on configuring this option.
To use the Plus Dialing feature
If your service plan is enabled for international dialing, you can use the Plus Dialing feature to place an international call. To use the Plus Dialing feature, type a plus sign (+) before the country code, city code, or area code of a contact's phone number in the Address Book or in the Phone Number/DCID dialog box when placing one-time calls. If a phone number link with a plus sign appears in your messages or in one of the handheld's other applications, you can click the link to place an international call.

Note: The Nextel wireless network translates the plus sign (+) into the appropriate international access code needed to place the international phone call.
Setting the volume
While you are connected to a call, roll the trackwheel to change the volume for your handheld's Phone application. Scroll up to increase the call's volume or scroll down to decrease the volume. The volume level that you set is used for all Phone applications.

Note: If you are working in one of the handheld's other applications while you are connected to a phone call and you want to change the volume for the Phone application, click the trackwheel to view the menu. Click Volume. The volume indicator appears. Roll the trackwheel to increase or decrease the volume.
Putting phone calls on hold
After you have placed or received a phone call, you can put it on hold.
Phone
To put a phone call on hold
-
On the Home screen, click the Phone icon. The Phone screen appears.
-
While you are connected to a phone call, click the trackwheel to view the menu. Click Hold. The call is put on hold and the screen displays On Hold.

Phone screen menu - Hold item
- To reconnect to the call, click the trackwheel to view the menu. Click Resume.
You are reconnected to the call.
Muting phone calls
You can mute phone calls on your handheld, so that you can hear your contact, but your contact cannot hear you. When a call is muted, the mute icon appears as a line through the phone call in progress icon. When you mute the phone call, the handheld plays a tone to indicate that the call is muted.
To mute phone calls
-
On the Home screen, click the Phone icon. The Phone screen appears.
-
While you are connected to a phone call, click the trackwheel to view the menu. Click Mute. The Active Call screen displays Muted.
-
When you want to participate in the call again, click the trackwheel to view the menu. Click Turn Mute Off. When you turn off the mute feature, the handheld plays a tone to indicate that the call is no longer muted.
You are reconnected to the call.

Tip: While you are connected to a phone call, press the button on the headset to mute the call. Press the button on the headset again to turn mute off.
Placing one-time phone calls
You can place a phone call without adding the recipient to your handheld's Address Book.
To place one-time phone calls
- On the Home screen, click the Phone icon. The Phone screen appears.
- Select One Time Dial and click the trackwheel. The Phone Number/DCID dialog box appears.

Tip: On the Phone screen, you can also press the Space key to open the Phone Number/DCID dialog box.
If you have used One Time Dial or the quick dialing feature before, the last number that you dialed appears in the Phone Number/DCID dialog box. To call this number, press the Space key. To delete the number, press the Escape button
- Type the phone number. Click Call.

Phone screen - placing a one-time call
Your handheld dials the number that you typed.

Tip: To place one-time phone calls on the To screen, select the [Use Once] option. To type a phone number extension, hold the 8 key. When the letter X appears, release the 8 key. Type the phone number extension.
Placing phone calls using links
Your handheld recognizes phone numbers in the body of messages and converts them into links. You can select an underlined link and use it to place a phone call.
Phone
To place a phone call using a link
-
On the Home screen, click the Messages icon. The Messages screen appears.
-
Select a received message that contains a link. Click the trackwheel to view the menu. Click Open.
-
Select the phone number link. Click the trackwheel to view the menu. Click Call.
Your handheld dials the phone number that you selected.

Tip: Links can also appear in the other handheld applications. You can place calls from any of those applications by following the procedure above.
Managing phone calls on the Phone screen
The last 20 contacts that you called or received calls from are listed on the Phone screen. When the Phone screen appears, the last number that you called is selected.

Note: If you have placed or received a phone call from a contact who is not in your Address Book, the Phone screen shows only the phone number.
To place calls from the Phone screen
From the Phone screen, you can quickly place a call to any of your contacts.
-
On the Home screen, click the Phone icon. The Phone screen appears.
-
Select a contact or phone number and click the trackwheel to view the menu. Click Call.
Your handheld dials the phone number that you have selected.

Tip: On the Phone application menu, any other phone numbers that you have saved for your contact are also listed. After you select a contact on the Phone screen, click the trackwheel to view the menu. Click one of the other phone numbers.
To delete items on the Phone screen
You can delete items from the list on the Phone screen.
-
On the Home screen, click the Phone icon. The Phone screen appears.
-
Select the name of the contact or the phone number that you want to remove from the list.
-
Click the trackwheel to view the menu. Click Delete. A dialog box appears prompting you to confirm that you want to delete the item. (This dialog box appears only if Confirm Delete is enabled on the General Options screen of the Phone options.) Click Delete.
You return to the Phone screen, and the contact is removed from the list.

Note: When you delete items from the Phone screen, you delete those contacts from the list on the screen. You do not delete the contacts from your handheld's Address Book.
Customizing Phone options
You can customize the following Phone options:
- Direct Connect: Set whether you want to disable Nextel Direct Connect or silence Nextel Direct Connect Call Alerts, Private Calls, and Group Calls. You can also set your current talkgroup and talkgroup area.
- Call Logging: Set whether you want your phone calls to appear on the Messages screen. You can also set which types of calls to log.
- Call Forwarding: Set whether you want to forward incoming phone calls to another phone number.
- Call Waiting: Set whether you want to be notified of incoming phone calls when you are connected to a phone call.
- General Options: Set the general phone options for your handheld, including confirm deletion. You can also set how you want to sort your list of contacts on the Phone screen and whether you want to enable dialing from the Home screen.
• Smart Dialing: Change the dialing properties for your handheld.
• Voice Mail: Set or change your voice mail access number.
• TTY Option: Enable or disable text telephone on your handheld.
Phone
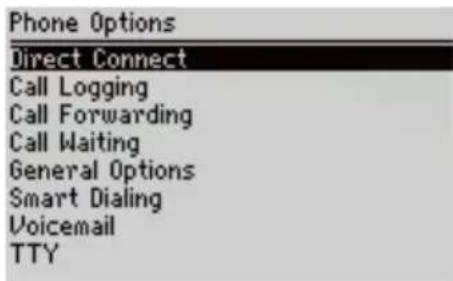
Phone Options screen

Note: Depending on your Nextel service plan, some Phone options might not be available on your handheld. Contact Nextel Customer Care for more information on available services.
Customizing Nextel Direct Connect options
On the Direct Connect screen of the Phone options, you can customize the following options:
- Phone Only: Select whether you want to use only the Phone application on your handheld. By default, this option is set to No. If you set this field to Yes, you can place and answer phone calls and receive SMS messages, but you cannot send and receive email and PIN messages, place and answer Nextel Direct Connect calls, or browse web pages.

Note: If you set the Phone Only field to Yes, the wireless coverage indicator in the handheld status section of the screen changes to Nxtl.
- Silence Call Alerts: Select whether you want to silence incoming Call Alerts. By default, this option is set to No. If you set this field to Yes, your handheld will ignore incoming Call Alerts.
- Silence Private Calls: Select whether you want to silence incoming Private Calls. By default, this option is set to No. If you set this field to Yes, your handheld will ignore incoming Private Calls.
- Silence Group Calls: Select whether you want to silence incoming Group Calls. By default, this option is set to No. If you set this field to Yes, your handheld will ignore incoming Group Calls.
- Current Talkgroup: Set your current talkgroup.
- Current Talkgroup Area: Set your current talkgroup area. If you select Local Area, you can communicate with talkgroup members who are currently in the
132 BlackBerry Wireless Handheld
same service area as you are. If you select Wide Area, you can communicate with talkgroup members who are currently in any service area. By default, this option is set to Wide Area.
To set Direct Connect options
- On the Home screen, click the Phone icon. The Phone screen appears.
- Click the trackwheel to view the menu. Click Options. The Phone Options screen appears.
- Click Direct Connect. The Direct Connect screen appears.
- In the fields that you want to set, press the Space key until the preferred option appears.
- Click the trackwheel to view the menu. Click Save.
You return to the Phone Options screen and the Nextel Direct Connect options are set as you have specified.

Note: Refer to "Placing Nextel Direct Connect calls" on page 110 for more information on placing Nextel Direct Connect calls.
Customizing call logging
By default, your handheld logs all calls that you place or receive on the Messages screen. You can customize the Phone application so that your calls do not appear on the Messages screen. You can also specify which calls should be logged.
To customize call logging
- On the Home screen, click the Phone icon. The Phone screen appears.
- Click the trackwheel to view the menu. Click Options. The Phone Options screen appears.
- Click Call Logging. The Call Logging screen appears.
- If you want to prevent phone calls from being listed on the Messages screen, in the Show Logs In Message List field, press the Space key until No appears.
- If you are logging phone calls, you can press the Space key to clear or select the check boxes to set the types of phone calls that are logged. By default,
Phone
Incoming Calls (Completed), Outgoing Calls (Completed), Attempted Calls, and Missed Calls are logged.
- Click the trackwheel to view the menu. Click Save.
You return to the Phone Options screen. Your phone calls are logged as you have specified.
Customizing call forwarding
You can customize two profiles for call forwarding. With the All Calls profile, you can set a phone number to which all phone calls should be directed. With the Unanswered Calls profile, you can set the phone numbers to which calls should be forwarded if your handheld's Phone is busy, if there is no reply, or if your handheld is not reachable. After you customize the profiles, you can enable and disable them. You can only enable one profile at a time.

Note: If your SIM card is not provisioned for call forwarding, the message Forwarding not available appears on your screen. Contact Nextel Customer Care for more information on call forwarding.
If your SIM card is provisioned for voice mail, the Unanswered Calls call forwarding profile is set to On. This call forwarding profile must be enabled to access a voice mail service on your handheld.
If you disable the Unanswered Calls call forwarding profile, voice mail service is removed from your handheld. To re-enable voice mail, set the Unanswered Calls call forwarding profile to On and manually type your voice mail access number. Refer to "To edit your voice mail access number" on page 140 for more information on setting your voice mail access number. Contact Nextel Customer Care for more information on the voice mail access number for your handheld.
To customize call forwarding profiles
- On the Home screen, click the Phone icon. The Phone screen appears.
- Click the trackwheel to view the menu. Click Options. The Phone Options screen appears.
- Click Call Forwarding. If your SIM card is provisioned for call forwarding, the Call Forwarding screen appears.
- Select All Calls and click the trackwheel to view the menu. Click Edit. The Edit Forwarding Profile screen appears.
-
In the Phone Number field, type the phone number to which you want all calls forwarded.
-
Click the trackwheel to view the menu. Click Save. You return to the Call Forwarding screen.
- Select Unanswered Calls and click the trackwheel to view the menu. Click Edit. The Edit Forwarding Profile screen appears.
- Type phone numbers in the Busy, No Answer, and Unreachable fields.
- Click the trackwheel to view the menu. Click Save.
You return to the Call Forwarding screen.
To enable a call forwarding profile
- On the Home screen, click the Phone icon. The Phone screen appears.
- Click the trackwheel to view the menu. Click Options. The Phone Options screen appears.
- Click Call Forwarding. If your SIM card is provisioned for call forwarding, the Call Forwarding screen appears.
- Select the profile that you want to use for call forwarding (either All Calls or Unanswered Calls). Click the trackwheel to view the menu. Click Enable.
- Click the trackwheel to view the menu. Click Close.
You return to the Phone Options screen. Phone calls that your handheld receives are redirected based on the call forwarding profile that you have selected.

Tip: To enable a call forwarding profile, select it and press the Space key. Press the Space key again to disable it.
The call forwarding icon appears in the handheld status section of the screen when you enable call forwarding.
To disable a call forwarding profile
- On the Home screen, click the Phone icon. The Phone screen appears.
- Click the trackwheel to view the menu. Click Options. The Phone Options screen appears.
- Click Call Forwarding. If your SIM card is provisioned for call forwarding, the Call Forwarding screen appears.
- Select the profile that you have enabled for call forwarding. Click the trackwheel to view the menu. Click Disable.
- Click the trackwheel to view the menu. Click Close.
Phone
You return to the Phone Options screen. You receive all calls on your handheld.

Tip: To quickly disable a call forwarding profile, select it on the Call Forwarding screen and press the Space key. Press the Space key again to enable it.
Setting call waiting
You can enable and disable call waiting.
To enable and disable call waiting
- On the Home screen, click the Phone icon. The Phone screen appears.
- Click the trackwheel to view the menu. Click Options. The Phone Options screen appears.
- Click Call Waiting. The Call Waiting screen appears.
-
In the Call Waiting Enabled field, press the Space key until the preferred option appears.
-
If you want to receive notification for incoming calls when you are connected to a call, select Yes.
-
If you do not want to receive notification for incoming calls when you are connected to a call, select No.
-
Click the trackwheel to view the menu. Click Save.
If call waiting is enabled, and you receive an incoming call while you are connected to another caller, you hear a tone and a dialog box prompts you to answer the call.
If call waiting is disabled, and you receive an incoming call while you are connected to another caller, the new caller hears a busy signal, or is directed to your voice mail if it is available.
Setting general phone options
On the General Options screen of the Phone options, you can customize the following options:
- Auto Answer: Set whether you want the handheld to answer incoming phone calls automatically when you remove your handheld from the holster. Choose from Out of Holster and Never. By default, this field is set to Never.
136 BlackBerry Wireless Handheld
- Auto Hangup: Set whether you want the handheld to end phone calls automatically when you insert your handheld in the holster. Choose from Into Holster and Never. By default, this field is set to Never.

Note: The Auto Hangup option does not apply if you are using the headset with your handheld.
- Confirm Delete: Select whether you want to confirm the deletion of phone numbers and contacts from the Phone screen. By default, this option is set to Yes.
- Sort By: Set how you want to sort your list of contacts on the Phone screen. Choose from Name, Most Recent, or Most Used. By default, this field is set to Most Recent.
- Dial from Home Screen: Set whether you want to be able to dial phone numbers quickly from the Home screen. When this field is set to Yes, you cannot use shortcut keys to open applications on the Home screen
To set general phone options
- On the Home screen, click the Phone icon. The Phone screen appears.
- Click the trackwheel to view the menu. Click Options. The Phone Options screen appears.
- Click General Options. The General Options screen appears.
- In the fields that you want to set, press the Space key until the preferred option appears.
- After you edit the fields, click the trackwheel to view the menu. Click Save.
You return to the Phone Options screen and the general options are set as you have specified.
Setting Smart Dialing options
You can specify default country and area codes, national number length, and national dialing options so that you do not have to specify these numbers each time that you type a phone number.
Phone
You can also set smart dialing options for corporate extensions. If you call a corporation frequently, you can set your smart dialing options so that you do not have to type the main number for the corporation. To call a contact in the corporation, you only need to type x and the extension number.

Note: Depending on your location, the smart dialing fields might appear differently on your handheld. Contact Nextel Customer Care for more information.
To set general smart dialing options
- On the Home screen, click the Phone icon. The Phone screen appears.
- Click the trackwheel to view the menu. Click Options. The Phone Options screen appears.
- Click Smart Dialing. The Smart Dialing screen appears. You can set your country code, area code, and specify the value for your national number length.

Note: The default phone number length that you type in the National Number Length field specifies the default length for phone numbers in your current country. This value includes your area code and local number, but does not include your country code or your National Direct Dialing prefix. When you type your area code, do not include your National Direct Dialing prefix.
- Click the trackwheel to view the menu. Click Save.
You return to the Phone Options screen.
To set corporate smart dialing options
- On the Home screen, click the Phone icon. The Phone screen appears.
- Click the trackwheel to view the menu. Click Options. The Phone Options screen appears.
- Click Smart Dialing. The Smart Dialing screen appears. In the Call field, type the main number of a corporation that you call frequently.

Note: If you have set general smart dialing options, you do not need to specify an area or country code.
- In the Wait For fields, press the Space key until the preferred option appears.
- If you set the Wait For field to My Response, after the handheld dials the main number, the Dial Extension dialog box appears. You are prompted to send the next numbers.
- If you set the Wait For field to 2 seconds, 4 seconds, or 6 seconds, the handheld pauses for the specified period of time before dialing the extension automatically.
-
In the Extension Length field, press the Space key until the preferred option appears.
-
Click the trackwheel to view the menu. Click Save.

Note: In the Address Book application, if you specified a pause or wait with an extension, the smart dialing options for corporate extensions do not apply. The handheld dials the extension according to your saved Address Book entry. Refer to "To add pauses and waits" on page 101 for more information.
Calling voice mail
If your SIM card is provisioned for voice mail, your handheld obtains the voice mail access number automatically from the SIM card. Refer to your Nextel Services Guide for more information on your Nextel Voice Mail service.

Note: If your SIM card is provisioned for voice mail, the Unanswered Calls call forwarding profile is set to On. You must keep this call forwarding profile enabled to have voice mail service on your handheld.
If you disable the Unanswered Calls call forwarding profile, voice mail service is removed from your handheld. To enable voice mail again, you must enable the Unanswered Calls call forwarding profile and manually type your voice mail access number. Refer to "To edit your voice mail access number" on page 140 for more information on setting your voice mail access number.
To call voice mail
You can use your handheld to check your voice mail messages.
-
On the Home screen, click the Phone icon. The Phone screen appears.
-
Click the trackwheel to view the menu. Click Call Voice Mail.
Phone
Your handheld dials your voice mail access number. Follow the prompts to listen to your messages.

Note: If your SIM card is provisioned for voice mail and a new voice mail message is received, a dialog box appears on the screen. In addition, the Call Voice Mail menu item appears on the menu of all handheld applications, and the voice mail icon appears in the handheld status section of the screen.
To call your handheld voice mail, you can place a phone call to your handheld's phone number. You are directed to your voice mail automatically. The first time you call your voice mail, you must set up your voice mail account.
To edit your voice mail access number
If you want to call an alternate voice mail system, you can edit the voice mail access number manually.
- On the Home screen, click the Phone icon. The Phone screen appears.
- Click the trackwheel to view the menu. Click Options. The Phone Options screen appears.
- Click Voice Mail. The Voice Mail screen appears.
- In the Access Number field, delete the voice mail access number (if one appears) and type the number that your handheld should dial to gain access to your voice mail.
- In the Additional Numbers field, type any additional numbers for your voice mail, such as a password.
- Click the trackwheel to view the menu. Click Save.
You return to the Phone Options screen.
Setting the TTY option (TTY)
Depending on your Nextel service plan, text telephone (TTY) might not be available on your handheld. If you have a text telephone device and TTY is available, you can place and receive phone calls to and from other text telephone devices. Connect your handheld to a standard TTY device that operates at 45.45 bps. Your handheld does not support TTY devices that operate at 50 bps.
To use the TTY device with your handheld, insert the TTY connector into the headset jack on the side of your handheld. If you use an RJ-11 connector, you must use an adaptor to connect the TTY device to your handheld.
To enable TTY
- On the Home screen, click the Phone icon. The Phone screen appears.
- Click the trackwheel to view the menu. Click Options. The Phone Options screen appears.
- Click TTY Option. The TTY Option screen appears.
- In the TTY Mode field, press the Space key to set the field to Yes.
- Click the trackwheel to view the menu. Click Save.
The TTY icon appears in the handheld status section of the screen. You return to the Phone Options screen.

Note: When you enable the TTY option, you cannot use the headset with the handheld. You must disable the TTY option before you can use the headset. To disable the TTY option, in the TTY Mode field, press the Space key until No appears. Click the trackwheel to view the menu. Click Save. You return to the Phone Options screen.
Using phone call notes
After your phone call ends, you can make notes to record the details of your conversation. The call notes are saved as part of the call log (along with the call date, time, length, and any three-way call members). Only one set of call notes is associated with each call.
You can add, edit, and delete your call notes, or forward them to an email address.

Note: If you delete the phone call log, the call notes are also deleted.
You can only edit, forward, and delete call notes if you log phone calls on the Messages screen. In the Phone options, on the Call Logging screen, set the Show Logs In Message List field to Yes.
If you are using a headset with the handheld, you can add call notes while you are connected to a phone call. While you are connected a phone call, click the trackwheel to view the menu. Click Notes. Add any notes that you want to make for the phone call. When the call ends, the notes are saved automatically.
To add call notes
- On the Home screen, click the Messages icon. The Messages screen appears.
Phone
-
Select the phone call for which you want to add call notes. Click the trackwheel to view the menu. Click Open. The View Call Log screen appears, listing the details of the phone call.
-
Click the trackwheel to view the menu. Click Add Notes. Type any notes that you want to associate with this call.

Phone screen menu - Add Notes item
- Click the trackwheel to view the menu. Click Save Notes.
You return to the View Call Log screen.

Note: While you are on a phone call, you can exit the call notes feature by pressing the Escape button or by clicking Hide Notes on the menu. Your call notes are saved automatically and you return to the Active Call screen.
To edit call notes
-
On the Home screen, click the Messages icon. The Messages screen appears.
-
Select the phone call that contains the notes that you want to edit. Click the trackwheel to view the menu. Click Open. The View Call Log screen appears, listing the details of the phone call and any associated call notes.
-
Click the trackwheel to view the menu. Click Edit Notes. Make any changes to your call notes.
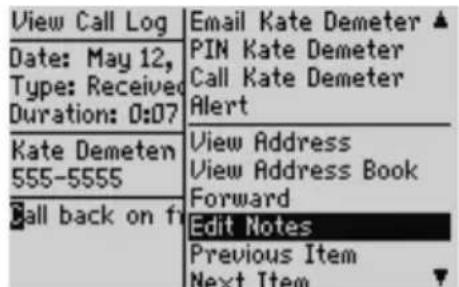
View Call Log screen menu - Edit Notes item
- Click the trackwheel to view the menu. Click Save Notes.
142 BlackBerry Wireless Handheld
You return to the View Call Log screen with your call notes changed.

Note: To clear the notes that are associated with a call, edit the call notes and click the trackwheel to view the menu. Click Clear Field. The call notes are deleted.
To forward call notes
You can forward the details of your phone call to an email address. Forwarding call notes is useful if you want to keep the notes that you made during the call but do not want to keep the call log on your handheld.
-
On the Home screen, click the Messages icon. The Messages screen appears.
-
Select the phone call that contains the notes that you want to forward. Click the trackwheel to view the menu. Click Open. The View Call Log screen appears, listing the details of the call and any associated call notes.
-
Click the trackwheel to view the menu. Click Forward. The Select Address screen appears.
-
Select the contact to whom you want to forward the call notes and click the trackwheel to view the menu. Click Email.

Note: If you have recorded more than one email address for your contact, you are prompted to select the address to which you want to forward the call notes.
The details of the call (the date, duration, and name of the contact) are also included when you forward the call notes.
- In the email message that appears, add any additional notes. Click the trackwheel to view the menu. Click Send.
You return to the Messages screen, and you can view the status of your sent message.
Using pauses and waits
You can add pauses and waits to your contacts' phone numbers in your handheld's Address Book. When you add a pause or wait in the phone number, your handheld automatically sends the next numbers that you specify (for a pause) or prompts you to send the next numbers (for waits).
Phone
For example, if you regularly call an automated information service that requires a password, you can specify a pause in the phone number to automatically enter your password. You can then enter a wait in the phone number to select the information service that you request most often.

Tip: Refer to "Adding pauses and waits to phone numbers" on page 101 for more information on adding pauses and waits to your handheld's Address Book entries.
To place calls using pauses or waits
-
On the Home screen, click the Phone icon. The Phone screen appears.
-
Begin typing the name of a contact from your Address Book. The Find screen appears, listing all the contacts whose names contain the letters that you typed. For this example, select a contact whose Address Book entry contains a phone number with a pause or a wait.
-
Select the contact and click the trackwheel to view the menu. Click Call. Your handheld dials the number.

Note: In the Phone application, click the trackwheel to view the menu and then click View Address to view the Address Book entry for any of your contacts.
- If you entered a pause in the contact's phone number, the additional numbers are sent after two seconds.
- If you entered a wait, a dialog box appears. This dialog box shows the additional numbers that you typed for this contact and prompts you to send the additional numbers. Click Dial.
You are connected to your contact.

Note: If you have entered x or ext in the Work, Home, and Mobile fields to specify a phone number extension, you are prompted to dial the extension. In the Dial Extension dialog box, click Dial.
Placing three-way calls
You can call two contacts at the same time to set up a three-way call.

Note: To use this feature of the Phone application, you must subscribe to it. Contact Nextel Customer Care for more information.
To place a three-way call
- On the Home screen, click the Phone icon. The Phone screen appears.
- Begin typing the name of the contact whom you want to call. The Call screen appears, listing the contacts whose names contain the letters that you typed.
- Select the contact and click the trackwheel to view the menu. Click Call. Your handheld dials the phone number that you selected.
- While you are connected to the call, click the trackwheel to view the menu. Click New Call. The Select Address screen appears and the current call recipient is put on hold.
- Select the name of the second contact and click the trackwheel to view the menu. Click Call.
- After you connect to the second call, click the trackwheel to view the menu. Click Join. The Active Call screen shows that you are currently connected to both recipients.
- When the three-way call is complete, click the trackwheel to view the menu. Click End Call.
You return to the Phone screen.

Note: When you are connected to both recipients on a three-way call, Join and Hold no longer appear on the menu.
You cannot place or receive phone calls while you are connected to a three-way call or while you are connected to one phone call with another phone call on hold. You must end both calls before you can place and receive new calls.
To speak to one recipient during a three-way call
- On the Home screen, click the Phone icon. The Phone screen appears.
- While you are connected to a three-way call, click the trackwheel to view the menu. Click Split Call. The Select Call dialog box appears.
- Select the recipient that you want to speak with privately. The other recipient is placed on hold.
- To reconnect the three-way call, click the trackwheel to view the menu. Click Join.
Phone
The three-way call resumes.

Note: When the three-way call is split, you can switch between the recipient to whom you are speaking and the recipient that is on hold by selecting Swap from the menu. Refer to "To swap phone calls" on page 125 for more information.
To disconnect three-way call recipients
- On the Home screen, click the Phone icon. The Phone screen appears.
- While you are connected to a three-way call, click the trackwheel to view the menu. Click Drop Call. The Select Call dialog box appears.
- Select the recipient that you want to drop from the three-way call.
The selected recipient is disconnected and you remain connected to the other recipient.
Viewing phone status
The Phone Info screen shows the duration of your last phone call and of all phone calls. It also shows the duration of your last Nextel Direct Connect call and of all Nextel Direct Connect calls.
To view phone status
- On the Home screen, click the Phone icon. The Phone screen appears.
- Click the trackwheel to view the menu. Click Status. The Phone Info screen appears, displaying the phone number for your handheld and your Nextel Direct Connect Number. The Phone Info screen also displays the Last Direct Connect Call timer, the Total Direct Connect Calls timer, the Last Call timer, and the Total Calls timer.
- Click the trackwheel to view the menu. Click Close.
You return to the Phone screen.
To reset call timers
You can reset one or all of the Phone's timers.
-
On the Home screen, click the Phone icon. The Phone screen appears.
-
Click the trackwheel to view the menu. Click Status. The Phone Info screen appears, displaying the phone number for your handheld and your Nextel Direct Connect Number. The Phone Info screen also displays the Last Direct Connect Call timer, the Total Direct Connect Calls timer, the Last Call timer, and the Total Calls timer.
-
Select the timer that you want to reset and click the trackwheel to view the menu. Click Clear Timer. The timer is reset to 0:00.
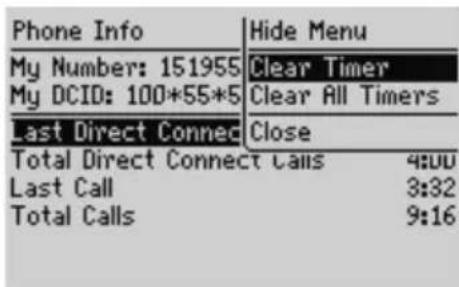
Phone Info screen menu - Clear Timer item

Note: To clear all the timers for your Phone application, click the trackwheel to view the menu. Click Clear All Timers.
- Click the trackwheel to view the menu, and then click Save.
The timer is reset and you return to the Phone screen.
Placing emergency calls
You can place calls to emergency numbers at any time, even if your handheld has a password set or does not have a SIM card inserted.

Warning: This feature is reserved for emergency calls ONLY. If you are placing a call when your handheld is locked, only recognized emergency numbers (such as 911) are accepted.
To place emergency calls
-
On the Home screen, click the Phone icon. The Phone screen appears.
-
Click One Time Dial. The Phone Number/DCID dialog box appears. Press the Escape button if a previously dialed number appears in the Phone Number/DCID dialog box.
-
Type the emergency phone number. Click Call.
Phone
- A dialog box prompts you to confirm that you want to make the emergency call. Click Yes.
Your handheld dials the emergency phone number.

Note: If your handheld's radio is turned off when you attempt to place an emergency call, the radio turns on automatically and the call is placed.
To place emergency calls when your handheld is locked
- Click the trackwheel. A dialog box appears with the message Handheld is locked.
- Click Emergency Call. A dialog box prompts you to confirm that you want to make the emergency call.
- Click Yes.
- Type a recognized emergency phone number and click the trackwheel.
Your handheld dials the emergency phone number.

Note: If your handheld's radio is turned off when you attempt to place an emergency call, the radio turns on automatically and the call is placed.
Tips for using the Phone application
- In number fields, type numbers without using the Alt key.
- To type a phone number extension, hold the 8 key. When the letter X appears, release the 8 key. Type the phone number extension.
- If your phone number contains letters or if you want to dial by name, press the Right Shift key while you type the letters. The letters appear on your screen and the handheld translates the letters into the appropriate numbers.
- On the Phone screen, press the Space key to open the Phone Number/DCID dialog box.
- On the Phone screen, type a letter to open the Call screen. All contacts whose names contain that letter are displayed.
Chapter 8 Browsing web pages
This section provides information on the following topics:
- B r o w s e r i c o n s
- Before you begin
- Navigating web pages
- Setting configuration options
- Setting general options
• Using the Find feature - Downloading images
- Viewing web addresses
• Using bookmarks
• Using bookmark subfolders - Saving web pages to your Messages screen
- Closing the application
- Tips for browsing web pages
Browsing web pages
Browser icons
These icons indicate the status of a particular web page.
| Icon Description | |
 | saved web page waiting; this icon appears in the handheld status section of the screen |
 | unopened saved web page; this icon appears on the Messages screen |
 | opened saved web page; this icon appears on the Messages screen |
 | browser is not connected to the wireless network |
 | browser is connected to the wireless network |
 | browser connection is not encrypted for security |
 | browser connection is encrypted for security |
Before you begin
To use the Nextel Online ® , the nextel.com, and the BlackBerry Browser applications, you must be in an area with sufficient wireless coverage for browsing web pages. You can browse web pages if NXTL or NxTL and one or more bars appear with the wireless coverage indicator in the handheld status section of the screen.

Note: Depending on your Nextel service plan, some applications or services might not be available on your handheld. Contact Nextel Customer Care for more information on available services.
Depending on your Nextel service plan, you might not be able to save bookmarks, open web pages from links in your messages, or type specific web site addresses. Contact Nextel Customer Care for more information on using these features of the browser applications.
Your handheld supports two browser application types. Depending on your handheld setup, one or both of the following browser types might be available:
| Icon Description | |
 | Wireless Application Protocol (WAP) Browsers: Use these browsers to open and browse web pages using the Nextel Online® and the nextel.com gateway. |
 | |
 | BlackBerry Browser: Use this browser to open and browse web pages using your BlackBerry Enterprise Server. This icon only appears if your handheld is integrated with an enterprise email account and is enabled on a BlackBerry Enterprise Server that has the Mobile Data Service enabled. Contact Nextel Customer Care for more information. |
When you first receive your handheld, the browser applications might not be activated. To determine whether they are activated, click a browser icon on the Home screen. If the startup screen appears and shows content, your application has been activated. If the startup screen is blank or displays an error, contact Nextel Customer Care.
Navigating web pages
You can view web pages by clicking links, using Previous and Next, or using your Browser history. You might also be able to open web pages by using specific web page addresses and bookmarks.
To open web pages using links
- On the Home screen, click a browser icon. The startup screen appears.
- Select a link and click the trackwheel to view the menu. Click Get Link.

Browser screen menu - Get Link item
Browsing web pages
The requested web page appears. The download progress of the page that you are trying to view appears at bottom of the screen. Requesting indicates that the browser application is requesting content from the web site. Loading indicates that the web page is currently loading on your handheld. To stop loading the web page, click the trackwheel to view the menu and click Stop.

Note: If Get Link does not appear on the menu, you might not have selected a link correctly. Select the link again and click the trackwheel to view the menu. Click Get Link. You have correctly selected an image link when the image's colors are reversed.
Depending on your browser configuration, the Browser Bookmarks screen might appear when you start a browser application. You might be able to set a different default subfolder that appears each time that you start a browser application. Refer to "To set a default subfolder" on page 163 for more information.
To open web pages using web page addresses
- On the Home screen, click a browser icon. The startup screen appears.
- Click the trackwheel to view the menu. Click Go To. The Go To dialog box appears.
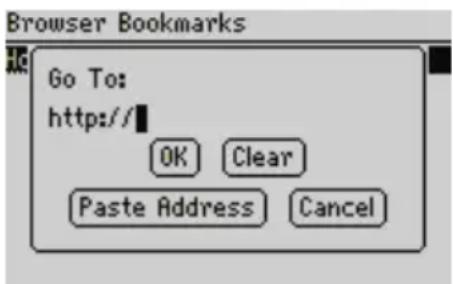
Go To dialog box - typing a web page address
- Type the address of the web page that you want to view. Press the Space key to insert a period and press the Shift key + the Space key to insert a slash mark (/). Click OK.
The requested web page appears.

Note: Depending on your Nextel service plan, you might not be able to use the Go To dialog box. Contact Nextel Customer Care for more information.
To open web pages using bookmarks
-
On the Home screen, click a browser icon. The startup screen appears.
-
Click the trackwheel to view the menu and click Bookmarks. The Browser Bookmarks screen appears. By default, your saved bookmarks appear on the Browser Bookmarks screen.
-
Select the bookmark for the web page that you want to view. Click the trackwheel to view the menu and click Get Link. The requested web page appears.

Note: Depending on your Nextel service plan, you might not be able to use bookmarks. Contact Nextel Customer Care for more information.
You can add, edit, and delete bookmarks. Refer to "Using bookmarks" on page 159 for more information. As your list of bookmarks grows, you can organize the bookmarks into folders and subfolders. Refer to "Using bookmark subfolders" on page 162 for more information.
To navigate within web pages
Depending on the configuration of the web page that you visit, customized links might appear in the menu or at the bottom of the screen. You can use these links to open web pages or to make selections in web pages.
- On the Home screen, click a browser icon. The startup screen appears.
- When you are viewing a web page, select one of the following options:
- Click the trackwheel to view the menu. Click a customized link.
- Scroll to the bottom of the web page. Click a customized link.
To view next and previous web pages
- On the Home screen, click a browser icon. The startup screen appears.
- When you are viewing web pages and you want to return to a web page that you viewed previously, click the trackwheel to view the menu. Click Previous.
- To return to the web page, click Next.
Browsing web pages

Note: Depending on the web pages that you view, Previous or Next might not appear on the menu. In addition, these menu items might not appear if you select a bookmark or open the Go To dialog box.
You can also press the Escape button to return to a previously viewed web page. If you are viewing the startup screen and you press the Escape button, you are prompted to confirm that you want to close the browser application. This prompt only appears if, in the Browser options, on the General Properties screen, you have selected the Confirm Close on Escape option.
To view your browsing history
-
On the Home screen, click a browser icon. The startup screen appears.
-
To view a list of web pages that you viewed most recently, click the trackwheel to view the menu. Click History. The History screen appears.

Note: The web page that you are currently viewing appears in bold.
-
Select the link for the web page that you want to view and click the trackwheel. The Go To dialog box appears.
-
Click OK to open the page or click Cancel to select another link.

Note: The History screen displays the 20 most recent web pages that you visited. After you clear the application's cache, the list of web pages no longer appears on the History screen. Selecting a bookmark, opening the Go To dialog box, or viewing certain web pages might also clear the application's history. Refer to "To clear the cache" on page 157 for more information on clearing the history manually.
Setting configuration options
The browser applications are configured automatically through the Browser service books. These service books set the default settings for browsing web pages. For example, the service books specify whether you can use bookmarks, the default page that loads when you start a browser application, and the address of your home page. You can view the settings for your current service book on the Browser Configuration screen. You might be able to choose a specific configuration or change some of the Browser configuration settings.

Note: The Browser configuration options are unique for each Browser on your handheld. You can set configuration options differently for each Browser.
To set configuration options
- On the Home screen, click a browser icon. The startup screen appears.
- Click the trackwheel to view the menu. Click Options. The Browser Options screen appears.
- Click Browser Configuration. The Browser Configuration screen appears.
- In the Home page address field, type the web address for your home page. This field cannot be empty.

Note: If you have modified the Home page address on the Browser Configuration screen, and you want to reset the field to the default address, click the trackwheel to view the menu and click Restore Home Page.
- In the On startup, load field, press the Space key until the page that you want to view each time you open a browser application appears.
- Click the trackwheel to view the menu. Click Save Options.

Warning: You should not change the additional fields and check boxes on the Browser Configuration screen. Contact Nextel Customer Care or your system administrator for more information.
You return to the Browser Options screen.

Note: You can see the version of your current Browser and configure the default Browser type by selecting the Browser item from the Options screen. Refer to "Browser" on page 232 for more information.
Setting general options
On the General Properties screen, you can customize the following options:
- Content Mode: Select the type of content that your handheld accepts. By default, this field is set to WML for the Nextel Online and Nextel.com browser applications and to WML & HTML for the BlackBerry Browser application.
- Smart Caching Expire Time: Select how much time should pass before the cache is automatically cleared. By default, this field is set to 0.

Note: Certain web sites do not save web pages to the cache. If you set this field, all web pages are cached. If you notice irregular behavior on a web site, set this field to 0.
Browsing web pages
- Images Per Request: Select the number of images that can be downloaded after the text portion of a web page loads, or when you select More Images from the menu while viewing a web page.
- Request Images after Loading: Select whether you want the browser application to download images after the text portion of a web page loads. If you do not want any images to load, clear the Request Images after Loading check box.
- Show Image Placeholders: Select whether you want the browser application to show image placeholders when images are not downloaded.
- Confirm Delete Bookmarks: Select whether you want to confirm before bookmarks are deleted. This check box only appears if you are able to use bookmarks.
- Confirm Close on Escape: Select whether you want to be prompted before the browser application closes when you press the Escape button on the startup screen.
- Confirm Execute WML Scripts: Select whether you want to confirm before WML scripts are run. By default, this check box is not selected.
- Start Links on New Line: Select whether you want web page links to be displayed on separate lines on the screen. If you select this option, each web page link starts on a new line. By default, this check box is not selected.
- Auto-Accept Service Books: Select whether you want to automatically accept all Browser service books that are received by your handheld. Your handheld must have the correct service book entries before you can use the browser application. By default, this check box is selected. Service books are automatically accepted by your handheld.
In addition, you can clear the content, page, raw data, cookie, and channel caches to free memory on your handheld.
To customize general options
- On the Home screen, click a browser icon. The startup screen appears.
- Click the trackwheel to view the menu. Click Options. The Browser Options screen appears.
- Click General Properties. The General Properties screen appears.
-
In the fields that you want to set, press the Space key until the preferred option appears.
-
After you edit the fields, click the trackwheel to view the menu and click Save Options. The Browser Options screen appears.

Note: If you change an option on the General Properties screen, you must refresh the web page that you are viewing for any changes to take effect. Click the trackwheel to view the menu and click Refresh.
To clear the cache
You can refresh all web pages by clearing the cache. Each cache can store up to ten items.
- On the Home screen, click a browser icon. The startup screen appears.
- Click the trackwheel to view the menu. Click Options. The Browser Options screen appears.
- Click General Properties. The General Properties screen appears.
- Click the trackwheel to view the menu and click the cache you want to clear. The web pages that you previously viewed are deleted from that cache. Select from Clear Content Cache, Clear Page Cache, Clear Raw Data Cache, Clear Cookie Cache, or Clear Channel Cache.
Using the Find feature
Your handheld's Find feature locates specific words and numbers within web pages.
To use the Find feature in a web page
- On the Home screen, click a browser icon. The startup screen appears.
- Go to the web page on which you want to find a specific word or number.
- Scroll to the top of the web page. Click the trackwheel to view the menu. Click Find. The Search for dialog box appears.

Tip: The Find feature only locates a word or number that appears at or following your cursor. To search the entire web page, place your cursor at the top of the web page.
- Type a word or number that you want to locate within the web page and click the trackwheel. The cursor moves to the first occurrence of the word or number that you specified.
Browsing web pages

Note: If the word or number is not found, the Not found dialog box appears.
- After you locate a specific word or number, you can search for that word or number again. Click the trackwheel to view the menu. Click Find Next.
The next occurrence of the word or number that you typed is selected.
Downloading images
If there are images on a web page that have not downloaded, you can request more images while you are viewing the text portion of the page.
To download more images
-
On the Home screen, click a browser icon. The startup screen appears.
-
Open a web page that contains images. Click the trackwheel to view the menu, and click one of the following options:
- More images: Select this option if you want to download another group of images. The number of images that are downloaded is specified in the Browser options, on the General Properties screen, in the Images Per Request field.
- All Images: Select this option if you want to download all of the images on the web page.
Viewing web addresses
You can view addresses for web pages and links. You can view web page addresses at any time, but you can only view web link addresses after you select a link.
To view web page addresses
-
On the Home screen, click a browser icon. The startup screen appears.
-
After the web page loads, click the trackwheel to view the menu and click Page Address. The Address dialog box appears, displaying the web page address and the date and time that you last requested the web page.
-
Click OK to close the Address dialog box.

Tip: Instead of typing addresses each time that you want to view a specific web page, you can copy and paste web page addresses. With a web page address selected, click the trackwheel to view the menu. Click Copy Address. When you copy a web page address, it is saved until the next time that you copy an address. In the Go To dialog box, click Paste Address. The most recently copied web page address appears in the Go To field. Click OK. The requested web page appears.
You can also paste web addresses into messages, memos, appointments, and the other handheld applications.
To view web link addresses
-
On the Home screen, click a browser icon. The startup screen appears.
-
After you select the link for which you want to view the address, click the trackwheel to view the menu and click Link Address. The Address dialog box appears, displaying the web link address.

Note: If Link Address does not appear on the menu, you might not have correctly selected a link. Links appear as underlined text. Select the link again and click the trackwheel to view the menu. Click Link Address. You have correctly selected an image link when the image's colors are reversed.
- Click OK to close the Address dialog box.
Using bookmarks
You can save the addresses of your most frequently viewed web pages as bookmarks so that you can view them in the future. By default, all bookmarks are added to the Browser Bookmarks folder.

Note: Depending on your Nextel service plan, you might not be able to use bookmarks. Contact Nextel Customer Care for more information.
You can use the desktop software's Backup and Restore tool to save the bookmarks on your handheld to your desktop. Refer to the Backup and Restore Online Help for more information on backing up your handheld.
To add bookmarks
- On the Home screen, click a browser icon. The startup screen appears.
Browsing web pages
- Open a web page that you want to add to your Browser Bookmarks folder. Click the trackwheel to view the menu and click Add Bookmark. The Add Bookmark dialog box appears.

Adding a bookmark - Add Bookmark dialog box
- In the Title field, the title of your bookmark appears. If you want to change the title, press the Backspace key to delete the title and type a new one.

Note: By default, the Create in field is set to Browser Bookmarks and all bookmarks are saved in that folder. Refer to "Using bookmark subfolders" on page 162 for more information on saving your bookmarks in a different subfolder and changing your default folder settings.
- If you want to view this web page when you are not connected to the wireless network, press the Space key to select the Make Available Offline check box.

Note: If you make the web page available offline, you can open the bookmark when your handheld radio is turned off or when you are out of a wireless coverage area. When you view a web page offline, the information might not be current. The web page displays the information that was current when you saved the bookmark.
- After you make changes, click Add. The web page address is added to your bookmarks folder.
You return to the web page that you were viewing.
To edit bookmarks
-
On the Home screen, click a browser icon. The startup screen appears.
-
Click the trackwheel to view the menu. Click Bookmarks. Your list of saved bookmarks appears.
-
Select the saved bookmark that you want to edit and click the trackwheel to view the menu. Click Edit Bookmark. A dialog box displays the address and title of the saved bookmark.
-
Make any changes to the Address and Title fields or if you want to copy the bookmark address, click Copy Address.

Editing a bookmark - Address dialog box

Note: If you make the web page available for offline viewing when you add it to your bookmarks, Available Offline appears in the dialog box. To change the Available Offline option, you must save the bookmark again. Refer to "To add bookmarks" on page 159 for more information.
- Click Accept.
You return to the Browser Bookmarks screen.
To copy a bookmark
You can copy bookmarks and paste them into different subfolders.
- On the Home screen, click a browser icon. The startup screen appears.
- Click the trackwheel to view the menu. Click Bookmarks. Your list of saved bookmarks appears.
- Select the bookmark that you want to copy and click the trackwheel to view the menu. Click Copy Bookmark. The Select Destination Folder window opens.
-
Select a folder or subfolder where you want to place a copy of the bookmark and click the trackwheel to view the menu. Click Select Folder. A dialog box appears asking if you want to copy the bookmark.
-
Click Copy.
A copy of the bookmark is placed in the selected folder.
To copy a bookmark's address
You can copy the address of a bookmark in the Browser application and paste it into fields within the Browser or into other applications.
Browsing web pages
- On the Home screen, click a browser icon. The startup screen appears.
- Click the trackwheel to view the menu. Click Bookmarks. Your list of saved bookmarks appears.
-
Click the trackwheel to view the menu. Click Copy Bookmark Address. A dialog appears stating that the address has been copied to the clipboard.
-
Click OK.
-
Place the cursor where you want to paste the address of the bookmark. Click the trackwheel to view the menu. Click Paste.
The address of the bookmark is displayed.
To delete bookmarks
You can delete bookmarks to manage your bookmark list more efficiently. You can also remove all bookmarks.
- On the Home screen, click a browser icon. The startup screen appears.
- Click the trackwheel to view the menu. Click Bookmarks. Your list of saved bookmarks appears.
-
Select the saved bookmark that you want to delete. Press the Backspace key. A dialog box appears that prompts you to confirm before the bookmark is deleted.
-
Click Delete.
You return to the Browser Bookmarks screen, and the bookmark is no longer listed.

Note: By default, the Browser Bookmarks screen always displays the Home Page bookmark. You cannot remove the Home Page bookmark.
Using bookmark subfolders
After you add bookmarks, you can organize them into subfolders. You can also specify a different default subfolder.

Note: If you save your bookmarks in subfolders or specify a different default folder, your saved bookmarks do not appear on the Browser Bookmarks screen. To view your folders and subfolders, click the trackwheel to view the menu and click View Bookmark Subfolders. Expand and collapse your subfolders until you find the one that you want.
162 BlackBerry Wireless Handheld
To create subfolders
- On the Home screen, click a browser icon. The startup screen appears.
- Click the trackwheel to view the menu. Click Bookmarks. Your list of saved bookmarks appears.
- Click the trackwheel to view the menu and click View Bookmark Subfolders. The Bookmarks screen appears.
- To add a subfolder to the Browser Bookmarks folder, click the trackwheel to view the menu and click Add Subfolder. Type a subfolder name.
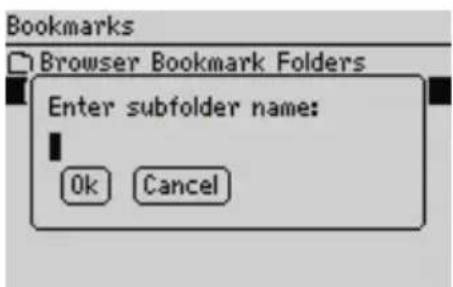
Bookmarks screen - Subfolder dialog box
- Click OK. The subfolder appears on the Browser Bookmarks screen.

Note: Folders that contain subfolders are marked with a plus sign (+). To expand folders, click the trackwheel to view the menu and click Open Folder. To collapse folders, click the trackwheel to view the menu and click Move Up. To return to the Browser Bookmarks folder on the Bookmarks screen, click the trackwheel to view the menu and click Go to Root. To select a subfolder, click the trackwheel to view the menu and click Select Folder.
To set a default subfolder
- On the Home screen, click a browser icon. The startup screen appears.
- Click the trackwheel to view the menu. Click Bookmarks. Your list of saved bookmarks appears.
- Click the trackwheel to view the menu and click View Bookmark Subfolders. The Bookmarks screen appears.
- Select the subfolder that you want to set as your default bookmarks folder. Click the trackwheel to view the menu and click Set Default Folder. A confirmation dialog box appears.
- Click OK.
Browsing web pages

Note: When you add new bookmarks, verify that the new default folder name appears in the Add Bookmark dialog box in the Create in field. Refer to "To add bookmarks to subfolders" below for more information.
To add bookmarks to subfolders
- On the Home screen, click a browser icon. The startup screen appears.
- Open a web page that you want to add to a folder and click the trackwheel to view the menu. Click Add Bookmark. The Add Bookmark dialog box appears.
- The title of your bookmark appears in the Title field. If you want to change the title, press the Backspace key to delete the title and type a new one.
- By default, bookmarks are added to the Browser Bookmarks folder. To specify a subfolder, click Change Folder. The Bookmarks screen appears.
-
Expand and collapse the folders to locate the subfolder into which you want to add your bookmark. Click the trackwheel to view the menu and click Select Folder. The Add Bookmark dialog box appears with the specified subfolder's name in the Create in field.
-
Click Add.
You return to the web page that you were viewing.
Saving web pages to your Messages screen
Instead of adding web pages to a bookmarks folder, you can save web pages on your Messages screen. The saved web page appears on your Messages screen with a W icon beside it. On the Messages screen, you can select a saved web page and start a browser application to view it.
To save web pages to your Messages screen
- On the Home screen, click a browser icon. The startup screen appears.
- Open a web site that contains a page that you want to save on your Messages screen and click the trackwheel to view the menu.
- Click Save Page.
The requested web page is added to your Messages screen. You return to the web page that you were viewing.

Note: You can open saved web pages directly from your Messages screen. Refer to "To open web pages that are saved on the Messages screen" on page 165 for more information.
When you click Close after viewing the web page, you return to the Messages screen instead of the Home screen. The Close menu item returns you to the application that you were using before you started the browser application.
To save requests
If the web page that you want to view takes too long to load, you can save the request on your Messages screen and view the request after the web page loads successfully. A W icon appears in the handheld status section of the screen to indicate that the requested web page loaded successfully.
-
On the Home screen, click a browser icon. The startup screen appears.
-
Open the web page that you want to view. While the web page loads, click the trackwheel to view the menu and click Save Request.

Note: If the web page has already loaded, Save Request does not appear on the menu.
When the requested web page is loaded, it is added to the Messages screen. You can open the web page from the Messages screen when it has loaded successfully.
To open web pages that are saved on the Messages screen
-
On the Home screen, click the Messages icon. The Messages screen appears.
-
Select a saved web page. Web pages are marked with a W. Click the trackwheel to view the menu.
-
Click Open Page. The requested web page opens in the default browser application.
-
After you view the web page, click the trackwheel to view the menu and click Close.
Browsing web pages
You return to the Messages screen.

Note: Refer to "Browser" on page 232 for more information on setting your default browser.
Closing the application
If you receive a message or a phone call while you are browsing web pages, you can switch to a different application without closing the current web page or disconnecting the browser application from the wireless network. Click the trackwheel to view the menu and click Hide. When you open the browser application again, you return to the last web page that you were viewing.
If you want to stop using the browser application, click the trackwheel to view the menu and click Close. The browser application is disconnected from the wireless network and you return to the Home screen or to the last application that you were using. When you open the browser application again, the startup screen appears.

Note: On the startup screen, press the Escape button to close the browser application. You are prompted to confirm that you want to close the browser application. This prompt only appears if, in the Browser Options, on the General Properties screen, you have selected the Confirm Close on Escape option.
Tips for browsing web pages
- Press T to move to the top of a web page.
- Press B to move to the bottom of a web page.
- Press N to go to the next page in the history.
- Press R to refresh a web page.
- Press 0 to open the Browser Options screen.
- Press P to open the Page Address dialog box.
- Press L to open the Link Address dialog box.
- Press the Space key to scroll through a web page.
- Press G to open the Go To dialog box.
- Press K to open the Browser Bookmarks screen.
- Press S to save a web page address on your Messages screen.
- In the Go To dialog box, press the Space key to insert a period (.) and press a Shift key and the Space key to insert a slash mark (/).
Tips for browsing web pages
- Press A to open the Add Bookmark dialog box.
- Press the Escape button when a page is loading to stop it from loading.
- Press the Escape button to return to the previous web page. If no previous web pages are available, you return to the startup screen.
Browsing web pages
Chapter 9 Attachments
This section provides information on the following topics:
- Before you begin
- Attachment service views
- Opening attachments
- Setting attachment service options
• Navigating attachments
• Using the Find feature - Deleting attachments
- Tips for using the attachment service
Attachments
Before you begin
The attachment service enables you to open file attachments that you receive with your messages. You can open Microsoft® Word or Corel™ WordPerfect® documents (.doc and .wpd file extensions), Microsoft Excel spreadsheets (.xls file extension), Microsoft PowerPoint® presentations (.ppt file extension), Adobe® Acrobat® PDF files (.pdf file extension), or text files (.txt file extension).

Note: To use the attachment service, one of the following requirements must be met:
- If your handheld is integrated with an enterprise email account, your handheld must be enabled on a BlackBerry Enterprise Server version 3.6 or later for Microsoft Exchange or on a BlackBerry Enterprise Server version 2.2 or later for Lotus Domino.
- If you use the BlackBerry Web Client, Nextel must enable your handheld for the attachment service.
You cannot view graphics on your handheld. If a document or spreadsheet contains graphics, they do not appear on your handheld.
Attachment service views
Depending on the type of attachment, you can open an attachment in Document or Spreadsheet view.
Document view
The attachment service can open attachments in Document view with the following file name extensions: .doc, .ppt, .pdf, .wpd, and .txt. The name of the document appears at the top of the screen.
Attachment service - Document view
Spreadsheet view
The attachment service can open attachments in Spreadsheet view with the extension .xls. The coordinates and the content of a selected cell appear at the top of the screen.
170 BlackBerry Wireless Handheld
| Expense Report | |||
| A | B | C | |
| 1 | Employee | ||
| 2 | |||
| 3 | PURPOSE | ||
| 4 | |||
| 5 | |||
| 6 | |||
| 7 | |||
Attachment service - Spreadsheet view

Note: If the content of a cell is too long to be displayed in the information label at the top of the Spreadsheet view, place your cursor in the cell and click the trackwheel to view the menu. Click View Cell. A dialog box displays the contents of the cell. Click the trackwheel to return to the spreadsheet.
Opening attachments
When you open attachments, you open either the full content or the table of contents. If you open the full content, the complete attachment appears. If you open the table of contents in Document view, the attachment's main headings appear. If you open the table of contents in Spreadsheet view, the list of sheets appears.
To open the table of contents
-
On the Home screen, click the Messages icon. The Messages screen appears.
-
Open the message that contains the attachment that you want to open.
-
Click the trackwheel to view the menu. Click Open Attachment. The Attachments screen lists the names of the attached files.
-
Under the name of the attachment that you want to open, select Table of Contents.
-
Click the trackwheel to view the menu. Click Retrieve. A request for the table of contents is sent to the server. A pending icon appears beside the Table of Contents heading of the selected attachment.
If your request for the table of contents is successful, the table of contents entries appear below the Table of Contents heading on the Attachments screen.
Attachments

Note: The message that contains the attachment is marked as unread on the Messages screen.
If the message contains multiple attachments, you can request the table of contents for another attachment while your handheld retrieves the table of contents for the current attachment. Select another attachment. Click the trackwheel to view the menu. Click Expand. Complete steps 4 and 5.
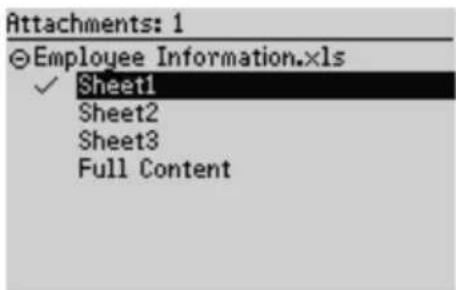
Attachments screen - table of contents entries

Note: If an X appears beside the Table of Contents heading, the attachment request failed. Refer to "Frequently asked questions" on page 246 for more information on the attachment service.
-
Select a table of contents entry and click the trackwheel to view the menu.
-
Click Retrieve. A request for the entry is sent and a pending icon appears beside the selected entry. When the selected table of contents entry is received, the content for the entry appears.
To open the full content of an attachment
-
On the Home screen, click the Messages icon. The Messages screen appears.
-
Open the message that contains the attachment that you want to open.
-
Click the trackwheel to view the menu. Click Open Attachment. The Attachments screen displays the names of the attached files.
-
Under the name of the attachment that you want to open, select Full Content.
-
Click the trackwheel to view the menu. Click Retrieve. A request for the full attachment is sent to the server. A pending icon appears beside the Full Content heading of the selected attachment.
172 BlackBerry Wireless Handheld
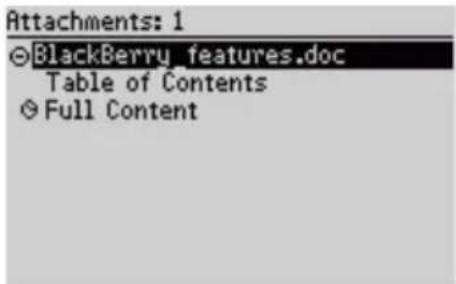
Attachments screen - Full Content pending

Note: If you open a .pdf attachment that is password protected, you must type the password before you retrieve the attachment. On the Attachments screen, click the trackwheel to view the menu. Click Password. Type the password and click the trackwheel.
If the message contains multiple attachments, you can request the content for another attachment while your handheld retrieves the content of the current attachment. Select another attachment. Click the trackwheel to view the menu. Click Expand. Complete steps 4 and 5.
The content of the attachment appears.

Note: If an X appears beside the Full Content heading, the attachment request failed. If you request the full content of an attachment more than once, a dialog box appears that displays Request already sent. Resend? Click either Yes or No.
If you request the full content for multiple attachments, the last attachment that you request is automatically displayed. On the Attachments screen, a check mark icon appears beside the headings of the other attachments when they arrive at your handheld. To view these attachments, click the trackwheel to view the menu and click View.
Attachment status icons
These icons appear on the Attachments screen to indicate the status of pending, sent, and received attachments.
| Icon Description | |
 | attachment request was sent to the server |
 | attachment was retrieved from the server |
 | attachment request failed |
Attachments
Setting attachment service options
You can customize the following attachment service options:
- Sheet Outline Cells: Select whether you want gridlines to appear when you view spreadsheet attachments. By default, this option is set to Yes.
- Sheet Horizontal Scroll: Select whether you want the information in spreadsheet cells to wrap around when scrolling horizontally. By default, this option is set to No.
- Sheet Vertical Scroll: Select whether you want the information in spreadsheet cells to wrap around when scrolling vertically. By default, this option is set to No.
- Sheet Column Width: Select the spreadsheet column width. By default, this option is set to Medium.
- Sheet Display Labels: Select whether you want spreadsheet columns to be labeled with letters and rows to be labeled with numbers. By default, this option is set to Yes.
- Case Sensitive Search: Select whether you want the Find feature to be case sensitive when it searches attachments. By default, this option is set to No.
- Font Size: Set the font size for attachments. By default, this option is set to 10.
To set attachment service options
- On the Home screen, click the Messages icon. The Messages screen appears.
- Open a message that contains an attachment and click the trackwheel to view the menu.
- Click Open Attachment. The Attachments screen appears.
- Select either Full Content or a table of contents entry for an attachment that has been retrieved and click the trackwheel to view the menu.
- Click View. The table of contents or the full content appears.
- Click the trackwheel to view the menu. Click Options. The Options screen appears.

Document view menu- Options item
-
In the fields that you want to set, press the Space key until the preferred option appears.
-
Click the trackwheel to view the menu. Click Save.
Navigating attachments
You can read attachments more easily by navigating to a specific cell of a worksheet in Spreadsheet view. You can also search for content and copy content from your attachments in both views.
To navigate to a specific cell
-
On the Home screen, click the Messages icon. The Messages screen appears.
-
Open a message that contains an attachment that has a .xls extension and click the trackwheel to view the menu. Click Open Attachment. The Attachments screen appears.
-
Select either Full Content or a table of contents entry for an attachment that has already been retrieved and click the trackwheel to view the menu.
-
Click View. The attachment appears. In the open attachment, click the trackwheel to view the menu.
-
Click Go to Cell. The Go to Cell dialog box appears. Type the coordinates of the cell that you want to view and click the trackwheel. The selected cell appears.
Attachments

Spreadsheet view menu - Go to Cell item
To navigate to a specific sheet
- On the Home screen, click the Messages icon. The Messages screen appears.
- Open a message that contains an attachment that has a .xls extension and click the trackwheel to view the menu. Click Open Attachment. The Attachments screen appears.
- Select Full Content or a table of contents entry for an attachment that has already been retrieved and click the trackwheel to view the menu. Click View. The attachment appears.
-
In the open attachment, click the trackwheel to view the menu. Select one of the following options:
-
Click Next Sheet (or Prev Sheet) to open the next (or previous) sheet in the attachment.
- Click Select Worksheet to view a list of available worksheets. Select the name of a worksheet and click the trackwheel to open the sheet.

Spreadsheet view menu - Select Worksheet item

Note: The Next Sheet, Prev Sheet and Select Worksheet menu items only appear if the attachment that you are viewing contains multiple worksheets.
To view pages or tables using links or bookmarks
- On the Home screen, click the Messages icon. The Messages screen appears.
- Open a message that contains an attachment and click the trackwheel to view the menu. Click Open Attachment. The Attachments screen appears.
- Select either Full Content or a table of contents entry for an attachment that has already been retrieved and click the trackwheel to view the menu.
- Click View. The attachment appears. Select a link or bookmark.
- If the link is to a table, when you click the trackwheel, the table opens in Spreadsheet view. To return to Document view, click the trackwheel to view the menu. Click Close. You return to the open attachment in Document view.
- If the link is to another page, click the trackwheel to view the menu. Click Jump. The appropriate section of the attachment appears.

Note: You can only view pages or tables using links or bookmarks if you are in a .doc attachment.
To read long attachments
- On the Home screen, click the Messages icon. The Messages screen appears.
- Open a message that contains an attachment and click the trackwheel to view the menu. Click Open Attachment. The Attachments screen appears.
- Select Full Content or a table of contents entry for an attachment that has already been retrieved and click the trackwheel to view the menu.
- Click View. The full content appears. Scroll through the message content.
- If, in the Messages application, on the Options screen, you have set the Auto More option to Yes, the remaining portion of long attachments is delivered to the handheld automatically as you scroll through the delivered portion.
- If, in the Messages application, on the Options screen, you have set the Auto More option to No, the message More Available appears at the end of the delivered portion of the attachment. Click the trackwheel to view the menu and click More. The remaining portion of your attachment is delivered.
Attachments
Using the Find feature
You can locate specific words and numbers in an attachment using the Find feature.
To use the Find feature
- On the Home screen, click the Messages icon. The Messages screen appears.
- Open a message that contains an attachment and click the trackwheel to view the menu.
- Click Open Attachment. The Attachments screen appears.
- Select either Full Content or a table of contents entry for a document attachment that has already been retrieved and click the trackwheel to view the menu.
- Click View. The attachment appears.
- In the open attachment, click the trackwheel to view the menu.
- Click Find. The Search for dialog box appears.
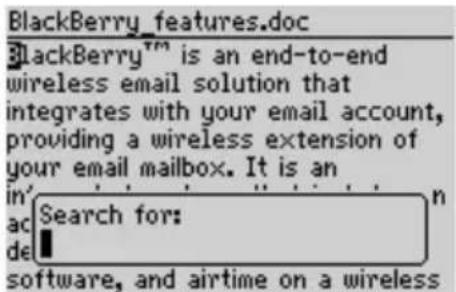
Document view menu - Search for dialog box

Tip: The Find feature only locates a word or number that appears at or following your cursor. To search the entire attachment, place your cursor at the top of the attachment.
- Type a word or number that you want to locate in the attachment and click the trackwheel. The cursor moves to the first occurrence of the word or number.
- To find the next occurrence of the word or number, click the trackwheel to view the menu.
- Click Find Next. The cursor moves to the next occurrence of the word or number.

Note: If the word or number is not found, the Reached end of section dialog box appears.
Deleting attachments
If you delete a message that contains an attachment, both the message and the attachment are deleted from your handheld.
To delete attachments
- On the Home screen, click the Messages icon. The Messages screen appears.
- Select a message that contains an attachment and click the trackwheel to view the menu. Click Delete.
- A dialog box prompts you to confirm that you want to delete the item. Click Delete.
You return to the Messages screen and the message and the attachment are deleted.
Tips for using the attachment service
- Press the Escape button to exit an open attachment and return to the Attachments screen.
Document view
- Press T to go to the top of a page.
- Press B to go to the bottom of a page.
- Press F to open the Search for dialog box. Press F again to find the next occurrence of your search string.
- Press J to go directly to a link or bookmark when the cursor is placed on a link or bookmark.
Spreadsheet view
- Roll the trackwheel to scroll vertically.
- Press the Alt key and roll the trackwheel to scroll horizontally.
- Press V to select a worksheet.
- Press T to go to the top left of the worksheet.
- Press B to go to the bottom right of the worksheet.
- Press F to open the Search for dialog box. Press F again to find the next occurrence of your search string.
Attachments
- Press G to open the Go to Cell dialog box.
- Press N to go to the next worksheet.
- Press P to go to the previous worksheet.
- Press the Space key to open the View Cell dialog box. Press the Space key again to close the View Cell dialog box
Chapter 10 Tasks
This section provides information on the following topics:
- Tasks icons
- Setting task options
- Adding tasks
- Managing tasks
- Tips for using the Tasks application
Tasks
Tasks icons
These icons appear on the screen to provide additional information on your Task entries.
| Icon Description | |
 | task has not been started or is in progress |
| [Z006] | task is deferred or is waiting |
 | task is complete |
Setting task options
You can customize the following task options for your handheld:
- Sort By: Select how you want to sort your tasks on the Find screen. Choose from Subject, Priority, Due Date, or Status. By default, this option is set to Subject.
- Confirm Delete: Select whether you want to confirm the deletion of Task entries. By default, this option is set to Yes.
To set task options
- On the Home screen, click the Tasks icon. The Find screen appears.
- Click the trackwheel to view the menu and click Options. The Tasks Options screen appears.
- In the fields that you want to set, press the Space key until the preferred option appears.
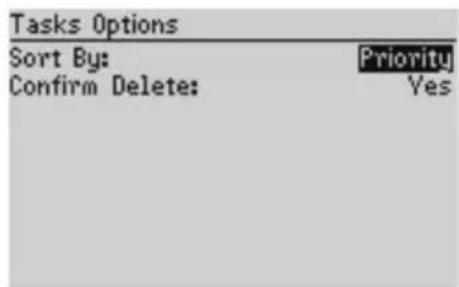
Task Options screen - setting options
- Click the trackwheel to view the menu and click Save.
You return to the Find screen.
Adding tasks
Add new tasks to your handheld to keep a record of the things that you need to do.
To add tasks
- On the Home screen, click the Tasks icon. The Find screen appears.
- Click the trackwheel to view the menu and click New. The New screen appears.
- In the Task field, complete the information for the task. Press the Enter key.
- In the Status, Priority, and Due fields, press the Space key until the preferred option appears.
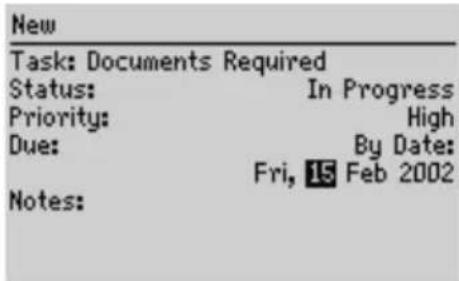
New screen - adding a task
-
In the Notes field, add any additional information that you want to include for this task.
-
Click the trackwheel to view the menu and click Save.
Tasks

Tip: To clear a field, click the trackwheel to view the menu and click Clear Field.
Your new task is listed on the Find screen.
Task fields
The New screen contains the following fields:
Task: Type the subject of the task.
Status: Set the status of the task. Your options are Not Started, In Progress, Completed, Waiting, and Deferred. By default, this option is set to Not Started.
Priority: Set the priority of the task. Your options are Normal, High, and Low. By default, this option is set to Normal.

Note: If you set the Priority field to High, an exclamation mark appears beside the task on the Find screen.
If you set the Priority field to Low, a down arrow appears beside the task on the Find screen.
Due: Set the date by which the task is to be completed. Your options are None or By Date. If you select None, no due date is recorded for this task. If you select By Date, you can select the date by which this task is due. By default, this option is set to None.
Notes: Type any reference notes that you want to record about the task.
Managing tasks
You can also view, edit, and delete tasks and change the status of a task.
To view and edit a task
-
On the Home screen, click the Tasks icon. The Find screen appears.
-
Select the task that you want to view or edit. Click the trackwheel to view the menu.
-
Click Open. The Edit Task screen displays the task details. Edit the task by changing the fields on this screen.
- Click the trackwheel to view the menu. Click Save.
You return to the Find screen.

Tip: You can use the cut, copy, and paste feature when you edit tasks. Refer to "Using cut, copy, and paste" on page 52 for more information.
To clear a field, click the trackwheel to view the menu and click Clear Field.
To change the status of a task
- On the Home screen, click the Tasks icon. The Find screen appears.
- Select the task for which you want to change the status and click the trackwheel to view the menu.
- Depending on the current status of the task, click either Mark Completed or Mark In Progress.
The status of the task is changed.

Note: Using the menu, you can only change the status of a completed task to In Progress. You can mark a task as Completed if it is marked as Deferred, Waiting, Not Started, or In Progress. To change a task to a status other than Completed or In Progress, you must edit the task. Refer to "To view and edit a task" on page 184 for more information.
To delete a task
- On the Home screen, click the Tasks icon. The Find screen appears.
- Select the task that you want to delete and click the trackwheel to view the menu. Click Delete.
- A dialog box appears, prompting you to confirm that you want to delete the task. Click Delete. (This dialog box appears only if Confirm Delete is enabled on the Tasks Options screen.)
You return to the Find screen and the task is no longer listed.

Tip: To delete all completed tasks, select a task and click the trackwheel to view the menu. Click Delete Completed.
You can also delete tasks on the Edit Task screen.
Tasks
Tips for using the Tasks application
- Type the first letters of a task to locate it on the Find screen.
- Press the Space key to mark an In Progress task as Completed or a Completed task as In Progress.
Chapter 11 Calendar
This section provides information on the following topics:
- C a l e n d a r i c o n s
- Before you begin
- Setting Calendar options
- Changing views
• Navigating in the Calendar application
- Enabling wireless calendar synchronization
- Adding appointments
- Managing appointments
• Managing meeting requests
- Tips for using the Calendar application
Calendar
Calendar icons
In Day view or Agenda view, one or more of the following icons might appear on your handheld to indicate additional information for your appointments.
| Icon Description | |
 | appointment was initiated with a meeting request |
 | appointment has a reminder set |
 | appointment has text typed in the Notes field |
 | appointment recurs |
 | recurring appointment has an exception |
 | appointment is an all-day event |
 | appointment spans multiple days; this icon appears in Agenda view for Microsoft Outlook users only |
Before you begin
You can synchronize your desktop and handheld Calendars using the Intellisync tool. Refer to the Intellisync Online Help for more information.
Integration with enterprise email account
If you have integrated your handheld with an enterprise email account that uses the BlackBerry Enterprise Server, you can create, edit, view, and respond to meeting requests from your handheld. Refer to "Managing meeting requests" on page 203 for more information. You can also enable wireless calendar synchronization. Refer to "Enabling wireless calendar synchronization" on page 194 for more information.
Setting Calendar options
You can customize the following Calendar options for your handheld:
- Enable Quick Entry: Select whether you want to be able to add appointments quickly in Day view by selecting a time and typing a subject and location. By default, this option is set to Yes.
- Initial View: Select the Calendar view that you want to appear when you open the Calendar application. By default, this option is set to Day.
- Default Reminder: Select the amount of time before an appointment that the Calendar should remind you of the appointment. By default, this option is set to 15 Min.
- Confirm Delete: Select whether you want to be prompted to confirm before appointments are deleted. By default, this option is set to Yes.
- Start Of Day: Select the time at which your day normally begins. By default, this option is set to 9:00 AM.
- End of Day: Select the time at which your day normally ends. By default, this option is set to 5:00 PM.
- First Day Of The Week: Select the day on which your week starts.

Note: If you set Enable Quick Entry to No, you can use shortcut keys in Day view. Refer to "Tips for using the Calendar application" on page 207 for more information.
To set Calendar options
- On the Home screen, click the Calendar icon. The Calendar screen appears.
- Click the trackwheel to view the menu. Click Options. The Calendar Options screen appears.
- In the fields that you want to set, press the Space key until the preferred option appears.
- Click the trackwheel to view the menu and click Save.
You return to the Calendar screen.
Calendar
Changing views
You can view your appointments in Day, Agenda, Week, or Month view.
To change Calendar views
- On the Home screen, click the Calendar icon. The Calendar screen displays your default Calendar view.
- Click the trackwheel to view the menu and click View Day, View Agenda, View Week, or View Month.
Day view
This view displays the day that you select and includes any appointments for that day. The selected day of the week is outlined in the navigation bar at the top of the screen. The current hour is outlined. The subject for any appointments appears beside the start hour and a sidebar spans the length of the appointment. The location of the appointment (enclosed in parentheses) appears beside the subject.

Calendar - Day view
Agenda view
This view displays only the days on which you have appointments. The appointments appear in chronological order. Each entry in Agenda view includes the start time, subject, and location of the appointment. Two arrows at the top of the screen indicate that you can scroll to view more appointments.

Calendar - Agenda view
Week view
This view displays the week that you select and includes any appointments for that week. Today's date is outlined. You can scroll vertically through your appointments by rolling the trackwheel. All appointments are marked with an outlined box that spans the length of the appointment.
Microsoft Exchange If you are using Microsoft Outlook as your desktop email program and your appointment spans multiple days, the outlined box spans the days on which the appointment is scheduled.
If an appointment is an all-day event, the day appears in bold. The column contains dotted lines to indicate that all the hours in the day are booked for an appointment.
When your cursor rests on an appointment, the subject, location, and time are displayed at the bottom of the screen. Hold the Alt key and roll the trackwheel to scroll horizontally through the appointments. Two arrows at the top of the screen indicate that you can scroll to view more appointments.

Calendar - Week view
Calendar
Month view
This view displays the month that you select and includes any appointments for that month. Today's date is outlined. You can scroll horizontally or vertically through the days of the month. To scroll vertically, hold the Alt key and roll the trackwheel. Two arrows at the top of the screen indicate that you can scroll to view more appointments.
Days with appointments have a black bar to the left of the day. The size of the bar depends on the length of the appointment. For example, a 1-hour appointment has a short bar, while a 4-hour appointment has a long bar. The position of the bar depends on the start time of the appointment. For example, the bar for morning appointments typically appears near the top of the date. If the appointment is an all-day event, the date appears in bold.
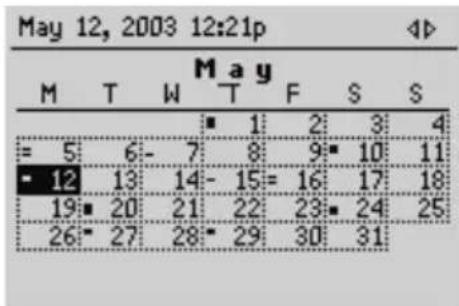
Calendar - Month view
Navigating in the Calendar application
You can navigate to specific days or months using the Calendar application.

Tip: To return to the current week in the current year, click the trackwheel to view the menu. Click Today. The current week is shown and today's date is selected.
You can scroll up past the first day of the week that is displayed on the screen to view the previous week. You can scroll down past the last day of the week to view the next week.
To navigate in Day and Week views
-
On the Home screen, click the Calendar icon. The Calendar screen appears.
-
If you are in Day view and you want to view a different day of the week, click the trackwheel to view the menu. Click the day that you want to view. The selected day appears.
- To view the selected day in the next (or previous) week, click the trackwheel to view the menu. Click Next Week (or Prev Week). The selected day in the next (or previous) week appears.
- If you are in Week view and you want to view the next (or previous) week, click the trackwheel to view the menu. Click Next Week (or Prev Week). The next (or previous) week appears.
- To scroll vertically between appointments, roll the trackwheel; to scroll horizontally between days, hold the Alt key and roll the trackwheel.

Tip: To return to today's date, click the trackwheel to view the menu. Click Today. Today's date appears.
To navigate in Agenda view
-
On the Home screen, click the Calendar icon. The Calendar screen appears. Verify that you are in Agenda view.
-
To view the next (or previous) day on which you have an appointment, click the trackwheel to view the menu. Click Next Day (or Previous Day). The next (or previous) day with an appointment appears at the top of the screen.

Tip: To return to the current date, click the trackwheel to view the menu. Click Today. If appointments are scheduled, the current date is displayed. If no appointments are scheduled for the current day, the next day with appointments is displayed.
To go to the previous day, hold the Alt key and roll the trackwheel up. To go to the next day, hold the Alt key and roll the trackwheel down.
To navigate in Month view
-
On the Home screen, click the Calendar icon. The Calendar screen appears. Verify that you are in Month view.
-
To view a different month in the current year, click the trackwheel to view the menu. Click the month that you want to view. The selected month appears.
-
To view the selected month in the next (or previous) year, click the trackwheel to view the menu. Click Next Year (or Prev Year). The selected month in the next (or previous) year appears.
Calendar

Tip: To return to the current month in the current year, click the trackwheel to view the menu. Click Today. The current month is shown and today's date is selected.
To go to the same day of the next week, hold the Alt key and roll the trackwheel. With your cursor at the end of the month, hold the Alt key and roll the trackwheel to go to the same day of the week in the following month.
You can scroll up past the month that is displayed on the screen to view the previous month. You can scroll down past the month that is displayed on the screen to view the next month.
To navigate to a specific date
- On the Home screen, click the Calendar icon. The Calendar screen appears.
- Click the trackwheel to view the menu and click Go to Date. A dialog box appears.
- Use the trackwheel to move between the month, date, and year fields, and press the Space key until the preferred date appears.
- Click the trackwheel.
The date that you select appears in your chosen Calendar view.

Tip: To return to today's date, click the trackwheel to view the menu. Click Today.
Enabling wireless calendar synchronization
If you enable wireless calendar synchronization, your desktop Calendar is synchronized with your handheld's Calendar. Any changes that you make to your desktop Calendar are reflected on your handheld, and any changes you make on your handheld are reflected on your desktop. After this feature is enabled, you do not have to connect your handheld to your desktop for calendar synchronization to occur, because synchronization occurs over the wireless network.
Integration with enterprise email account
To enable wireless calendar synchronization, your handheld must be enabled on a BlackBerry Enterprise Server version 2.1 or later. Contact Nextel Customer Care for more information on whether you can use wireless calendar synchronization.
To enable wireless calendar synchronization
Before you enable wireless calendar synchronization, connect your handheld to your desktop and synchronize your handheld and desktop Calendars using the MS Outlook 98/2000, Lotus Notes 4.6 ® , or Lotus Notes 5.0 translator. Refer to the Intellisync Online Help for more information on synchronizing. You should also back up your handheld's Calendar. Refer to the Backup and Restore Online Help for more information.
- In the BlackBerry Desktop Manager, double-click the Intellisync icon. The Intellisync window appears.
- Click Configure PIM. The Handheld Configuration window appears.
- Select the Calendar application and click Choose. The Choose Translator window appears.
- From the list of available translators, select BlackBerry Wireless Sync and click OK. You return to the Handheld Configuration window.

Note: In the Choose Translator window, Synchronize is selected as the default operation. This operation keeps your handheld and desktop Calendars synchronized over the wireless network. If you change the operation to Import, any change that you make on your desktop Calendar is imported to your handheld Calendar over the Nextel wireless network. If you change the operation to Export, any change that you make on your handheld Calendar is exported to your desktop Calendar over the Nextel wireless network.
- Verify that the check box beside the Calendar application is selected and click OK. You return to the Intellisync window.

Tip: If you have many appointments to transfer to your handheld, you might want to select only the Calendar application for synchronization.
-
In the Synchronize now section at the top of the window, select the Synchronize PIM check box.
-
Click Synchronize now. A dialog box appears. If you continue with the operation, your existing handheld Calendar entries are erased and are replaced with your desktop Calendar entries. Click OK.
The desktop software synchronizes your calendars and the entries from your desktop Calendar are transferred to your handheld. Any subsequent calendar updates are sent over the Nextel wireless network. As long as the check box is
Calendar
selected beside the Calendar application in the Handheld Configuration window, wireless calendar synchronization is enabled. If you clear the check box or select a new translator, wireless calendar synchronization is automatically disabled.
If a change is made to an existing appointment or a new appointment is added in your desktop Calendar, and you have wireless calendar synchronization enabled, you do not receive notification of the change on your handheld. Check your handheld Calendar regularly to see any updates.

Note: To receive updates to your handheld Calendar, you must be in an area of sufficient wireless coverage. NXTL or NxTL and one or more bars must appear with the wireless coverage indicator to receive updates over the Nextel wireless network.
Adding appointments
You can add new appointments to your handheld's Calendar.

Warning: If you turn off your handheld using the Power button or the Turn Power Off icon on the Home screen, Calendar reminders do not turn on the handheld and you are not notified. Set the Auto On/Off feature if you want Calendar reminders to turn on the handheld. Refer to "Auto On/Off" on page 232 for more information.
Integration with enterprise email account
If you have integrated your handheld with an enterprise email account, you can create meeting requests. To create meeting requests, your handheld must be enabled on a BlackBerry Enterprise Server version 2.1 or later. Refer to "To create meeting requests" on page 203 for more information.
If you have enabled wireless calendar synchronization and are in an area of sufficient wireless coverage, new appointments that you create on your handheld are synchronized over the Nextel wireless network and appear on your desktop Calendar.
To add appointments
- On the Home screen, click the Calendar icon. The Calendar screen appears.
- Click the trackwheel to view the menu and click New. The New Appointment screen appears.
- In the Subject and Location fields, type information for the appointment.
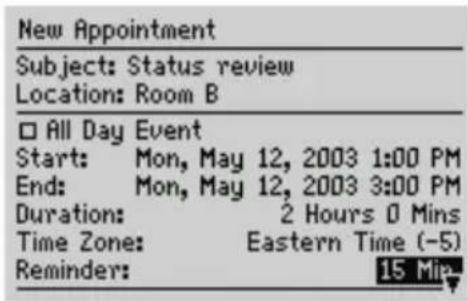
Calendar - New Appointment screen
-
In the Start field, set the start date and time for the appointment. In the Duration field, set the length of the appointment. When you modify this field, the End field automatically reflects the changes. (If you change the End field, the Duration field is automatically updated.)
-
In the Reminder field, set the amount of time before an appointment that the Calendar should remind you of the appointment. If you do not want to be reminded of the appointment, set this field to None.

Note: If you want your appointment to recur regularly, complete steps 6 through 8. If you do not want your appointment to recur regularly, proceed to step 9.
-
In the Recurrence field, press the Space key until the preferred option appears. Choose from Daily, Weekly, Monthly, Yearly, or None. For this example, select Daily to set an appointment that recurs on a daily basis. Below the Recurrence field, additional fields and a message describing the recurrence pattern appears.
-
In the Every field, press the Space key until the preferred amount of time between appointments appears. For this example, select 2 to set an appointment that recurs every second day.

Note: If you set your appointment to recur weekly, you can specify the day of the week on which it should recur. If you set your appointment to recur monthly or yearly, you can set whether you want the appointment to recur on the exact date or on the relative date. For example, you can specify that your recurring appointment occurs on the 28th of each month (exact date) or on the last Monday of each month (relative date).
Calendar

New Appointment screen - setting a recurring appointment
- In the End field, set the specific date on which the recurring appointment should end.
Microsoft Exchange If you are using Microsoft Outlook as your desktop email program, you can set the End field to Never. If you set this field to Never, your appointment recurs perpetually.
- In the Notes field, type any additional notes for the appointment. Click the trackwheel to view the menu. Click Save.
You return to the Calendar screen.

Tip: To clear a text field, click the trackwheel to view the menu. Click Clear Field.
To add appointments quickly
If, on the Calendar Options screen, you have the Enable Quick Entry field set to Yes, you can add appointments quickly in Day view.
- On the Home screen, click the Calendar icon. The Calendar screen appears. Verify that you are in Day view.
- Scroll to a start time and type a name for the appointment. To add a location, type it in parentheses.
- Roll the trackwheel to change the appointment's end time.
- Click the trackwheel. The appointment appears on the Calendar screen.

Note: To add more information to the appointment, click the trackwheel to view the menu. Click Open.
Appointment fields
The New Appointment screen contains the following fields:
Subject: Type the subject for the appointment.
Location: Type the location of the appointment.
All Day Event: Set whether the appointment occupies a full day.

Note: The date of an all-day event does not change when you change the time zone for your handheld.
Start: Select the start date and time for the appointment. The defaults are the date and time that are selected before you enter the New Appointment screen.
End: Select the end date and time of the appointment. The defaults are today's date and one hour after the start time.
Lotus Domino If you use Lotus Notes as your desktop email program, appointments cannot span more than one day. The end date of your appointment must be the same as the start date.
Duration: Select the length of the appointment. When you modify this field, the End field automatically reflects the changes. By default, this option is set to 1 hour.
Time Zone: Select the time zone in which the appointment occurs. By default, this option is set to Eastern Time.
Reminder: Select how early you want to be notified of the appointment. By default, this option is set to 15 Min.
Recurrence: Set how often the appointment recurs. By default, this option is set to None.
Every: Select the amount of time between recurring appointments. By default, this option is set to 1. This field only appears if you have set the Recurrence field to an option other than None.
End: Set the specific date on which the recurring appointment should end. This field only appears if you have set the Recurrence field to an option other than None.
Days: Select the day(s) on which you want the appointment to recur. This field only appears if you have set the Recurrence field to Weekly.
Calendar
Relative Date: Set whether the appointment recurs on the selected day (instead of the specific date) every month or year. This field only appears if you have set the Recurrence field to Monthly or Yearly.
Notes: Type any reference notes for the appointment.
Managing appointments
You can view, edit, and delete appointments in your chosen Calendar view.
Viewing and editing appointments
You can view or edit appointments at any time.
To view and edit appointments in Day, Agenda, or Week view
-
On the Home screen, click the Calendar icon. The Calendar screen appears. Verify that you are in Day, Agenda, or Week view.
-
Select the appointment that you want to view or edit and click the trackwheel to view the menu. Click Open.

Note: If you select a recurring appointment, you are prompted to indicate whether you want to view and edit all occurrences of the appointment (click Open the series) or only the selected appointment (click Open this occurrence). The Appointment Details screen appears.
- Edit the appointment. In the All Day Event, Start, End, Duration, Time Zone, and Reminder fields, press the Space key until the preferred option appears.
Lotus Domino If you use Lotus Notes as your desktop email program, you cannot edit the Start, End, Duration, or Time Zone fields for a saved recurring appointment.
- If you edit a recurring appointment, in the Recurrence field, press the Space key until the preferred option appears.
Lotus Domino If you use Lotus Notes as your desktop email program, you cannot edit the recurrence pattern of a saved appointment.
- Click the trackwheel to view the menu. Click Save.
You return to the Calendar screen.

Tip: To clear a text field, click the trackwheel to view the menu. Click Clear Field.
If you are in Week view and want to view all the appointments for the day that you select, click the trackwheel to view the menu. Click View Appts. The appointments for the selected day appear in Day view. Press the Escape button to return to Week view.
To view and edit appointments in Month view
- On the Home screen, click the Calendar icon. The Calendar screen appears. Verify that you are in Month view.
- Select the day on which there are appointments that you want to view or edit. Click the trackwheel to view the menu and click View Appts. The appointments for the selected day appear in Day view.
- Select the appointment that you want to view or edit and click the trackwheel to view menu. Click Open.

Note: If you select a recurring appointment, you are prompted to indicate whether you want to view and edit all occurrences of the appointment (click Open the series) or only the selected appointment (click Open this occurrence). The Appointment Details window appears.
- Edit the appointment. In the All Day Event, Start, End, Duration, and Reminder fields, press the Space key until the preferred option appears.
Lotus Domino If you use Lotus Notes as your desktop email program, you cannot edit the Start, End, Duration, or Time Zone fields for a saved recurring appointment.
- If you edit a recurring appointment, in the Recurrence field, press the Space key until the preferred option appears.
Lotus Domino If you use Lotus Notes as your desktop email program, you cannot edit the recurrence pattern of a saved appointment.
- Click the trackwheel to view the menu and then click Save.
You return to the Calendar screen.

Tip: To clear a text field, click the trackwheel to view the menu, and then click Clear Field.
If you are in Month view and you click View Appts on the menu, your appointments appear in Day view. Press the Escape button to return to Month view.
Calendar
Deleting appointments
You can maintain your Calendar efficiently by deleting old appointments to free memory.
Microsoft Exchange
If you have enabled the Microsoft Outlook Auto Archive feature and wireless calendar synchronization, appointments are deleted from your handheld when they are archived in Outlook.
To delete appointments in Day, Agenda, or Week view
- On the Home screen, click the Calendar icon. The Calendar screen appears. Verify that you are in Day, Agenda, or Week view.
-
Select the appointment that you want to delete. Click the trackwheel to view the menu. Click Delete.
-
If the appointment is a recurring appointment, you are prompted to indicate whether you want to delete all occurrences of the appointment (click Delete the series) or only the selected appointment (click Delete this occurrence).
- If the appointment is not a recurring appointment, a dialog box prompts you to confirm the deletion. Click Delete.
You return to the Calendar screen and the appointment is no longer listed.
Integration with enterprise email account
If you have integrated your handheld with an enterprise email account that uses the BlackBerry Enterprise Server and have enabled wireless calendar synchronization, any appointments that you delete from your handheld Calendar are also deleted from your desktop Calendar.
To delete multiple appointments by date
You can delete all appointments prior to a particular date by selecting a date field.
- On the Home screen, click the Calendar icon. The Calendar screen appears. Verify that you are in Agenda view.
- Select a date field. Click the trackwheel to view the menu. Click Delete Prior. A dialog box prompts you to confirm before all items prior to and including that date are deleted.
- Click Delete.
You return to the Calendar screen and the appointments are no longer listed.
To delete appointments in Month view
- On the Home screen, click the Calendar icon. The Calendar screen appears. Verify that you are in Month view.
- Select the day on which there are appointments that you want to delete. Click the trackwheel to view the menu. Click View Appts. The appointments for the selected day appear in Day view.
- Select the appointment that you want to delete and click the trackwheel to view the menu. Click Delete.
- If the appointment is a recurring appointment, you are prompted to indicate whether you want to delete all occurrences of the appointment (click Delete the series) or only the selected appointment (click Delete this occurrence).
- If the appointment is not a recurring appointment, a dialog box prompts you to confirm the deletion. Click Delete.
You return to the Calendar screen and the appointment is no longer listed.
Integration with enterprise email account
If you have integrated your handheld with an enterprise email account that uses the BlackBerry Enterprise Server and have enabled wireless calendar synchronization, any appointments that you delete from your handheld Calendar are also deleted from your desktop Calendar.
Managing meeting requests
If you have integrated your handheld with an enterprise email account, you can create, respond to, view, edit, and delete meeting requests on your handheld.
Integration with enterprise email account
To create meeting requests, your handheld must be enabled on a BlackBerry Enterprise Server version 2.1 or later.
If you have enabled wireless calendar synchronization and are in an area of sufficient wireless coverage, meeting requests are synchronized over the Nextel wireless network and appear in your desktop Calendar. NXTL or NxTL and one or more bars must appear with the wireless coverage indicator to receive updates over the wireless network.
To create meeting requests
- On the Home screen, click the Calendar icon. The Calendar screen appears.
Calendar
- Click the trackwheel to view the menu. Click New. The New Appointment screen appears.
- Roll the trackwheel to scroll from field to field, and add information for the meeting. Refer to "Appointment fields" on page 199 for more information on these fields.
- Click the trackwheel to view the menu and click Invite Attendee. Your handheld's Address Book appears, listing all your contacts.
- Select an existing contact or create a new one. Click the trackwheel to view the menu. Click Invite. Repeat steps 4 and 5 until all invitees are added to the meeting request.

Note: If you specified more than one email address for a contact, you are prompted to select the address to which the meeting request should be sent.
Do not invite yourself to the meeting. You are already registered as the meeting organizer.
If you want to change or remove attendees after you add them to the meeting, click the trackwheel to view the menu. Click Change Attendee or Remove Attendee.
- Click the trackwheel to view the menu. Click Save. The appointment is added to your handheld.
If you enabled wireless calendar synchronization, your desktop Calendar is also updated. A meeting request is sent to the invitees and a sent message appears on the Messages screen. This message contains a meeting request attachment. You can open this attachment to review the details of your meeting.
Any responses to your meeting request are received as messages in the Messages application. You can also open the meeting in the Calendar application and view whether an invitee has accepted or declined the meeting.
To respond to meeting requests
You can respond to meeting requests that you receive. When you receive a meeting request, it appears on your Messages screen as a message.
- On the Home screen, click the Messages icon. The Messages screen appears.
- Open the meeting request message. The details of the meeting appear.
- Click the trackwheel to view the menu.
• To send a response without comments, click Accept or Decline.
- To send a response with comments, click Accept with comments or Decline with comments. The Comments screen appears. Type your comments and click the trackwheel to view the menu. Click Send.
A response is sent to the meeting organizer.

Tip: To check your Calendar while you view the open meeting request, click the trackwheel to view the menu. Click View Calendar. When you close your Calendar, you return to the open meeting request.
If you accept the meeting, your handheld and desktop Calendars are updated over the Nextel wireless network. The original message that contained the meeting request no longer appears on the Messages screen. It is replaced by the response message that you sent to the meeting organizer. You can view the meeting details by viewing the appropriate appointment on the Calendar screen or by opening the meeting response attachment in the sent message.

Note: If you are managing someone else's Calendar, meeting requests for that person are not delivered to your handheld. The meeting request remains at your desktop and you can accept it from there. After you accept it, the person's handheld and desktop Calendars are updated.
To view meeting requests
You can view the details for meetings that you have organized, or meetings to which you have responded, by viewing the appointment in your handheld's Calendar. You can also view the details by opening the sent meeting request or meeting response on your Messages screen and viewing the meeting request or meeting response attachment.
If you have organized a meeting or the organizer has sent an update, the meeting details indicate who has accepted and who has declined.
To edit meeting requests
You can only edit the attendee list for a meeting if you are the organizer.
-
On the Home screen, click the Calendar icon. The Calendar screen appears.
-
Open an appointment for which you are the organizer. Edit the meeting.
Lotus Domino
If you are using Lotus Notes as your desktop email program, you cannot edit the Start, End, Duration, or Time Zone fields for a saved recurring appointment.
Calendar
-
To add, edit, or delete invitees to your meeting, select the Accepted or Declined field and click the trackwheel to view the menu.
-
To invite a new contact, click Invite Attendee. The Select Address screen appears. Select a contact or create a new one. Click the trackwheel to view the menu. Click Invite.
- To replace one contact with another contact, click Change Attendee. The Select Address screen appears. Select a contact or create a new one. Click the trackwheel to view the menu. Click Invite.
-
To revoke the invitation to a contact, click Remove Attendee. A dialog box appears. Click Delete.
-
Click the trackwheel to view the menu. Click Save.
The appointment is updated on your handheld and an updated meeting request is sent to all invitees. A sent message appears on the Messages screen. This message contains an updated meeting request attachment. You can open this attachment to review the details of your meeting.

Note: Do not invite yourself to the meeting. You are already registered as the meeting organizer.
To delete meeting requests
If you have not responded to a meeting request (either on your handheld or on your desktop) and you delete the meeting request message from your handheld Messages screen, the appointment is deleted and removed from both your handheld and your desktop Calendar. To avoid inadvertently missing a meeting, always respond to meeting requests either on your desktop or on your handheld.
After the meeting has occurred, you can delete the meeting from your handheld Calendar. Refer to "Deleting appointments" on page 202 for more information.
To cancel meetings
If you have wireless calendar synchronization enabled and you delete a meeting from your handheld Calendar, the appointment is removed from your desktop Calendar. No response message is sent to the meeting organizer.
If you are the organizer for a meeting and you delete the meeting from your handheld, you can send an email message that cancels the meeting. After you delete the meeting, the Send cancellation to attendees dialog box appears. Click Yes to send the email message.
Tips for using the Calendar application
- In Agenda, Week, or Month view, press D to go to Day view, W to go to Week view, M to go to Month view, and A to go to Agenda view. To use these shortcuts in Day view, on the Calendar Options screen, set the Enable Quick Entry field to No.
- In Day view, hold the Alt key and roll the trackwheel to go to the previous or next day.
- In Day view, press the Space key to go to the next day and press the Shift key + the Space key to go to the previous day.
- In Week view, press the Alt key and roll the trackwheel to scroll horizontally through the days.
- Hold the Alt key and press the Back key to move to the previous day, week, or month.
- Hold the Alt key and press the Forward key to move to the next day, week, or month.
- Press T to go to today's date, press G to go to a specific date, press N to go to the next day, week, or month, and P to go to the previous day, week, or month. To use these shortcuts in Day view, on the Calendar Options screen, set the Enable Quick Entry field to No.
- Press the Enter key to create an appointment at a selected time or to view an appointment, if one is selected.
Calendar
Chapter 12 MemoPad
This section provides information on the following topics:
- Setting MemoPad options
- Adding memos
- Managing memos
- Tips for using the MemoPad application
MemoPad
Setting MemoPad options
You can customize the following MemoPad option for your handheld:
- Confirm Delete: Select whether you want to confirm the deletion of memos. By default, this option is set to Yes.
To set MemoPad options
- On the Home screen, click the MemoPad icon. The Find screen appears.
- Click the trackwheel to view the menu. Click Options. The MemoPad Options screen appears.
- In the Confirm Delete field, press the Space key until the preferred option appears.

MemoPad Options screen
- Click the trackwheel to view the menu. Click Save.
You return to the MemoPad screen.
Adding memos
You can add memos to your handheld.
To add memos
- On the Home screen, click the MemoPad icon. The Find screen appears.
- Click the trackwheel to view the menu. Click New.
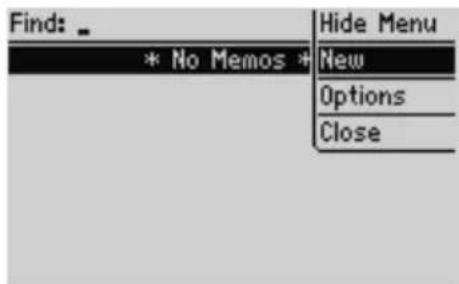
Find screen menu - New item
-
Type a title for your memo and press the Enter key. If you do not type a title, you cannot save the memo.
-
Type the body of the memo.
-
Click the trackwheel to view the menu. Click Save.
You return to the Find screen and your new memo appears, listed in alphabetical order.
Managing memos
You can view, edit, and delete memos on your handheld.
To view memos
-
On the Home screen, click the MemoPad icon. The Find screen appears.
-
Select the memo that you want to view. Click the trackwheel to view the menu. Click View.
The full memo appears on the screen.

Tip: To edit a memo that you are viewing, click the trackwheel to view the menu. Click Edit.
To edit memos
-
On the Home screen, click the MemoPad icon. The Find screen appears.
-
Select the memo that you want to edit and click the trackwheel to view the menu. Click Edit.
MemoPad
- Add or edit text. Hold the Alt key and roll the trackwheel to scroll horizontally through the text.

Tip: Use your handheld's cut, copy, and paste features when you edit memos. Refer to "Using cut, copy, and paste" on page 52 for more information.
To clear the title or body, click the trackwheel to view the menu. Click Clear Field.
- Click the trackwheel to view the menu and click Save.
To delete memos
- On the Home screen, click the MemoPad icon. The Find screen appears.
- Select the memo that you want to delete and click the trackwheel to view the menu. Click Delete.
- A dialog box prompts you to confirm the deletion. Click Delete.
You return to the Find screen and the memo is no longer listed.
Tips for using the MemoPad application
- Type the first letters of a memo to locate it on the Find screen.
- Press the Enter key on the Find screen with a memo selected to open the memo.
- Press the Space key to move down a page in an open memo.
- Press a Shift key + the Space key to move up a page in an open memo.
Chapter 13 Calculator
This section provides information on the following topics:
• Performing mathematical operations
• Performing measurement conversions
- Closing the Calculator
- Tips for using the Calculator application
Calculator
Performing mathematical operations
You can use the Calculator to perform standard mathematical operations.
To perform a calculation
- On the Home screen, click the Calculator icon. The Calculator screen appears.
- Type the first number of the mathematical operation. You can also use the trackwheel to select the numbers that are displayed on the screen.
- Click the operator that you want to use for this calculation.
- Type the next number in the mathematical operation.
- Click the equal sign (=).
The result of the calculation appears.

Tip: You can use the Calculator memory to save the results of a particular calculation. Use MR, MC, MS, and M+ to respectively recall, clear, subtract, and add numbers to the Calculator memory. The current contents of the memory are shown at the top of the screen.
You can click the equal sign (=) or press the Enter key to display the result of a calculation.
Press the Backspace key to clear your handheld display.
Performing measurement conversions
You can use your handheld's Calculator to convert numbers to and from metric measurements. You can convert between centimeters and inches, meters and feet, meters and yards, kilometers and miles, kilograms and pounds, Celsius and Fahrenheit, liters and US gallons, and liters and UK gallons.
To convert measurements
- On the Home screen, click the Calculator icon. The Calculator screen appears.
- Type the number that you want to convert and click Menu.
- Click From Metric or To Metric. For this example, select From Metric. A second menu appears. Select the type of conversion that you want the Calculator to perform.
214 BlackBerry Wireless Handheld
The converted results are shown on the Calculator's display.
Closing the Calculator
On the Calculator screen, click Menu. Click Close.
Tips for using the Calculator application
- On the Calculator screen, hold the Alt key and roll the trackwheel to scroll vertically.
- Press I to add.
- Press U to subtract.
- Press A to multiply.
- Press G to divide.
- Press Q to change the number from positive to negative or from negative to positive.
- Press V to find the square root of a number.
- Press J to recall the memory.
- Press H to clear the memory.
- Press L to add the number to the memory.
- Press the Enter key to see the result of your calculation.
- Press T to clear the Calculator screen.
Calculator
Chapter 14 Options
This section provides information on the following topics:
- Setting the Alarm
- Locking the keyboard
- Customizing notification profiles
- Setting the Auto On/Off feature
- Customizing handheld options
- Handheld options
Options
Setting the Alarm
Your handheld has an Alarm feature that you can set to tone or vibrate at a specific time. You can also specify whether the Alarm should notify you every day or only on weekdays.

Warning: If you turn off your handheld using the Power button or the Turn Power Off icon on the Home screen, Alarm notifications do not turn on the handheld and you are not notified. Set the Auto On/Off feature if you want Alarm notification to turn on the handheld. Refer to "Setting the Auto On/Off feature" on page 229 for more information.
| Icon Description | |
 | The Alarm icon appears on the Home screen. |
To set the Alarm
- On the Home screen, click the Alarm icon. The Alarm screen appears.
- In the fields that you want to set, press the Space key until the preferred option appears.
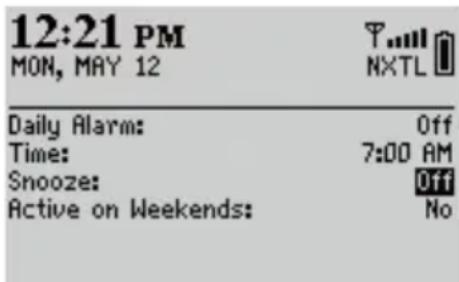
Alarm screen - setting options
- Click the trackwheel to view the menu. Click Save.
When the Alarm notifies you, the Daily Alarm dialog box appears. Press the Enter key or click the trackwheel to close it. This action does not disable the Alarm; the handheld notifies you again at the set time even if the Alarm has been silenced. You must set the Alarm field to Off to disable the Alarm.
If you set the Snooze field, the Daily Alarm dialog box appears at the set time. Click the trackwheel or press the Enter key to silence the notification for the set amount of time. The Alarm sounds again after the amount of time that is set in the Snooze field.
Alarm fields
The Alarm screen contains the following fields:
Daily Alarm: Select whether you want the Alarm to notify you. By default, this field is set to Off.
Time: Set the time at which you want the Alarm to notify you. By default, this field is set to 00:00.
Snooze: Select whether you want a snooze feature. Set the interval at which you want the Alarm to sound again. Choose from Off, 1 Min, 5 Min, or 10 Min. By default, this field is set to Off.
Active on Weekends: Select whether the Alarm should notify you every day, including Saturday and Sunday. By default, this field is set to Yes. With the field set to No, the Alarm notifies you on weekdays only.
Locking the keyboard
You can lock your handheld's keyboard to avoid accidentally placing phone calls or typing characters. When you lock your keyboard, the Lock screen appears. If you type owner information on the Owner screen, it appears on the Lock screen. You should include your contact information in case your handheld is lost.
| Icon Description | |
 | The Keyboard Lock icon appears on the Home screen. |
- On the Home screen, click the Keyboard Lock icon. The Lock screen appears.
- To use your handheld again, double-click the trackwheel.

Tip: You can also lock your handheld with a password. Refer to "Security" on page 237 for more information.
Options
Customizing notification profiles
Your handheld has profiles that control notification. Within each profile, you can set different notification options for each of the following items:

Note: Depending on your Nextel service plan, some items might not be available. Contact Nextel Customer Care for more information on available services.
Alarm: Set how your handheld notifies you of the Alarm.
Browser: Set how your handheld notifies you of saved web pages. If you enabled the WAP Push feature on your handheld, this profile also notifies you of incoming WAP messages and applications.
Calendar: Set how your handheld notifies you of appointment reminders.
Level 1 Messages: Set how your handheld notifies you of incoming messages that were sent with a Level 1 notification priority. Email and PIN messages that are sent to the handheld with Level 1 notification appear in bold on the Messages screen.
PIN messages are always considered as Level 1 messages if, on the Message List Options screen, the Consider PIN Level 1 field is set to Yes. Refer to "Setting message options" on page 43 for more information.

Note: The priority with which email messages are forwarded to your handheld depends on the filter rules that are set in the desktop software and on the server. You can use the Redirector Settings tool to create a new filter that specifies which email messages are forwarded with Level 1 notification. Refer to the Redirector Settings Online Help for more information.
Direct Connect Alert: Set how your handheld notifies you of Nextel Direct Connect Call Alerts.
Direct Connect: Set how your handheld notifies you of Nextel Direct Connect Private Calls and Group Calls.
Messages: Set how your handheld notifies you of incoming email and PIN messages.
Phone: Set how your handheld notifies you of incoming phone calls.
SMS: Set how your handheld notifies you of incoming SMS messages.
| Icon Description | |
 | The Profiles icon appears on the Home screen. |
To enable a notification profile
- On the Home screen, click the Profiles icon. The Profiles screen appears.
- Select the profile that you want to enable. Click the trackwheel to view the menu. Click Enable. On the Profiles screen, the word (On) appears beside your selection.

Tip: On the Profiles screen, select a profile and press the Space key to enable it.
To add a notification profile
- On the Home screen, click the Profiles icon. The Profiles screen appears.
- Click the trackwheel to view the menu. Click New.
- In the Name field, type a profile name.
- Select the item for which you want to set notification options. Choose from Alarm, Browser, Calendar, Direct Connect Alert, Direct Connect, Messages, Phone, or SMS. For this example, select Messages. Click the trackwheel to view the menu. Click Edit.
- In the fields that you want to set, press the Space key until the preferred option appears.
- Click the trackwheel to view the menu. Click Save. The list of items for which you can receive notification appears.
- Repeat steps 4 through 6 to set the notification options for the other items.
- Click the trackwheel to view the menu. Click Save.
Your new notification profile appears on the Profiles screen.

Note: After you add a new profile, you must enable it before your customized notification options take effect.
Options
Profile fields
You can set the following fields for each item:
Out of Holster: Set how your handheld notifies you when it is out of the holster. Choose from None, Tone, Vibrate, and Vibrate+Tone.
In Holster: Set how your handheld notifies you when it is in the holster. Choose from None, Tone, Vibrate, and Vibrate+Tone.

Note: For the Direct Connect and Direct Connect Alert items, if you set the Out of Holster or In Holster fields to None or Vibrate, you do not hear the beep to indicate the current speaker during a Nextel Direct Connect call. If you are using a headset during a Nextel Direct Connect call, however, you continue to hear the beeps in the headset.
Tune: Select the tune that you want to hear when you are notified. Choose from BlackBerry 1, BlackBerry 2, BlackBerry 3, BlackBerry 4, BlackBerry 5, BlackBerry 6, Ring 1, Ring 2, Ring 3, Ring 4, Ring 5, Ring 6, UK Ring 1, UK Ring 2, UK Ring 3, or UK Ring 4.
Volume: Select the volume for your notification tune. Choose from Mute, Low, Medium, High, or Escalating. If you select the Escalating option, notification volume progresses from quiet to louder notification.
Number of Beeps: Select how many times the notification sounds before it stops. Choose from 1, 2, or 3.

Note: For the Phone and Direct Connect Alert items, your handheld provides continuous notification. For these items, the option that you set in the Number of Beeps field determines the number of times that the handheld sounds during notification.
The Number of Beeps field determines the number of times that the notification sounds in the headset for the Phone item.
Repeat Notification: Set whether you want to be reminded of any unopened messages. Choose from None or LED Flashing. You can select LED Flashing for the notification LED to remind you of unopened items.
Do Not Disturb: Set whether you want to stop all notification for the Phone and Direct Connect Alert items. Choose from Yes or No. If you set this field to Yes, you are not notified of incoming phone calls or Nextel Direct Connect Call Alerts.
Settings for the default profiles
The handheld has four preprogrammed profiles: Loud, Discreet, Quiet, and Default. When you first receive your handheld, the Default profile is enabled. You cannot delete these profiles.
Loud profile
The following table outlines the default Out of Holster notification settings for each field of the Loud profile.
| Out of Holster | Tune Volume Number | of Beeps | Repeat Notification | ||
| Alarm Vibrate + Tone | BlackBerry 1 High 3 None | ||||
| Browser Vibrate + Tone | BlackBerry 4 High 3 None | ||||
| Calendar Vibrate + Tone | BlackBerry 2 High 3 None | ||||
| Direct Connect Alert | Vibrate + Tone | Ring 3 High 3 None | |||
| Direct Connect | Vibrate + Tone | BlackBerry 6 High 3 None | |||
| Level 1 Messages | Vibrate + Tone | BlackBerry 3 High 3 None | |||
| Messages Vibrate + Tone | BlackBerry 3 High 3 None | ||||
| Phone Vibrate + Tone | Ring 6 High 3 None | ||||
| SMS | Vibrate + Tone | BlackBerry 3 | High 3 None | ||
Options
The following table outlines the default In Holster notification settings for each field of the Loud profile.
| In Holster | Tune Volume Number | of Beeps | Repeat Notification | ||
| Alarm Vibrate | + Tone | BlackBerry 1 | High 3 None | ||
| Browser Vibrate | + Tone | BlackBerry 4 | High 3 None | ||
| Calendar Vibrate | + Tone | BlackBerry 2 | High 3 None | ||
| Direct Connect Alert | Vibrate + Tone | Ring 3 High | 3 None | ||
| Direct Connect | Vibrate + Tone | BlackBerry 6 | High 3 None | ||
| Level 1 Messages | Vibrate + Tone | BlackBerry 3 | High 3 None | ||
| Messages Vibrate | + Tone | BlackBerry 3 | High 3 None | ||
| Phone Vibrate | + Tone | Ring 6 | High 3 None | ||
| SMS | Vibrate + Tone | BlackBerry 3 | High 3 None | ||
Discreet profile
The following table outlines the default Out of Holster notification settings for each field of the Discreet profile.
| Out of Holster | Tune Volume Number | of Beeps | Repeat Notification | ||
| Alarm | Tone | BlackBerry 1 | Low | 3 | None |
| Browser | Vibrate | BlackBerry 4 | Mute | 3 | None |
| Calendar | Vibrate | BlackBerry 2 | Mute | 3 | None |
| Out of Holster | Tune Volume Number | of Beeps | Repeat Notification | |
| Direct Connect Alert | Vibrate Ring 3 Mute 3 None | |||
| Direct Connect | Vibrate BlackBerry 6 Mute 3 | None | ||
| Level 1 Messages | Vibrate BlackBerry 3 Mute 3 | None | ||
| Messages Vibrate BlackBerry 3 Mute 3 None | ||||
| Phone Vibrate Ring 6 Mute 3 | None | |||
| SMS Vibrate BlackBerry 3 Mute 3 None | ||||
The following table outlines the default In Holster notification settings for each field of the Discreet profile.
| In Holster | Tune Volume Number | of Beeps | Repeat Notification | ||
| Alarm | Tone | BlackBerry 1 | Low | 3 | None |
| Browser | Vibrate BlackBerry 4 Mute 3 | None | |||
| Calendar Vibrate BlackBerry 2 Mute | 3 None | ||||
| Direct Connect Alert | Vibrate Ring 3 Mute 3 None | ||||
| Direct Connect | Vibrate BlackBerry 6 Mute 3 | None | |||
| Level 1 Messages | Vibrate BlackBerry 3 Mute 3 | None | |||
| Messages Vibrate BlackBerry 3 Mute 3 None | |||||
| Phone Vibrate Ring 6 Mute 3 None | |||||
| SMS Vibrate BlackBerry Mute 3 None | |||||
Options
Quiet profile
The following table outlines the default Out of Holster notification settings for each field of the Quiet profile.
| Out of Holster | Tune Volume | Number | of Beeps | Repeat Notification | |
| Alarm None B | blackBerry 1 Mute 1 None | ||||
| Browser None | BlackBerry 4 Mute 1 None | ||||
| Calendar None | BlackBerry 2 Mute 1 None | ||||
| Direct Connect Alert | None Ring 3 Mute 1 None | ||||
| Direct Connect | None BlackBerry 6 Mute 1 None | ||||
| Level 1 Messages | None BlackBerry 3 Mute 1 None | ||||
| Messages None | BlackBerry 3 Mute 1 None | ||||
| Phone None Ring 6 Mute 1 None | |||||
| SMS | None BlackBerry 3 Mute 1 None | ||||
The following table outlines the default In Holster notification settings for each field of the Quiet profile.
| In Holster | Tune Volume Number | of Beeps | Repeat Notification | |
| Alarm None | BlackBerry 1 Mute | 1 None | ||
| Browser None | BlackBerry 4 Mute | 1 None | ||
| Calendar None | BlackBerry 2 Mute | 1 None | ||
| Direct Connect Alert | None Ring | 3 Mute 1 None | ||
| Direct Connect | None BlackBerry 6 Mute 1 | None | ||
| Level 1Messages | None BlackBerry 3 Mute 1 None | |||
| Messages None BlackBerry 3 Mute 1 None | ||||
| Phone None Ring 6 Mute 1 None | ||||
| SMS None BlackBerry 3 Mute 1 None | ||||
Default profile
The following table outlines the default Out of Holster notification settings for each field of the Default profile.
| Out of Holster | Tune Volume | Number | of Beeps | Repeat Notification | |
| Alarm | Tone | BlackBerry 1 | High | 3 | None |
| Browser None | BlackBerry 4 Mute 1 | LED Flashing | |||
| Calendar | None BlackBerry 2 Mute 1 | LED Flashing | |||
| Direct Connect Alert | Tone | Ring 3 | High | 1 None | |
| Direct Connect | Tone | BlackBerry 6 M | Medium 1 None | ||
| Level 1 Messages | None BlackBerry 3 Mute 1 | LED Flashing | |||
| Messages None | BlackBerry 3 Mute 1 | LED Flashing | |||
| Phone | Tone | Ring 6 | High | 1 | None |
| SMS None | BlackBerry 3 Mute 1 | LED Flashing | |||
Options
The following table outlines the default In Holster notification settings for each field of the Default profile.
| In Holster | Tune Volume Number | of Beeps | Repeat Notification | ||
| Alarm Tone | BlackBerry 1 High | 3 None | |||
| Browser | Vibrate | BlackBerry 4 | Mute | 1 | None |
| Calendar | Vibrate | BlackBerry 2 | Mute | 1 | None |
| Direct Connect Alert | Vibrate + Tone | Ring 3 | High 1 None | ||
| Direct Connect | Vibrate + Tone | BlackBerry 6 Medium | 1 None | ||
| Level 1 Messages | Vibrate | BlackBerry 3 | Mute | 1 None | |
| Messages | Vibrate | BlackBerry 3 | Mute | 1 | None |
| Phone | Vibrate + Tone | Ring 6 | High 1 None | ||
| SMS | Vibrate | BlackBerry 3 | Mute | 1 | None |
To edit notification profiles
- On the Home screen, click the Profiles icon. The Profiles screen appears.
- Select the profile that you want to edit and click the trackwheel to view the menu. Click Edit.
- Select the item for which you want to edit the notification options. Select from Alarm, Browser, Calendar, Direct Connect Alert, Direct Connect, Messages, Phone, or SMS. Click the trackwheel to view the menu. Click Edit.
- In the fields that you want to set, press the Space key until the preferred option appears.
- Click the trackwheel to view the menu. Click Save. The list of items appears for which you can receive notification.
-
Repeat steps 3 through 5 to edit the notification options for the other items.
-
Click the trackwheel to view the menu. Click Close.
You return to the Profiles screen.
To delete a notification profile
- On the Home screen, click the Profiles icon. The Profiles screen appears.
- Select the profile that you want to delete and click the trackwheel to view the menu. Click Delete. A dialog box prompts you to confirm the deletion.
- Click Delete.
You return to the Profiles screen, and the profile is no longer listed.

Note: You cannot delete the preprogrammed notification profiles.
Setting the Auto On/Off feature
You can set whether you want your handheld to turn on and off automatically at specified times. Setting the Auto On/Off feature also helps to conserve your handheld battery.

Warning: If you are in an area where wireless signals might interfere with normal operations (for example, on an airplane), turn off your handheld's radio. On the Home screen, click the Turn Wireless Off icon. Do not use the Auto On/Off feature. Refer to "Important safety information" on page 9 for more information on areas where interference might occur.
| Icon Description | |
 | The Auto On/Off feature is accessible through the Options application. The Options icon appears on the Home screen. |
To set the Auto On/Off feature
- On the Home screen, click the Options icon. The Options screen appears.
- Click Auto On/Off. The Auto On/Off screen appears.
- In the fields that you want to set, press the Space key until the preferred option appears.
Options
- Click the trackwheel to view the menu. Click Save.
You return to the Options screen.
Auto On/Off fields
The Auto On/Off screen contains the following fields:
Weekday On: Set whether the handheld turns on automatically at a specific time on weekdays.
Weekday Off: Set whether the handheld turns off automatically at a specific time on weekdays.
Weekend On: Set whether the handheld turns on automatically at a specific time on the weekend.
Weekend Off: Set whether the handheld turns off automatically at a specific time on the weekend.

Note: Both Weekday and Weekend options have an Enabled/Disabled field. These fields must be set to Enabled for the handheld to turn on and off automatically.
To turn off the handheld when the Auto On/Off feature is enabled
If you turn off your handheld using the Power button, the handheld turns on again at the specified Auto On time. Calendar reminders and Alarm notifications also turn on your handheld.
If you turn off your handheld using the Turn Power Off icon when the Auto On/Off feature is enabled, you are prompted to select one of the following options:
- Auto Off: Select this option if you want the handheld to turn on again at the specified Auto On time. Calendar reminders and Alarm notifications also turn on your handheld.
- Power Off: Select this option if you want to turn the handheld off completely. Calendar reminders and Alarm notifications do not turn on the handheld. If you select Power Off, you must press the Power button to turn the handheld on again.

Home screen - Turn Power Off icon
Customizing handheld options
On the Options screen, you can type information in some fields and choose options in other fields to customize several of your handheld's features.
| Icon Description | |
 | The Options icon appears on the Home screen. |
-
On the Home screen, click the Options icon. The Options screen appears.
-
Click the handheld option that you want to change.
![[Return To Home Screen] About Applications Auto On/Off AutoText Browser Date/Time Firewall](/content/2026/05/990810/images/65967e7fe423dd3302350c2da3f77d4b2fe983256c1fd9e78772b5e3e16bf92b.jpg)
Options screen
- In the fields that you want to set, press the Space key until the preferred option appears.
- Click the trackwheel to view the menu. Click Save.
You return to the Options screen.
Handheld options
The following sections provide more information on your handheld's options.
Options
About
The About screen contains copyright information about your handheld. You cannot change the information on this screen. Press the Escape button twice to return to the Options screen.
Applications
The Applications screen provides a list of all third-party applications that are installed on your handheld. Third-party applications are applications that were not factory installed on your handheld.
To delete a third-party application, on the Applications screen, select an application. Click the trackwheel to view the menu. Click Delete.
To view the module name and version number of all installed default applications, on the Applications screen, click the trackwheel to view the menu. Click Modules. You cannot change the information on this screen.
To view additional information about applications and modules, select an application or module for which you want to view more information. Click the trackwheel to view the menu. Click Properties for applications or Module Information for modules.
Auto On/Off
Use the automatic on/off feature to maximize battery life. Refer to "Setting the Auto On/Off feature" on page 229 for more information.
AutoText
The AutoText screen lists all your AutoText entries. You can add, edit, and delete entries at any time. Refer to "Using AutoText" on page 48 for more information on how to work with AutoText entries.
Browser
On the Browser screen, you can view your browser version and set the default browser configuration settings. Refer to "Setting general options" on page 155 for more information on setting the other options for the browser.
Default browser configuration: Select the browser that opens when you click links in messages. All available browser configurations are listed.
'W' hotkey configuration: If you have more than one WAP Browser available on your handheld, set the WAP Browser that opens when you press the W key on the Home screen.
'B' hotkey configuration: If you have more than one BlackBerry Browser available on your handheld, set the BlackBerry Browser that opens when you press the B key on the Home screen.

Note: On the Browser screen, the options vary depending on the Browser applications that are available on your handheld.
To use the W and B shortcut keys on the Home screen, in the Phone application, on the General Options screen, the Dial from Home Screen field must be set to No.
Date/Time
Set the date and time on your handheld so that your messages, phone calls, and appointments contain the correct time stamp.

Tip: You can update the date and time automatically using the desktop software. Refer to the Intellisync Online Help for more information.
Time Zone: Select your time zone. Your handheld automatically adjusts the time depending on the time zone.
Time: Set the current time.
Time Format: Select a 12-hour or 24-hour clock.
Date: Set the current date.
Network Date: This field displays the current date on the Nextel wireless network.
Network Time: This field displays the current time on the Nextel wireless network

Note: The information that you set in the Time, Time Format, and Date fields determines how the date and time appear in the handheld status section of the screen, and on the Calendar and Lock screens.
You can update your handheld date and time automatically by using the network date and time. Click the trackwheel to view the menu. Click Copy Network Time. The date and time from the network are copied into the Date and Time fields on this screen. Click the trackwheel to view the menu. Click Save.
Options
Firewall
If you have third-party applications on your handheld, the firewall option prevents these applications from sending information to or receiving information from your handheld without your knowledge. If a third-party application attempts to open a connection, you are prompted to allow or deny the connection.
You can specify that you do not want to be prompted each time that a connection request is made. In the dialog box that appears when a request is made, approve or deny the request. In the Don't ask this again section, select the check box. Any other connections that the application attempts are allowed or denied, depending on what you select in the dialog box.
If you have set whether connections should be allowed or denied, and then you want to be prompted again, complete the following procedure to reset the settings:
-
On the Home screen, click the Options icon. The Options screen appears.
-
Click Firewall. The Firewall screen appears.
-
Click the trackwheel to view the menu. Click Reset Settings.
The settings are reset and you are prompted each time that a third-party application attempts to send data to or receive data from your handheld.

Note: The firewall feature does not apply to any of the default applications on your handheld. This feature only applies to third-party applications that you load onto your handheld.
Research In Motion does not in any way endorse or guarantee the security of third-party applications and your usage of third-party applications is your sole responsibility.
Host Routing Table
This option contains no user-variable settings.
Localization
If you have more than one language enabled on your handheld, you can change the locale for your handheld.
Locale: Select the language that you want to use on your handheld.
Message Services
Any email message services to which you have access are listed on this screen.
Messaging (CMIME): Select a default email service. Any new messages are sent to the selected message service.
Integration with new or ISP email account
If you have integrated your handheld with a new or ISP email account or an enterprise email account that uses the BlackBerry Web Client, the default service is Web Client.
Integration with enterprise email account
If you have integrated your handheld with an enterprise email account that uses the BlackBerry Enterprise Server or the BlackBerry Desktop Redirector, the default service is Desktop.

Note: If you have integrated your handheld with an enterprise email account and a new or ISP email account, more than one option appears in the Messaging field. Press the Space key to select the option that you want to set as your default. Click the trackwheel to view the menu. Click Save. All email messages that you send from your handheld are sent from the default message service that you set on this screen.
Network
This screen displays your handheld's network settings.
Radio: Turn on and turn off your handheld's radio. In certain situations, such as on an airplane, it is important to turn off your handheld's radio to prevent radio frequency interference. Refer to "Important safety information" on page 9 for more information on radio frequency interference.
Scan Mode: This field is set to automatically scan for the current network. The handheld scans for available networks and automatically selects the network with the best available wireless coverage. In most cases, this network is your home network. If you are outside of your home network's wireless coverage area, the network that is associated with your home network with the best available wireless coverage is selected.
Active Network: This field shows the name of the network that is currently in use.

Note: You can register with the network on the Network screen. Click the trackwheel to view the menu and click Register Now. Unless you have been advised to do so, or you have just received your handheld and it is not working, you should not register your handheld more than once.
Options
Owner
The text that you type here appears on the Lock screen. If you do not type any owner information, a default message appears on the Lock screen.
Name: Type your name.
Information: Type any additional information that you want to appear on the Lock screen. You should include your contact information.
Profiles
The Profiles screen contains a list of notification profiles. You can enable, add, edit, and delete profiles at any time. Refer to "Customizing notification profiles" on page 220 for more information on customizing notification profiles.
Screen/Keyboard
On the Screen/Keyboard screen, you can change the LCD screen appearance by adjusting contrast levels and font size. You can also change the key rate and tone.
Screen Contrast: Adjust the screen's contrast if you are having difficulty seeing the screen. The default contrast level is 15, but you can set it anywhere between 1 and 30.

Tip: If you are using your handheld in low light, try the backlighting feature. Press the Power button to turn on your handheld's backlighting.
Font Family: View the font name. The default is System.
Font Size: Set the size of the font to be used on the screen. Choose from 8, 10, 12 or 15. By default, this option is set to 10.
Key Tone: Set the key tone field to On if you want your handheld to emit a tone each time that you press a key. By default, this option is set to Off.
Key Rate: Set the speed (Slow, Fast, or Off) at which your cursor moves when you press and hold the Backspace key, the Enter key, or the Space key. By default, this option is set to Slow.

Tip: The Key Rate setting controls an automatic capitalization feature. With Key Rate set to either Slow or Fast, you can hold a letter key to capitalize it.
Security
On the Security screen, you can set your password options for greater handheld security. You can also verify the integrity of security applications on your handheld using the Security Self Test application.
Password: Select whether you want to enable a password on your handheld. By default, this option is set to Disabled. Your password must be a minimum of four characters and can contain both letters and numbers. You cannot use a sequence of letters or numbers (for example, abcd) in your password.
Security Timeout: Set the duration of time (in minutes) that your handheld is idle before the Lock screen appears. The default setting is 2 Min.
Lock Handheld Upon Holstering: Select whether you want the handheld to lock when you insert it into the holster. By default, this option is set to No.
IT Policy: This field displays the name of the IT policy that is assigned to your handheld. After you connect your handheld to your desktop for the first time, Nextel can send the policy settings to your handheld over the Nextel wireless network.

Note: Wireless IT policy is only available if your handheld is enabled on a BlackBerry Enterprise Server version 3.5 or later for Microsoft Exchange. Contact your system administrator for more information on your company's IT policy settings.
If your handheld is lost or stolen, contact Nextel Customer Care. Using wireless IT Policy, Nextel can disable your handheld, which clears all data and applications, or reset your handheld password, which displays the Lock screen.
To enable password protection
If you enable the password, you must type it to connect to the desktop software and to use the Application Loader.
-
On the Home screen, click the Options icon. The Options screen appears.
-
Click Security. The Security screen appears.
-
In the Password field, press the Space key until Enabled appears.
-
In the Security Timeout field, set how much idle time should pass before the Lock screen appears. Press the Space key until the preferred timeout setting appears.
-
Click the trackwheel to view the menu. Click Save. A dialog box appears that prompts you to type a password with at least four characters.
-
Type a password. Click the trackwheel.
Options
- Type your password again to verify it. Click the trackwheel.
The Options screen appears and your new password is enabled.
To lock your handheld
After you set a password, you can lock your handheld with the password at any time.
On the Home screen, click the Lock icon. The Lock screen appears. The Lock screen displays your contact information (if, on the Owner screen, you have typed your contact information).

Note: When the handheld is locked, you can make an emergency call. On the Lock screen, roll the trackwheel. The Handheld is locked dialog box appears. Click Emergency Call. Type an emergency phone number. You can only place calls to recognized emergency phone numbers when the handheld is locked.
To unlock your handheld
When the Lock screen is visible, you must unlock your handheld before you can connect to the desktop software. If you turn off your handheld with the Lock screen enabled, you must type your password when you turn on your handheld again.
- On the Lock screen, roll the trackwheel. The Handheld is locked dialog box appears.
- Click Unlock. The Enter password dialog box appears.
- Type your password. Click the trackwheel.

Note: If you receive a phone call while your handheld is locked, you can answer the phone call. You can also unlock the handheld while you are connected to the call. Refer to "To answer phone calls when the handheld is locked" on page 125 for more information.

Warning: If you type your password incorrectly five times, you are prompted to type blackberry before you can continue. For subsequent password attempts, the characters that you type are displayed in the Enter Password dialog box.
If your password is typed incorrectly eight times, you are prompted to type blackberry again before you can continue.
If your password is typed incorrectly ten times, all information is erased from your handheld for security reasons. You should regularly back up any information from your handheld that might not have originated on your desktop. Refer to the Backup and Restore Online Help for more information.
To change your password
You can provide greater security by occasionally changing your password.
- On the Home screen, click the Options icon. The Options screen appears.
- Click Security. The Security screen appears.
- Click the trackwheel to view the menu. Click Change Password. A dialog box appears that prompts you to type your current password.
- Type your current password. Click the trackwheel.
- Type a new password that contains at least four characters. Click the trackwheel.
- Type your new password again to verify it. Click the trackwheel.
- Click the trackwheel to view the menu. Click Save.
The Options screen appears and your password is changed.
To disable password protection
If you disable your password, the Lock screen no longer appears after the specified amount of idle time. You do not need to type your password to open the Security screen or to connect your handheld to your desktop.

Note: If you disable password protection, you can continue to use the keyboard lock feature to lock your handheld against accidental input. Refer to "Locking the keyboard" on page 219 for more information on the keyboard lock feature.
- On the Home screen, click the Options icon. The Options screen appears.
- Click Security. The Security screen appears.
- In the Password field, press the Space key until Disabled appears.
- Click the trackwheel to view the menu. Click Save. A dialog box appears that prompts you to type your password.
- Type your password. Click the trackwheel.
The Options screen appears and your password is disabled.
Options
To perform Security Self Tests
The Security Self Test application verifies that cryptographic algorithms are implemented properly on your handheld. It runs automatically after your handheld reinitializes, and it notifies you of the status of applications on the handheld.
If the tests pass, a dialog box appears on your screen to indicate that the tests were successful. If the tests fail, a dialog box appears on your screen to indicate which tests failed.
To perform the Security Self Tests manually, complete the following steps:
- On the Home screen, click the Options icon. The Options screen appears.
- Click Security. The Security screen appears.
- Click the trackwheel to view the menu. Click Verify Security Software. The Verifying Security Software dialog box appears.
- After the verification process is complete, click OK.
Service Book
The Service Book screen shows the service books on your handheld.

Note: Your integration option determines which email service book appears on your handheld.
To view service books
- On the Home screen, click the Options icon. The Options screen appears.
- Click Service Book. The Service Books screen appears.

Tip: To view the service record for a service book, select a service book and click the trackwheel to view the menu. Click View.
To accept a service book
Your handheld accepts most service books automatically. If a service book is not accepted automatically, a book icon appears in the handheld status section of the screen. To accept a service book manually, complete the following steps:
-
On the Home screen, click the Options icon. The Options screen appears.
-
Click Service Book. The Service Books screen appears.
-
Select a pending service book and click the trackwheel to view the menu. Click Accept.
The service book is accepted.
SIM Card
On the SIM Card screen, you can view your handheld's SMS-compatible phone number and your SIM card identification number.
SMS
You can set the following option as the default option for every SMS message that you receive.
Leave messages on SIM Card: Select whether you want incoming SMS messages to be saved on your SIM card. By default, this option is set to No.

Note: With this option set to No, received SMS messages are stored on your handheld. If there are SMS messages on your SIM card and you insert it into your handheld, the SMS messages are moved to your handheld.
If you set this option to Yes, received SMS messages are stored on your SIM card. Your SIM card can store up to 16 SMS messages. If there are 16 SMS messages on your SIM card, you are prompted to delete existing SMS messages before your SIM card can accept incoming SMS messages.
Status
The Status screen provides information about your handheld and the Nextel wireless network. You cannot change the information on this screen.
Signal: This field shows the strength of your handheld's network signal, in decibel milliwatts (dBm).
Battery: This field shows the approximate amount of battery life remaining.
File Free: This field shows the amount of available memory, in bytes, to store messages, call logs, Address Book entries, AutoText entries, memos, tasks, and appointments.
File Total: This field shows the amount of memory, in bytes, that is currently being used.
Options
PIN: This field shows your handheld's personal identification number (PIN).
IMEI: This field shows your handheld's International Mobile Equipment Identifier number.
IP Address: This field shows your handheld's Internet Protocol address. This option only appears if NXTL, NxTL, or nxTL and one or more bars appear with the wireless coverage indicator in the handheld status section of the screen.
TLS
Transport Layer Security (TLS) provides additional authentication and security when you browse web pages. On the TLS screen, you can select Proxy TLS or Handheld TLS.
Integration with enterprise email account
You can only use TLS if you have integrated your handheld with an enterprise email account that uses the BlackBerry Enterprise Server or the BlackBerry Desktop Redirector.
- Proxy: If you select Proxy TLS, transport layer security is used only when the BlackBerry Enterprise Server connects to the web server.
- Handheld: If you select Handheld TLS, transport layer security is used for the entire connection between your handheld and the web server.

Note: Network access is slower if you select Handheld TLS.
WAP Push
Depending on your Nextel service plan, you might be able to receive messages and applications through the WAP Push feature. You can select how the handheld processes these messages and applications by setting the following options:
Enable WAP Push: Select whether you want the WAP Push feature to operate on your handheld.
Process Service Load: Select how handheld will processes Service Load (SL) messages, such as web pages or applications. Select from the following options:
- Select Auto if you want messages and applications to be displayed on the Messages screen and to display a dialog box when they arrive at your handheld, if the sender configures them to do so.
242 BlackBerry Wireless Handheld
- Select Prompt if you want messages and applications to be displayed on the Messages screen and to always display a dialog box when they arrive at your handheld, regardless of how the sender configures them.
- Select Reject if you do not want to see any indication of messages and applications when they arrive at your handheld.
Process Service Indication: Select how your handheld processes Service Indication (SI) messages, such as web page addresses and email messages. Choose from Auto, Prompt, or Reject.
Process Other Messages: Select how your handheld processes messages that are not service load or service indication messages, for example, messages that are sent by third parties. Choose from Auto, Prompt, or Reject.
Allow WAP Push Applications: Select whether you want your handheld to accept applications that are developed by third parties.
If you have enabled WAP Push, you will also receive notification of incoming messages and applications based on the settings that you configure in the Browser notification profile. Refer to "Customizing notification profiles" on page 220 for more information on setting the Browser notification profile.
WTLS
Wireless Transport Layer Security (WTLS) is the security layer of the WAP Browser that provides confidentiality, data integrity, and authentication for WAP services. WTLS allows the client and server to achieve authenticated and encrypted communication for greater security of wireless transactions.
WTLS is an optional security feature that you can load onto your handheld when using the desktop software's Application Loader tool. If your Nextel service plan requires WTLS for secure Browser connections, you must load WTLS onto your handheld. Refer to the Application Loader Online Help for more information on loading additional handheld applications.
If Nextel enables your SIM card for browsing web pages using WTLS, the WTLS security key is stored on your SIM card. You can use the SIM card from your BlackBerry 6510 Wireless Handheld from Nextel in a cellular phone.
To configure the WTLS default settings
- On the Home screen, click the Options icon. The Options screen appears.
Options
- Click WTLS. The WTLS screen appears. In the Encryption Strength and Prompt For Server Trust fields, press the Space key until the preferred option appears.
- Click the trackwheel to view the menu. Click Save.
You return to the Options screen.
Contact your Nextel Customer Care for more information on WTLS and available services.
Chapter 15 Troubleshooting
This chapter provides information on the following topics:
• Frequently asked questions
- Handheld error messages
Troubleshooting
Frequently asked questions
Alarm
Why is my Alarm not notifying me?
- Verify that the Alarm On/Off field is set to On. When the Alarm is set, a bell icon appears on the Home screen. Refer to "Setting the Alarm" on page 218 for more information.
- Verify that the Alarm item is set correctly in your notification profile. The Volume field in your selected notification profile should be set to Low, Medium, High, or Escalating, instead of Mute. Refer to "Customizing notification profiles" on page 220 for more information.
- If you turn off your handheld using the Power key or the Turn Power Off icon, Alarm notifications do not turn on the handheld. Set the handheld's Auto On/Off feature if you want your Alarm to notify you. Refer to "Setting the Auto On/Off feature" on page 229 for more information.
Attachment service
Why is my attachment not opening?
- Verify that the attachment that you are opening is a supported attachment type. The attachment service supports attachments with .doc, .pdf, .txt, .wpd, .xls, and .ppt file extensions.
- If you are opening a .pdf file that is password protected, verify that you typed the correct password.
How do I know if I need to type a password to view my attachment?
- The attachment service currently supports password-protected .pdf file attachments. If you try to view a password-protected .pdf file attachment and you do not type a password, the attachment request fails. An error message appears informing you that it is a password-protected attachment. Refer to "Opening attachments" on page 171 for more information.
I requested an attachment and an X icon appears where the check mark usually appears. What should I do?
- When an X appears beside a requested attachment, a problem prevented the attachment from being retrieved. Check the file name extension of the attachment that you are requesting to verify that it is a supported attachment type.
Why is my message marked as unread again?
- After you retrieve an attachment, the message that contains the attachment is marked as unread on the Messages screen. This indicates that the attachment is available for viewing. The message is marked as read after you open the message again.
246 BlackBerry Wireless Handheld
How do I save attachments?
- Your attachment is connected to your message. To save the attachment, you must save the message. Refer to "Saving messages" on page 73 for more information.
Battery
Why is my battery depleting quickly?
There are several reasons why your battery might deplete quickly. The following suggestions can help extend battery life:
- Limit your use of the backlighting feature.
- Enable the handheld's Auto On/Off feature to conserve the handheld's battery at night or on weekends. Refer to "Setting the Auto On/Off feature" on page 229 for more information.
- If you are sending the same email message to more than one person, use multiple recipients in one message instead of transmitting the same message more than once. Refer to "To send a message to several contacts at one time" on page 41 for more information on composing an email message to multiple recipients.
- Turn off your handheld's radio when you do not need to send or receive email and PIN messages, place phone calls or Nextel Direct Connect calls, browse web pages, receive SMS messages, or when you are in an area without wireless coverage for an extended period of time.
Integration with enterprise email account
If you have integrated your handheld with an enterprise email account that uses the BlackBerry Enterprise Server or the BlackBerry Desktop Redirector, set filter rules in the desktop software's Redirector Settings tool to specify which email messages should be forwarded to your handheld. Refer to the Redirector Settings Online Help for more information.
Integration with new or ISP email account
If you have integrated your handheld with a new or ISP email account or an enterprise email account that uses the BlackBerry Web Client, set filter rules in the BlackBerry Web Client to specify which email messages should be forwarded to your handheld. Refer to the BlackBerry Web Client Online Help for more information
What should I do if my handheld does not turn on?
Recharge your handheld's battery. Refer to the Getting Started Guide for more information on using and charging the battery.
If your handheld does not turn on after you recharge the battery, reset the handheld. Refer to "Maintenance" on page 249 for more information on resetting the handheld.
Why is my handheld not charging?
If you have installed the desktop software recently, the USB drivers might have been updated during the desktop software installation process. Disconnect your handheld from the desktop software and reconnect it.
Troubleshooting
Calendar
I am using wireless calendar synchronization and I deleted a meeting request from my handheld. Now the appointment is not on my handheld or in my desktop Calendar. Why are meeting requests being deleted from my handheld and desktop Calendars?
If you do not respond to a meeting request (either on your handheld or on your desktop) and you delete the meeting request from your handheld's Messages screen, the appointment is deleted and removed from both your handheld and desktop Calendars. To avoid inadvertently missing a meeting, always respond to meeting requests either on your desktop or from your handheld's Messages application.
Why is my handheld not synchronizing over the Nextel wireless network?
The BlackBerry Enterprise Server, not the desktop software, controls wireless calendar synchronization. To synchronize your handheld Calendar over the Nextel wireless network, verify that you are enabled on a BlackBerry Enterprise Server version 2.1 or later. Contact your system administrator for more information.
Integration with enterprise email account
If you use the BlackBerry Desktop Redirector for Microsoft Exchange to forward your email messages, you cannot configure your handheld Calendar for wireless calendar synchronization.
Home screen
How do I return to the Home screen?
The screen that displays the applications icons and the date and time is called the Home screen. Press the Escape button to close application screens and return to the Home screen.
You can also select Close from an application menu or, on the Options screen, click [Return to Home Screen].
LCD screen
What can I do if my LCD screen seems faint?
If you are operating your handheld in low light conditions, use the backlighting feature. While the handheld is on, press the Power button to activate backlighting. Backlighting turns off after ten seconds if you do not press a key or use the trackwheel. You can turn off the backlighting manually by pressing the Power button again.
The handheld's backlighting turns on automatically when you receive an incoming phone call.
If your screen seems faint all the time, check the Screen/Keyboard option on the Options screen. Refer to "Screen/Keyboard" on page 236 for more information on setting these fields.
Maintenance
I accidentally dropped my handheld in water and now it does not work. What should I do?
While a few drops of moisture should not damage your handheld, you should avoid placing it in direct contact with liquids. If your handheld is exposed to liquid and stops operating, let it dry out completely, allowing time for internal components to dry. If it does not begin to work again when it is dry, contact Nextel Customer Care.
How can I reset my handheld?
On rare occasions, the handheld might report an internal handheld error message, and instruct you to press R to reset. You can also reset the handheld by pressing the Alt key + the Shift key + the Backspace key.
Messages
What is a PIN?
PIN stands for personal identification number. Each handheld has a unique address that is similar to a phone number. PINs are up to eight digits long and cannot be modified.
To find the PIN for your handheld, on the Home screen, click the Options icon, and then click Status.
I sent a message and an X icon appears where the check mark usually appears. What should I do?
When an X appears beside a message that you sent from your handheld, a problem prevented the message from being sent properly. You can find out specifically what went wrong by opening the message and scrolling to the top of it. The Message Status field specifies the problem.
Refer to "Message status field error messages" on page 263 for more information.
Why am I not notified when new messages arrive?
Verify that the volume setting of the notification profile that you are using is set to Low, Medium, High, or Escalating instead of Mute. If the volume is set to Mute, you do not receive notification of new messages. If you are having difficulty hearing the notification, increase the volume or the number of beeps. Refer to "Customizing notification profiles" on page 220 for more information on changing your notification profile settings.
Why are new email messages on my handheld filed into an "Unknown" folder?
You must synchronize your email messages using the Intellisync tool to transfer a folder that you created on your desktop to your handheld. Refer to the “Reconciling email” topic of the Intellisync Online Help for more information. After you perform the email reconciliation, your handheld recognizes the new folder and any email messages that are redirected from that desktop folder on your desktop are transferred into the proper folder on your handheld.
Troubleshooting
If you have enabled wireless email reconciliation, your handheld recognizes when new folders are created on your desktop. Refer to "Using wireless email reconciliation" on page 72 for more information.
Why are new email messages on my handheld being marked as opened?
If you briefly remove your handheld from the holster to stop notification, a new message might be marked as opened. If you remove your handheld from the holster when you are notified of a new message, the new message is displayed on the screen. When you return your handheld to the holster, the message closes. Even if you did not actually read the message, your handheld might mark the message as opened.
If you have enabled wireless email reconciliation, your handheld recognizes when messages have been opened on your desktop and marks them as opened on your handheld. Refer to "Using wireless email reconciliation" on page 72 for more information.
I deleted an email message from my desktop and then reconciled my email messages. Why are email messages not being deleted from my handheld?
You must configure the Message List Options screen so that messages that are deleted from your desktop are deleted from your handheld each time that your email messages are reconciled. Refer to "To delete email messages on your handheld and your desktop" on page 89 for more information.
Messages that you delete from the desktop are moved into the Deleted Items folder. The messages are deleted from your handheld the next time email reconciliation occurs.
Microsoft Exchange
If you are Microsoft Outlook user on a Microsoft Exchange server, two scenarios might prevent messages from being deleted from your handheld:
- In Microsoft Outlook, on the Tools menu, click Options and click the Other tab. Verify that the Empty Deleted Items folder upon exit option is not selected. If you empty your Deleted Items folder when you close Outlook, there is no method to verify where that message belongs. Without reference to the Deleted Items folder, the status of the message on your handheld cannot be updated and the message is not deleted.
- If you delete messages from your desktop using a Shift key + the Backspace key, the message is removed from your desktop and does not appear in your Deleted Items folder. Without reference to the message, the status of the message on your handheld cannot be updated and the message is not deleted.
Messages are not being sent from my handheld. What should I do?
Verify that your handheld's radio is turned on and that the network settings are correct. Your messages might not be transmitting for a few reasons:
- If a clock icon appears beside the unsent message, you are not in a wireless coverage area. You must be in a location with sufficient wireless coverage for your messages to be sent. Check the wireless coverage indicator that is located in the top right corner of your handheld's Home screen. Refer to "Network status icons" on page 34 for more information on the wireless coverage indicator.
- If an X icon appears beside the unsent message, an error occurred during its transmission. Open the message and scroll to the top of it. The Message Status field indicates what happened. Refer to "Handheld error messages" on page 254 for more information on the error messages that appear in the Message Status field.
- If you have integrated your handheld with an enterprise email account and a check mark appears beside the sent message but the recipient has not yet received it, check Microsoft Outlook or Lotus Notes and verify that a copy of the message appears your Sent Items folder.
I have integrated my handheld with an enterprise email account that uses the BlackBerry Enterprise Server or the BlackBerry Desktop Redirector, but my email messages are not forwarded to my handheld. What should I do?
Email messages might not be forwarded to your handheld for several reasons:
Microsoft Exchange
Is your computer turned on? If you are a Microsoft Exchange user, and you are using the BlackBerry Desktop Redirector, and your computer is turned off, messages are not forwarded to your handheld. Your computer must be turned on any time that you want to receive messages on your handheld.
Is the BlackBerry Desktop Redirector running? If you are a Microsoft Exchange user and you are using the desktop redirector to forward your email messages, messages are not forwarded to your handheld is the desktop redirector is not running. If your company uses the BlackBerry Enterprise Server to forward your email messages, you do not need to have the desktop redirector running. Look for the desktop redirector icon in the right corner of your Windows taskbar. If it appears, the desktop redirector is running. If it does not appear, click Start on the Windows taskbar and select Programs > BlackBerry > BlackBerry Desktop Redirector.
Have you created Microsoft Exchange Inbox Assistant rules? If you are a Microsoft Exchange user and you have set up Inbox Assistant rules that move new messages from the Inbox to another folder, new messages are not forwarded to your handheld unless email is specifically redirected from that folder. If you have not specified email redirection from specific folders, the Inbox Assistant moves the message before the message can be forwarded. Either delete the Inbox Assistant rule or change the folder redirection settings to forward messages to your handheld.
- Is your handheld connected to your computer with the desktop software running? If your handheld is connected to the computer with the desktop software running, and you have selected the option to not forward messages when your handheld connected to the computer, you do not receive messages on your handheld.
- Have you set Redirector Settings filter rules? If you have enabled filters in the Redirector Settings tool, you might have instructed the desktop software to send only certain messages to your handheld. Check the filters to verify that the messages that you want to receive are being forwarded.
- Have you set the order of the filters? If a new Redirector Settings filter applies to a subset of the messages of an existing filter, the new filter should appear at the top of the list.
Troubleshooting
- Have you selected the "Forward messages to my handheld" check box? Check the settings on the General tab and verify that the Forward messages to my handheld check box is selected. Check the settings on the Advanced tab and verify that you have selected the proper folders from which email should be redirected. If you are using the BlackBerry Enterprise Server to forward your email messages, there are certain cases in which messages might not be forwarded to your handheld if they are read on your desktop before being processed by the server. If you are in an area of low wireless coverage and you read a message on your desktop, before it is processed by the BlackBerry Enterprise Server, the server might not recognize the message as unread. Therefore, it is not forwarded to your handheld.
- Have you selected from which folders you want to receive email messages? Check the Advanced tab of the Redirector Settings tool and verify that you have selected the folders from which you want to receive email messages. Refer to the Redirector Settings Online Help for more information on selecting folders.
Why can I not forward messages from my handheld?
If an X icon appears beside the message that you sent, a transmission error occurred that prevented it from being sent. You cannot forward messages that have not been transmitted properly. Open the message and scroll to the top of it. The Message Status field indicates the error. Refer to "Handheld error messages" on page 254 for more information. After the original message is sent successfully, you can forward it to another email address.
Why did I have several email messages on my handheld before I turned on the radio?
These email messages are previously loaded onto your handheld and contain information to help you learn about your handheld when you first receive it. As soon as you turn on your handheld's radio, another message should arrive, indicating that the handheld is registered with the Nextel wireless network.
How do I send an email message from a specific service?
To send an email message from a specific service, scroll to the top of the message. In the Using field, press the Space key until the preferred service appears. Any subsequent messages are also sent from this service.
Punctuation
Where can I find the period (.) and other punctuation marks on the keyboard?
- The quickest way to type a period (.) is to press the Space key twice at the end of a sentence. The next letter is capitalized automatically.
- Press the Alt key and an associated character at the same time to insert common punctuation marks. The punctuation mark is printed above the primary character on the key. Refer to "Using the keyboard and trackwheel" on page 24 for more information on the Alt key and special key combinations.
- Other punctuation marks are included in the symbols library, which you can open by pressing the Symbol key. Refer to "Inserting symbols" on page 46 for more information.
252 BlackBerry Wireless Handheld
- You can also insert international and accented characters in your messages. When you are composing a message or entering text, hold a letter and roll the trackwheel to scroll through international characters, marks, and equation symbols. When the preferred character appears, release the letter key.
Security
What should I do if the Security Self Tests fail?
If you perform a Security Self Test and the tests fail, run the tests again. Refer to "To perform Security Self Tests" on page 240 for more information.
If the tests fail a second time, reload your handheld's applications. Refer to the Getting Started Guide for information on loading handheld applications. If the tests continue to fail, contact Nextel Customer Care for more information.
Storage
What should I do if I will not use my handheld for a short period of time?
If you expect that you will not use your handheld for a short period of time (two weeks or less) turn off the handheld. On the Home screen, click the Turn Power Off icon. To turn on the handheld again, press the Power key.
What should I do if I will not use my handheld for an extended period of time?
Before you store your handheld for an extended period of time, you should save the information from your handheld to your desktop using the desktop software's Backup and Restore tool.
If you expect that you will not use your handheld for many weeks or months, on the Home screen, click the Turn Power Off icon, and then remove the battery from the handheld. Your handheld shuts down and, after approximately 24 hours, enters a special storage state. You should store your handheld in a cool, dry place. When you press any keys or click the trackwheel while your handheld is in this state, it does not respond.
To reactivate your handheld, insert the battery into your handheld and recharge it. Your stored addresses and messages are preserved while your handheld is turned off. When you turn on your handheld, a dialog box appears on your screen that prompts you to confirm the current date and time. Click Edit to open the Date/Time screen to set the date and time.
Troubleshooting
Handheld error messages
The following error messages might appear when you use your handheld applications and features.
| Error Description | |
| Data connection refused If this error message appears in the handheld status section of the screen, the Nextel wireless network refused a data connection to your handheld. Under normal circumstances, the handheld does not regain data coverage by itself. Turn off your handheld's radio, wait for 90 seconds, and then turn on the radio again. If you continue to receive this error, turn the radio off until you move to an area with wireless coverage from your home network, or from one of its roaming partners, and then turn on the radio and wait until the handheld connects to the network. If you still encounter problems, contact Nextel Customer Care for more information. | |
Address Book error messages
| Error Description | |
| Duplicate Name If this message appears, you have entered a new contact with the same name as an existing contact and the Allow Duplicate Names field on the Address Book Options screen is set to No. Refer to "Setting Address Book options" on page 94 for more information. | |
| Name or Company Name Required | If this message appears, you have entered a new contact without adding a name or company name for the contact. When you add a new contact, you must type text in the Name or Company Name field. |
Attachment service error messages
| Error Description | |
| An unknown error was encountered | If this message appears, an error exists with the attachment service. Contact your system administrator for more information. |
| Document is empty or Spreadsheet is empty | If this message appears, there is no content available in the attachment. |
| Embedded sheet data not present on the device | If this message appears, the data for the table that you attempted to view is not available on the handheld. Return to the Table of Contents view and retrieve the section of the attachment that contains the table. |
| No supported attachments found | If this message appears, no valid attachments were found in the message that you are currently viewing. |
| Password protected document | If this message appears, the message requires a password to be viewed successfully. On the Attachment screen, click the trackwheel to view the menu. Click Password. Type the password and click the trackwheel to return to the Attachment screen. |
| Table of Contents not available | If this message appears, the attachment service was unable to create a Table of Contents. The document might be too small or contain insufficient information with which to create a Table of Contents. |
| The content of this document is truncated to 32 KB to limit network traffic. To view the rest of the document, please use the Table of Contents command | If this message appears, the attachment that you are attempting to view is longer than what the network can transmit. The maximum amount of data that is allowed is sent to your handheld. To view the rest of the document, use the Table of Contents to view each chapter individually. |
| The document conversion failed | If this message appears, the attachment you attempted to view might contain invalid data. Verify that the attachment is valid by opening it in its original application. |
| The password for this document is incorrect | If this message appears, the password that you have provided is incorrect. Try typing the password again. |
| Unknown document format | If this message appears, the attachment that you attempted to view is not supported by the attachment service. |
| Unsupported document type | If this message appears, the attachment file type or file type version that you attempted to view is not supported by the attachment service. |
WAP Browser error messages
| Error Description | |
| Error Occurred This message | appears when an error occurs while the handheld is loading a web page. Click the trackwheel to view the menu and click Refresh to reload the web page. If the page still does not load successfully, a problem could exist with the page. Try opening the web page again later.If this message appears at a later time, the link that you are trying to load could be incorrect or the gateway that your handheld is currently using might be malfunctioning. |
| WBMP Converter: Unable to convert WBMP image of type | If this message appears, there was an error converting the image on the current web page. Click the trackwheel to view the menu and click Refresh to reload the web page. If you continue to receive this message, the application could be using the wrong content mode for this page. Refer to "Setting general options" on page 155 for more information. |
| Error Creating Bookmark | Verify that your handheld has sufficient memory to store the new bookmark. In the Options application, on the Status screen, check the File Free field. If the memory is full, delete some saved messages or bookmarks and try to create the bookmark again.The handheld might not have been able to secure the IP address of the page that you want to bookmark. Click the trackwheel to view the menu and click Refresh to reload the web page. Try to create the bookmark again.You might receive this error if you attempt to bookmark a page that has either failed to load or has an error. |
| Unable to connect to a WAP gateway at the following address | If this message appears, the application cannot contact the currently configured WAP server. You could be in an area that does not allow service to this particular WAP gateway. Verify that you are in an area of sufficient wireless coverage. In the handheld status section of the screen, NXTL or NxTL and one or more bars should appear with the wireless coverage indicator in the upper right corner.If you are in an area of sufficient wireless coverage, click the trackwheel to view the menu and click Refresh to reload the web page.If you are still unable to connect to the WAP gateway at this address, contact your system administrator for more information. |
| The requested page was too large to deliver to the device | The web page that you are attempting to load is too large for the handheld. |
| Data was received, but an error occurred while reading data | If this message appears, there is an error displaying the page. Click the trackwheel to view the menu and click Refresh to reload the web page. If the page still does not load successfully, there might be an error in the data that you have received from the web site. |
| An error occurred while fetching the requested page | If this message appears, an error occurred opening the web page. Click the trackwheel to view the menu and click Refresh to reload the web page. If the web page still does not load successfully, there could be an error in the data that you have received from the web site, or the web page might be too large to load on your handheld. |
| Exceeded maximum redirect attempts to server | If this message appears, the web page that you are attempting to load has been redirected more than 30 times, preventing the page from loading. Verify that the web page address is correct and try to load the page again. If this error still appears, try loading a different web page. |
| The returned page had no content type, and therefore cannot be processed | If this message appears, the web page that you are trying to view has no stated content type, preventing the application from displaying the page. Load a different web page. |
| Your device does not currently have any Browser Configuration Service Book entries | If this message appears, you might have to register your handheld with the Nextel wireless network. Verify that you are in an area of sufficient wireless coverage for sending and receiving email messages. You are in an area of sufficient wireless coverage if NXTL or NxTL and one or more bars appear with the wireless coverage indicator in the handheld status section of the screen. Refer to your Getting Started Guide for more information on registering with the network.If you continue to encounter problems after registering with the Nextel wireless network, the application for browsing web pages might not be enabled. Contact Nextel Customer Care for more information. |
| The page fetch operation was not successful (empty CacheResult) | If this message appears, an error occurred while retrieving the web page. Click the trackwheel to view the menu and click Refresh to reload the web page. |
| A problem occurred while trying to render the page | If this message appears, an error occurred while displaying the current web page. Click the trackwheel to view the menu and click Refresh to reload the web page. If you continue to receive this message when the handheld tries to display the web page, the application could be using the wrong content mode for this page. Refer to "Setting general options" on page 155 for more information. |
Troubleshooting
| Error Description | |
| Attempting to display a null page | The web page that you are attempting to view no longer exists or is currently unavailable. |
| Browser Error If this message | appears, a problem occurred when starting the application. Contact Nextel Customer Care for more information. |
| Internal Server Error If this | message appears, a server error occurred when your handheld requested the web page. Click the trackwheel to view the menu and click Refresh to reload the web page. If you continue to receive this message, try loading a different web page. |
| Unable to find a converter for the following content type | If this message appears, the application does not support the content type on the web page. Load a different web page. |
| WAP Service Book does not exist or does not contain appropriate values | If this message appears, you need to update your WAP service book. To reload your WAP service book, you need to register your handheld. Refer to your Getting Started Guide for more information on registering with the network.If you continue to encounter problems after registering with the network, contact Nextel Customer Care. |
| Fetch Request Failed because it requires authorization | The web page that you are attempting to load requires authorization. If a page requires authorization, the application attempts to obtain a valid user name and password three times. If you supply three incorrect user name and password combinations, this error appears. This message also appears if you press the Escape button when the application prompts for a user name and password.Click the trackwheel to view the menu and click Refresh to reload the web page. If you continue to receive this message, try loading a different web page. |
| The fetch request returned a 301 REDIRECT response without a location to redirect to | The web page that you are attempting to view has moved, no longer exists, or is too old. Verify that the web page address is current and try to load the web page again. |
| Unable to parse address If | this message appears, the address that you typed might be incorrect. Try typing the address again. |
| You may not be in an area covered by wireless data service | If this message appears, the application cannot contact the currently configured WAP server. You could be in an area that does not allow service to this particular WAP gateway. Verify that you are in an area of sufficient wireless coverage. NXTL or NxTL and one or more bars should appear with the wireless coverage indicator in the handheld status section of the screen.If you are within an area of wireless coverage, click the trackwheel to view the menu and click Refresh to reload the web page.If you are still unable to connect to the WAP gateway at this address, contact Nextel Customer Care for more information. |
| The Browser encountered a problem while processing this document and is unable to display it | If this message appears, an error occurred while displaying the current web page. Click the trackwheel to view the menu and click Refresh to reload the web page. If you continue to receive this message when the handheld tries to display the web page, the application could be using the wrong content mode for this page. Refer to "Setting general options" on page 155 for more information. |
| You are not currently in an area that can handle data communication | If this message appears, the application cannot retrieve any web pages because you might be in an insufficient wireless coverage area. NXTL or NxTL and one or more bars should appear with the wireless coverage indicator in the handheld status section of the screen.If you are within an area of wireless coverage, click the trackwheel to view the menu and click Refresh to reload the web page.If you are still experiencing problems, contact Nextel Customer Care. |
| The radio on the device is currently turned off or the battery is too low | You might receive this message if you attempt to use the application when the handheld's radio is turned off. To turn on the radio, on the Home screen, click the Turn Wireless On icon.You might also receive this message if you attempt to use the application, but there is not enough battery power. Refer to the Getting Started Guide for more information on recharging the battery. |
| Attempting to paste text that is not an address | If you receive this message, the text that you are attempting to paste in the Go To field is not in a recognized web page address format. Verify that no spaces or additional characters exist in the text that you have pasted and click OK. If you continue to receive this error, type the address directly in the Go To field. |
Troubleshooting
| Error Description | |
| An Error occurred while processing the requested deck. As a result, the Page cannot be displayed. | If this message appears, a problem occurred while loading the web page. Click the trackwheel to view the menu and click Refresh to reload the web page. If the page still does not load successfully, try opening the web page again later. |
| The following deck did not contain a card with the name | If this message appears, the link points to a part of the web page that does not exist. Try loading a different web page or selecting another link. |
| WML Converter was unable to convert the data | If this message appears, the web page that you are attempting to view might not be available in WML format or might contain incorrect WML tags or attributes. Click the trackwheel to view the menu and click Refresh to reload the web page. If you continue to receive this message when the handheld tries to load a page, the application might using the wrong content mode. Refer to "Setting general options" on page 155 for more information.If the web page still does not load successfully, there could be a problem with the page. Try visiting the web page again later. |
| WML Page error: Attempting to set a task outside a container | If this message appears, the page that you are attempting to view might not be available in WML format, or it might contain incorrect WML tags or attributes. Click the trackwheel to view the menu and click Refresh to reload the web page. If you continue to receive this message when the handheld tries to load a web page, the application might be using the wrong content mode for this page. Refer to "Setting general options" on page 155 for more information.If the page does not load successfully, try opening the web page again later. |
| Unable to create a Browser session | If this message appears, your handheld is unable to connect to the WAP gateway. The wireless network to which you are connected might only support one connection at a time from your handheld. Your handheld's Messages application might be using that single connection.If your wireless network supports multiple connections, the application for browsing web pages might not be configured to use the correct gateway or the WAP gateway that your handheld is configured to use might be temporarily out of service.Try opening the application again later. If the problem continues, contact Nextel Customer Care for more information. |
| The Browser has not loaded any pages yet | This message appears if you are attempting to view the web page address before any content has been loaded. Wait for the web page to finish loading before you attempt to view the web page address. |
| The following address was successfully retrieved but contained no data | If this message appears, there is currently no content available from the web page that you opened. To reload the web page, click the trackwheel to view the menu and click Refresh. If the page continues to load incorrectly, a problem could exist with the page. Try opening the web page again later. |
| Unable to fetch the following address | An error occurred while retrieving the web page. To reload the web page, click the trackwheel to view the menu and click Refresh. If you continue to receive this message, try to load a different web page. |
| An internal gateway error prevents the gateway from fulfilling your request | If this error appears, the web server might not be responding, the returned page might be in a format that is incompatible with the application, or the returned page might be too large for your handheld.Click the trackwheel to view the menu and click Refresh to reload the web page. If you continue to receive this error, try to load a different web page. |
| The currently configured Browser profile, with a CID of ‘{0}’, does not have an associated protocol stack registered with the Browser | If this message appears, an error occurred while updating your Browser service books. To update your service books, register your handheld with the Nextel wireless network. Refer to your Getting Started Guide for more information on registering with the network.If you still encounter problems after registering with the network, contact Nextel Customer Care. |
| Expired, Unknown, or Invalid Certificate | If you are browsing web pages using the WTLS security option and this message appears, the certificate that is used to authenticate the WAP gateway is either revoked, expired, or not trusted. Contact Nextel Customer Care for more information. |
| General Failure If you are browsing web pages using the WTLS security option and this message appears, an error occurred while connecting to the WAP gateway. Contact Nextel Customer Care for more information. | |
| Handshake Failure If you are browsing web pages using the WTLS security option and this message appears, a failure occurred during the negotiation of a secure connection with the WAP gateway. Contact Nextel Customer Care for more information. | |
| IO Exception If you are browsing web pages using the WTLS security option and this message appears, the WAP gateway could not be contacted using a secure protocol. Contact Nextel Customer Care for more information. | |
Troubleshooting
| Error Description | |
| Key Exchange Disabled If you are browsing web pages using the WTLS security option and this message appears, the WAP gateway reported that security cannot be negotiated with the handheld or the account is locked. Contact Nextel Customer Care to verify that your handheld is provisioned to negotiate security keys with the gateway and that your account is unlocked. | |
| Security not installed If you are browsing web pages and this message appears, the WTLS security libraries are not present on your handheld. Use the Application Loader tool to load the WTLS Security Package on your handheld, and then try browsing web pages again. If this message continues to appear, select a different Browser configuration, if one is available. | |
| Unknown key id If you are browsing web pages using the WTLS security option and this message appears, the WAP gateway reported that the handheld is not known. Contact Nextel Customer Care to verify that your handheld has been registered with the gateway. | |
| Unable to read security key info, please wait and retry | If you are browsing web pages using the WTLS security option and this message appears, the browser cannot read the security key information from the SIM card. Close the browser and try again later. |
Calendar error messages
| Error Description | |
| Appointments cannot span midnight | If you are using Lotus Notes as your desktop email program, this message appears if you attempt to create an appointment that starts on one date and ends on another. Appointments must start and end on the same day. |
| Cannot reschedule: Date skips over a later/earlier occurrence | If you are using Microsoft Outlook as your desktop email program, this message appears when you edit an occurrence of a recurring appointment, and the new date for that appointment is earlier than the previous occurrence of the appointment or later than the next occurrence of the appointment. |
Message status field error messages
| Error Description | |
| Address field truncated Your email address header field has exceeded 1024 characters.Only the first 1024 characters are used, but the message is saved.If you select Reply or Add to Address Book, verify that the email address has been entered properly. | |
| Could not receive More - original message was deleted | If you request to receive more of a message, the original message must appear on the Messages or Saved Messages screen. If you deleted the first part of the message after selecting More, your handheld cannot receive more of the message.The original message must also appear on your desktop. You are not able to receive more of the message if you have deleted, moved, or modified the message from your desktop Inbox.Verify that your handheld is within an area of sufficient wireless coverage and verify that no Inbox rules filter incoming email messages. |
| Decryption failure - please connect handheld to your computer | If this message appears, your handheld has an encryption key that is different from the one on your computer. You cannot send or receive messages until you connect your handheld to your computer, open the desktop software, and update the encryption key. Refer to the Redirector Settings Online Help for more information on generating encryption keys. |
| Desktop couldn't find the original message | This message indicates that the original message is no longer on your desktop. If a message has been deleted from your desktop email program, you cannot forward, reply to, or request to see more of that message. |
| Desktop Email program unable to store message | Your desktop email program is not able to store the message. Check your mailbox capacity. If you are not certain, contact your system administrator to verify that your desktop mailbox has not exceeded its limit. |
| Desktop Email program unable to create message | Your desktop email program is not able to recreate the message to send over the Internet. Verify that all parts of the original message are present. |
| Desktop Email program unable to submit message | Your desktop email program is not able to send the message over the Internet. |
| Formatting failure There is a problem sending your message. Resend the message. If your message still does not send, try resetting your handheld by pressing the Alt key + the Shift key + the Backspace key.If you continue to encounter problems, contact Nextel Customer Care for more information. | |
Troubleshooting
| Error Description | |
| General radio failure There | is a problem sending your message. Resend the message. If your message still does not send, try resetting your handheld by pressing the Alt key + the Shift key + the Backspace key.If you continue to encounter problems, contact Nextel Customer Care for more information. |
| General send failure - please try again | If you receive this error message, your message could not be sent. Try sending the message again. If you continue to receive this error, verify that you are in an area of sufficient wireless coverage for sending and receiving messages. You are in an area of sufficient wireless coverage if NXTL or NxTL and one or more bars appear with the wireless coverage in the handheld status section of the screen.If this message continues to appear, save your message and reset your handheld by pressing the Alt key + the Shift key + the Backspace key. |
| Encryption failure - please connect handheld to your computer | If this message appears, your handheld might have an encryption key that is different from the one on your computer. You cannot send or receive messages until you connect your handheld to your computer, open the desktop software, and update the encryption key. Refer to the Redirector Settings Online Help for more information on generating encryption keys. |
| General message error There | is a problem sending your message. Resend the message. If your message still does not send, try resetting your handheld by pressing the Alt key + the Shift key + the Backspace key.If you still encounter problems, contact Nextel Customer Care for more information. |
| General transaction failure | There is a problem sending your message. Resend the message. If your message still does not send, try resetting your handheld by pressing the Alt key + the Shift key + the Backspace key.If you still encounter problems, contact Nextel Customer Care for more information. |
| Handheld is not registered - please register now | When you first receive your handheld and turn it on, it attempts to register with the Nextel wireless network. Verify that you are in an area of sufficient wireless coverage for sending and receiving email messages. You are in an area of sufficient wireless coverage if NXTL or NxTL and one or more bars appears with the wireless coverage indicator in the handheld status section of the screen. Refer to your Getting Started Guide for more information on registering with the network. |
| Handheld lost message packet | A problem occurred while sending your message. Resend the message. |
| Handheld message packet queue full | This message indicates that the queue of messages that are waiting to be sent from your handheld is too long. Wait until the messages in the queue are sent to the network successfully before sending more messages. |
| Illegal message packet tag | There is a problem sending your message. Resend the message. If you continue to receive this message, contact Nextel Customer Care for more information. |
| Invalid routing - please connect handheld to your computer | Invalid routing is usually caused by invalid configuration of the email system. Verify that you have a mailbox on the Microsoft Exchange Server or Lotus Domino Server.The connection between your handheld and your computer might not be working properly. Connect your handheld to your computer and start the desktop software to update the settings. Refer to the Getting Started Guide for more information on connecting your handheld to your computer. |
| Message included an invalid address | If this message appears, one of the email addresses to which you are sending the message is invalid. Check the email addresses, correct the error, and resend the message. |
| Message included an unknown attachment | If this message appears, your handheld does not recognize the attachment's file type. Save your message and reset your handheld by pressing the Alt key + the Shift key + the Backspace key. Resend the message. |
| Message not delivered An attempt to send your message failed. Open your message and view the Message Status field for more information. | |
| Message packet data bad A problem occurred while sending your message. Resend the message. If this message continues to appear, contact Nextel Customer Care for more information. | |
| Message packet incorrectly formatted | A problem occurred while sending your message. Resend the message. If this message continues to appear, contact Nextel Customer Care for more information. |
| Message refused - please try again later | A temporary problem occurred while sending the message. Resend the message later. |
| 'More' error - desktop couldn't find original message | If this message appears, the original message was removed from your desktop email program before you requested more of the message. The original message must appear on the Messages or Saved Messages screen when your handheld receives the rest of the message. You cannot receive more of the message if you have deleted, moved, or modified the message. Restore the original message on your desktop and request more of the message on your handheld again. |
Troubleshooting
| Error Description | |
| 'More' error - general failure | If this message appears, more of your message could not be obtained. The original message must appear on the Messages or Saved Messages screen when your handheld receives the rest of the message. You cannot receive more of the message if you have deleted, moved, or modified the message. Restore the original message on your desktop and request more of the message on your handheld again. |
| 'More' error - invalid part identifier | Although more of the message has been requested, this error message indicates that there is a problem receiving the rest of the message. Request More again. If you are still unsuccessful, contact Nextel Customer Care for more information. |
| Please repeat your last More request | Your handheld has received more of a message but cannot save the data into the associated message because your handheld has insufficient memory to save the message. To check the amount of free memory on your handheld, click the Options icon, and then click Status. The File Free field should indicate at least 64 000 bytes. If you have less than that, delete old messages, tasks, memos, or appointments, and request more of the message again. |
| Please connect your handheld to your computer | If this message appears, your handheld might have an encryption key that is different from the one on your computer. You cannot send or receive messages until you connect your handheld to your computer, open the desktop software, and update the encryption key. Refer to the Redirector Settings Online Help for more information on generating encryption keys. |
| Radio sync problem: please reset handheld | The radio in your handheld is not synchronizing with the Nextel wireless network properly. Reset your handheld by pressing the Alt key + the Shift key + the Backspace key. |
| Request failed - please try again | A request that is associated with a received message (such as a request for More) was sent from your handheld, but failed due to a temporary error on your company's computer network. Send your request again. |
| Redirector transaction failure | If you are a Microsoft Exchange user, this message appears if your desktop redirector is not working temporarily. This transaction failure is probably because of a problem with your network. Resend the message later. |
| Registration request failed - please try again | This message appears if your attempt to register with the Nextel wireless network has failed. Try registering again manually. Verify that you are in an area of sufficient wireless coverage. You are in an area of sufficient wireless coverage if NXTL or NxTL and one or more bars appear with the wireless coverage indicator in the handheld status section of the screen. Refer to the Getting Started Guide for more information on registering your handheld. |
| Registration request sent | This message confirms that the registration request reached the network successfully, but the network has not responded. |
| Request for More failed | This error message usually indicates that more of a particular message cannot be obtained. Try requesting More again. If you continue to receive this message, the entire message can still be read in your desktop email application. |
| Send cancelled by transport | This message indicates that the send process was cancelled before it was complete. Resend the message. |
| Sending failed (please resend and watch for error message) | This message usually appears either because of a network registration problem or a connection failure between your handheld and your computer. Resend the message and watch your handheld for an error message. Refer to the explanation for that specific error for details. |
| Temporary network problem - please resend later | The Nextel wireless network is temporarily busy. Resend the message later. |
| Temporary service problem - please resend later | If this message appears, a temporary problem with the Nextel wireless network is occurring. Wait before you send a message again. |
| Text header field truncated | Your text field has exceeded 1024 characters. Only the first 1024 characters are used, but the message is saved. |
| Timeout - message not delivered | This message might appear several minutes after you send a message to indicate that the message could not be sent. Resend the message later. |
| Transport not registered | This message appears if the radio code on your handheld is not working properly. Reset your handheld by pressing the Alt key + the Shift key + the Backspace key. |
| Unknown command byte | There was a problem sending your message. Reset your handheld by pressing the Alt key + the Shift key + the Backspace key. If you continue to receive this message, contact Nextel Customer Care for more information. |
Troubleshooting
| Error Description | |
| Unlisted message error There | There was a problem sending your message. Resend the message. If you continue to receive this error, contact Nextel Customer Care for more information. |
| Unlisted send error There | was a problem sending your message. Resend the message. If you continue to receive this message, contact Nextel Customer Care for more information. |
| Unlisted transaction error | There was a problem sending your message. Resend the message. If you continue to receive this message, reset your handheld by pressing the Alt key + the Shift key + the Backspace key.If you continue to receive this message, contact Nextel Customer Care for more information. |
Phone error messages
| Error Description | |
| Forwarding Not Available | If this message appears, call forwarding might not be available on your handheld. You must subscribe to call forwarding before you can configure this feature. Contact Nextel Customer Care for more information.If you have just subscribed to call forwarding, a delay of up to 60 seconds occurs before forwarding is available. Your handheld might not have checked with the network to determine that call forwarding is now available. |
| Forwarding numbernot set for.Please check the number and try again. | If this message appears, there was a problem setting the call forwarding number. Try setting the call forwarding number again later. Refer to "Customizing call forwarding" on page 134 for more information. |
| No forwarding number provided | If this message appears, the call forwarding number has not been set. Refer to "Customizing call forwarding" on page 134 for more information. |
| Cannot connect If this message appears, check the phone number that you are dialing. Correct any errors and try the call again. If you continue to receive this message, the Nextel wireless network might be busy. Call again later.If you cannot connect later, contact Nextel Customer Care for more information. | |
| Cannot connect - call in progress | If this message appears, your handheld cannot place an additional call because a three-way call is in progress. Contact Nextel Customer Care to find out if your handheld is enabled for three-way calls. |
| Timeout waiting for radio | If this message appears, your handheld's radio was turned off and the handheld attempted to place a call that automatically turned on the radio. The handheld did not attach to the Nextel wireless network before the phone call was processed. Wait until the handheld attaches to the Nextel wireless network and place your call again. |
| The phone number to access your voice mail has not been set. | If this message appears, the voice mail access number for your handheld has not been set. If you want to select a different voice mail service, you can type an alternative number. Refer to "To edit your voice mail access number" on page 124 for more information. |
| No response from network - please try again | If this message appears, you have attempted to modify supplementary services but the Nextel wireless network is not responding. Try again later. |
Troubleshooting
| Error Description | |
| Timeout waiting for network - Please try again | If this message appears, you have attempted to modify supplementary services, but the Nextel wireless network is not responding. Try again later. |
| Call Failed If this message appears, your handheld cannot place a phone call because you might not be in an area of sufficient wireless coverage. NXTL, NxTL, NXTI, or Nxtl and one or more bars should appear with the wireless coverage indicator in the handheld status section of the screen. Verify that you are in an area of sufficient wireless coverage and place your call again. | |
| System busy - try later | If this message appears, the Nextel wireless network is busy and cannot place your call. Try again later. |
| User Not Available This message appears if you call your own phone number. | |
| Battery too low for radio use | If this message appears, you cannot place a phone call because the handheld battery is too low. Connect your handheld to the computer to charge the handheld battery. Try placing the call again when the handheld battery is charged. |
| Please Try Later If this message appears, there is a problem with the Nextel wireless network. Call again later. | |
| Service Conflict If this message appears, there is a problem with the Nextel wireless network. Call again later. | |
Nextel Direct Connect error messages
| Error Description | |
| Cannot connect due to phone only mode. Enable Direct Connect services? | If this message appears, the Nextel Direct Connect service is not enabled on your handheld. Click Yes if you want to enable Nextel Direct Connect. |
| Could not modify silencing options | If this message appears, in the Phone options, on the Nextel Direct Connect screen, you have modified the Silence Call Alerts, Silence Private Calls, or Silence Group Calls fields, but the change cannot be processed because the handheld's radio is busy. Modify the settings at another time. |
| Could not modify phone only status | If this message appears, in the Phone options, on the Nextel Direct Connect screen, you have modified the Phone only status field, but the change cannot be processed because the handheld's radio is busy or because you are not within an area of sufficient wireless coverage. Modify the setting at another time. |
| Error Description | |
| Out of dispatch coverage - try again later | If this message appears, you are not within an area of sufficient wireless coverage to place a Nextel Direct Connect call. Call again later. |
| Invalid Mode If this message | appears, you have dialed an invalid number when you attempted to join a talkgroup. Type a valid talkgroup number and place your call again. |
| Invalid Area ID If this message | appears, the Area ID of the contact that you are trying to call is out of range. Check your contact's Nextel Direct Connect Number (DCID) and place your call again. |
| Isolated Site Operation If this message | appears, the handheld's radio is in Isolated Site Operation and cannot place a Nextel Direct Connect call. Call again later. |
| High Battery Condition If this message | appears, you cannot place a Nextel Direct Connect call because the handheld's radio is being used outside the normal operating conditions. Call again later. Refer to the product information in the Getting Started Guide for more information. |
| High Temperature Condition | If this message appears, you cannot place a Nextel Direct Connect call because the handheld's radio is being used outside the normal operating conditions. Call again later. Refer to the product information in the Getting Started Guide for more information. |
| Invalid Fleet Member ID If this message | appears, you have attempted to place a Nextel Direct Connect call to a contact whose Nextel Direct Connect Number (DCID) is out of range. Check the DCID and place your call again. |
| Number Not In Service If this message | appears, you have typed an invalid talkgroup number or Direct Connect ID. Check the number and try your call again. |
| Please Try Later If this message | appears, there is a problem with the Nextel wireless network. Call again later. |
| Service Conflict If this message | appears, there is a problem with the Nextel wireless network. Call again later. |
| User Busy In Private If this message | appears, the contact that you are trying to call is connected to a private call with another contact. Call again later. |
| User Busy In Data If this message | appears, the contact that you are trying to call is using an application that uses the Nextel wireless network. Call again later. |
| User Not Authorized If this message | appears, the handheld that you are trying to call is not provisioned for Nextel Direct Connect. |
Troubleshooting
| Error Description | |
| User Not Available If this message appears, the phone number that you are trying to call is busy, outside an area of sufficient wireless coverage, or disconnected from the Nextel wireless network. Call again later. | |
| User Not Reachable If this message appears, the contact to which you have placed a Private Call or a Call Alert is out of range. | |
| Cannot connect - call in progress | If this message appears, your handheld cannot place a call because a call is already in progress. |
| Request to join talk group denied | If this message appears, you have attempted to join a talkgroup that you are not permitted to join or you attempted to join a talkgroup while there is a problem with the Nextel wireless network. Attempt to join the talkgroup again later. |
Tasks error messages
| Error Description | |
| Warning! Due date has already passed | If this message appears, the date you have typed in theDuefield has already occurred. Type a future date on which your task is due. |
Transmission error messages
If an x appears beside a message that you sent from your handheld, the message was not sent properly. You can determine the cause by opening the message and scrolling to the top of it. The Message Status field identifies the problem.
| Transmission error Description | |
| Attempt to send to multiple services that have different routing information | If this message appears, your handheld is trying to send a message to addresses with different routing information. Try registering with the Nextel wireless network. Verify that you are in an area of sufficient wireless coverage for sending and receiving email messages. You are in an area of sufficient wireless coverage if NXTL or NxTL and one or more bars appear with the wireless coverage indicator in the handheld status section of the screen. Refer to your Getting Started Guide for more information on registering with the network.If you continue to receive this error message, contact your system administrator. |
| Bad Address If this message | appears, one of the addresses to which you are sending your message is incorrect. Verify the addresses, correct any errors, and resend the message. |
| Bad version If this message | appears, the connection to the Nextel wireless network refused your message. Contact Nextel Customer Care for more information. |
| Could not receive message from service | If this message appears, a temporary problem might exist with the Nextel wireless network. Wait before you resend your message. If this message appears repeatedly, your handheld might have a different encryption key from the one on your desktop. Connect your handheld to your computer, open the desktop software, and update the encryption key in the Redirector Settings tool on the Security tab. Refer to the Redirector Settings Online Help for more information. |
| Failed by service If this message | appears, there is an error with the BlackBerry Enterprise Server. Check with your system administrator for more information. |
| Failed to contact service If this message | this message appears, the connection to the Nextel wireless network does not acknowledge your message. Resend the message later. If a problem still occurs, contact Nextel Customer Care. |
| Failed to send message If you receive this error message, your message was received by the BlackBerry Enterprise Server, but the server cannot send the message to the recipients. Resend the message later. | |
| Failed to send message - bad apn | If this message appears, the handheld has incorrect routing information. Contact Nextel Customer Care for more information. |
| Failed to send message - invalid address | If this message appears, the handheld has incorrect routing information. Contact Nextel Customer Care for more information. |
| Failed to send message - packet error | If this message appears, there is an error sending the message. Contact Nextel Customer Care for more information. |
| Message cancelled If this message | appears, your message was cancelled before it was sent. Resend the message. |
| Message could not be sent | If this message appears, there is a problem sending the message. Contact Nextel Customer Care for more information. |
Troubleshooting
| Transmission error Description | |
| 'More' error - desktop couldn't find original message | If this message appears, the original message was removed from your desktop email program before you requested more of the message. The original message must appear on your desktop. You cannot receive more of the message if you have deleted, moved, or modified the message. Restore the original message on your desktop and, on your handheld, request more of the message again. |
| 'More' error - general failure | If this message appears, more of your message could not be obtained. The original message must appear on the Messages or Saved Messages screen when your handheld receives the rest of the message. If you delete the first part of the message after you select More, your handheld cannot receive more of the message. |
| 'More' error - invalid part identifier | Although more of the message has been requested, this error message indicates that there is a problem receiving the rest of the message. Request More again. If more of the message still does not arrive at your handheld, contact Nextel Customer Care for more information. |
| No routing information If this message appears, the handheld does not have the correct routing information to send the message. Register your handheld with the Nextel wireless network to update the routing information. You must be in an area of sufficient wireless coverage to register your handheld. You are in an area of sufficient wireless coverage if NXTL or NxTL and one or more bars appear with the wireless coverage indicator in the handheld status section of the screen. Refer to the Getting Started Guide for more information on registering with the network. | |
| Refused by service If this message appears, the connection to the Nextel wireless network refused your message. Send a new email message to your contact. | |
| Service Disabled If this message appears, the ability to send and receive messages is disabled. Connect your handheld to the desktop software. If the message appears again, contact your system administrator. | |
| Transaction error If this message appears, a general error occurred with your handheld. Contact your system administrator. | |
| Transaction error - bad format | If this message appears, there is an error transmitting the message. Try registering with the wireless network. Verify that you are in an area of sufficient wireless coverage for sending and receiving messages. You are in an area of sufficient wireless coverage if NXTL or NxTL and one or more bars appear with the wireless coverage indicator in the handheld status section of the screen. Refer to your Getting Started Guide for more information on registering your handheld. |
| Transmission error Description | |
| Transaction error - decryption error | If this message appears, your handheld might have a different encryption key than your desktop. Refer to the Redirector Settings Online Help for more information on generating encryption keys. |
| Transaction error - failure at service | If this message appears, a temporary problem occurred with the Nextel wireless network. Resend the message later. |
| Transaction error - general failure | If this message appears, there is a general error transmitting the message. Try registering with the Nextel wireless network. Verify that you are in an area of sufficient wireless coverage for sending and receiving messages. You are in an area of sufficient wireless coverage if NXTL or NxTL and one or more bars appear with the wireless coverage indicator in the handheld status section of the screen. Refer to your Getting Started Guide for more information on registering your handheld.If this message continues to appear, contact Nextel Customer Care. |
| Transaction error - timeout | If this message appears, a temporary problem with the connection to your BlackBerry Enterprise Server prevented your message from being sent. Contact your system administrator for more information. |
| Transaction error - unknown command | If this message appears, an error occurred with the handheld's radio. Try registering with the Nextel wireless network. Try registering with the Nextel wireless network. Verify that you are in an area of sufficient wireless coverage for sending and receiving messages. You are in an area of sufficient wireless coverage if NXTL or NxTL and one or more bars appear with the wireless coverage indicator in the handheld status section of the screen. Refer to your Getting Started Guide for more information on registering your handheld.If this message continues to appear, contact your system administrator. |
| Transaction error - unknown service, bad UID | If this message appears, your handheld has not received the correct service book to send and receive messages. Connect your handheld to the desktop software, and then send your message. |
| Unable to compress/encrypt message | If this message appears, the handheld could not send the message because it could not be encrypted properly. Generate a new encryption key. Refer to the Redirector Settings Online Help for more information on generating encryption keys. |
| Unable to find specified service | If this message appears, the service to which your message is addressed is not available. Connect your handheld to the desktop software to receive the correct service information. |
Troubleshooting
| Transmission error Description | |
| Unknown error This message | might appear when you generate an encryptionkey manually and clickUpdateto copy the new encryption key to your handheld. An error occurred as your computer and your handheld were exchanging information. Verify that the email address that is specified in the Redirector Settings tool, on theAdvancedtab, is correct. Verify that your handheld is registered on the Nextel wireless network and that it is properly connected to your computer. Update the encryption key again. Refer to theRedirector Settings Online Helpfor more information.If you continue to receive this message, contact your system administrator. |
| Unlisted message error If this message appears, there was a problem sending your message. Resend the message. If you continue to receive this message, contact Nextel Customer Care for more information. | |
Index
A
about this guide, 19
accepting, service books, 240
adding
addresses, 95
addresses from call logs, 96
addresses from links, 97
addresses from messages, 96
addresses from Phone screen, 97
addresses from remote address lookup results, 103
appointments, 196
attachments to Address Book, 61
attachments to messages, 55
AutoText entries, 49
bookmarks, 159
bookmarks to subfolders, 164
bullet characters, 46
call notes, 141
group addresses, 102
invitees to meeting, 203
memos, 210
notification profiles, 221
pauses and waits, 101
special characters, 46
symbols, 46
tasks, 183
Address Book
adding addresses from attachments, 61
adding addresses from call logs, 96
adding addresses from links, 97
adding addresses from
messages, 96
adding addresses from Phone screen, 97
adding addresses from remote address lookup results, 103
adding addresses manually, 95
adding group addresses, 102
attaching addresses to messages, 55
changing name of user-defined field, 101
deleting addresses, 107
deleting group addresses, 107
description of, 31
editing addresses, 106
editing group addresses, 106
error messages, 254
fields, 98
searching addresses, 106
setting options, 94
status icons, 94
tips for using, 107
updating addresses from Phone screen, 98
using cut, copy, and paste, 52
viewing addresses, 105
viewing contacts in the Phone application, 144
viewing group addresses, 105
addresses
adding from call logs, 96
adding from links, 97
adding from Phone screen, 97
Index
adding from received messages, 96
adding group, 102
adding manually, 95
changing in messages, 76
deleting group, 107
editing group, 106
lookup, 103
showing, 59
updating, 98
viewing group, 105
Alarm
customizing notification profiles, 220
description of, 32
FAQs, 246
fields, 219
setting, 218
snooze feature, 218
turning off, 218
alert
answering, 116
ending, 116
placing from Phone screen, 114
placing one-time, 111
Alt key
description, 25
use with other keys, 26
use with trackwheel, 25
answering
Call Alerts, 116
Group Calls, 116
phone calls, 123
Private Calls, 116
applications
screens, 29
third-party, 232
viewing, 232
appointments
adding, 196
cancelling meeting requests, 206
changing attendees, 204
changing meeting request invitees, 205
creating meeting requests, 203
customizing notification profiles, 220
deleting in Day, Agenda, or Week view, 202
deleting in Month view, 203
deleting meeting requests, 206
editing in Day, Agenda, or Week view, 200
editing in Month view, 201
editing meeting requests, 205
enabling wireless calendar synchronization, 194
fields, 199
managing, 200
managing for someone else, 205
recurring, 197
removing attendees, 204
responding to meeting requests, 204
using cut, copy, and paste, 52
viewing meeting requests, 205
attachments
adding from Address Book to messages, 55
adding to Address Book from messages, 61
auto more, 177
deleting, 179
document view, 170
forwarding file, 62
full content, 172
handling, 61
meeting request, 204
meeting response, 205
more option, 177
navigating, 175
opening, 171
options, 174
setting options, 174
spreadsheet view, 170
status icons, 173
table of contents, 171
tips, 179
using find, 178
viewing next, 176
viewing pages, 177
viewing previous, 176
viewing sheet, 176
viewing tables, 177
audience, before you begin, 19
auto more, viewing long
attachments, 177
Auto On/Off
description, 232
fields, 230
setting, 229
auto signature
customizing for enterprise email account, 55
customizing for new or ISP email account, 56
automatic formatting
capitalization, 47
email fields, 48
number fields, 48
number lock, 48
punctuation, 47
AutoText
adding entries, 49
deleting entries, 52
editing entries, 52
locale, 50
searching for entries, 51
smartcase, 50
specified case, 50
using in email and PIN messages, 48
with macros, 50
B
Back key, using, 26
backlighting
activating, 28
and receiving phone calls, 28
Backspace key, using, 27
battery
FAQs, 247
low, 126
BlackBerry Browser
status icons, 150
tips for using, 166
bookmarks
adding, 159
adding to subfolders, 164
copying, 161
copying address, 161
creating subfolders, 163
editing, 160
making available offline, 160
opening web pages using, 152
organizing, 153
setting default subfolder, 163
using, 159
browser
accepting service books automatically, 156
clearing caches, 157
copying addresses, 159
refreshing web pages, 157
returning to previous web page, 154
setting configuration options, 154
setting general options, 155
using Find, 157
viewing history, 154
viewing next and previous web pages, 153
browser application
closing, 166
browser, WTLS, 243
bullet characters, inserting, 46
Index
C
cache, clearing, 157
Calculator
closing, 215
description of, 32
performing mathematical operations, 214
performing measurement conversions, 214
tips for using, 215
using, 213
Calendar
adding appointments, 196
Agenda view, 190
appointment fields, 199
cancelling meeting requests, 206
changing attendees, 204
changing meeting request invitees, 205
changing views, 190
creating meeting requests, 203
Day view, 190
deleting appointments in Day, Agenda, or Week view, 202
deleting appointments in Month view, 203
deleting meeting requests, 206
description of, 31
editing appointments in Day, Agenda, or Week view, 200
editing appointments in Month view, 201
editing meeting requests, 205
enabling wireless calendar synchronization, 194
error messages, 262
FAQs, 248
managing appointments, 200
managing for someone else, 205
Month view, 192
navigating in Agenda view, 193
navigating in Day view, 192
navigating in Month view, 193
navigating to a specific date, 194
removing attendees, 204
responding to meeting requests, 204
setting options, 189
setting recurring appointments, 197
status icons, 188
tips, 207
using cut, copy, and paste, 52
viewing and editing appointments in Day, Agenda, or Week view, 200
viewing appointments in Month view, 201
viewing meeting requests, 205 Week view, 191
Call Alerts
answering, 116
ending, 116
placing from Phone screen, 114
placing one-time, 111
call forwarding
customizing, 134
description, 131
disabling, 135
enabling, 135
call logging
customizing, 133
description, 131
types of calls to log, 133
call logs
adding addresses from, 96
deleting, 87
deleting from Phone screen, 131
deleting multiple by date, 89
managing, 69
searching, 80
tips for managing, 91
viewing, 87
call notes
adding, 141
editing, 142
forwarding, 143
using in Phone application, 141
call waiting
description, 131
enabling and disabling, 136
setting, 136
calls
answer options, 124
answering, 116
answering and holster, 136
backlighting, 28
configuring voice mail, 140
ending after connected, 116, 125
ending and holster, 137
ending before connected, 122
forwarding, 134
holding, 124, 143
making notes, 141
muting, 128
placing, 121
placing emergency, 147
placing from Home screen, 126
placing Group Calls from Phone screen, 115
placing on Phone screen, 130
placing one-time Group Calls, 112
placing one-time in Phone application, 126, 129
placing quickly, 126
placing to corporate extensions, 127, 138
placing using links, 129
placing using pauses and waits, 144
placing using shortcuts, 126
receive options, 124
resetting call timers, 146
setting general options for, 136
setting volume, 122, 127
swapping, 125
three-way, 144
to voice mail, 139
viewing call timers, 146
cancelling meeting requests, 206
capital-letter lock, 26
changing
Address Book options, 94
addresses, 106
addresses in messages, 76
appointments in Day, Agenda, or Week view, 200
appointments in Month view, 201
auto signature, 55
AutoText entries, 52
bookmarks, 160
Calendar options, 189
Calendar views, 190
call notes, 142
current email message options, 43
email message delete, 89
group addresses, 106
handheld options, 231
meeting request invitees, 205
MemoPad options, 210
memos, 211
message options, 43
notification profiles, 228
searches, 83
sent messages, 75
sent PIN messages, 75
SMS message options, 241
Task options, 182
task status, 185
Tasks, 184
text, 53
user-defined field name, 101
Index
clearing fields
in Address Book, 106
in Calendar, 198
in call notes, 143
in memos, 212
in searches, 82
in tasks, 184
closing
browser application, 166
compose, description of, 31
composing
and saving, 75
email messages, 39
messages using links, 43
one-time phone calls, 126, 129
PIN messages, 40
using AutoText, 48
conference calls
disconnect, 146
split call, 145
configuring, voice mail, 140
conventions, 19
converting measurements, 214
copying
bookmarks, 161
bookmarks address, 161
copying text
in a message, 53
tips for using, 64
creating
Address Book entries, 95
AutoText entries, 49
bookmark subfolders, 163
email messages, 39
meeting requests, 203
memos, 210
phone calls, 121
PIN messages, 40
tasks, 183
customizing
Address Book options, 94
Alarm, 218
auto signature, 55
Calendar options, 189
call forwarding, 134
call logging, 133
current email message options, 43
handheld options, 231
home page, 155
MemoPad options, 210
message options, 43
Nextel Direct Connect options, 132
notification profiles, 228
Phone options, 131
SMS message options, 241
Task options, 182
cutting text
in a message, 53
tips for using, 64
D
date and time
copying from network, 233
fields, 233
DCID
field in Address Book, 100
format, 100
placing one-time Call Alerts, 111
placing one-time Group Calls, 112
placing one-time Private Calls, 110
typing quickly, 126
deleting
addresses, 107
appointments in Day, Agenda, or Week view, 202
appointments in Month view, 203
attachments, 179
AutoText entries, 52
call logs, 87
email messages from handheld and desktop, 89
group addresses, 107
items on Phone screen, 131
meeting requests, 206
memos, 212
messages, 87
messages using wireless email reconciliation, 88
multiple items by date, 89
notification profiles, 229
original text from reply messages, 58
searches, 84
SMS messages from SIM card, 88
Tasks, 185
text, 53
third-party applications, 232
delivery confirmation, email
messages, 56
description
Address Book, 31
Alarm, 32
Calculator, 32
Calendar, 31
compose, 31
keyboard, 24
LCD screen, 28
lock, 33
MemoPad, 32
messages, 31
Nextel Online, 32
nextel.com, 32
options, 32
Phone, 31
profiles, 32
saved messages, 31
search messages, 31
tasks, 31
trackwheel, 24
turn power on/off, 33
turn radio on/off, 33
desktop software online Help, 21
dial from Home screen, 126
disabling
Alarm, 218
auto signature, 56
call forwarding, 135
call logging, 133
password security screen, 239
document view
attachments, 170
tips, 179
documentation, other sources, 21
E
editing
Address Book options, 94
addresses, 106
appointments in Day, Agenda, or Week view, 200
appointments in Month view, 201
auto signature, 55
AutoText entries, 52
bookmarks, 160
Calendar options, 189
call notes, 142
current email message options, 43
email message delete, 89
group addresses, 106
handheld options, 231
MemoPad options, 210
memos, 211
message options, 43
notification profiles, 228
Phone options, 131
searches, 83
sent email messages, 75
SMS message options, 241
Task options, 182
task status, 185
Tasks, 184
Index
text, 53
user-defined field name, 101
using cut, copy, and paste, 52
email messages
automatic capitalization in, 47
automatic punctuation in, 47
changing address while composing, 77
changing addresses, 76
composing, 39
customizing auto signature, 55
customizing notification profiles, 220
deleting, 87
deleting from handheld and desktop, 89
deleting multiple by date, 89
editing sent, 75
filing, 70
formatting automatically, 47
forwarding, 58
options for received messages, 57
reading, 57
receiving confirmation for, 56
receiving long, 60
reconciling, 73
saving, 73
saving drafts, 75
searching, 80
searching by sender or recipient, 85
searching by subject, 86
sending, 39
sending from specific service, 252
setting current message options, 43
show address, 59
show name, 59
status icons, 38
tips, 63
using cut, copy, and paste, 52
emergency calls, placing, 147
enabling
Alarm, 218
auto on/off, 230
call forwarding, 135
call logging, 133
password security screen, 237
wireless calendar synchronization, 194
wireless email reconciliation, 72
ending
Nextel Direct Connect calls, 116
phone calls, 125
Enter key, using, 27
error messages
Address Book, 254
Calendar, 262
handheld, 254
message status field, 263
Nextel Direct Connect, 270
Nextel Online, 256
Phone, 269
Tasks, 272
transmission, 272
Escape button, using, 27
F
fields
Address Book, 98
Alarm, 219
Auto On/Off, 230
Calendar appointment, 199
clearing, 82, 106, 184, 198, 212
network, 235
owner information, 236
profiles, 222
screen/keyboard, 236
security, 237
SMS, 241
status, 241
Tasks, 184
user-defined, 101
WAP Push, 242
file attachments, forwarding, 62
filing email messages, 70
find
using in attachments, 178
using in messages, 53
using in web pages, 157
firewall, 234
folders
adding bookmarks to, 164
creating for Browser bookmarks, 163
on handheld, 70
returning to default in search, 82
searching in, 81
setting default for Browser bookmarks, 163
formatting
automatic capitalization, 47
automatic punctuation, 47
messages automatically, 47
Forward key, using, 26
forwarding
call notes, 143
email and PIN messages, 58
file attachments, 62
phone calls, 134
frequently asked questions
Alarm, 246
battery, 247
Calendar, 248
Home screen, 248
LCD screen, 248
maintenance, 249
new messages, 249
PIN, 249
punctuation, 252
storage, 253
full content for attachments, 172
G
general phone options,
description, 131
Getting Started Guide, 21
Group Calls
answering, 116
ending, 116
placing from Phone screen, 115
placing one-time, 112
H
handheld
Address Book icons, 94
application icons, 31
BlackBerry Browser icons, 150
Calendar icons, 188
changing the password, 239
customizing options, 217
error messages, 254
keyboard, 24
LCD screen, 28
locking, 238
locking keyboard, 219
message status icons, 38, 66
navigational icons, 35
network status icons, 34
Nextel Online icons, 150
nextel.com icons, 150
Phone icons, 120
setting options, 36
SMS-compatible phone number, 66
status icons, 33
status section, 28
Task icons, 182
trackwheel, 24
turning off, 230
unlocking, 238
handheld options
about, 232
applications, 232
Index
Auto On/Off, 232
AutoText, 232
customizing, 231
date/time, 233
description of, 231
firewall, 234
host routing table, 234
localization, 234
message services, 235
modules, 232
network, 235
owner, 236
profiles, 236
screen/keyboard, 236
security, 237
service book options, 240
SIM card, 241
SMS, 241
status, 241
WAP Push, 242
holding phone calls, 124, 143
holster
answering phone calls and, 136
ending phone calls and, 137
home page, customizing, 155
Home screen, FAQs, 248
|
icons
Address Book, 94
application, 31
attachment status, 173
BlackBerry Browser, 150
Calendar, 188
handheld status, 33
message status, 38
navigational status, 35
network status, 34
Nextel Online, 150
nextel.com, 150
Phone, 120
service book pending, 34
SMS message status, 66
Tasks, 182
importance, setting for email
messages, 43
Industry Canada certification, 18
inserting
bullet characters, 46
meeting request invitees, 206
special characters, 46
symbols, 46
K
key assignment chart, 24
key rate, 236
keyboard
description, 24
locking, 219
shortcut keys, 24
keys
Alt, 25
Back, 26
Backspace, 27
Enter, 27
Escape, 27
Forward, 26
Space, 28
L
LCD screen
application screens, 29
backlighting, 28
description, 28
FAQs, 248
links
adding addresses from, 97
placing calls using, 129
sending messages using, 43
using, 30
viewing addresses in
browser, 159
localization, setting language, 234
locating handheld PIN, 40
locking
keyboard, 219
the handheld, 238
with a password, 33
logging phone calls, 133
low battery notification, 126
M
maintenance, FAQs, 249
managing
Address Book, 93
Address Book attachments, 61
appointments, 200
call logs, 69
memos, 209
messages, 69
someone else's Calendar, 205
Tasks, 181
marking
all messages as opened, 78
messages as opened, 78
messages as unopened, 79
meeting requests
cancelling, 206
changing attendees, 204
changing invitees, 205
creating, 203
deleting, 206
inserting invitees, 206
managing someone else's
Calendar, 205
removing attendees, 204
responding to, 204
viewing, 205
MemoPad
adding memos, 210
deleting memos, 212
description of, 32
editing memos, 211
searching memos, 212
setting options, 210
tips for using, 212
using, 209
using cut, copy, and paste, 52
viewing memos, 211
message status field, error
messages, 263
messages
adding addresses from, 96
attaching addresses to, 55
deleting, 87
deleting multiple by date, 89
deleting saved, 74
description of, 31
inserting symbols, 28
logging calls on Messages screen, 133
managing, 69
marking as opened, 78
marking as unopened, 79
opening saved web pages, 165
placing calls, 86
resending, 77
saving, 73
saving sent or received, 73
saving web pages to Messages screen, 164
searching, 80
searching by sender or recipient, 85
sending using links, 43
setting message options, 43
status icons, 38, 66
tips, 91
using AutoText, 48
using Find, 53
using links, 30
working with Nextel Direct Connect calls, 91
working with phone calls, 91
modules, 232
muting phone calls, 128
Index
N
name, showing, 59
navigating
attachments, 175
the Calendar, 192
network
fields, 235
selecting, 235
status icons, 34
new messages, FAQs, 249
Nextel Direct Connect
answering Call Alerts, 116
answering calls, 116
answering Group Calls, 116
answering Private Calls, 116
customizing notification profiles, 220
customizing options, 132
deleting call logs, 87
description, 131
ending calls, 116
error messages, 270
placing Call Alerts from Phone screen, 114
placing calls, 110
placing Group Calls from Phone screen, 115
placing one-time Call Alerts, 111
placing one-time Group Calls, 112
placing one-time Private Calls, 110
placing Private Calls from Phone screen, 113
Push-to-Talk button, 110
tips for using, 117
viewing call logs, 87
viewing call timers, 146
viewing status, 146
working with Messages screen, 91
Nextel Online
description of, 32
error messages, 256
status icons, 150
tips for using, 166
using cut, copy, and paste, 52
using links, 30
nextel.com
description of, 32
status icons, 150
tips for using, 166
notification profiles
adding, 221
deleting, 229
editing, 228
enabling, 221
number lock, 27, 48
0
one-time
edit search, 84
phone calls, 126, 129
searches, 82
online Help
BlackBerry Desktop Software, 21
BlackBerry Web Client, 22
opening
attachments, 171
full content for an
attachment, 172
web pages saved on Messages screen, 165
web pages using addresses, 152
web pages using bookmarks, 152
web pages using links, 151
options
Address Book, 94
attachments, 174
browser, 154
Calendar, 189
description of, 32
dial from Home screen, 126
handheld, 217
MemoPad, 210
messages, 43
Nextel Direct Connect, 132
Phone, 131
received email messages, 57
smart dialing, 137
SMS messages, 66, 241
Tasks, 182
WTLS, 243
owner information fields, 236
P
password security screen
changing password, 239
disabling, 239
enabling, 237, 238
unlocking, 238
password, typed incorrectly, 238
pasting text
in a message, 53
tips for using, 64
pauses
adding, 101
using, 143
performing
mathematical operations, 214
measurement conversions, 214
search by sender or recipient, 85
search by subject, 86
searches, 80
personal folders, 70
Phone
adding addresses from, 97
alpha-dialing, 126
and backlighting, 28, 123
available services, 121
call waiting, 136
calling voice mail, 139
customizing notification profiles for, 220
customizing options, 131
deleting items, 131
description of, 31
dialing corporate extensions, 99, 127, 138
displaying phone number, 121
emergency calls with radio off, 148
ending phone calls, 125
error messages, 269
holding calls, 143
muting calls, 128
placing calls, 121, 130
placing calls from Messages screen, 86
placing calls using links, 129
placing emergency calls, 147
placing one-time calls, 126, 129
plus dialing using, 127
receive options, 124
restricting call timers, 146
setting auto answer, 136
setting auto hangup, 137
setting general options, 136
status icons, 120
three-way calls, 144
tips for using, 148
touch tone, 121
TTY option, 140
updating addresses from, 98
using, 119
using alphabetic characters to dial, 126
using cut, copy, and paste, 52
using links, 30
using shortcuts to dial quickly, 126
using with other applications, 122
viewing call logs, 87
viewing contacts, 144
viewing status, 146
viewing timers, 146
working with Messages
Index
screen, 91
phone calls
adding notes, 141
and backlighting, 123
answer options, 124
answering, 123
calling voice mail, 139
configuring voice mail, 140
editing notes, 142
emergency calls with radio off, 148
ending after connected, 125
ending before connected, 122
extensions, 122, 144
forwarding, 134
forwarding call notes, 143
holding, 124
logging, 133
placing, 121
placing emergency, 147
placing on Phone screen, 130
placing one-time in Phone application, 126, 129
placing using links, 129
redialing, 130
resetting call timers, 146
setting volume, 122, 127
swapping, 125
three-way, 144
using Plus Dialing, 127
viewing timers, 146
phone numbers
extensions, 122, 144
using pauses and waits, 99
PIN
FAQs, 249
locating for your handheld, 40
PIN messages
changing address while composing, 77
changing addresses, 76
composing, 40
editing sent, 75
forwarding, 58
reading, 57
sending, 40
placing
Call Alerts from Phone screen, 114
calls, 110
calls from Home screen, 126
calls from Messages screen, 86
calls quickly, 126
calls to corporate extensions, 127, 138
calls using alphabetic characters, 126
calls using pauses and waits, 144
calls using shortcuts, 126
emergency calls, 147
Group Calls from Phone screen, 115
one-time Call Alerts, 111
one-time Group Calls, 112
one-time phone calls, 126, 129
one-time Private Calls, 110
phone calls, 121
phone calls using links, 129
Private Calls from the Phone screen, 113
three-way calls, 144
power on/off, 25
Private Calls
answering, 116
ending, 116
placing from Phone screen, 113
placing one-time, 110
profiles
adding, 221
choosing, 220
deleting, 229
description of, 32, 236
editing, 228
enabling, 221
fields, 222
settings for default, 223
punctuation
automatic, 47
FAQs, 252
Push-to-Talk button, using, 110
R
reading
email messages, 57
PIN messages, 57
SMS messages, 66
Readme file, 21
recalling searches, 83
received email messages
options, 57
saving, 73
received messages, searching, 85
received SMS messages
options, 67
saving, 73
receiving
Address Book attachments, 61
confirmation of email messages, 56
file attachments, 62
long email messages, 60
SMS messages, 66
reconciling email messages, 73
recurring appointments
adding, 197
deleting in Day, Agenda, or Week view, 202
deleting in Month view, 203
viewing and editing in Day, Agenda, or Week view, 200
remote address lookup
adding addresses from results, 103
using, 103
removing
addresses, 107
appointments in Day, Agenda, or Week view, 202
appointments in Month view, 203
AutoText entries, 52
bookmarks, 162
email messages from handheld and desktop, 89
items on Phone screen, 131
meeting requests, 206
memos, 212
messages, 87
messages from saved messages list, 74
multiple items by date, 89
notification profiles, 229
original text from reply messages, 58
searches, 84
Tasks, 185
resending messages
on failed attempt, 77
on successful transmission, 77
resetting call timers, 146
S
safety information, 9
saved messages
description of, 31
removing from list, 74
saving
drafts, 75
messages, 73
received messages, 73
sent messages, 73
web pages to Messages screen, 164, 165
scanning for networks, 235
screen/keyboard fields, 236
search messages, description of, 31
searches
Index
deleting, 84
editing, 83
editing once, 84
new, 82
one-time, 82
performing, 80
recalling, 83
saving, 80
saving with a shortcut key, 82
setting shortcut key, 82
specifying terms, 80
tips for using, 91
viewing default, 83
searching
addresses, 106
AutoText entries, 51
by recipient, 85
by sender, 85
call logs, 80
email messages by subject, 86
folders, 81
memos, 212
messages, 80
Nextel Direct Connect calls, 80
phone calls, 80
remote address directory, 103
SMS messages, 80
Tasks, 186
security
changing the password, 239
disabling password protection, 239
enabling password protection, 237
fields, 237
locking the handheld, 238
self test application, 240
unlocking the handheld, 238
sending
email messages, 39
email messages from specific service, 252
messages using links, 43
PIN messages, 40
sent messages
editing, 75
saving, 73
searching, 85
service book
icon, 34
service books
accepting, 240
automatically accepting in BlackBerry Browser, 156
automatically accepting in Nextel Online, 156
automatically accepting in nextel.com, 156
viewing, 240
setting
Address Book options, 94
Alarm, 218
attachments options, 174
Auto On/Off, 229
Browser configuration options, 154
browser general options, 155
Calendar options, 189
current talkgroup, 132
current talkgroup area, 132
date and time, 233
default subfolder for Browser bookmarks, 163
email messages to delete on handheld and desktop, 89
general phone options, 136
handheld options, 217
MemoPad options, 210
message options, 43
Nextel Direct Connect options, 132
notification profiles, 221
owner information, 236
password security screen, 238
phone call waiting, 136
Phone options, 131
recurring appointments, 197
smart dialing options, 137
SMS options, 66, 241
Task options, 182
volume for Phone, 122, 127
settings, scrolling through, 30
shortcut keys, 24
Smart Dialing options
description, 131
smart dialing options
setting, 137
SMS messages
cannot receive new
messages, 241
changing addresses, 76
customizing notification
profiles, 220
deleting, 87
deleting from SIM card, 241
deleting multiple by date, 89
leaving messages on SIM
card, 241
reading, 66
received message options, 67
saving, 73
searching, 80
setting options, 241
status icons, 66
tips, 67
using cut, copy, and paste, 52
Space key, using, 28
special characters
inserting, 46
scrolling through, 25
specifying search terms, 80
spreadsheet view
attachments, 170
tips, 179
status fields, 241
status, handheld, 28
storing, received or saved
messages, 73
subfolders
adding bookmarks to, 164
creating for Browser bookmarks, 163
setting default for Browser
bookmarks, 163
swapping phone calls, 125
symbol key, using, 28
symbols
inserting, 28, 46
inserting bullets, 46
inserting special characters, 46
T
table of contents, for attachments, 171
talkgroup
placing Group Calls from Phone screen, 115
placing one-time Group Calls, 112
setting current, 132
setting current area, 132
Tasks
adding, 183
changing status, 185
deleting, 185
deleting completed, 185
description of, 31
editing, 184
error messages, 272
fields, 184
managing, 181
searching, 186
setting options, 182
setting priority, 184
status icons, 182
tips for using, 186
using cut, copy, and paste, 52
Index
viewing, 184
text
cutting and copying, 53
deleting original from reply messages, 58
pasting, 53
time
copying from network, 233
setting, 233
timers
resetting, 146
viewing, 146
tips
Address Book, 107
attachments, 179
BlackBerry Browser, 166
Calculator, 215
Calendar, 207
document view, 179
handheld, 36
managing call logs, 91
managing messages, 91
MemoPad, 212
Nextel Direct Connect, 117
Nextel Online, 166
nextel.com, 166
Phone, 148
reading SMS messages, 67
sending and reading email messages, 63
spreadsheet view, 179
Tasks, 186
trackwheel
description of, 24
scrolling and selecting, 25
scrolling through special characters, 25
use with the Alt key, 25
transmission, error messages, 272
TTY option description, 131
turn power on/off, description of, 33
turn radio on/off, description of, 33
turning on/off
auto off, 230
power, 230
U
unlocking password security
screen, 238
updating, addresses from Phone
screen, 98
user-defined fields, changing field
name, 101
users
on Lotus Domino Server, 20
on Microsoft Exchange Server, 20
using
Address Book, 93
AutoText, 48
BlackBerry Browser, 149
bookmarks, 159
Calculator, 213
cut, copy, and paste, 52
Find feature in messages, 53
Find feature in web pages, 157
links, 30
lock, 238
macros in AutoText entries, 50
MemoPad, 209
Nextel Online, 149
nextel.com, 149
Phone, 119
Plus Dialing, 127
Push-to-Talk button, 110
remote address lookup, 103
shortcuts when placing calls, 126
symbol key, 28
wireless calendar synchronization, 194
V
verify security software, 240
viewing
addresses, 105
appointments in Day, Agenda, or Week view, 200
appointments in Month view, 201
call logs on Messages screen, 87
document attachments, 170
email messages, 57
group addresses, 105
installed applications, 232
meeting requests, 205
memos, 211
more in attachments, 177
next sheet or page in attachments, 176
pages in attachments, 177
Phone status, 146
Phone timers, 146
PIN messages, 57
previous sheet or page in attachments, 176
service books, 240
sheet in attachments, 176
SMS messages, 66
spreadsheet attachments, 170
tables in attachments, 177
Tasks, 184
web addresses, 158
voice mail
calling, 139
configuring, 140
description of, 131
volume, setting for Phone, 122, 127
W
waits
adding, 101
placing calls using, 144
using, 143
WAP Push
enabling/disabling, 242
fields, 242
web addresses, viewing, 158
web client online Help, 22
web pages
background requests, 165
opening saved web pages from
Messages screen, 165
opening using addresses, 152
opening using bookmarks, 152
opening using links, 151
saving to Messages screen, 164
stop loading, 152
viewing addresses, 158
viewing history, 154
viewing next and previous, 153
wireless calendar synchronization
adding appointments, 196, 203
and auto archive, 202
description of, 194
enabling, 194
managing someone else's
Calendar, 205
wireless email reconciliation
deleting messages, 88
enabling, 72
WTLS, 243
Index
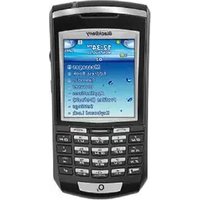
- BLACKBERRY 6510 FROM NEXTEL®
- CONTENTS
- IMPORTANT SAFETY INFORMATION....9
- ABOUT THIS GUIDE ....19
- GETTING TO KNOW YOUR HANDHELD 23
- EMAIL AND PIN MESSAGES....37
- RECEIVING SMS MESSAGES 65
- MANAGING MESSAGES AND CALL LOGS 69
- ADDRESS BOOK 93
- USING NEXTEL DIRECT CONNECT™....109
- PHONE....119
- BROWSING WEB PAGES....149
- ATTACHMENTS....169
- TASKS 181
- CALENDAR 187
- MEMOPAD 209
- CALCULATOR 213
- OPTIONS 217
- TROUBLESHOOTING 245
- INDEX 277
- IMPORTANT SAFETY INFORMATION
- ELECTRICAL SAFETY
- ACCESSORIES
- DRIVING
- FOR VEHICLES EQUIPPED WITH AN AIR BAG
- ELECTRONIC DEVICES
- PACEMAKERS
- HEARING AIDS
- OTHER MEDICAL DEVICES
- POSTED FACILITIES
- BLASTING AREAS
- POTENTIALLY EXPLOSIVE ATMOSPHERES
- ADDITIONAL SAFETY GUIDELINES
- 12 BLACKBERRY WIRELESS HANDHELD
- IMPORTANT SAFETY/COMPLIANCE INFORMATION
- EXPOSURE TO RADIO FREQUENCY SIGNALS
- 14 BLACKBERRY WIRELESS HANDHELD
- SPECIFIC ABSORPTION RATE DATA
- THIS MODEL WIRELESS HANDHELD MEETS GOVERNMENT REQUIREMENTS FOR EXPOSURE TO RADIO WAVES
- ANTENNA CARE
- AIRCRAFT
- FCC COMPLIANCE STATEMENT (USA)
- INDUSTRY CANADA CERTIFICATION
- CLASS B COMPLIANCE
- ABOUT THIS GUIDE
- AUDIENCE
- CONVENTIONS
- INTEGRATION WITH ENTERPRISE EMAIL ACCOUNT
- MICROSOFT EXCHANGE
- LOTUS DOMINO
- RELATED RESOURCES
- CHAPTER 1 GETTING TO KNOW YOUR HANDHELD
- GETTING TO KNOW YOUR HANDHELD
- USING THE KEYBOARD AND TRACKWHEEL
- ACTIVATING BACKLIGHTING
- NAVIGATING APPLICATIONS
- TO OPEN APPLICATIONS
- TO NAVIGATE MENUS
- TO SCROLL THROUGH OPTIONS
- TO USE LINKS
- HANDHELD ICONS
- APPLICATION ICONS
- 32 BLACKBERRY WIRELESS HANDHELD
- NETWORK STATUS ICONS
- NAVIGATIONAL ICONS
- CONFIGURING YOUR HANDHELD'S OPTIONS
- TIPS FOR USING YOUR HANDHELD
- CHAPTER 2 EMAIL AND PIN MESSAGES
- EMAIL AND PIN MESSAGES
- MESSAGE ICONS
- SENDING EMAIL AND PIN MESSAGES
- TO SEND AN EMAIL MESSAGE
- TO SEND A PIN MESSAGE
- TO SEND A MESSAGE TO SEVERAL CONTACTS AT ONE TIME
- TO SEND A MESSAGE TO A ONE-TIME RECIPIENT
- 42 BLACKBERRY WIRELESS HANDHELD
- TO SEND A MESSAGE USING A LINK
- SETTING MESSAGE OPTIONS
- TO SET MESSAGE OPTIONS
- TO SET CURRENT MESSAGE OPTIONS
- INSERTING SYMBOLS
- TO INSERT SYMBOLS
- TO INSERT SPECIAL CHARACTERS
- FORMATTING YOUR MESSAGES
- AUTOMATIC CAPITALIZATION
- AUTOMATIC PUNCTUATION
- EMAIL AND NUMBER FIELDS
- NUMBER LOCK
- USING AUTOTEXT
- 48 BLACKBERRY WIRELESS HANDHELD
- AUTOTEXT EXAMPLE
- TO ADD A NEW AUTOTEXT ENTRY
- TO ADD A NEW AUTOTEXT ENTRY USING A MACRO
- TO PERFORM AN AUTOTEXT SEARCH
- TO EDIT AN AUTOTEXT ENTRY
- TO DELETE AN AUTOTEXT ENTRY
- USING CUT, COPY, AND PASTE
- 52 BLACKBERRY WIRELESS HANDHELD
- TO CUT AND COPY TEXT IN A MESSAGE
- TO PASTE TEXT INTO A MESSAGE
- USING THE FIND FEATURE
- TO USE THE FIND FEATURE IN A SENT OR RECEIVED MESSAGE
- 54 BLACKBERRY WIRELESS HANDHELD
- ADDING ATTACHMENTS TO MESSAGES
- TO ATTACH ADDRESS BOOK ENTRIES
- CUSTOMIZING THE AUTO SIGNATURE
- TO CUSTOMIZE THE AUTO SIGNATURE
- RECEIVING DELIVERY CONFIRMATION
- TO RECEIVE DELIVERY CONFIRMATION
- COMPOSING A MESSAGE - SPECIFYING DELIVERY CONFIRMATION
- READING EMAIL OR PIN MESSAGES
- TO READ A MESSAGE
- RECEIVED EMAIL MESSAGE ACTIONS
- RECEIVING LONG EMAIL MESSAGES
- TO RECEIVE MORE OF A MESSAGE AUTOMATICALLY
- TO REQUEST MORE OF A MESSAGE MANUALLY
- MANAGING ATTACHMENTS
- TO OPEN ADDRESS BOOK ATTACHMENTS
- OPEN EMAIL MESSAGE WITH ADDRESS BOOK ATTACHMENT
- TO FORWARD MESSAGES WITH FILE ATTACHMENTS
- RECEIVED EMAIL MESSAGE WITH FILE ATTACHMENT
- TIPS FOR EMAIL AND PIN MESSAGES
- COMPOSING MESSAGES
- READING MESSAGES
- CHAPTER 3 RECEIVING SMS MESSAGES
- SETTING SMS OPTIONS
- READING SMS MESSAGES
- TO READ AN SMS MESSAGE
- RECEIVED SMS MESSAGES OPTIONS
- TIPS FOR READING SMS MESSAGES
- CHAPTER 4 MANAGING MESSAGES AND CALL LOGS
- MANAGING MESSAGES AND CALL LOGS
- FILING EMAIL MESSAGES
- TO FILE AN EMAIL MESSAGE
- USING WIRELESS EMAIL RECONCILIATION
- TO ENABLE WIRELESS EMAIL RECONCILIATION
- TO RECONCILE EMAIL MESSAGES FROM YOUR HANDHELD
- SAVING MESSAGES
- TO SAVE A MESSAGE
- OPEN MESSAGE - MARKING ITEM AS SAVED DIALOG BOX
- SAVED MESSAGES SCREEN - SAVED MESSAGE
- TO REMOVE MESSAGES FROM THE SAVED MESSAGES SCREEN
- 74 BLACKBERRY WIRELESS HANDHELD
- TO SAVE A DRAFT OF AN EMAIL OR PIN MESSAGE
- EDITING MESSAGES
- TO EDIT AN EMAIL OR PIN MESSAGE
- TO CHANGE THE RECIPIENT OF AN EMAIL OR PIN MESSAGE
- RESENDING MESSAGES
- TO RESEND A MESSAGE
- MARKING MESSAGES AS OPENED
- TO MARK A MESSAGE AS OPENED
- TO MARK ALL MESSAGES AS OPENED
- MARKING MESSAGES AS UNOPENED
- TO MARK A MESSAGE AS UNOPENED
- SEARCHING MESSAGES AND PHONE CALL LOGS
- TO PERFORM A SEARCH
- SEARCHING IN FOLDERS
- TO RECALL A SEARCH
- TO EDIT A SEARCH
- TO EDIT A SEARCH ONCE
- TO DELETE A SEARCH
- CLICK DELETE
- TO SEARCH FOR A SENDER OR RECIPIENT
- TO SEARCH EMAIL AND PIN MESSAGES BY SUBJECT
- MANAGING CALLS ON THE MESSAGES SCREEN
- TO PLACE PHONE CALLS FROM THE MESSAGES APPLICATION
- TO VIEW CALL LOGS ON THE MESSAGES SCREEN
- DELETING MESSAGES AND CALL LOGS
- TO DELETE A MESSAGE OR CALL LOG
- TO DELETE MULTIPLE ITEMS BY DATE
- TO DELETE EMAIL MESSAGES ON YOUR HANDHELD AND YOUR DESKTOP
- MESSAGE LIST OPTIONS SCREEN - DELETE ON FIELD
- TO EMPTY THE DELETED MESSAGES FOLDER ON YOUR DESKTOP
- TIPS FOR MANAGING MESSAGES AND CALL LOGS
- CHAPTER 5 ADDRESS BOOK
- ADDRESS BOOK
- ADDRESS BOOK ICONS
- SETTING ADDRESS BOOK OPTIONS
- TO SET ADDRESS BOOK OPTIONS
- ADDING ADDRESSES
- TO ADD ADDRESSES MANUALLY
- TO ADD ADDRESSES FROM RECEIVED MESSAGES AND CALL LOGS
- RECEIVED MESSAGE FROM FIELD MENU - ADD TO ADDRESS BOOK ITEM
- TO ADD ADDRESSES FROM LINKS
- TO ADD ADDRESSES FROM THE PHONE SCREEN
- TO UPDATE ADDRESSES FROM THE PHONE SCREEN
- ADDRESS BOOK FIELDS
- ADDING PAUSES AND WAITS TO PHONE NUMBERS
- TO ADD PAUSES AND WAITS
- CHANGING USER-DEFINED FIELD NAMES
- TO CHANGE USER-DEFINED FIELD NAMES
- ADDING GROUP ADDRESSES
- TO ADD GROUP ADDRESSES
- USING REMOTE ADDRESS LOOKUP
- TO ADD ADDRESS BOOK ENTRIES FROM REMOTE ADDRESS LOOKUP RESULTS
- REMOTE ADDRESS LOOKUP ACTIONS
- 104 BLACKBERRY WIRELESS HANDHELD
- MANAGING ADDRESS BOOK ENTRIES
- TO VIEW INDIVIDUAL ADDRESS BOOK ENTRIES
- TO VIEW GROUP ADDRESS BOOK ENTRIES
- TO SEARCH LOCAL ADDRESS BOOK ENTRIES
- TO EDIT INDIVIDUAL ADDRESS BOOK ENTRIES
- TO EDIT GROUP ADDRESS BOOK ENTRIES
- TO DELETE ADDRESS BOOK ENTRIES
- TO DELETE GROUP ADDRESS BOOK ENTRIES
- TIPS FOR USING THE ADDRESS BOOK APPLICATION
- CHAPTER 6 USING NEXTEL DIRECT CONNECT™
- BEFORE YOU BEGIN
- USING THE PUSH-TO-TALK™ BUTTON
- PLACING NEXTEL DIRECT CONNECT CALLS
- PLACING ONE-TIME NEXTEL DIRECT CONNECT CALLS
- TO PLACE A ONE-TIME NEXTEL DIRECT CONNECT PRIVATE CALL
- TO PLACE A ONE-TIME NEXTEL DIRECT CONNECT CALL ALERT
- TO PLACE A ONE-TIME NEXTEL DIRECT CONNECT GROUP CALL
- PLACING NEXTEL DIRECT CONNECT CALLS FROM THE PHONE SCREEN
- TO PLACE A NEXTEL DIRECT CONNECT PRIVATE CALL FROM THE PHONE SCREEN
- TO PLACE A NEXTEL DIRECT CONNECT CALL ALERT FROM THE PHONE SCREEN
- TO PLACE A NEXTEL DIRECT CONNECT GROUP CALL FROM THE PHONE SCREEN
- ANSWERING NEXTEL DIRECT CONNECT CALLS
- TO ANSWER A NEXTEL DIRECT CONNECT PRIVATE CALL OR GROUP CALL
- TO ANSWER A NEXTEL DIRECT CONNECT CALL ALERT
- ENDING NEXTEL DIRECT CONNECT CALLS
- TIPS FOR USING NEXTEL DIRECT CONNECT
- CHAPTER 7 PHONE
- PHONE
- PHONE ICONS
- PLACING PHONE CALLS
- TO PLACE PHONE CALLS
- ANSWERING PHONE CALLS
- TO ANSWER PHONE CALLS
- TO ANSWER PHONE CALLS WHEN THE HANDHELD IS LOCKED
- TO SWAP PHONE CALLS
- ENDING PHONE CALLS
- USING SHORTCUTS WHEN YOU PLACE CALLS
- TO DIAL PHONE NUMBERS QUICKLY
- TO ALPHA-DIAL
- TO DIAL CORPORATE EXTENSIONS
- TO USE THE PLUS DIALING FEATURE
- SETTING THE VOLUME
- PUTTING PHONE CALLS ON HOLD
- TO PUT A PHONE CALL ON HOLD
- MUTING PHONE CALLS
- TO MUTE PHONE CALLS
- PLACING ONE-TIME PHONE CALLS
- TO PLACE ONE-TIME PHONE CALLS
- PLACING PHONE CALLS USING LINKS
- TO PLACE A PHONE CALL USING A LINK
- MANAGING PHONE CALLS ON THE PHONE SCREEN
- TO PLACE CALLS FROM THE PHONE SCREEN
- TO DELETE ITEMS ON THE PHONE SCREEN
- CUSTOMIZING PHONE OPTIONS
- CUSTOMIZING NEXTEL DIRECT CONNECT OPTIONS
- 132 BLACKBERRY WIRELESS HANDHELD
- TO SET DIRECT CONNECT OPTIONS
- CUSTOMIZING CALL LOGGING
- TO CUSTOMIZE CALL LOGGING
- CUSTOMIZING CALL FORWARDING
- TO CUSTOMIZE CALL FORWARDING PROFILES
- TO ENABLE A CALL FORWARDING PROFILE
- TO DISABLE A CALL FORWARDING PROFILE
- SETTING CALL WAITING
- TO ENABLE AND DISABLE CALL WAITING
- SETTING GENERAL PHONE OPTIONS
- 136 BLACKBERRY WIRELESS HANDHELD
- TO SET GENERAL PHONE OPTIONS
- SETTING SMART DIALING OPTIONS
- TO SET GENERAL SMART DIALING OPTIONS
- TO SET CORPORATE SMART DIALING OPTIONS
- CALLING VOICE MAIL
- TO CALL VOICE MAIL
- TO EDIT YOUR VOICE MAIL ACCESS NUMBER
- SETTING THE TTY OPTION (TTY)
- TO ENABLE TTY
- USING PHONE CALL NOTES
- TO ADD CALL NOTES
- TO EDIT CALL NOTES
- 142 BLACKBERRY WIRELESS HANDHELD
- TO FORWARD CALL NOTES
- USING PAUSES AND WAITS
- TO PLACE CALLS USING PAUSES OR WAITS
- PLACING THREE-WAY CALLS
- TO PLACE A THREE-WAY CALL
- TO SPEAK TO ONE RECIPIENT DURING A THREE-WAY CALL
- TO DISCONNECT THREE-WAY CALL RECIPIENTS
- VIEWING PHONE STATUS
- TO VIEW PHONE STATUS
- TO RESET CALL TIMERS
- PLACING EMERGENCY CALLS
- TO PLACE EMERGENCY CALLS
- TO PLACE EMERGENCY CALLS WHEN YOUR HANDHELD IS LOCKED
- TIPS FOR USING THE PHONE APPLICATION
- CHAPTER 8 BROWSING WEB PAGES
- BROWSING WEB PAGES
- BROWSER ICONS
- NAVIGATING WEB PAGES
- TO OPEN WEB PAGES USING LINKS
- TO OPEN WEB PAGES USING WEB PAGE ADDRESSES
- TO OPEN WEB PAGES USING BOOKMARKS
- TO NAVIGATE WITHIN WEB PAGES
- TO VIEW NEXT AND PREVIOUS WEB PAGES
- TO VIEW YOUR BROWSING HISTORY
- SETTING CONFIGURATION OPTIONS
- TO SET CONFIGURATION OPTIONS
- SETTING GENERAL OPTIONS
- TO CUSTOMIZE GENERAL OPTIONS
- TO CLEAR THE CACHE
- TO USE THE FIND FEATURE IN A WEB PAGE
- DOWNLOADING IMAGES
- TO DOWNLOAD MORE IMAGES
- VIEWING WEB ADDRESSES
- TO VIEW WEB PAGE ADDRESSES
- TO VIEW WEB LINK ADDRESSES
- USING BOOKMARKS
- TO ADD BOOKMARKS
- TO EDIT BOOKMARKS
- TO COPY A BOOKMARK
- TO COPY A BOOKMARK'S ADDRESS
- TO DELETE BOOKMARKS
- USING BOOKMARK SUBFOLDERS
- 162 BLACKBERRY WIRELESS HANDHELD
- TO CREATE SUBFOLDERS
- TO SET A DEFAULT SUBFOLDER
- TO ADD BOOKMARKS TO SUBFOLDERS
- SAVING WEB PAGES TO YOUR MESSAGES SCREEN
- TO SAVE WEB PAGES TO YOUR MESSAGES SCREEN
- TO SAVE REQUESTS
- TO OPEN WEB PAGES THAT ARE SAVED ON THE MESSAGES SCREEN
- CLOSING THE APPLICATION
- TIPS FOR BROWSING WEB PAGES
- CHAPTER 9 ATTACHMENTS
- ATTACHMENTS
- ATTACHMENT SERVICE VIEWS
- DOCUMENT VIEW
- SPREADSHEET VIEW
- 170 BLACKBERRY WIRELESS HANDHELD
- ATTACHMENT SERVICE - SPREADSHEET VIEW
- OPENING ATTACHMENTS
- TO OPEN THE TABLE OF CONTENTS
- TO OPEN THE FULL CONTENT OF AN ATTACHMENT
- 172 BLACKBERRY WIRELESS HANDHELD
- ATTACHMENTS SCREEN - FULL CONTENT PENDING
- ATTACHMENT STATUS ICONS
- SETTING ATTACHMENT SERVICE OPTIONS
- TO SET ATTACHMENT SERVICE OPTIONS
- NAVIGATING ATTACHMENTS
- TO NAVIGATE TO A SPECIFIC CELL
- TO NAVIGATE TO A SPECIFIC SHEET
- TO VIEW PAGES OR TABLES USING LINKS OR BOOKMARKS
- TO READ LONG ATTACHMENTS
- TO USE THE FIND FEATURE
- DELETING ATTACHMENTS
- TO DELETE ATTACHMENTS
- TIPS FOR USING THE ATTACHMENT SERVICE
- CHAPTER 10 TASKS
- TASKS
- TASKS ICONS
- SETTING TASK OPTIONS
- TO SET TASK OPTIONS
- ADDING TASKS
- TO ADD TASKS
- TASK FIELDS
- MANAGING TASKS
- TO VIEW AND EDIT A TASK
- TO CHANGE THE STATUS OF A TASK
- TO DELETE A TASK
- TIPS FOR USING THE TASKS APPLICATION
- CHAPTER 11 CALENDAR
- CALENDAR
- CALENDAR ICONS
- SETTING CALENDAR OPTIONS
- TO SET CALENDAR OPTIONS
- CHANGING VIEWS
- TO CHANGE CALENDAR VIEWS
- DAY VIEW
- AGENDA VIEW
- WEEK VIEW
- MONTH VIEW
- NAVIGATING IN THE CALENDAR APPLICATION
- TO NAVIGATE IN DAY AND WEEK VIEWS
- TO NAVIGATE IN AGENDA VIEW
- TO NAVIGATE IN MONTH VIEW
- TO NAVIGATE TO A SPECIFIC DATE
- ENABLING WIRELESS CALENDAR SYNCHRONIZATION
- TO ENABLE WIRELESS CALENDAR SYNCHRONIZATION
- ADDING APPOINTMENTS
- TO ADD APPOINTMENTS
- NEW APPOINTMENT SCREEN - SETTING A RECURRING APPOINTMENT
- TO ADD APPOINTMENTS QUICKLY
- APPOINTMENT FIELDS
- MANAGING APPOINTMENTS
- VIEWING AND EDITING APPOINTMENTS
- TO VIEW AND EDIT APPOINTMENTS IN DAY, AGENDA, OR WEEK VIEW
- TO VIEW AND EDIT APPOINTMENTS IN MONTH VIEW
- DELETING APPOINTMENTS
- TO DELETE APPOINTMENTS IN DAY, AGENDA, OR WEEK VIEW
- TO DELETE MULTIPLE APPOINTMENTS BY DATE
- TO DELETE APPOINTMENTS IN MONTH VIEW
- MANAGING MEETING REQUESTS
- TO CREATE MEETING REQUESTS
- TO RESPOND TO MEETING REQUESTS
- TO VIEW MEETING REQUESTS
- TO EDIT MEETING REQUESTS
- TO DELETE MEETING REQUESTS
- TO CANCEL MEETINGS
- TIPS FOR USING THE CALENDAR APPLICATION
- CHAPTER 12 MEMOPAD
- MEMOPAD
- SETTING MEMOPAD OPTIONS
- TO SET MEMOPAD OPTIONS
- ADDING MEMOS
- TO ADD MEMOS
- MANAGING MEMOS
- TO VIEW MEMOS
- TO EDIT MEMOS
- TO DELETE MEMOS
- TIPS FOR USING THE MEMOPAD APPLICATION
- CHAPTER 13 CALCULATOR
- CALCULATOR
- PERFORMING MATHEMATICAL OPERATIONS
- TO PERFORM A CALCULATION
- PERFORMING MEASUREMENT CONVERSIONS
- TO CONVERT MEASUREMENTS
- 214 BLACKBERRY WIRELESS HANDHELD
- CLOSING THE CALCULATOR
- TIPS FOR USING THE CALCULATOR APPLICATION
- CHAPTER 14 OPTIONS
- OPTIONS
- SETTING THE ALARM
- TO SET THE ALARM
- ALARM FIELDS
- LOCKING THE KEYBOARD
- CUSTOMIZING NOTIFICATION PROFILES
- TO ENABLE A NOTIFICATION PROFILE
- TO ADD A NOTIFICATION PROFILE
- PROFILE FIELDS
- SETTINGS FOR THE DEFAULT PROFILES
- LOUD PROFILE
- DISCREET PROFILE
- QUIET PROFILE
- DEFAULT PROFILE
- TO EDIT NOTIFICATION PROFILES
- TO DELETE A NOTIFICATION PROFILE
- SETTING THE AUTO ON/OFF FEATURE
- TO SET THE AUTO ON/OFF FEATURE
- AUTO ON/OFF FIELDS
- TO TURN OFF THE HANDHELD WHEN THE AUTO ON/OFF FEATURE IS ENABLED
- CUSTOMIZING HANDHELD OPTIONS
- HANDHELD OPTIONS
- ABOUT
- APPLICATIONS
- AUTO ON/OFF
- AUTOTEXT
- BROWSER
- DATE/TIME
- FIREWALL
- HOST ROUTING TABLE
- LOCALIZATION
- MESSAGE SERVICES
- NETWORK
- OWNER
- PROFILES
- SCREEN/KEYBOARD
- SECURITY
- TO ENABLE PASSWORD PROTECTION
- TO LOCK YOUR HANDHELD
- TO UNLOCK YOUR HANDHELD
- TO CHANGE YOUR PASSWORD
- TO DISABLE PASSWORD PROTECTION
- TO PERFORM SECURITY SELF TESTS
- SERVICE BOOK
- TO VIEW SERVICE BOOKS
- TO ACCEPT A SERVICE BOOK
- SIM CARD
- SMS
- STATUS
- TLS
- WAP PUSH
- 242 BLACKBERRY WIRELESS HANDHELD
- WTLS
- TO CONFIGURE THE WTLS DEFAULT SETTINGS
- CHAPTER 15 TROUBLESHOOTING
- TROUBLESHOOTING
- FREQUENTLY ASKED QUESTIONS
- ALARM
- WHY IS MY ALARM NOT NOTIFYING ME
- ATTACHMENT SERVICE
- WHY IS MY ATTACHMENT NOT OPENING
- HOW DO I KNOW IF I NEED TO TYPE A PASSWORD TO VIEW MY ATTACHMENT
- I REQUESTED AN ATTACHMENT AND AN X ICON APPEARS WHERE THE CHECK MARK USUALLY APPEARS. WHAT SHOULD I DO
- WHY IS MY MESSAGE MARKED AS UNREAD AGAIN
- 246 BLACKBERRY WIRELESS HANDHELD
- HOW DO I SAVE ATTACHMENTS
- BATTERY
- WHY IS MY BATTERY DEPLETING QUICKLY
- INTEGRATION WITH NEW OR ISP EMAIL ACCOUNT
- WHAT SHOULD I DO IF MY HANDHELD DOES NOT TURN ON
- WHY IS MY HANDHELD NOT CHARGING
- HOME SCREEN
- LCD SCREEN
- MAINTENANCE
- I ACCIDENTALLY DROPPED MY HANDHELD IN WATER AND NOW IT DOES NOT WORK. WHAT SHOULD I DO
- HOW CAN I RESET MY HANDHELD
- MESSAGES
- WHAT IS A PIN
- I SENT A MESSAGE AND AN X ICON APPEARS WHERE THE CHECK MARK USUALLY APPEARS. WHAT SHOULD I DO
- WHY AM I NOT NOTIFIED WHEN NEW MESSAGES ARRIVE
- WHY ARE NEW EMAIL MESSAGES ON MY HANDHELD FILED INTO AN "UNKNOWN" FOLDER
- WHY ARE NEW EMAIL MESSAGES ON MY HANDHELD BEING MARKED AS OPENED
- I DELETED AN EMAIL MESSAGE FROM MY DESKTOP AND THEN RECONCILED MY EMAIL MESSAGES. WHY ARE EMAIL MESSAGES NOT BEING DELETED FROM MY HANDHELD
- MESSAGES ARE NOT BEING SENT FROM MY HANDHELD. WHAT SHOULD I DO
- I HAVE INTEGRATED MY HANDHELD WITH AN ENTERPRISE EMAIL ACCOUNT THAT USES THE BLACKBERRY ENTERPRISE SERVER OR THE BLACKBERRY DESKTOP REDIRECTOR, BUT MY EMAIL MESSAGES ARE NOT FORWARDED TO MY HANDHELD. WHAT SHOULD I DO
- WHY CAN I NOT FORWARD MESSAGES FROM MY HANDHELD
- WHY DID I HAVE SEVERAL EMAIL MESSAGES ON MY HANDHELD BEFORE I TURNED ON THE RADIO
- HOW DO I SEND AN EMAIL MESSAGE FROM A SPECIFIC SERVICE
- PUNCTUATION
- WHERE CAN I FIND THE PERIOD (.) AND OTHER PUNCTUATION MARKS ON THE KEYBOARD
- 252 BLACKBERRY WIRELESS HANDHELD
- WHAT SHOULD I DO IF THE SECURITY SELF TESTS FAIL
- STORAGE
- WHAT SHOULD I DO IF I WILL NOT USE MY HANDHELD FOR A SHORT PERIOD OF TIME
- WHAT SHOULD I DO IF I WILL NOT USE MY HANDHELD FOR AN EXTENDED PERIOD OF TIME
- HANDHELD ERROR MESSAGES
- ADDRESS BOOK ERROR MESSAGES
- CALENDAR ERROR MESSAGES
- NEXTEL DIRECT CONNECT ERROR MESSAGES
- TASKS ERROR MESSAGES
- TRANSMISSION ERROR MESSAGES
- INDEX
- A
- B
- C
- D
- E
- F
- G
- H
- K
- L
- M
- N
- 0
- P
- R
- S
- T
- U
- V
- W
Brand : BLACKBERRY
Model : 6510
Category : Mobile Phone