
451D - Switch Tork - Free user manual and instructions
Find the device manual for free 451D Tork in PDF.


| Product Type | Single Pole Switch |
| Brand | Tork |
| Model | 451D |
| Rated Voltage | 120 VAC |
| Rated Current | 15 A |
| Dimensions | 4.25 x 2.75 x 1.5 inches |
| Weight | 0.15 lb |
| Material | Thermoplastic |
| Color | White |
| Functions | Manual on/off |
| Protection Rating | NEMA 1 |
| Operating Temperature | -40°F to 140°F |
| Certifications | UL Listed, CSA Certified |
| Installation | Wall box mount |
| Warranty | Limited 1 year |
| Maintenance | Wipe with dry cloth |
| Safety | Suitable for indoor use |
Frequently Asked Questions - 451D Tork
User questions about 451D Tork
0 question about this device. Answer the ones you know or ask your own.
Ask a new question about this device
Download the instructions for your Switch in PDF format for free! Find your manual 451D - Tork and take your electronic device back in hand. On this page are published all the documents necessary for the use of your device. 451D by Tork.
USER MANUAL 451D Tork
natural_image
White TORK remote control device with buttons and a power outlet (no visible text or symbols)MODEL#: 451D
| DESCRIPTION: | DIGITAL 7 DAY PLUG-IN TIMER |
| CONTACT RATINGS: | 120VAC/60Hz: 15A, 500W TUNGSTEN |
PROGRAMMING AND OPERATING THE TIMER
451D Keypad and LCD
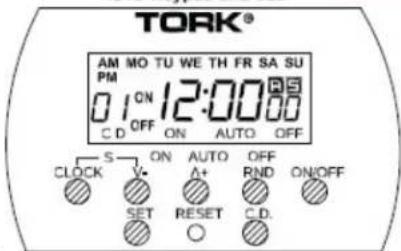
- Plug the unit into the 120VAC receptacle
- Press the Reset button. The unit will display "12:00" along with "AM" "AUTO" and the day, "MO".
- To set the time, press and hold the SET button for about three seconds, until the day of the week indicator starts to flash. In this unit, flashing LCD segments are those changed by the buttons.
- To set the day of the week: Use the A^+ button to increase the day, and press the V- button to decrease the day. Press the SET button to store the day. The hours indicator will flash, telling you that you are setting them.
- As previously, use the A^+ and V^- buttons to set the time in hours. Press the SET button to store the hours, and repeat this for time in minutes.
To Adjust Daylight Saving Time (Twice a year)
-
If you want to move the clock forward one hour, press both the CLOCK and V- buttons simultaneously. An "S" icon on the LCD will become visible, to demonstrate that you are in the Daylight Saving Time Mode
-
To go back to the standard time in the fall, press the CLOCK and V- buttons simultaneously. The "S" icon on the LCD will turn off.
PROGRAMMING
The unit's memory can hold up to 20 programs. Each program consists of 2 events, an ON time and an OFF time. The events can be set up to execute on a daily basis or on a combination of days. While you are programming the event times, if you do not press a button for 15 seconds, you will be returned to the AUTO mode, and any program changes that you've made will be stored in the unit's memory.
- Press the 2+ button. The display will show the following:
In order to set the schedule, you must first press the Set button. The days of the week will flash.
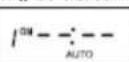
- As done earlier in setting the clock, you use the A^+ and V- buttons to set in order the day(s) of the week, the hour, and the minute, pressing the SET button each time to store the setting, and advance to the next choice. To select which day(s) of the week the program will execute, press the A^+ and V- buttons, sending you forwards or backwards through this list:
MO-SU, MO, TU, WE, TH, FR, SA,SU,
MO+WE+FR, TU+TH+SA, SA-SU, MO-WE,
TH-SA, MO-FR, MO-SA, (and then back to all days)
When you are satisfied with the day of the week selection, press the SET button to store the setting, and advance to setting the hours, then the minutes.
- Pressing the SET button to store the minutes, stores this completed event. After you've done this, there will be no flashing segments on the LCD display. Pressing the A+ button will advance you to the first OFF event. You can use the A+ and V- buttons to select any of the 20 ON or OFF events, pressing the SET button to choose which event to program: you can repeating this entire procedure as often as needed.
REVIEWING, EDITING OR DELETING PROGRAMS
To review all programs:
- Press the A^+ button. The LCD will display the first event, the "1 ON" event.
- Each successive press of the A^+ button will display the next program, alternating ON and OFF schedules.
To Edit a program:
- Use the A+ Button until the LCD displays the schedule you want to edit.
- Use the SET, A^+ and V -buttons as earlier to change the desired time or day.
- Press the SET button to store the revised schedule and display the next.
To Delete a program:
- Use the A+ button until the LCD displays the schedule you want to edit
- Press the ON/OFF button to disable the program. Pressing the ON/OFF button again will enable it. Each successive press toggles the event's status
PROGRAMMING AND RUNNING COUNT-DOWN EVENTS
Before running a count-down event, you must first set its duration, from 1 second to 99 hours, 59 minutes and 59 seconds. First press the V-button. The display will show "d ON =:- -".
Press the SET button to select, the ON LCD segment will flash. Press the SET button once more to select the ON countdown time, or press either the A+ or V- buttons followed by the SET button to select the OFF countdown time.
Using the A^+ , V- and SET buttons as before, set the countdown duration in hours, minutes, and seconds. When finished, press the CLOCK button To manually start the countdown: Press the C.D. button. The timer will immediately change from ON to OFF, or from OFF to ON. It will continue in this state, until the countdown period ends, when it will return to the previous load status. Pressing the V- button will display the countdown time. Pressing the CLOCK button will display the current time.
MANUAL OVERRIDE SWITCH To Manually override the load status: When not setting the time, or programming a schedule, press the ON/OFF button. The unit has three operational modes, ON, AUTO, or OFF. When the unit is in the ON mode, the timer will be always ON. In the AUTO mode, the load will be controlled by the timer settings. In the OFF mode, the load will always be OFF. Each successive press of this button will change the mode from ON to AUTO to OFF and then back to AUTO. The load will change from ON to OFF, or from OFF to ON. The LCD display will change to show the mode, either ON or AUTO or OFF.
RANDOM ON/OFF TIMES
This feature a gives your lights a "lived-in" feel, providing added security. The load will continuously turn ON and OFF at random, with ON times varying between 10 and 26 minutes, and the OFF time varying between 26 and 42 minutes. To enter the random mode, press the RND button. An "R" icon will appear on the LCD. Pressing the RND button again will end random mode, causing the unit to automatically switch the loads ON and OFF again, based on schedules.
ONE YEAR LIMITED WARRANTY: If this product fails because of a manufacturing defect within one year after purchase, we will, at our option, either repair or replace it at no charge. Our warranty does not cover damage caused by accident, abuse or misuse. We assume no further liability with respect to the sale or use of this product. THIS WARRANTY IS IN LIEU OF ALL OTHER WARRANTIES, EXPRESSED OR IMPLIED, INCLUDING THE WARRANTY OF MERCHANTABILITY. We make no warranty with respect to the fitness of any goods for the users particular application. This warranty gives you specific legal rights, and you also may have other rights which vary from state to state.
It is our intent to provide accurate and current specification information. However, in the interest of product improvement, TORK may alter the specifications or constructional details without prior notice.
TORK, INC. • 888.500.4598 • www.TORK.com
A DIVISION OF NSI NSH INDUSTRIES, LLC
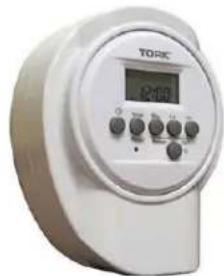
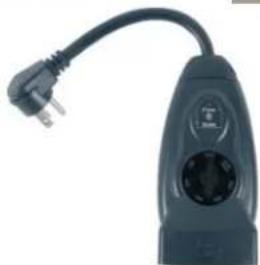
Tork in-wall and plug-in timers
http://waterheatertimer.org/Tork-consumer-timers-and-manuals.html http://waterheatertimer.org/Woods-timers-and-manuals.html#seven
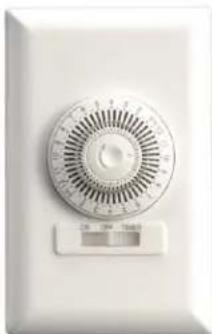
natural_image
Close-up of a circular industrial air conditioner unit with radial slots and a control scale (no visible text or symbols)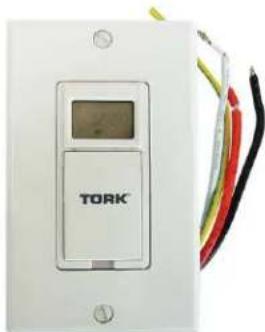
natural_image
White wall-mounted electrical control panel with TORK logo and multicolored wires (no readable text or symbols)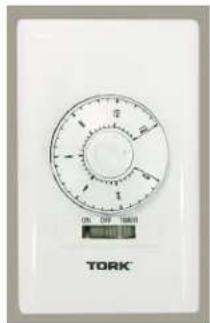
natural_image
White TORE digital timer with control knobs and display (no visible text or symbols)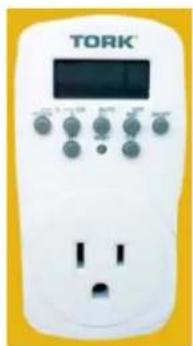
natural_image
Close-up of a black electrical plug with a terminal socket and power outlet (no visible text or symbols)
Tork mechanical timers
http://waterheatertimer.org/Tork-timers-and-manuals.html
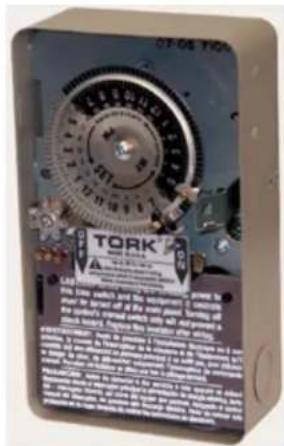
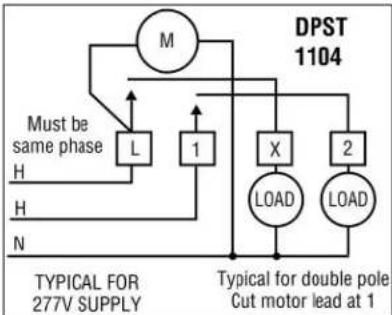
flowchart
graph TD
    A["M"] --> B["L"]
    B --> C["1"]
    C --> D["X"]
    D --> E["LOAD"]
    D --> F["2"]
    F --> G["LOAD"]
    H["H"] --> I["N"]
    J["H"] --> K["N"]
    L["Must be same phase"] --> M["L"]
    N["TYPICAL FOR 277V SUPPLY"] --> O["Typical for double pole Cut motor lead at 1"]
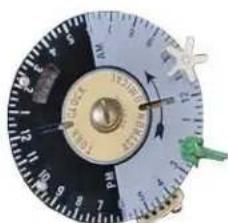
natural_image
Close-up of a circular dial with measurement markings and directional arrows (no readable text or symbols)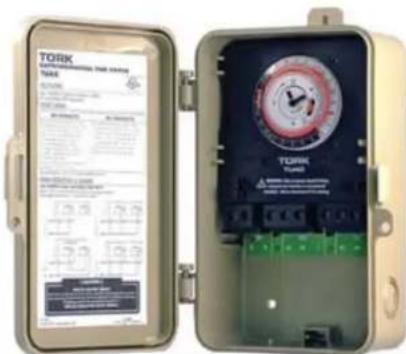
Tork digital timers
http://waterheatertimer.org/Tork-Digital-timers-and-manuals.html
- PROGRAMMING AND OPERATING THE TIMER
- To Adjust Daylight Saving Time (Twice a year)
- PROGRAMMING
- REVIEWING, EDITING OR DELETING PROGRAMS
- To review all programs:
- To Edit a program:
- To Delete a program:
- PROGRAMMING AND RUNNING COUNT-DOWN EVENTS
- RANDOM ON/OFF TIMES
- Tork in-wall and plug-in timers
- Tork mechanical timers
- Tork digital timers
Brand : Tork
Model : 451D
Category : Switch