T50DM - Tumble dryer Technika - Free user manual and instructions
Find the device manual for free T50DM Technika in PDF.


| Product Type | Tumble Dryer |
| Model | T50DM |
| Brand | Technika |
| Drying Capacity | 5.0 kg |
| Energy Efficiency Class | C (according to EU regulations) |
| Drying System | Vented |
| Dimensions (H x W x D) | 85 x 60 x 55 cm |
| Net Weight | 33 kg |
| Power Supply | 220-240 V, 50 Hz |
| Power Consumption | 2000 W |
| Noise Level | 65 dB(A) |
| Number of Drying Programs | 6 (Cotton, Synthetics, Delicates, etc.) |
| Anti-Crease Function | Yes, with cool-down period |
| Lint Filter | Removable, washable mesh filter |
| Condenser Unit | Not applicable (vented model) |
| Installation Type | Freestanding |
| Door Reversible | Yes |
| Control Type | Rotary knob + push buttons |
| Display | LED indicator lights |
| Delay Start | Up to 9 hours |
| Child Lock | No |
| Safety Features | Overheat protection, door interlock |
| Cleaning and Maintenance | Clean lint filter after each use; check vent hose for blockage annually |
| Spare Parts Availability | Heating element, thermostat, belt, door gasket available from authorized service centers |
| Repairability Index | 6.5/10 (est.) |
Frequently Asked Questions - T50DM Technika
User questions about T50DM Technika
0 question about this device. Answer the ones you know or ask your own.
Ask a new question about this device
Download the instructions for your Tumble dryer in PDF format for free! Find your manual T50DM - Technika and take your electronic device back in hand. On this page are published all the documents necessary for the use of your device. T50DM by Technika.
USER MANUAL T50DM Technika
Exhaust Type Tumble Dryer

natural_image
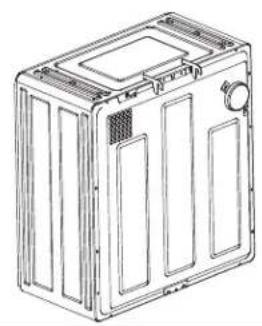
Line drawing of a rectangular box with a circular recess and a small inset component (no text or symbols)T50DM
- Please read this manual carefully before using.
- Retain it for future reference.
Important Safety Instructions
Warning-To reduce the risk of fire, electric shock, or injury to persons when using your appliance, follow basic precautions, including the following:
- Read all instructions before using the appliance.
- The tumble dryer is not to be used if chemicals have been used for cleaning.
- The tumble dryer is intended only for drying textile material washed in water.
- There has to be adequate ventilation to avoid the back flow of gases into the room from appliances burning other fuels including open fires, when operating the tumble dryer.
- The lint trap is to be cleaned frequently.
- Lint is not to be allowed to accumulate around the tumble dryer.
- For appliances with ventilation openings in the base, that a carpet must not obstruct the openings.
- Exhaust air must not be discharged into a flue which is used for exhausting fumes from appliances burning gas or other fuels.
- Do not dry articles that have been previously cleaned in, washed in, socked in, or spotted with gasoline, dry-cleaning solvents, or other flammable or explosive substances, as they give off vapors that could ignite or explode.
- Do not place items exposed to cooking oils in your dryer. Items contaminated with cooking oils may contribute to a chemical reaction that could cause a load to catch fire.
- Fabric softeners or similar products should not be used in a tumble dryer to eliminate the effects of static electricity unless this practice is specifically recommended by the manufacturer of the fabric softener or product.
- Do not use heat to dry articles containing foam rubber or similarly textured rubber-like materials.
Important Safety Instructions
- Do not allow children to play on, climb on or in the appliance. Close supervision of children is necessary when the appliance is used near children.
- Before the appliance is removed from service or discarded, remove the door to the drying compartment.
- Keep your dryer away from combustible materials (such as gasoline) during operation to prevent the risk of fire.
- Do not use or place stove, gas device, water heater, tinder or similarities close to your dryer. Do not install or store this appliance where it will be exposed to water and/or to the weather.
- Do not tamper with controls.
- Do not repair or replace any part of the appliance or attempt any servicing unless specifically recommended in the user-maintenance instructions or in published user-repair instructions that you understand and have skills to carry out.
- Keep area around the exhaust opening and adjacent surrounding areas free from the accumulation of lint, dust and dirt.
- If material has been used with any flammable liquids or solids it should not be used in the dryer until all traces of the flammable liquids and its fumes have been removed.
- This dryer shall be connected to a three-wire, single phase, 220-240V AC power receptacle more than 10A, which must be reliably grounded. A leakage protector shall be used, if possible.
- Do not share a receptacle with other appliances. Do not use it when a plug loosely inserted into a receptacle.
- Do not excessively bend, stretch, twist, bind power cord or put heavy stuff on it. Keep the terminator of power cord clean. Carefully clean it with dry cloth if dusts accumulated. If damaged, power cord or plug must be replaced by our service agent or qualified after-sale service person to avoid the risk of danger.
Important Safety Instructions
- When normally using, the power cord of dryer shall be easily plugged or unplugged by hand. It must be unplugged during power blackout, moving, not in use or cleaning. Do not plug or unplug the power cord with wet hands.
- Always disconnect dryer from electrical supply before attempting any service. Disconnect power cord by grasping the plug, not the cord.
- Do not block the exhaust vent when dryer operating to prevent it from overheating or other dangers.
- Do not let your dryer operate on packing foam. Otherwise it may be cause fire since heat accumulation or other external factors.
- Only place sufficiently dehydrated clothes into your dryer for drying to prevent leakage and longer drying time.
- Do not place washed wet clothes in your dryer for a long time not drying them (which may result in water leakage).
- Don't touch the intake for the high temperature during the drying cycle.
- Do not exceed dryer rated Max. Capacity.
- The appliance must not be installed behind a lockable door, a sliding door or a door with a hinge on the opposite side to that of the tumble dryer.
Names Of The Parts
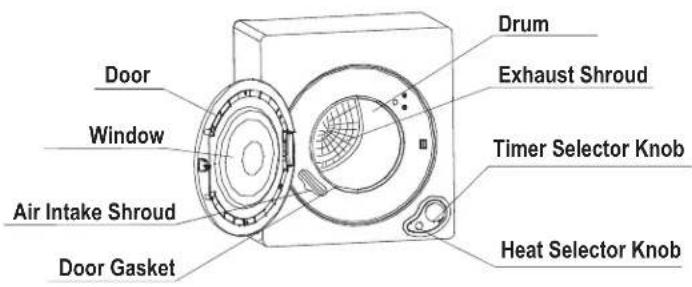
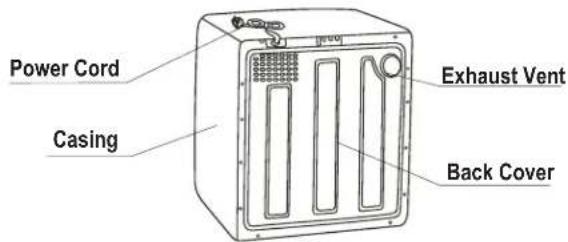
- Please check if the power receptacle has good earthing Condition before using to guarantee your safety.
- The manufacturer will not take responsibility for those Risks occurred from not obeying this manual.
Operation Cautions
Clothes with ribbon or lace should be dried in a nylon netPut chemical fiber and/or clothes with ribbon or lace into a nylon net before drying. 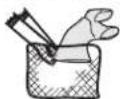 | Avoid to dry starched clothes in your dryer to prevent link filter from clogging, which may lead to bad exhaust performance. |
Put rumpled clothes in orderPut all clothes in order after dehydrated before drying them.  | |
| Clothes with zipperDry this kind of clothes with zipper zipped or fastener buckled and inside out (to reduce the impact noise between metal and the drum) | Anti-wrinkle method for clothes crumpled easilyDecrease capacity to get good anti-wrinkle result (the capacity shall be 4/5 of that of normal clothes). Remove the clothes out of your dryer as early as possible to reduce rumples. Remove the clothes out of your dryer as early as possible to reduce rumples.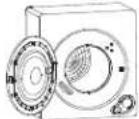  Please hang the easily crumpled clothes up with a hanger after dried Please hang the easily crumpled clothes up with a hanger after dried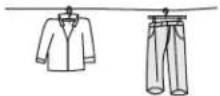 |
Do not load your dryer when it is running.Loading the dryer when it is running shall be avoided to prevent the clothes overdried or incompletely dried. 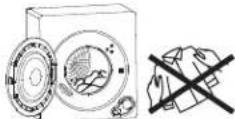 | |
| Please flip clothes over manually from time to time, if necessary, when drying large ones.It is not easy to flip over large clothes (such as overcoat) in the drum, uneven drying therefore happens sometimes. If necessary, flip them over manually from time to time to make them dried completely. Flip over clothes |
Installation Instructions
For your safety and correct using your dryer, please observe all the instructions in this manual to install and adjust your dryer.
Location of your dryer
- Dryer should be located in a dry and well-vented place, not filled with moisture and vapors and where rain cannot reach (like bathroom, open balcony and water faucet). Do not locate your dryer in a place where sunlight directly shines.
- Do not use stove, gas etc. near your dryer to avoid dangers.
- Locate your dryer on horizontal solid ground, floor or a special bracket to prevent vibration and noise. Keep a distance of 10cm-15cm away from the rear wall when installing.
- The dryer has air intake and exhaust cycles, which needs good air-exhaust vent in the rear and well-vented room. If used in a small space, air exchange fan or exhaust duct can be installed at the vent to exhaust hot wet air outdoors.
The length of exhaust duct shall not exceed 2m.

Install and use the fixed legs of your dryer
- If the dryer is not used with bracket, take fixed legs out of the accessory bag and screw them into the assembly hole of the dryer to ensure it be placed stable.

Wall Mounting Instructions
- Determine dryer position on wall and mark required bracket position.
* A minimum 50mm is needed between the top of the dryer and the ceiling for ease of installation.
* If mounting above a washing machine, allow sufficient room to open the lid of the washer.
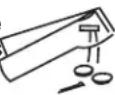
| Tools required | ||
| For Plaster/wooden wall | Drill & 3mm Bit | 1 |
| Philips Head Screw Driver | 1 | |
| Wood Screws, 12g x 50mm Timber Screws | 4 | |
| Wall Mounting Kit includes | ||
| Description | Wall hanging brackets | 2 |
| Hanging hook | 1 | |
| Plastic Spacers | 2 | |
| Exhaust pipe | 4 pieces | |
- Fix the wall hanging brackets to the wall securely (eg. into the stud.) If the studs are too far apart fit a timber slat to the studs then mount the brackets onto the slat. The distance between each bracket is 155mm as per diagram.
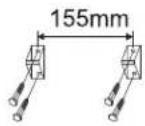

Wall Mounting Instructions
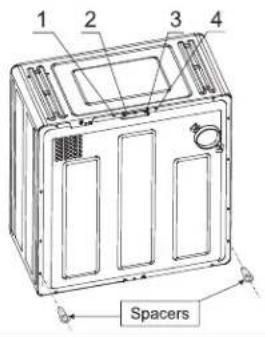
- To install the hanging hook to the dryer, remove screws 1, 2, 3 & 4 as indicated in Fig. 2.
- Align bracket as shown in Fig. 3 and fasten screws tightly.
- Remove lower side screws and install the spacers provided as per Fig. 2.
- Install exhaust pipe: for upwards discharge, join sections 1 and 3, for downwards discharge, join sections 1, 2, 2 & 3 as per Fig. 4.
- With assistance, mount dryer on wall bracket. See Fig. 5.
Fig. 2


natural_image
Line drawing of a microwave oven with ventilation slots and a central vent (no text or symbols)Fig. 3
natural_image
Line drawing of a rectangular electronic device casing with ventilation grilles and a handle (no text or symbols)Using Method
1. Plug the power cord
- The appliance shall be supplied with 220-240V, 50Hz, connected to a special receptacle more than 10A (reliably grounded).
2. Place the dehydrated clothes in your dryer
- Check the following items before putting clothes in. They shall be loaded in such a way that 2-3 pieces each time and not in a group to avoid tangling, which is not easy to turn it over resulting in uneven drying since the clothes were wrapped.
- Please put clothes into the drum. Avoid clothes being pressed by the door due to exposure out of the port, which will cause clothes entangle and door gasket release and consequently poor drying effect.


Before drying your clothes
- Make sure if clothes have any special requirements and suitable for drying. Do not dry your clothes in your dryer if the materials of which cannot be dried in a dryer or they bear the following labels:

Do not tumble dry

Hang to dry

Drip dry

Dry flat

Dry in the shade
- Carefully check the clothes to be dried and remove combustible material such as lighter and match as well as sharp metal items like coin, hair clip and safety pin maybe mixed with the clothes and in pockets.
- Clothes with zipper or fastener shall be put into your dryer inside out with zipper zipped and fastener buckled.
- Separate dark and light colored items, like you do for washing. Check for stains that may not have been removed in washing. Dryer heat may permanently set some stains. Properly dried clothes will need minimum of care when removed from dryer.
- For optimum results, use dryer load of similar fabric, weight and construction. Placesmall items in a mesh bag prevent from tangling. Do not overload the dryer. An average load will fill up half the drum.

Using Method
3. Control panel and its functions
Heat Selector Knob
Select drying level according to the material, quantity and drying requirements of the clothes to be dried as shown in the figure
- Select strong Dry for clothes particularly thick and in large quantities or in lower room temperature.
- Select Soft Dry for clothes not resistant to heat (like nylon, chemical fibre and silk).


Soft

Strong
Heat Selector Knob
Drying Timer Knob
- According to the selected dry time and heater working or not, five dry combinations are available: cool, anti-wrinkle, warm, hot dry and air fluff

Using Method
4. Set 'heat selector knob' to select Strong dry' or 'Soft dry' level.
• Strong dry level for large quantity and low room temperature.
• Soft dry for non heat-resistant clothes. Strong

temperature.
Solid
Strong
Heat selector knob
5. Dry time settings
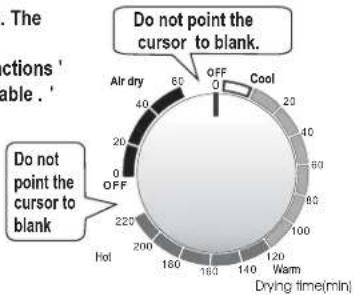
- Select dry program according to clothes materials and quantity, turn the timer knob to relative position. The dryer starts running.
- Please refer to page 10 ' Control panel and its functions ' and page 12 ' Dry Capacity Dry Time Reference Table . '
- Caution: Dry timing knob cursor shouldn't be set at the blank area, as indicated in the right figure.
pie
| Category | Value | |---|---| | Cool | 20 | | Cold | 40 | | Cool | 60 | | Cool | 80 | | Cool | 100 | | Cool | 120 | | Cool | 140 | | Cool | 160 | | Cool | 180 | | Cool | 200 | | Cool | 220 | | Air dry | 0 | | Air dry | 20 | | Air dry | 40 | | Air dry | 60 | | Air dry | 80 | | Air dry | 100 | | Air dry | 120 | | Air dry | 140 | | Air dry | 160 | | Air dry | 180 | | Air dry | 200 | | Air dry | 220 | | Air dry | 240 | | Air dry | 260 | | Air dry | 280 | | Air dry | 300 | | Air dry | 320 | | Air dry | 340 | | Air dry | 360 | | Air dry | 380 | | Air dry | 400 | | Air dry | 420 | | Air dry | 440 | | Air dry | 460 | | Air dry | 480 | | Air dry | 500 | | Air dry | 520 | | Air dry | 540 | | Air dry | 560 | | Air dry | 580 | | Air dry | 600 | | Cool | 0 | | Cool | 20 | | Cool | 40 | | Cool | 60 | | Cool | 80 | | Cool | 100 | | Cool | 120 | | Cool | 140 | | Cool | 160 | | Cool | 180 | | Cool | 200 | | Cool | 220 | | Cool | 240 | | Cool | 260 | | Cool | 280 | | Cool | 300 | | Cool | 320 | | Cool | 340 | | Cool | 360 | | Cool | 380 | | Cool | 400 | | Cool | 420 | | Cool | 440 | | Cool | 460 | | Cool | 480 | | Cool | 500 | | Cool | 520 | | Cool | 540 | | Cool | 560 | | Cool | 580 | | Cool | 600 | The instructions ' Enable.' Do not point the cursor to blank. Do not point the cursor to blank.6. Do not take the laundry out until drying process is done
- The last 20 minutes of hot air drying is cooling to reduce the temperature of laundry inside the drum.
• To take the laundry out during drying, please run cooling operation first since the temperature inside the drum must be high. - Static electricity, due to friction, will be generated on clothes made of chemical fibre after dried. You can feel it when taking them out, which is normal and shall not to be worried about.

natural_image
Illustration of a hand inserting a fan into a device with a circular component (no text or symbols)7. Unplug the power cord
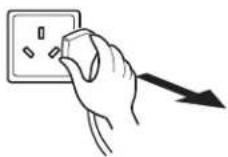
- Please hold plug to unplug power cord from a receptacle. Do not pull electrical wire directly to prevent internal breakage or bad connection.
8. Clean filters
- Clean the lint filter after every load and before each use. A clean filter ensures sufficient drying. A layer of lint on the filter reduces airflow through the clothes and prolongs drying time
• Refer to the instructions on page 13.
Dry Capacity Dry Time Reference Table
| Dry Capacity | Approx.1kg Approx.2kg Approx.3kg | Approx.5.0kg | ||
| Dry time | Strong | Approx.90minApprox.50min | Approx.220minApprox.150min | |
| Soft | Approx.90min | Approx.150min | ||
| Dry time affected by many factors, such as material, weight, thickness and the hydrated ratio of clothes , the above listed dry time is only for reference. | ||||
Care And Cleaning
- Clean the buildup such as lints on filters in time after each use, otherwise it will affect the performance of your dryer.
- Please unplug the power cord first when cleaning it.
Cleaning of filters
- The lint filter must be used for drying.
- It must be cleaned in time before and after each use.
- Remove the filters Remove by pulling straight up with hands inserted into the four holes around the exhaust vent shroud in the sequence of 'Exhaust vent shroud - Lint filter - Exhaust filter', as shown in figure 1.
- Clean the lints Separate exhaust vent shroud, 'lint filter and exhaust filter' and clean the lints on the filter and exhaust filter with a soft brush or vacuum cleaner. Do not damage the filters (as shown in figure 2)
- Install the filters After cleaning, assemble in the sequence of 'exhaust filter -filter-exhaust vent shroud', align the recesses in the center of filter with the projection in the center of drum and make sure that it is firmly inserted (as shown in figure 3). Note: The filter fixed in the bottom of the drum shall also be cleaned with a soft brush.
DO NOT USE YOUR DRYER WITHOUT THE LINT FILTER.
The filter fixed in the bottom of the drum

Exhaust
vent shroud

Lint filter

Exhaust Filter

Figure 1

Lint Filter

Exhaust Filter
Dust Cleaner
Figure 2


Figure 3
Clean the interior drum or dryer housing, with wet soft cloth, if stained.
- Do not wash directly with water.
- Do not use thinner, gasoline or alcohol.
- Do not use any type of spray cleaner when cleaning the interior. Hazardous fumes or electric shock could occur. If dryer drum becomes stained, clean the drum with a damp cloth. Remove any residue before drying the next load. Clean cabinet with mild soap and water. Donot use harsh or abrasive cleaners, this could damage the dryer.
- Do not let any kind of liquid get into the air intake or on the control panel.

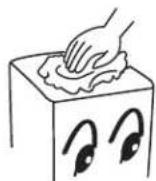
Trouble Shooting
(If your dryer exhibits problems, please unplug the power cord before checking) The following maybe unrelated to a malfunction of the dryer itself, please reconfirm before calling a serviceman. If it does relate to a malfunction, please contact our service agent or after-sales service and do not repair it by yourself.
Problem Possible Cause What to do
| Timer knob does not turn | ●Is the power cord inserted firmly? | ●Insert the power cord firmly |
| Drum does not turn | ●Is the door closed?●Is the power cord inserted?●Does the receptacle have power? | ●Close the door.●Insert the power cord firmly.●Check the power cord receptacle. |
| No hot air blown out | ●Is the timer incorrectly set up in cold air? | ●Set to hot air |
| The laundry is not throughly dried (some of the clothes still wet after dryer stops) | ●Is the back filter clogged?●Have the clothes been fully dehydrated?●Is the laundry too much?●Have the dryer have been added during operation?●Does the laundry twist?●Have any clothes dry easily and hardly been dried together?●Is the dryer placed in a small and badly-vented space? | ●Clean the filter.●Dehydrate the laundry completely.●Reduce the laundry quantity.●Dry the undried laundry again.●Loose the twisted laundry and dry again.●Dry the undried laundry again.●Place the dryer in a well-vented place. |
| Dryer does not start | ●Is power failure?●Is the power cord inserted firmly?●Is the door closed?●Is the timer in OFF position? | ●Try again after power recovered●Insert the power cord firmly●Close the door●Set dry time |
Specification
| Model | T50DM |
| Rated Voltage-Frequency | 220-240V~ 50Hz |
| Rated Input Power | Extra:1070W Light 700W |
| Rated Fuse Current | 10A |
| Rated Max. Capacity | 5.0kg |
| Overall Dimension | 630mm>515mm 685mm |
| Net Weight | 26.5kg |


- Important Safety Instructions
- Names Of The Parts
- Operation Cautions
- Installation Instructions
- Location of your dryer
- Install and use the fixed legs of your dryer
- Wall Mounting Instructions
- Using Method
- Plug the power cord
- Place the dehydrated clothes in your dryer
- Before drying your clothes
- Control panel and its functions
- Heat Selector Knob
- Drying Timer Knob
- Set 'heat selector knob' to select Strong dry' or 'Soft dry' level.
- Dry time settings
- Do not take the laundry out until drying process is done
- Unplug the power cord
- Clean filters
- Dry Capacity Dry Time Reference Table
- Care And Cleaning
- Cleaning of filters
- Trouble Shooting
Brand : Technika
Model : T50DM
Category : Tumble dryer