
PhonePad X532 Ultra - Smartphone Mediacom - Free user manual and instructions
Find the device manual for free PhonePad X532 Ultra Mediacom in PDF.


| Product Type | Smartphone |
| Brand | Mediacom |
| Model | PhonePad X532 Ultra |
| Dimensions (H x W x D) | 165 x 76 x 8.5 mm |
| Weight | 190 g |
| Operating System | Android 11 |
| Display Size | 6.5 inches |
| Resolution | HD+ (1600 x 720 pixels) |
| Processor | Quad-core 1.8 GHz |
| RAM | 4 GB |
| Storage | 64 GB, expandable via microSD |
| Battery Capacity | 4000 mAh, Li-ion |
| Charging Port | USB Type-C |
| Rear Camera | 13 MP + 2 MP dual lens |
| Front Camera | 8 MP |
| Connectivity | 4G LTE, Wi-Fi 802.11 b/g/n, Bluetooth 5.0, GPS, Dual SIM |
| Sensors | Fingerprint (side-mounted), accelerometer, proximity |
| Power Supply | 5V/2A charger (included) |
| Maintenance & Cleaning | Wipe with a soft, dry cloth. Avoid water and harsh chemicals. |
| Safety Precautions | Use original accessories. Avoid extreme temperatures. Do not disassemble. |
| Spare Parts & Repairability | Battery and screen can be replaced by authorized service centers. |
| General Information | Manufactured by Mediacom. Model: PhonePad X532 Ultra. |
Frequently Asked Questions - PhonePad X532 Ultra Mediacom
User questions about PhonePad X532 Ultra Mediacom
0 question about this device. Answer the ones you know or ask your own.
Ask a new question about this device
Download the instructions for your Smartphone in PDF format for free! Find your manual PhonePad X532 Ultra - Mediacom and take your electronic device back in hand. On this page are published all the documents necessary for the use of your device. PhonePad X532 Ultra by Mediacom.
USER MANUAL PhonePad X532 Ultra Mediacom
For safe and efficient operation of your device please observe the following rules:
- Keep the phone away from extreme heat, cold, moisture and dust.
- Do not spill any liquids on the device as it may damage the device or cause a fire.
- Do not use liquids and chemical cleaners for cleaning the device.
- Do not insert any objects in the phone air vents or other slots.
- Do not keep the device near magnetic sources, heaters, microwave ovens, heating up kitchen appliances, or in high pressure containers, as it may cause the battery leaking, the device overheating and inflammation.
- Do not disassemble the device, only a certified service technician should perform repairs on your computer.
- Use only the AC adapters, power cords and batteries that are approved for use with this device. Use of another type of battery or AC adapter may cause fire or explosion.
Note: The device pictures, as well as data on the device appearance, color and design features are given in the manual for reference only. Mediacom reserves the right to change the appearance and technical parameters of its products without prior notice.
About your device (Picture 1)
- Power button
- Speaker
- Volume button
- Headset port
- USB port/charging
- "Reset" (if available)
- SIM 1 slot
- Rear camera
- SIM 2 slot
- Front camera
- Micro-SD card slot
- Microphone
- Flash light
- Fingerprint
Switching on/off
To switch on the device, press and hold the Power button. When startup window appears, release the button. The system initialization may take several minutes. Please wait patiently.
To switch off the device, press and hold the Power button. When "Power off" message appears, release the button. Touch the message, then press OK.
Recommendation: To save the battery charge, the device is set to sleep mode: the screen is locked and sensor functions become inactive (in accordance with the settings of screen lock time). To "wake up" the device, short press the power button.
Unlocking the screen (Picture 2)
If you do not use the screen during certain period of time, the screen will be locked. To unlock the screen, press the power button once and drag "Lock" image right.
Main screen (Picture 3)
- Voice search
- Application menu
- Battery indicator
- Time
- SIM 1 - SIM 2
- Submenu
- Home/Recent used applications
- Back
- Google search
Restarting the device
If the screen does not response to key press or tap, restart your device by keeping power button depressed for long time.
Factory reset
To delete all data and restore your device to factory defaults, touch Settings > > Recovery and reset; touch menu item Reset > Reset to factory defaults.
Contents
Phone, USB Cable, Power adapter AC / DC, Quick Guide, Headset
Charging the battery
Device is provided with built in rechargeable battery.
Important: The battery must be charged before using it for the first time. When related Icon or warning message alerts you please charge the battery using porper adapter (do not use diefferent adapter from original one).
Opening of the phone
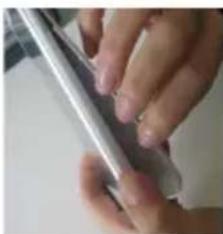
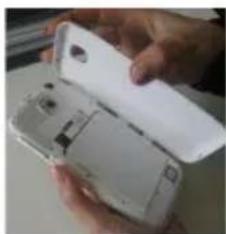
To open the phone insert your fingernail into the slot (Fig. 1) and then slide to the rest of Corver (fig. 2), remove the entire cover to insert the SIM (Fig. 3)

(fig. 1)
(fig. 2)
(fig. 3)
3G networks - 4G (if available)
Note that your device will only have signal if you are in an area covered by your 3G provider's 3G or EDGE network.
Before inserting a SIM card, you must turn off the device.
A Pin number may be requested. Enter the SIM card pin number.
Your device will attempt to connect to the 3G network of your provider.
This screen will appear when turning on device with new SIM.
Please confirm selection or make your change if required.
NOTE: If your device does not connect to your 3G provider's network
- Contact your 3G provider to obtain the connection parameters.
- On your device, tap the Menu icon, then settings.
- Select Wireless & networks > Mobile networks > Select your operator.
In Access Point Names, select the correct access point name and enter the exact connection parameters.

Wireless networks
Prior to starting an Internet-application, activate Wi-Fi connection and set up Wi-Fi network.
- Touch the icon "Applications" > "Settings" > "Wireless connections". Select Wi-Fi item and set the switch to On position.
- The device will automatically start searching for available networks and will display them on the right panel.
- Select any network from the list and press "Connect". If the network you selected is protected by WEP-protocol, type the security key, then press "Connect" button.
When the connection is successfully created, "Connected to" (Network name) message will appear on the screen.
Bluetooth
Tap "Settings" > Select "Wireless connections/Bluetooth" > Tap "On" to switch on the Bluetooth function. The device will automatically search for available Bluetooth device.
Select the Bluetooth device and start data transmission.
Intelligent touch e Fingerprint
Inside Settings Intelligent Touch function, user can close navigation bar and just use the center key to select following functions: Back/Home/Overview/Switch off screen
To learn how to use and set the Fingerprint functions select Smartphone
"Guide" in this menu
Phone PAD
(fig. 1)

(fig. 2)

(fig. 3)
(слика 1)
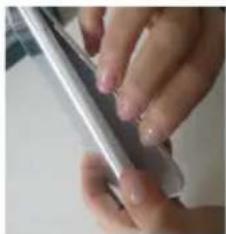
(слика 2)

(слика 3)
(fig. 1)

(fig. 2)

(fig. 3)
Reti 3G o 4G (dove previsto)
Imported and distributed by Datamatic S.p.A.
Via Agordat, 34 - 20127 - Milano - Italy
www.mediacomeurope.it
- ABOUT YOUR DEVICE (PICTURE 1)
- SWITCHING ON/OFF
- UNLOCKING THE SCREEN (PICTURE 2)
- MAIN SCREEN (PICTURE 3)
- RESTARTING THE DEVICE
- FACTORY RESET
- CONTENTS
- CHARGING THE BATTERY
- OPENING OF THE PHONE
- 3G NETWORKS - 4G (IF AVAILABLE)
- WIRELESS NETWORKS
- BLUETOOTH
- INTELLIGENT TOUCH E FINGERPRINT
- PHONE PAD
- RETI 3G O 4G (DOVE PREVISTO)
Brand : Mediacom
Model : PhonePad X532 Ultra
Category : Smartphone