
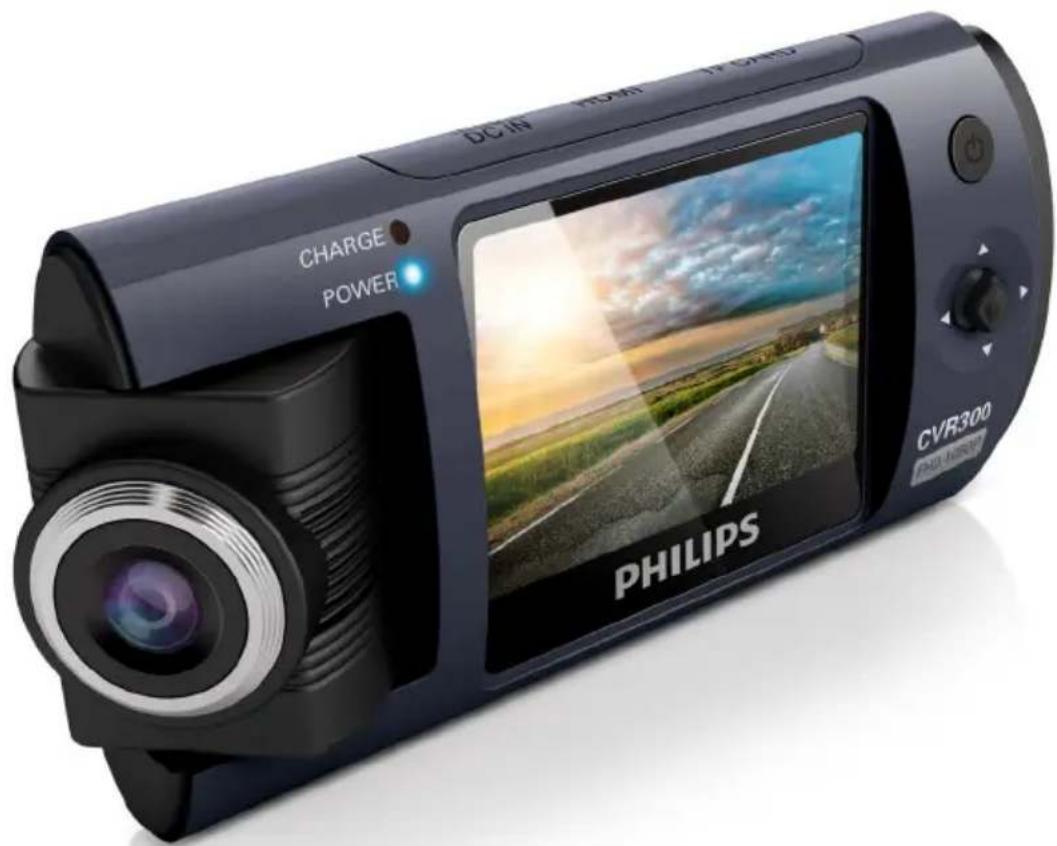
CVR300 - Dash cam PHILIPS - Free user manual and instructions
Find the device manual for free CVR300 PHILIPS in PDF.


| Type of Product | Dashboard Camera (Dash Cam) |
| Brand | Philips |
| Model | CVR300 |
| Dimensions | Approx. 90 x 55 x 30 mm |
| Weight | Approx. 80 g |
| Power Supply | 12/24 V vehicle cigarette lighter adapter; built-in rechargeable battery |
| Video Resolution | Full HD 1920x1080p @ 30 fps |
| Lens Angle | 140° wide angle |
| Display | 2.0 inch LCD screen |
| Storage | Supports microSD card up to 32 GB (Class 10 or higher) |
| Recording Modes | Continuous loop recording, G-sensor event recording, parking mode |
| G-Sensor | 3-axis gravity sensor for automatic event locking |
| Night Vision | Low light enhancement with WDR technology |
| Audio | Built-in microphone and speaker |
| Mounting | Suction cup or adhesive mount |
| Connectivity | micro USB for power and data transfer |
| Operating Temperature | -10°C to 60°C |
| Battery Life | Approx. 20 minutes on internal battery |
| Main Functions | Continuous recording, collision detection, parking surveillance, date/time stamp |
| Cleaning and Maintenance | Clean lens with soft cloth; do not use harsh chemicals |
| Safety | Built-in overheat protection; use only supplied accessories |
| Spare Parts and Repairability | Spare suction cups and USB cables available; battery replacement by authorized service |
| General Information | User manual available for download; compliant with vehicle safety standards |
Frequently Asked Questions - CVR300 PHILIPS
User questions about CVR300 PHILIPS
0 question about this device. Answer the ones you know or ask your own.
Ask a new question about this device
Download the instructions for your Dash cam in PDF format for free! Find your manual CVR300 - PHILIPS and take your electronic device back in hand. On this page are published all the documents necessary for the use of your device. CVR300 by PHILIPS.
USER MANUAL CVR300 PHILIPS
Always there to help you
Register your product and get support at
www.philips.com/welcome

CVR300
使用手册 29
用户手册 15User manual 1
Contents
1 Important 2
Safety 2
Notice 2
2 Your car driving recorder 4
Introduction 4
What's in the box 4
Overview of the main unit 5
3 Get started 6
Install the driving recorder 6
Insert Micro SD card 6
Turn on the driving recorder 7
For the first time use 7
Mode switch 7
4 Video Recording 8
Video settings 8
5 Photo capture 9
Photo settings 9
6 Playback 10
Video playback 10
Photo playback 10
7 Connect the driving recorder to
a computer 12
8 System settings 13
9 Product information 14
General 14
1 Important
Safety
- Read and understand all instructions before you use your apparatus. If damage is caused by failure to follow instructions, the warranty does not apply.
- Use only the supplied mounting hardware for a safe and secure installation.
- Only use attachments/accessories specified by the manufacturer.
- To avoid short circuit, do not expose the apparatus to rain or water.
- Never insert objects into the ventilation slots or other openings on the apparatus.
- Clean the apparatus and frame with a soft, damp cloth. Never use substances such as alcohol, chemicals or household cleaners on the apparatus.
- Risk of damage to the apparatus screen! Never touch, push, rub or strike the screen with any object.
- Batteries (battery pack or batteries installed) shall not be exposed to excessive heat such as sunshine, fire or the like.
- Danger of explosion if battery is incorrectly replaced. Replace only with the same or equivalent type.
- For your own safety, do not operate the device while driving.
- Do not install the device in the position that blocks the driver's sight or affects the work of the airbags.
- To void accident caused by exhaust of car battery, disconnect the car charger before leaving the car for the users whose car cigarette lighter keeps power supplying after the engine is stopped.
- When the car engine is stopped or the power is shut down, the device still can save the recording files with its built-in battery power, do not remove the micro
SD card during the period to prevent data loss.
- The apparatus shall not be exposed to dripping or splashing.
- Do not place any sources of danger on the apparatus (e.g. liquid filled objects, lighted candles).
Notice
Any changes or modifications made to this device that are not expressly approved by WOOX Innovations may void the user's authority to operate the equipment.
Environmental information
All unnecessary packaging has been omitted. We have tried to make the packaging easy to separate into three materials: cardboard (box), polystyrene foam (buffer) and polyethylene (bags, protective foam sheet.)
Your system consists of materials which can be recycled and reused if disassembled by a specialized company. Please observe the local regulations regarding the disposal of packaging materials, exhausted batteries and old equipment.
Disposal of your old product and batteries
Your product is designed and manufactured with high quality materials and components, which can be recycled and reused.
Never dispose of your product with other household waste. Please inform yourself about the local rules on the separate collection of electrical and electronic products and batteries. The correct disposal of these products helps prevent potentially negative consequences on the environment and human health.
Your product contains batteries, which cannot be disposed of with normal household waste.
Please inform yourself about the local rules on separate collection of batteries. The correct
disposal of batteries helps prevent potentially negative consequences on the environment and human health.
Please visit www.recycle.philips.com for additional information on a recycling center in your area.
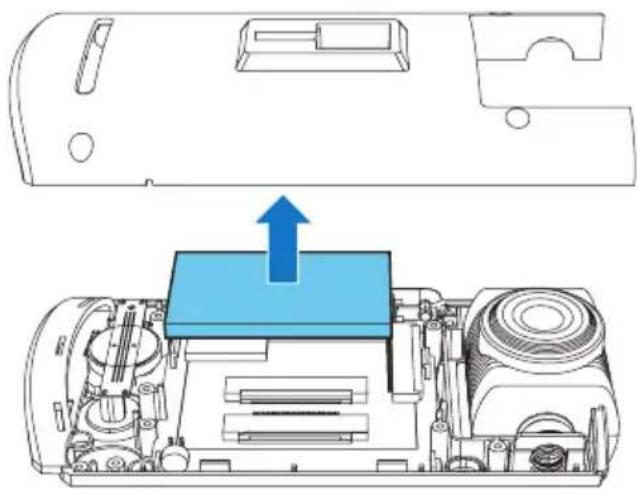
Always bring your product to a professional to remove the built-in battery.
natural_image
Technical diagram of a device interior showing internal components and a blue upward arrow indicating a component (no text or symbols present)2013 © WOOX Innovations Limited. All rights reserved.
Specifications are subject to change without notice. WOOX reserves the right to change products at any time without being obliged to adjust earlier supplies accordingly.
2 Your car driving recorder
Congratulations on your purchase, and welcome to Philips! To fully benefit from the support that Philips offers, register your product at www.philips.com/welcome.
Introduction
With the car driving recorder, you can:
- Record videos automatically when you are driving
- Take photos
- Play back videos/photos
What's in the box
Check and identify the contents of your package:
① Driving recorder
② Suction bracket
③ Car charger
④ mini USB cable
⑤ User Manual
Overview of the main unit
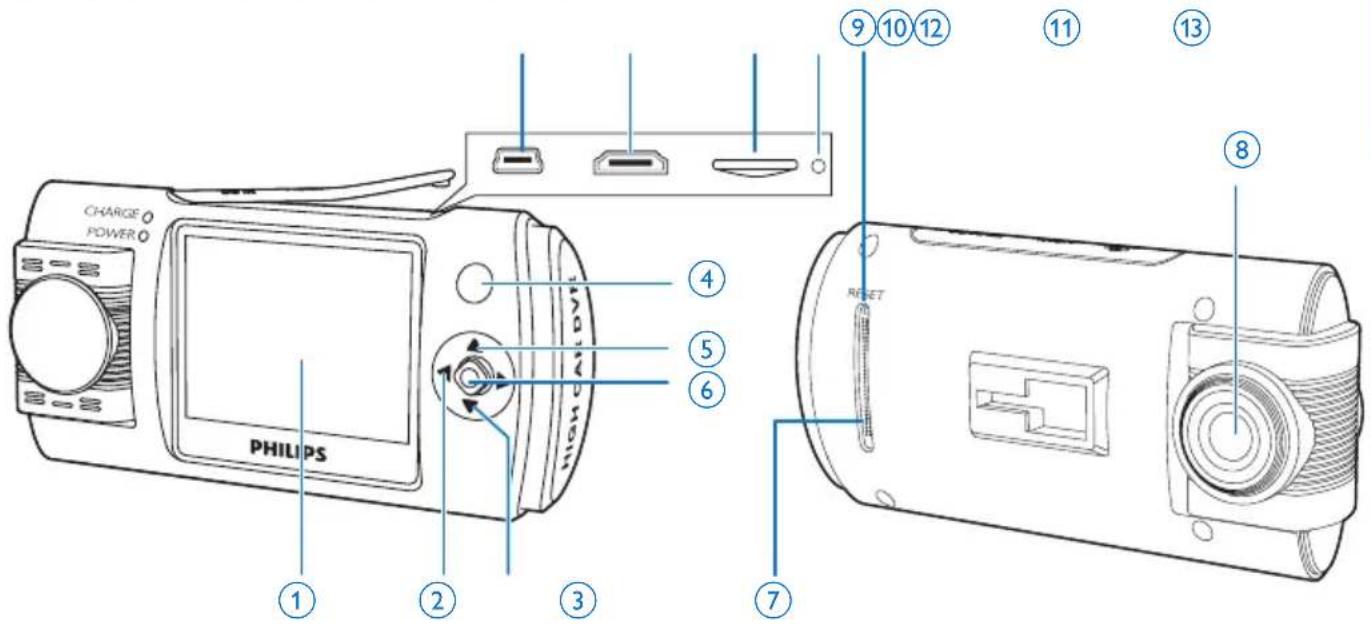
① LCD touch screen
②
- Press repeatedly to select the video recording mode or photo capture mode.
- Exit the sub-menu.
③ ▼
▼
- Press to access settings.
④
⑤ ▲
- Press to access playback mode.
⑥
◆
- Confirm a selection.
• Take photos. - Start video recording.
⑦ Speaker
⑧ Camera lens
⑨ Reset key
⑩ DC socket
⑪ Micro SD card slot
⑫ mini HDMI socket
⑬ mini USB socket
3 Get started
Install the driving recorder

Caution
- Do not place the driving recorder in locations where it may block the driver's view or affect the operation of airbags.

Note
- In order to get clear images, if there is any smudginess on the windshield, please clean it before installing.
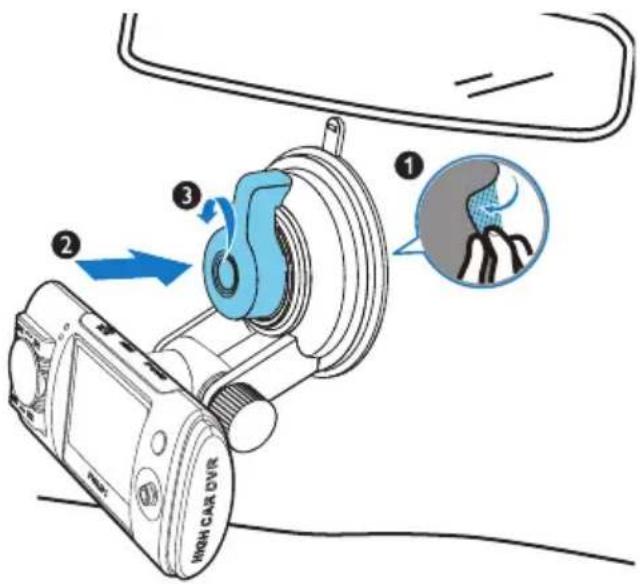
1 Connect the driving recorder with the suction bracket below:
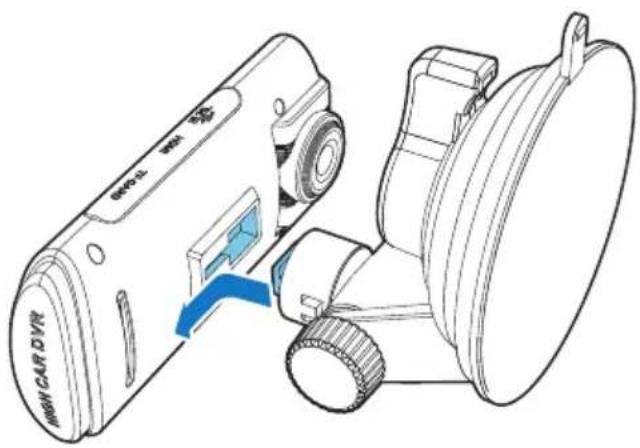
2 Wipe clean the windshield.
3 Remove the protective cover of the suction bracket and rotate the fix button of suction.
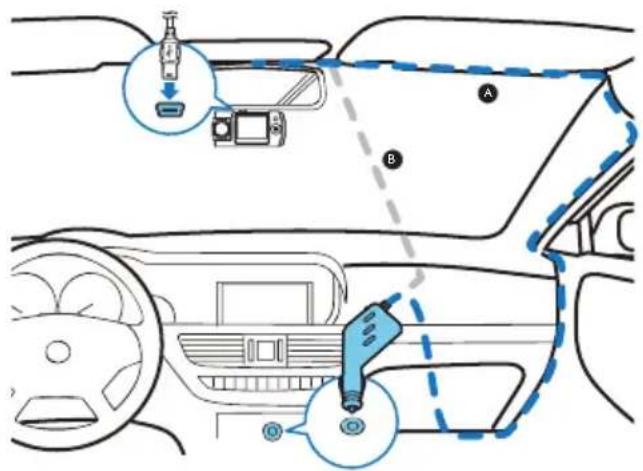
4 Connect the USB cable to:
- The mini USB socket of the driving recorder
• The cigarette lighter socket of the car
Insert Micro SD card

Caution
- Insert the micro SD card before using the driving recorder.
- Insert the micro SD card with the right direction. Wrong direction may damage the driving recorder and the card.

Note
- When using for the first time, please format the micro SD card to ensure videos are recorded normally.
Insert a micro SD card into the card slot until you hear a "click".
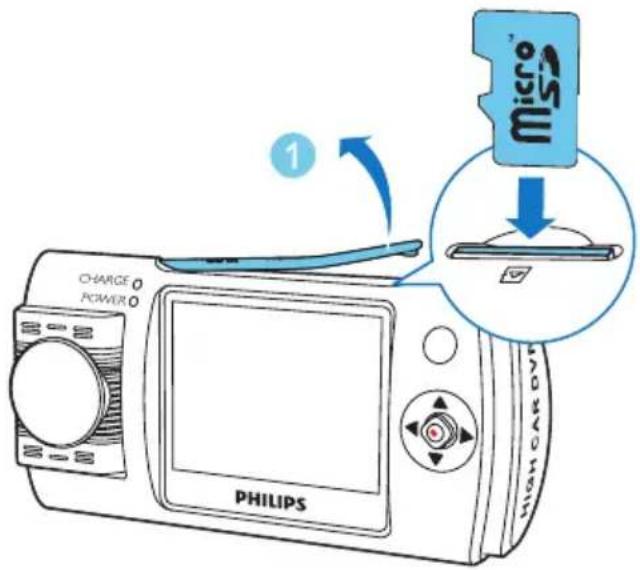
• To remove the micro SD card
Push the card inwards until you hear a "click". → The card is disengaged.
Turn on the driving recorder
Press ⬆to turn on the driving recorder.
- To turn off the driving recorder, press and hold ⚙for more than 3 seconds.

Note
- When using for the first time, please set the date/time.
For the first time use
After the driving recorder is turned on, set the language and format the micro SD card.
Select language
1 Press to access system setting menu.
2 Press ▲ to select the language setting menu and then press ▶ to enter the menu.
3 Press ▲ to select a languages, then press ◆ to confirm.
Format SD card
1 Press ▼ to access system setting menu.
2 Press ▲ to select format micro SD card menu and then press ▶ to enter the menu.
3 Select YES to format the micro SD card.
Mode switch
- Press repeatedly to select the video recording mode or photo capture mode.
- Press t▲access playback mode.
- Press to access system setting menu.
4 Video Recording
When the driving recording is turned on, video recording starts automatically.
Video recording screen:
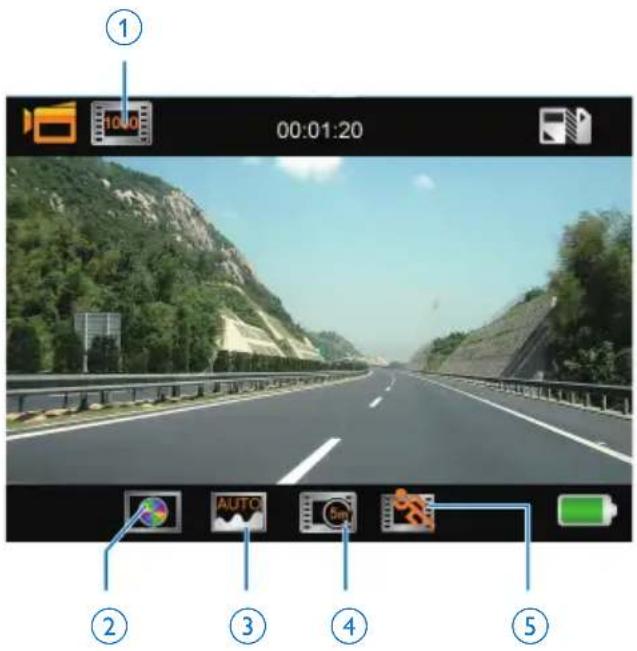
① Video resolution
② Digital effect
③ White balance
④ Record time
⑤ Motion detection

Note
- The driving recorder will continue running for a while after the engine is shut down to protect last recorded file.
- For safety reasons the built-in battery will stop charging if the device remains at a high-temperature for period of time. If the built-in battery runs out of power you will need to reset the date and time.
Video settings
1 In video recording mode, press ▶ to enter video settings menu.
2 Press ▲ to toggle through the sub-menus and press ▶ to enter the sub-menu.
3 Press ▲ to select an option and press ◆ to confirm.
• You can adjust the following settings:
- Video Resolution
- Record Time
- Motion detection
- Date Stamp
- Voice Recorder

Note
- Press ◀ to exit the sub-menu, press ◀ again to exit the video settings menu.
• The selected option is highlighted with red font.
5 Photo capture
In photo capture mode, press ♦ to take photos.
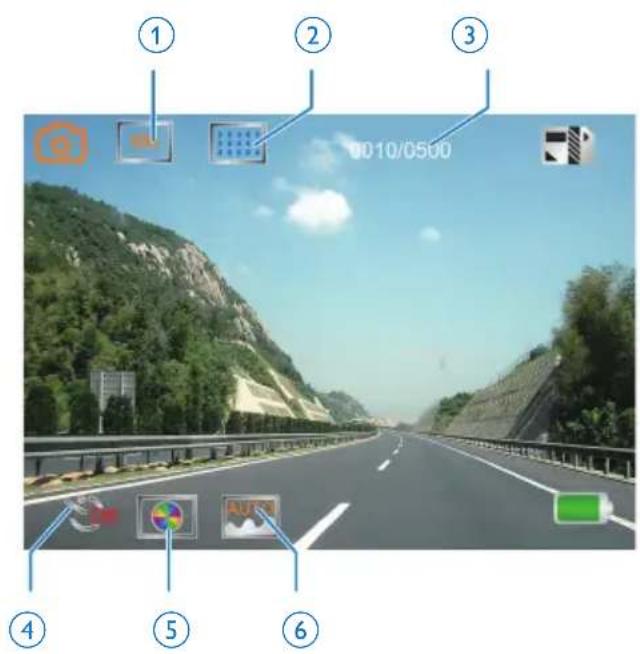
① Photo resolution
② Photo quality
③ Photo numbers/total photo numbers
④ Self-timer
⑤ Digital effect
⑥ White balance
Photo settings
1 In video recording mode, press ▶ to enter photo settings menu.
2 Press ▲ to toggle through the sub-menus and press ▶ to enter the sub-menu.
3 Press ▲ to select an option and press ◆ to confirm.
• You can adjust the following settings:
- Resolution
• Quality - White Balance
- Digital Effect
- SelfTimer
- Capture Mode
- Date Stamp
- Exposure Value

Note
- Press ◀ to exit the sub-menu, press ◀ again to exit the video settings menu.
- The selected option is highlighted with red font.
6 Playback
Video playback
1 Press ▲ enter video/photo playback mode.
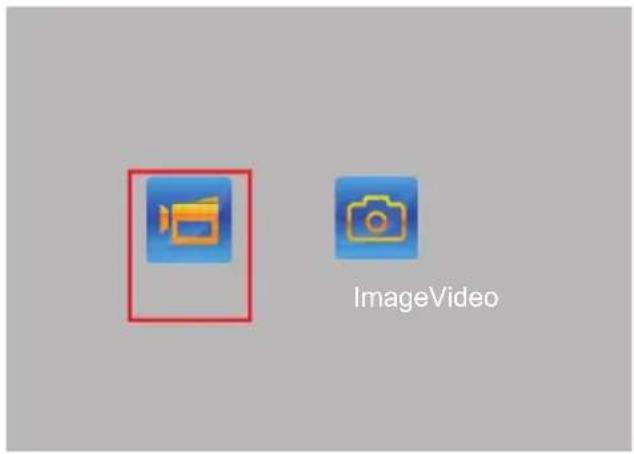
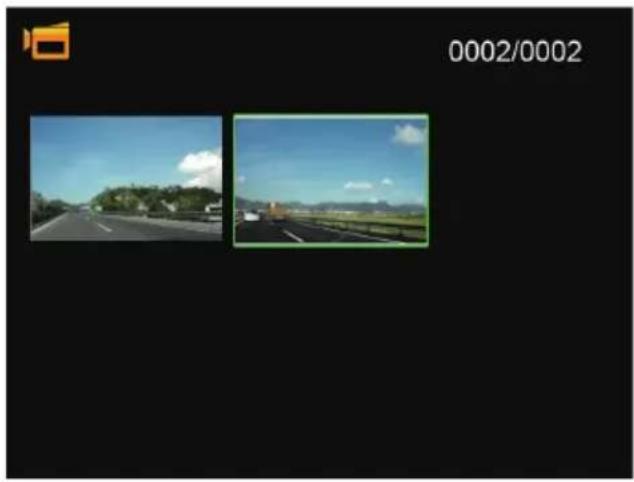
2 In the playback screen, press ↗ to select video playback mode, then press
natural_image
Two highway scenes with scenic background under blue sky, one in foreground and one in lane (no visible text or symbols)3 Press ▲ /▼/ ◀ to ▶ elect a video, press ◆ to view the video, press ◆ again to play the video.
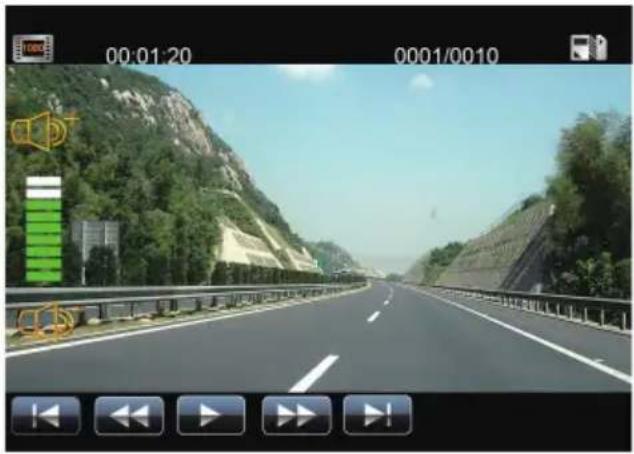
- In the video pause screen, press ▼ to manage videos, you can delete the current video, all videos, or exit the menu.
- Press ▲ return to video recording mode.
- During playback, press ▲ to increase or decrease volume, press ◀/▶ to fast reverse or fast backward.
- During playback, you can pause/restart the video, or delete the video.
Photo playback
1 Press 🔔 enter video/photo playback mode.
2 In the playback screen, press ◀ to select photo playback mode, then press ◆
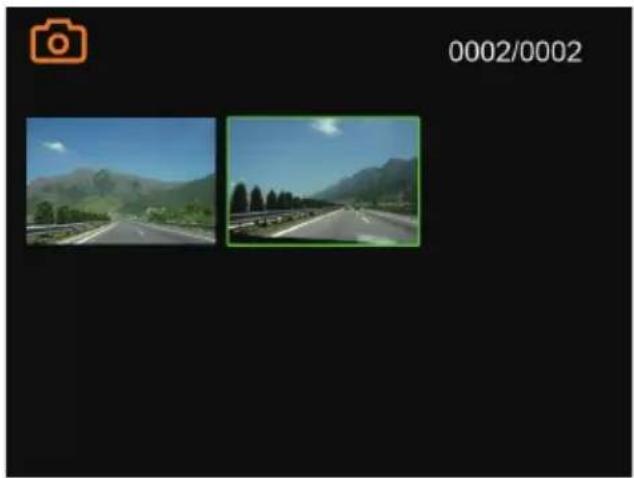
natural_image
Two highway landscape photos showing mountainous terrain under clear sky, one with camera icon and the other with camera frame (no text or symbols on images)3 Press ▲ /▼/ ◀ to select a photo, press ◆ to view the photo.
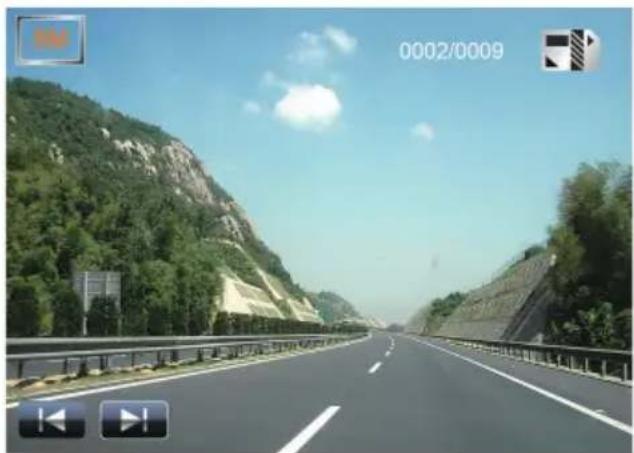
natural_image
Highway view through a forested mountain road under clear sky, no visible text or symbols on the road or surroundings.- During photo playback, press to manage photos, you can delete the current photo, all photos, or exit the menu.
- Press ▲ return to video recording mode.
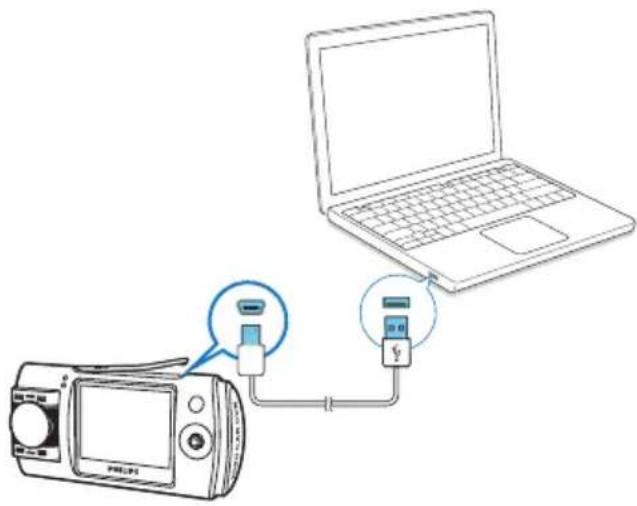
7 Connect the driving recorder to a computer
When the driving recorder is connected to a computer, the micro SD card will be automatically recognized. You can then copy videos or photos from the micro SD card to your computer.
8 System settings
1 Press ▼ to enter system settings menu.
2 Press ▲ / ▼ to toggle through the sub-menus and press ▶ to enter the sub-menu.
3 Press ▲ to select an option and press to confirm.
- Press ◀ to exit the sub-menu, press ◀ again to exit the system setting menu.
• You can adjust the following settings:
Beep Sound Turn the beep sound on or off.
• On
• Off
Frequency Select the frequency.
- 50Hz
- 60Hz
Format Format the micro SD card.
- Yes
• No
Default Reset to default settings.
- Yes
• No
Language Select a language.
- English
- Simplified Chinese
• Traditional Chinese
Auto off Turn off driving recorder in a period of time.
- 5 Min
• 3 Min
• off
Auto LCD off Turn off the LCD screen.
• on
• off
Date/Time Set date and time.
Select TV broadcast standard.
- Pal
- Ntsc
Version NO. The current software version.
9 Product information

Note
• Product information is subject to change without prior notice.
General
| Battery Rechargeable lithium battery (Designed for last data backup purpose only, not for normally video recording) | |
| Power supply Car charger (Input DC 12 - 24V, output: DC 5.5V) | |
| LCD screen 2.0 inch | |
| Lens 95° wide angle, 180° horizontal rotatory camera | |
| Video Full HD (1920 × 1080p) 30 FPS | |
| HD (1280 × 720p) 60FPS | |
| Video format MP4 | |
| External memory Micro SD card class 6, or higher (up to 32GB) | |
| Connection socket USB 2.0/mini HDMI | |
| Microphone/Speaker Built-in | |
| Storage humidity | 20% - 85% |
| Storage temperature -20 °C - 70 °C | |
| Working temperature | -20 °C - 60 °C |
| Dimensions | |
| - Driving recorder (W × H × D) | 100.0 × 50.0 × 27.0 mm |
| - Suction bracket (Diameter × Height) | 70.0 × 63.0 mm |
| Weight | |
| - Driving recorder (W × H × D) | 60.0g |
| - Suction bracket (Diameter × Height) | 60.0g |

Specifications are subject to change without notice
2013 © WOOX Innovations Limited. All rights reserved.
This product was brought to the market by WOOX Innovations Limited or one of its affiliates, further referred to in this document as WOOX Innovations, and is the manufacturer of the product. WOOX Innovations is the warrantor in relation to the product with which this booklet was packaged. Philips and the Philips Shield Emblem are registered trademarks of Koninklijke Philips N.V."

- Always there to help you
- Contents
- Important 2
- Your car driving recorder 4
- Get started 6
- Video Recording 8
- Photo capture 9
- Playback 10
- Connect the driving recorder to
- System settings 13
- Product information 14
- Important
- Safety
- Notice
- Environmental information
- Disposal of your old product and batteries
- Your car driving recorder
- Introduction
- What's in the box
- Get started
- Install the driving recorder
- Caution
- Note
- Insert Micro SD card
- Turn on the driving recorder
- For the first time use
- Select language
- Format SD card
- Mode switch
- Video Recording
- Video settings
- Photo capture
- Photo settings
- Playback
- Video playback
- Photo playback
- Connect the driving recorder to a computer
- System settings
- Product information
Brand : PHILIPS
Model : CVR300
Category : Dash cam